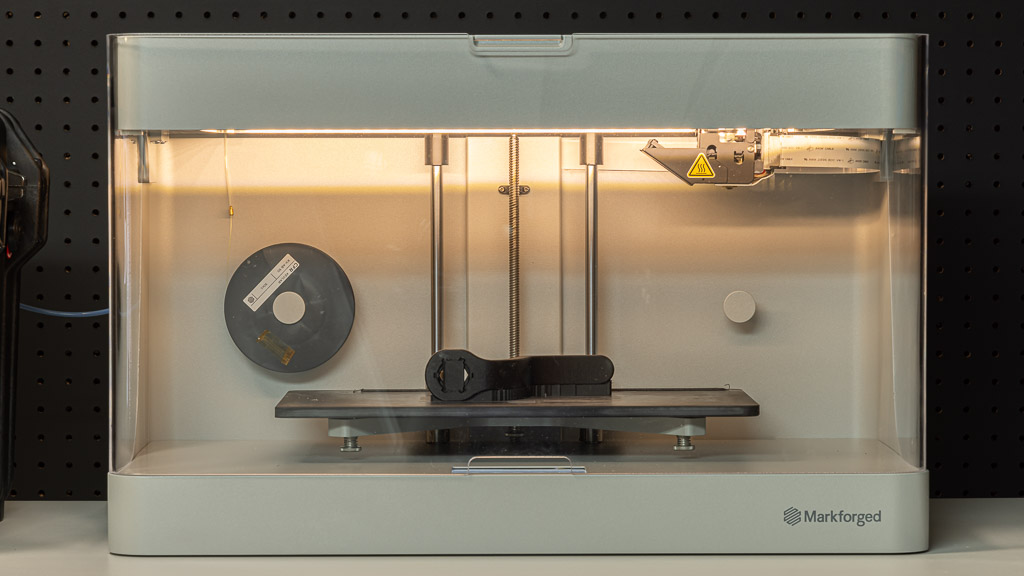
REVIEW – Occasionally, a review offer comes along that simply doesn’t seem real. I’m not referring to a Kickstarter project that will probably never ship, but an incredible product that’s already being produced. We were sent an offer to review the Markforged Mark Two 3D printer, and I’ve never jumped so fast at an item like I did this time.
What is it?
The Markforged Mark Two (Gen 2) is a dual extruder 3D printer that features continuous fiber-reinforced composite 3D printing.
What’s in the box?
- Markforged Mark Two Printer
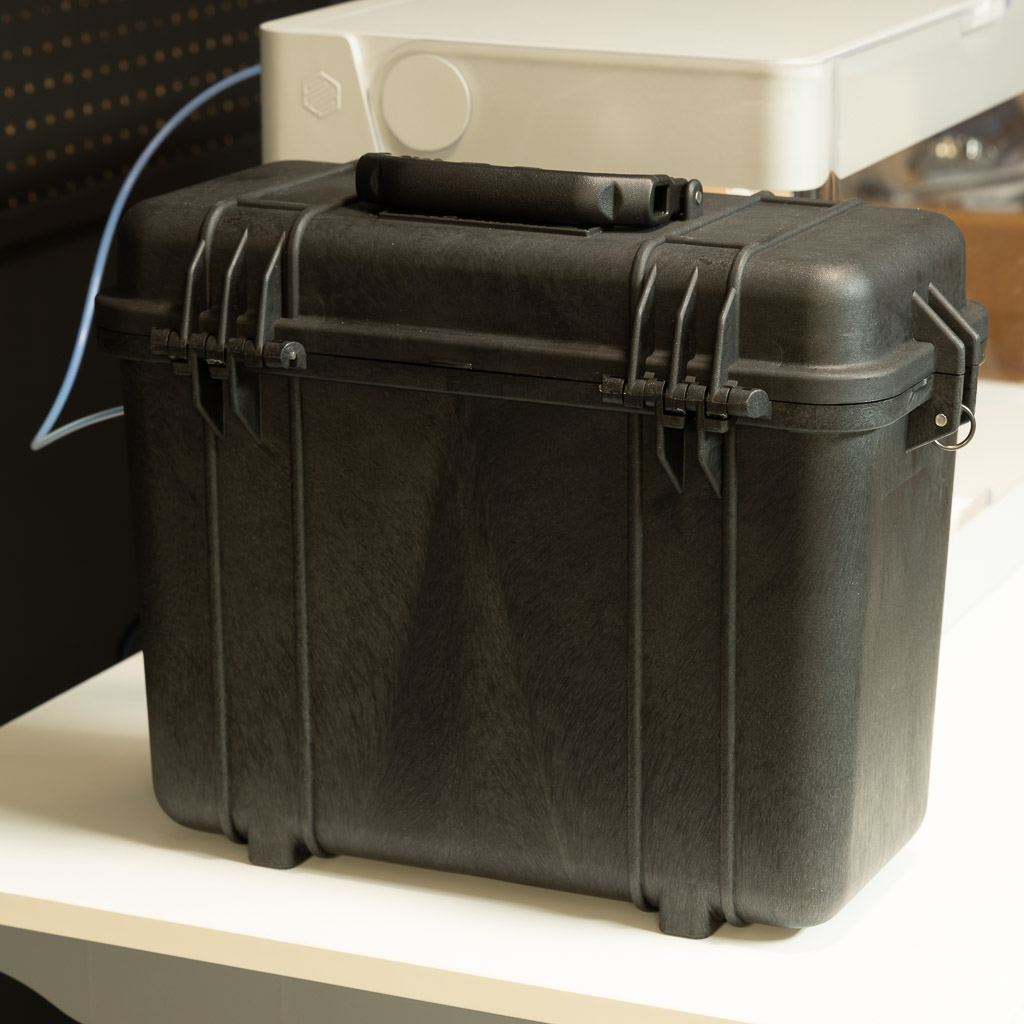
- Dry box pelican case
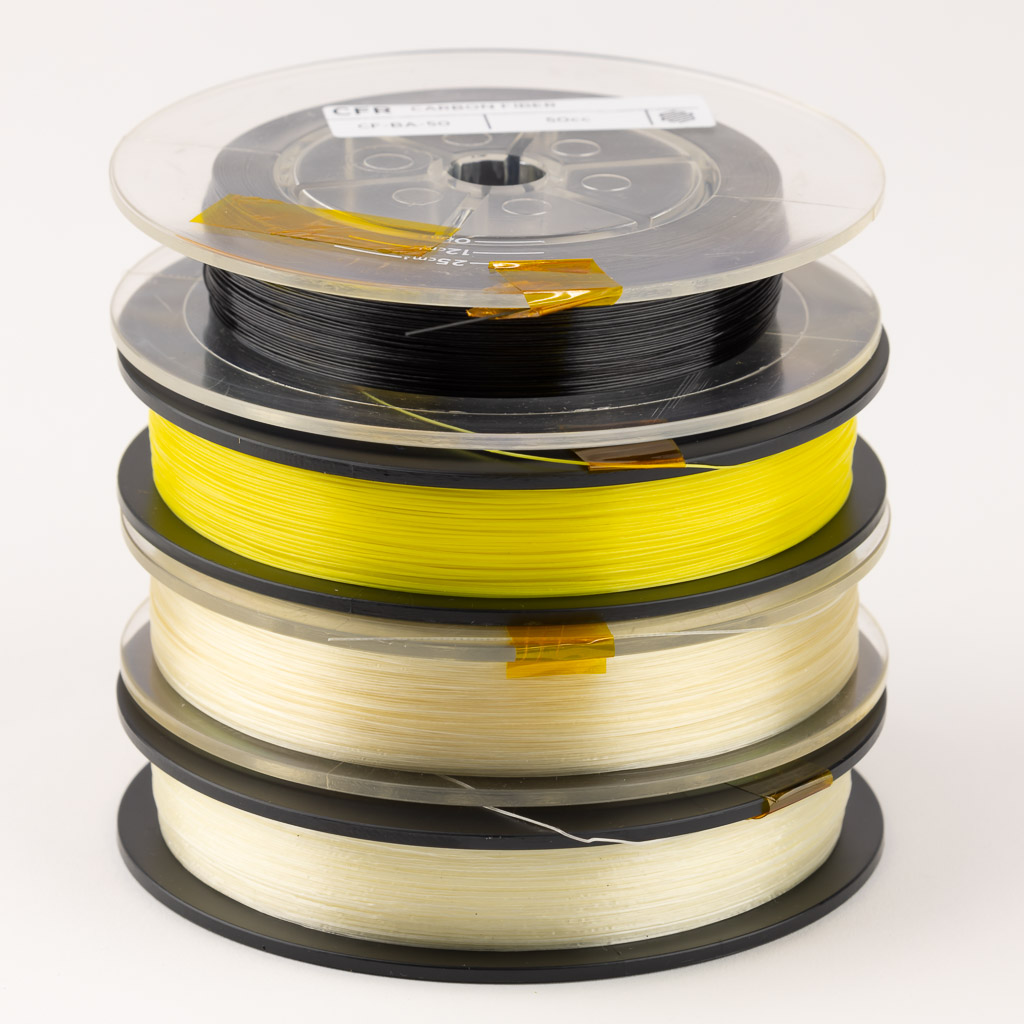
- 800cc spool of Onyx filament (inside the drybox)
- Two spools of 50cc Carbon
- One spool of 50cc Fiberglass
- One spool of 50cc HSHT Fiberglass
- One spool of 50cc Kevlar
- Quick Start Instructions
- USB-A extension cable
- USB-B cable
- Wi-Fi antenna
- Three spare hardened nozzles (primary nozzle)
- Three spare fiber nozzles
- Five spare PTFE Fiber Nozzle tubes
- Hex keys and drybox plug
- Tweezers
- T-Handle screwdriver with preset torque and hex bits (for nozzles)
- Scraper
- Cutting Pliers
- Wire brush
- Anti-seize lubricating compound (applied to plastic/fiber nozzles when installing)
- Brass shims for the plastic and fiber nozzle leveling
- Glue Stick (applied to print bed before each print)

Hardware specs
Printer
Machine Footprint: 584 x 330 x 355 mm (23w x 13d x 14h in)
Build Volume: 320 x 132 x 154 mm (12.6 x 5.2 x 6 in)
Weight: 16 kg (35 lbs)
Process: Fused filament fabrication, Continuous Filament Fabrication
Print Bed: Kinematic coupling — flat to within 160 µm
Extrusion System: Second-generation extruder, out-of-plastic detection
Extruders: 2
Power: 100–240 VAC, 150 W (2 A peak)
RF Module: Operating Band 2.4 GHz Wi-Fi Standards 802.11 b/g/n
Materials
Plastics Available: Onyx, Nylon White
Fibers Available: Carbon fiber, fiberglass, Kevlar®, HSHT fiberglass
Tensile Strength: 800 MPa (25.8x ABS, 2.6x 6061-T6 Aluminum) *
Tensile Modulus: 60 GPa (26.9x ABS, 0.87x 6061-T6 Aluminum)
* Continuous carbon fiber data.
Part Properties
Layer Height: 100 µm default, 200 µm maximum
Infill: Closed-cell infill: multiple geometries available
See the full specifications here (PDF).
Design and features
3D printing has revolutionized many areas of modern life. Hobbyists, inventors, and manufacturers have all found a use for 3D printing. Over the last couple of years, I’ve become more addicted to 3D printing. I’ve always had many ideas for inventions, tools, or just things to make life easier. Whether designing a new bracket to hold something or repairing an item around the house, 3D printing can often solve the problem or bring an idea to life.
One of the problems of 3D printing is that the primary material is PLA, nylon, ABS, or other materials that often have strength issues or are challenging to print. Occasionally, the part I’m trying to print with my standard 3D printer is either too weak or too flexible for the task. Also, standard PLA filament becomes flexible at high temperatures, so it’s not suitable for use in vehicles.
The Markforged Mark Two addresses this problem by using a primary filament made from micro carbon fiber-filled nylon (called Onyx) and adding the option to selectively reinforce the part with layers of continuous fiber such as carbon fiber, Kevlar, fiberglass, or high-strength high-temp fiberglass.

This continuous fiber stand differentiates the Markforged Mark Two from other 3D printers that only use chopped carbon fiber or other materials in the primary filament. In layman’s terms, it irons down continuous fiber reinforcing stands (carbon fiber, Kevlar, or fiberglass) between the layers of the primary filament, Onyx. The Onyx material is very strong on its own but is made even better when reinforced. However, it is more expensive than most other filaments at $190 for an 800cc spool of Onyx filament. The fiber reinforcement also contributes to the cost, often doubling the price to print the part.
The Continuous Fiber Reinforcement (CFR) process is stiff, strong, extremely durable, and can replace machined aluminum. The Markforged Carbon fiber reinforced Onyx has a tensile strength of 800 MPa (25.8 times that of ABS and 2.6 times that of 6061-T6 Aluminum).
The Markforged Mark Two primarily aims at manufacturers, inventors, and hobbyists who need extremely strong 3D printed parts. Although parts printed on the Mark Two do cost more than parts printed with PLA, ABS, PETG, Etc., they are much stronger than those filaments and less expensive than having a part CNC machined from aluminum.
The Markforged Mark Two has produced better-looking prints than any machine I have seen thus far, and the dimensions of the parts are much better also. It has been easier to start using and has produced great parts consistently.
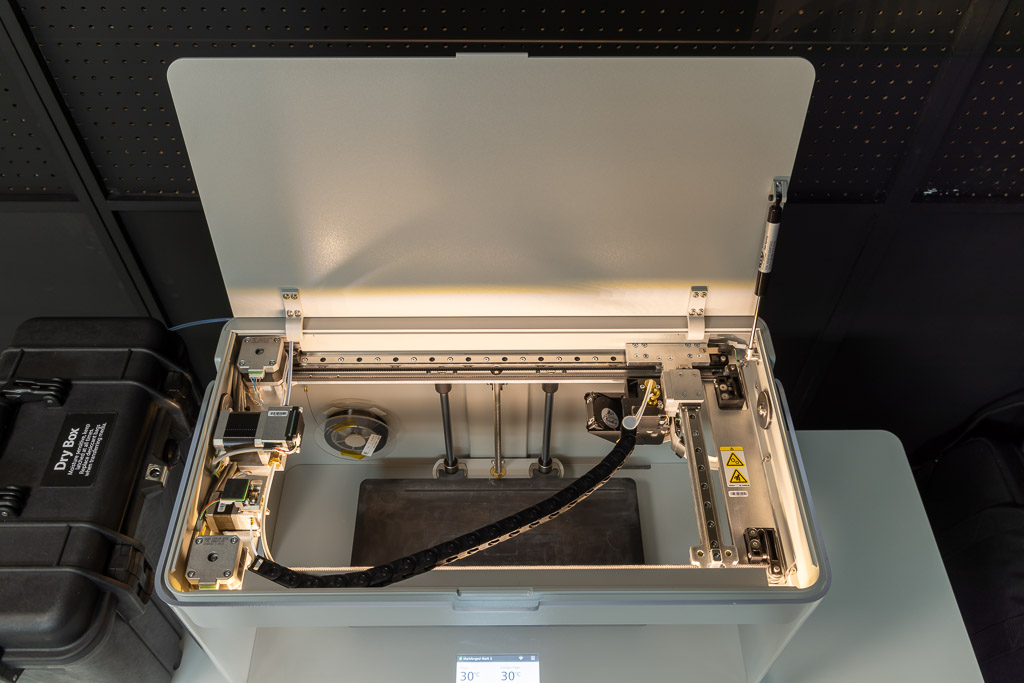
The design of the Mark Two is fantastic, consisting of a unibody aluminum chassis and precision-machined components. The aluminum lid has a gas-charged strut to keep it open when doing maintenance. The clear acrylic visor (window) stays up by itself when lifted. It has that high-quality product feel. The control screen is a 4.3″ color touchscreen and sits nicely inside the machine. The only other control is the power switch on the back. Ports on the back include power, ethernet, two USB, and a wireless antenna (included).

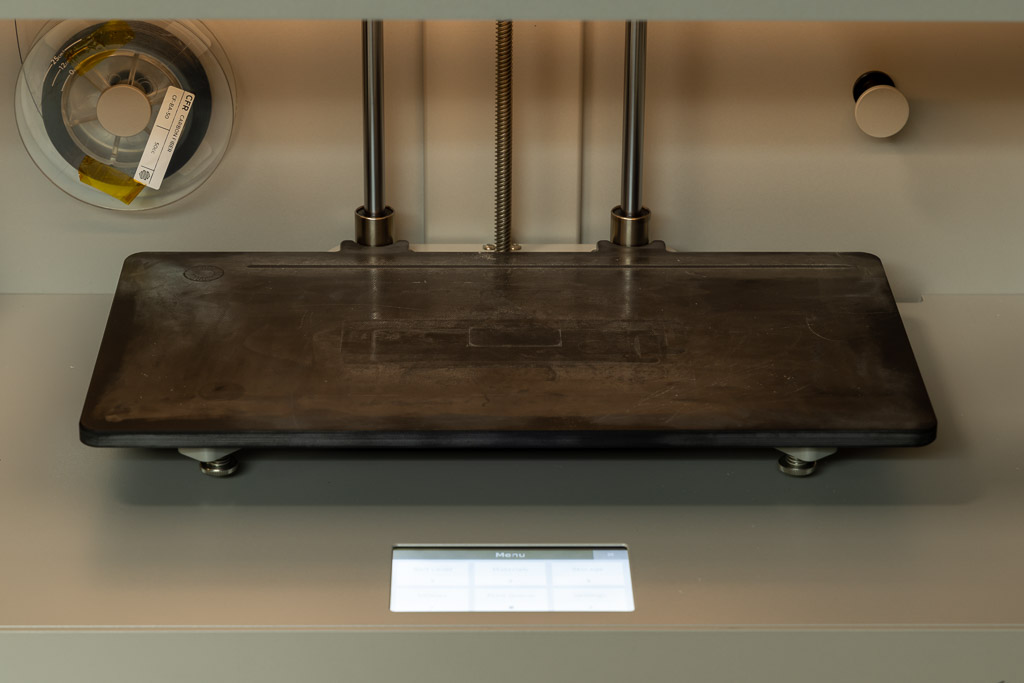
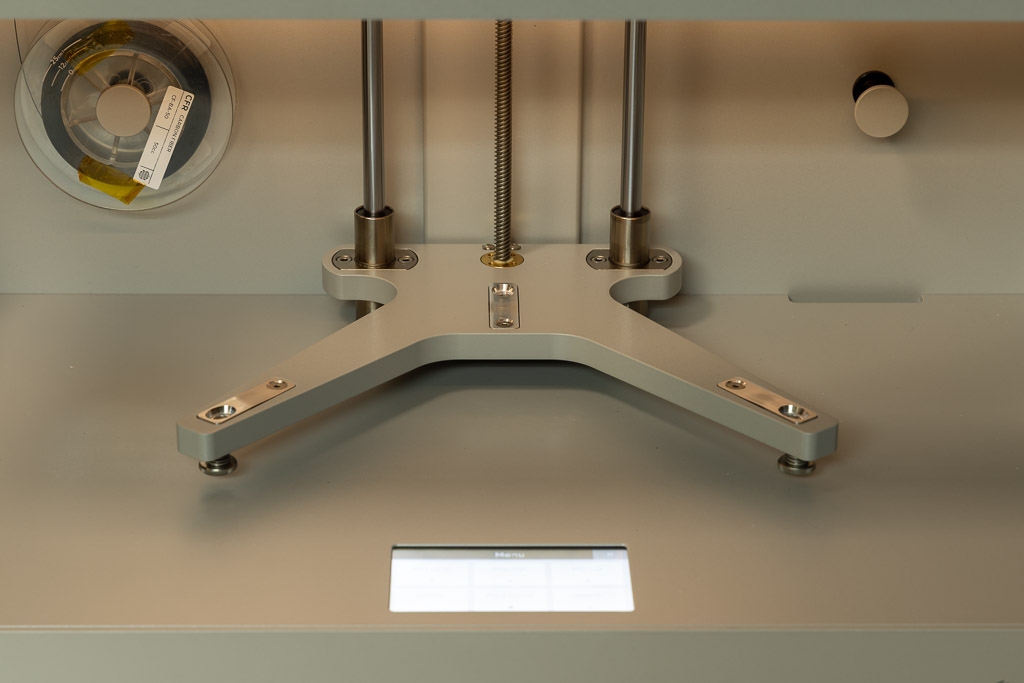
The print bed is a composite material that feels much like slate but definitely is not. I was apprehensive at first, having had problems with non-PEI print surfaces, but this material works perfectly with the nylon that Markforged produces. The patented Kinematic coupling (magnetic self-locating) mounts for the bed allow you to remove the bed surface to remove prints or add components into a print and place it back in the exact same position (with 10 micron accuracy) – without having the re-level the bed. After a month of using the Mark Two and removing and replacing the bed hundreds of times, it is still spot on level.
The extrusion system includes a hardened nozzle and easy-to-reach wear components (like nozzles and feed tubes). The primary components are just below the top lid, making it easy not only to see them while the machine is printing, but loading materials and performing maintenance is easy.
The one thing about the design that could use some improvement is the use of the drybox. Nylon and Onyx are very susceptible to absorbing moisture which can cause printing problems. Markforged includes a modified air-tight Pelican case (Drybox) for the Onxy/Nylon filament that protects it. Drybox uses a 20″ tube that feeds the filament to the printer. However, this limits the location you can place the drybox. You’re pretty much limited to having it to the left of the printer or behind it. If this tube was a little longer, I could mount it under the table the printer is sitting on. While the drybox certainly isn’t a deal-breaker, it needs to be considered if you’re placing the printer in a confined space.
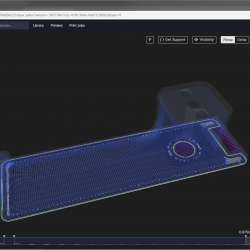
Eiger Slicer Software
The Markforged Mark Two differs from your typical 3D printer in that the software used for slicing and printing is browser-based. Google Chrome browser is required, and WebSockets must be enabled. There is an offline version of the software, but I’m told it is expensive and sort of reserved for government or high-security areas.
The Eiger software is more than just a slicer; it is a file repository, a slicer, and a fleet management tool all in one. The “online-only” aspect of the browser-based software enables you to monitor multiple printers and start printing from anywhere. Unlike other slicers, where the settings and processes are challenging for newcomers to learn, the Eiger slicer software is very intuitive and easy to use.
With Eiger, the slicer settings are basically used just to decide how you want to print the part (layers, reinforcement, supports, etc) instead of a typical 3D printer where the settings are largely used to get a good print. A print with Eiger just always worked for me – every time.

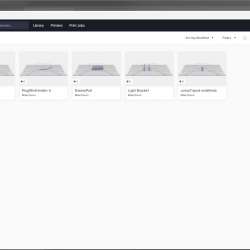
The Library (file storage area) enables you to manage your parts in Eiger’s online library. You can create folders to organize your various parts, and the settings you choose to print with are stored with each part. The thumbnail image of each part includes indicators for the material to print with and the reinforcement material to be used (if any). If you’re in an organization, you can print and copy parts from other individuals in your organization. If you’re working by yourself, you can make copies of parts to apply and store different settings for that part.
Markforged maintains Eiger’s slicer for optimal print quality. Compared to software such as Cura or other slicers, the slicer settings are very limited. Many of the settings you might see in other software are because the slicer has to work with many printers and materials. The Eiger slicer only works with the Markforged materials, reducing the number of settings required to produce great prints.
To print a part, you follow these basic steps:
1. Import the *.STL file.
2. Choose the filament material, the fiber material (if any), and rotate/orient the part if needed.
3. Choose the layer height, 0.1, 0.125, or 0.2mm. (Layer height is locked to 0.125 when printing with carbon fiber and 0.1 for all other fiber).
4. Choose whether or not to use supports.
5. Choose the desired infill pattern; Triangular (default), hexagonal, Rectangular, gyroid, or solid.
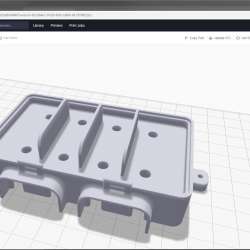
6. If you’re using reinforcement fiber, use the internal view to choose where to place the fiber (which layers and associated settings).
7. Select Print, or optionally queue the print for printing later.
Additional settings include Fill Density, Roof and Floor Layers, Wall Layers, and a few others for specific applications. However, many of the settings you’ll see in other slicers are not present – most of them because you don’t need them; the software is optimized for the Markforged materials and printers.


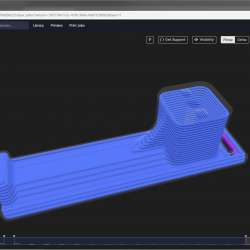
However, there is room for improvement with the slicer. There is no ability to control where supports are placed; it’s either on or off. There is also only one type of support, but I must say it is very nice support. Part surfaces printed on top of supports have the best underside surface finish of any prints I have ever done (on the surface that touches the supports).
For slicer settings that Eiger does not have, I would like to see tree supports, something like Cura’s Cubic Subdivision infill, and the ability to choose an area to change the type of infill for reinforcing holes or avoiding support where you know you won’t need it.
If you cannot connect to your printer due to network issues, you will still be able to print offline via USB by exporting the file to a USB drive and plugging it into the printer. However, you’ll still need an internet connection on the PC you export from to connect to Eiger. Alternatively, you can also connect the printer via the USB cable to your computer.
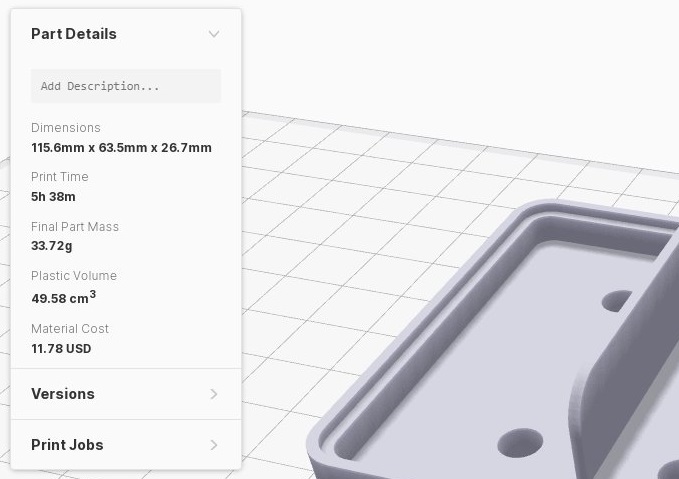
One of the things I really like about the slicing software is the part details display. The details include dimensions, print time, part mass and volume, and material cost. When selecting a group of fiber layers in the internal view, you can also see how much that group of fibers will cost.
The Eiger software also includes a section called Builds. It’s not apparent at first how to make a build, or even what it is. A build is a multi-part print. First, you configure all of the parts you want to print. Once you have parts that all have the same settings, there’s an Add Part option in the print dialog where you position parts. Selecting other parts adds them to the build layout. Once you have multiple parts on the print preview, you can save that as a build so you can print the multi-part print again later without having to go through all of the layout steps.
While the printer is printing, you can add prints to the print queue. Later you can start prints from the queue from the Eiger software or directly from the printer. This is a handy feature since you’re right there removing the finished print at the printer.
The Eiger software has other features such as searching for parts, a list of past prints, and a dashboard with analytics. It is actually really nice to use.
You can try out the Eiger slicing software without a printer; visit their website to get started.
Fiber Reinforcement
Undoubtedly, the flagship feature of the Markforged Mark Two is the ability to print Continuous Fiber Reinforcement (CFR). Each of the fiber materials (carbon fiber, Kevlar, fiberglass, or high-strength high-temp fiberglass) have their own unique properties, which you’ll have to choose based on your part and its application. For example, Kevlar has high toughness and shock resistance, making it ideal for shock-loading and high-impact conditions, bending instead of breaking. Carbon Fiber is stiffer, and fiberglass is still strong yet less expensive.
CFR works by using two print nozzles. The printer builds the matrix material out of a thermoplastic (Onyx) and irons down continuous strands of fibers into the part. The fibers are impregnated with nylon and are fused to the Onyx layer. There are several settings for where the fiber is laid down. You can choose layers or groups of layers and change the settings for each group of fibers.
The primary setting for the fiber layers is the fiber fill type: Isotropic or Concentric. Isotropic lays down in all directions over the entire layer and concentric places the material around the edges of walls. Isotropic has options for fiber directions, and concentric has options for all walls, inner holes only, and outer shell only. Other than the concentric options, the software does not let you choose to reinforce just a section of a layer, for example, if you only wanted to reinforce a single tab or hole. Hopefully, Markforged will add this in future versions of the software.
The type of reinforcement you use will depend on the application. Markforged has a guide on Fiber Reinforcement Strategies for helping you out with that as well as many other learning materials in their Learning Library.
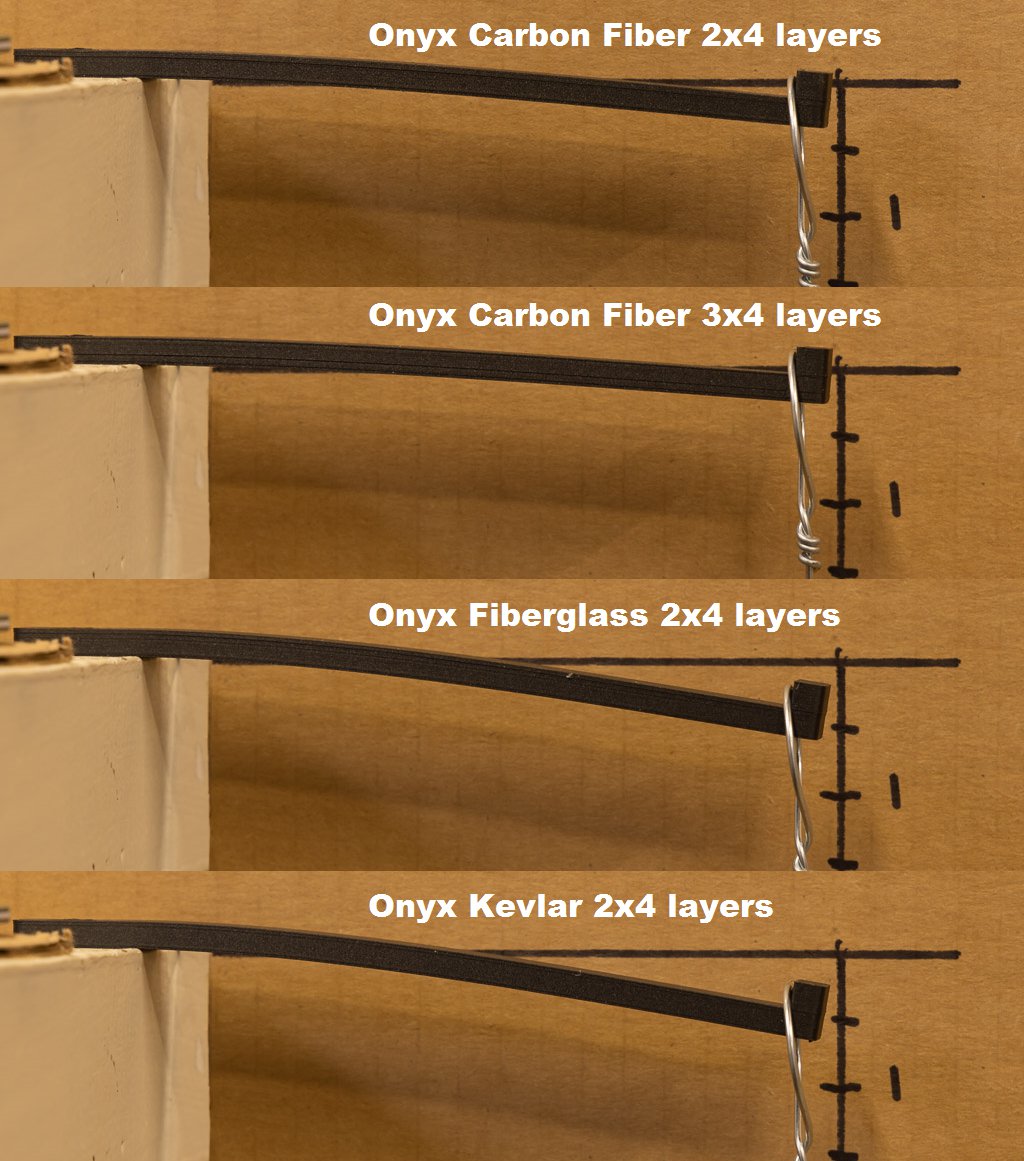
There is a learning curve for exactly what type of fiber layout to use and where to place it. In one of my first destructive test experiments shown below, I placed the fiber reinforcement below my screw mounting surface, and when a lot of force was applied (I screwed it to a rafter and hung from it), the layers separated at the top of the fiber surface. I must highlight that this was more force than this part was designed for and is not surprising based on the layered manufacturing process.

Fiber reinforcement does have its limits, though. There is a minimum length of fiber you can lay down (40mm), and the area must be at least 1/8″ (3mm) wide to have room for the material between the print walls and the surrounding Onyx material. Layer height is limited to 0.125 when printing with carbon fiber and 0.1 when printing with fiberglass, kevlar, and HSHT fiberglass.
I made some test prints of PLA (from my other printer) and Onyx from the Mark Two. The test print was only 15mm wide (0.6 inches) by 5mm (0.2 inches) thick, with an overhang of 120mm (4.7 inches) from the table edge to the weight point. I then hung a 1.8kg (4 lb) weight on the test print. As you can see from the photos, the fiber-reinforced parts were much stiffer. The vertical deflection marks are in inches. The fiber-reinforced prints had two or three groups of reinforcement (top and bottom) of just four layers in each group. Adding more fiber would have made it even stiffer.

Performance
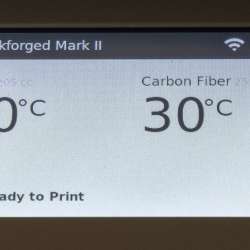
The bed leveling and auto homing features of the Markforged Mark Two 3D printer are just fantastic. With a typical 3D printer, you turn it on, home the print head, level the bed, and then print. With the Mark Two, you simply turn it on and print. Even after removing the print bed, scraping off a print, and then reinstalling it, the bed stays level.
The Mark Two isn’t the fastest printer, but the accuracy and quality of the prints are the best I’ve seen. With a typical 3D printer, you constantly have to trim off filament that oozes out of the nozzle when it’s warming up and babysit the first layer to ensure the print starts correctly. If the bed is clear and ready with the Mark Two, you just hit print, and it works. I did not have a single failed print. The prints stuck to the bed every time. I even purposely did not re-apply glue after dozens of prints and the next print still stuck to the bed very well. Markforged does recommend to wash the bed and reapply the glue daily though.

The limited material choices (Onyx and white Nylon) are a drawback. Although I don’t print much stuff in other colors, it would be an excellent option to have. I do realize that carbon fiber is black, so making other colors of carbon-reinforced nylon may be difficult. However, another color of nylon would be nice.
The build volume is 320mm wide x 132mm deep x 154mm tall (12.6 x 5.2 x 6 in). I find this a bit limiting considering the cost of this machine; I would really like to at least print a 12.6 x 12.6 area. Larger print volumes are available in their industrial series of printers, but those are too expensive for a hobbyist or small-time inventor.
My test print of a 20mm test cube was within 0.1mm accuracy. I also paused a print and then continued it several minutes later. There was absolutely no change in the layer lines on the print at that point.
Ease of Use
Typical 3D printing is not a plug-and-play process. You don’t just take a 3D object file and send it to a printer you just bought. 3D printing requires a bit of configuration for whatever filament you’re using by tweaking and testing dozens of different settings until you get the print quality you want—taking anywhere from hours to days to get right if you’re new to it. Some people never get it right.
The Markforged Mark Two is different. Once the bed is leveled correctly and the nozzles aligned (both of which have onscreen instructions to guide you along), it just works – every time. The only settings you change are the part-specific settings that determine how you want the part built (layer height, fiber use, infill, support use, etc.).
Many of the Mark Two’s menu system items walk you through procedures step-by-step. For example, loading and unloading filament or fiber. The touch screen makes navigating the menus a breeze.
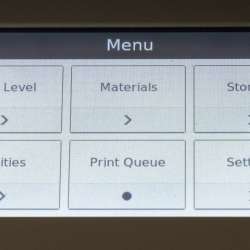
The printer, since it’s connected to the internet, will not only notify you that there’s a firmware update, a simple tap on the screen will download and install the update. The self-updating feature is far better than downloading firmware updates to SD cards, as many other printers require.
Customer Service
I had a question about how the printer was behaving, so I filled out a support ticket on a Sunday afternoon. At 9:11 am on Monday, I received an explanation of what the printer was doing. The print head moved to the right rear corner every five layers and then continued. It turns out this is normal behavior; the printer is just checking that the print head is in the right place.
Markforged also has an extensive support area with PDF guides, Maintenance info, Getting Started information, Operation information, and more. There are also unofficial Facebook groups.
Setup
The Markforged Mark Two 3D printer arrived in two boxes and was very well packed. The included setup sheet was easy to follow. There were a couple of zip ties to remove from the print head and the typical plastic protective covering.
I followed the Quick Start Guide instructions, which look much more extensive in print than the actual procedure is. Setup includes unboxing, filament and fiber installation, print bed installation (placing it on the mounts), bed leveling, Wi-Fi or ethernet setup, and a sample print for bed level. Next, I ran the print head alignment, which was spot-on out of the box.
Initially, I did have problems leveling the bed; it was too close to start the shimming procedure. I used the “Adjust Print Bed Z Offset” menu item, and after that, I was able to adjust the bed level easily.
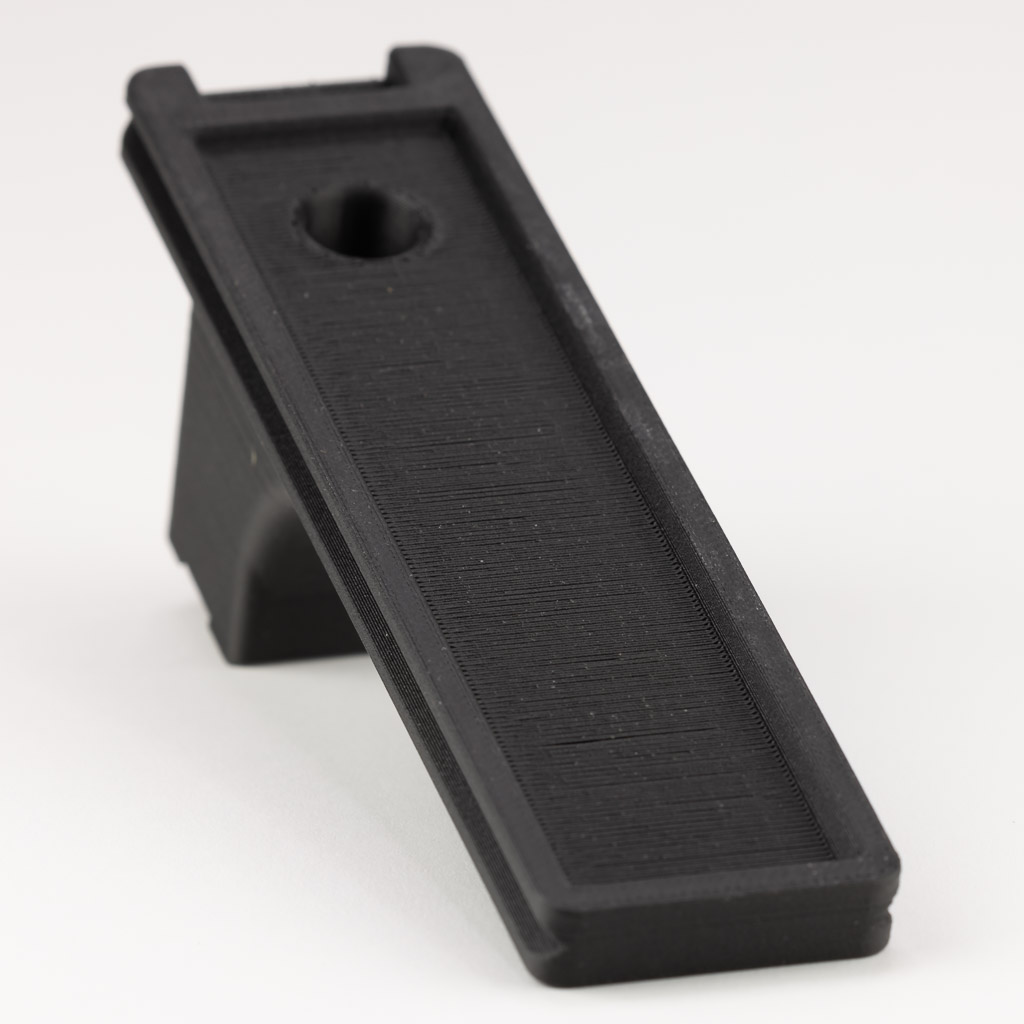
More Sample Prints
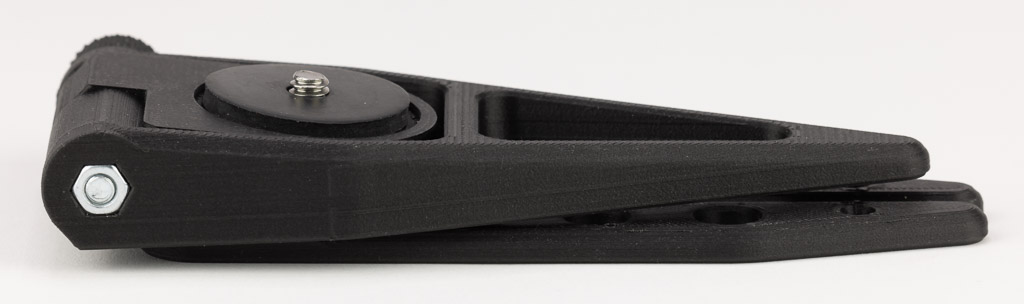
Small or thin items are often flimsy when printed in PLA. The Mark Two’s fiber reinforcement made this 5.75″ (146mm) tripod rock solid.

Onyx’s ability to withstand higher temperatures made it possible to design and print a custom fuse box for my son’s 1977 Datsun 280Z. The item is installed in the engine compartment, where temperatures would turn standard PLA into mush.

The Mark Two’s fiber reinforcement also made it possible to print a lens foot for my telephoto lens. I would never trust $6000 worth of camera equipment to a mount made of just PLA! I went through several versions of this design. I was quite impressed with the fine detail on the top surface. It’s still a work in progress, but it works great.
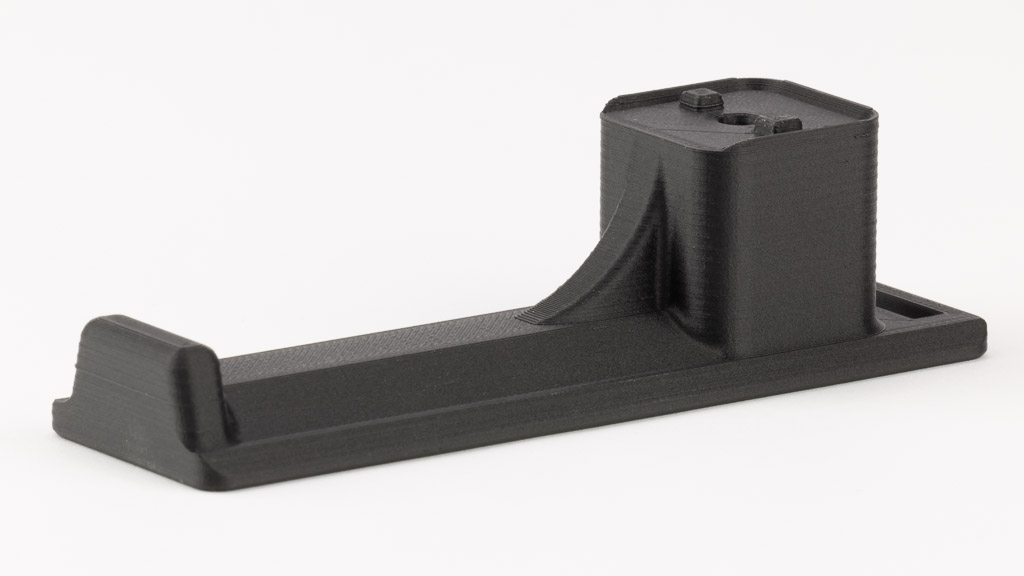

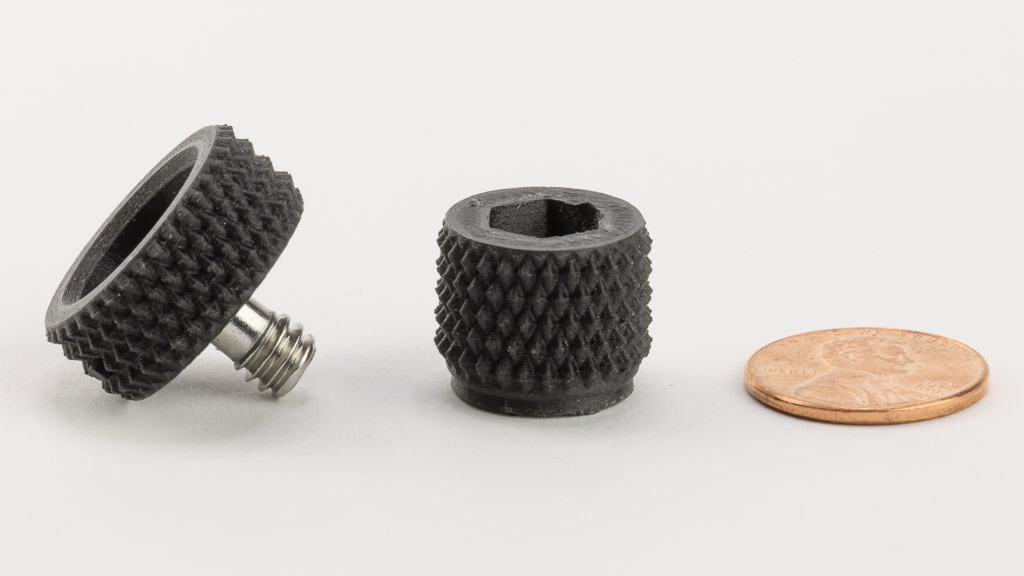
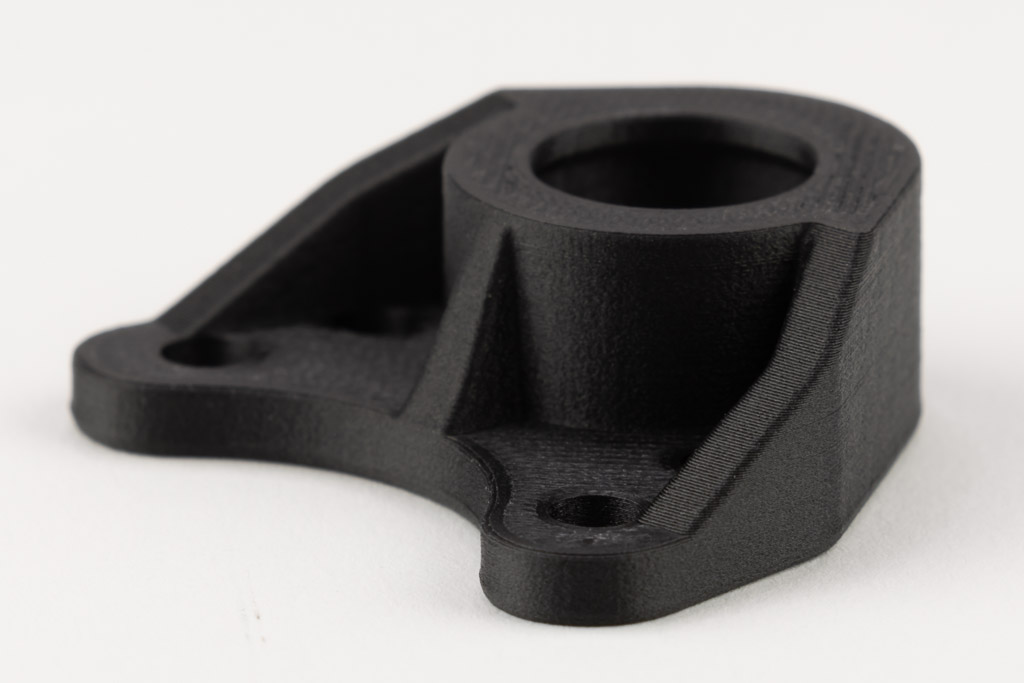
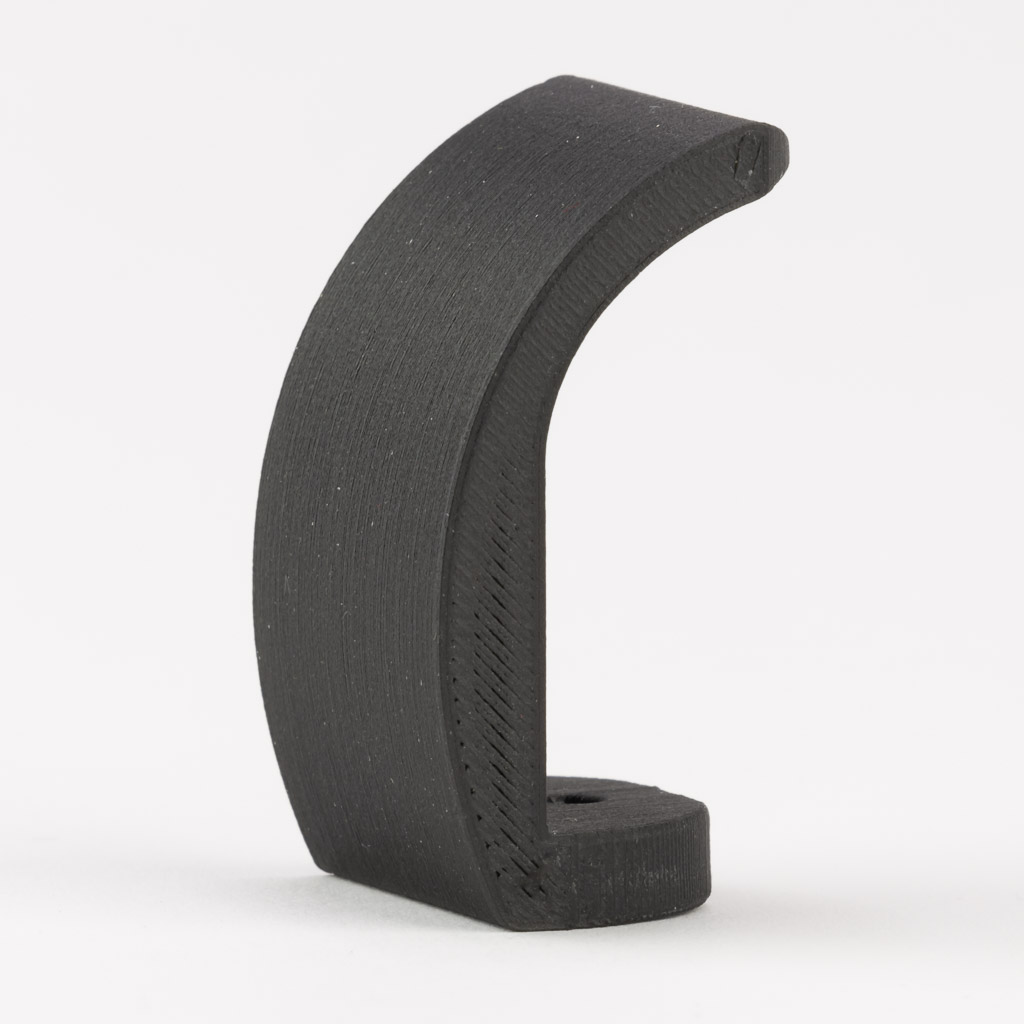
Miscellaneous part photos:
What I like
- High-Quality Prints, both in appearance and accuracy
- High Strength Fiber-reinforced parts
- Built-in Print tests for bed leveling and fiber nozzle adjustments
- Magnetic build plate and leveling mechanism
- 4.3″ Color Touchscreen interface
- Printer software that walks you through procedures
- Print bed magnetically held in place with 10-micron accuracy
- Automatic tracking of filament amounts
What I’d change
- Limited Material/Color Choices
- Internet connection is required unless you get the offline software
- Much more expensive to print than standard filament
- May print slower than other printers, but the quality is better
- Smaller than average build plate
- Slicer could use some improvements to make it even better
- A better drybox setup would be nice
Final thoughts
I’ve found the Markforged Mark Two 3D printer to be the best 3D printer I’ve ever used, and it has produced some of the best-looking prints that I’ve seen (even on the internet). Although there are a few things I would like to see changed, none of them would be a deal-breaker for me.
I still use my other printers for quick prototyping, but if I’m making a final part, I like to use the Markforged Mark Two. The cost of the machine may be a bit of a hurdle, but for some people, the time and cost savings of having parts CNC machined may just pay for themselves over time. If you’re a hobbyist or inventor that needs really strong, high-quality parts, definitely consider this printer.
Update 4/19/22
Markforged has come out with a new affordable filament called Precise PLA (P-PLA). Precise PLA is Markforged’s specialized version of the popular PLA (Polylactic Acid) that many are familiar with. Precise PLA is available in eight color options – yellow, red, green, blue, orange, black, white, and gray. At $50 per 600cc spool (1/3 the price point of Onyx) P-PLA makes for a cost-efficient option for prototyping, fit checks, and printing low-performance parts.
See my full review of Markforged Precise PLA (P-PLA) 3D printer filament.
Price: $20,000 as tested, other desktop models range from $4,500, to $10,000.
Where to buy: Markforged
Source: The sample of this product was provided by Markforged.

ESR for MagSafe Wallet, 5 Card Holder with RFID Blocking, MagSafe Sticker Included, Slim Magnetic Wallet for iPhone 17e/17/16/15/14/13/12 Series and Selected Samsung Devices, Not for 13/12 Mini, Black
(as of July 8, 2026 14:33 GMT -05:00 - More infoProduct prices and availability are accurate as of the date/time indicated and are subject to change. Any price and availability information displayed on [relevant Amazon Site(s), as applicable] at the time of purchase will apply to the purchase of this product.)
Gadgeteer Comment Policy - Please read before commenting
As someone who wanted more color from their Markforged manufactured items, I found you can dye the white/clear nylon printed items just like other nylon items (lacrosse sticks). I found it does not significantly reduce the overall capability of the part if done properly especially if the part is designed with this type of coloration in mind.
That’s good to know, thanks!
@French0012 Thanks for the tip!
As a 2 years Mark II owner, I find your analysis thorough, without bias and well organized. Totally agree with your conclusion.
Excellent and very accurate review.
We needed stiff parts to try and match Aluminium. With the Onyx +carbon the stiffness is approx 50GPa vs 70GPa for Aluminium, so a small increase in wall thickness will work.
However that assumes that the carbon filling is added everywhere or at least where needed, and be aware that the wall thickness’ needs to be 3.2mm to accept the carbon fibre.
Its quite hard to carry out FEA analysis of Onyx+CF parts as the properties of the 2 materials are so different. It would be great if the software could export a CAD file with Onyx and carbon as different yet bonded solids – that way we could accurately predict stiffness and strength of parts.
IF ANYONE knows a way of doing this PLEASE share.
If in doubt, I agree, it IS probably THE best desktop printer.
As a Markforged operator of both an X7 and Mark II, I found your review spot on, but wanted to add a few things.
First and foremost, and not chastizing you, but who CARES how long it takes to make a print when “accuracy” is, and should be, your number one concern? I’ve had vendors tell me they could print a part in half the time, but when I received the sample part of the .stl I provided, surfaces were far from what the Markforged gives you and hole dimensions were far from what I needed, the dimensional accuracy is far from what is expected and both required additional modifications.
When I print parts, the minimal amount of time I have to “post process” on the parts is my number one concern. I install heat inserts when I need threads and the Onyx is perfect for this. The material “taps” well and the threads are stong and reliable and depending on what surface a hole is placed, you can always depend on +/- .003 to .005 tolerance on prints on top down holes but any hole on and side surface requires “supports” which I try to make sure through my design and print set up, will not need to be accurate or will be heat insert holes. You can drill holes after you remove the supports and make them round, clean and they accept tapped threads, inserts and pins.
The supports on Markforged parts have always been my biggest issue and is usually 90% of my post processing time but thru many iterations, I have learned that sanding with 320 grit paper, then Scotchbrite, then sandblasting, you get the perfect surface that you are looking to achieve. The supports hold on tight and I have been working with Markforged in trying new ideas i.e. different angles on supports, finished parts are easier to process, but they still need further updates. Supports on threads are a nightmare to clean up, but I have found this the case with any RP machine.
I am in agreement that the online Eiger software is the greatest, but it still needs updates and hopefully, they will take my suggestion on “adding parts to builds”. I make folders for all my projects and if I know a print will take 25cm of material, and I have 30cm of material left on the spool, I’ll add parts to use up the spool. The software only shows the “latest” parts you added to your library and you have to constantly scroll downward and “load more parts” which can take forever to find if you added a part “last year” and the “search for part” feature works great if you remember the part name from a year ago. What Markforged / Eiger needs is more of a Microsoft Explorer database when the search allows you to choose the “folder” where you know where the parts are located. How this feature was missed is beyond me.
One other issue I wish Markforged would address is the Carbon Fiber (as well as all the others fiber inlay) “direction” and “placement” of the fiber as I can only place fiber in each layer and not in certain areas of a layer, but thats another issue entirely.
Bed size is an issue, but I find I can design parts that “interlock” and solve some of those restrictions amd most times, I can make something from multiple parts that satisfies the design requirement.
As far as the Mark II dry box location issue is concerned, I purchased a 6 foot length of the same tube from McMaster and place the box under the table I have my Mark II located and its a simple fix.
The cost of the printer can be offset by the realization that the parts are of better quality and with far less “post processing” time, you can make better parts than any competitor. People have no issue paying for quality and I find 9 times out of 10, people who pass on my parts end up coming back after getting parts made for “half the price” of mine after they find out the cheaper parts are, just that, cheaper. Also, if you plan your builds, you can efficiently make parts and turn a profit.
In closing, Markforged Tech Support is second to none and if you submit a ticket, and if they dont have an answer because they’ve “seen it before”, they will email you for files and build information and if that doesnt solve your case, they call and will do Teams meetings and they have even visited my location a few times if the issue was something that demanded a personal visit. At this present time, there are only 2 items that no one has been able to solve, but “they are working to correct it”.
20K may sound like a lot for a rapid prototyper, but the “all in one, out of the box” operation most certainly beats all the other hoops you have to jump thru with most every other printer. It not only makes “prototype” parts, but “production” parts as well