I receive frequent emails asking me how I take such nice close up (macro) product images for my reviews. As a result, I thought I would share some of my ‘secrets’ for macro photography. Some people think that if they buy the most expensive bazillion mega pixel DSLR camera on the market, that they will automatically become a professional photographer with the ability to take perfect shots. I’ve found that while good equipment is very important, you definitely do not have to spend $1000’s dollars to get excellent results. I’m going to explain what I currently use and also offer suggestions to help you adapt your own existing equipment, so you can take great shots too.
My equipment list…
Nikon Coolpix 8800 digital camera
Nikon Speedlight SB-600 External flash
A good place to work (your ‘studio’)
Poster board
Adobe Photoshop CS2
My camera
The camera that I use is a Nikon Coolpix 8800. It is not an expensive DSLR and is over 2 years old now. It’s an 8 mega pixel camera which is actually overkill for what I use it for, but its macro capability is excellent and it has a hot shoe.
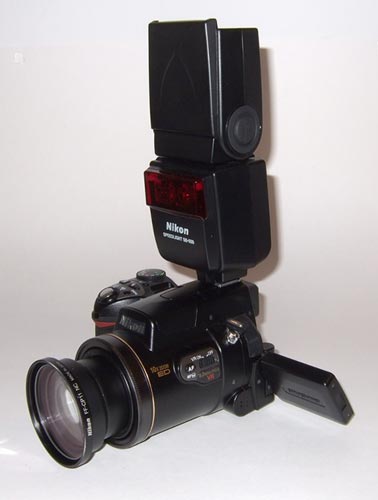
If you don’t happen to know what a hot shoe is, it’s the little metal socket on the top of some cameras that allows you to connect an external flash. If you take away anything from this article, you should remember that an external flash is the main secret to macro photography. The external flash that I use is the Nikon Speedlight SB-600. You can see it attached to my camera in the image above. The head of the flash can pivot and you can see that I have it pointed straight up. I’ll explain why I do this in just a minute.
My ‘studio’
When I remodeled gadgeteer headquarters a couple of years ago, I made sure I designed a ‘studio’ space where I could do my macro photography. For me, the studio started out as just a short section of clear desk space directly beside my computer. Definitely nothing fancy.
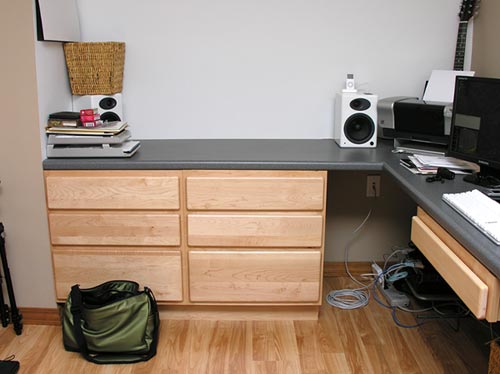
Initially I had the whole office painted in Beige. Including the photography area that you see above.
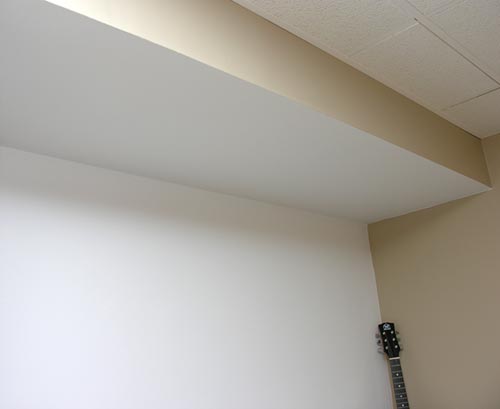
However, once the room was completed, I decided that it was better to paint that area (including the ceiling section) in a flat White paint. This made the area brighter and also helped with White balance. Of course, it’s not imperative that you have a photography area with strictly White walls and ceiling. It just helps a little bit.
You probably notice that the counter top in my studio area is not White, but almost all my review images have a White background. I achieve this not by using a bulky, inconvenient light box / tent and multi light setup.
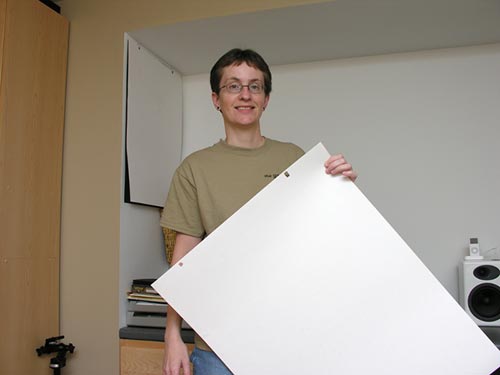
Instead, I use a .50 cent piece of White poster board purchased from my local Hobby Lobby store. Poster board comes in many different colors. 9 times out of 10 I use White, but I also use Black poster board on occasion.
You might be wondering what the heck you do with the poster board when you’re not using it. I just punch two holes along one edge and hang them on the wall. Not elegant, but it works ;o)
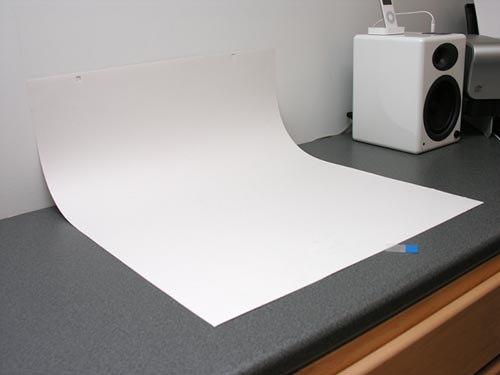
I position the poster board so that it curves along the back wall of my studio area and lays flat on the counter. I use a post-it note or post-it flag sticker to keep the poster board from sliding off the table. I don’t use Scotch tape or anything too sticky because it might tear the poster board when I remove it.
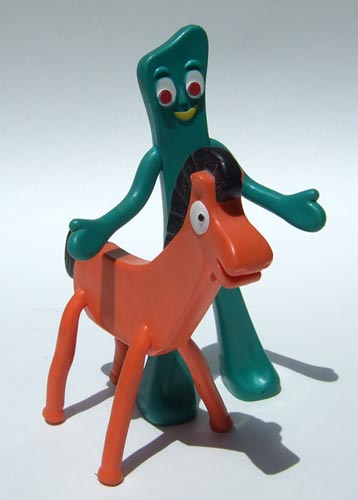
By curving the White poster board like I do, it makes the image background appear to be continuous and gives the subject the illusion of floating in space.
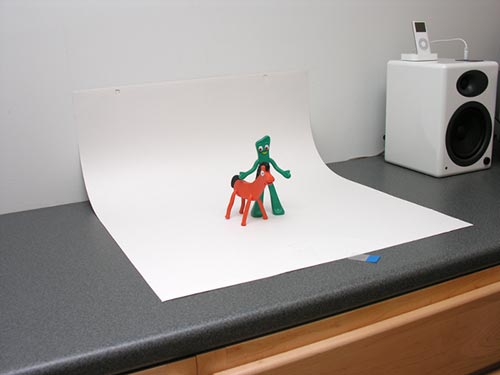
I then arrange the item(s) on the poster board. In this example it’s Gumby and Pokey :o) If your subject is too large for the poster board, then just use 2 sheets by overlapping them on the counter.
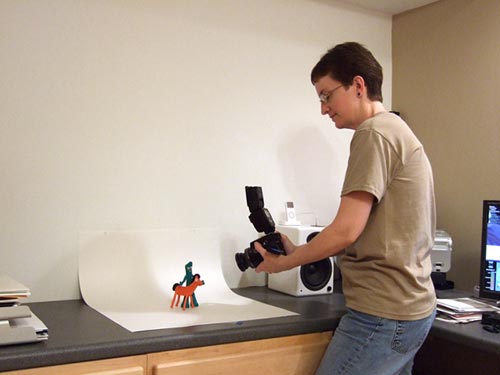
Now for the actual picture taking! Set your camera to macro mode and point your external flash so that the flash will hit the ceiling like I’m doing in the image above. You don’t want to point the flash directly your subject. Doing so will just over expose your image. Bouncing off a White ceiling is your best bet and the way I’ve been taking all my review shots for years now.
Optimizing the images with software
Once you have some pictures, it’s time to work on them in your image processing software. I use Photoshop, but there are all kinds of other software options that are way less expensive and even free. A lot of cameras come with Photoshop Elements (a lite version of Photoshop) that will work well and then there’s GIMP which is totally free.

Click thumbnail to see full sized screen shot
Load up your pictures and then go to the levels adjustments screen.
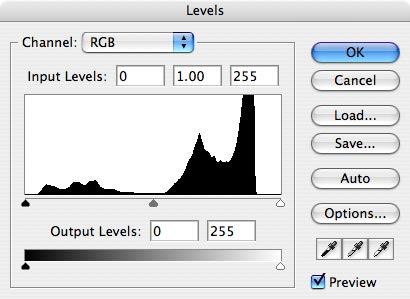
Depending on the software that you’re using, you’ll see a graph that might look like the image above. It’s basically telling you the range of Black, Grey and White in your picture.
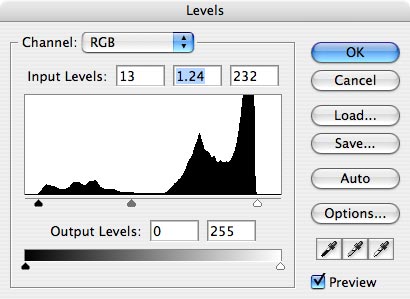
I move the outside little level sliders to the leftmost and rightmost edges of the graph. Then I move the middle slider a little to the left to lighten up the whole image. This is all a matter of individual taste, but I like my background to be as light as possible, while allowing the subject to remain vibrant and not washed out.
I then crop it so that the subject fills the image almost completely. I like to leave a little white space all around the edges, but not a lot.
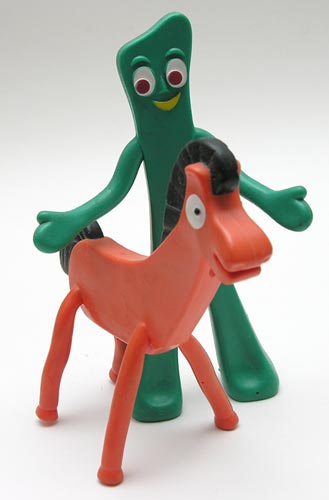
Here’s the resulting image. What do you think?
What if you don’t have a digital camera with a hot shoe or an external flash?
If you don’t have a digital camera with a built in hot shoe and an external flash, and you don’t want to buy one or either, you can still take some good macro shots by improvising. Besides my Nikon Coolpix 8800, I also have a little point and shoot Fuji Finepix F30. This camera does not have a hot shoe. It does have a macro mode though.
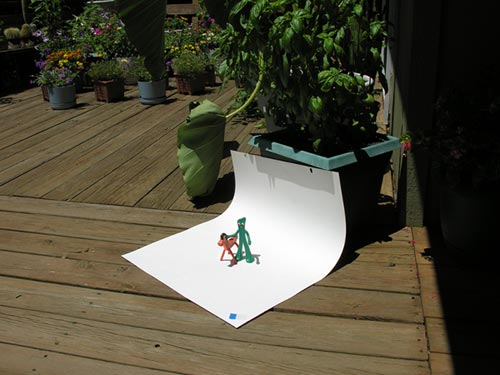
So instead of using an external flash to light up the subject, you could take your poster board outside and take advantage of that big external speedlight in the sky. The sun.
Arrange your subject on the poster board just like we did before, edit in your image processing software and you’ll have a decent shot. Yes, the shadows are quite heavy and the image might have worked better if I had taken it in a bit of well lit shade instead of the direct sun. I realize this isn’t the best solution, but it is a quick and dirty method if you don’t have optimal equipment.
So there you have my method of taking macro shots for my gadgeteer reviews. This has worked out very well for me as I don’t have to setup and tear down a lot of equipment every time I need to take a batch of product shots. It’s quick and easy which is just the way I prefer things to be. Do you have some tips for this type of photography? If so, please share them!

HP Everyday Laptop • 2026 Edition • 8GB RAM • 256GB SSD • Microsoft Office 365 Included • Thin & Portable • Fast Charge and Up to 12 Hours Battery Life • Windows 11
(as of June 11, 2026 02:06 GMT -05:00 - More infoProduct prices and availability are accurate as of the date/time indicated and are subject to change. Any price and availability information displayed on [relevant Amazon Site(s), as applicable] at the time of purchase will apply to the purchase of this product.)
Gadgeteer Comment Policy - Please read before commenting
just curious…
in your screen-shot, i see a japanese “Domo-kun” icon in your dock (second icon from left). What app is that??
It’s a customized icon for the Adium instant messaging chat client.
http://www.adiumx.com/
For the outdoor shots, if you have a white bed sheet and some kind of convenient support (railing, pole, tent, etc) you can put that between the subject and the sun and decrease the high-contrast shadows.
-a
Thanks so much for the info; it really is practical and helped a heap. kind regards,
Gary
Listen up Julie
I just want to say how much you have helped me with my photography business, the photos are coming out as crisp as an apple! (Lol) I take professional photos of things like apples oranges bananas and grass seed.
One day, one day
Chester V.
@Chester Thank you!