REVIEW – I’ve never dabbled in 3d printing before, one big reason being that it seemed to be a complex hobby with a steep learning curve. I’ve eyeballed some cheaper 3d printers in the past but never pulled the trigger after reading reviews where they were either limited in functionality, or not as beginner-friendly as they marketed themselves to be. I didn’t know quite what to expect when I received the ANYCUBIC Vyper Auto-Leveling 3D Printer to review, but I was surprised at how easy it was to set up and operate. I’m also realizing that the auto-leveling feature is hugely helpful for beginners and advanced 3D printers alike.
What is it?
The ANYCUBIC Vyper Auto-Leveling 3D Printer is a filament printer that can “print” objects in 3 dimensions (as opposed to the classic office printer, which puts ink or pigment onto a page in 2 dimensions). You can use a wide variety of different filaments for different purposes (if you’ve ever seen lawn-trimmer string, it’s very similar – spools of plastic string looking stuff). The actual “printing” is accomplished by melting the filament as it reaches the nozzle, which is maneuvered to create layers in specific patterns on top of each other.
In the world of 3D printers, it seems like filament printers and resin printers are by far the most popular. The resin ones use UV light and resin liquid to create 3D models, but create fumes that shouldn’t be breathed. The filament type (like this ANYCUBIC Vyper) can use a wide variety of filaments, many of which produce little to no fumes so they can be used indoors. Be sure to research any filament you use and make sure there’s ventilation if needed!
What’s in the box?
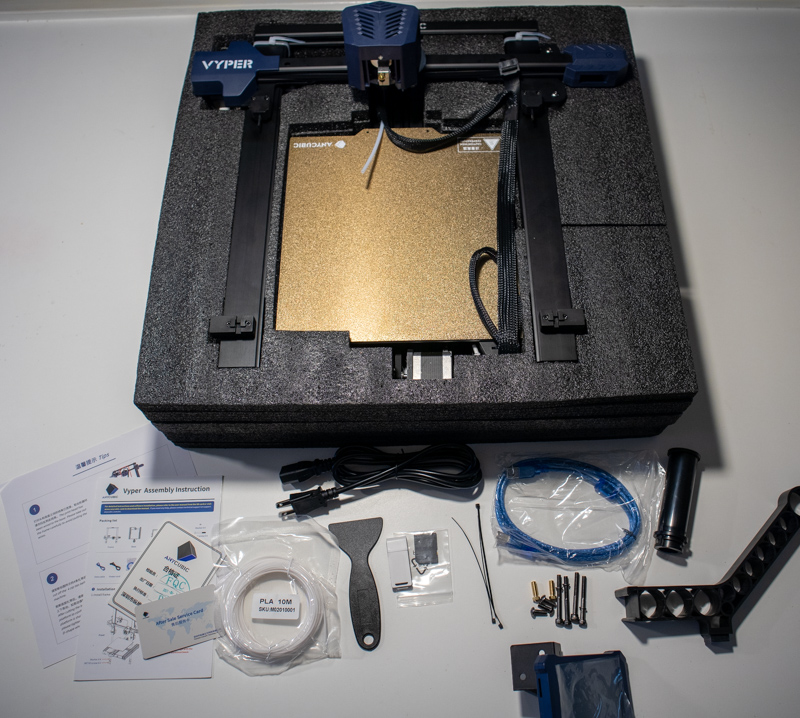
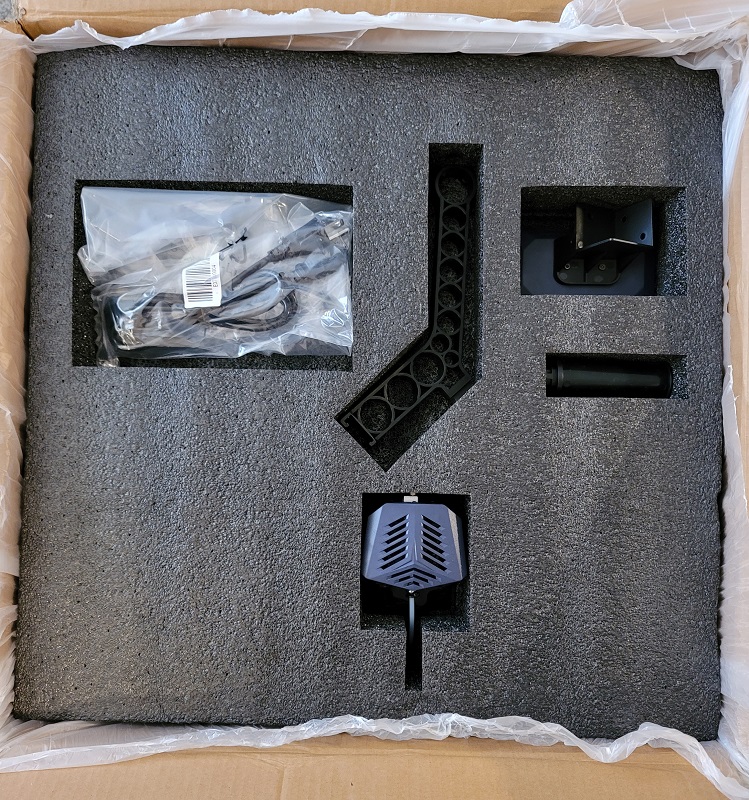
Included in the box is the ANYCUBIC Vyper Auto-Leveling 3D Printer in several pieces, screws for installation, a USB cable, SD card, card reader, various tools (more on that below) and manuals.
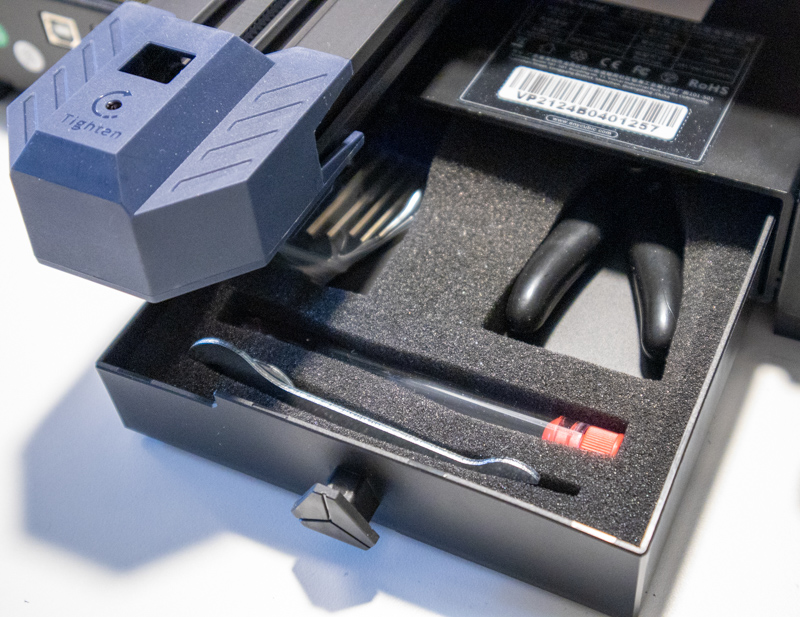
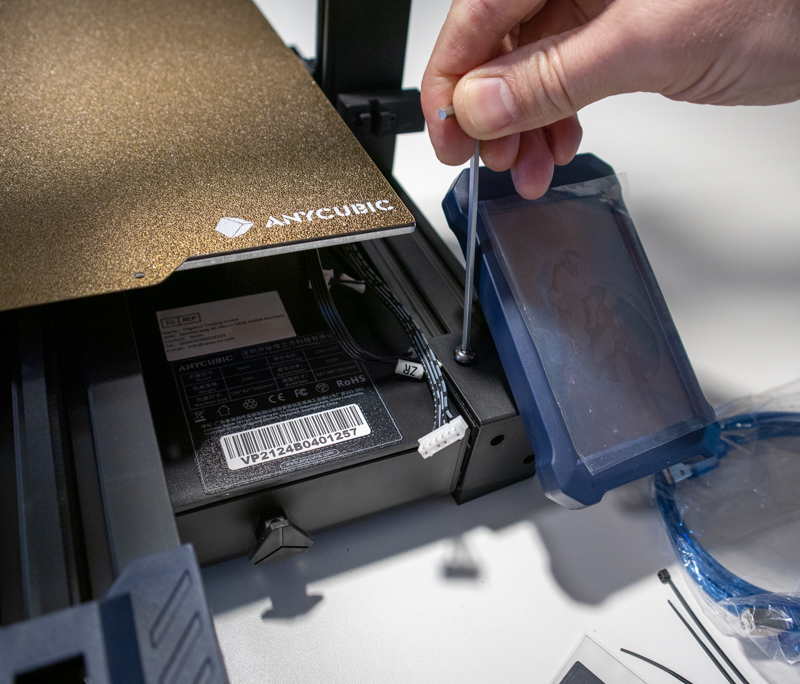
Some of the tools were in the box, and the others were in this neat little drawer that I didn’t find until reading the manual. It stays in place with magnets, and has foam cutouts to hold the toolkit.

Tools include wrenches and Allen wrenches, filament snips, and a needle tool for un-clogging nozzles. There were also 2 replacement 0.4mm brass nozzles in the drawer.
Hardware specs
- Printing Technology: FDM (Fused Deposition Modeling)
- Build Volume: 245 mm(Length) x 245 mm(Width) x 260 mm(Height)
- Print Resolution: ±0.1mm
- Extruder: Single
- Nozzle diameter (installed): 0.4 mm
- Print Speed: Up to 180 mm/s, recommended 80-100 mm/s
- Supported filaments: PLA, TPU, ABS, PETG, Wood
- Machine exterior dimensions: 508 mm length x 457 mm width x 516 mm height
- Machine weight: ~10kg
- Nozzle temperature: max 260°C
- Hot Bed temperature: max 110°C
- Slicing software included: Cura
- Input formats for Cura: .STL, .OBJ, .AMF
- Output format supported by printer: GCode
- Connection mode: SD card or USB cable
- Input voltage: 110V/240V AC, 50/60Hz
- Output voltage: 24V/14.6A (350W)
- Interface: 4.3″ large touch screen
- Internal processor: M3
Design and features
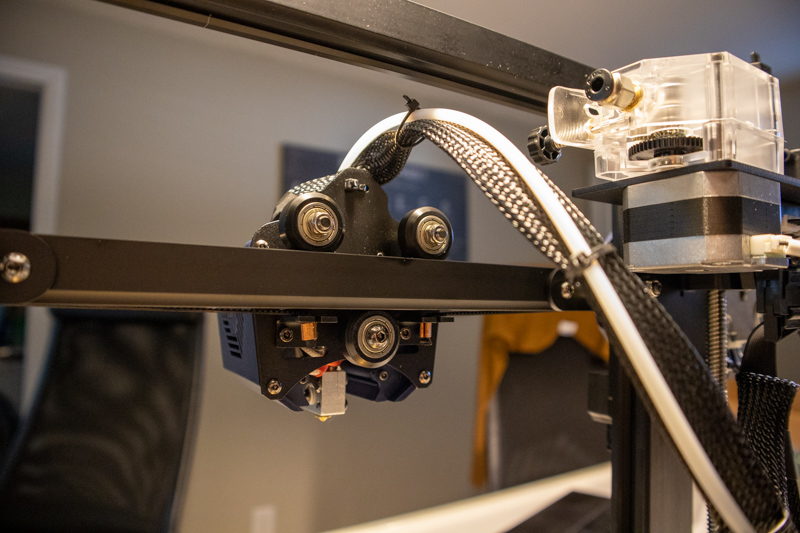
Construction of the ANYCUBIC Vyper Auto-Leveling 3D Printer is very solid and seems high-end to me (though admittedly I haven’t used any other makes/models). Materials are sturdy and tolerances tight. Like most 3D printers on the market, ANYCUBIC doesn’t hide all the motors, wires, belts, and pulleys. This results in an industrial look, and probably more importantly leaves easy access for maintenance, tweaking, and upgrades.
I printed pretty much nonstop for weeks during my review, and nothing seemed to be having any issues or strain at all. Belts and motors are all working well after 100+ hours of printing.
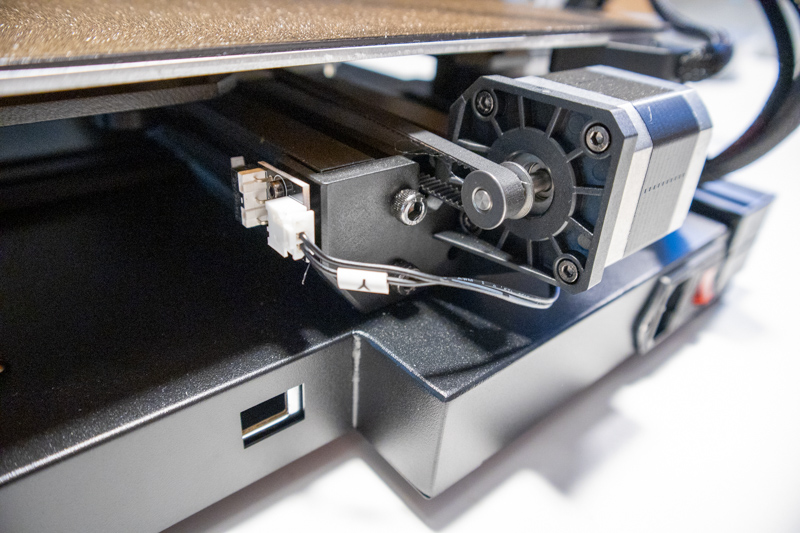
A couple of included zip ties attach the filament guide to the extruder head assembly (sorry if I’m using the wrong terminology throughout this review, I’m a newb!).

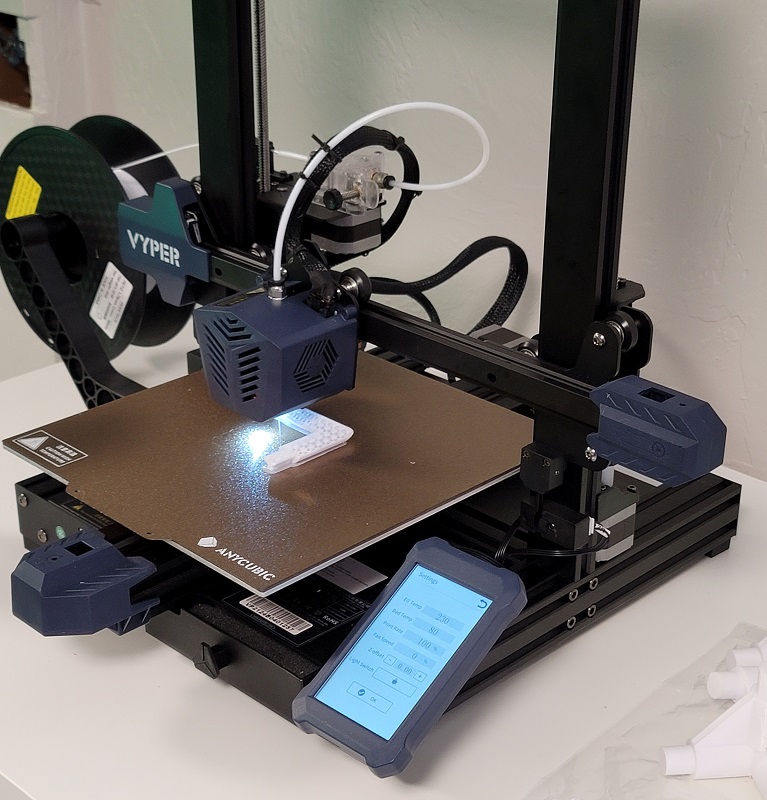
The touchscreen interface is informative and easy to navigate. ANYCUBIC does a good job of organizing functions into coherent menus and I could always quickly and easily accomplish what I was wanting to do when interacting. It was also bright and easy to read even with bright overhead lights.

The end result is a nice looking machine that seems like some sort of magic when you start using it.
Installation and setup
The ANYCUBIC Vyper Auto-Leveling 3D Printer was shipped in a very well-packed box. I don’t usually post box photos, but the foam inserts and packing strategy were a thing of beauty to me.

Here’s the lower layer, everything was fairly easy to get out – though be careful removing the base and extruder assembly – they’re connected by a cable bundle that you don’t want to rip out.
Installation on the ANYCUBIC Vyper Auto-Leveling 3D Printer was fairly easy, with good instructions in the manual. After removing and organizing everything, you first have to install the upper part (gantry?) into the base, then attach screws through the bottom of the base to secure it. This part was a bit tricky solo, but everything else can be done easily by one person.
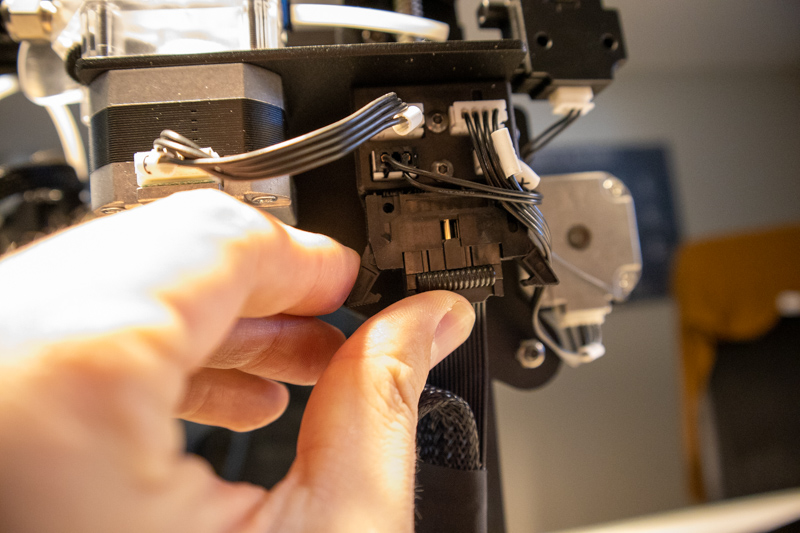
Roughly a half-dozen plugs have to be connected, and a few bolts and screws tightened (all easy to follow in the manual).
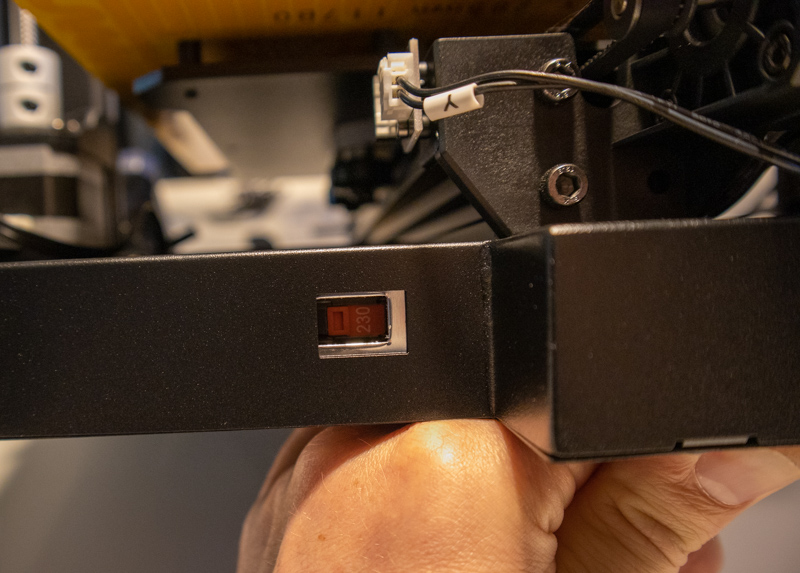
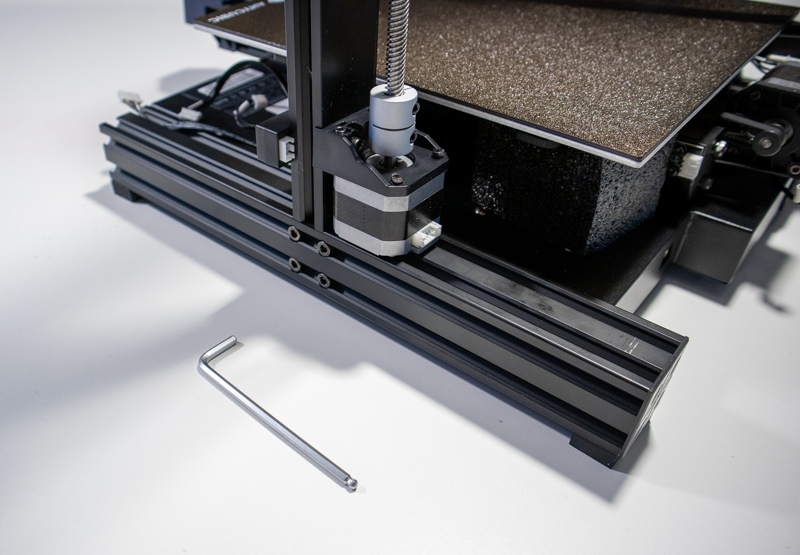
As instructed, you do need to locate the voltage switch on the very back of the base. This was set to 230V from the factory, you need to use a tool like a small flathead screwdriver to slide that to the right until it reads “110” if you’re on 120V AC power like me.
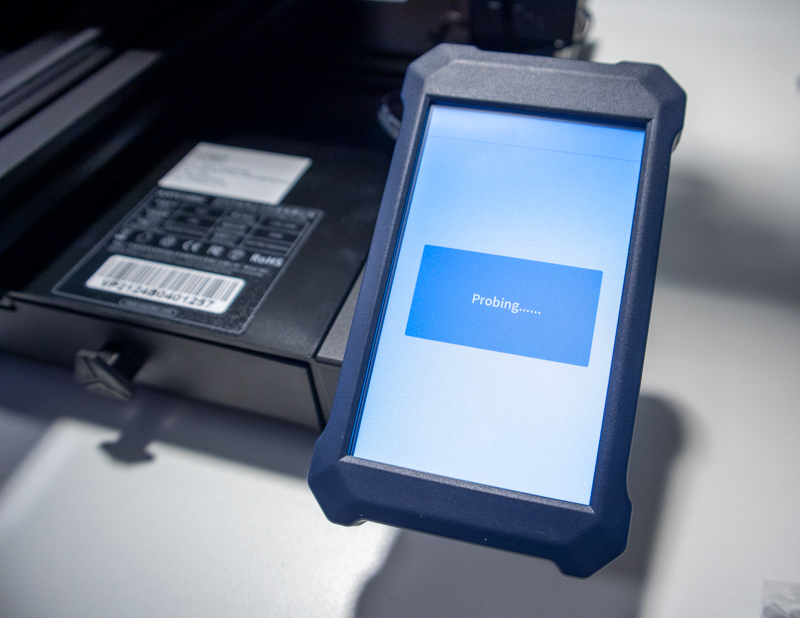
Next up was running the auto-level program (located under Tools on the main screen). Once this is finished (a couple minutes) the printer will automatically compensate for any unevenness on the printing bed going forward, without which would result in poor or even failed end results. This leveling process looks to be fairly time consuming on printers without the auto-leveling feature, I was glad I had it!
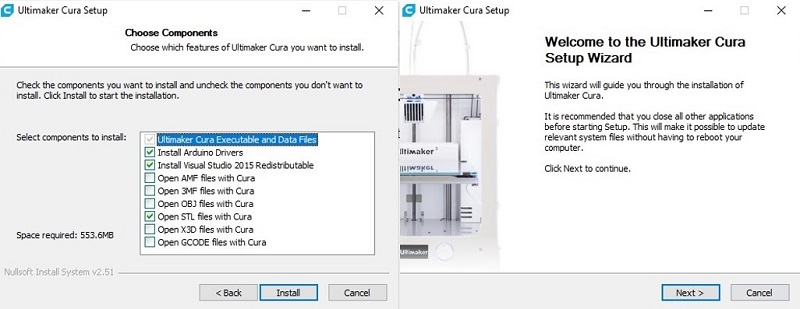
I then took the SD card and installed the Cura “slicing software” on my Windows 10 machine. You’ll need slicing software of some sort to do 3D printing: this is what takes a 3D computer file and translates it into step-by-step printing instructions that can be read by the printer (think “move 2mm in the positive X axis while pushing out filament at 40 mm/s at a temperature of 200”, repeated about a zillion times for every line and pixel on the finished model).
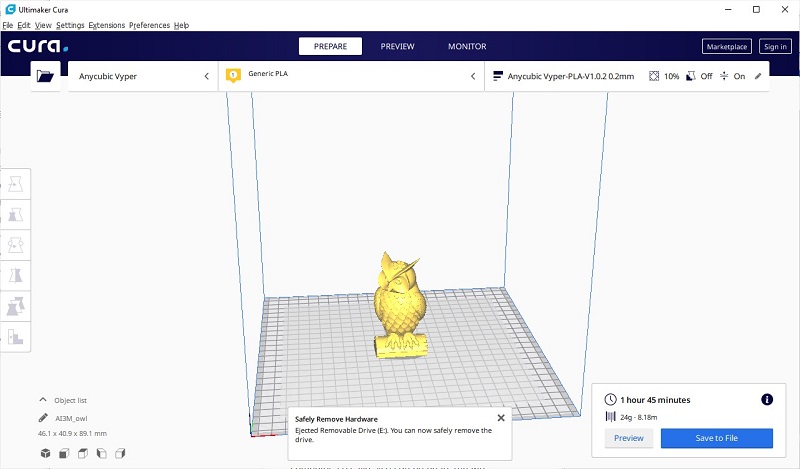
There are a TON of options that can be tweaked in this software to refine your print quality (or to compensate for print issues). I appreciated the easy-to-follow baseline instructions ANYCUBIC includes in the manual. These all worked great for me, and weeks later I’m just now starting to experiment with different filament materials and settings.
Above is a video in real time of what the ANYCUBIC Vyper Auto-Leveling 3D Printer looks like while creating a 3D print. You can also hear the sound of the printer itself in this video. It sounds to me like a standard laptop fan running, plus noises that sound very similar to an inkjet printer printing a page.
And this video is a timelapse of 2+ hours of printing (some of the items I printed took over 8 hours, it all depends on size and print settings/speed).
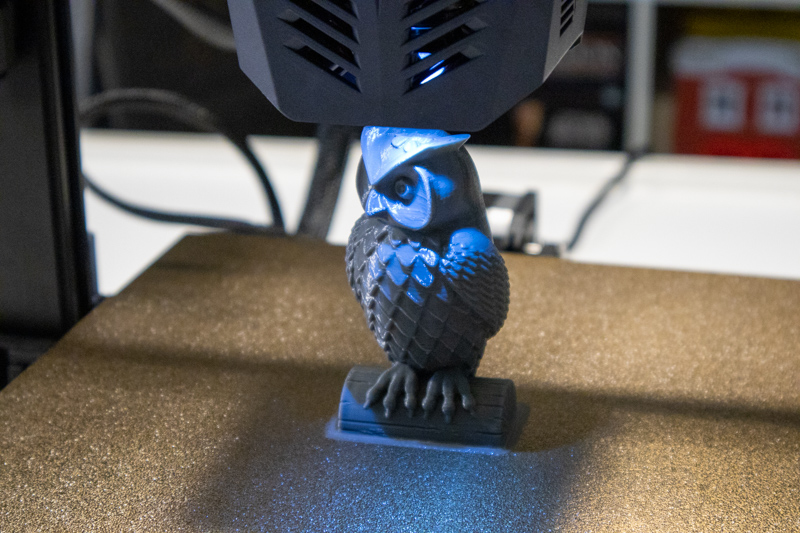
And here’s the end result! This is the default 3D model included on the SD card in the box. It seems to be a pretty standard test print in the industry, and from my browsing on forums and Reddit it looks like the ANYCUBIC Vyper Auto-Leveling 3D Printer did a great job for a first print.
Performance
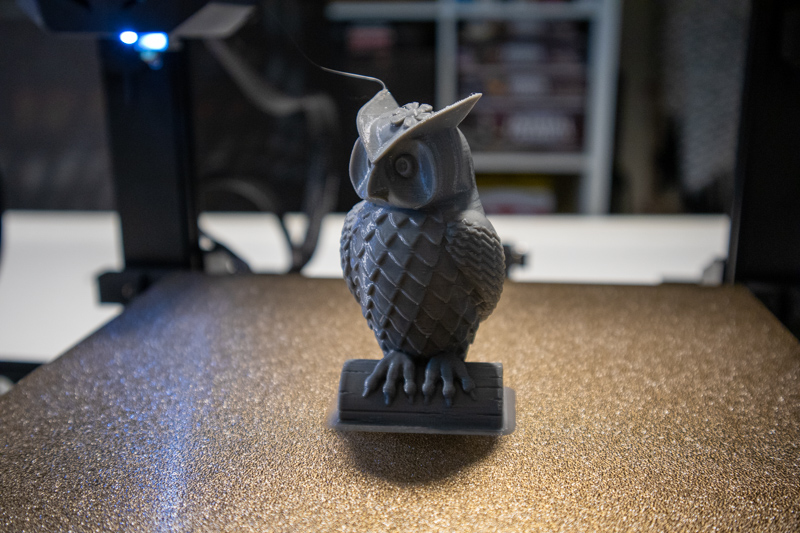
Most of my printing was done using the default settings and a roll of PLA (very popular type of plastic filament) that ANYCUBIC included with the printer. I downloaded most of the models that I tested with from Thingiverse, but you can import 3D models from a variety of CAD programs as well.
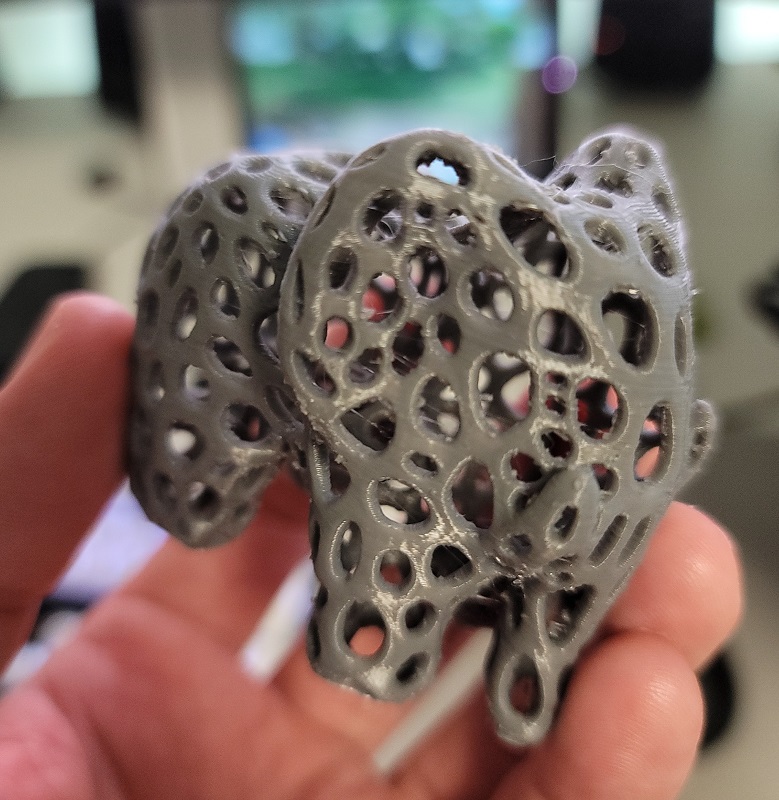
Even complex prints like the hollow elephant above turned out better than I expected. I didn’t have any major issues with any of the items I printed, except for one quite large board game organizer that took up most of the print bed: this one ended up printing warped, and it seems to have been caused by a cold draft hitting one side of the printer during the print, which caused the base of the model to lift off the heat bed and deform. I’ve spent the past week printing out parts to build a PVC and Plexiglass enclosure to prevent drafts from affecting future prints. I’m amazed that you can use a 3D printer to create parts to improve your 3D printer!
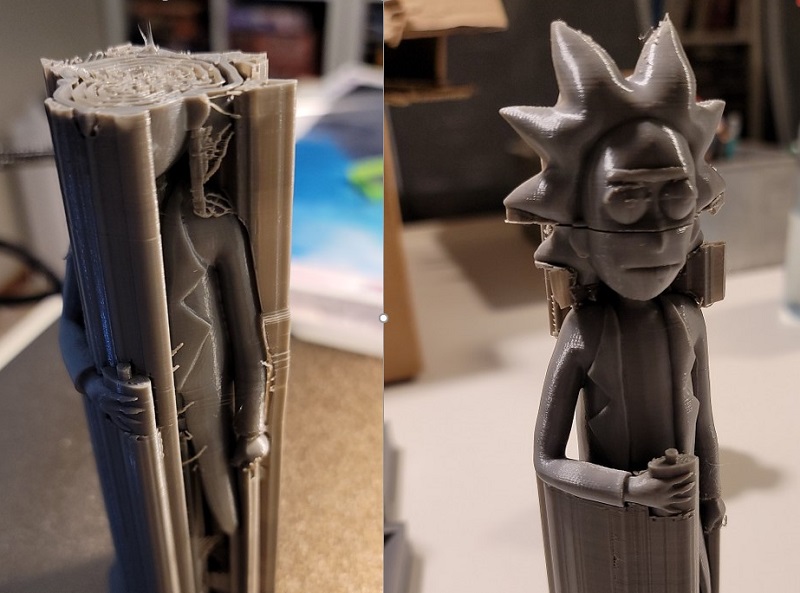
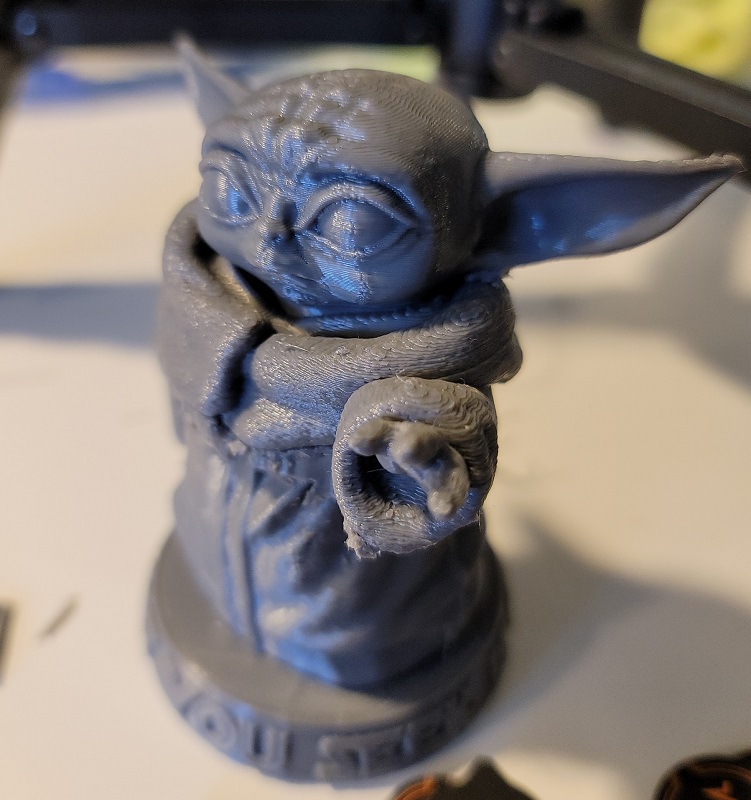
The other issue I had several times was the print stopping right in the middle of the print. Pictured above is Rick Sanchez being printed out at a finer resolution than the previous examples, but then the printer just stopped right in the middle of his head. I simply moved the model down in the Cura slicing software, and finished printing the rest (a bit of sanding and glue and no one will be the wiser). Long story short – it turns out that the SD card with the 3D printer GCode for the model wasn’t pushed fully in. It felt like it was fully in when I was inserting it, but for the first few weeks I wasn’t actually fully inserting it – there’s a click-to-lock that needs to be felt or it’s just partially in. Once I discovered my shameful mistake, all further prints worked like a charm.
One final note to round out the performance section of the ANYCUBIC Vyper Auto-Leveling 3D Printer: our power went out right in the middle of a print while I was writing this review (and on a 95 degree day, of course). Once it came back up a few hours later, the ANYCUBIC Vyper Auto-Leveling 3D Printer prompted me to resume the print. It had melted a bit of filament in the middle of the model, but as it resumed printing the upper layers completely covered that mistake and it seamlessly finished.
What I like
- Easy to use for beginners
- Large print volume
- Build quality and print quality
- Auto-leveling feature
- Helpful instructions
What I’d change
- The included filament holder allows some of the 3rd party filament spools I bought to fall off while printing. I’m going to 3D model and print a spool holder that keeps them in place better, but it would be nice to have the original one just work
Final thoughts
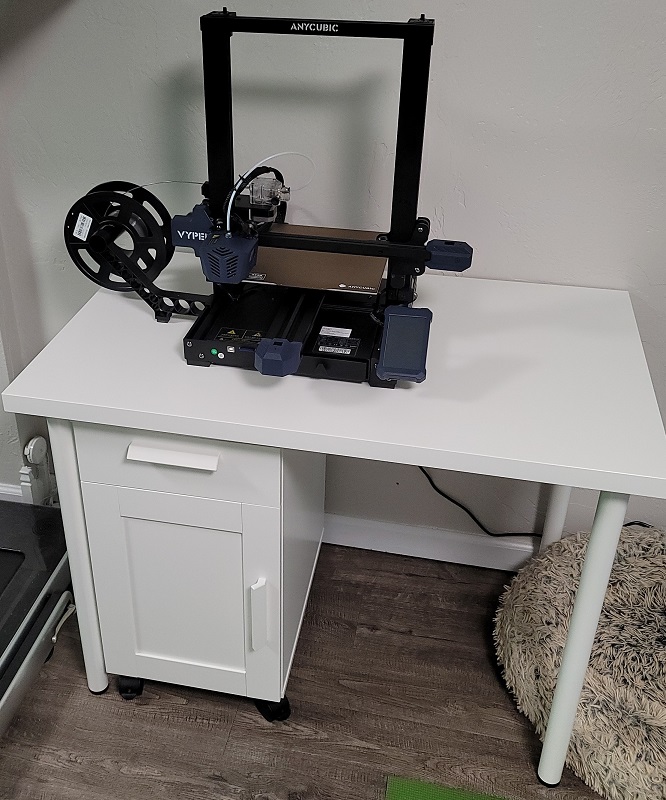
This was one of those review items that I didn’t just like, but ended up loving. I’m using the ANYCUBIC Vyper Auto-Leveling 3D Printer non-stop (and have weeks of planned things to print out and many spools of filament on order). I even went to Ikea and got a small table and cabinet for it. It was easy to learn, and I can tell that it will be endlessly tweakable and powerful as I learn more about 3D printing and 3D modeling. It was perfect for a first-timer 3D printer like myself, and I’d imagine it would be great for experienced users as well.
Price: $359 ($299 early bird from June 10th for the first 3000 units)
Where to buy: Anycubic
Source: The sample for this review was provided by Anycubic

Google Review Tap Cards (3-Pack) by TapFive - Tap for Instant Reviews - All Phones Compatible - Reusable Smart Tap NFC & QR - Boost Business Reviews - Powered by TapFive (3 Card Pack)
(as of June 20, 2026 22:56 GMT -05:00 - More infoProduct prices and availability are accurate as of the date/time indicated and are subject to change. Any price and availability information displayed on [relevant Amazon Site(s), as applicable] at the time of purchase will apply to the purchase of this product.)
Gadgeteer Comment Policy - Please read before commenting
Matt, you make me want a 3D printer now! I reviewed a printer quite a few years ago that was pretty rough as far as the print quality and ease of use. The newer printers look so much better than that one!
It really is a blast! Now I just need to learn a CAD program, I’ve gone through many tutorial videos already and I’m still struggling to make even basic shapes (but I’ve always been artistically challenged). 🙂
You might try Tinkercad. Easy to get started and use. I have no experience with CAD but I was able to get right into using it. http://Www.tinkercad.com.
This seems fantastic, thanks! I knew there had to be an easier option out there!
I graduated from filament printing to resin printer. Highly recommend resin!! Extremely fast prints, higher strength and no sanding!!