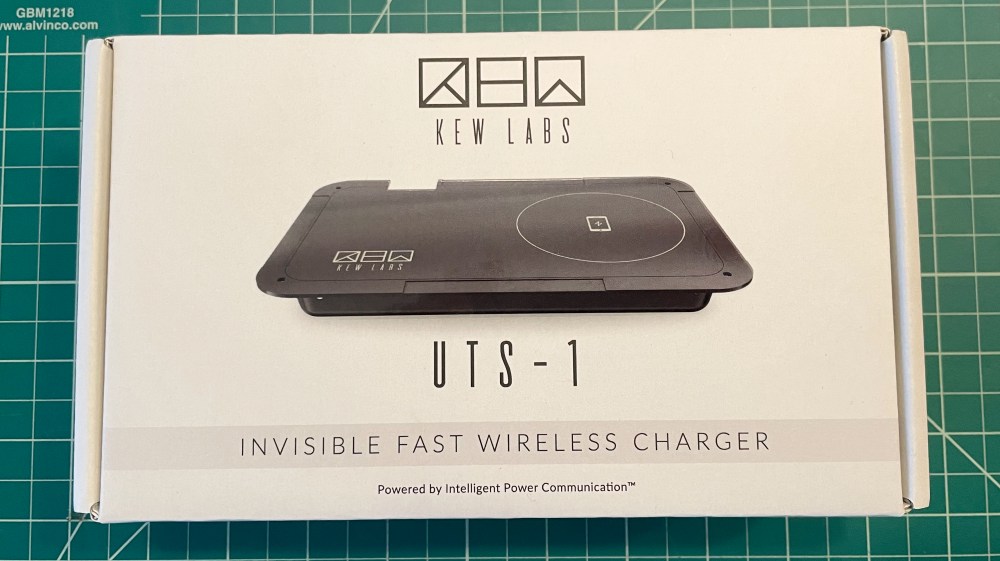
REVIEW – Wireless chargers are here to stay and we’ve reviewed countless here at the Gadgeteer. Usually they are stands, pucks, catchalls or some combination. Or maybe they charge multiple devices at once and as a result take up some real estate. But what if it didn’t take up any space at all? At least not where you’d notice. Sounds magical right? Well Kew Labs UTS-1 Wireless Charger kinda is. Check it out.
What is it?
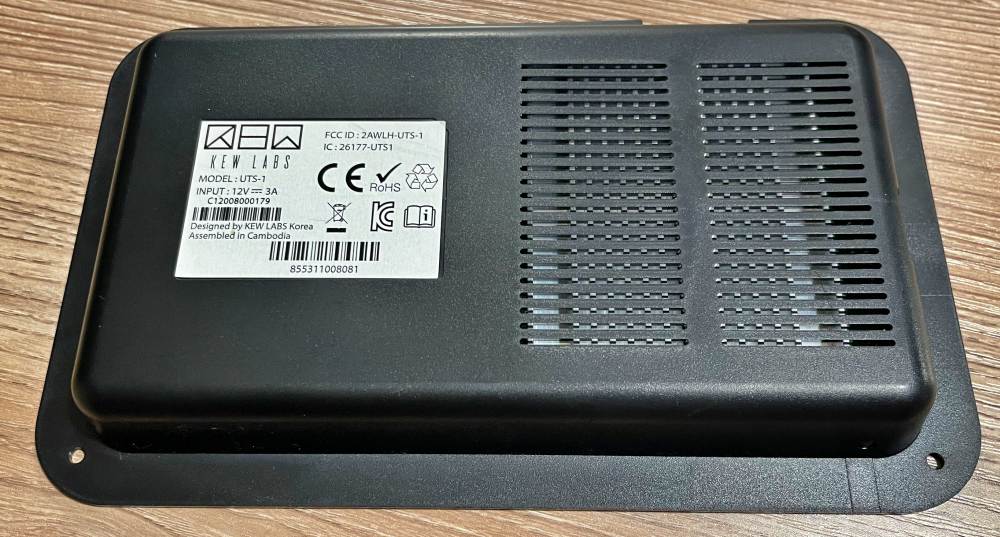
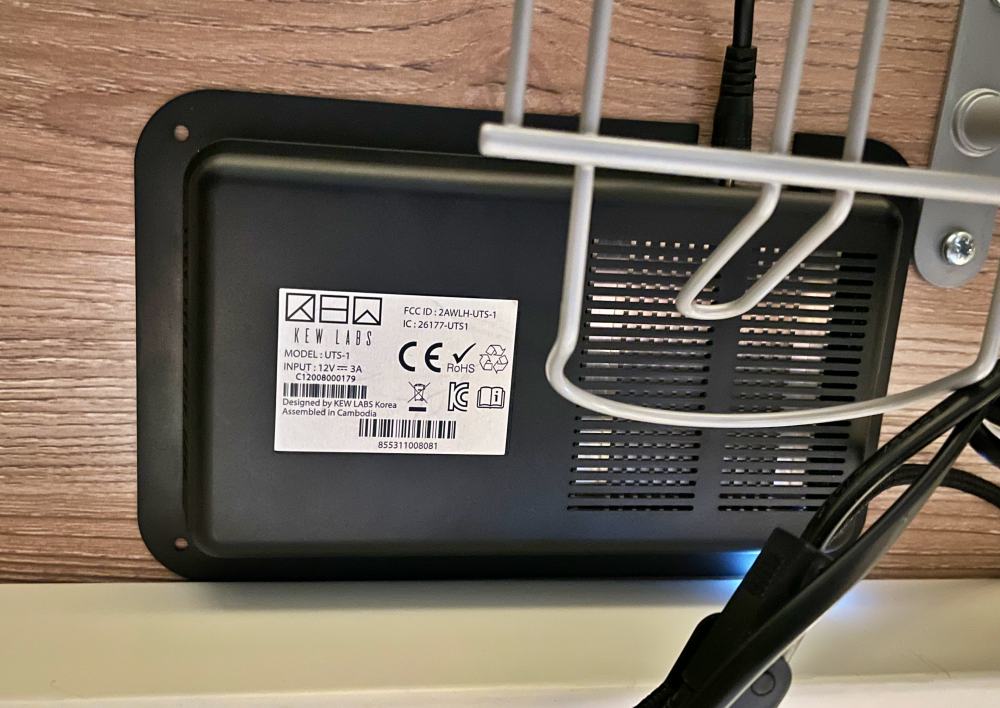
The UTS-1 Wireless Charger from Kew Labs is a charger that mounts under your desk or table and charges your Qi-compatible device through the surface.
What’s in the box?
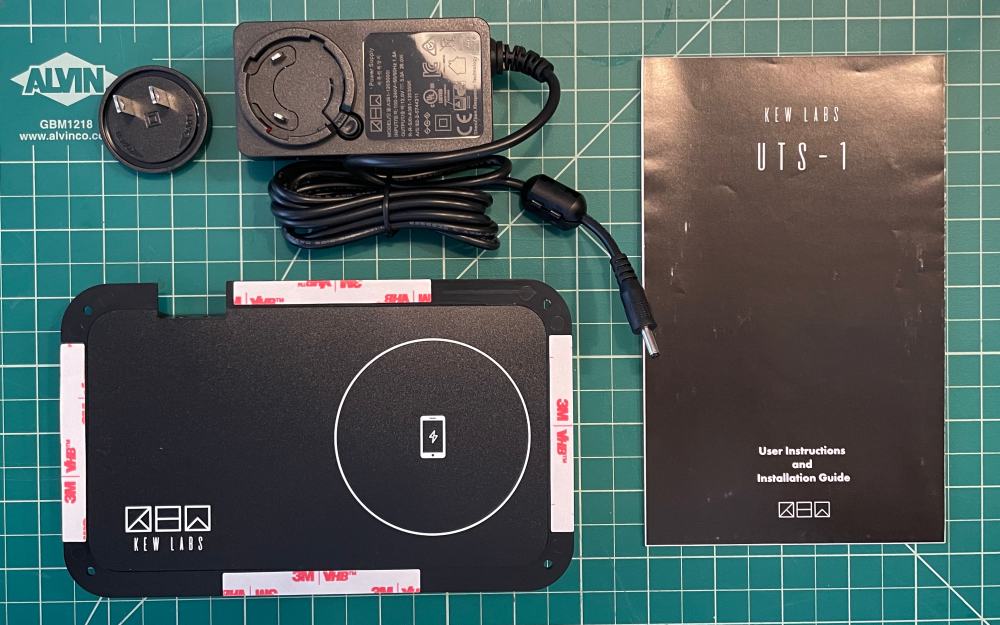
- UTS-1 Wireless Charger
- Wall Charger + Regional wall prongs
- User Instructions

- Device Templates
- Mounting Screws and Cable Guides
- Charging Location Decals
Hardware specs
Technologies: Intelligent Power Communication™ (IPC) | Apple Samsung Fast Charge | Qi Wireless Charging
Input: 12V 3A DC wall adapter
Output: 30W output power | Apple 7.5W Fast Charge | Samsung 9W Fast Charge | Qi standard 5W normal charger
Dimensions: 18.2 x 12.2 x 2cm (7.17″ x 4.8″ x 0.79″) |250g (0.55lb)
Design and features
The UTS-1 Wireless Charger is designed to mount where you can’t see it, so its distinctive shape has intentional purpose.
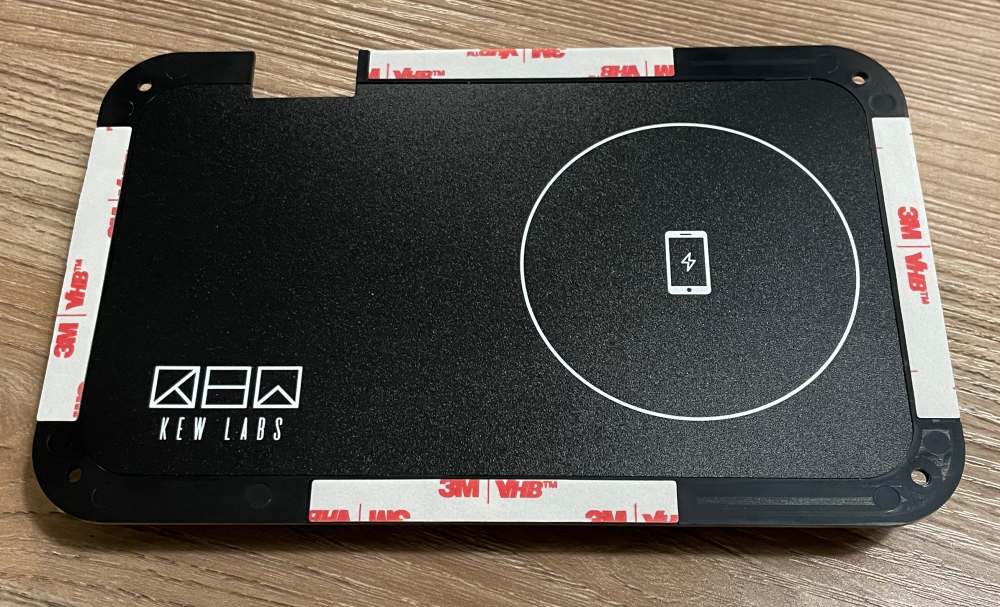
The top is completely flat and has minimal material so that the wireless charging coils are as close to your table surface as possible. The underside has venting for increased airflow.
Dual power ports so that units can be daisy chained if you need multiple chargers on larger surfaces.
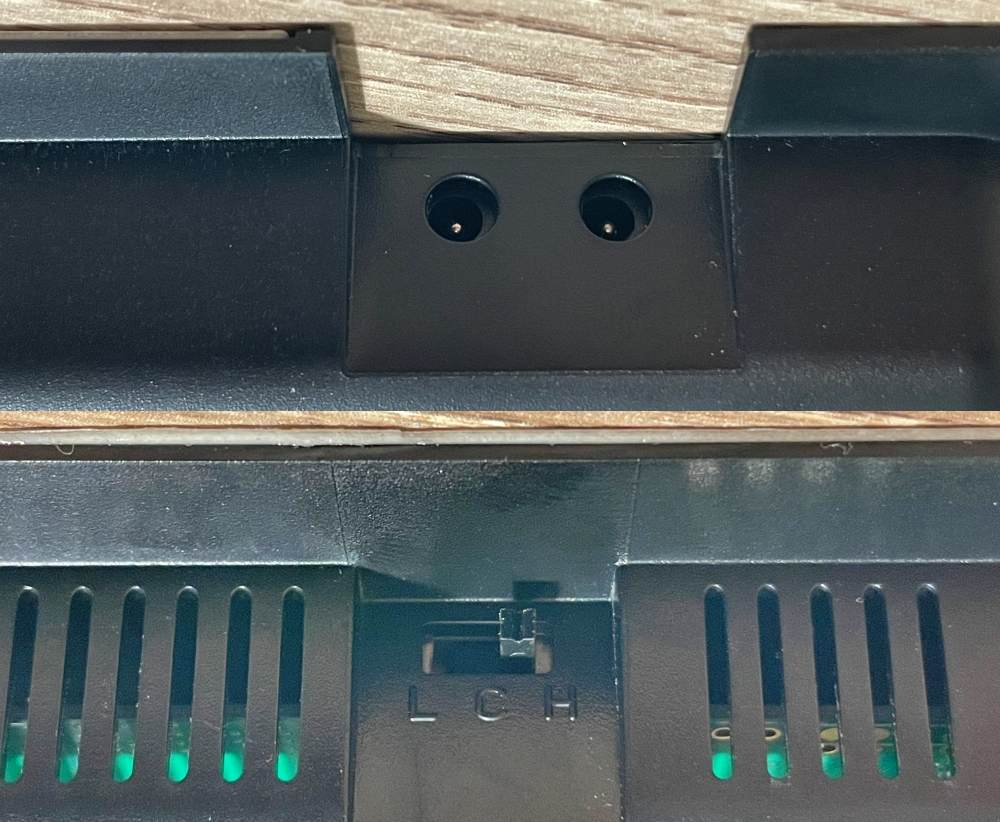
The switch has 3 settings; L, C, H. (L) low and (H) high are separate power settings to work on different table thicknesses from 18-25mm (0.7″-1.0″) as well as multiple materials like wood, glass, plastic, marble, granite and quartz. The (C) position is for calibration and is used during setup.
Setup
Getting it installed is definitely part of the fun here, or at least it was for me. I got an adjustable height desk earlier this year when it became clear I would be working from home for a while.
I mention this because part of making a standing desk work is managing cables well. I’ve got a hanging cable tree cage from Ikea that holds a large power strip and all my power adapters.
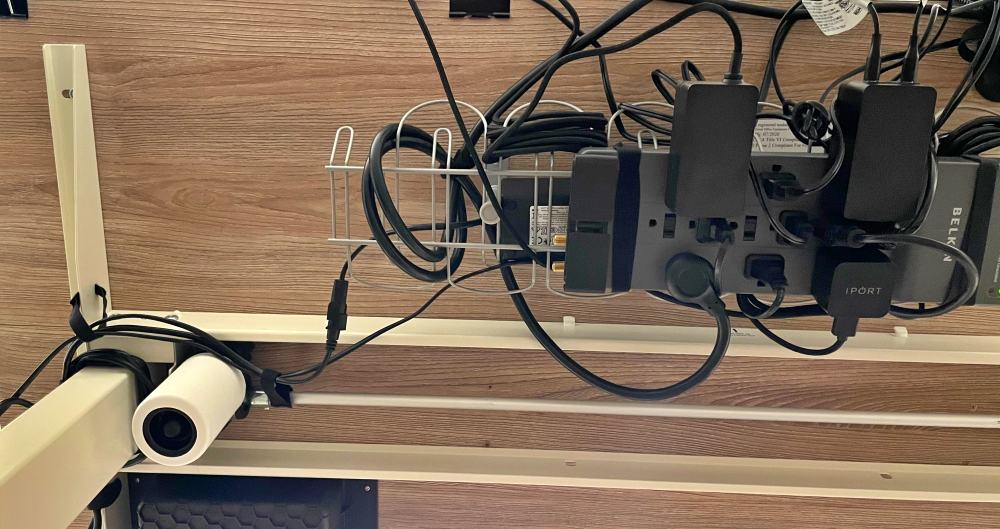
This way, only the power strip cable has to deal with the desk going up and down. It takes up a fair amount of space and that’s where this adventure begins.
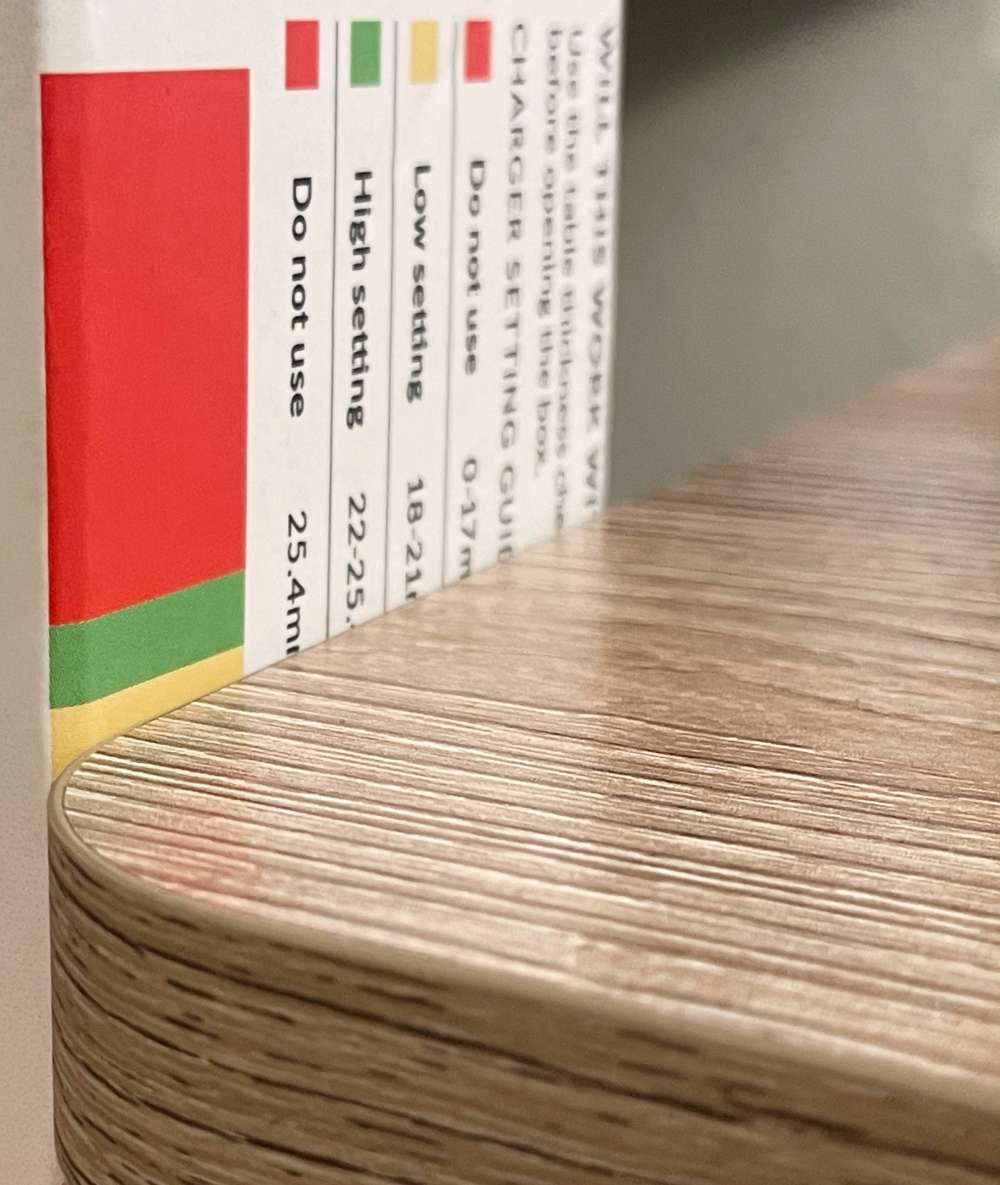
The first step (ideally before purchasing) is that you confirm your table is thin enough for the charger to work through. It’s designed for surfaces between 18-25mm (0.7″-1.0″). There’s a handy graphic on the side of the box…
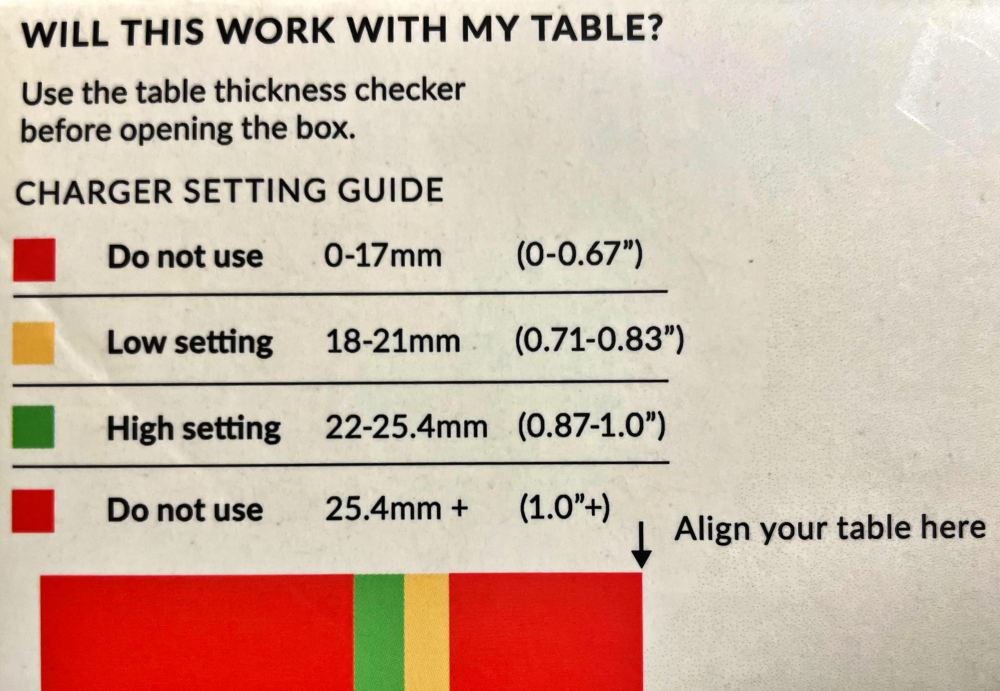
that you can use to measure the desk, as well as determine which of the two power modes you’ll need to use after setup. You can see here that my tabletop thickness falls into the yellow section and requires the Low setting.
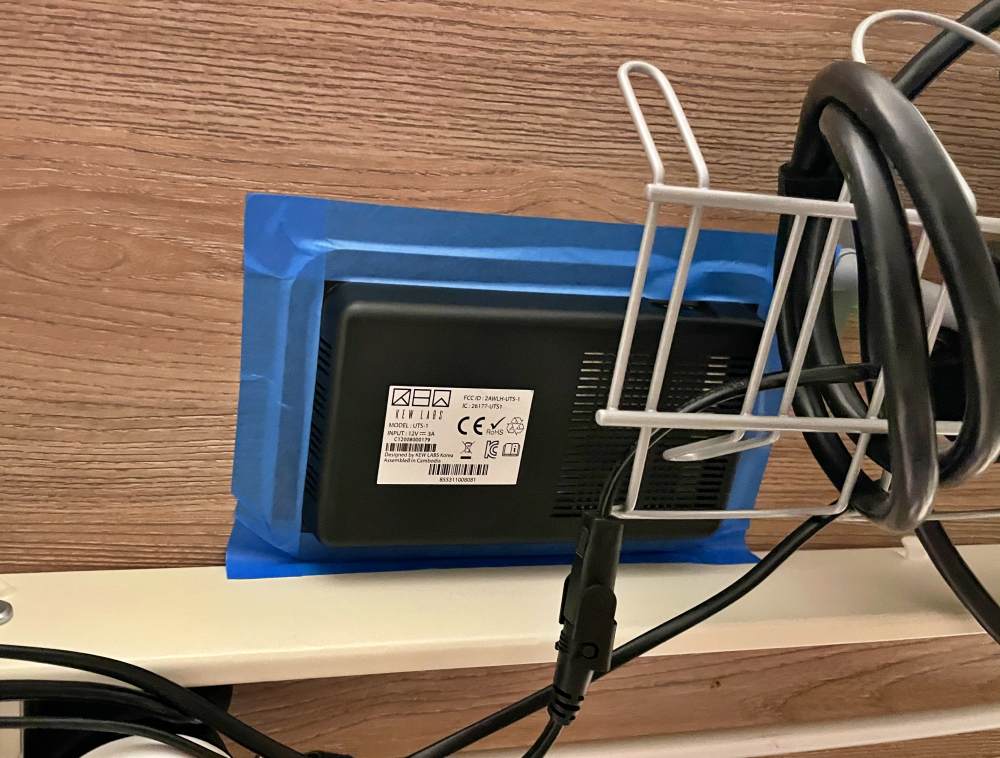
I knew that I wanted my phone close to where I currently had a wireless charger, but was unsure exactly where I had space on the underside due to the cross supports, motor and cabling. I didn’t want to screw or even double stick the Kew charger until I new I had it placed right, so I broke out the painters tape.
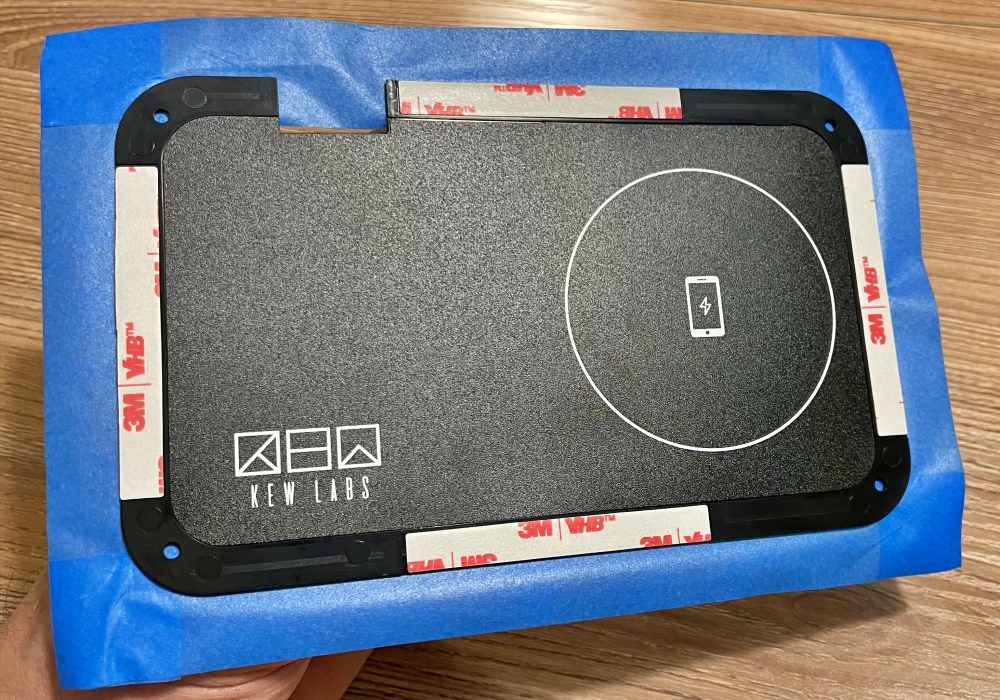
After taping up all four sides, I ventured underneath and stuck the charger approximately where I wanted it and then plugged it in and moved the switch to the center position which is its calibration mode.
Back topside, I was then able to place my phone approximately where I thought the charger was and then slowly reposition it until I heard a chirp. As you get closer to the center the chirps get faster until almost a solid tone. Well, at least they’re supposed to. That’s when I discovered my painters tape was allowing the charger to slowly fall away from the table making the distance too far for proper charging (and calibration). It did allow me to know I was close enough to the position I wanted for me to install it properly. So, after removing my tape, I opted to use the pre-positioned 3M adhesive strips and stuck it to the underside and reconnected to power.
I then repeated the location process using the device template to play the hot/cold location game.
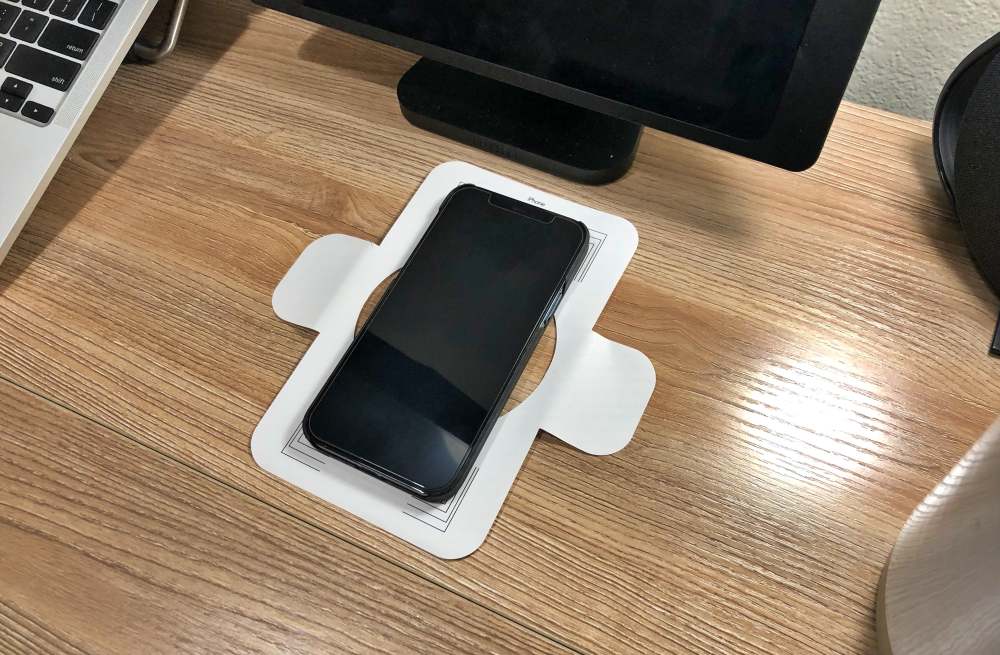
When you find the spot, you careful remove your phone from the template which now shows you where to place a decal.
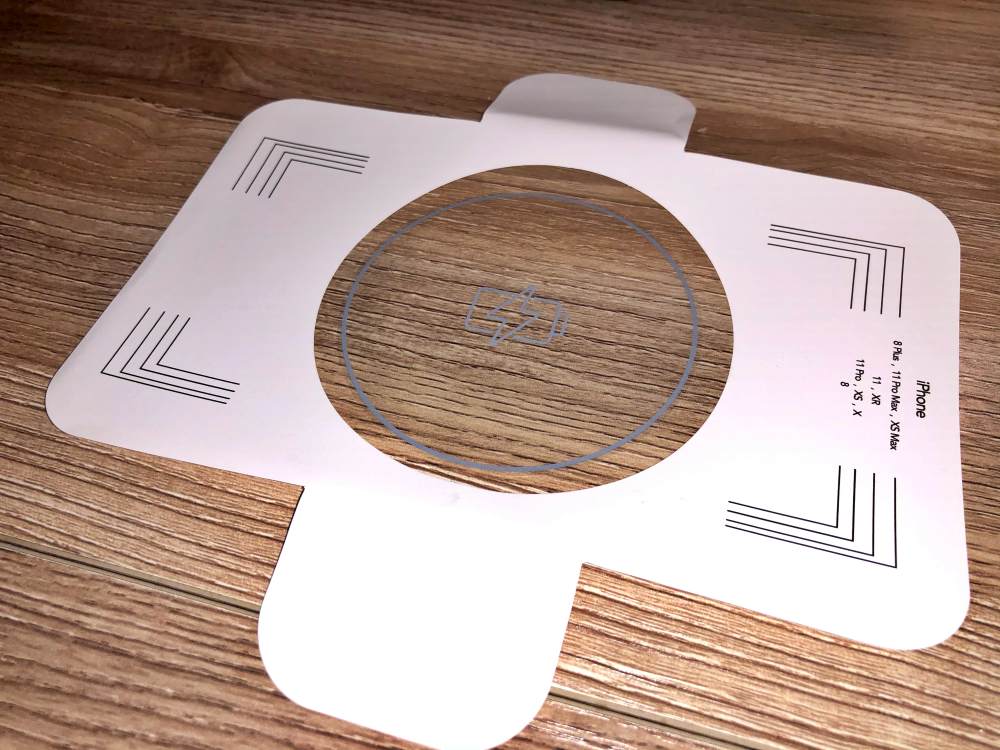
Kew provides a few different decal styles from device borders, to bold charging icons to small battery icons. I chose the larger circle with light gray graphics that would be less noticeable on my desk surface (and subsequently really hard to photograph).
The last step is to get back under the desk and move the switch on the charger to the correct power level for the thickness of your desk, which also ensures you don’t over-power your device. Again that was the (L) low setting for me.
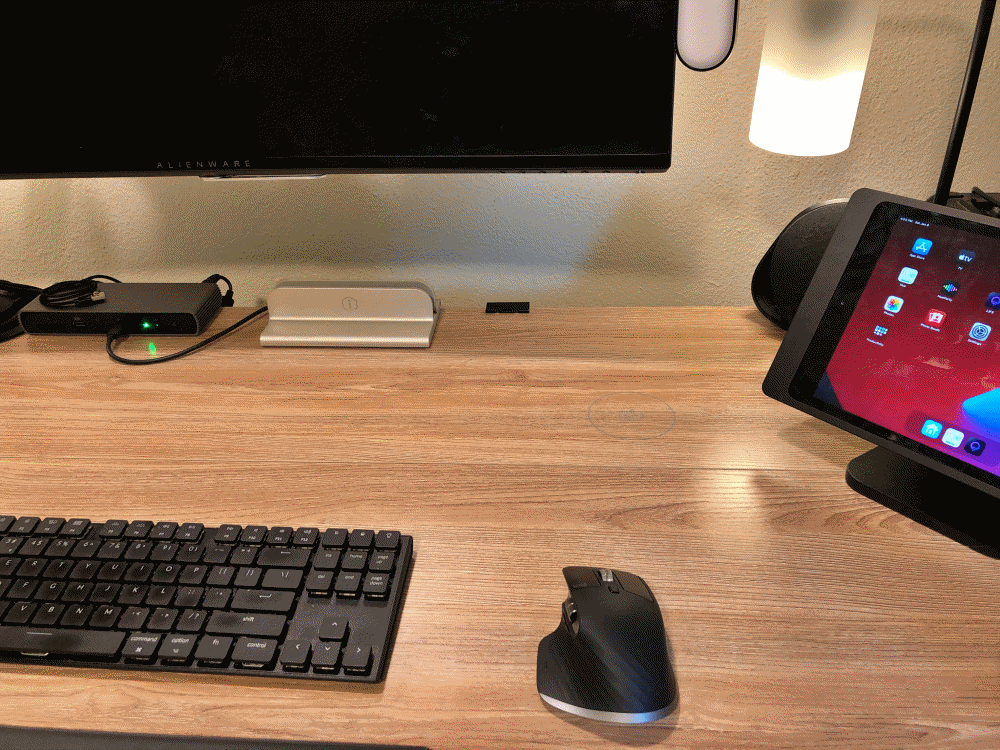
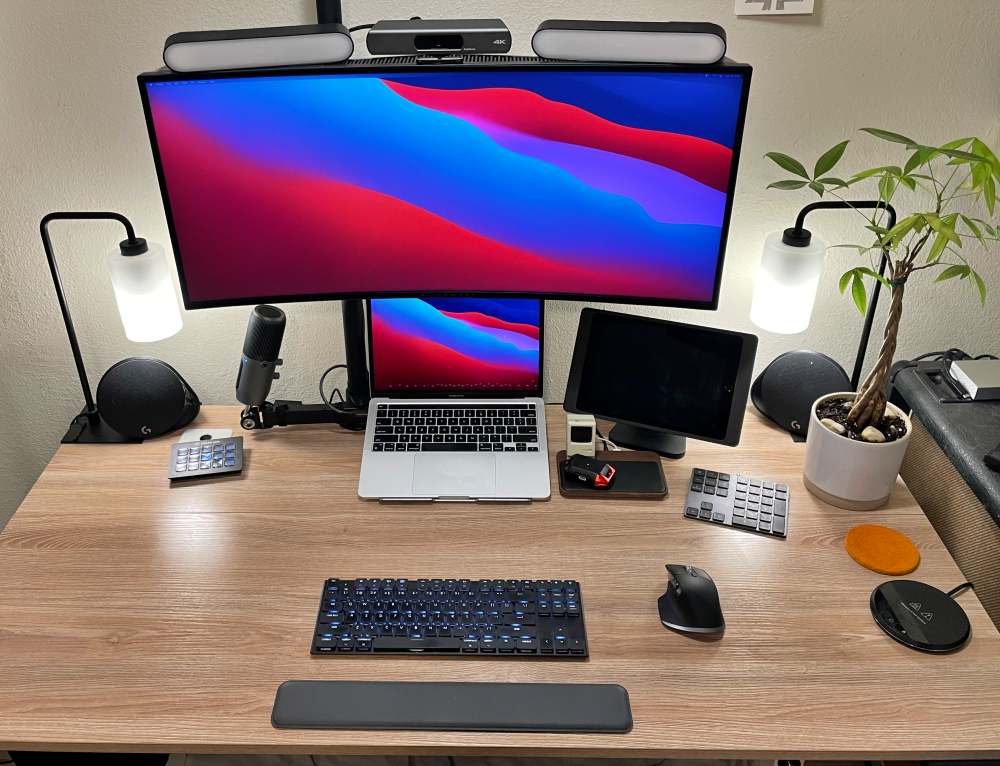
Now you I can charge my phone like this…
Performance
After installation there are a few statements I can make.
- Installing it was fun
- I did not miss having a physical charger taking up space on the top of my desk
- I’m so used to a physical charger or cable that sticker marking the spot was necessary for both exact location and reminding me that I don’t need a physical charger on top of the desk.
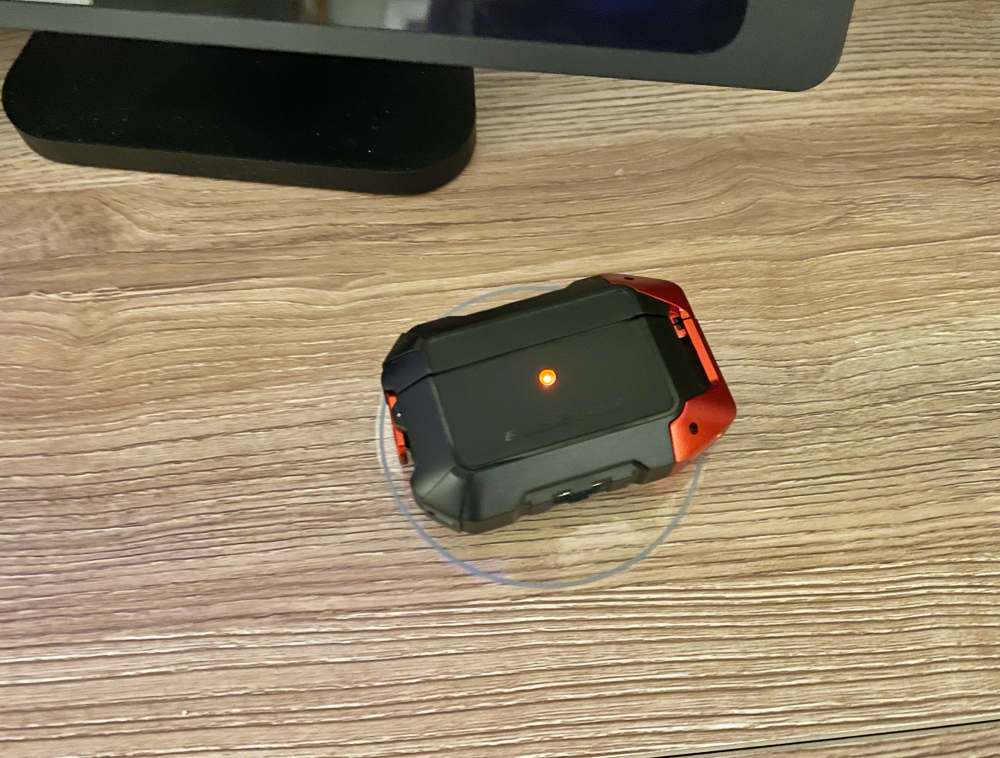
It works well and it does feel a bit magical to move your phone into place and it just starts charging while laying on the desk by itself. My AirPod Pro case charged without issue as did any other Qi compatible device I placed there.
I did experience my phone getting pretty warm once, but I’ve had that happen with a lightning cable and other Qi chargers so nothing unique to the UTS-1. In fact it is monitoring the charge level and even the heat and will shut itself off if your phone is fully charged or getting too warm.
The charger itself does get warm on the underside of your desk, so you may not want to install it anywhere there is limited space or airflow like in a nightstand drawer.
You should also consider the thickness of any case you use as that does increase the distance from the charger to your phone. I did not run into any issues with typical cases from thin Pitaka cases to thicker styles like Otterbox or Speck.
Note that the charger is incompatible with metal surfaces whether that’s your desk surface or a metal case or kickstand. Wallets and some holding solutions like PopSockets will need to be removed for it to work.
I think there’s potential to not need a sticker if you mount it close to the edge of the table or near some other indicator like a knot in the surface or unique visual anomaly in whatever material your desk is. If anyone else uses your desk, you’ll want the sticker for sure as otherwise there would be no way of knowing there’s even a charger there.
The only other issue I had was of my own making and that’s my power strip facing down where gravity (and the desk moving from high to low position) started dropping the wall adapter out of the socket where it basically came unplugged. I only mention this for any of you deciding to mount your power strip similarly.
What I like
- Installation was fun
- Wireless charging works great
- Top of my desk has one less appliance
What I’d change
- I’d use this solution in additional places around the house if it was less expensive
Final thoughts
Keeping your desk tidy is a chore all its own, but reducing the number of things on your desk in the first place can significantly help. If your phone supports wireless charging and your desk top is thin enough (18-25mm or 0.7″-1.0″), this charger can free up some space while keeping your phone topped off. How cool is that?
Price: $104.99
Where to buy: Kew Labs
Source: The sample of this product was provided by Kew Labs

5-in-1 Wireless Charging Station with Bluetooth Speaker,Magnetic Charger with Night Light,Charger Stand with 33W Adapter Compatible with Apple Watch&iPhone 16 15 14 13 12 Pro Max&Wireless Earbuds
(as of June 30, 2026 14:25 GMT -05:00 - More infoProduct prices and availability are accurate as of the date/time indicated and are subject to change. Any price and availability information displayed on [relevant Amazon Site(s), as applicable] at the time of purchase will apply to the purchase of this product.)
Gadgeteer Comment Policy - Please read before commenting
This was a really good review – I liked the way you described the practicalities of installing the charger and shared some of the “gotchas”. Now I must think about a cable tray to reduce the cable salad under my desk.
I want to know what the tablet/kiosk is on the right hand of picture.
In your review you said it works with your airpods, but their FAQ says it doesn’t work well with airpods. https://www.kewlabstech.com/uts-1-faqs/
Maybe your airpods are charging at a very slow speed?