Even before I took delivery of my MINI Cooper, I knew that the first modification I’d do it, would be to add a smartphone mount. There are many options on the market that use different mounting methods like Velcro, suction cups, cup holders and sticky tape. None of those appealed to me, I wanted something that looked great, was easy to install, easy to use and something that I wouldn’t have to worry about falling off while I was driving. As luck would have it, I was contacted by iOmounts, a few weeks before I received my new car to see if I would be interested in reviewing their brand new iOauto Pro car mount. It was exactly what I had been looking for, so I happily accepted their offer.
Note: Images can be clicked to view a larger size.
I want to start off by stating what should be obvious – each mount is different depending on your vehicle. The one I’m showing you here is made specifically for a 2013 MINI Cooper S hardtop with two glove boxes. So just keep that in mind as you are reading this.
The first step you need to do, is to order the clip that has been designed for your vehicle. iOmounts has partnered with one of the main vehicle mounting designers – ProClip USA. When you visit their joint site, you can choose your car’s make, model and year to see what options are available to you. You will also be able to choose from 2 iOmounts iOauto mounts: the iOauto and the iOauto Pro. The difference between the two is that the iOauto only allows you to rotate your device, while the iOauto Pro allows you to rotate and change the angle. There’s a $10 price difference, with the Pro being the more expensive of the two.
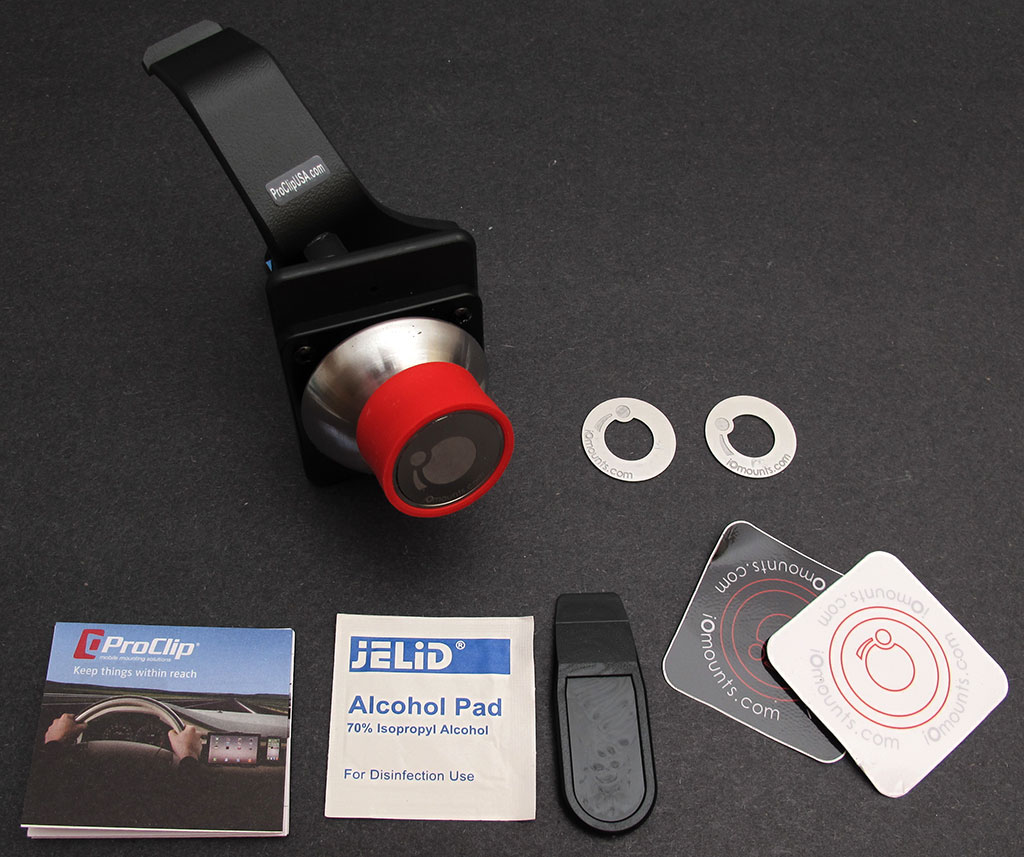
I was offered the iOauto Pro, which comes with:
ProClip w/iOauto Pro mount
2 iOadapt metal discs
2 iOadapt stickers
Alcohol cleaning pad
Wedgie tool
Instructions

The ProClip is made of a rugged bead blast finished black plastic and comes with the iOauto Pro mount bolted on.
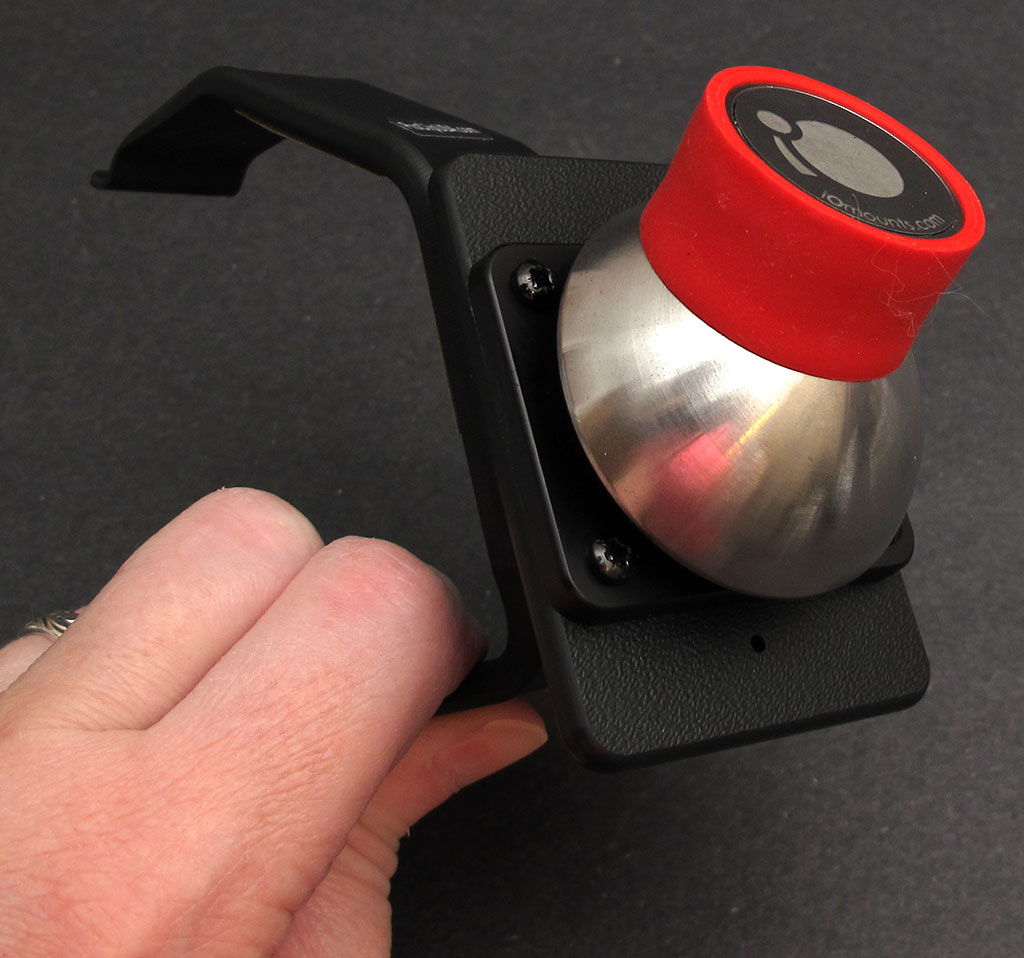
The Pro version has a half dome metal shaped surface that the iOauto connects to using a very strong magnet.
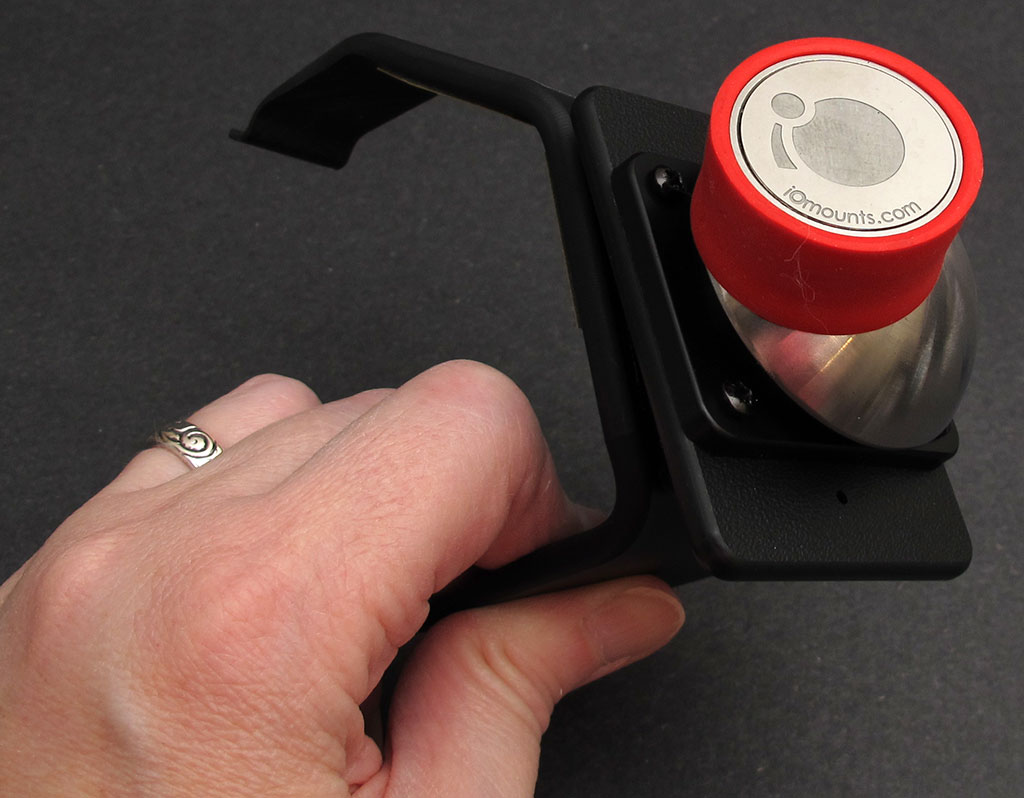
The red iOauto mount smoothly glides over the dome surface so that you can easily change the angle of the attached mobile device.
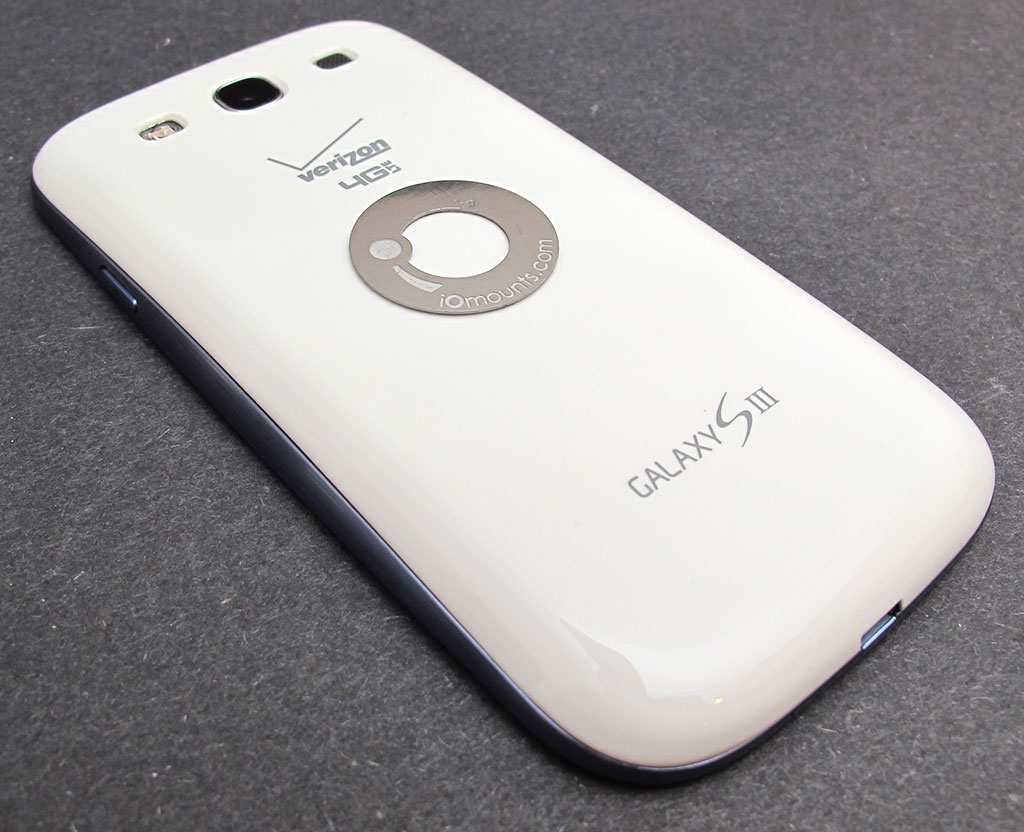
The magnet is only in the iOauto part of the mount. A thin metal disc called the iOadapt attaches to the back of the device that you want to mount. The disc attaches via a layer of really strong adhesive. Don’t be dumb like me and not read the directions before applying it. That’s what the two square stickers are for… you’re supposed to put the sticker on the back of your phone first and then put the iOadapt disc on top of that.
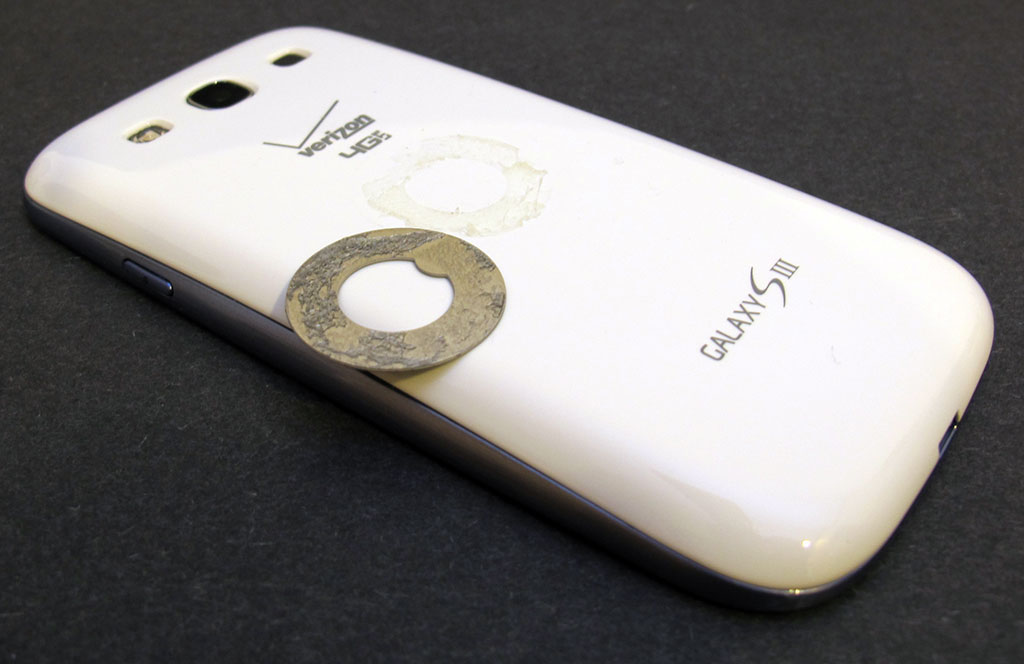
There’s nothing wrong with applying the iOadapt directly to the back of your device, but it will be tough to remove it later if you didn’t use the sticker. I used a box cutter knife to get under the edge of the disc and worked my around it till it popped off. A ring of adhesive was left on the device. I thought I might need some solvent to remove the adhesive, but in a fit of inspiration, I pulled out some box tape, cut off a piece and just stuck it over the residual adhesive. I then pulled it back off. I repeated this about 20 times and then the back of the phone was good as new.
The disc is very thin and adds no bulk or weight to your device. However it does have an issue – it has sharp edges. In hand it feels like it could cut you. This hasn’t happened to me, but I worry it will.
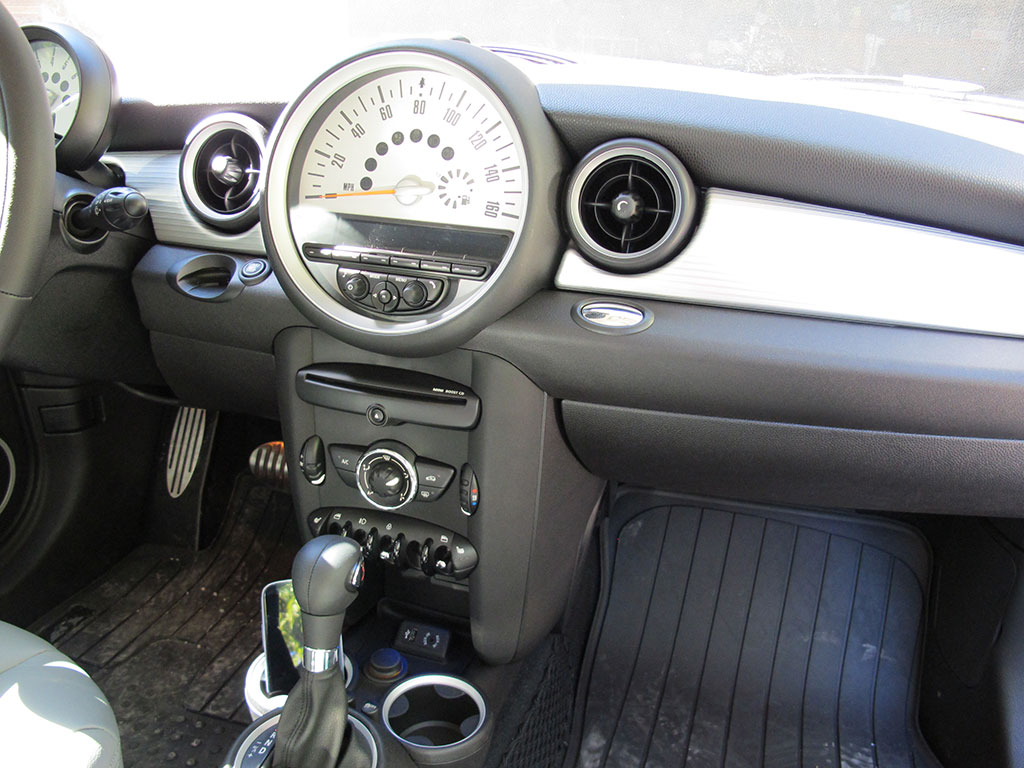
I was a little nervous about installing the mounting clip because I didn’t want to do anything that might mar or damage my new car. I’m happy to report that installation was very easy and very quick. You don’t need any tools except for the wedgie tool included in the package.
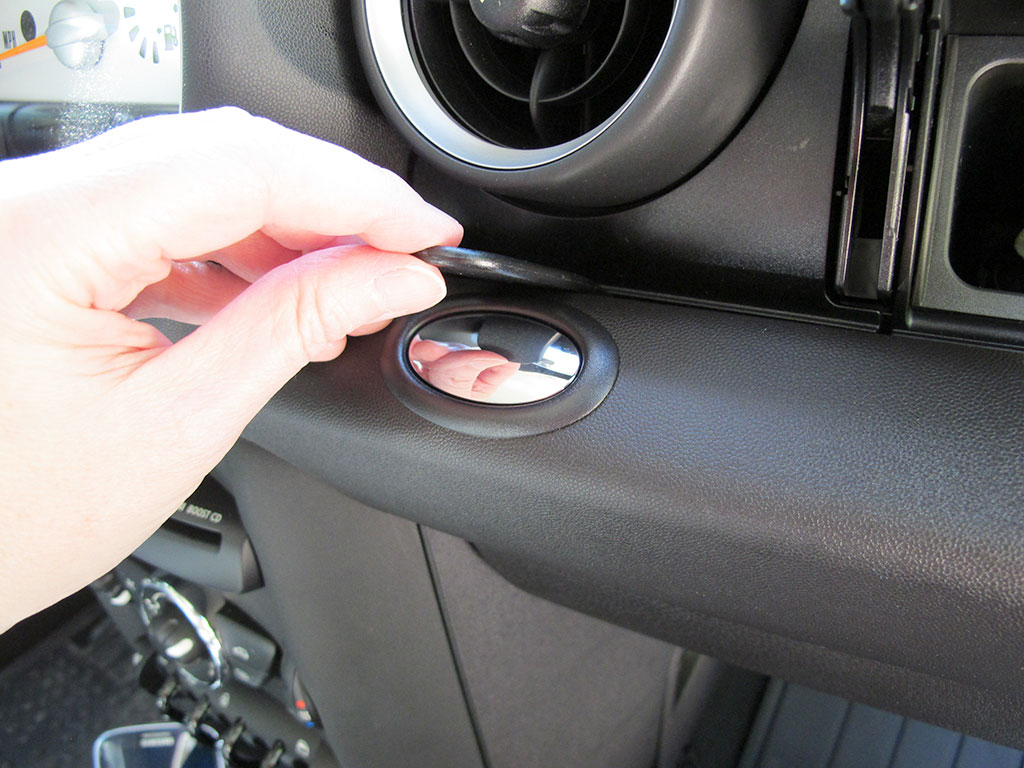
I was instructed to insert the small plastic wedgie tool in the seam between the upper glove box and vent to help spread the area for the top edge of the clip.

A slight amount of pressure was all that was needed to fit the top part of the clip into the newly created slot.
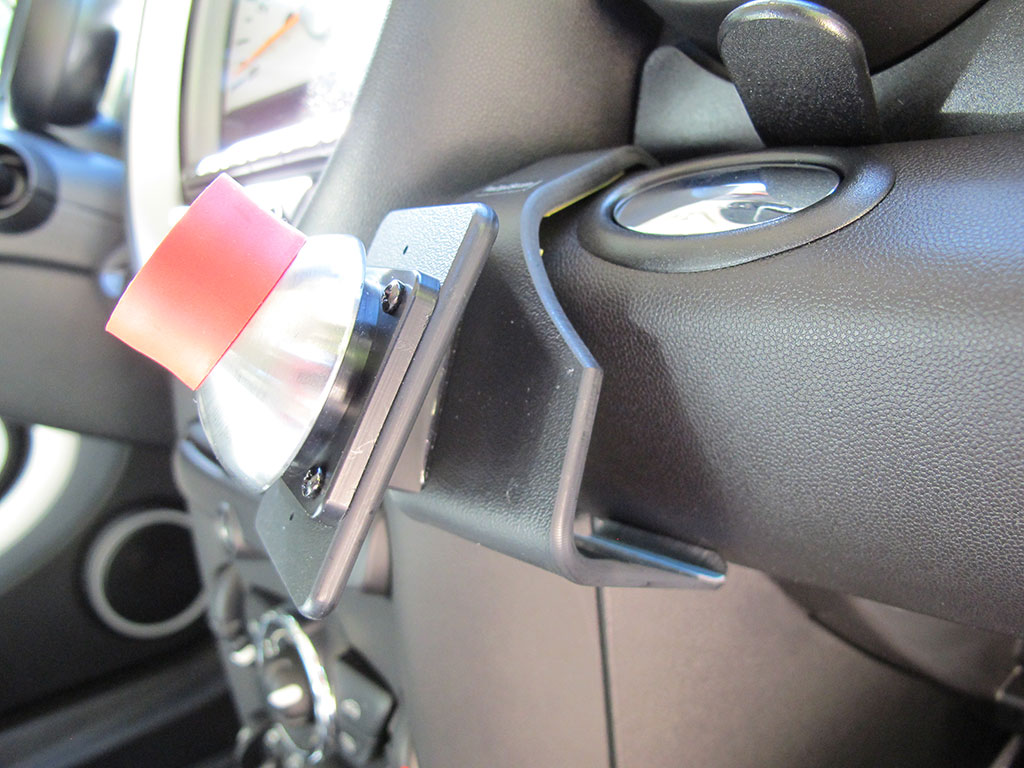
The bottom part of the clip then snaps into place in the area at the top edge of the bottom glove box. Remove the wedgie tool and you’re done. No mess, no stress. Just the way I like it.

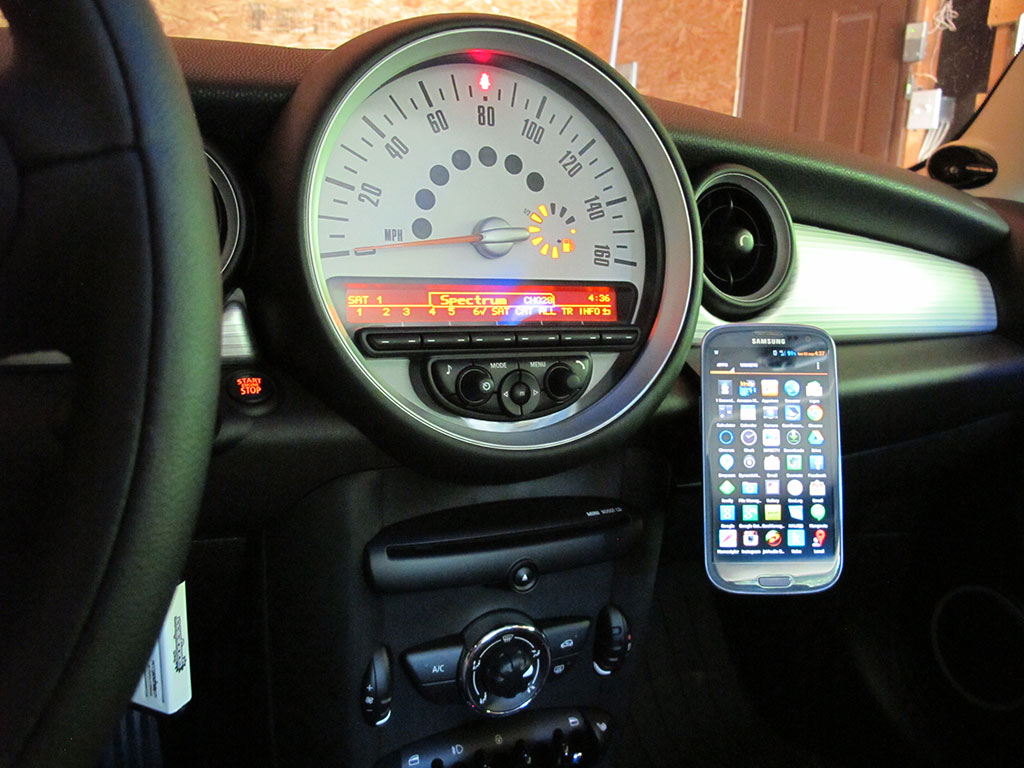
The iOmount iOauto Pro car mount is installed and ready to use. Installation time: less than 5 minutes. Both glove boxes and everything else on the car still works as expected. No clearance issues or any new problems are introduced by installing the clip.
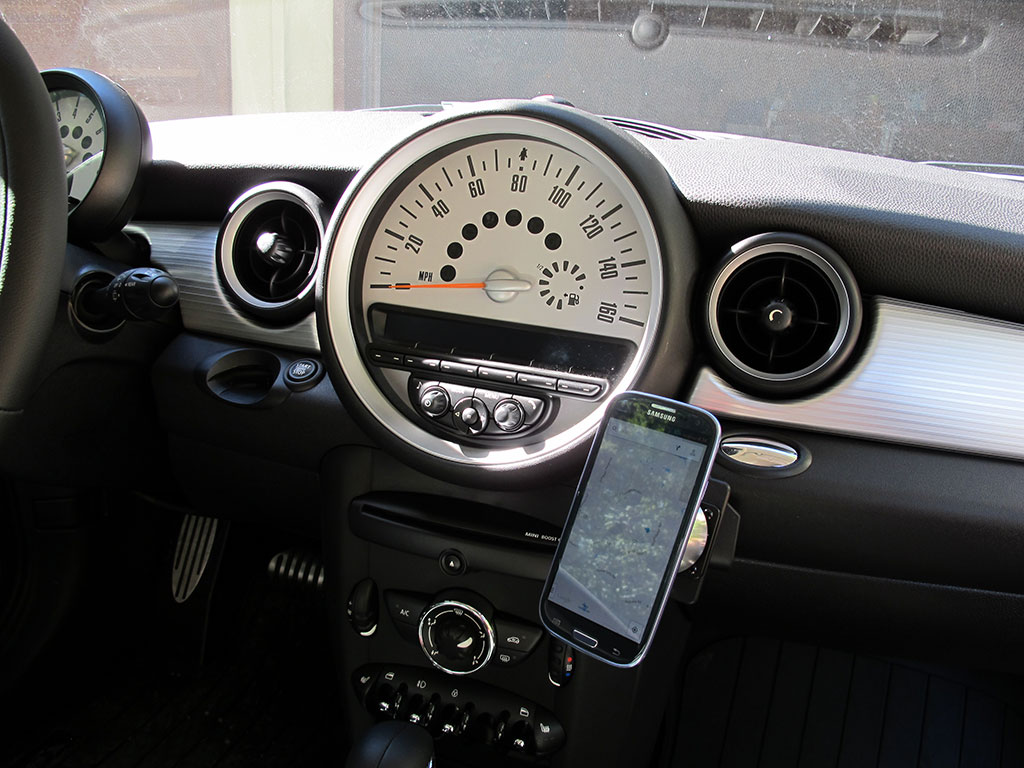
To use, just touch the back of the device with the iOadapt disc installed and twunk they are connected. The connection is strong, so you can easy swivel the device up, down, left, right with no problems.
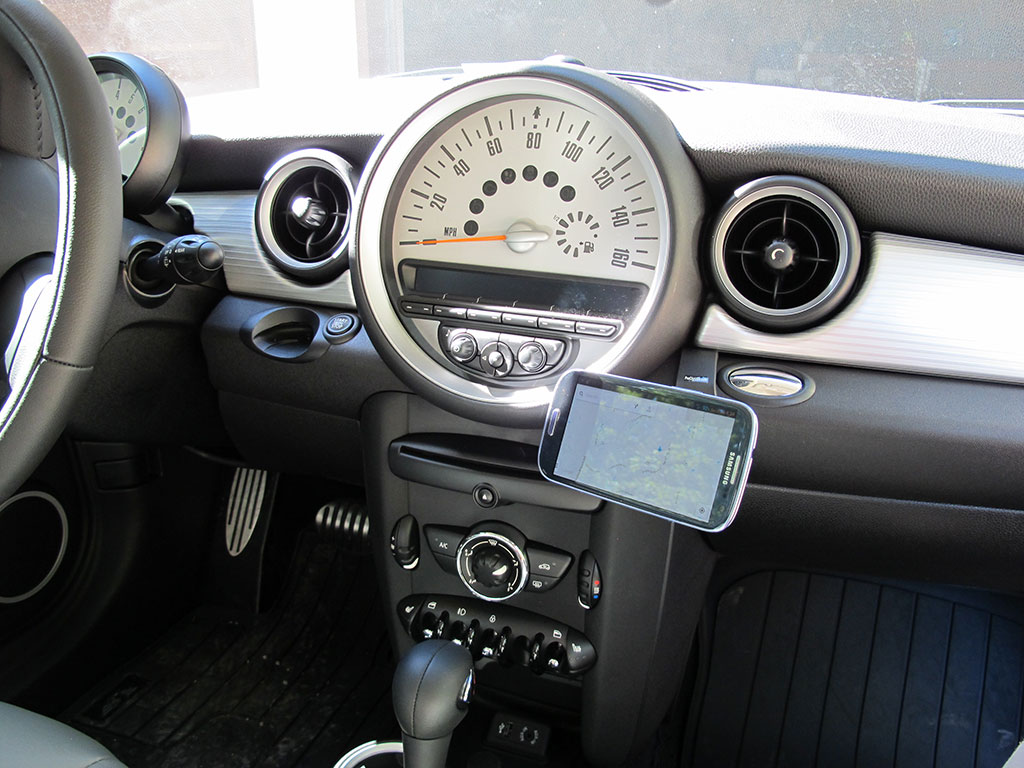
Need to see something in landscape orientation? No problem, just rotate it and you’re done. I have no worries that the phone will fall off while I”m driving because the magnet is so strong.

Removing the device from the iOmount does take some practice though… I thought mine was defective because the red iOauto mount stayed attached to the back of my phone when I tried to pull it off. The trick is to slide the device off to the left or right to detach it. Once I got used to doing that, it’s been a snap.
See it in action
In addition to the sharp edges on the iOadapt disc, there’s one more problem that I ran into. With the iOadapt disc on the back of my Samsung Galaxy S3, wireless charging does not work with my Nokia charging dock. However reading NFC tags still works fine.
Update: I may have found a possible solution. I’ve relocated the iOadapt disc from the outside of the phone to under the back wireless charging cover. This solves the wireless charging issue and the sharp edges issue. I’m not sure how well the magnetic connection will work with it setup this way as the hold is noticeably weaker. But even so, I don’t think it will fall off. I’ll use it this way for a few days and report back with my experience.
The iOmount iOauto Pro is the nicest and easiest mounting solution that I’ve ever used and gets two thumbs up from me.
Updates 04/30/15
Since writing this post, I’ve switched phones two times. Each time I’ve been able to put the iOadapt disc under the back cover of the phone. I’m still using the iOmount in my MINI Cooper and am currently using it with an LG G3 with the iOadapt disc stuck to the inside of the back snap on cover. I’m not sure how much longer I’ll be using the iOmount though because I plan to upgrade to a new phone later this spring or summer and most newer phones have sealed backs. I don’t want to stick the iOadapt disc to the back of the phone where it would show. So I may be looking for a different type of car mount. But as of right now, this mount is still serving me well.
Updates 07/20/16
A year ago I said that I was looking for another mount, but I’ve yet to find one that I like better than the iOmount. Right now I’m using this mount with my Nexus 6P. However, I have been toying with the idea of using my phone as a dashcam instead of using a dedicated dashcam. If I end up doing that, I’ll most likely be switching to a dash mounted mount so I can have the phone’s camera pointing out the front window.
Source: The sample for this review was provided by iOmounts. Please visit their site for more info.

HumanCentric Universal Wall Mount, Adjustable Mount for Cable Boxes, DVD Players, Routers, Modems, and More, Fits Devices 12”-32” in Perimeter and Up to 30 lb, Hardware Included
(as of March 13, 2026 03:47 GMT -05:00 - More infoProduct prices and availability are accurate as of the date/time indicated and are subject to change. Any price and availability information displayed on [relevant Amazon Site(s), as applicable] at the time of purchase will apply to the purchase of this product.)
Universal Streaming Device Mount Holds Media Devices Up to 3lbs Securely Behind Flat Screen TVs - Compatible with Apple TV, Roku, Amazon Fire TV, TiVo Mini, and More - Echo-SDMU
(as of March 13, 2026 09:41 GMT -05:00 - More infoProduct prices and availability are accurate as of the date/time indicated and are subject to change. Any price and availability information displayed on [relevant Amazon Site(s), as applicable] at the time of purchase will apply to the purchase of this product.)Product Information
| Price: | $80 |
| Manufacturer: | iOmounts |
| Pros: |
|
| Cons: |
|
Gadgeteer Comment Policy - Please read before commenting
LOVE that speedometer!!!
Sounds like the disk also precludes using most phone cases too. And I wonder about what the strong magnet does to the phone’s compass calibration. I have a ProClip in my new Xterra, but I use the RAM X-grip mount (with a short articulating arm on a 1″ ball mount).
I have been impressed with the ProcClips mounts. nice to see continued options.
I have one in each car, and they are great. The magnetics won’t effect your GPS – but if you had a compass app – it would tell you that you’re facing north.
I put the iOadapt (little disk) right on my phone case, and it works great. I really like how I can quickly take the phone off the mount and put it back on. Magnets are fun.
Also – I really do like your speedometer!!
@Jeremy thanks for the tip about the compass app. I didn’t try that. I didn’t seem to have any problems with my GPS, so you’re right about the magnet not causing issues.
That big speedometer is cool, but it does have it’s down side… My passenger always knows how fast I’m going 😉
Can you file the edges of the disk before mounting it to make it dull?
@Norm I’m sure you could. I may try that with the 2nd disc. One downer is that extra discs cost a whopping $15 for 3. $5 each seems pretty expensive…
You might be able to find a metal washer close to the same size and use it. Rub against a magnet to magnetize it.
@Norm the disk doesn’t need to be magnetized. It just needs to be steel… The iOauto is the magnet part of the mount.
Then your next task is find the right type of glue to use.
I’m a little concerned that the magnet would damage the speakers in my HTC One. I’d like to ask a few questions but the iOmounts website doesn’t provide any contact info. Also, it reference their FAQs section but there isn’t one anywhere on the website. Any chance that you could post an email address and/or contact phone number for them?
Hey Paul –
Brian from iOmounts here. Here’s a link to the FAQ: http://www.iomounts.com/pages/faq. Also, I use an HTC One myself, and haven’t noticed any issues with the speakers (one of the phone’s best features!).
If you have any other questions, just let me know. Thanks!
-Brian
Since everyone else seems to love your speedometer, let me be the voice of dissent and say that I think placing the speedometer in the exact middle of the dashboard where it’s not in the direct line of sight of driver is a ridiculous idea and it looks silly.
But hey, at least the folks in the back seat have a clear line of sight to the speedometer, whatever that’s worth.
@Matt there’s also a digital speedometer right in front of the steering wheel.
@Julie are you still using this product? Would you recommend the purchase of the proclip iomount pro combo still?
@Gabe I’m still using the setup that I reviewed and would still recommend it.
I’m still using the same Proclips setup for several years. I did have to replace the car half but only because I got a new car. They make great products.
I am using a Nexus 6P and interested in using it as a dashcam, have you looked into this further / any setups you might recommend? I would like to use it for OpenStreetView, ideally the Camera would not have the mount in view and as little of the car hood as possible.
I like the simplicity of this mount but the compass interference would be a downside.
GekoGrips have some dash mounted magnetic mounts that you might want to check out: http://the-gadgeteer.com/2016/07/27/gekogrip-device-car-mounts-review/