REVIEW – There are two popular types of 3D printers on the market today: resin (SLA -Stereolithography) and FDM (fused deposition modeling). We’ve reviewed many of both types here at The Gadgeteer including the previous Saturn model, but this new Elegoo Saturn 2 8k 3D printer will be both my first resin printer to test, as well as the first 8k resolution resin printer we’ve tested. A large format (for resin) print volume combined with high resolution imaging should result in large models with lots of precise detail, but I’ll need to run it through its paces to see if it lives up to the promise.
What is it?
The Elegoo Saturn 2 8k 3D printer is a resin 3D printer. These types of printers use ultraviolet light to cure resin into 3d models, one layer at a time. Compared to FDM printers, this results in the potential for more intricate detail on the prints, but at the cost of strength and with extra steps in the production process. Working with FDM printers is as easy as connecting a spool of material and hitting print, but with a resin printer, you need to fill the resin vat, cover it all to prevent ambient UV light from messing up the resin, and then wash and “cure” the finished print. Oh, and did I mention the resin itself and the fumes it creates are toxic? Make sure to have a well ventilated area to print in (I used my garage for the entire review).
What’s in the box?
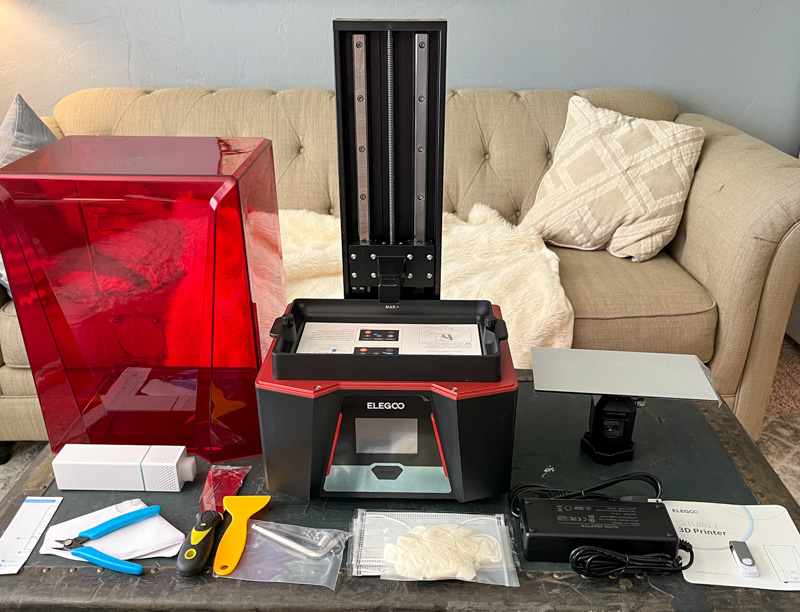
In the box is:
- Elegoo Saturn 2 Printer with Resin Tank attached
- UV Cover
- Removable Build Platform
- AC adaptor with wall plug
- Mini Air Purifier
- Scraping tools (x2)
- Levelling paper and instructions
- USB disk with software and test files for printing
- Paper funnels for pouring resin
- Disposable gloves
- Instruction manual
- Extra screws
- Snipping tool (for model cleanup and removing supports)
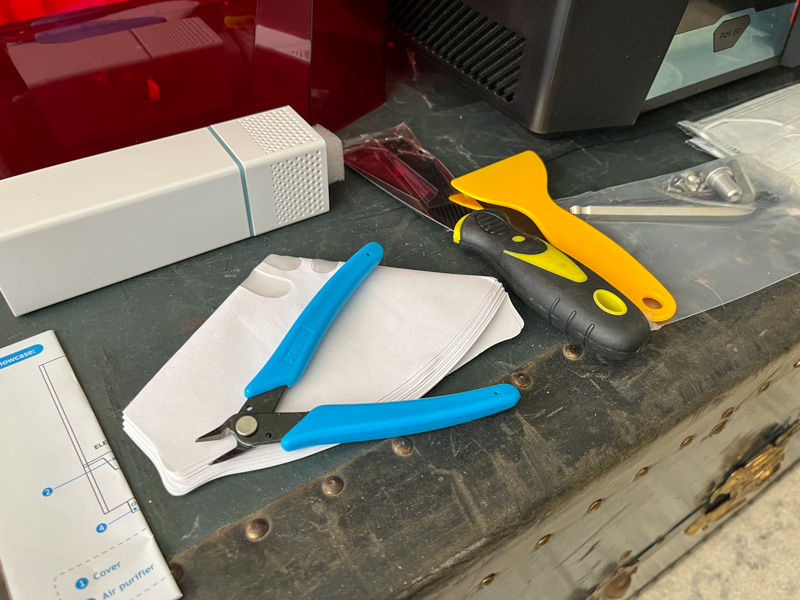
Above is another shot of some of the included items.
Hardware specs
- Screen: 3.5 inch touchscreen
- Connectivity: USB
- Technology: MSLA
- Light source: UVLED 405nm
- XY Resolution: 7680 x 4320 pixels (8K)
- Z axis accuracy: 0.00125 mm
- Layer thickness: 0.01 – 0.2 mm
- Printing speed: 30-70 mm/hour
- Power requirements: 100-240V 50/60Hz 24V 4A 96W
- Overall dimensions: 12.04in L *10.75in W *22.33in H (305.9mm L *273mm W *567.3mm H)
- Build volume: 8.62in L *4.85in W *9.84in H (218.88mm L *123.12mm W *250mm H)
- Weight: 24.25 lbs (11kg)
Design and features
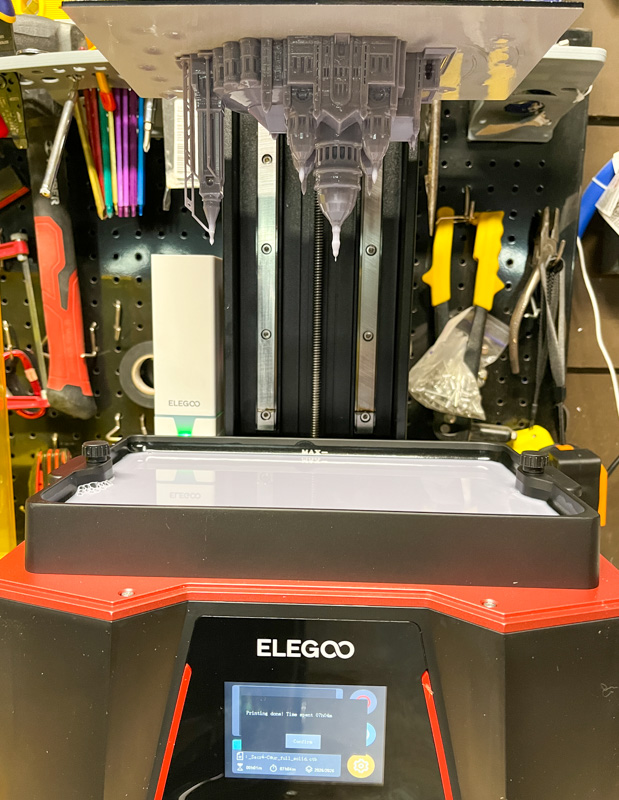
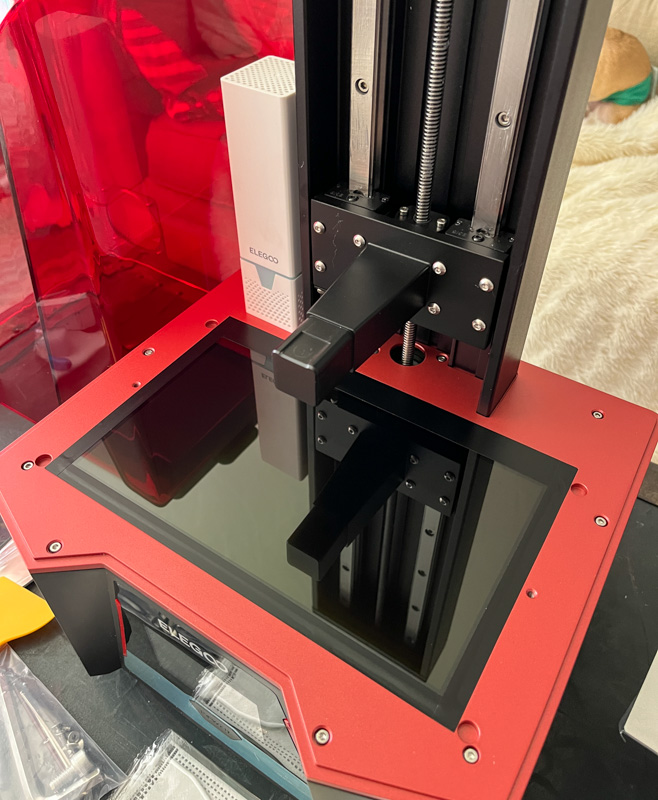
The basic layout and design of the Elegoo Saturn 2 3D printer is very similar to most consumer SLA 3D printers: a large box. In the base of the unit is a light source and screen combination (basically a small black and white LCD/LED screen system). Below is a shot of the screen with the resin tank and build plate removed:
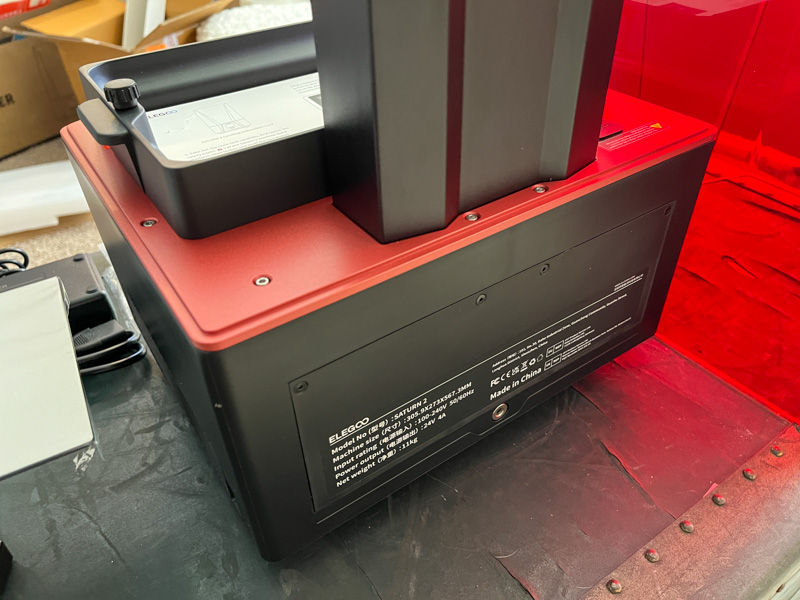
A resin tank sits on top of this, then the build plate is attached to a motor and rail system to lift it in and out of the resin tank while a model is printed. Here’s a shot from the back with the resin tank in place:
Sitting in front is a 5 inch color LCD control screen. This not only allows for direct control, maintenance functions, and print initiation from a file on a USB stick, but also shows status during the print including ETA and a preview of what each layer being cured looks like as it happens.

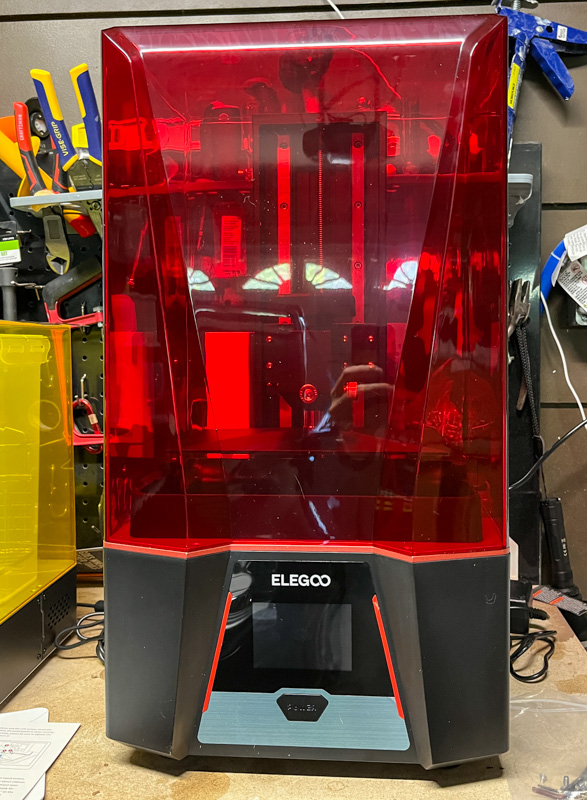
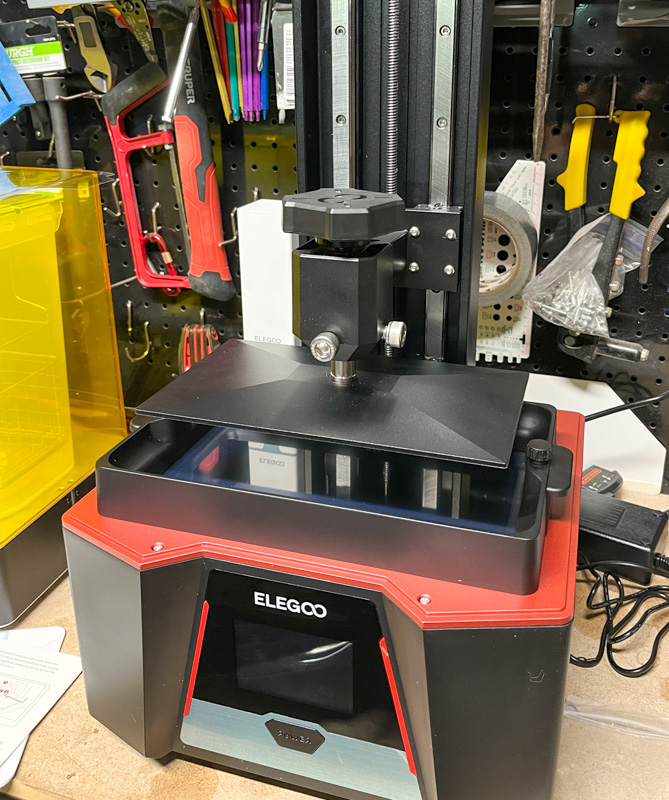
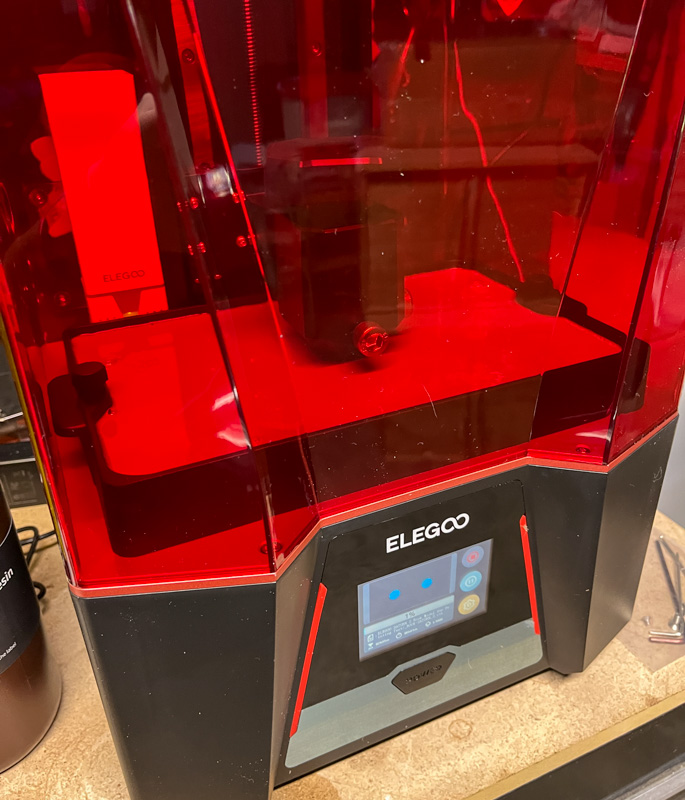
Below is the entire setup minus the UV cover ready for action in my garage:
Installation and setup
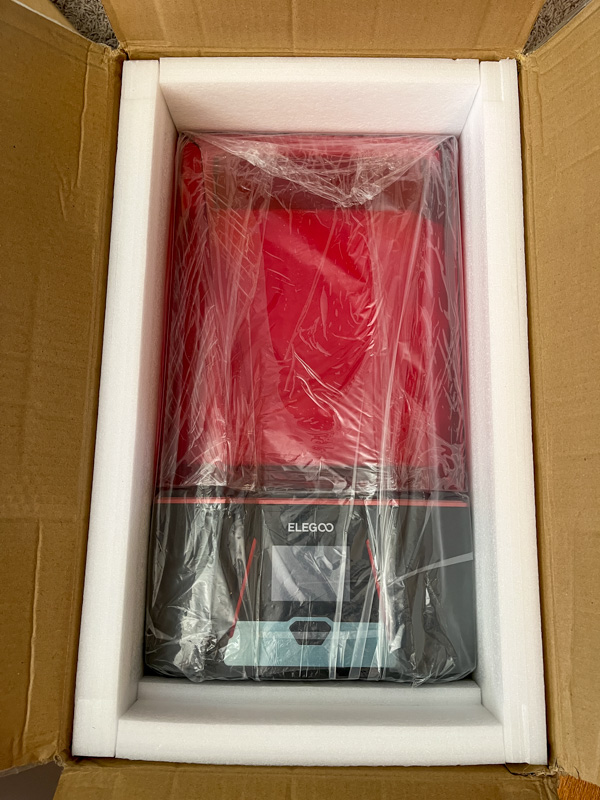
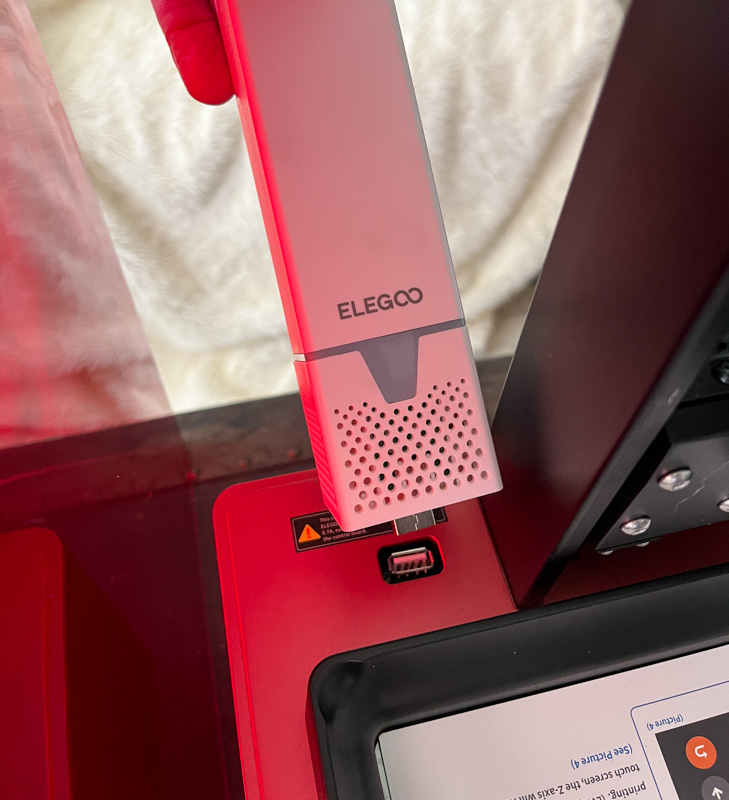
The Elegoo Saturn 2 8K 3D printer came very well protected. After removing the packaging I installed the USB-powered mini air filter into the USB port on the Elegoo Saturn 2:
Then I took it out to the garage and leveled the bed. The included bed-leveling instructions and thick paper sheet to aid in leveling made it a breeze.
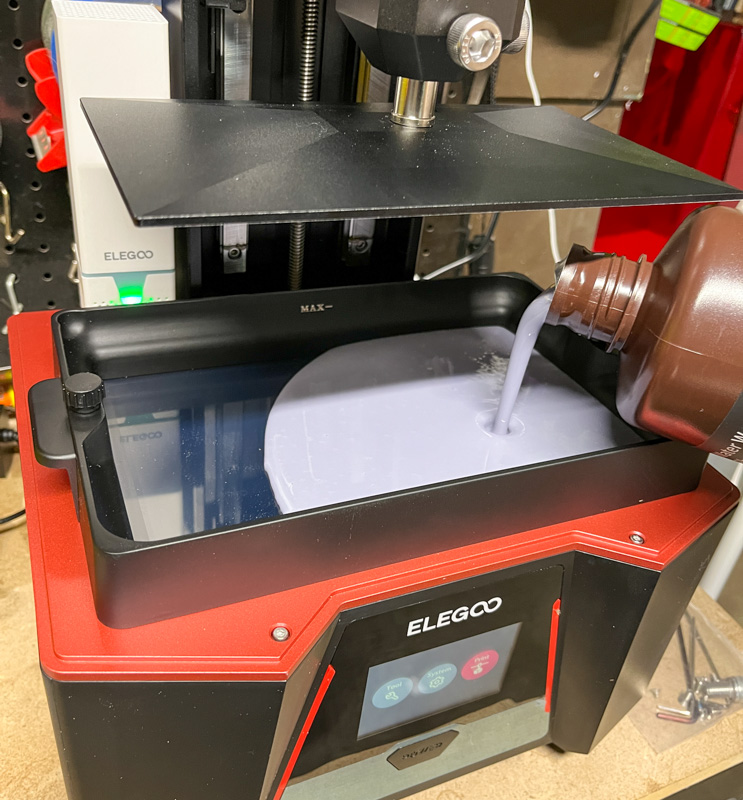
Once leveled, I poured in my first batch of resin to prepare for printing. I started with some Elegoo water-washable resin that I bought separately (no resin is included in the box). I poured about half of a large bottle making sure to stop before the MAX line. Then I put the cover on and started the included pre-sliced test print – a pair of chess pieces that Elegoo has on the USB stick that’s included. The printer blasts light every few seconds as the print bed is raised and lowered, the end result being just small bits of resin “cured” (hardened) onto each layer, thus creating a 3D resin model layer by layer.
Performance
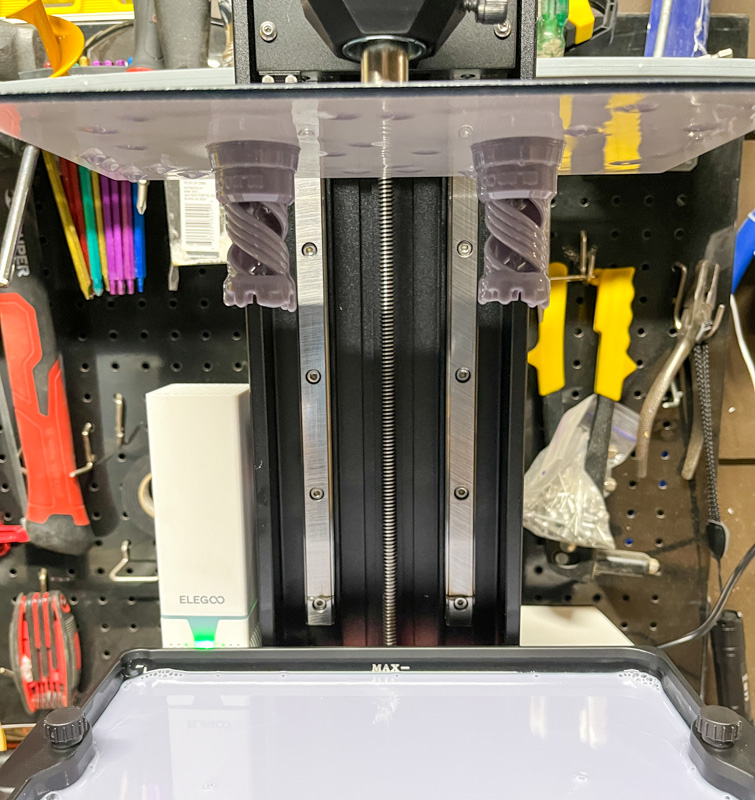
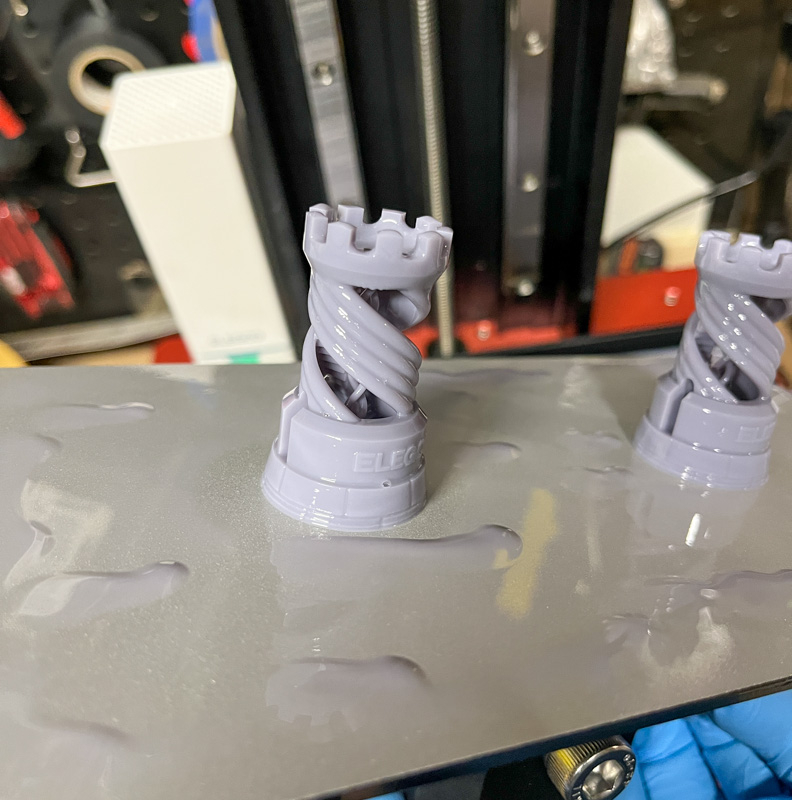
Here’s a shot showing the test models right after they finished printing. Notice the liquid resin still on them and all over the build plate, this is smelly (and toxic), so working in a well ventilated area with a mask and gloves is highly recommended. I watched quite a few tutorials to prepare for SLA printing and the chemical burns from careless resin handling are no joke.
The next step is to remove those models from the print bed (scrape them off carefully with the included metal scraper), and then wash and cure them. Washing is accomplished by either rinsing them with water (for water-washable resin) or with isopropyl alcohol or another solvent for other resins (refer to the resin manufacturer for compatibility and washing/rinsing instructions). The water washable resin was convenient, but I had more issues with it than the alcohol-wash version I tested later. Here’s another shot showing more detail of the test pieces:
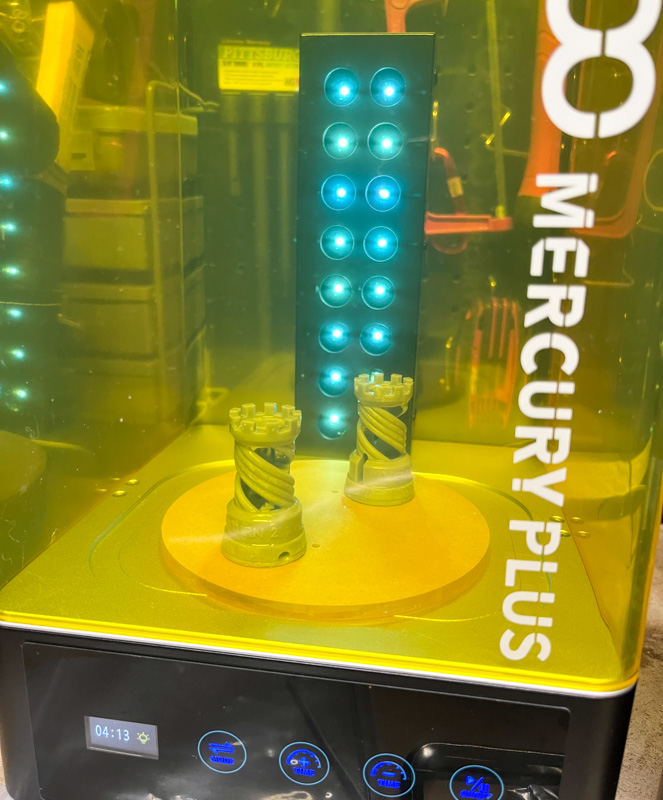
After washing, the prints will still not be fully cured, so you can either place them out in the sun for a day (making sure to rotate so all sides get cured by ultraviolet light), or you can purchase a curing station that will accomplish the task much more efficiently (in seconds or just a few minutes depending on the size of the model). I opted for the second strategy, and purchased an Elegoo Mercury Plus washing and curing station. Here’s the station in curing mode (a turntable slowly spins the models around while the UV lights get every nook and cranny to harden the resin):
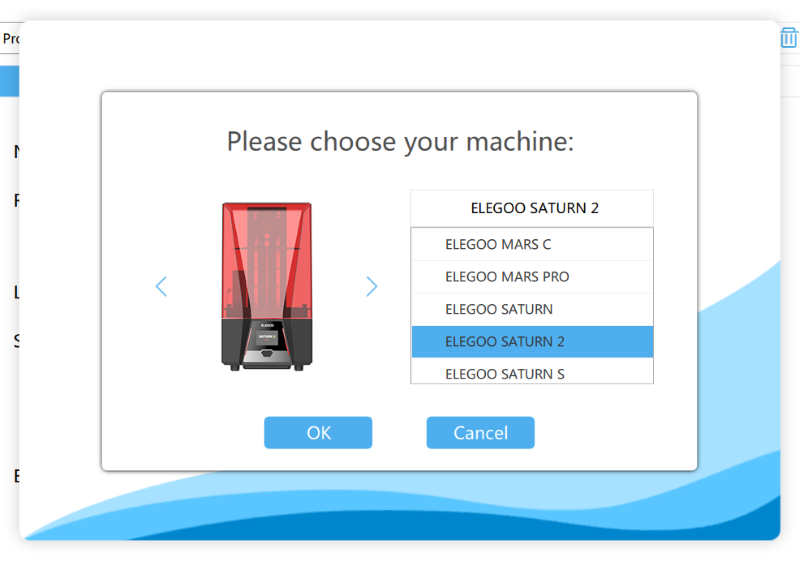
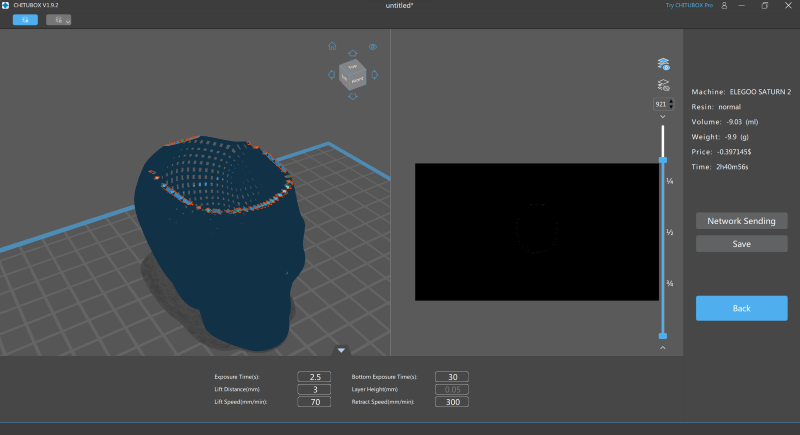
After the successful first test print, I ventured out into finding new models to try out with the Elegoo Saturn 2 8K 3D printer. The included CHITUBOX software on the USB disk was easy to install and use, I did all my testing on Windows:
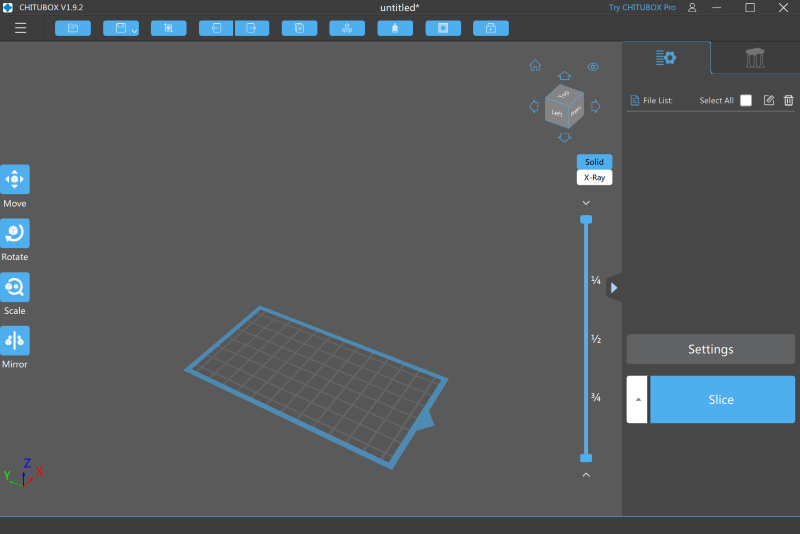
Support for the Saturn 2 was already present for the review. Selecting this printer automatically set up the correct build volume and recommended settings for the slicer.
I found the defaults to be pretty good for my needs, but you’ll want to watch or read some tutorials for tips and tricks. The most important takeaway for me was to carefully check the placement of supports. If sections of resin are printed that aren’t connected to previous layers, they’ll harden in the resin tank but not be attached to anything, creating floating bits of debris that can interfere with the print. I found it’s pretty easy to miss these spots if you’re not careful, more on that in a bit.
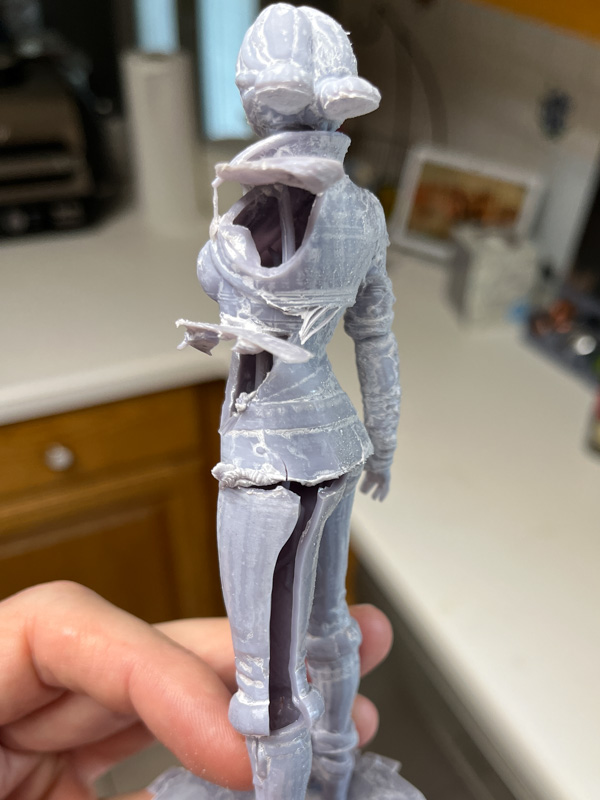
You’ll need to create or find a 3D model for printing. I’ve previously created 3D models with TinkerCAD, or you can use a variety of other modeling programs to do this, and can find models ready to print from sites like Thingiverse, Prusa Printables, Cults3D, and many more. I tried out a model of Triss Merrigold from the Witcher series, and missed a section of her arm that wasn’t supported to other layers (and the auto-supports didn’t catch it either), here’s the result:
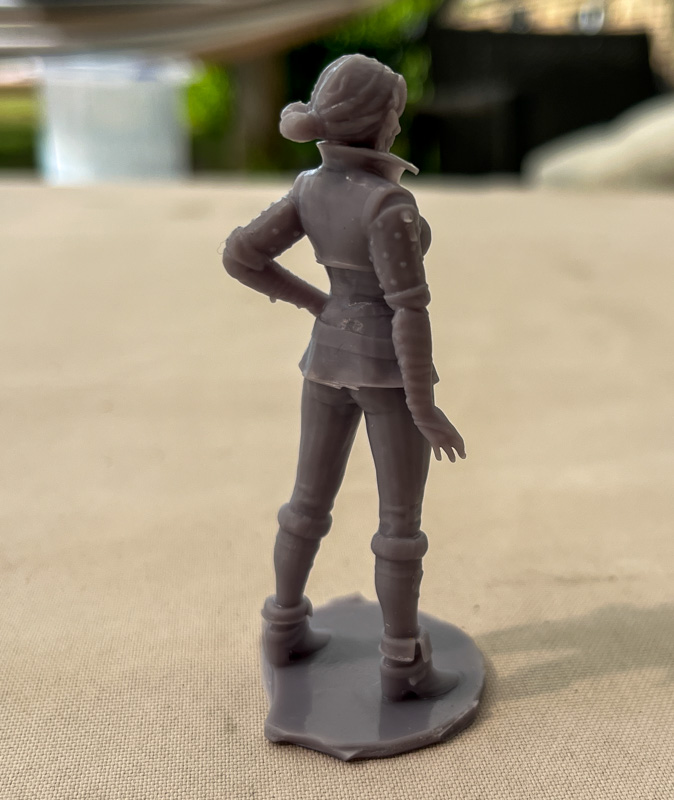
After reslicing and reprinting with better supports and a smaller solid model rather than a large hollow one, I was very happy with the result:
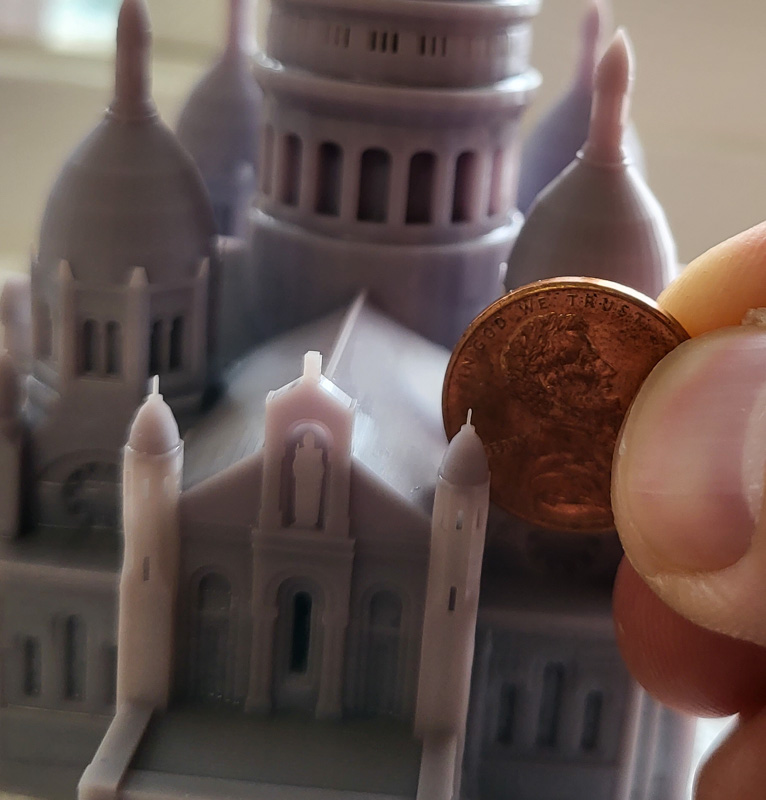
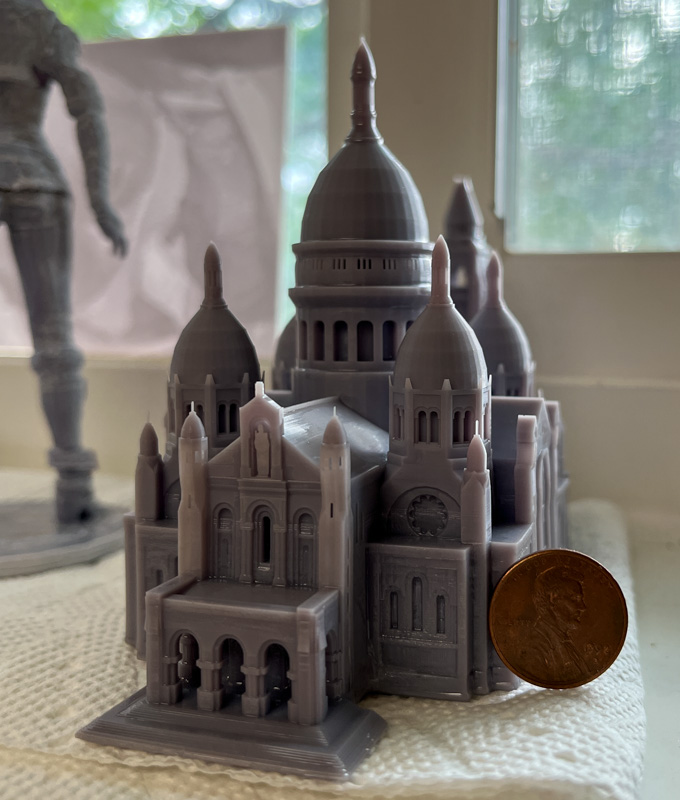
Next, I wanted to see how detailed the prints could get, so I found a model of Sacré-Cœur in Paris, France and printed it out. The insanely small spires and windows exceeded anything I’ve been able to accomplish on my FDM printer, by quite a bit. As you can see in the picture below, the printer is capable of printing out tiny details fractions of millimeters thick.
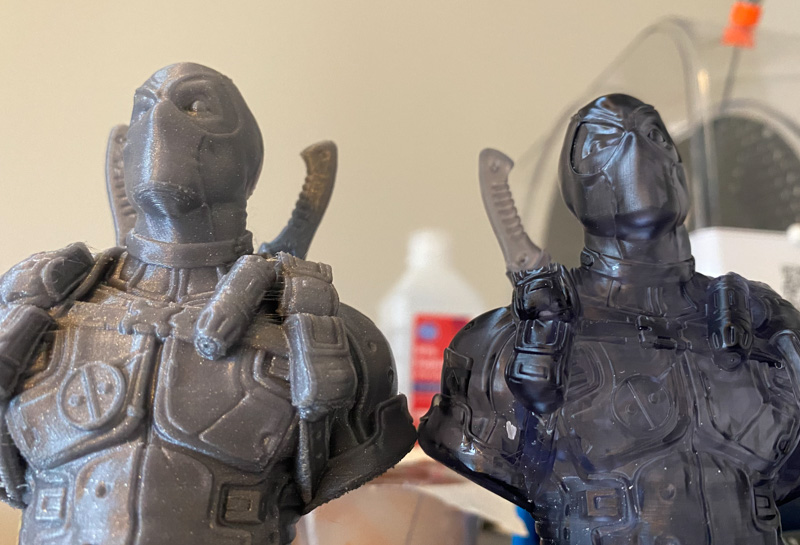
Layer lines are non-existent (with FDM printers, even at very fine settings you can often see layer lines, in the picture below the same model was printed on an FDM printer (left) and the Elegoo Saturn 2 (right). Notice under the chin especially: all of the details are sharper and surfaces are cleaner with the Elegoo.
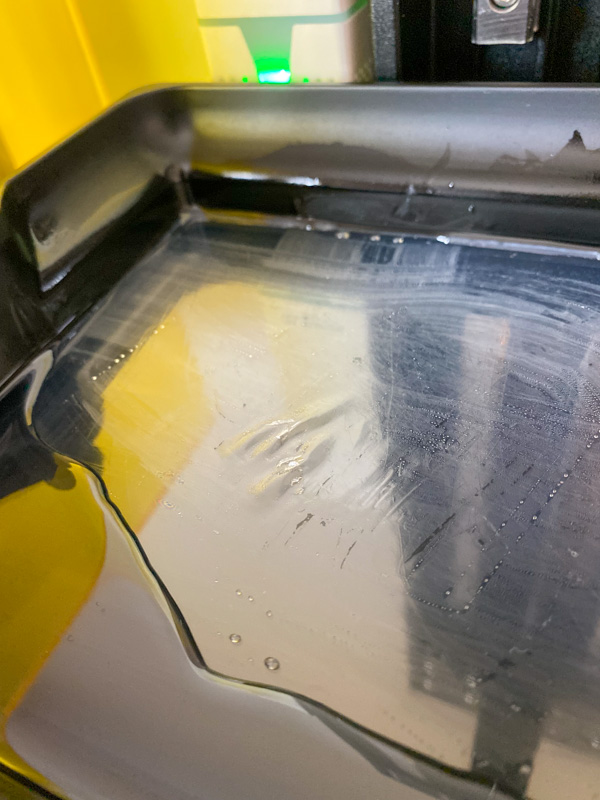
Near the end of the review period, I had a print fail and parts of the resin fuse to the bottom of the resin vat. I tried to carefully remove this with the plastic scraper provided, but as you can see below I managed to damage the film at the bottom of the vat. This is apparently pretty common in SLA printing, especially for beginners, so luckily Elegoo sells replacement film sheets as well.
What I like
- Very easy to set up and use (for an SLA printer)
- Larger than average build volume
- Very high resolution for great detail
What I’d change
- At this price – nothing. You could pay more for a larger printer or better ventilation/filtration options, but compared to the rest of the similar-priced models I looked at while reviewing this, it seems like a great set of features for the price.
Final thoughts
While I still prefer FDM printing for most projects due to the toxic fumes and wash/cure and cleanup with resin, the Elegoo Saturn 2 8K 3D printer is my new go-to for any high-detail models I want to print. The incredible 8k resolution and pretty generous build volume allow for all sorts of tabletop gaming models and much more.
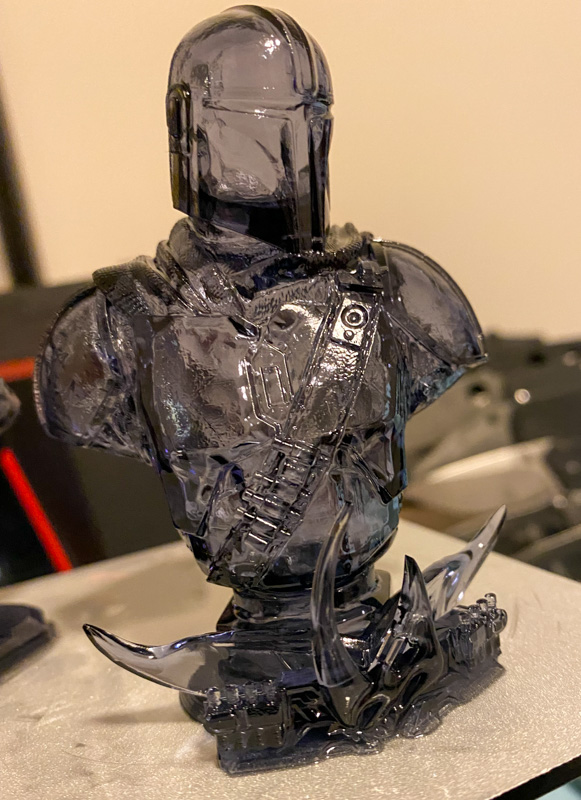
As a final sidenote, I love the look of the “smoke grey” resin from Elegoo, shown above. This semi-transparent resin made for some stunning busts and models, only a few of which I was able to show in the review.
Price: $600 ($550 early bird special at time of review)
Where to buy: Elegoo and Amazon
Source: The sample for this review was provided by Elegoo

Now retrieving an image set.
2-Pack LED Video Light Kit, NiceVeedi Studio Light, 2800-6500K Dimmable Photography Lighting Kit with Tripod Stand&Phone Holder, 73" Stream Light for Video Recording, Game Streaming, YouTube
(as of July 14, 2026 14:09 GMT -05:00 - More infoProduct prices and availability are accurate as of the date/time indicated and are subject to change. Any price and availability information displayed on [relevant Amazon Site(s), as applicable] at the time of purchase will apply to the purchase of this product.)
Gadgeteer Comment Policy - Please read before commenting
You guys need to run proper test prints, not just the rooks. The rooks are essentially to prove that your machine works. The community made test prints: Cones of Calibration or Ameralabs Test Town will actually help you calibrate your machines settings (with each different resin) to give you the best quality prints. It’s very obvious from the photos of the prints you have posted here that you have not done so. Which is very odd for a review post. Especially since the calibration prints are free, and you have posted other prints from files not made by elegoo.
I received my Saturn 2 on Monday of this week. After leveling, I ran the Ameralabs Test Town instead of the rooks. The results were amazing using Elegoo’s Space Grey 8K resin. Then I started printing NomNom Studio’s Lilith figure (Diablo IV) at 178mm. Lots of fine detail and all of the pre-supported files printed and fit together perfectly. I am extremely happy with this machine.
I’ll have to try that Test Town out! Everything’s been fantastic, some of the sub-millimeter details blow my mind even after months of printing…