REVIEW – Using a gun for defensive purposes is a dangerous pursuit. If you’re unlucky enough to find yourself in that position, any advantage you can gain could mean life or death. Adding a tactical light to your gun can gain you that advantage by both providing superior targeting lighting and also by blinding and confusing your attacker. Imalent manufacturers high-quality lights of all styles. They have been featured on The Gadgeteer here, here, and here. They have introduced a tactical weapon light, the UT10. Let’s see if it deserves a place on your defensive weapon.
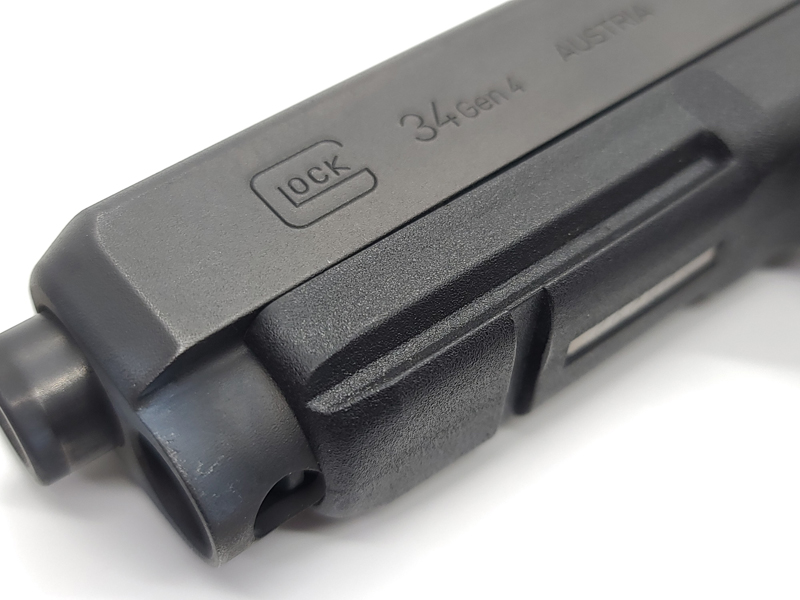
Before we get into it, let me state very clearly that the gun featured in this review, a Glock 34, 9mm handgun, was unloaded for the duration of the review. There was no magazine inserted into the gun, and a plastic block flag was inserted into the chamber and the slide was closed on the flag, making it impossible to load and/or discharge the weapon. Safety first!
What is it?
The Imalent UT10 is a tactical weapon light designed to securely attach to either Picatinny rails typically found on tactical rifles like AR15s or to Glock guide rails found on nearly all Glock handguns.
What’s in the box?
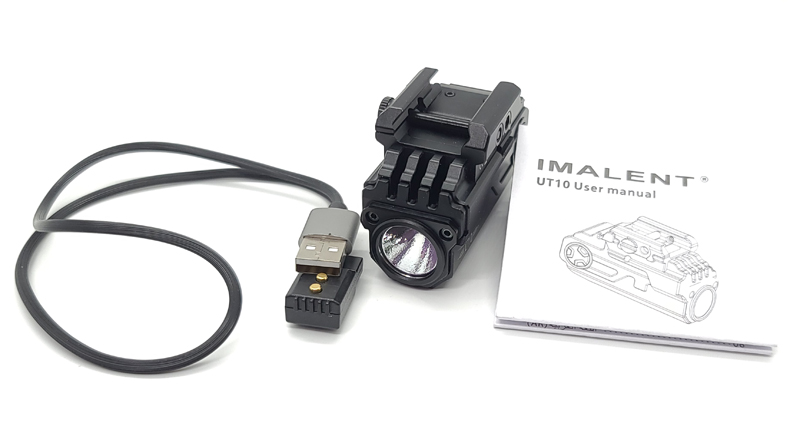
- Imalent UT10 tactical weapon light
- Charging cable – USB-A to a proprietary magnetic connector
- Manual
- The website says a wrench is included, but it wasn’t
Hardware specs
- Product size: 72.6mm (length) x 34mm (width) x 44mm (height)
- Net Weight: 128g (battery included)
- Waterproofing: IPX4 (resistant to water splashes from any direction)
- Output: High – 1160lm + 500lm (bright burst + dimmer long term); Low – 300lm; Strobe – 1160lm
- Runtime: Well…on the website, for high output, it says both 2+76min (whatever that means) and 2min+56s (OK – so about three minutes?) and the manual says 2+56min (again, whatever that means). For low output, the website says 2 hours in both places but the manual says 88 minutes. OK – so, documentation isn’t strong with this one…
- Attachment system: Picatinny rail and/or Glock guide rail
- Switch: Pushbutton, ambidextrous
- Charging: Magnetically attached, proprietary connector to USB-A cable
Design and features
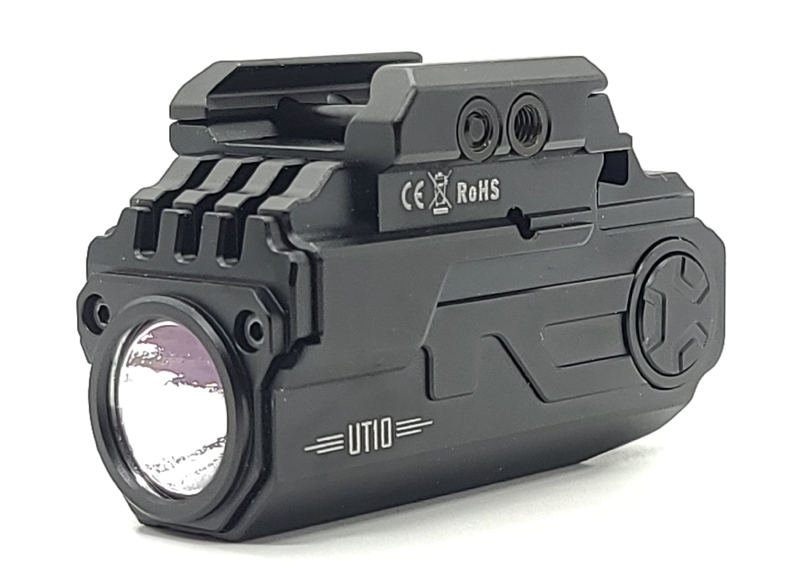
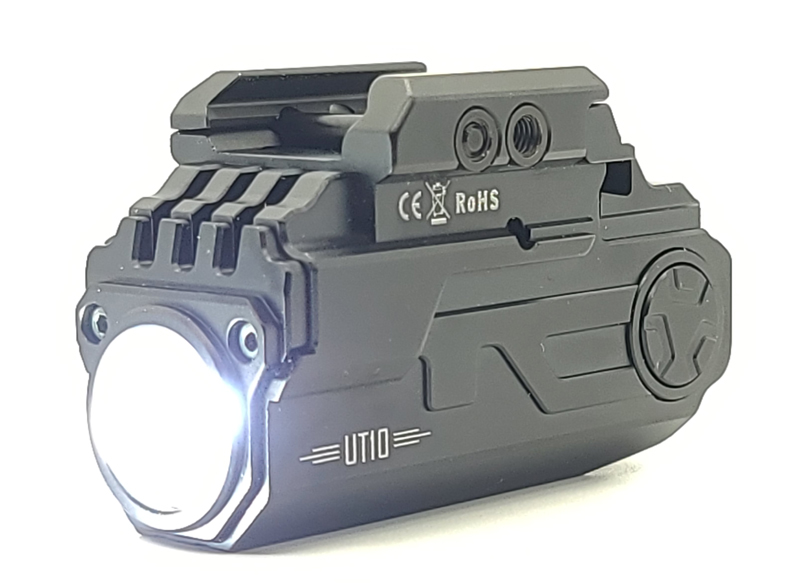
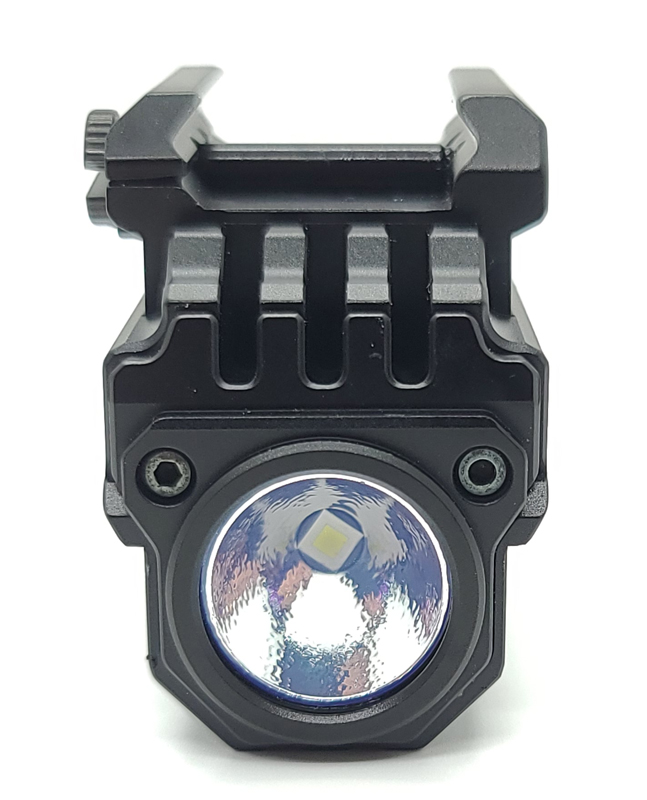
The UT10 is a hefty little light. It is very solidly built and designed to withstand the rigors of being attached to a device that constantly contains small explosions. Its all-metal construction should hold up to years of use and abuse.
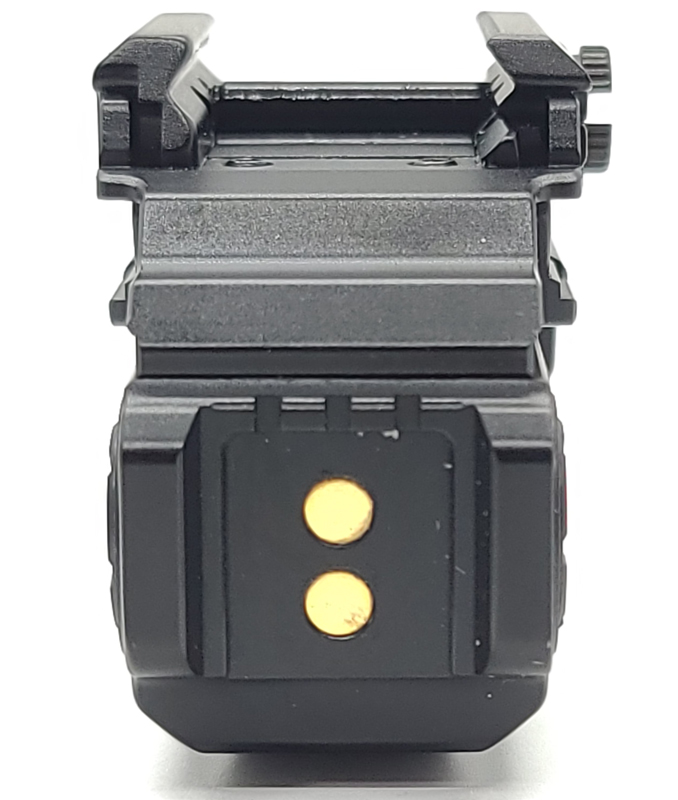
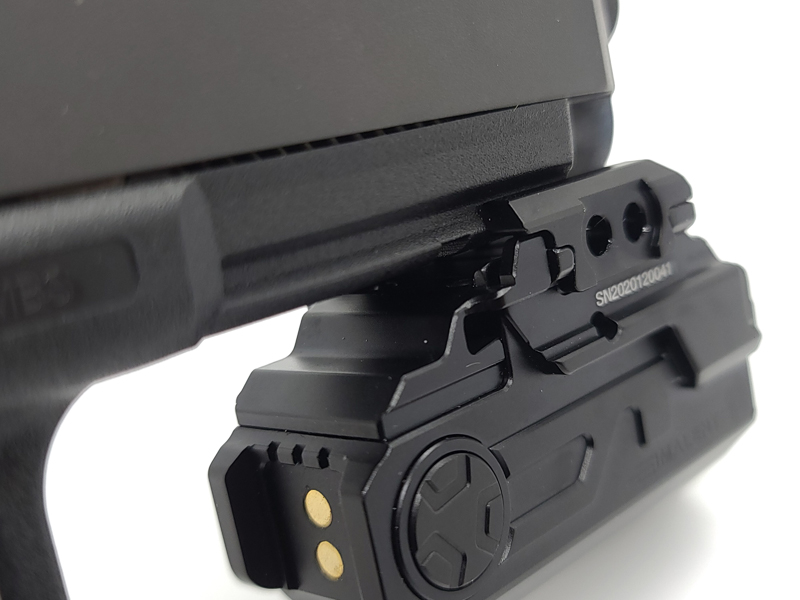
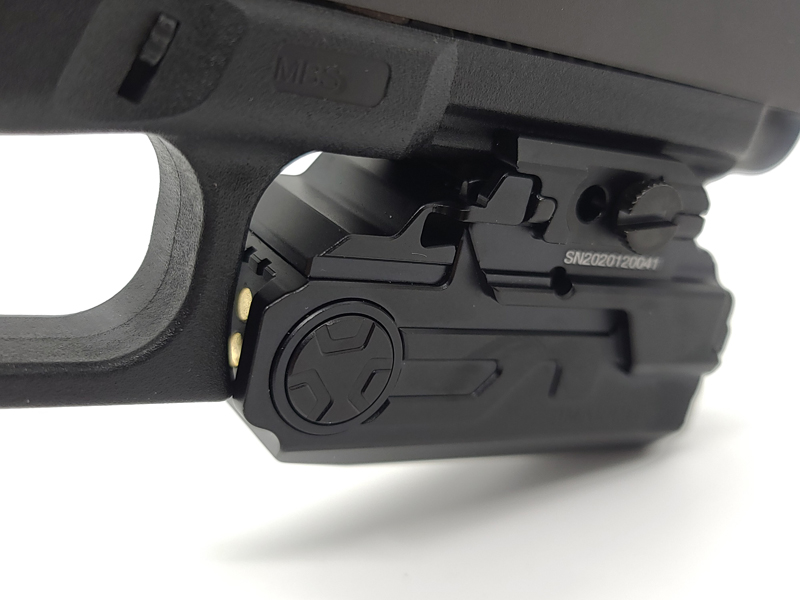
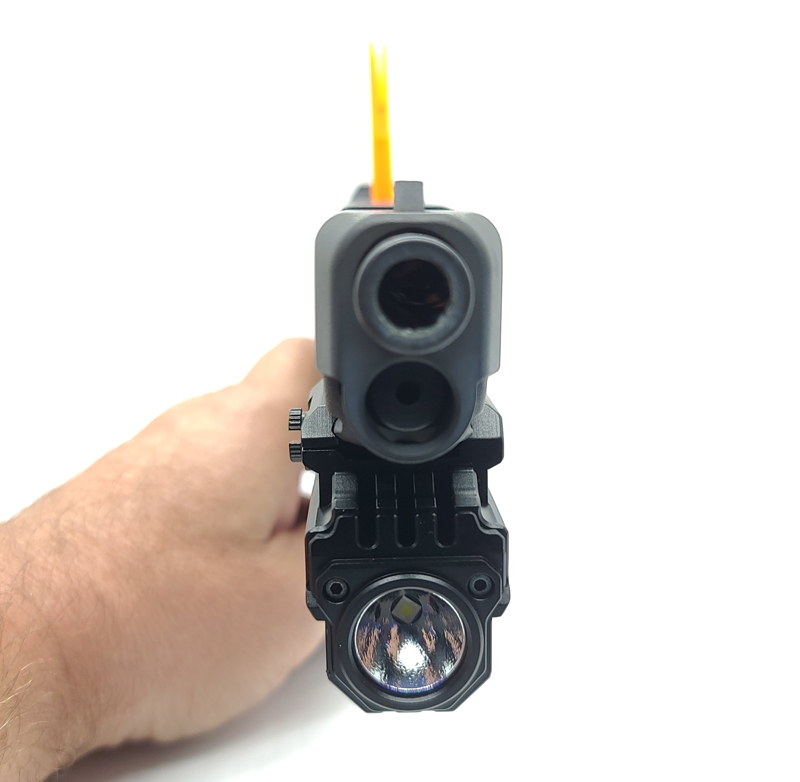
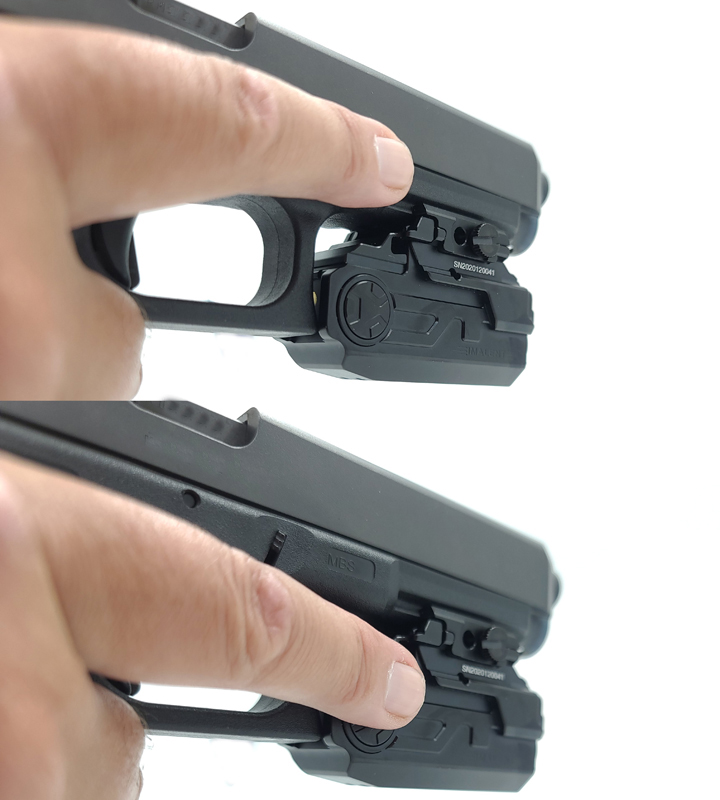
You can see the activation button – the round, textured disc – toward the back of the light. There is an identical one on the other side. Both buttons work exactly the same.
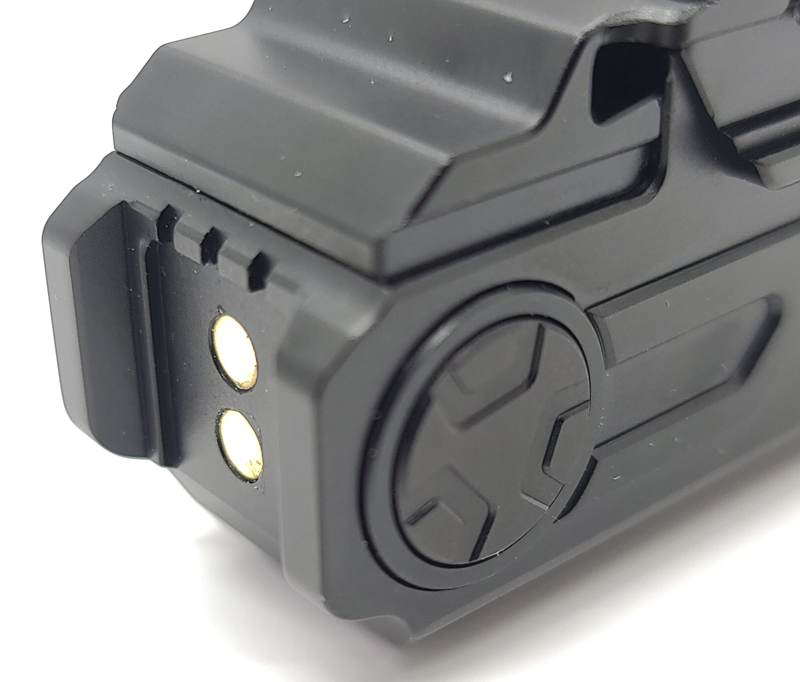
On the back of the light, we find the two-contact charging pad.
The front of the light is the business end.
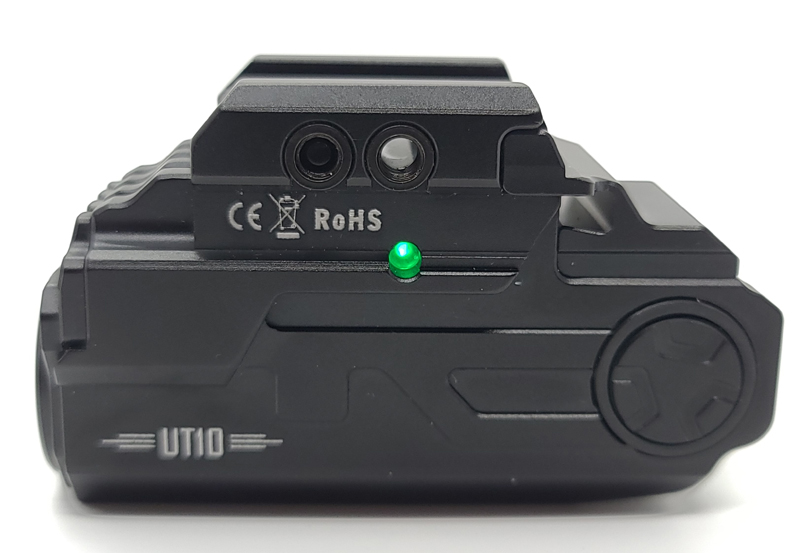
On both sides, there is a single LED that glows green or red, depending on what’s happening. More on that later.
Setup
The first step is to charge the light. Use your favorite USB charger and plug in the charging cable. Then, attach the charging cable to the charging pads on the back of the light.
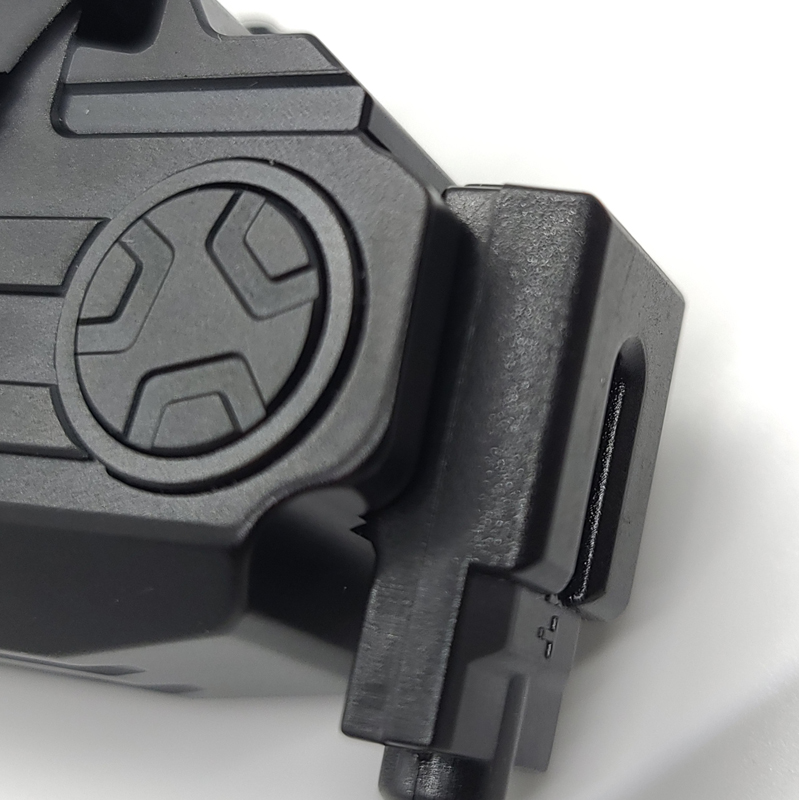
The magnet in the cable snaps the cable into place, but the alignment is finicky. I had to wiggle it until it snapped just so. That could use a little work. The LEDs on the sides of the light illuminate once you make a good connection.
After charging the light, you attach it to your gun.
In the photo above, you can see the “rail”, the slot below the barrel running front to back. In the middle of that slot, you can see the crossing slot that runs along the bottom of the gun.
You start by removing the bolt that is used to attach the light to the gun.
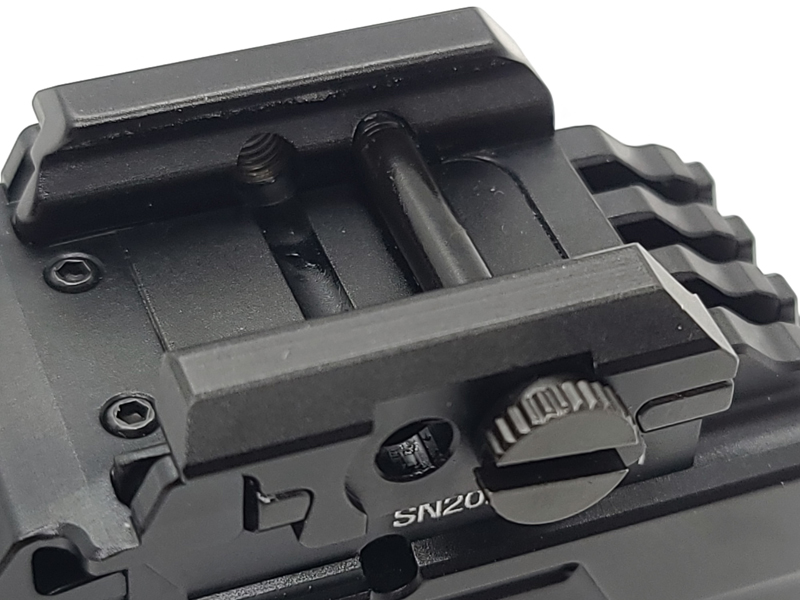
The UT10 slides onto that rail. You insert the bolt into one of the holes and then slide the light back until the bolt slides into the crossing rail.
You can then tighten the bolt into the threads on the other side of the UT10, locking it into place on the gun.
Once you tighten the bolt, you’re ready to go. Note that when the light is attached to the gun, you cannot attach the charging cable. To charge, you have to loosen the bolt, slide it out, slide the light forward, and attached the charging cable. Not a deal-breaker, but certainly not what I’d call convenient.
Performance
With the light mounted on my gun, I was able to test out functionality.
Let’s talk first about the buttons and what they do. Again, both buttons work exactly the same.
- One tap- turn on/off
- When on – two taps – toggle between high and low brightness
- Three taps – battery check
- Green flash – 4.1v-4.2v
- Green flash x2 – 3.8v-4.0v
- Green flash x3 – 3.6v-3.7v
- Red flash x4 – 2.9v-3.6v
- Four taps – lock/unlock
- Red flash x3 – light is locked and switches disabled
- Green flash x3 – light is unlocked and switches enabled
- Tap both switches – turn on strobe mode
- One tap either switch – return to the previous mode (on or off)
The button falls just ahead of the trigger guard and proved to be an easy and natural reach.
In the documentation, it refers to high mode as 1160lm-500lm, but it doesn’t explain what that means. Couple that with the confusing runtimes (2+56min) and it was really unclear how this thing works. I think I eventually figured it all out.
In high mode, the light will only run at full brightness, 1160lm, for two minutes. Then, it steps down to 500lm until turned off or the battery dies. That explains the runtime – 2 minutes at 1160lm plus 56 more at 500lm. A-ha! It still doesn’t explain the discrepancy between the different claimed runtimes on the website, but it got us in the ballpark. Based on letting the battery completely die, the 2 minutes at 1160lm plus 56 more at 500lm seems plausible. The runtime at 300lm is somewhere between 90 minutes and two hours.
Keep in mind that a tactical gun light is not designed for long usage. It’s designed to get a job done and over with.
Here’s a short video showing the operation of the light. Again, the gun was unloaded and the chamber was blocked during the video.
What I like
- Simple operation
- Solid built quality
- Good lighting modes
What I’d change
- Hire a professional documentation writer and get the details straight and consistent throughout your documentation offerings
- Make the charging cable connection more reliable
- Relocate the charging port so it is accessible when the light is mounted to the gun
Final thoughts
I enjoy pistol shooting. I find it challenging to improve my shooting skills. I have defensive pistols. My goal is to never, ever use them in that manner. But, if I am forced to, I want to have every advantage I can. The Imalent UT10 is a terrific addition to my bedside defensive pistol – the one that would most likely be used in a limited light situation. Having the ability to properly identify a target as well as the ability to produce blinding, confusing light might give me the edge. I hope that never happens. But if it does, I know I can count on the UT10 to light the way.
Price: $89.99
Where to buy: Amazon and Imalent
Source: The sample of this product was provided by Imalent.

Google Review Tap Cards (3-Pack) by TapFive - Tap for Instant Reviews - All Phones Compatible - Reusable Smart Tap NFC & QR - Boost Business Reviews - Powered by TapFive (3 Card Pack)
(as of June 9, 2026 19:27 GMT -05:00 - More infoProduct prices and availability are accurate as of the date/time indicated and are subject to change. Any price and availability information displayed on [relevant Amazon Site(s), as applicable] at the time of purchase will apply to the purchase of this product.)
Gadgeteer Comment Policy - Please read before commenting
i’ve mounted similar lights to my cameras for nighttime shots of owls, raccoons and opossums
just a picatinny rail drilled out for 1/4×20 screw is used for a base
Craig, I’d like to see the pictures of the faces of those critters when they get that bright light shined in their eyes. I bet it’s one of surprise. 😉
Each one with two glowing eyes staring back at you.
In a home defense situation I would rather have a light with a replaceable battery. There is such a thing of having too bright of a light, due to shining it on walls that you are close to blinding your sight vision. Streamlights are my go to. Thanks for reviewing this.