REVIEW – If you believe what you see on TV, cameras are everywhere. The police dramas regularly use surveillance video to get the bad guys. We have also seen all the fun video on Facebook and Youtube from home cameras, catching the family pets, or the family themselves, doing cute, funny, and even dangerous things.
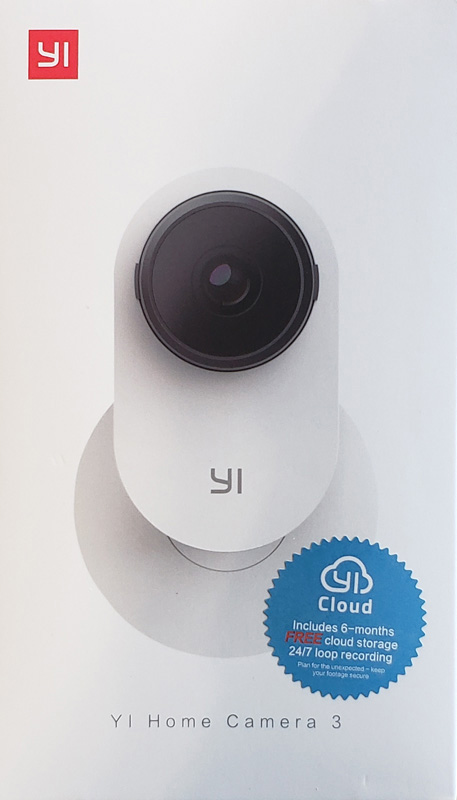
Yi (pronounced “Yee”) Technologies has a new entry in their line of connected cameras with the Home Camera 3. Should you get one to capture your own set of internet-worthy videos? Let’s take a look.
What is it?
The Home Camera 3 (I will just use “camera” from here on) is a standalone 1080p Wi-Fi camera. Yi also includes six months of cloud storage with subscription options available after that.
What’s in the box?
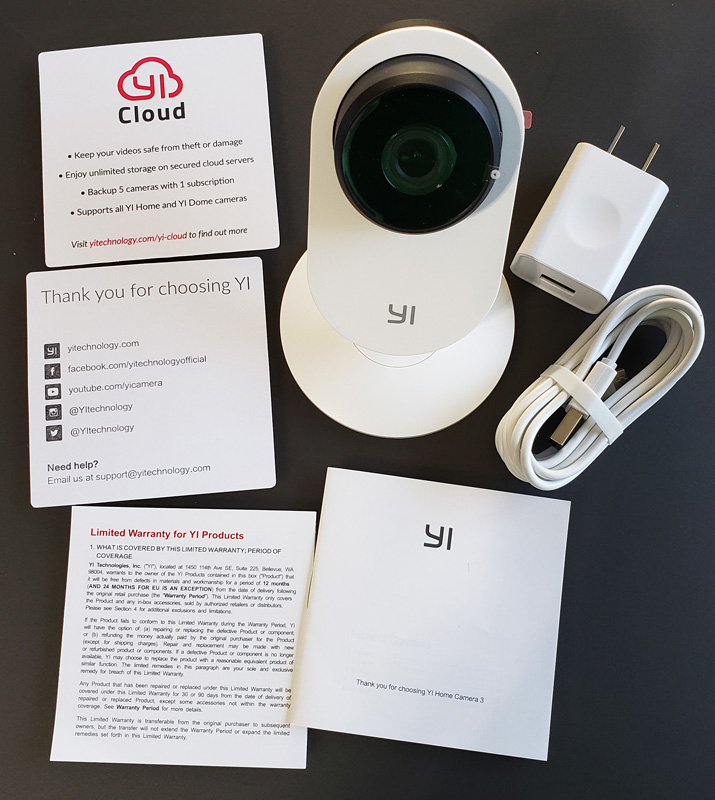
- Home Camera 3
- USB-A to micro USB power cable
- USB power adapter
- Cloud storage info card
- Yi Technology contact card
- Limited warranty
- Instructions
Hardware specs
- Dimensions: 4.3 x 5.9 x 4.3 inches
- Weight: 9.6 oz
- Resolution: 1080p (1920×1080)
- Lens view: 107 degrees
- Audio: mic/speaker full duplex
- Wi-FI: 802.11 bgn
- Wireless security: WEP/WPA/WPA2
- Power: DC 5v/1A Micro USB
- Video compression: h.264
Design and features
The camera is nicely styled and can blend into most decors. I opted to put the camera in my garage. Here it is on a shelf by the entry door, pointing toward the garage door.
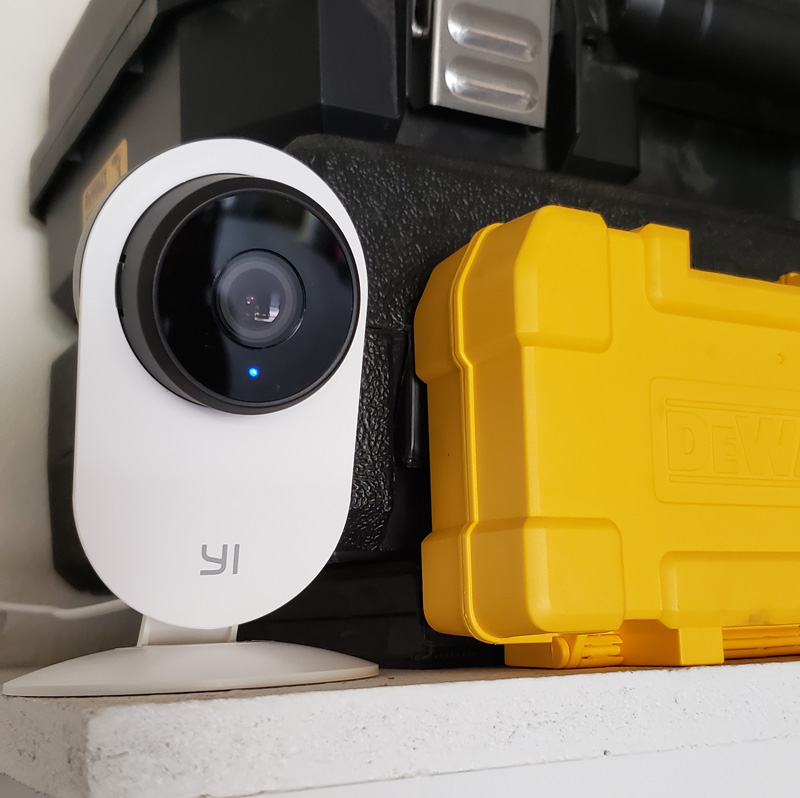
For reference, that yellow case is a set of screwdriver bits. At just over four inches tall, the camera fits almost anywhere. You can also see the small blue LED below the lens, indicating the camera is online.
The camera has a rotating mount, allowing you to rotate the camera a full 180 degrees, from flat, pointing up, to flat, pointing down, relative to the base.
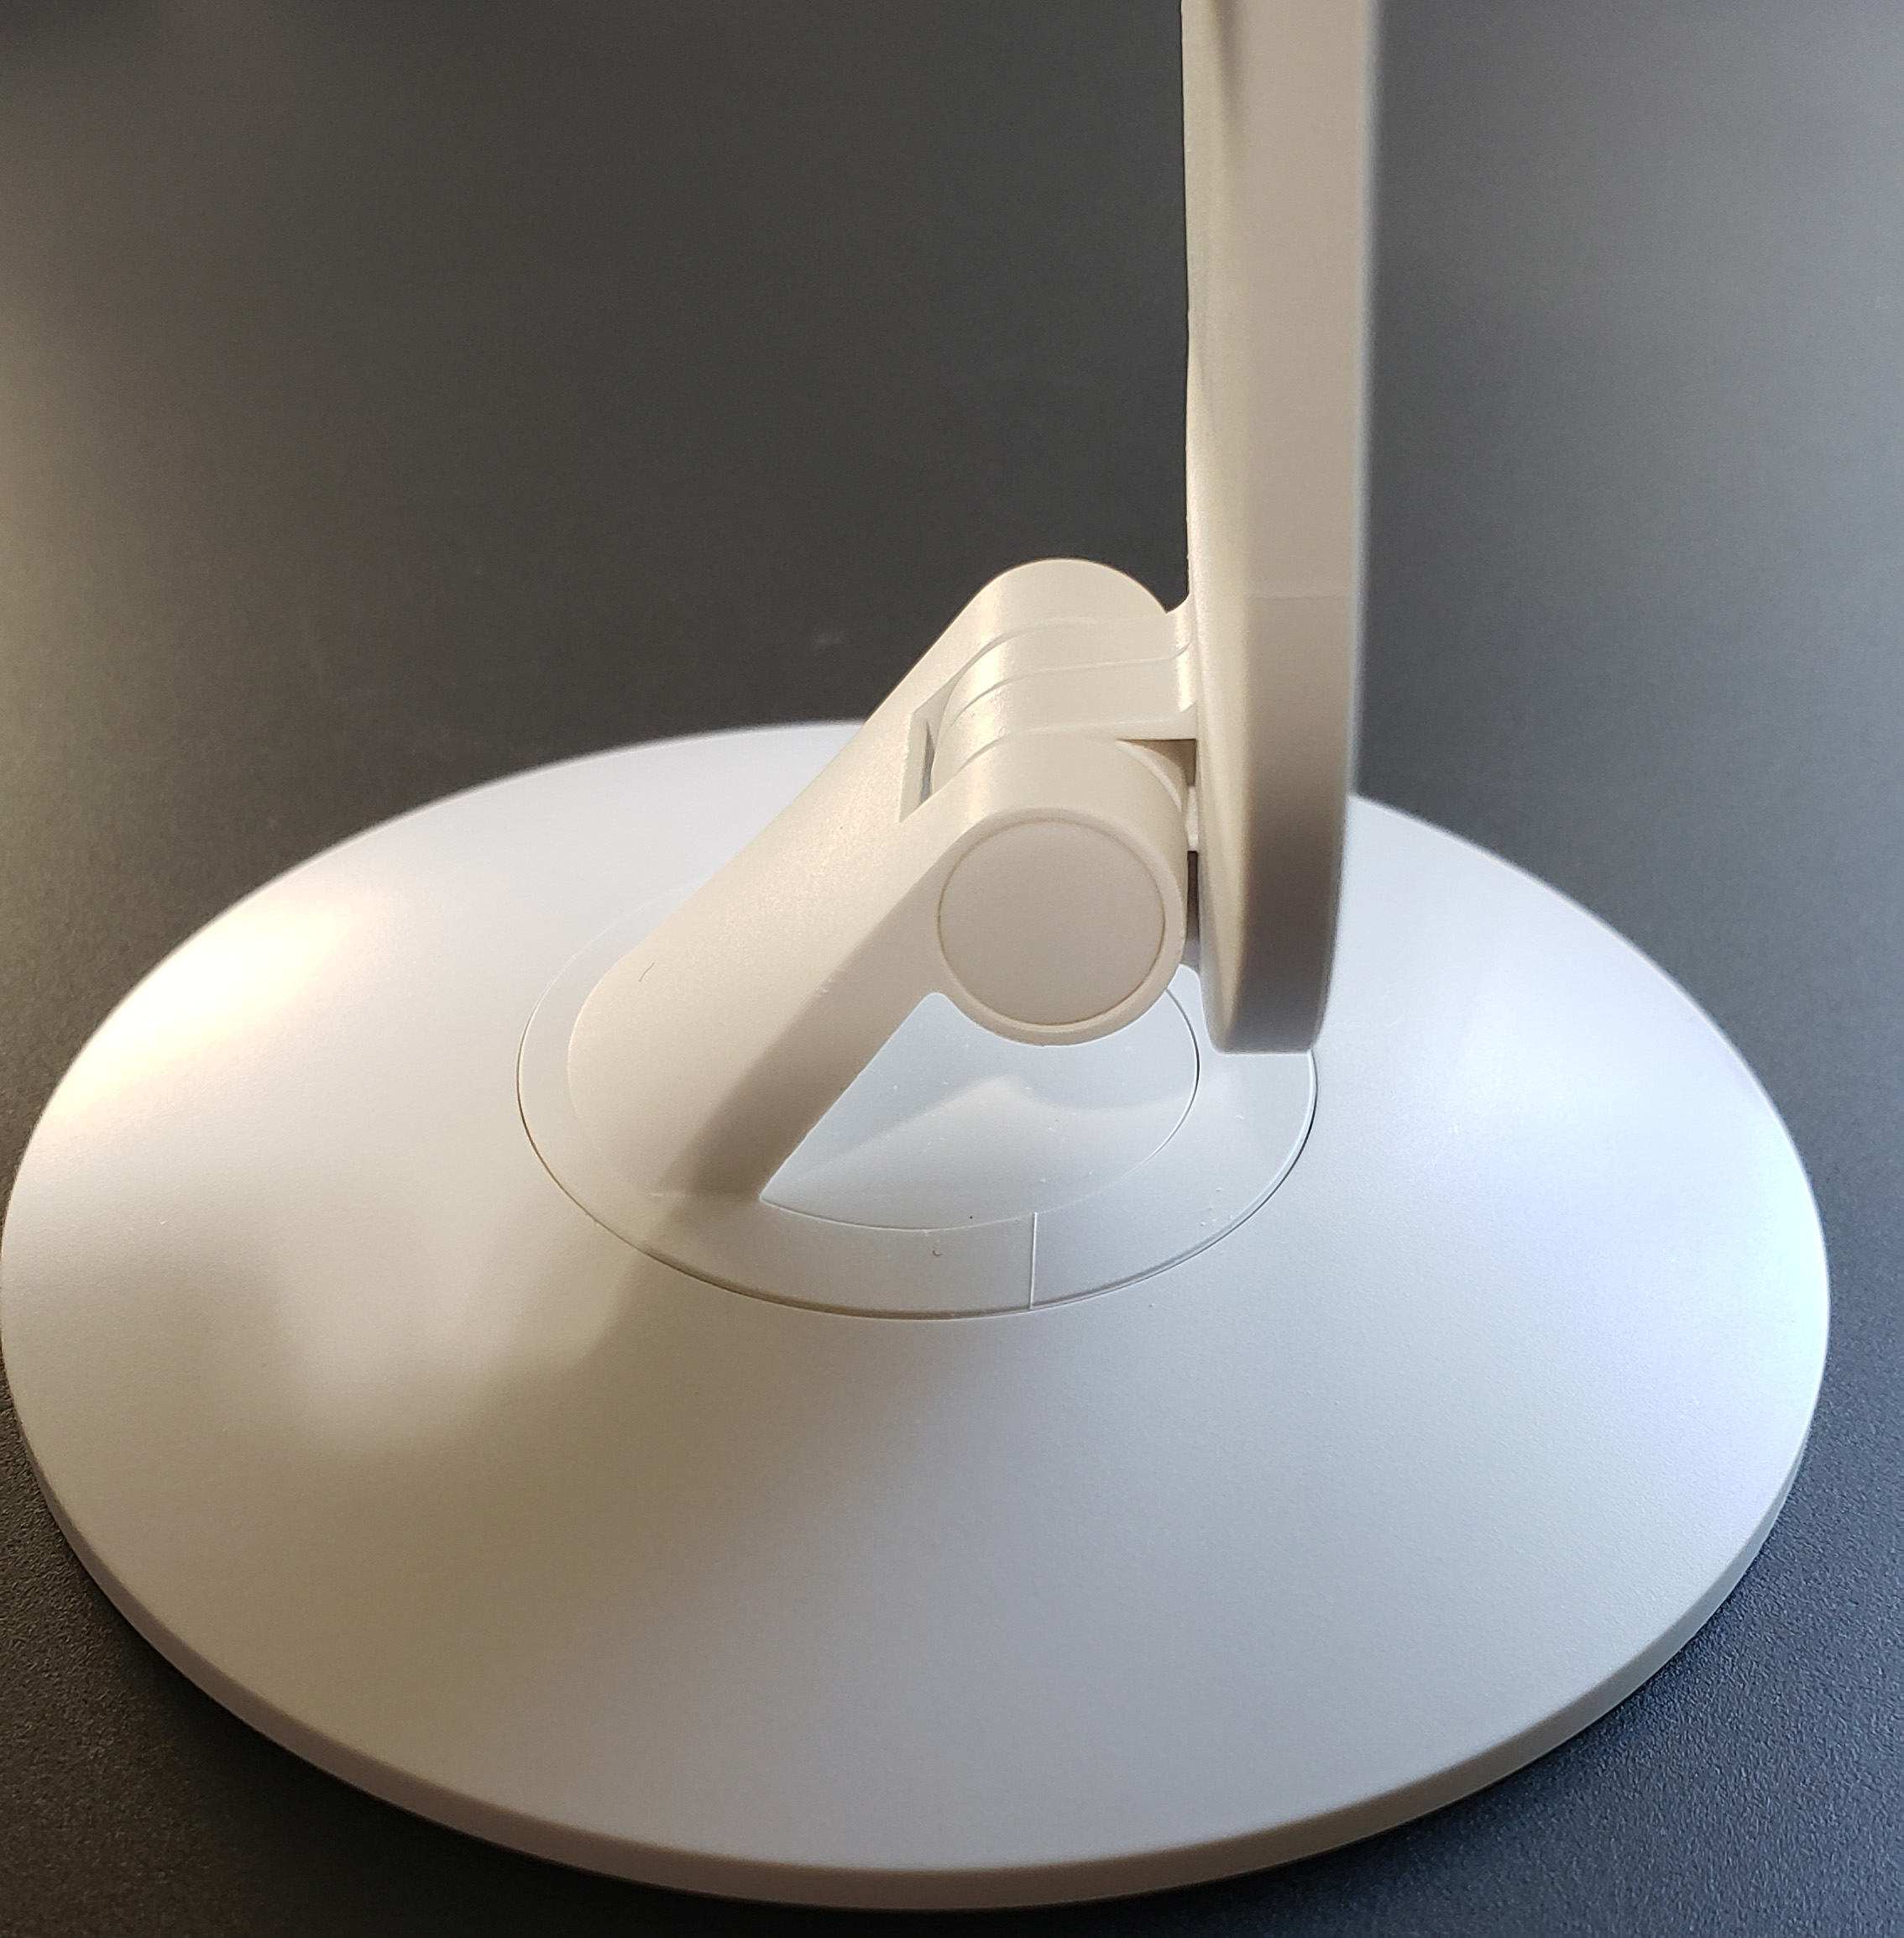
And, that base has a magnet in it, so you can mount it to anything a magnet can stick to.
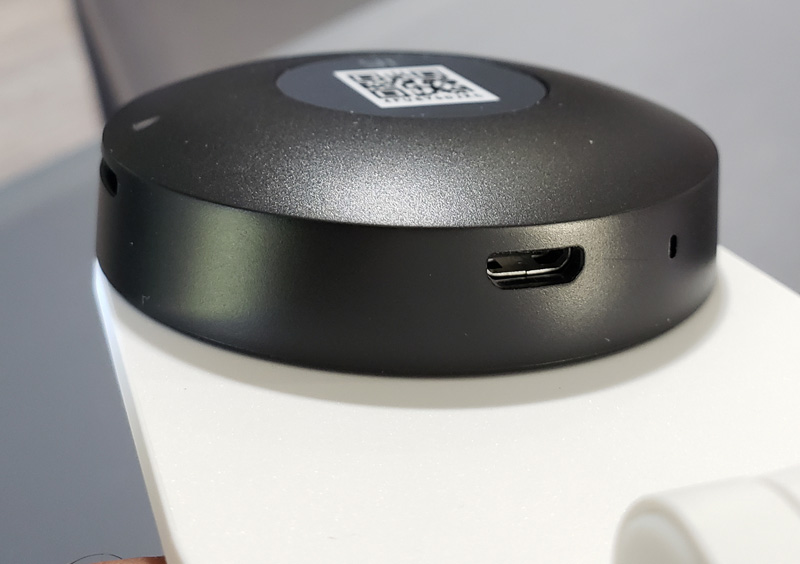
On the side, we find a microSD slot.
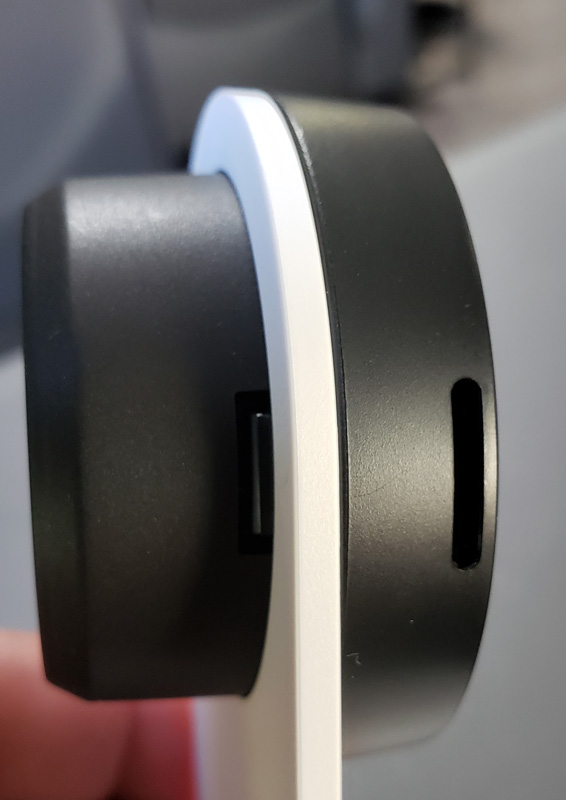
On the bottom of the camera assembly, we find the USB port for power. This is a powered camera, so you will have to be relatively close to a 110V power plug. It is a little snug, getting the power cord into the port, but with a little patience, I got it connected.
Setup
After the unboxing, I installed the Yi Home app on my Galaxy S9+, and set up an account. I inserted my own microSD card into the slot on the camera and plugged in the camera.
The camera surprised me with a series of verbal updates and commands. They were quite clear and made the setup very smooth. I didn’t get everything transcribed exactly, as the audio came as a surprise. I will describe the gist of what the voice prompts conveyed.
As soon as I plugged in the camera, it welcomed me to Yi Home. It then reported that it was waiting to connect. In the app, I chose to add a new camera and provided Wi-Fi connection information. The app presented a QR code and the camera told me to put the QR code in front of the lens. As soon as I did, it reported that the pairing was successful and that I could begin using the camera. I was impressed with how simple the process was, and how well the camera reported progress. Nice work, Yi.
Performance
Initially, I installed the camera in my living room. The 107-degree view allowed me to see from one side of the room all the way to the other. This is a screenshot from my phone.
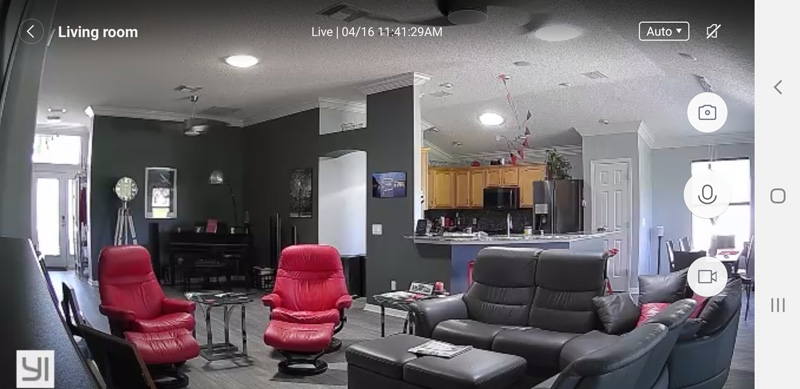
The image quality was pretty impressive with a bright, clear image and accurate colors.
After thinking about it, I decided that I really wanted to be able to monitor my garage, so I relocated the camera to the garage. This is a downloaded snapshot from the camera.
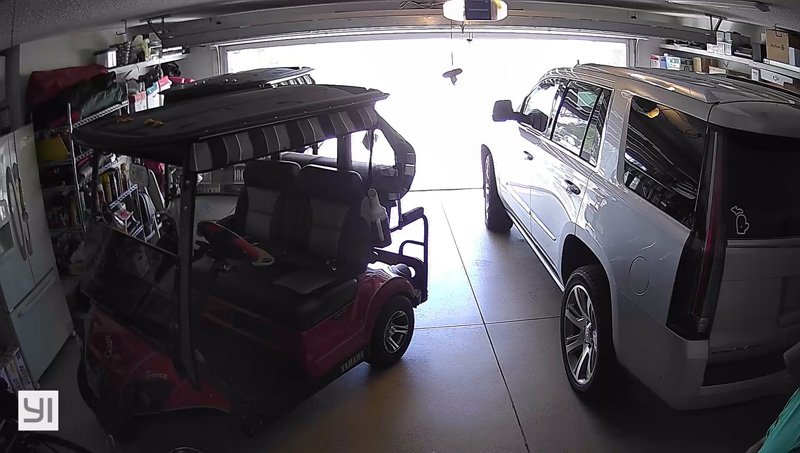
Note that this is really tricky lighting. I have a retractable garage screen, so much of the time, there is strong light coming in, Still, the camera does a good job showing colors and overall detail. That green in the lower right is actually my shirt sleeve.
When you view alerts on your phone, they are segregated by day.

Items that you still need to review are highlighted in orange. You can also live-monitor the camera. When in that mode, you can use the microphone on the camera and on your phone to do full-duplex two-way conversations.
In the app, you can control a wide variety of camera options, like 180-degree image rotation, turning the camera status light on/off, whether to use the IR night vision light, whether you want to use the camera microphone (perhaps as a baby monitor), and if you want the audio to be in push-to-talk mode or full-duplex hands-free. You can also set up camera schedules and whether you want to use cloud storage or just the microSD storage.
Alerts are controlled by another large variety of option settings. You can choose motion, sound or both to trigger the camera. In addition, they have logic included that detects human movement versus other movements. In my testing, lowering my garage door triggered as human movement, so that can certainly be improved. Movement and sound both come with sensitivity adjustments so you can fine-tune the alerts to meet your needs.
Video quality is good, especially given my challenging lighting conditions. Here I am heading out to pickleball in the morning.
Downloading video is a little finicky. The app is pretty specific about where you tap, and trimming the selected video, while available in the app, is pretty hit or miss.
Another issue is that the videos are not accessible in the app unless cloud recording is turned on. Without cloud recording, to view the videos – all mp4 files – you have to pop out the micro SD card, put it in an adapter and pop it in your PC. Then, you have to find the right video. The mp4 files are in a folder called “record” and then subfolders named like <YYYY>Y<MM>M<DD>D<HH>H, so videos from 4/20/2019 at 11am should be named 2019Y04M20D11H, however…they aren’t. Everything was exactly four hours ahead of my local time. I expect that they are labeled for GMT (Greenwich Mean Time), which is four hours ahead of where I am in EDT. My folder for that time was labeled 2019Y04M20D15H. The files themselves are labeled like <mm>M<ss>S<tt>.mp4, where mm is replaced with the minute within the hour, ss is replaced with the seconds within the minute when the video begins and tt is replaced with the duration of the clip. It all sounds complicated, but overall it makes sense. To find a video recorded on 4/21/2019 at 2:33:15 pm that runs 18 seconds, assuming no GMT offset, look in the 2019H04M21D14H folder for 33M15S18.mp4. Just remember to add the GMT offset for your timezone to get to the right folder.
Videos are saved in a rolling fashion, where the oldest recordings are replaced with newer ones as you run out of room on the micro SD card. The number of days you can save will depend on how often the camera triggers based on our settings and the size of the SD card. Mine triggers a lot since motion and sound outside the garage screen trigger it based on my sensitivity settings. With a 16GB card, I get about three days worth of recordings. I should be able to expand that by lowering the sensitivity a bit to eliminate records of essentially nothing.
If you opt for cloud recording, six months of seven-day rolling cloud recording is included. After that, Yi offers six options:
- 7-day rolling, 24-hour continuous for one camera – $19.99/qtr;$66/year
- 7-day rolling, motion detection only for up to five cameras – $19.99/qtr;$66/year
- 15-day rolling, 24-hour continuous for one camera – $9.99/mo;$99/year
- 15-day rolling, motion detection only for up to five cameras – $9.99/mo;$99/year
- 30-day rolling, 24-hour continuous for one camera – $19.99/mo;$199/year
- 30-day rolling, motion detection only for up to five cameras – $14.99/mo;$149/year
One thing that I don’t like is the app’s insatiable demand for power. The first day I installed it, my phone battery was really low in the evening – about 15%. I usually have 30-40% at that point. When I looked at what was sucking battery, Yi Home was right at the top of the list by a long margin. Using the Yi Home app means that I can’t get a full day out of my phone without recharging. I opted to change the app management settings and allow Android to put Yi Home to sleep. That solved the problem, but, I no longer get alerts from the camera until I open the app. That kind of defeats the purpose. Even today, when I have the app mostly sleeping but have opened it to write this, Yi Home has consumed 4.3% of my battery over the past hour or so. Google Play Services is the closest at 1.5%. This is kind of a deal breaker for me.
What I like
- Nice design
- Terrific setup process
- Really good image and video quality
- Comprehensive application with lots of customization
- Free cloud storage, even though for only six months
What needs to be improved
- Yi Home needs to be modified to stop eating my entire battery
- Video download interface needs to be improved
- Human detection needs to be improved
- The timestamp on the mp4 files should match local time
- Videos should be viewable in the app directly from the SD card and not require cloud services
- The instructions should have some explanation about how the SD card and cloud services work – there is absolutely nothing about it
Final thoughts
Overall, the Yi Hime Camera 3 is a nice little camera. It was easy to set up and produces great images and video. But until the app can be modified to stop wiping out my phone battery, I will have to have the app sleep most of the time, eliminating much of the benefit of a monitored camera.
Price: $49.99
Where to buy: Amazon
Source: The sample of this product was provided by Yi Technology.

Gerber Gear Suspension 12-in-1 EDC Multi-Plier Multitool with Pocket Knife, Needle Nose Pliers, Wire Cutters and More, Gifts for Men, Camping and Survival, Grey
(as of July 29, 2026 09:33 GMT -05:00 - More infoProduct prices and availability are accurate as of the date/time indicated and are subject to change. Any price and availability information displayed on [relevant Amazon Site(s), as applicable] at the time of purchase will apply to the purchase of this product.)
Gadgeteer Comment Policy - Please read before commenting
Hi Garry, thank you for that awesome review. Videos from the SD card can be viewed, if you go in the camera live stream and tip on the image once. A timeline will pop up below and red sections indicates recordings that are stored on the SD card. If you play it and tip on the image once more you can hit the record button on the very left and hit it again once you have captured what you want to store on your smartphone. That recorded video of the SD card based stream can be shared or simply kept on the phone.
The time zone of the device can be set according to the time zone of the device. For that you need to go to the “camera settings (Status light, image rotation, firmware, more.)” and choose the “time zone” you wish to use. Default is UTC+8 for the Region North America.
I wonder about the battery usage. I use the app as well and I want to dig in more details for that remark. Can you share some insights I want to understand better what happened.
Pablo:
Just an update that after changing camera settings to low sensitivity and stopping Android from forcing the app to sleep, everything looks good. I get alerts, don’t get many false alarms like before and battery usage is way down.
It is working great.
Garry
Pablo:
Thank you for your kind words and comments.
First, thank you for the tips on accessing the videos on the SD card from the app. I tried that this morning, and it works as you describe. I must have missed that in the documentation as I do not recall anything about that. If I can provide some feedback, to me, it isn’t very intuitive, however, having said that, it does work well. I was able to figure out that pinching or spreading on the timeline compresses or expands the timeline, allowing for fast, or more precise movement along the timeline.
Second, the timezone on my phone app is set to UTC-5 Eastern time, so I don’t have any more input on the time on the recordings. For what it’s worth, I also don’t see a daylight saving time adjustment in the app, so for the moment, when I am in EDT, not EST, even if the time was correctly interpreted based on timezone setting, it would still be off by an hour.
Finally, for several days of usage, the Yi Home app was far and away the highest battery use on my phone, making it so I could not possibly get through a day without recharging. Once I updated Android to put the app to sleep when not active, my battery usage returned to normal. I have my sensitivity set to medium. I am experimenting now with it let to low and I will see if it reduces battery use.
We tried these cameras and love them! We use them everyday! Here’s a great review on them! https://youtu.be/apSFwkTyEsY