REVIEW – We have a Netatmo Presence Outdoor Security Camera and floodlight that has some blind spots that we’d like to fill with another motion detecting camera/floodlight. We wanted the new camera to detect and hopefully scare away any would-be thieves. Then recently, I was offered the Momentum Aria LED Floodlight with WiFi Camera to review. We mounted the Aria on the corner of our house such that the camera diagonally overlooked our driveway, front yard, and the road in front of our house. Did it detect and scare off any would-be intruders? Well, if you consider an intruder a thing on four wheels that drove away on the road in front of our house when the floodlight came on, then yes. But, it had difficulty with detecting people in our yard and driveway. In our attempts to troubleshoot the problems, we now have a camera that doesn’t detect motions anymore. What happened? Well, that’s a good question. Read on, to find out about all our attempts to try to make the Aria work.
What is it?
The Momentum Aria LED Floodlight with WiFi Camera is an outdoor home security device that has motion detecting floodlights and a camera such that when the motion sensor is triggered, it will send you a notification, the camera will automatically record the movement, and the floodlight will turn on. All this is done through rules that you create. Aria connects to your home’s WiFi network so that you can see live video and recordings, speak to the person on the camera via two-way audio, manually record videos and photos, and control the floodlight and siren through the Momentum app.
Hardware specs
Camera: HD Camera with 1080P sensor
Field of View: 140° wide-angle lens
Motion Detection: 270° motion detection
Floodlight / Night Vision: 5,000 Total Lumen LEDs / Infrared LEDs with Automatic Night Vision Mode
Siren: 110-decibel alarm
SD Card Slot: Micro SD slot (up to 128GB SD Card)
Connectivity: 802.11 b/g/n WiFi connection @ 2.4GHz
Audio: Two-way audio with built-in speaker and microphone
Dimensions: Height: 7.13”, Width: 11.40”, Thickness: 7.13”
Weight: 78.40 oz (4.9 lbs.)
Power: 100-240V
Warranty: 1-Year Limited Warranty
What’s in the box?
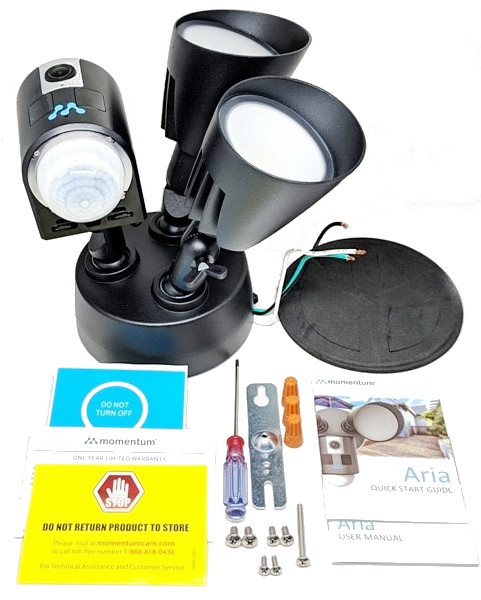 Momentum Aria Floodlight Camera (with mounting base)
Weatherproof Gasket
Screwdriver
Mounting Bracket
Wire Nuts (3)
#8 Long Bracket Screw (1)
#10, #8, #6 Short Bracket Screws (2 each)
Aria Quick Start Guide
Aria User Manual
Design and features
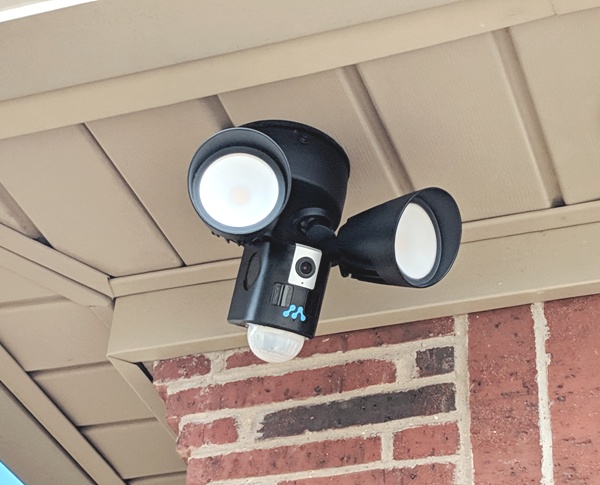
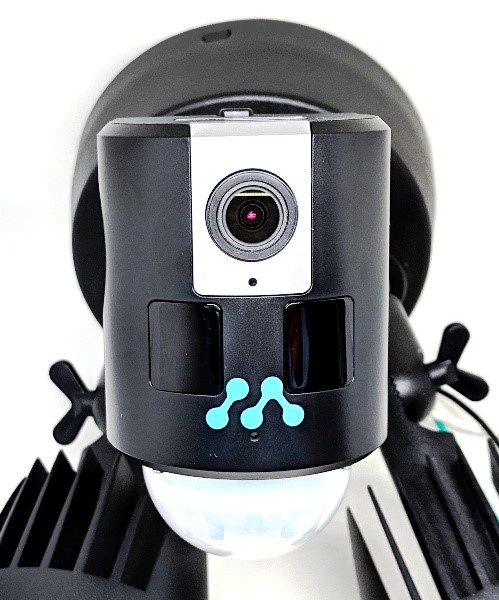 The above photo shows the camera of the Momentum Aria LED Floodlight with WiFi Camera. The body of the 1080p camera is made of matte black plastic. Just below the 140-degree wide-angle camera lens is an LED status light. Here is the list of status lights and what they mean:
- Solid Red Light: Aria is booting up.
- Slow Blinking Red Light: Disconnected from Wi-Fi.
- Double Blinking Blue Light: Ready to connect to Wi-Fi.
- Blinking Blue Light: Aria is connected to Wi-Fi.
- Solid Blue Light: User is currently live streaming.
Below the LED status light are two rectangular IR LEDs and right under the Momentum (“M”) logo is the tiny microphone. The white plastic dome beneath the camera contains the PIR (Pyroelectric or “Passive” InfraRed) sensor which is used to detect 270 degrees of motion. 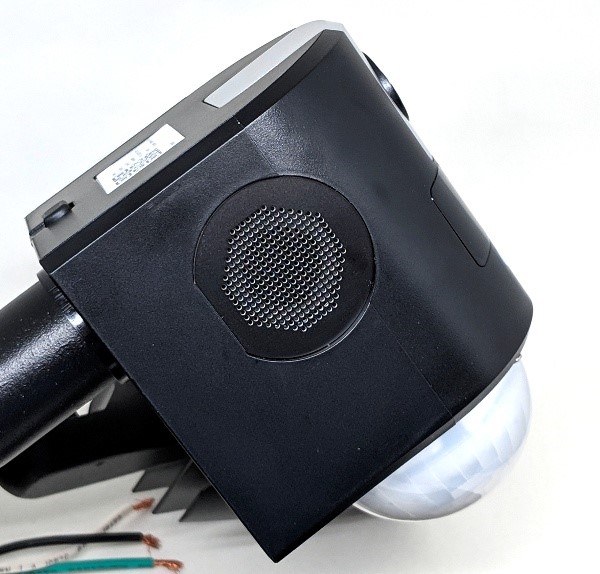 One side of the camera has a speaker.
 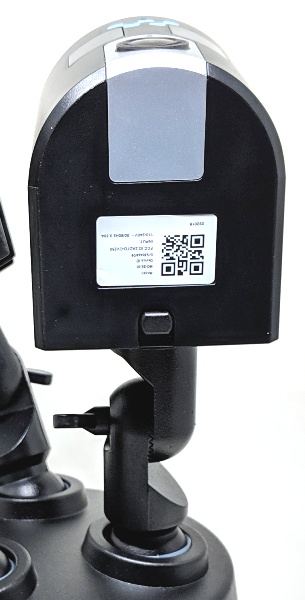 The underside of the camera has the QR code for the Aria and a button that releases the bottom cover of the camera. Also, notice that this version of the Aria is a soffit mount version. The metal arms that hold the camera and floodlights have ball joints (common to both the soffit and wall mount versions), but the soffit mounted version has another adjustable joint with a wingnut on each arm that allows the angle of the camera and floodlights to be oriented as required to allow the Aria to be mounted horizontally on your house.
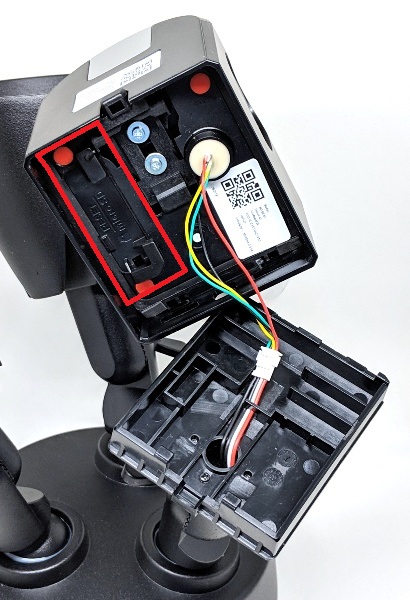 Removing the bottom cover of the camera gives you access to the micro SD card and the Reset button which is hidden beneath a small cover as shown in the red box in the photo above. Note: This configuration is different for the wall mounted version.
 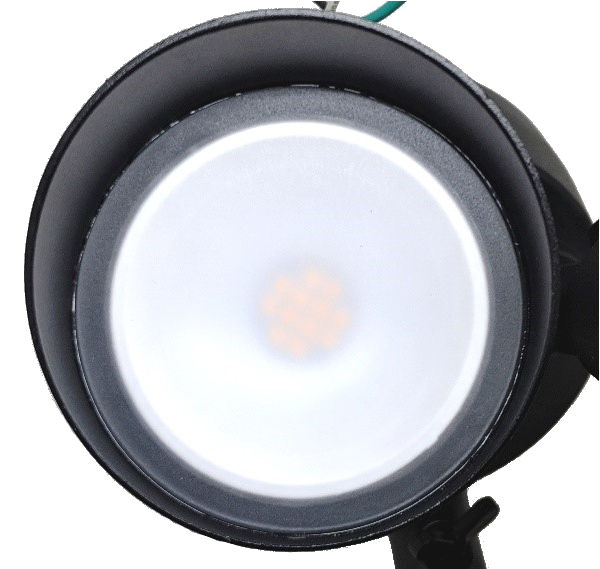 The Aria has two LED floodlights. The housing for the floodlights is made out of metal.
 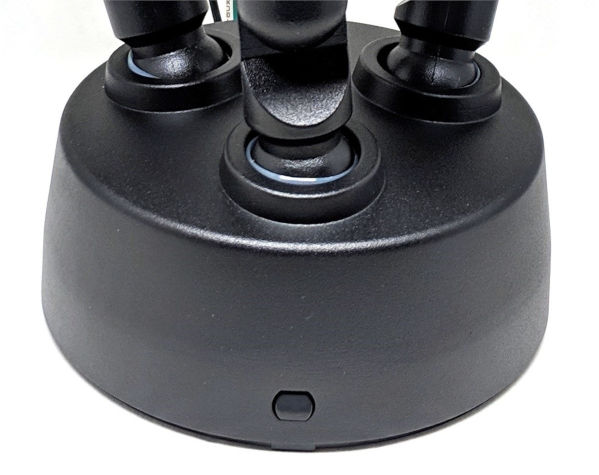 The base of the Aria is also made of metal. In this view of the Aria, you can see the mounting base release button.
 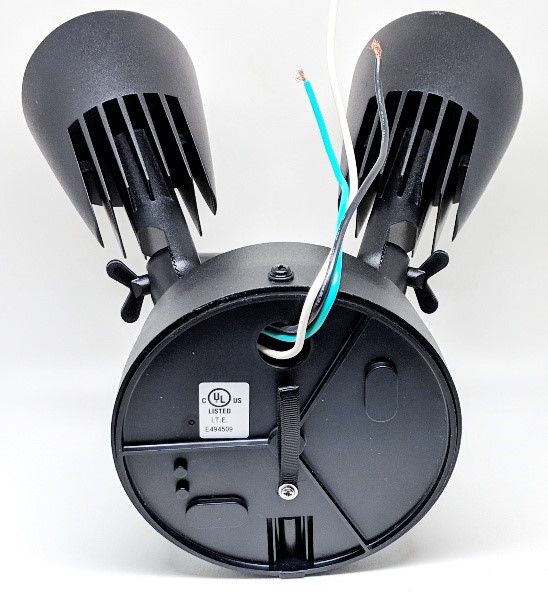 This view of the Aria reveals the wiring for the device and the mounting-base screw that holds the base of the Aria to its mounting base (the mounting base is plastic).
Setup
The installer of my Gadgeteer devices that require electrical wiring work is my engineer husband, Rob. So I’ll let him tell you about the installation of the Aria. His writing is in blue.
Installation of the Aria is pretty straightforward and should be able to be completed in less than an hour, assuming you already have a flood light installed. The version of the Aria we have is designed to be mounted in a horizontally oriented box installed in the soffit of your home. Note that the Aria also comes in a configuration that would be mounted to a vertically oriented box installed in the exterior wall of your home, and the installation steps would be essentially identical.
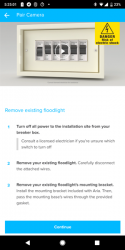
The first step is to remove the existing floodlight. This would involve turning off the power to the circuit (at the breaker box) and physically removing and disconnecting the floodlight. In our case, we did not have an existing floodlight so we installed a new circuit and electrical box in the soffit for this purpose. I would recommend hiring an electrician to do this. Installing a soffit electrical box is significantly easier than installing a new vertically oriented box in an exterior wall (especially if your exterior wall is brick, like ours). This is the advantage of the Aria’s horizontal mount configuration. 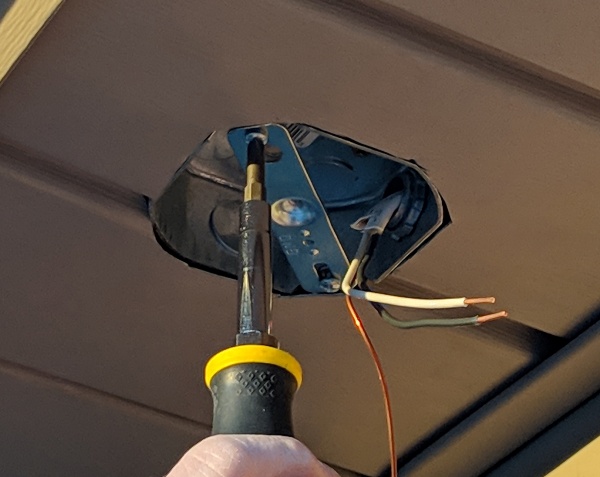 Once the electrical box is accessible, the first step is to attach the mounting bracket to the box. The Aria includes this bracket and several different size mounting screws to accommodate various box types. Note that the box will be carrying the weight of the Aria (which is almost 5 lbs and heavier than most typical floodlights), so it is important that it be robust enough to carry the weight and that the box is appropriately attached. A metal box is preferred in this application. NOTE: If you install a metal box, the box itself must be properly grounded. More on that later.
 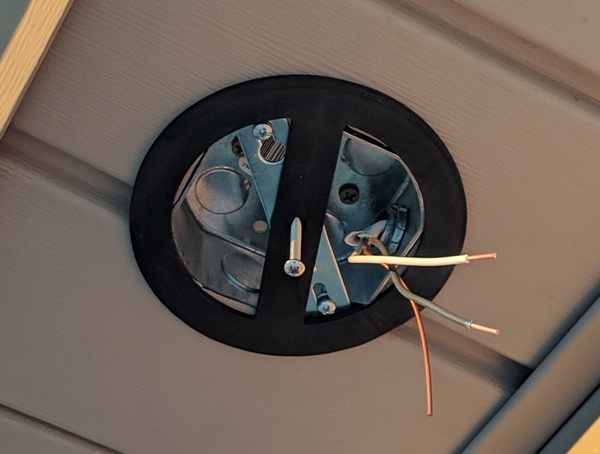 The next step is to install the gasket, which has an adhesive side to provide a seal to the surface around the electrical box. Proper installation of the gasket is vital since this is what keeps water from getting inside the Aria. It should be positioned such that it is centered over the box. I used the mounting screw to ensure it was properly centered, removed the adhesive backing, and pressed it into position. Also note that I rotated the gasket slightly to keep it from covering the bracket mounting screws (although that was probably not necessary), and also to ensure the largest possible opening for the wires.
In the soffit installation shown above, since the soffit siding panels contain large grooves, it will be necessary to seal the opening at the groove under the gasket to ensure a watertight installation. Some exterior-rated silicone is ideal for this purpose.
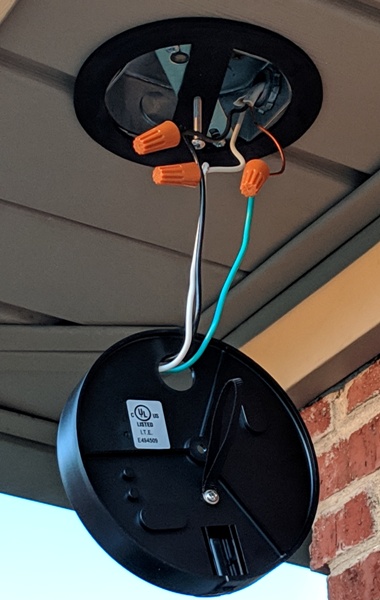 Next, it is time to connect the wires from the mounting base. It will be necessary to remove the mounting base from the Aria assembly (it comes installed) which involves removing a small mounting base screw from one side and pushing a release button on the other side. The mounting base was difficult to remove and it seems to have been sealed at one location with some silicone. Also, there’s an O-ring inside the base of the Aria that fits against the plastic mounting base (that keeps water from getting in between the mounting base and base of the Aria), and this O-ring popped out when I removed the mounting base. I used a small screwdriver and was able to get it reseated.
Once the mounting base is removed, it can be installed, but before doing this it is important to determine the orientation of the Aria (meaning the direction the camera and lights will face and the location of the camera with respect to the floodlights). The orientation of the mounting base determines the orientation of the camera. It is important to do this now because that will determine which side of the bracket you attach the wires. For the wall-mounted configuration, the orientation will be obvious; the two lights will be above the camera and rotating the entire assembly will likely not be necessary.
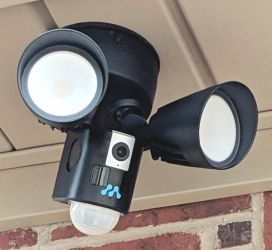
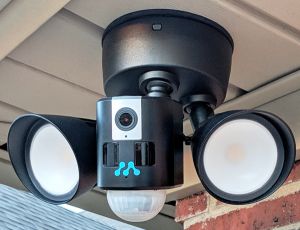
However, for the soffit mounted configuration, the direction the camera will need to face could vary, and you could install it with the camera either in the back (as shown in the first photo above) or with the camera in front (as shown in the second photo above). Unfortunately, we can’t say for sure which orientation is better …. we’ve had troubles getting this to work in both positions.
 Note that the base has a hole where the wires are connected to a terminal strip that the light fixture itself “plugs” into. Where this hole ends up will determine where the wires need to be. After you make the wiring connections and install the base, you can rotate it a few degrees for final positioning, but you won’t be able to rotate it 180 degrees if you decide to switch the orientation. Rotating 180 degrees will require rewiring the Aria. The excess wire leads must be coiled up inside the electrical box.
In our case, we had so much difficulty getting the camera to work that I ended up removing and re-installing the camera numerous times trying different mounting orientations. I had to disconnect the electrical connections each time and move the wires from one side of the mounting bracket to the other.
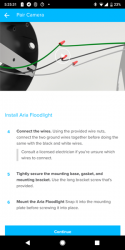
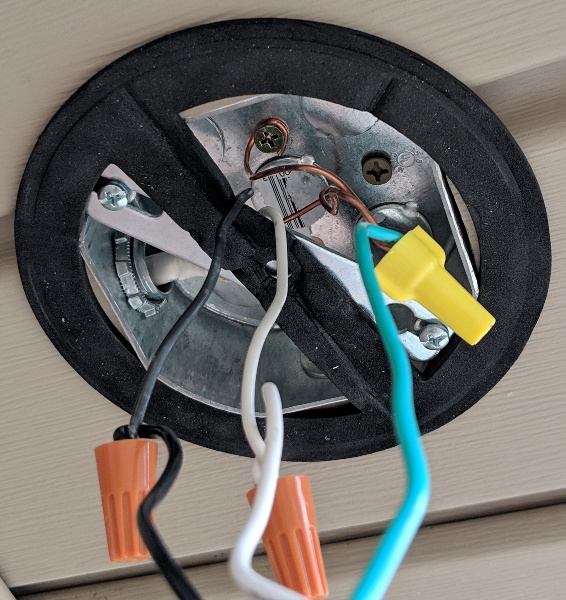 IMPORTANT NOTE ABOUT GROUNDING THE ELECTRICAL BOX: Note that the installation instructions that come with the Aria only show the three wires attached to each other (black is hot, white is neutral, and green/copper is the ground). However, when using a metal electrical box, the code requires the ground wire to also be directly attached to the box (thus grounding the box). This was done by connecting a third short length of copper wire (of equivalent gauge; #14 AWG in our case) to the other two ground wires (using a wire nut that is larger than the ones provided) and securing this third wire to the box with a screw as shown in the photo above. If you have an existing floodlight with a metal box, it should already be grounded, and if it isn’t, you should contact an electrician to do this and to check the circuit. If the electrical box is plastic, it is not necessary to ground the box. In our case, since we installed a new metal box, we had to install the ground.
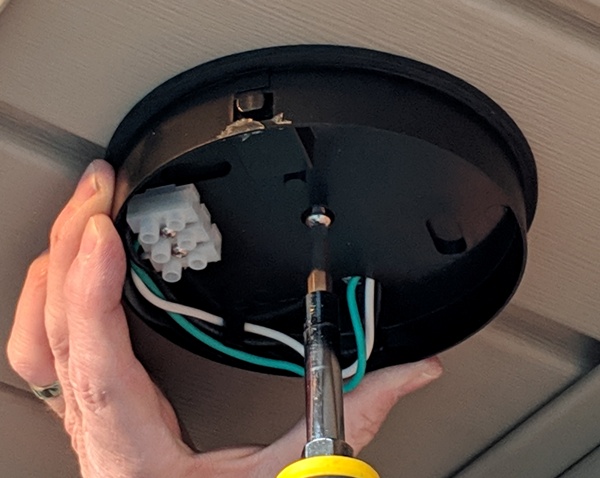 Now the Aria mounting base can be installed, taking care to be sure it is oriented in the correct direction and sealed against the gasket. It is held in place with a single mounting screw that is provided and attaches to the center of the mounting bracket.
 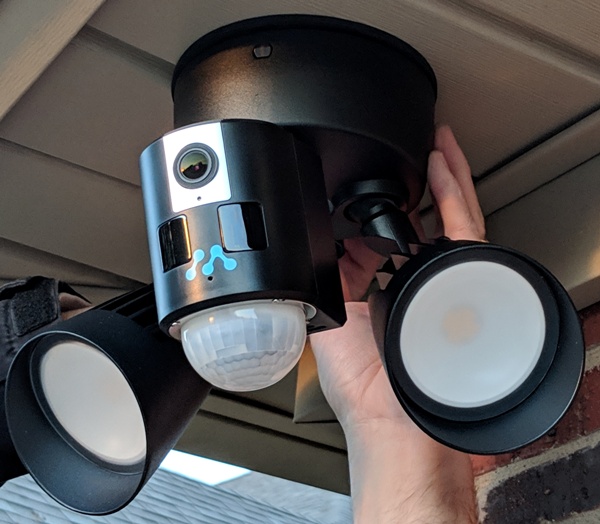 Now you are ready to attach the Aria to the mounting base. This is the reverse of the removal steps; it clicks into place on one side and the mounting base screw is installed on the opposite side.
We later adjusted the camera and floodlights so that the floodlights weren’t obstructing the PIR motion sensor in an effort to improve people detection.
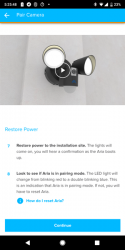
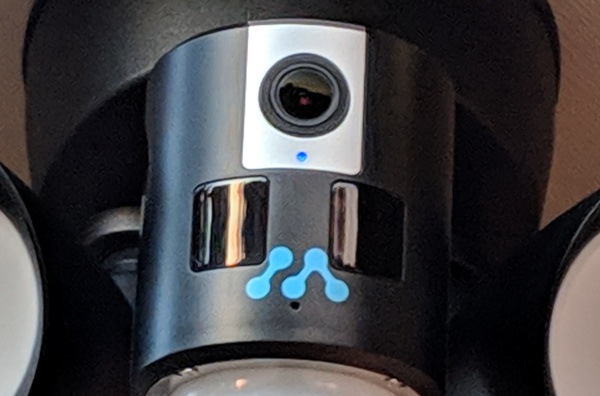 Once the Aria was powered on, the LED status light was initially a solid red light indicating that the Aria was booting up. It then started to double blink blue indicating that it was ready to pair.
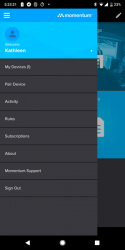
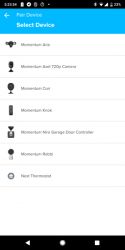
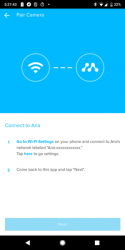
At this point, you’ll install the Momentum app and set up an account. Because I reviewed the Momentum Niro Garage Door Controller and Camera earlier this year, I already had the app installed and an account set up. After that, with the app open, I tapped on the menu icon located in the upper left corner of the app Dashboard, tapped on “Pair device”, selected “Aria” from the list, then followed the prompts from the app.
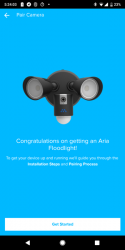
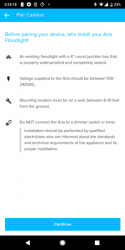
The prompts take you step-by-step through the physical installation of the Aria that we already described above.
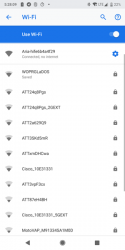
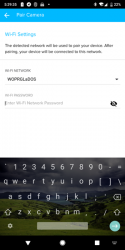
After the installation steps, the app prompted me to connect to the Aria so that it could detect my network and I could log into it. When my network was discovered, I entered my password. After which, the Aria should have been connected to our home WiFi network. I had difficulty with this last step.
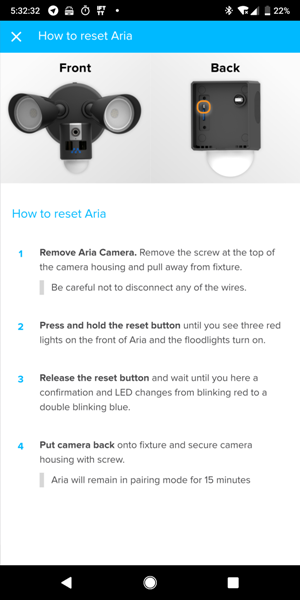 After several resets (the reset process is shown in the screenshot above) and cycling the power to the Aria, I discovered that the problem was that I needed to have a dedicated 2.4 GHz network for Aria to log into. I have a dual band router in which I used the same Service Set Identifier (SSID – which is the technical term for the network’s name) and password for both bands. I REALLY didn’t want to create a different name and password for one of my bands to separate them. I have about 40 devices logged into that single SSID. I really didn’t want to have to log 20 of my devices into a new SSID with a new password, all because of just ONE device (about half of my devices use the 2.4 GHz band and the other half use the 5 GHz band). I have several other 2.4 GHz devices that have successfully logged onto my single SSID dual-band WiFi network without issues.
So, instead, I set up a 2.4 GHz guest network on my router just to test if this was the issue. Indeed, the Aria does need a dedicated 2.4 GHz band network to log into. So for now, the Aria will stay there all by itself on my guest network because it wouldn’t play nice. It’s interesting because I have the Momentum Niro Garage Door Controller and Camera which has the ability to use either 2.4 GHz or 5 GHz which made installing the Niro a breeze, but for some reason, they did not give this capability to the Aria.
Performance
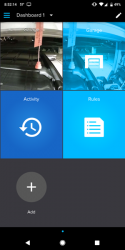
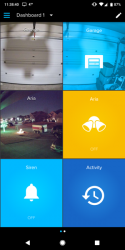
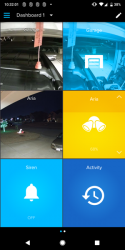
Once the Aria was logged into my guest network, I needed to add it to my Dashboard. I did this by tapping on the “+” or “Add” tile (left screenshot above) which gave me the list of new devices to add. The Aria has a camera, floodlight (floodlight icon), and siren tile (bell icon) that I added to the Dashboard. You can rearrange your dashboard by tapping on the pencil icon located in the upper right corner of the Dashboard and then save it when you are satisfied.
At this point, I want to provide a brief explanation of things that were happening as I used the Aria. I will go into a little more detail about them later after I have described to you the app settings for the Aria and the app features and how they work (which will make the detailed explanation more understandable). We used the Aria for a little while to see how it handled motion events. Initially, we found that it didn’t work at all. We tried adjusting the camera, the settings, etc. but nothing seemed to work, so we ended up rotating the whole Aria assembly to see if that would help (this required doing the wiring again). It definitely seemed to help because we started to get all kinds of notifications for all the cars driving by our house but very few, if any, of the people in our driveway or yard. At this point, I started writing the review but continued to troubleshoot the motion event problems.
Creating and using rules
In order for the Aria to give you notifications that a motion was detected and automatically record that motion event, you MUST create a rule. But before you create a rule, you must first sync the Aria to your phone’s time (which will be discussed in the next section). To create a rule, you tap on the Rule tile (you can also get to Rules from the Menu).
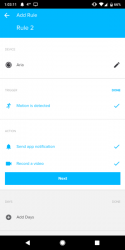
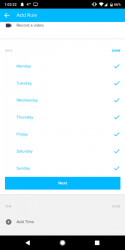
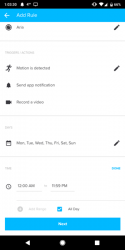
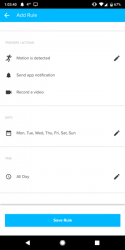
To add a new rule, you’ll need to tap on the “+” icon in the upper right corner of the Rules screen. Tap on the device you want to work with (the Aria with a black dot next to it), select the triggers (actually, the triggers are already selected and cannot be unselected), select the days you want the rule to run, select the time during a day you want the rule to run, and then save the rule. Now when your Aria detects motion, it will record a video on all the days you selected during the times you selected and furnish you with notifications of each motion event.
Aria settings
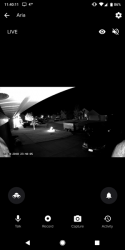
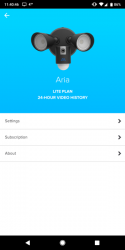
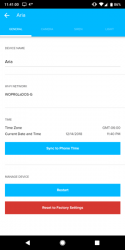
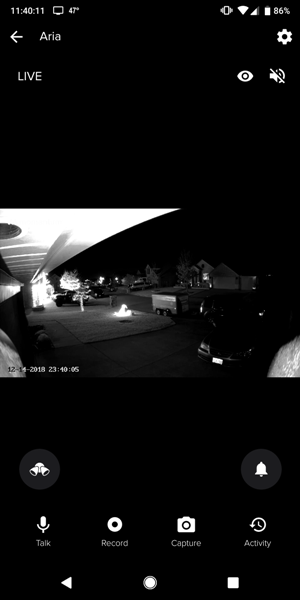
When you tap on the Aria camera tile on the app dashboard, it brings up the live video. You can get to the Aria settings by tapping on the gear icon located in the upper right corner of the live video screen (shown in the first screenshot above). From the settings, you have four tabs at the top: General, Camera, Siren, and Light as shown in the last screenshot above.
General settings: In the General settings, you can change the device name, see the network that the Aria is logged into, sync the Aria to your phone’s time, restart the device, or perform a factory reset of the Aria.
IMPORTANT NOTE: Apparently, you MUST tap on “Sync to Phone Time” before you create a rule for the Aria camera in order to get a more accurate Activities list (list of motions events, manual recordings, and manual capture of photos). If you do not sync to your phone’s time before you create a rule, the Activites list will only show some of the activities.
Although this improved the list of motions detected, I know for a fact that while my husband was working in the driveway, it was not detecting and recording his motions. I received a gazillion motion notifications for cars but only a couple for my husband who was working in the driveway and our yard. That’s absolutely ridiculous. I want my Aria, which is a security device, to be able to tell me when it detects people on my property.
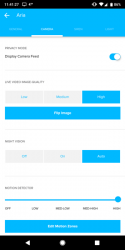
Camera settings: The Camera settings tab allows you to adjust the settings on whether or not to display the camera feed, set the image quality (low, medium, or high), flip the image (upside down), set night vision to “On”, “Off”, or “Auto”, change the sensitivity of the motion detector (off, low, med-low, med-high, or high), edit motion zones, and view the micro SD card backup or format the micro SD card.
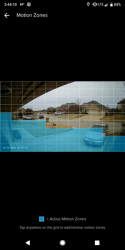
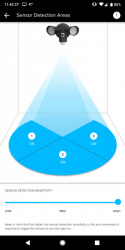
The right screenshot above shows the motion zones that I set. The areas in blue are the actively monitored zones. Notice that the road in front of my house was not in an active zone because I didn’t want notifications of the cars driving by my house.
Now, notice how the Aria completely ignored my motion zones settings and recorded this car driving by during the day…
…and another car at night. These are just two of the many, many recordings that I have. I have so many that I don’t even want to count them. I even had the motion sensitivity set on its lowest setting when these videos were recorded.
The video quality of the recordings during the day and night are wonderful. I just don’t want to receive notifications and recordings of every car that drives by my house. What I really want are motion notifications when people enter my yard or driveway, which I was not receiving.
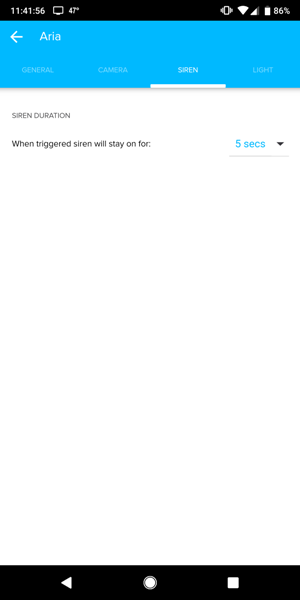 Siren settings: You can set the siren to go off for particular durations: 5 seconds, 10 seconds, 15 seconds, 30 seconds, 1 minute, 2 minutes, or 5 minutes. I set mine for 5 seconds.
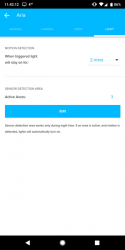
Floodlight settings: You can set the duration that the floodlight will stay on when motion is detected and you can select the floodlight active areas as shown in the last screenshot above. I set the floodlight to stay on for 2 minutes when motion is detected and for it to detect all sensor detection areas (1, 2, and 3 shown in the right screenshot above) using the highest motion sensor detection sensitivity.
Aria camera tile
When you tap on the Aria camera tile, it brings up the live video stream which may be accessed from anywhere. I noticed that the live video was a little choppy probably because of a weaker internet connection. The Aria is one of our devices that is furthest away from our router (which is why the Aria needs the 2.4 GHz band because it has the furthest reach of the two bands).
Eye icon: In the upper right corner of the live video screen below the gear icon, there is an eye icon. Tapping on this turns off the camera for privacy. This worked well.
Speaker icon: Also in the upper right corner is a speaker icon. Tapping on this allows you to hear the sounds being picked up by the camera’s microphone. This worked well.
Floodlight button: At the bottom of the live video screen, you’ll see six buttons: the floodlight (floodlight icon), siren (bell icon), talk (microphone icon), recording (recording icon), photo capture (camera icon), and activities (circular arrow/clock icon) buttons. The first one is the floodlight button. You can tap on it to manually to turn on the floodlight then tap on it again to turn it off. This worked well.
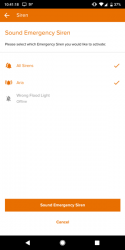
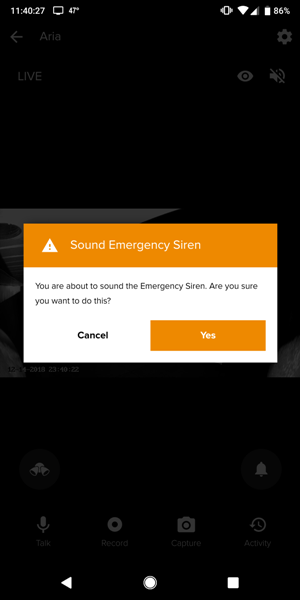 Siren button: You can tap on the siren button (bell icon) to sound off the siren which brings up an alert asking you if you are sure you want to sound the Emergency Siren (shown in the screenshot above). You may tap on “Yes” or “Cancel”. To turn off the siren all you need to do is tap on the siren button again (bell icon). Thankfully, the siren is not as loud as I thought it would be. I don’t think it is enough to bother the neighbors but it is enough to startle and scare away intruders. This worked well.
Talk button: You may tap on the Talk button to talk to the person that you see on the camera, but you must tap it again to listen to them. When you use this button, there is a delay, so you must tell the person to wait for a couple of seconds or so in order to provide enough time for the microphone to turn off to hear what they have to say. I could hear the person on the camera’s live view, but the audio was a little choppy (maybe due to weaker internet connection?). And the person in front of the camera stated that I could be heard but that there were some static sounds in the background.
Record button: Next is the Record button. By tapping on this button, you can manually record the live video, but you are given only 20 seconds of time before the recording ends automatically. Otherwise, this seemed to work well.
Camera button: By tapping on the Camera button you can capture a photo of the live video. This too seemed to work well.
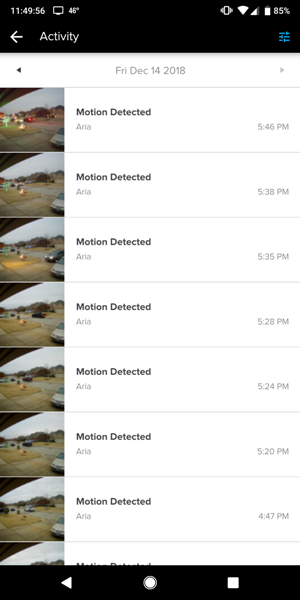 Activities button: And last, to view all of the Aria’s activities (recordings and photos), you can tap on the Activities button on the live video screen or the Activities tile on the Dashboard.
Floodlight tile
When you tap on the Floodlight tile from the Dashboard of the Momentum app, it turns on the floodlight. It also allows you to adjust the intensity of the light. Observe how the floodlight tile in the right screenshot above is split into two shades of yellow. You can adjust the intensity by sliding the line dividing the shades of yellow up or down, or you can tap on the up or down arrows located in the upper right corner and lower right corner of the tile. To turn off the floodlight, just tap on the tile again. When I was testing this feature, I noticed that there was a delay of about two seconds before the floodlight responded to my adjustments.
Siren tile
When you tap on the Siren tile (bell icon), it brings up a screen that has selected “All sirens” and “Aria”. There really is no selection here. If you try to unselect one, it unselects the other. So when the sirens are selected, by tapping on “Continue” the siren will sound until you tap on the Dashboard’s Siren tile again. There’s a split second delay when tapping on the tile again to turn off the siren, but otherwise, it seemed very responsive.
Aria impressions
Initially, when we installed the Aria, it wouldn’t even detect cars when it was set at the highest motion detection sensitivity and all of the motion zones were active. We then rotated the whole Aria assembly 180 degrees to see if that was the problem (this process required us to do the wiring again). The Aria then seemed to work, but only for detecting every single car that drove by. It wasn’t detecting people. In addition, the automatic motion event recordings were not always backed up on the micro SD card that we’ve inserted in the camera. Even though we have the Lite subscription service which will store 24 hours of video for free, I like having the recordings backed up on the micro SD card so that if I want to, I can view the video later. I wrote the review at this point but continued to try to troubleshoot the device to try to get it to detect people.
In my troubleshooting process, I adjusted several app settings like the motion zones and motion detection sensitivity, I adjusted the floodlights and camera up and down and all around, I cycled the power to the Aria, I reset the device and performed the whole app setup again, I deleted the app cache and user data, all without success. Thus, we decided to try to rotate the whole Aria assembly 180 degrees again. This resulted in the Aria not working at all, even though we tried everything again. So we rotated the whole setup 180 degrees again. Nothing worked. No motions were detected unless you were essentially right in front of the camera. So our Aria no longer detects motions in any physical setup or in any app setup. The only thing we can do now is observe the live video, manually take photos and recordings of the live video, and turn on the floodlight and siren. I’m thinking we might have a dud which might not be a true representation of the working product.
What I like
- Live video can be accessed from anywhere
- The quality of the video recordings during the day and night is excellent
- It’s a soffit mounted floodlight (Aria has a wall-mounted floodlight as well so be careful to select the one you need when you are ordering)
What needs to be improved
- Make it compatible with both 2.4 GHz and 5 GHz bands
- Make the soffit mount Aria sensitive to motions no matter what its orientation is when installed
- Make the arm of the camera longer so that the floodlights do not impede the camera’s view or the PIR sensor
- Implement artificial intelligence (AI) to tell the difference between people, animals, and cars
- Back up all activities on the micro SD card (some activities were missing on the SD card)
Final thoughts
Initially, when we installed the Momentum Aria LED Floodlight with WiFi Camera, I struggled to get it connected to my network because I use one SSID and password for my dual band router. The Aria needs a dedicated 2.4 GHz band network to log into so I created a 2.4 GHz guest network for it to log into. And once it was set up in the Momentum app, it wouldn’t even detect cars until we rotated the entire Aria assembly 180 degrees (this process required us to do the whole physical set up again, wiring and all).
The Aria then detected all the cars that drove by no matter what the motion sensitivity settings were or how we set up the motion zones. It detected cars driving by but did not detect people. I really wish Momentum would implement AI to help tell the difference among people, animals, and cars so that I can eliminate useless notifications. In addition to the aforementioned problems, not all of the motion event recordings were backed up on the micro SD card that we’ve inserted in the camera.
This was the best we could ever get the Aria to work. We kept trying all kinds of things like rotating the Aria assembly again and again but without success and now the Aria no longer detects motions unless you are almost right in front of the camera. It will still allow you to view the live video (which looks great) and record and capture photos of the live video. At this point, I think that we have a dud that needs to be replaced. Thus our experience may not be representative of a working product.
NOTE: The Aria comes in two configurations: the wall mount version and the soffit mount version. We used the soffit mount version in this review. In this configuration, the camera and floodlights are mounted on adjustable joints with wingnuts in order to adapt the Aria to the horizontal soffit mount position.
Price: $154.98 – $179.00
Where to buy: Amazon, Home Depot, or Momentum
Source: The sample of this product was provided by Momentum.




Gadgeteer Comment Policy - Please read before commenting
Hi there,
I was really looking for a detailed step by step guide to do this because I was really confused about doing this.
Thanks a lot, buddy.
Keep posting good stuff. Cheers.
Electrical Design – I’m glad to hear that the review helped! And thanks for the encouragement!
I have the Momentum Aria floodlight camera, why the lights would not go off because i want to make it on when only someone passes by? Thank you!
Daniel – Unfortunately, I no longer use the Momentum Aria. Momentum customer support may be able to answer your question:
https://support.momentumcam.com/aria-product-support/
Good luck!
Thanks for taking the time to install and review. Looks like they have some work to do on motion detection.
Our Ring doorbell can’t tell the difference between trucks and people, but at least the distance setting works well enough to compensate.
John Kes – Indeed, the motion detection needs work. Strangely, over the last few days, the motion detection seems to be working better for me; but with all of my other results that I mentioned in the review, I’m not quite sure what to make of it…
Thanks for your work. I’m still trying to get it to connect to it’s own wifi. Not happy at all. Like plug an play. Definitely not with this. I purchased 2. Will be returning at least 1 maybe both.
Ernie – Yeah, the Aria was absolutely no fun trying to get it to work. Connecting to WiFi was especially irritating. Mine still resides on our guest network (2.4 GHz).
Interestingly, the Aria slowly started working after a week or two from the date of the published review. I didn’t do a thing to it after the review – it just slowly started working. I don’t know it it was a firmware update or what. Anyway, I’m not touching it for fear of messing things up again.
If I had the problems you’re having, I would return the product and try something else.
If you should find something else that works well, leave a comment. I’d be interested to know!
Hi Kathleen,
We bought three of the Aria’s off Amazon and realized after we’d gotten them that they were all wall mount, not under eave/soffit mounts like the one you reviewed. I went hunting and the only ones I could find were the wall mounted ones. I even went to Momentumcam.com website, and they only have the wall mount on their product list. I tried calling them, but their tech support persons English wasn’t too good, they didn’t understand what I was asking for… Where did you get yours? Do you know if it’s still available as an under eave mounted unit?
Thanks
Jim Dolan – Momentum initially sent me a wall-mounted unit. I was not overly excited about creating a hole in the brick of our home to test it, so I was told that they were working on a soffit-mounted version and would send me one when that was ready. They later sent me a soffit-mounted version to review.
It LOOKS like this is the soffit-mounted version in following Amazon link because the floodlights are jointed in the product photos (though it makes no mention about being soffit mounted in the product description):
https://www.amazon.com/Momentum-Floodlight-Wi-Fi-Camera-Storage/dp/B07KQN8H31/ref=sr_1_3?keywords=aria+floodlight&qid=1564453241&s=gateway&sr=8-3
You may want to contact Momentum support just to be sure:
https://support.momentumcam.com/new-product-support/
I hope this helps. Good luck!
My aria momentum is not working don’t show any activity
Nayda – I’m not sure what’s going on with your outdoor camera. You may want to contact Momentum for help with this issue:
https://momentumcam.com/pages/contact-us
I removed my Aria and replaced it with a Netatmo Outdoor Security Camera. I kept getting away too many unnecessary motion notifications (the Netamo tells me when it detects a person).
I learned something new today thanks to your interesting post. We appreciate you sharing your knowledge.
https://www.tumblr.com/nsharma28808