REVIEW – Here was a typical scenario in our household: We’re getting ready to go somewhere and hop into the car parked in the garage. We open the garage door, back out, and drive away. “Did I close the garage door?” my husband asks me. After thinking about it, I respond, “I don’t remember.” We then turn the car around to go back to the house to check to see if we closed the garage door.
Products like the Momentum Niro Universal WiFi Garage Door Controller with Built-in Camera help to eliminate such scenarios. I was able to review this product and found that it works fairly well. You can open or close the garage door from anywhere, view the live video stream within the garage, and manually take pictures or record video. Furthermore, you can set up rules to create automatic recordings and send notifications when motion or sound is detected. It works with the Nest thermostat but does not appear to work with Alexa, Google Home, Apple HomeKit, or other smart home systems. In addition, the app needs a little reorganization.
What is it?
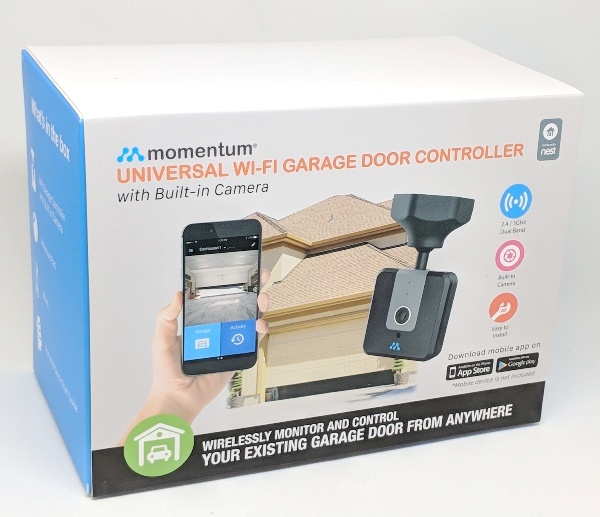
The Momentum Niro Universal WiFi Garage Door Controller with Built-in Camera is a WiFi garage door controller with a built-in 720P camera that attaches to your existing compatible garage door openers. It allows you to monitor, record movement or sound from within the garage, and open or close your garage door from anywhere using the Momentum app. It will also send you notifications of any motion or sound event detected.
Hardware specs
Camera: HD Camera with 720P sensor
Field of View: 110° wide-angle lens
Motion Detection: Adjustable sensitivity with push notifications
Night Vision: Infrared LEDs with Automatic Night Vision Mode
SD Card Slot: Micro SD Slot (up to 128GB SD Card)
Compatible Garage Doors: Garage Compatibility List
Connectivity: 802.11 b/g/n Wi-Fi connection @ 2.4GHz or 5.0GHz
Audio: Two Way Audio
Dimensions: Height: 5.30”, Width: 3.00”, Thickness: 0.99”
Weight: 5.30 oz
Power: 100-240V
Warranty: 1-Year Limited Warranty
What’s in the box?
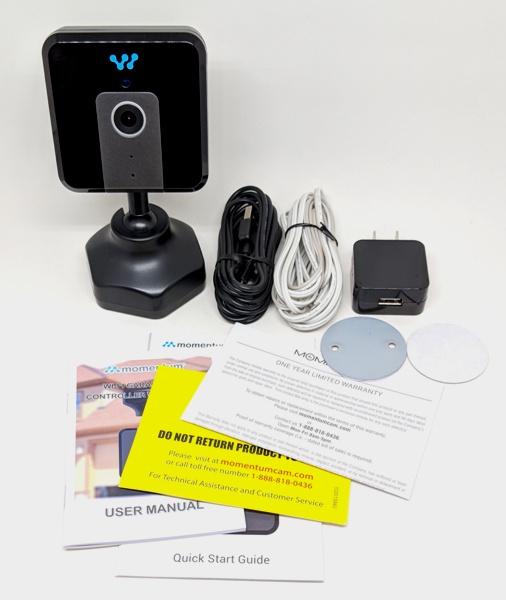
- Momentum Niro Garage Door Controller
- USB Cable
- Power Adapter
- Garage Door Control Wires
- Mounting Plate (round metal plate)
- Round 3M Double-sided Adhesive Tape
- Niro Quick Start Guide
- Niro User Manual
Design and features
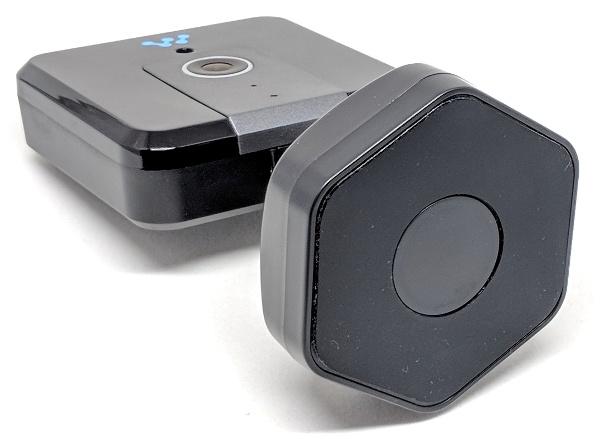
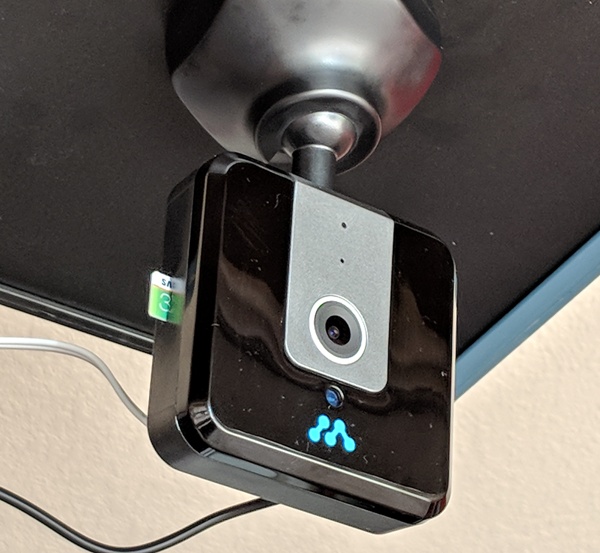
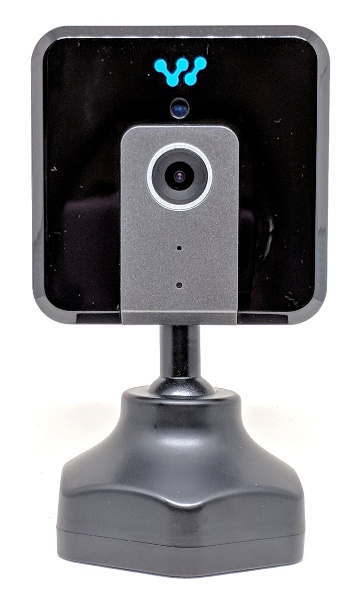 The Momentum Niro Universal WiFi Garage Door Controller comes with a built-in camera which resides in a rigid plastic housing. Starting from the top of the device, you can see the infrared light for night vision, the camera lens, the microphone, and the indicator/status light.
The indicator lights are as follows:
- solid red light: the camera is booting up
- slow blinking red light: disconnected from WiFi
- double blinking blue light: ready to connect to WiFi
- blinking blue light: connected to WiFi
- solid blue light: a user is currently live streaming
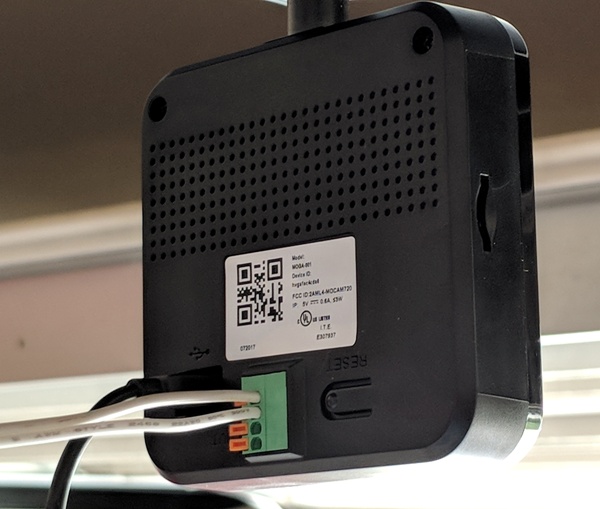
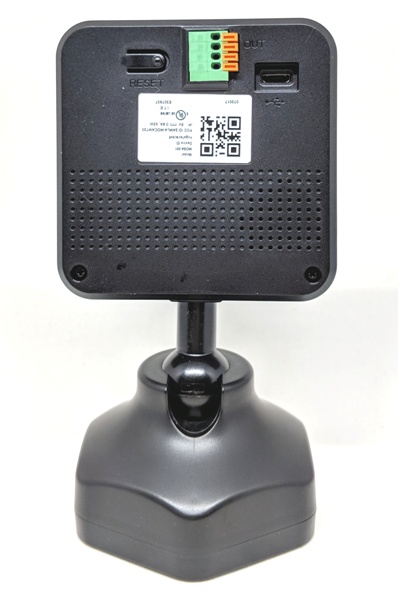 In the above photo starting from the left, the back of Niro shows the reset button, the wire connector ports (in green), the release buttons (in orange), the micro-USB power port, and the built-in speaker. The whole assembly is mounted on a plastic ball pivot hinge to allow you to rotate and position Niro as you wish.
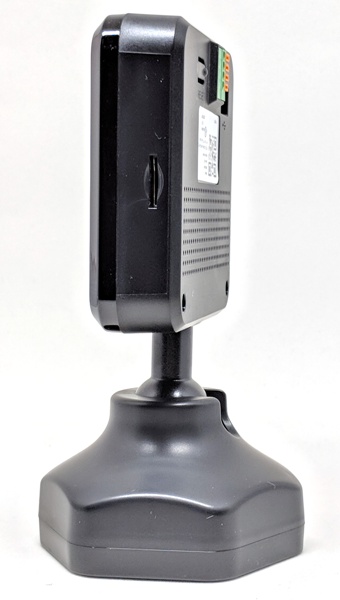
One side of Niro contains the micro-SD card slot which will accommodate a card up to 128GB. You can save videos to Momentum’s cloud or an SD card (not provided). You do not have to use a cloud plan to use Niro. Yay! But just in case you are interested, they have a 7-day event recording plan for $5 per month and a 30-day event recording plan for $10 per month (see Momentum Capture Cloud Service). I generally gravitate toward devices that have local storage rather than pay for a cloud plan.
The bottom of Niro has a silicone base and a magnet that you can use to mount it to the metal mounting plate.
Setup
App Setup
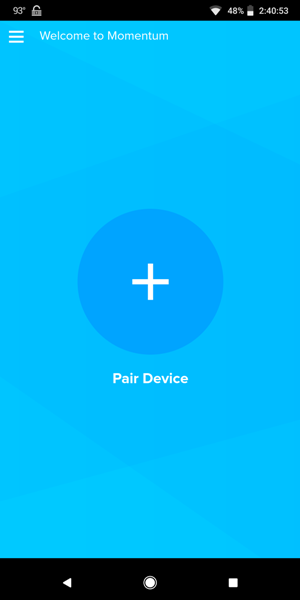
The first thing I needed to do was to download the Momentum app onto my phone (Pixel 2 XL) and create an account. I then needed to pair Niro to the app.
To pair Niro with the app, I needed to plug it into an outlet. We used the same outlet that our garage door opener was connected to.
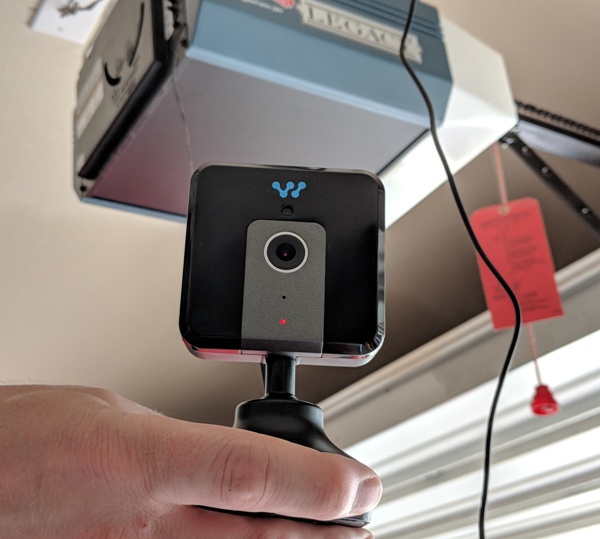
Once plugged in, the status light was a solid red indicating that Niro was booting up.
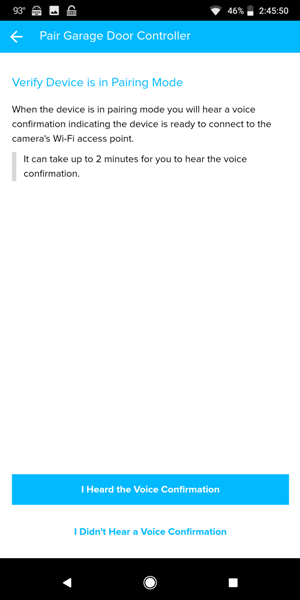
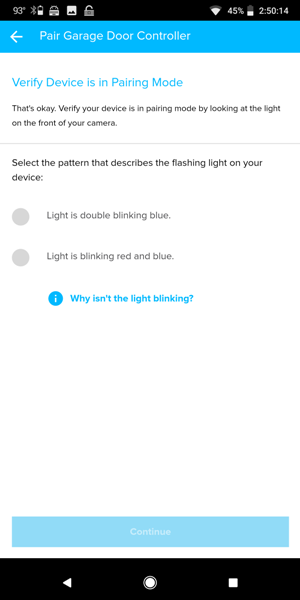
After booting up, I was supposed to hear a voice stating that Niro was in pairing mode but unfortunately, I didn’t. Instead, I had to verify that the status LED light was flashing red and blue and thankfully it was. I then went back into the app, tapped on “Pair” and tapped on the “Momentum Niro Garage Door Controller” from the list of other Momentum devices.
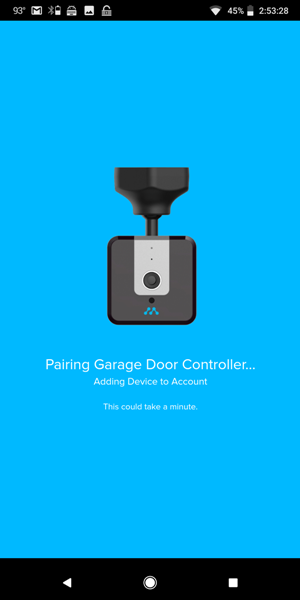
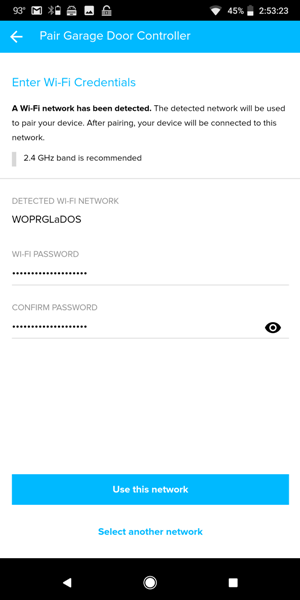
At that point, I then selected my WiFi network and entered my credentials.
After pairing with the app and connecting to my network, I then tried to update the firmware but it failed the first time. It did finally update.
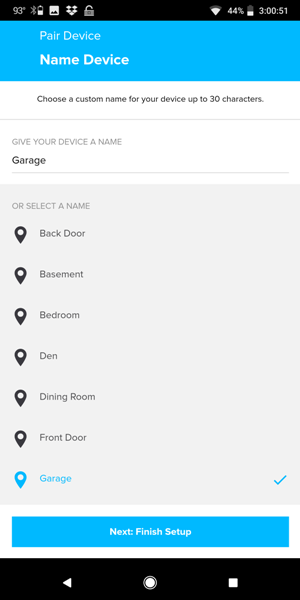
Next, I named my Niro garage door controller “Garage”, after which I needed to complete the rest of the physical installation of the device.
Niro Garage Door Controller setup
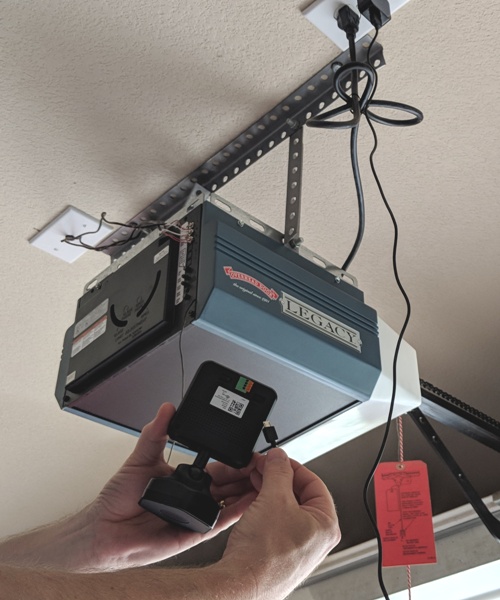
We used the double-sided round 3M adhesive provided and placed it under our garage door opener. You could then attach Niro to this adhesive disk, but instead, we chose to attach the round metal plate to the adhesive.
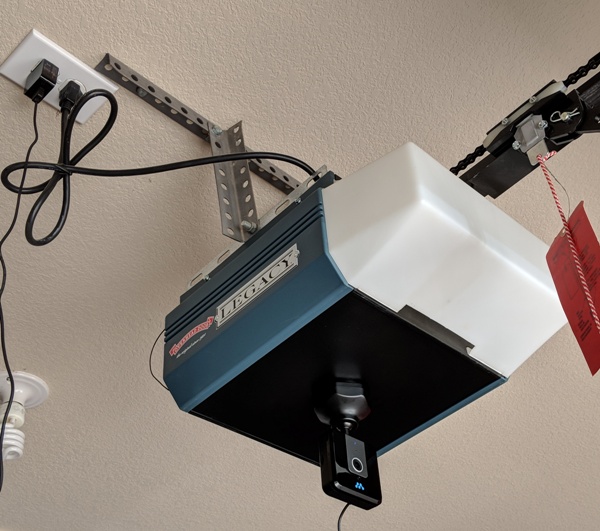
Then we attached Niro magnetically to the metal plate. This allows us to easily remove Niro should we ever need to.
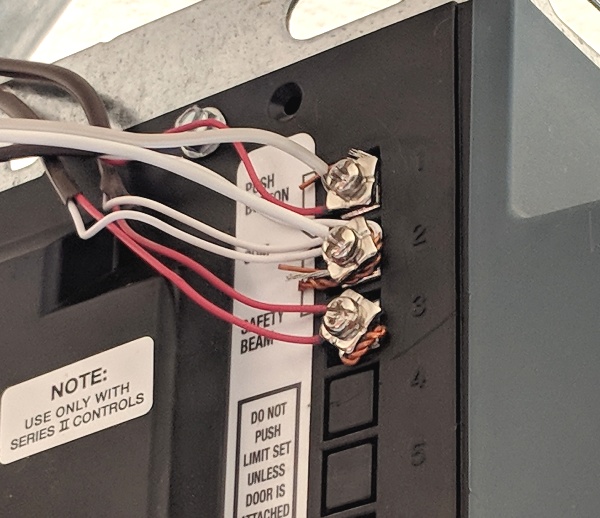
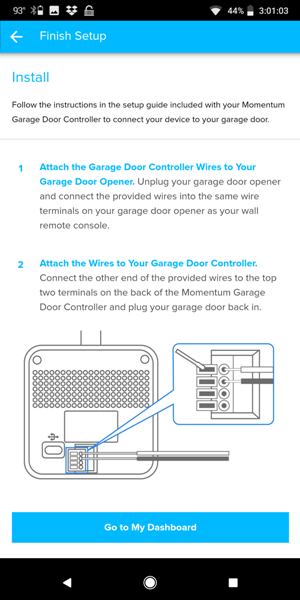
Next, we needed to attach the wires to the garage door opener. The garage door controller wire provided is much longer than what is needed, so we trimmed the wire and stripped the insulation at the end we cut (use this end to connect to the garage door opener terminals shown above).
The two wires, beige and white, were attached to the 1 and 2 positions of our opener by unscrewing the screws and wrapping the exposed ends of the wires around each screw and then tightening them. These terminals on your garage door opener are most likely already connected to your push button controller, and by connecting Niro to the same terminals, you are installing two switches in parallel. This will ensure that either the push button or Niro will open or close the garage door at any time.
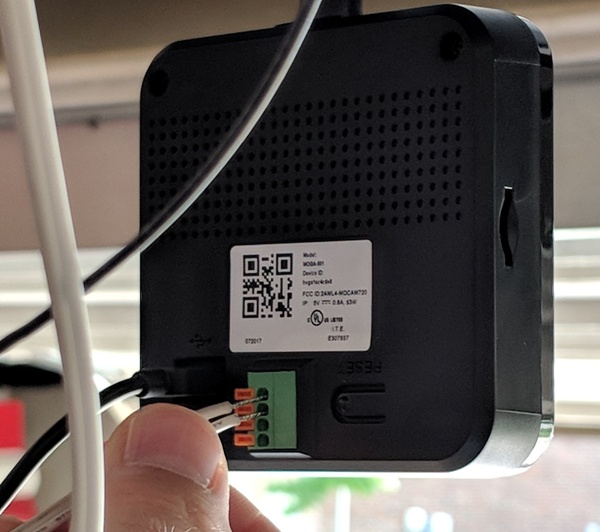
The other ends of the wires needed to be attached to Niro in the first two wire connector ports. “Note: Both wires are neutral, so it doesn’t matter which color wire goes into which of the two ports. However, make sure the open wire ends are not touching each other.” (-Niro Quick Start Guide).
If you happened to trim the control wire to a more reasonable length as I mentioned above, be sure to use the tinned ends (the ends that were stripped by the manufacturer and coated in solder to be rigid) because they will more easily fit into the tiny holes in the back of the Niro.
To insert the wires, the orange release buttons needed to be depressed.
Last, I inserted a 32 GB micro-SD card into the slot (this slot will accommodate up to 128GB).
Performance
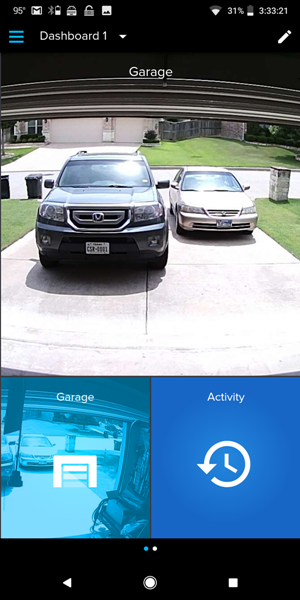
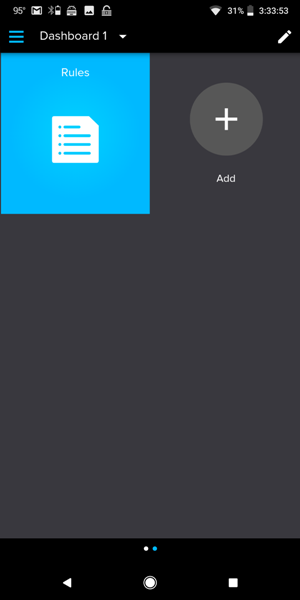
The default Momentum dashboard has three tiles on it. However, you can change the dashboard appearance if you wish by tapping on the pencil icon located at the top right corner as shown in the first screenshot above.
Camera tile
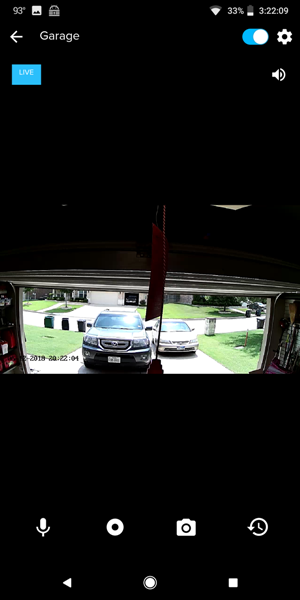
To access the live video feed and camera controls, you must tap on the “Camera” tile which is the largest tile located at the top of the dashboard. In addition to the live video, it will allow you to tap on each of four icons located at the bottom of the screen (center screenshot above): Microphone icon for two-way communication, Record Video icon for manually recording video, Camera icon for manually taking a screenshot of the live video, and Activity icon for viewing the activity for the day.
While in the “Camera” tile of the app, to perform two-way communication, you must press the Microphone icon once to speak to the person in front of the Niro camera and then again in order to hear them speak to you. To manually record a video, you need to tap on the Record Video icon to start the recording and then again to stop it. To take a picture, you need to tap on the Camera icon. The last icon is the Activity icon which will take you to a list of all the activities recorded.
I was able to speak to a person in the garage easily and the audio quality was fine. Additionally, recording and taking screenshots were easy too. I could view my manual video recordings and photos in the Activity list; although it takes a few minutes or so for them to show up there.
Garage tile
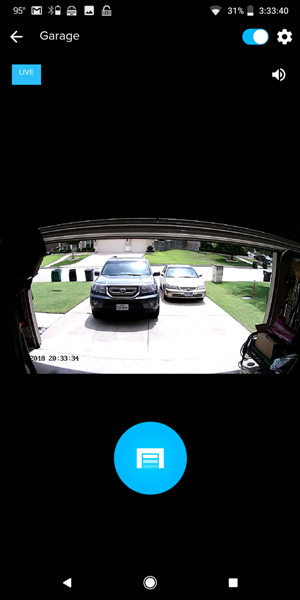
Next, you can access the garage door controls by tapping on the “Garage” tile in the lower left corner of the dashboard (the one that has a garage door icon on it). From here, you can view the live video feed and open and close the garage door. Most of the time I was able to open the garage door by using the app. However, there were a couple of times when I opened the app and it was unable to connect to the Niro garage door controller. This is a concern and thus you may want to carry a backup garage door remote when this happens.
I’m not sure why the “Camera” and “Garage” tiles couldn’t be combined into one. That way all the garage door and camera controls are all together for each of your Niro controllers.
By the way, the live views from the “Camera” and “Garage” tiles are normally identical. I actually adjusted the camera down in the right screenshot above which is why it looks different from the center screenshot.
Settings
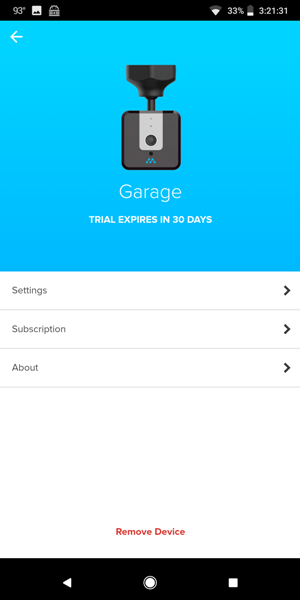
While in the live video feed portion of the app, there is a gear icon located in the upper right corner of the screen that will give you a list of options to choose from: “Settings”, “Subscription”, or “About”.
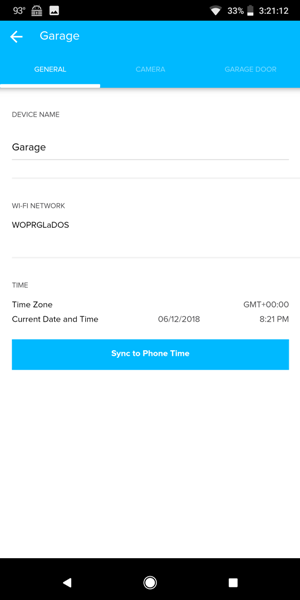
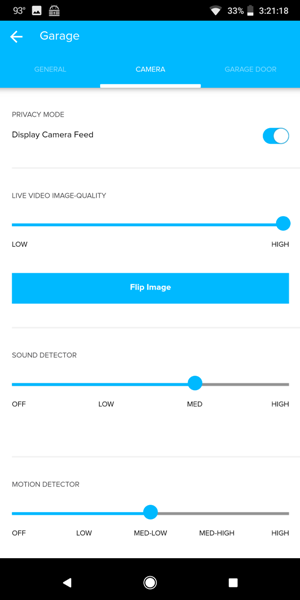
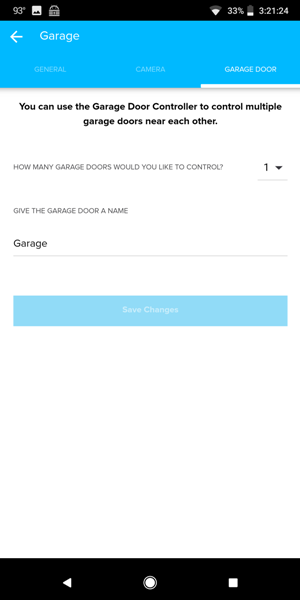
In the settings, you can change the name of your device (second screenshot above), adjust the live video image quality, and adjust the sensitivity of the sound and motion detectors. You may also view camera backups on the SD card or format the card (third screenshot above). Additionally, you can set the garage door controller to control multiple garage doors near each other (last screenshot above).
Creating and using Rules
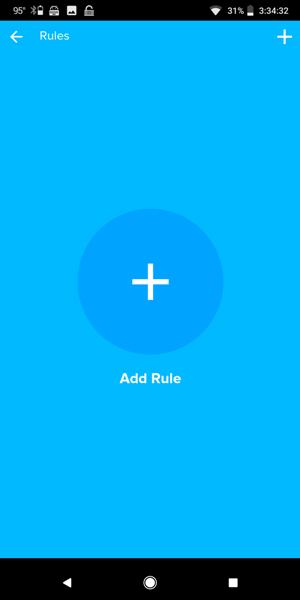
If you swipe left on the default Momentum app dashboard, you will see one other tile – the “Rules” tile. By tapping on it, you can create your own rules to trigger the Niro camera.
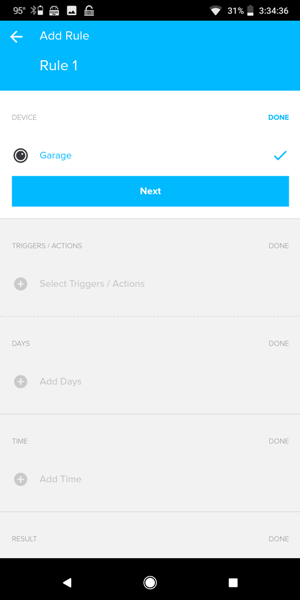

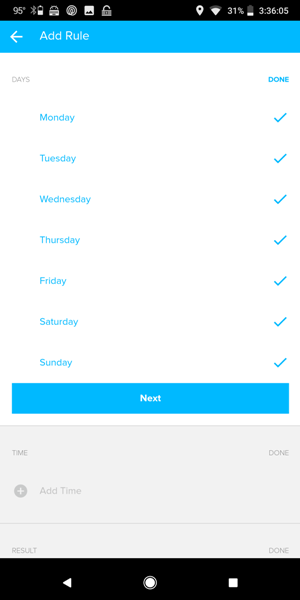
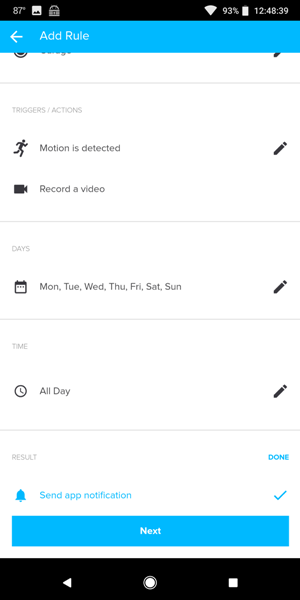
I created a rule for my Niro garage door controller. I only had one Niro, so it was already selected under the list of “Devices”. Then, under “Trigger”, I selected “Motion is detected” and under “Action”, I selected “Record a video”. Actually, I was unable to select anything else under “Trigger” or “Action”. I then selected which days and the time of day I wanted to detect and record motions. And last, I selected “Send app notification”.
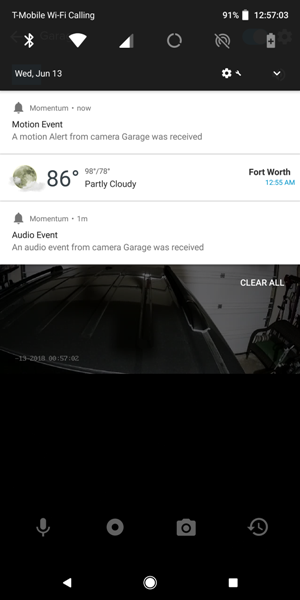
Whenever Niro detected a motion, it would automatically record video of it and send me a notification. Notice that it also sent a notification that an “Audio Event” was detected in the screenshot above.
Here are a couple of samples of the video quality and audio quality of the Niro camera. Notice how nicely the camera switches from IR nighttime (our garage has no windows so it is dark when the garage door is closed) to daytime video.
While using Niro for about a month, I noticed that every recording was only 19 seconds long. Often, this was not enough time to record the entire motion event so another 19-second video was recorded to finish capturing it. However, the second video starts about 20 seconds after the end of the first video thus missing the end of the motion event and capturing nothing in the second recording. I received a motion event notification for each recording. There does not seem to be a way to alter the 19-second video recording length in the settings.
In addition, I noticed that I would receive another motion event notification a few minutes after closing the garage door. Perhaps it was due to the garage light shutting off thus eliminating shadows detected by the camera. You can adjust the sensitivity of the motion detector although it may not eliminate this issue.
You can use the Momentum app to control your Nest thermostat. To pair your Nest with the Momentum app, you must tap on the menu icon located in the upper left corner of the dashboard and select “Pair device”. Once paired, tapping on the thermostat tile on the Momentum dashboard flips it over. One side allows you to adjust the Nest to “Home” or “Away” modes. The other side allows you to change your temperature settings by sliding up or down on the snowflake icon or flame icon.
What I like
- Installation was easy
- I was able to check to view the garage door status and open/close the garage door while away from home
- Transitioning from nighttime vision to daytime was seamless
- It works with the Nest thermostat
What needs to be improved
- Garage door and camera controls should be located in the same tile on the app
- Allow the user to change the duration of the automatic recordings
- It doesn’t appear to work with Alexa, Google Home, Apple HomeKit, or other smart home systems
Final thoughts
I really enjoy using the Momentum Niro WiFi Universal Garage Door Controller with Built-in Camera. First of all, it was wonderfully easy to install. Furthermore, I was able to connect to Niro to check on my garage door status and open/close the garage door from anywhere. There were only a couple of times that I could not connect with Niro. Thus, I suggest that you keep your garage door remote with you, just in case.
There are a few things that mildly bothered me. First of all, it would be nice to have all the garage door and camera controls all in one place. Next, it would be nice to allow the user to alter the video recording durations beyond 19 seconds. Third, Niro only works with the Nest thermostat. It doesn’t work with Alexa or Google Home (or other smart home systems except for Nest). Other than these drawbacks, I really enjoy using the Momentum Niro. Please be sure to check your garage door opener for compatibility with Niro before purchasing.
Price: $99.88 – $99.95
Where to buy: Amazon and Walmart
Source: The sample of this product was provided by Momentum

Zip Ties Assorted Sizes(4”+6”+8”+12”), 400 Pack, Black Cable Ties, UV Resistant Wire Ties by ANOSON
(as of May 20, 2026 03:50 GMT -05:00 - More infoProduct prices and availability are accurate as of the date/time indicated and are subject to change. Any price and availability information displayed on [relevant Amazon Site(s), as applicable] at the time of purchase will apply to the purchase of this product.)
Gadgeteer Comment Policy - Please read before commenting
I have read all instructions and for me ( not a technical person) sounds on the difficult level.
When you get to wires is when I am lost. ( Electric)
I want to make sure if my husband sets this up with his iPhone
Will I still be able to use our original garage door opener in our van and located on our garage wall together.
Or will installing this remove any ability for me to use our original garage door openers?
I have an android phone and I really do not want this on my phone.
Is the garage door opener especially for iPhones connected by Bluetooth Better and easier for Han this one?
Thanks appreciate your reply.
Linda – Installing the Momentum Niro will not affect any of the functions of any of the garage door openers you currently have. It connects to your home’s WiFi network (not Bluetooth) and can be used with Android or iOS devices. I hope this helps.
It seems a bit complicated than the Garager I have. I have it hooked up in 10 minutes and I use Alexa to open close my garage door.
You should update your article to let users know that the app will not work with Android 10. It is very easy to install and works great. I was able to use it for about 2 months before my phone updated. It has been 2 months, and there is no fix for the app.
PS – I will update the review to include that information. Thanks!
So I just installed this. Works fine from the app. Bought it because it said it was nest compatible but seems like that only means you can control your nest thermostat from the momentum app. Nest has a far superior app for controlling itself so what is the advantage to this limited compatibility?
Jim – Yeah, I noticed that there wasn’t a lot of functionality using the Momentum app to control our Nest thermostat. I much prefer using the Nest app to control the thermostat rather than the Momentum app. I agree – with such limited functionality, I don’t see why Momentum bothers with Nest compatibility at all.
i installed the wi-fi garage door controller with camera from Momentum but I do not hear a voice confirmation indicating it is ready to pair. my light keeps blinking red/blue no matter how many times I reset it and I have never seen Niro wi-fi come up in network settings. Can you help me?
Michelle – I was having some problems connecting my Niro to my WiFi after upgrading to a new router and was unable to resolve it until after Momentum updated their app in October. I’m assuming that you installed your Niro after that; if that is the case, I am not sure how to help you (I am just a reviewer of gadgets here on The Gadgeteer).
You can contact Momentum Niro Customer Service and ask them to help you using the following link:
https://support.momentumcam.com/gdc-product-support/
Good luck!