REVIEW – What’s cooking, family? I’m testing The MeatStick X, a Bluetooth-enabled remote cooking thermometer that’s getting a lot of buzz for its ease of use and smart technology. Buckle in because tonight we feast! To the review!
What is it?
It’s a remote Bluetooth-enabled cooking thermometer. The MeatStick X model allows you to monitor your food from the app up to 260 feet away and uses smart technology to take the guesswork out of when your dinner is ready.
What’s in the box?
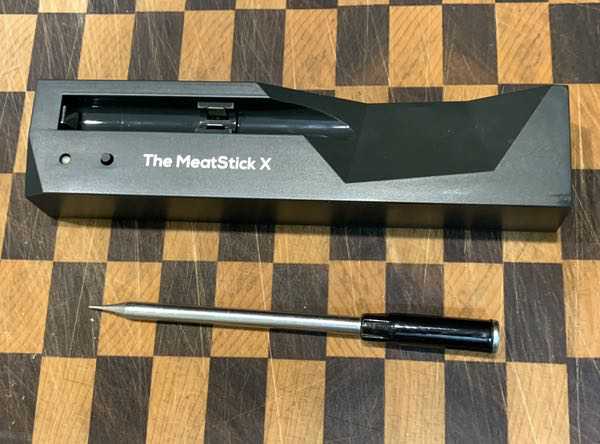
The MeatStick X comes with two components. You’ll get the temperature probe. You’ll also get the base unit that serves as a storage case, a charger for the probe, and an extender that adds up to 260 feet of range to the device for remote monitoring.
Hardware specs
- Wireless Bluetooth probe
- Android and iOS compatible
- A thermometer measures both ambient temperature and internal temperature
- Combination charger/signal extender provides 260 foot monitoring range
- Charging base using AA batteries
- Deep fryer and dishwasher safe
- Max. Heat Resistance 572°F / 300°C
Design and features
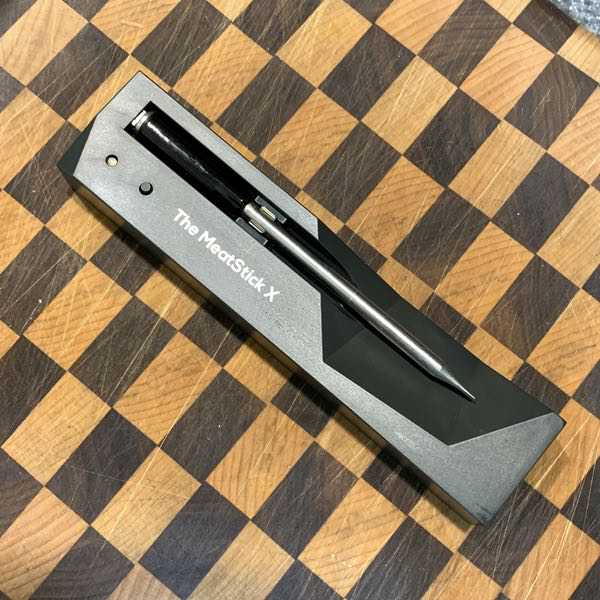
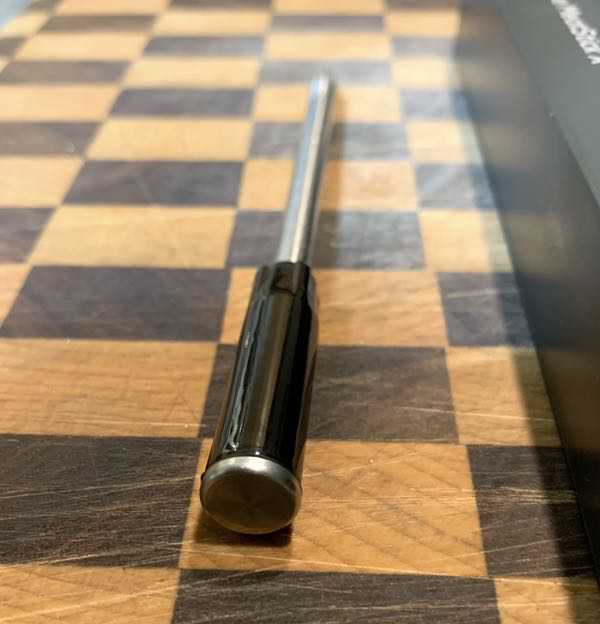
Your journey starts with the hardware. The probe gets inserted as shown below into the base unit. 2 AA batteries are required to charge the probe and to utilize the features of the base.
The probe itself is 5-1/8″ in total length, with a 1-1/2″ black cap. You’ll insert the whole length of the probe up to the cap into your protein when it’s time to go work. The probe itself is a solid piece of gear that can withstand temperatures of up to 572 degrees and is dishwasher safe. It also has two temperature monitors: one for the meat and one to monitor the ambient temperature in your cooking medium of choice.
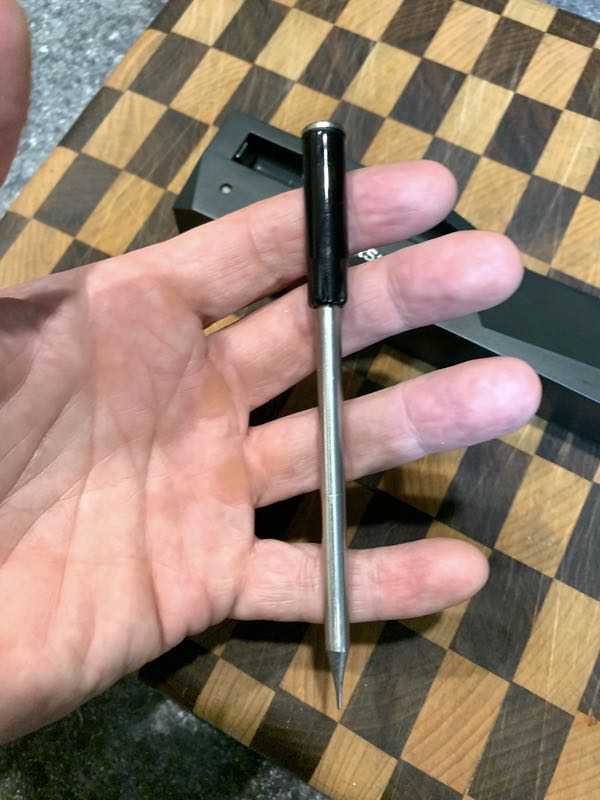
Something important to note here: see that metal end cap? That cap needs to be touching the contact plate on the base to set the unit up and to recharge it. Your Humble Reviewer did not realize this when he first set it up, which led to some awkward conversations with the superb tech support folks at The MeatStick. The good news is that their customer support is excellent… and very patient.
You don’t pair the thermometer with your Bluetooth connection. You’ll download the app to your smartphone first and follow the directions to charge the probe. Once it is charged you’ll connect to your base unit with the app. The MeatStick lineup is extensible so that you can control multiple units from the app if you’re hardcore.
Pairing is pretty simple, and the super-friendly tech support is there if you run into trouble as I did. Follow the directions and the unit now appears in your app.
Tap on the unit’s tab on the screen, and you’re ready to get cooking. I did a couple of cooks for my testing. Let’s start with the whole chicken.
Roasting A Chicken
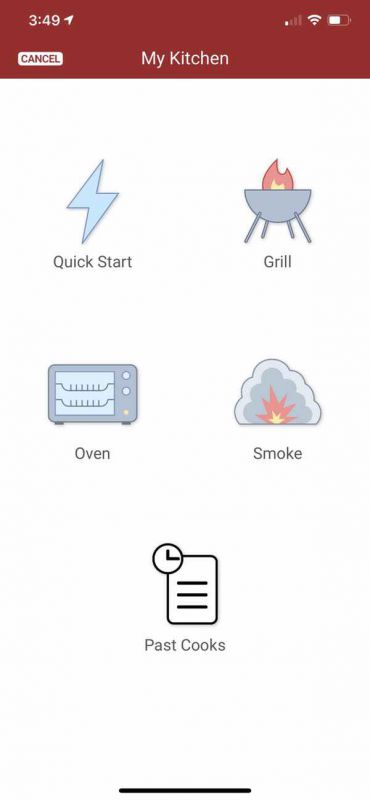
The Meatstick app does a pretty amazing job of taking the guesswork out of your cooking. You start with a menu of options to choose from based on your heat source. My grill has been iced over (thanks, Mother Nature!) so I’m choosing the Oven option for this one.
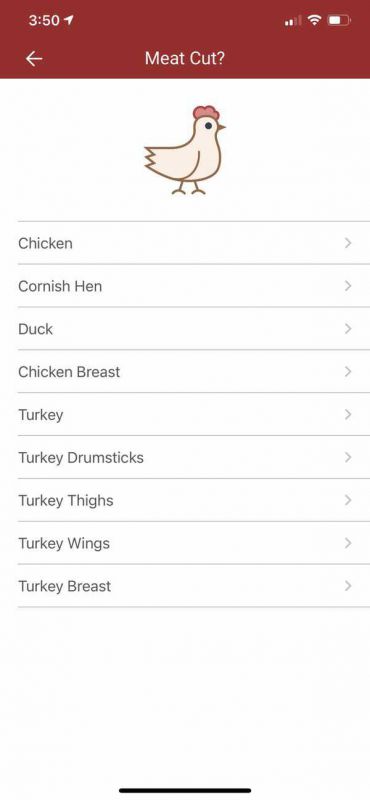
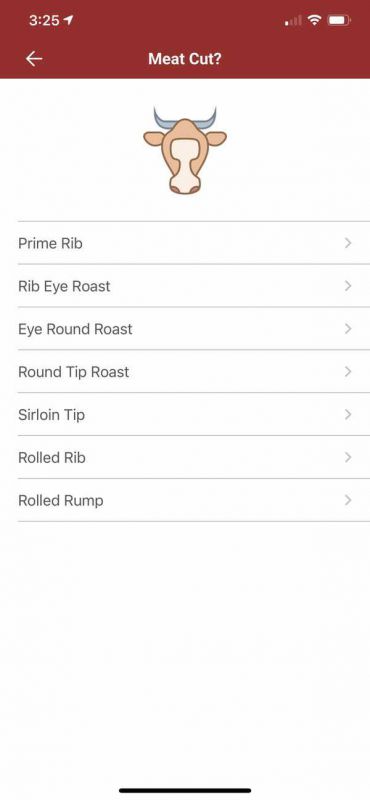
Next, you’ll pick your protein and your cut. I’m doing a whole chicken here, so I chose the Poultry option first.
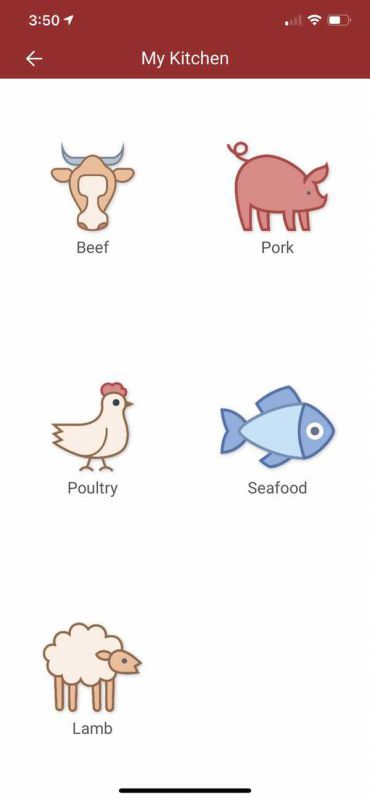
Now I’ll pick my details. “Chicken” is a whole chicken here.
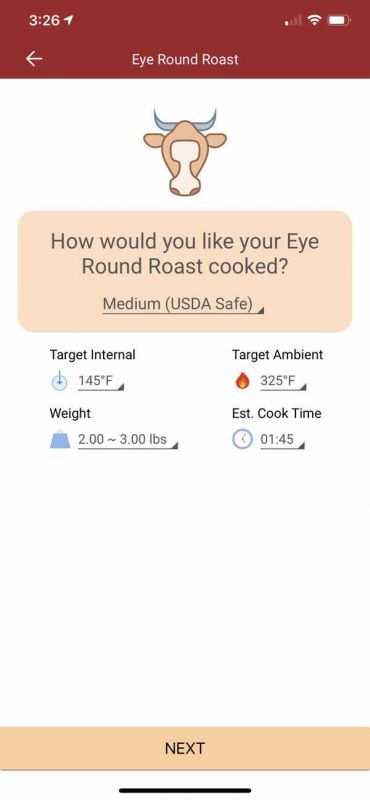
Now you’ll set your specifics for target finished temperature and ambient temperature (the oven in my case). The app will set defaults for target temp which you can customize. You’ll pick the weight of your protein and the app will estimate the total cooking time.
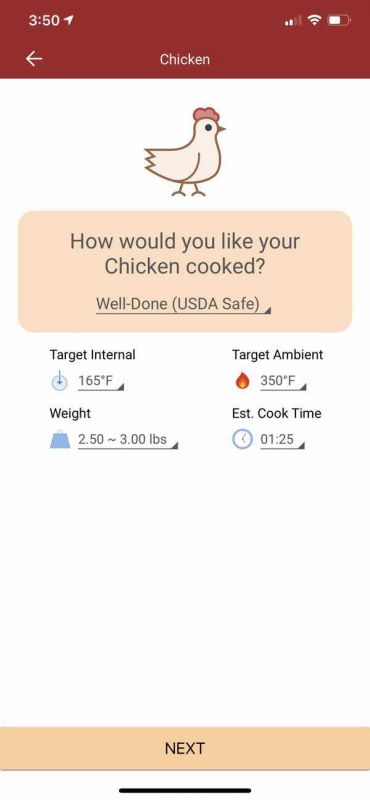
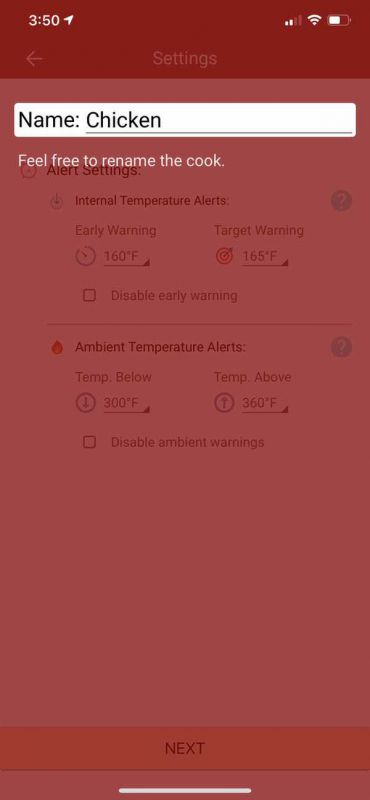
You can also name your cooks, which will be stored for future reference if you have a recipe you cook on multiple occasions.
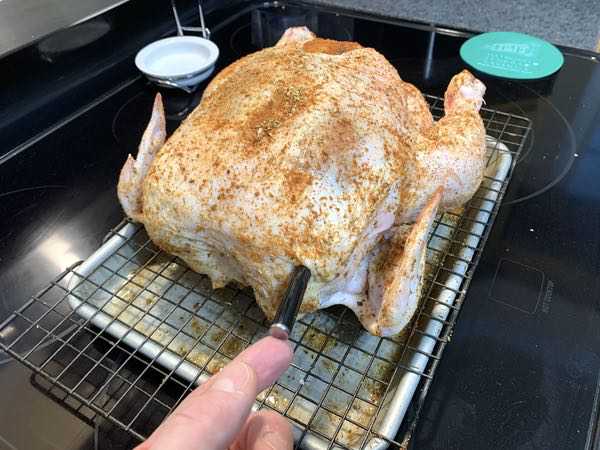
Now we get down to business. The MeatStick gets inserted into the thickest part of the bird.
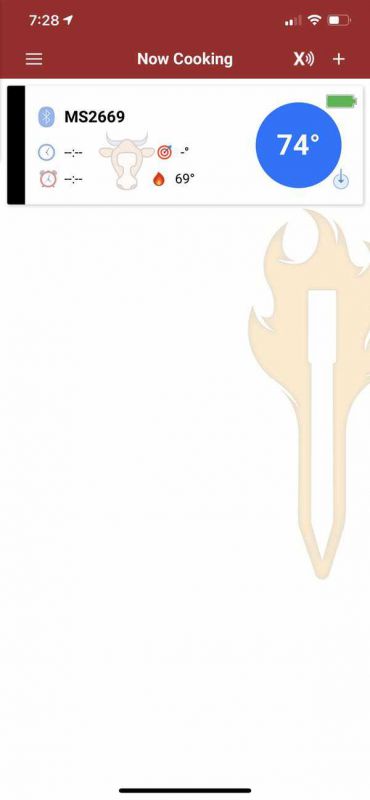
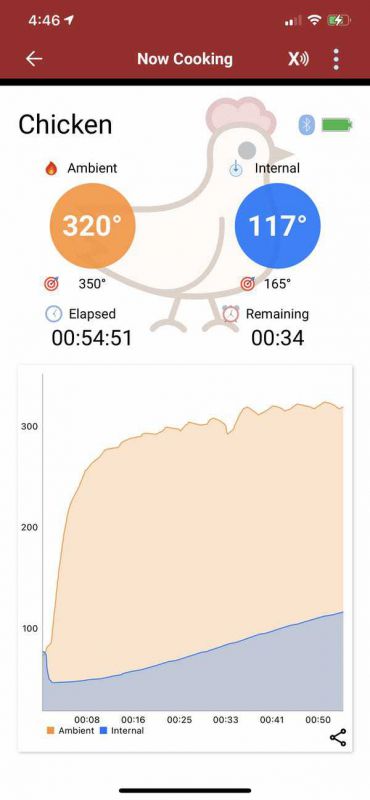
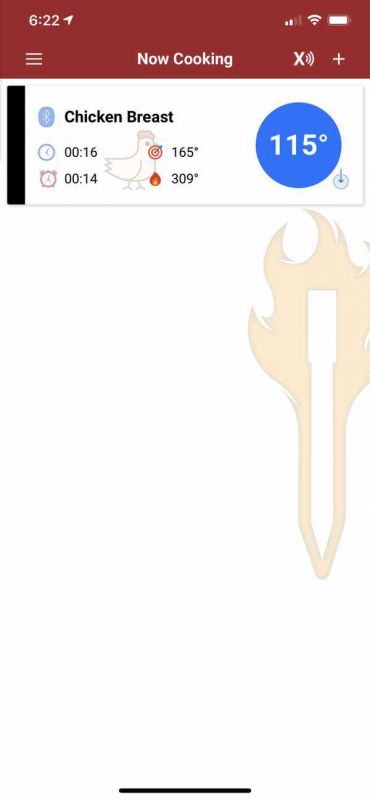
You’ll monitor your progress from the app. Your “Now Cooking” screen provides real-time updates of the ambient temperature in my oven, the internal temperature of the bird, elapsed time, and estimated time to reach the target temperature! It also provides a visual that graphs the changes in temperature throughout the process.
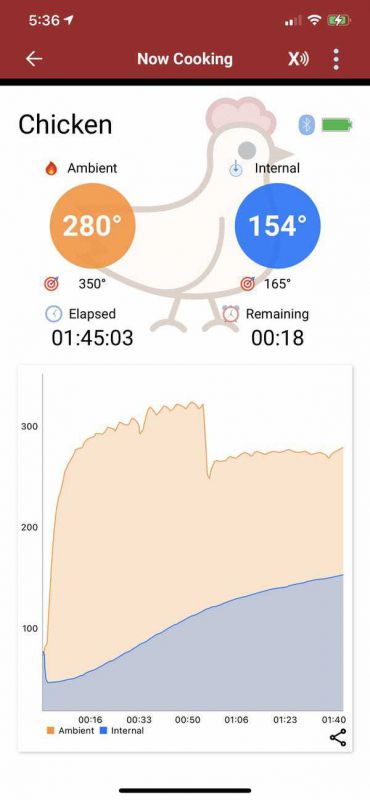
At the hour mark, I opened the oven to cover the bird so the skin wouldn’t burn.

Not only did the app pick up the drop in temperature (see below), but it recalculated the cooking time. I realized at some point that I picked the wrong weight for my bird, but the app adjusted on the fly.
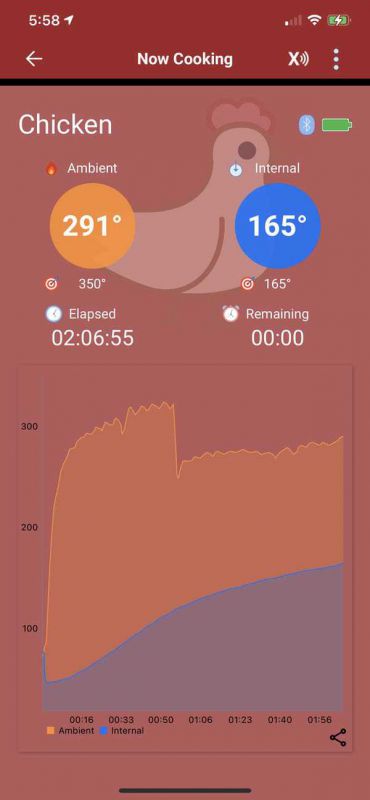
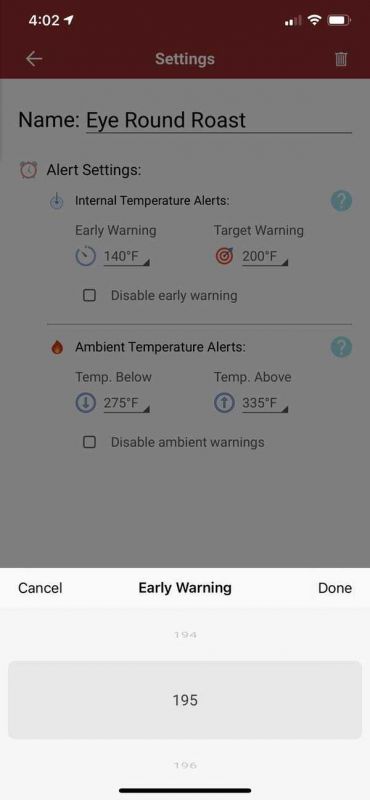
You can set warning notifications to let you know when you are getting close to completion. The app notified me when it hit the 160 degree mark. When finished, I got a notification it was time to evacuate the bird. You can also set alarms for the ambient temperature, which would be VERY useful for grilling and smoking if I could get to my grill.
The finished bird rested for 15 minutes, and was spot-on perfect. Unfortunately, my pictures got screwed up! That’s OK, though, because we have more chicken.
Baking Chicken Breasts
Here I’m cooking a pair of fat chicken breasts with a spice rub.
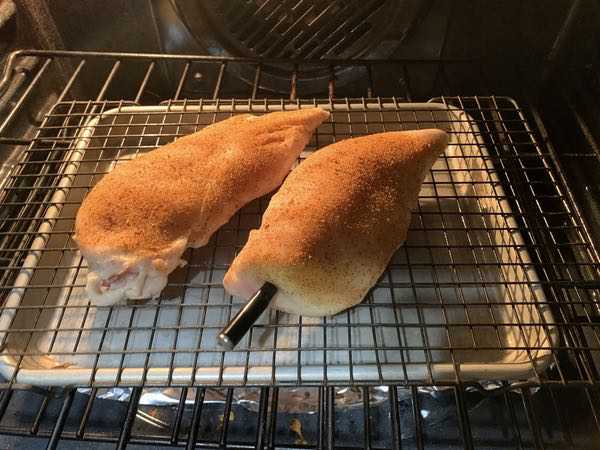
This is a shorter cook, originally estimated to be 30 minutes.
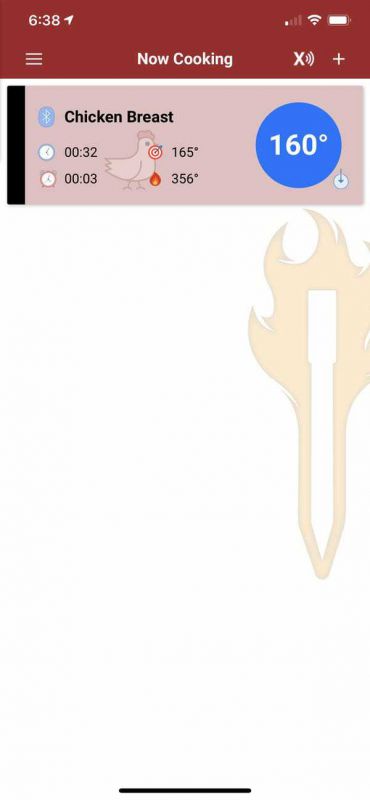
Here’s the warning notification when the internal temp hits 160 degrees. We’re almost there…
And now we’re good to go!
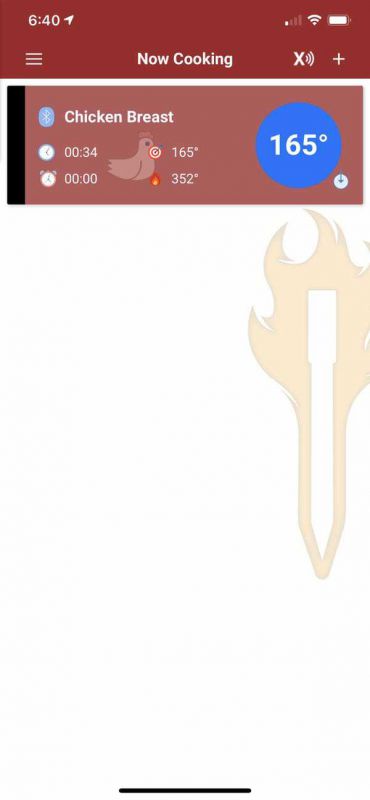
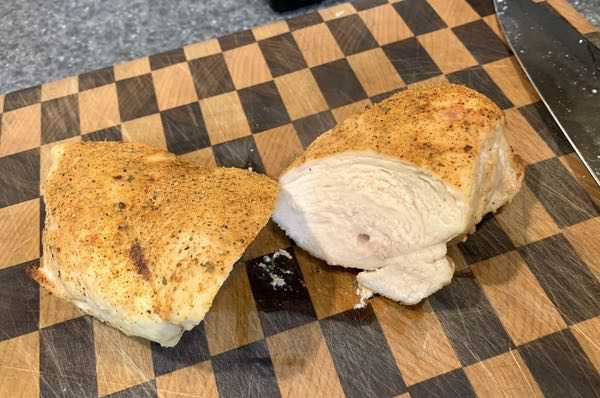
34 minutes total cook time and the MeatStick is right on the money again for perfectly cooked poultry. Check it out. Moist and perfect.
Dutch Oven Beef Stew
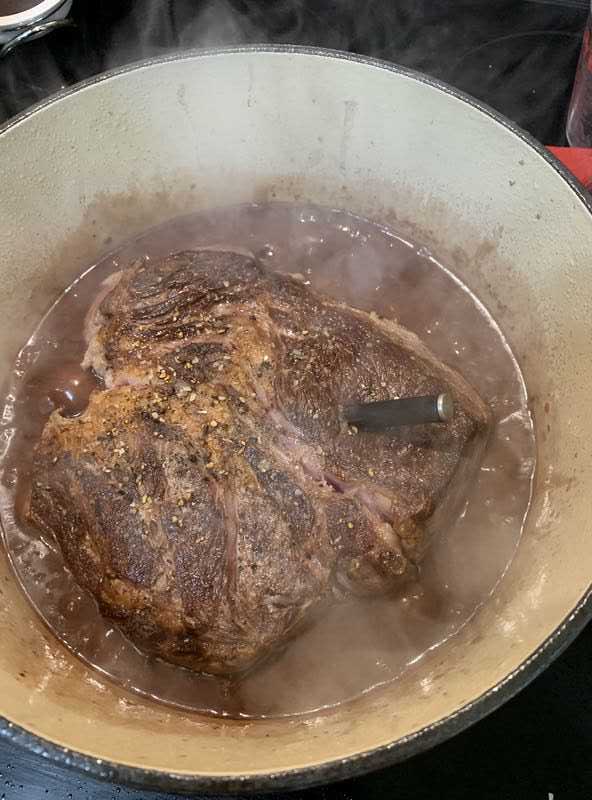
Wanna see beef? Let’s cook beef. I’m actually braising a 2 pound beef roast to pull-apart tenderness in a dutch oven for a stew. We started by picking the cut and setting the cooking parameters.
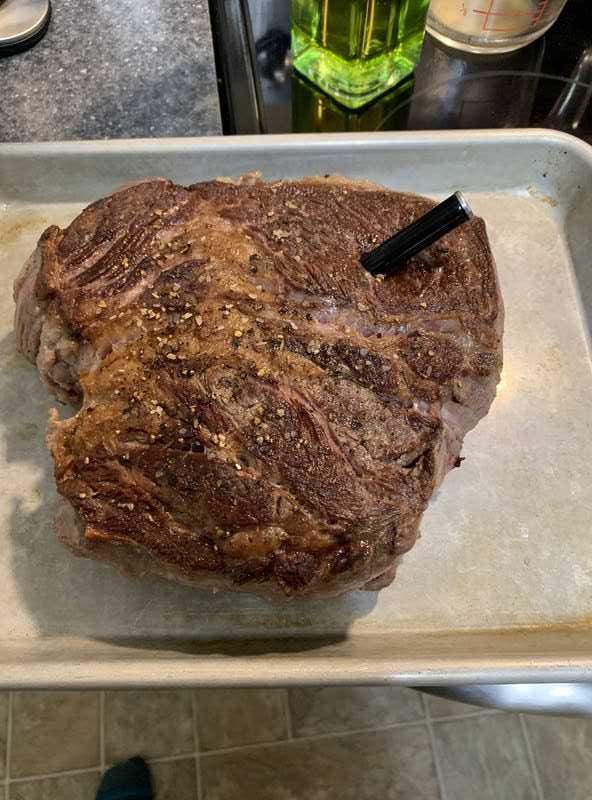
I started by searing the beef in the dutch oven, then pulled it out to insert the MeatStick.
I built a red wine base and plunked the roast back into the dutch oven. This got covered and placed in the oven for a long roast.
Here was a neat thing I discovered. When I started the cook I had the roast set for a medium finish temperature (145 degrees). That won’t do for shreddable beef. One of the nice features about the Meatstick app, however, is that you can adjust the settings mid-cook. I reset the target temp for 212 degrees, and we carried on.
The beef braised on its own for about 90 minutes in what would be a 2-1/2 hour total cook time. This is where the app’s auto-calculations came in handy as I was cooking vegetables with the roast for the last hour. When the timer hit the “60 minutes remaining” mark I added my vegetables. I pulled the beef when it hit 200 degrees to shred and put back in the stew. Flawless finish:

(For those wondering: my vegetables are carrots, cubed turnips, and cubed celery root with a fresh parsley finish.)
The durable probe really shines here. MeatStick claims that you can use it for deep frying applications. It performed like a champ in that bubbling goo and cleans up easily.
Other App Notes
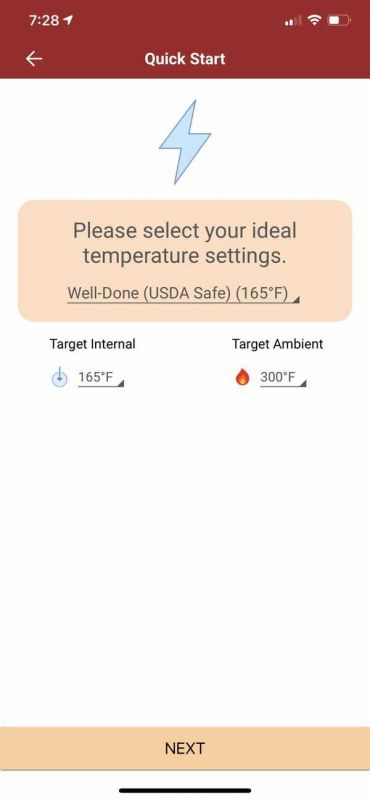
You don’t have to use the preset configurations to choose your cooking options. The “Quick Start” selection allows you to manually dial up your own temperatures and skip the presets.
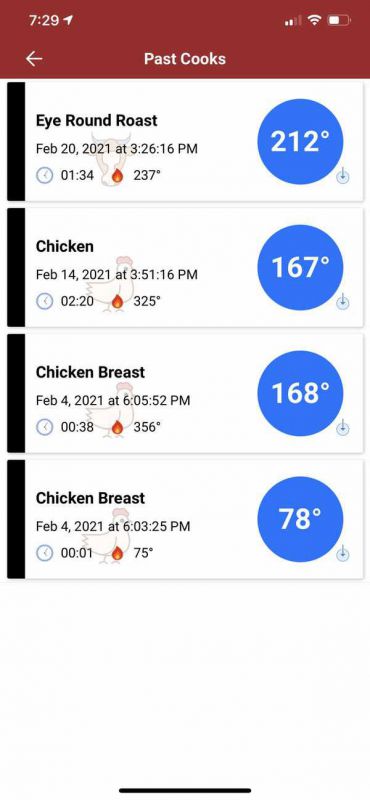
You’ll also be able to keep a record of your past cooks for reference.
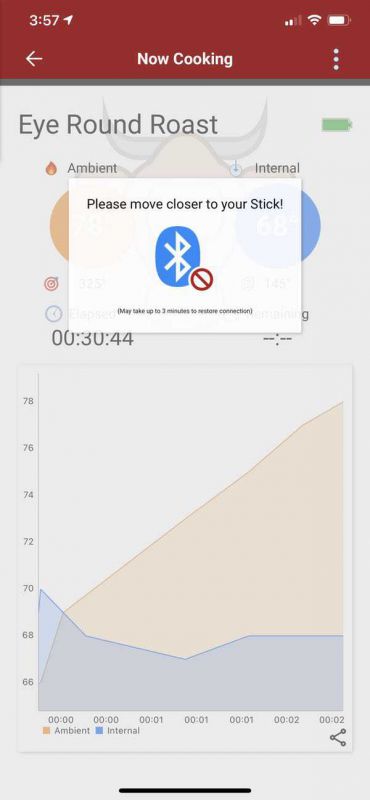
I did notice the occasional connectivity issues. I got this one when I was cooking my beef roast. I’m not sure if it was the fact that the probe was in a cast iron dutch oven inside my oven blocking the signal or just a dropoff. It did correct itself after a few minutes.
I have noticed that sometimes the MeatStick loses its pairing to the app on startup, but restarting the app usually fixes that. Their support is outstanding if you run into a problem.
Finally, it’s important to note that the Meatstick app requires that the location detection setting is set to “always on” to function. My understanding is that this enables MeatStick’s remote monitoring and no additional data is being captured. You can turn that setting off when not in use, which is what I do.
What I like
- Durable, easy to clean probe
- Excellent and intuitive app that works for beginner and experienced cooks
- Seriously accurate at calculating and monitoring cook times
- Excellent customer support
What needs to be improved
- Would like an alternative to AA batteries to charge and use the device
- Occasional wonky connection issues when starting the app
Final thoughts
The MeatStick X shines as a simple and easy to use remote cooking thermometer. The app is elegantly simple and user-friendly, taking the guesswork out of your cooking with impressively accurate measurements. The real-time metrics enable perfect timing, especially important if you’re preparing sides to go with your meats. The probe is built to last. I’d prefer a USB charging option to AA batteries, but that may be an option with other models.
Once the ice and snow stops here in the northeast part of the country I’m looking forward to using the MeatStick for some grilling and smoking. Spring is coming!
Price: $99.99
Where to buy: Go to the MeatStick X page on their web site and Amazon
Source: The sample of this product was provided by The Meatstick.

ESR for MagSafe Wallet, 5 Card Holder with RFID Blocking, MagSafe Sticker Included, Slim Magnetic Wallet for iPhone 17e/17/16/15/14/13/12 Series and Selected Samsung Devices, Not for 13/12 Mini, Black
(as of June 16, 2026 14:02 GMT -05:00 - More infoProduct prices and availability are accurate as of the date/time indicated and are subject to change. Any price and availability information displayed on [relevant Amazon Site(s), as applicable] at the time of purchase will apply to the purchase of this product.)
Gadgeteer Comment Policy - Please read before commenting
Will it work on smaller cuts for example – bacon wrapped beef filets?
Hi Jerry,
The length of The MeatStick probe is 3.7 inches. If you are looking for a shorter wireless meat thermometer you can check on our website for our Mini by TMS, a smaller/shorter version of The MeatStick.
Hi Bob,
What did you do with the thermometer after you shredded the beef for the stew? Are you able to just drop it in the pan and get temp readings while the vegetables are cooking or did you just finish the cooking without the probe?
thanks
Hi there!
I did not leave it in the pot. When the roast hit the temp I removed it and took out the probe. Then I shredded the roast and returned the meat to the pot for another 20 minutes of cooking to blend the flavors.