It is not that the Logitech Alert video surveillance system we use has become all that long in the tooth. It still works well enough. The fact is I want/need to expand my coverage and their outdoor cameras are difficult to get ahold of and surprisingly costly when you do. Julie and I have been discussing surveillance cameras for a while now and the Dropcam Pro comes up regularly. With the conversation usually ending in the sad note that it is a shame Dropcam does not have a solution for mounting their cameras outdoors. So, I started looking for an aftermarket outdoor enclosure for the Dropcam Pro and discovered how few there are. However, I did come to find out that folks were creating DIY (do-it-yourself) enclosures and decided to give it a try for myself…

After puttering around a couple of my local hardware stores, Dropcam Pro in hand, I went with 2″ PVC piping due to its ease of use and how perfectly the Dropcam fits inside.
Building supplies:
- 2 x 2 inch PVC pipe – 1.25″ long (pennies)
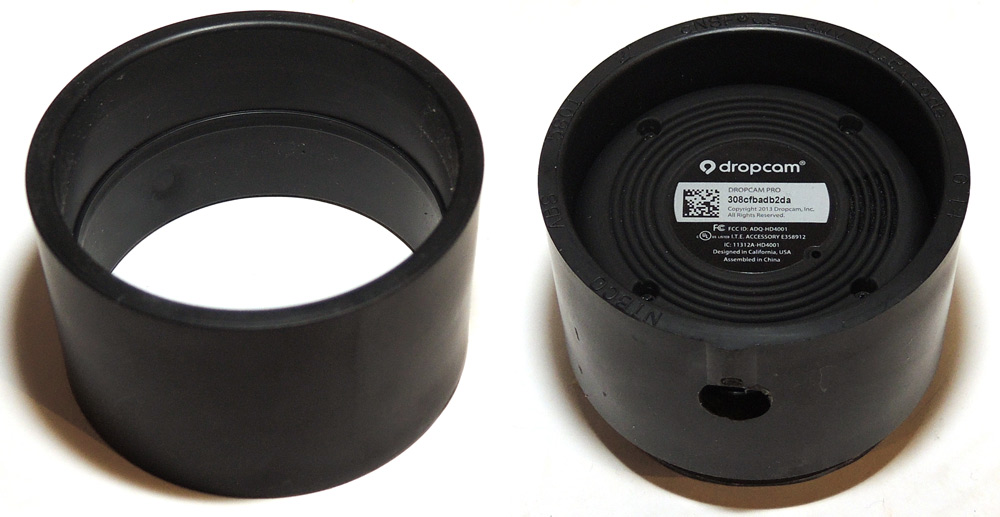
- 1 x 2 inch PVC coupling ($0.85)
- 1 x 2 inch PVC end cap ($2.49)
- 1/8″ clear plexiglass (pennies)
- 2 x black zip-ties (pennies)
- 1 x plastic adjustable speaker mount ($4.00)
- Clear silicone caulk (pennies)
- PVC glue (pennies)

The parts come together quite easily, as if they were designed for this purpose. First step is to cut the two short lengths of pipe. I used a miter chop saw.
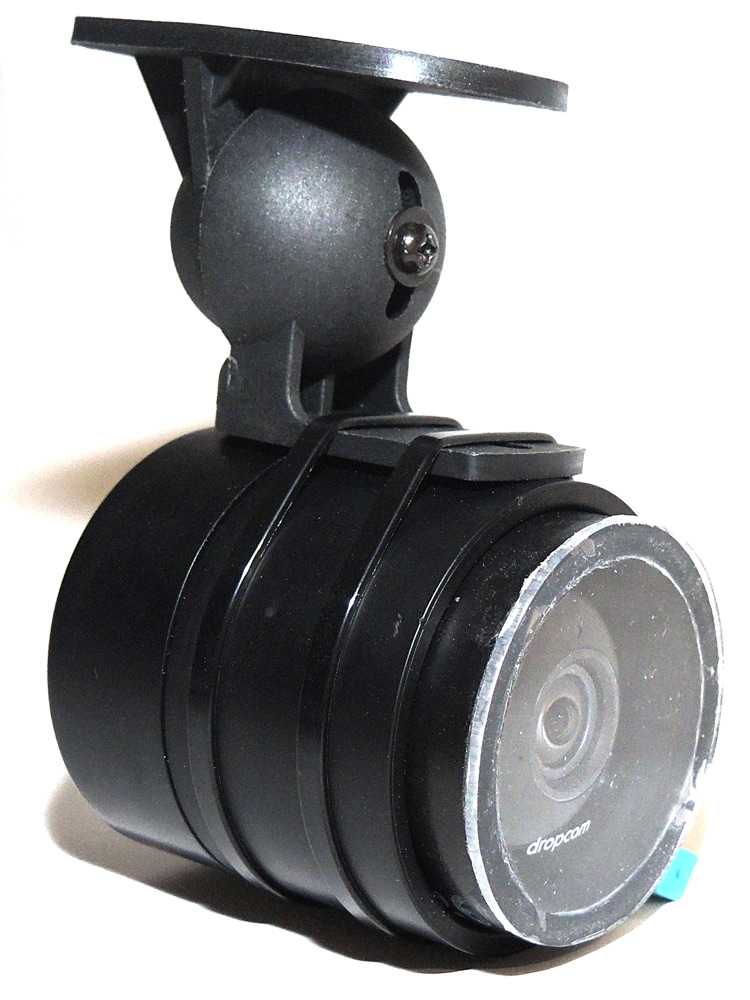
The Dropcam Pro slides into the coupling as if it were engineered to hold it. The center stop on the inside of the coupling holds the camera from the slipping all the way through.
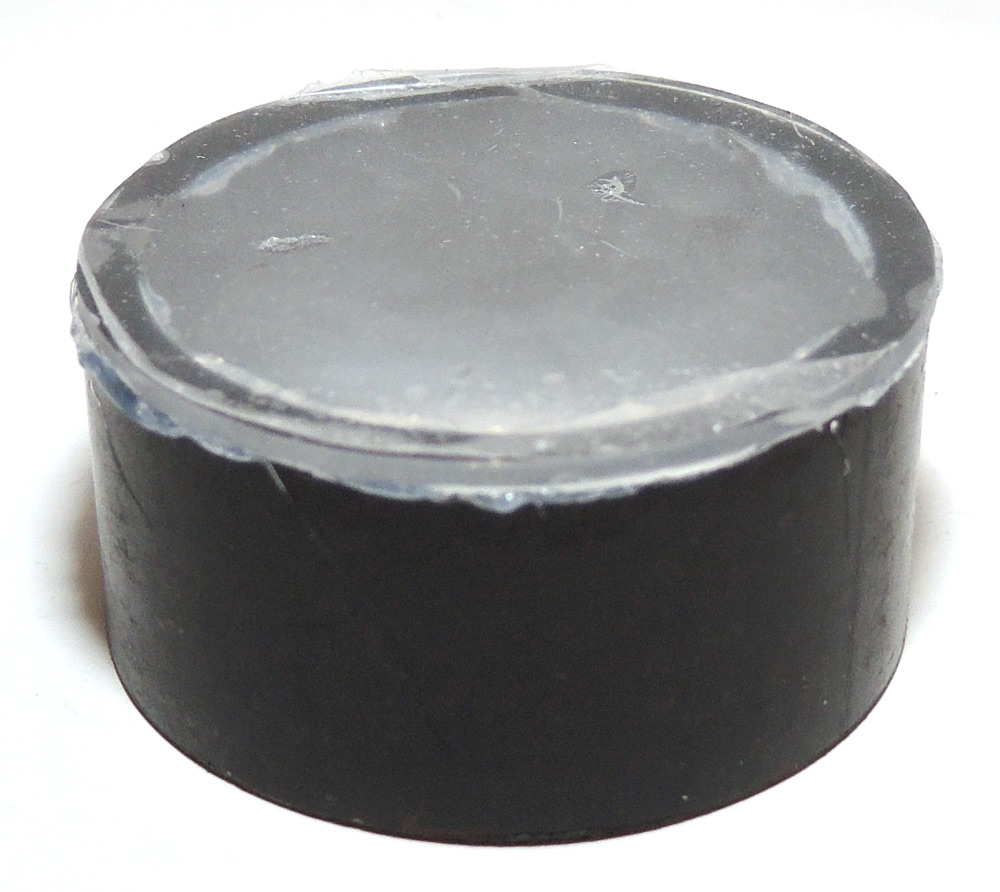
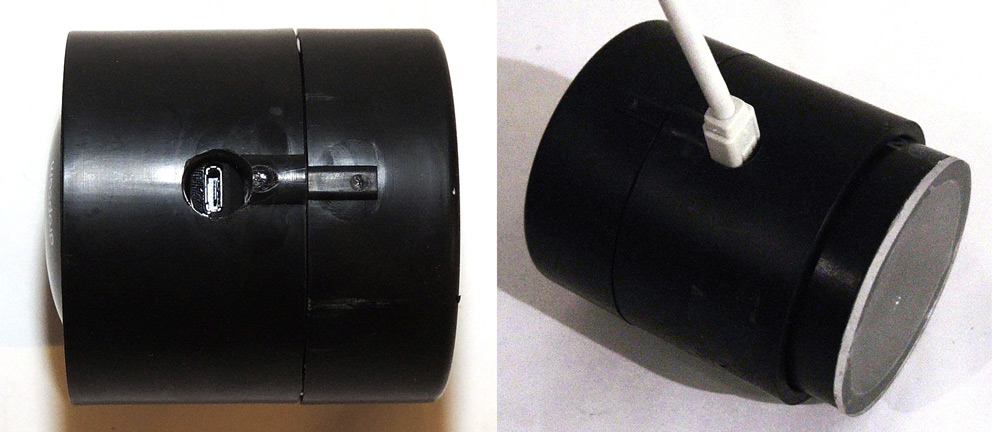
To protect the front of the Dropcam and seal the enclosure, I created a plexiglass lens with my bench grinder that I siliconed to a piece of the 2″ PVC pipe 1.25 inches long. This picture is of the two together before I cleaned off the extra silicone and removed the protective plastic from the plexiglass.
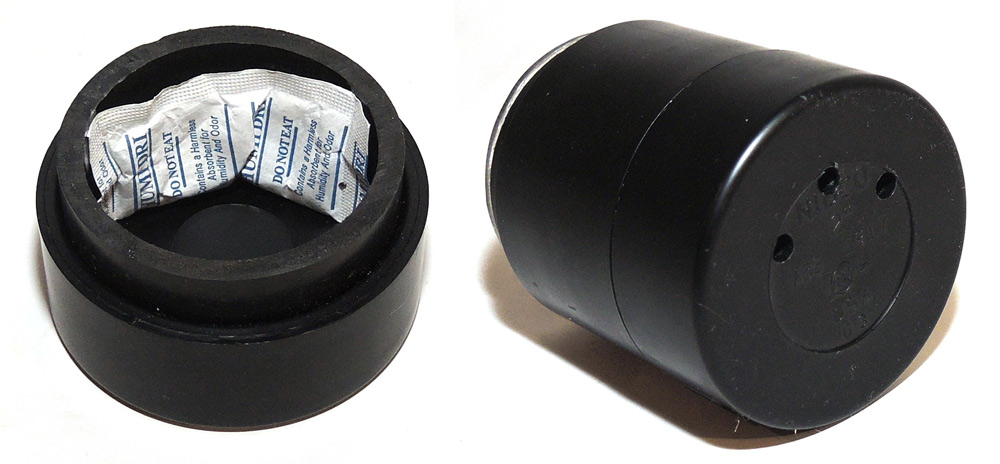
The back is made of a 2″ PVC cap and another piece of pipe 1.25 inches long. To keep the Dropcam and interior of the enclosure dry, I added a small desiccant pack to the rear section to absorb moisture. I originally envisioned the enclosure to be completely sealed. But taking excessive heat into account, I drilled three holes in the cap for the heat to escape and cool the interior. I plan these Dropcam enclosures to be mounted under the eves of my house and semi-protected from the weather/rain…so, water getting in should not be an issue.
I glued the tail cap and pipe piece together but due to its snug fit, it was not needed. The base cap sandwiches the Dropcam between the couplings stop ring and itself.
I used a 1/2″ drill bit to create an access port to plug the USB cable into the Dropcam. This part takes relatively precise measuring for a perfect fit.
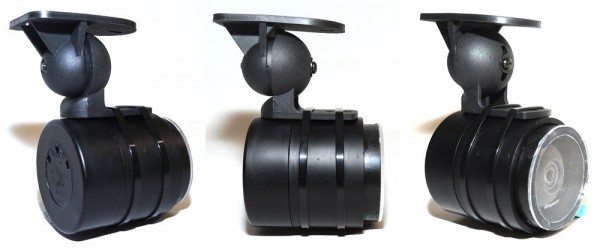
To mount the Dropcam enclosure, I zip-tied a plastic adjustable speaker mount I purchased off of Amazon to the top of the setup. It turned out surprisingly secure and didn’t look half bad.
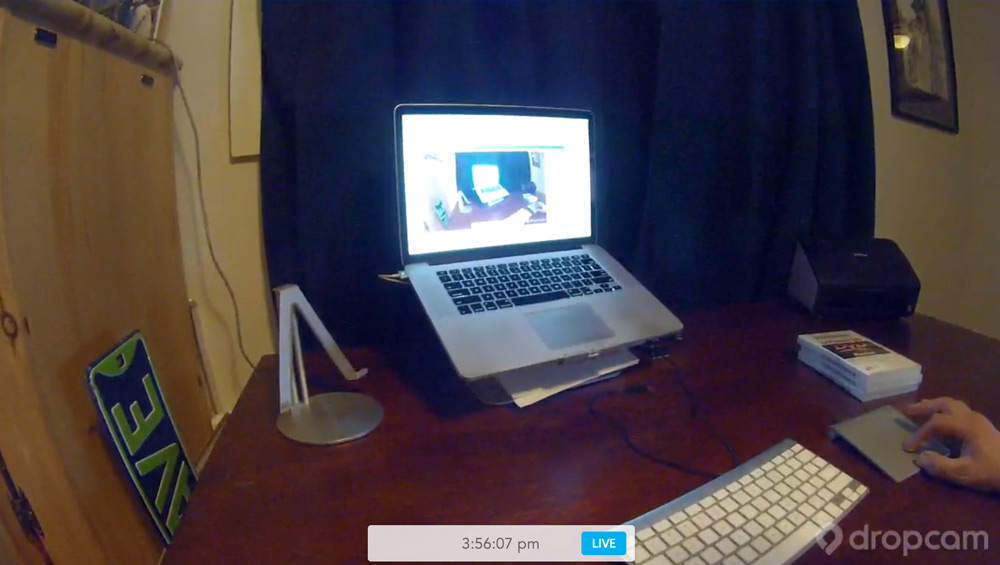
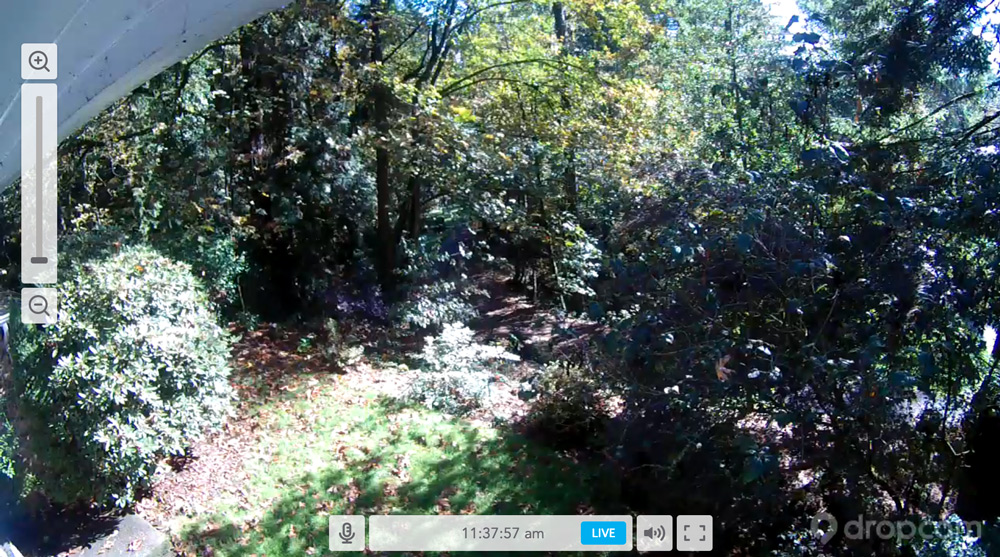
After I cleaned it off, the lens took nothing away from the picture quality of the Dropcam Pro.
But it does reflect the built in IR lights for night vision.

All things considered, I am very pleased with my first attempt of Macgyvering an outdoor enclosure for my Dropcam Pro. The entire setup cost less than $10 and that cost would decrease with each enclosure made. I plan on three or four exterior cameras in all. Once I determined the best design, I created two additional enclosures in less than 30 minutes; less silicone drying time.
However, before I go all in with an exterior DIY Dropcam Pro video surveillance system, I will see how my prototype survives the next few months of Seattle rain. If all goes well (aka the camera survives moisture and heat build up) the next camera or two will hopefully be installed around the holidays.
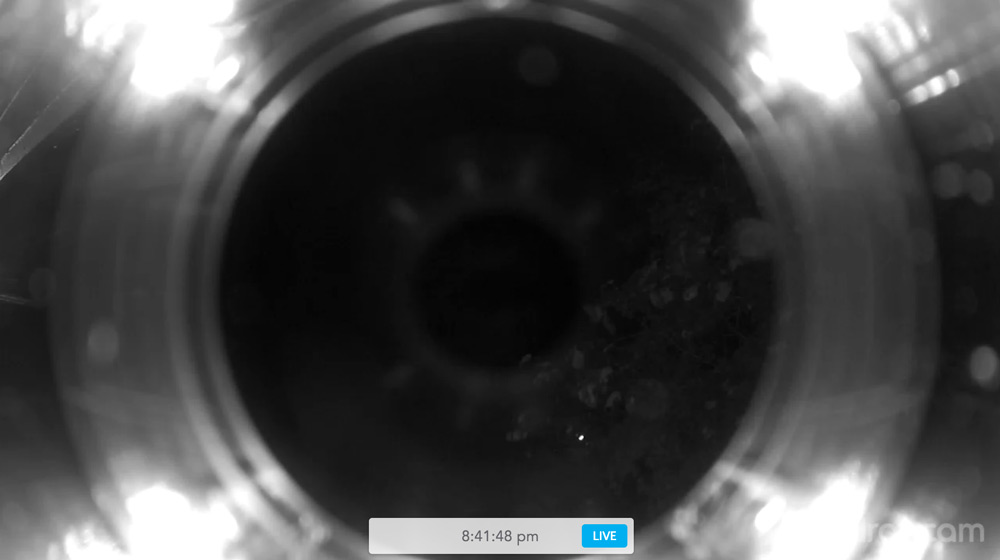
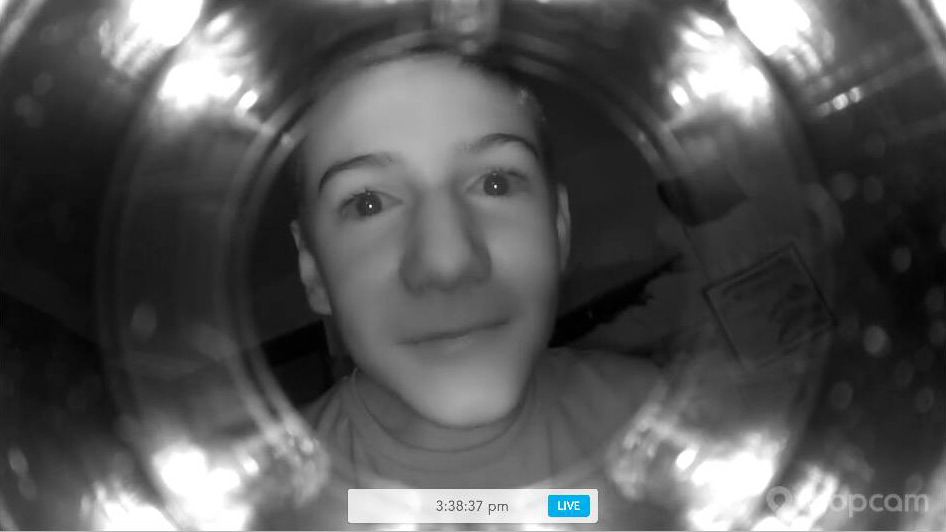
As requested, here is a picture of how poorly the night vision works in the outside enclosure.

TP-Link Tapo 1080P Indoor Security Camera for Baby Monitor, Dog Camera w/Motion Detection, 2-Way Audio Siren, Night Vision, Cloud & SD Card Storage, Works w/Alexa & Google Home (Tapo C100)
(as of July 15, 2026 07:24 GMT -05:00 - More infoProduct prices and availability are accurate as of the date/time indicated and are subject to change. Any price and availability information displayed on [relevant Amazon Site(s), as applicable] at the time of purchase will apply to the purchase of this product.)
Gadgeteer Comment Policy - Please read before commenting
Does the camera work at all for night vision? It looks like the center is clear at least. Can you add a real photo of what it shows at night with night vision turned on?
I’m most interested in how it performs at night also. I purchased the $49.99 version from Europe featured here a few weeks ago but haven’t received it yet. It promises non-reflective night vision and am wondering how they do it.
@1000Acres which camera did you order? I don’t remember one that is supposed to have non-reflective night vision. I might want to check it out too.
Good work, but if you had put the hole in the top and used the Dropcam’s image flip option you could have the cable run down the top of the contraption instead of poking out of the bottom.
To answer others, I don’t consider Dropcam a viable exterior night vision camera personally. It doesn’t throw enough IR, and its night vision suffers badly from blurring in any case due to long exposure times necessary to pull in an image.
Given that $100-190 (e.g. http://amzn.to/1Fyh0Cl or http://amzn.to/1tJaRQz ) now buys a 3 megapixel outdoor rated camera with far better picture quality and much brighter IR (yes, it is wired and requires data storage in the house), I think if you’re willing to spend the time on a really good solution that’s the way you ought to go. You can then add additional cameras for the cost of the camera only, no extra bandwidth taken up or $5/month for each additional camera.
Julie, I ordered the Dropcase that you reviewed on October 7. It is by Mate Basis UG. I was suspicious about the non-reflective night vision, but the Dropcase customer reviews say it really does work. Dropcam is my favorite cam. It has been very reliable. My only complaint is the night vision glaring on the window. Hopefully this will fix that.
@1000 Acres my mistake, I thought you were talking about buying a different camera. 🙂 I didn’t review the Dropcase. That was just a news item. I’m curious about it so please let me know once you get it and are able to test it.
Here’s one already made and allows use of the dropcam mount.
http://www.dropcapsule.com
I added a picture of how poorly the night vision works in the outside enclosure.
Dave, would it help the night vision if you could paint the interior of that pipe with a matte black paint, or maybe get a piece of adhesive-backed black felt or fabric to line the interior? It seems like reflections inside your enclosure are part of the problem with the night vision.
I’ve looked at this kind of outdoor solution for Dropcam before and always got put off by the non functioning of IR. I ended up buying a HomeMonitor HD Pro from Y-cam for my outdoor security. Its a pain going between the 2 apps, but at least I can see whats going on outdoors in the dark.
hello and thanks for the design info. Can you build two for me and ship? I’ll pay for time and materials – very busy at work and can’t take time.
Thank you,
HD
Hi Guys,
We ran into the same need for outdoor mounting of these cameras and developed a product you may be interested in.
droparmor.com
how do you think it would work if instead of using plexiglass, you use a polarizing filter (for cameras)? would that help/stop the glare during IR?
I know I’m late in commenting, but if you can mask the lens from the IR LED’s then the reflection won’t show in the camera. It like cupping your hands around your eyes to look outside a window at night. Just take a rubber O-ring, which has a diameter smaller than the ring of IR LEDS, and place it between the camera lens and the plexiglass window.