 I have an e-book reader I’m finding that I want to put everything that I have that is on paper into the device: books, magazine articles, users/owners manuals, cheat-sheets, blah, blah and blah. But after spending several hours scanning an out-of-print book that was falling apart using my standard Epson desktop scanner a few weeks ago, my enthusiasm faded. It just took too long per scanned page and I had to sit in front of or very near my desk for several hours. Plus, it required booting up my PC, logging on, waiting for boot up, firing up the scanner software, yada, yada and yada. And yes, I DO happen to be the laziest person on the planet.
I also spent some time looking through several DIY book reader web sites (diybookscanner.org, for example) and while those devices could speed up the scanning time, building such a contraption is out of my technical skills and patience level.
I bumbled across Julie’s review of the DocuPen and I thought that would be a nifty compromise to the long scan time of the desktop scanner versus the mechanical finesse required to build a DIY book scanner. But then I bumbled on to the price of the DocuPen (and yes I also happen to be the cheapest person on the planet). Then the VuPoint Magic Wand hand scanner($99) started popping up here and there. For $99 I hoped it would make the new Great Compromise. Think it did the job?
BASIC SPECS
Here are the fru-fru specs from the VuPoint Solutions web site:
- Model PDS-ST410-VP
- Sensor A4 Color Contact image Sensor
- Resolution Standard Reso: 300x300dpi (default); High Reso: 600x600dpi
- External Memory Support Micro SD card up to 32GB (Micro SD card not included)
- File Format JPEG
- LCD Scanning status display
- Auto Power Off Off/ 3 minute/ 5 minute
- Scanning Speed Approximate scanning speed (standard letter size)
-High res. with color – 13 sec.
-High res with mono – 6 sec.
-Standard res. with color – 3 sec.
-Standard res with mono – 2 sec. - White Balance Auto
- USB Port USB 2.0 high speed
- Power Source 2xAA Batteries
- Battery Life Approx. 180 color or 200 monochromatic scans
- Dimension(LxHxW) 10” x 1.2” x 1.1”
- LCD Display Size 0.787” x 0.59”
- Weight 7.5 oz (with batteries)
- Support System Driver free to download for Windows® XP SP2/ Windows® Vista/ Windows® 7™ and
Macintosh 10.4 or above ( direct plug-in, driverinstallation not required) - Accessories USB cable, 2x AA alkaline batteries, OCR software CD, Pouch, Cleaning cloth, user’s manual
HARDWARE TOUR
Next, let’s take a tour of the device.
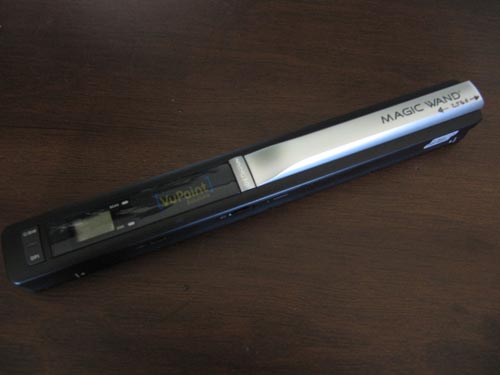
First it is about a foot long and about an inch wide and deep. It has an indentation on each of its sides, providing a good grip when scanning.
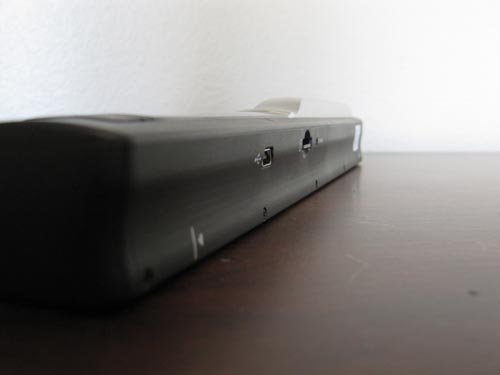
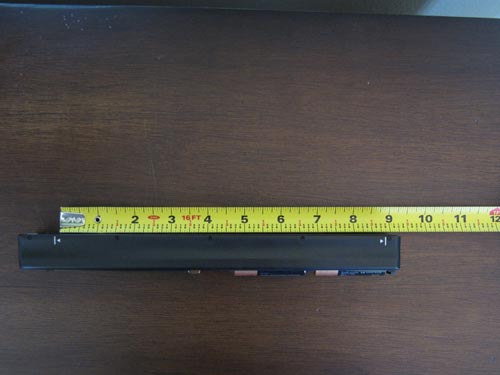
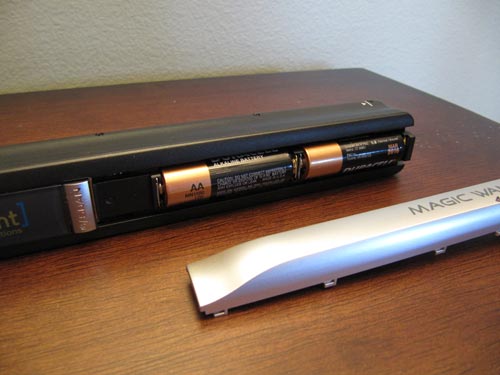
It is powered by two AA batteries and I’ve been running the thing for three or four days now and it’s still going strong. This is in part due, I believe, to the way that a scan is performed: you first hit the scan start button, do the scan, then hit the start button again. Additionally, the scan light only illuminates when the little rollers on the bottom of the device are in motion (more on that in a bit).
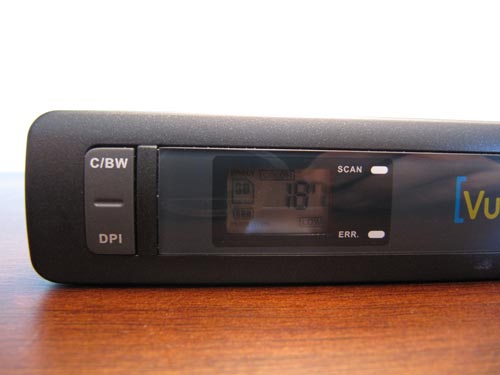
On the top of the device are two buttons that allow you to choose between color or black and white and 300 or 600 DPI. The on/off switch and start/scan switch (one switch doing two jobs) is also on the top of the scanner. An LCD screen gives you indication of the number of scans you’ve performed, and the mode and resolution chosen. Two LEDs indicate when a scan is in progress and if an error during the scan was detected.
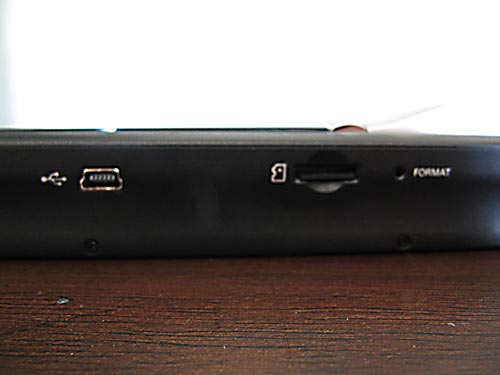
A USB port and micro ScanDisk port are along the side. There is additionally a “Format” button that can be pressed to reformat the memory disk, though I never used it.
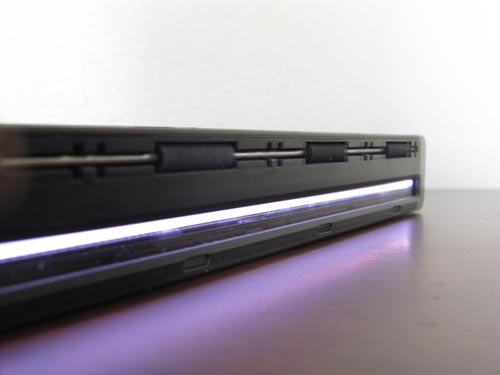
On the bottom of the unit you’ll find the meat: the scanner and, equally important, a set of rollers. The scanning will only take place while the rollers are in motion, a notion that is very important to remember as we go through this review.
The wand also comes with OCR software.
To perform a scan, turn the Magic Wand on with the on/off button for a few seconds until it turns on; then press the on/off button again to start a scan, do the scan thang, then turn the on/off button again to stop the scan. Wash, rinse repeat.
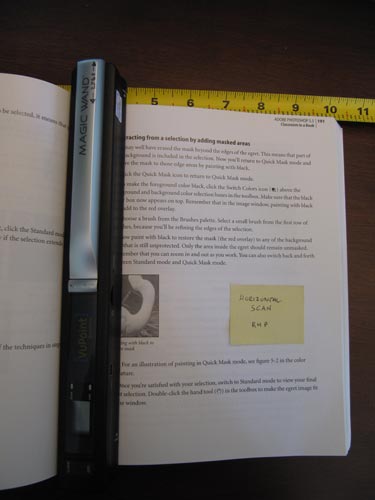
By default, the scanner turns on in color mode and in the 300 DPI resolution. Pressing one of the two option buttons allow you to easily change these modes.
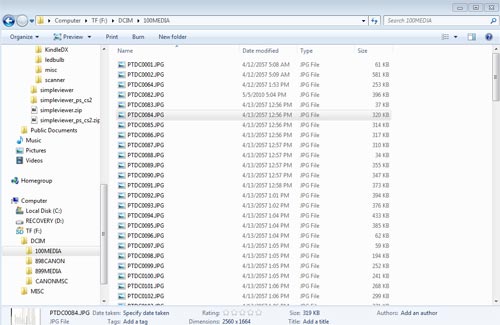
Overall, the design is pretty sweet. It’s small and narrow, has a nifty ergonomic indentation along the sides to help you with the grip during a scan, and has a limited number of buttons to futz with. The LEDs and display offer simple and intuitive feedback. If the ERR LED lights up, it indicates that the scan was not successful, although the scan is nonetheless saved off as a file. That’s one of the annoying things I found during scans: I couldn’t tell what it was that would cause a scan error and I wish that it would not save the scan when an error did occur because those extra files with errors in them would require editing out later. Some of the scans that were reported as an error actually looked ok, so I would often times end up with near-duplicate scans of the same page when editing. Below is a screen shot of the contents of the micro drive when connected through the USB port on a PC after several scans:
SCANNING EXAMPLES
Scanning actually took me a while to get used to because I kept trying to scan my book excerpts from top to bottom. Instead, due to the bending that occurs in the center of the book binding (aka a “book crack” hee hee), the scanner works best when running it from the center of the binding out to the end of the pages in a horizontal fashion. Once I dawned (duhed) onto running the scan sideways it usually became a breeze to scan a few pages here and there. I am a klutz so it was easy for me to foul up scans a number of times and the scanner would illuminate its ERROR light when that occurred. There were times when I thought that I had a smooth scan but the ERROR light would still turn on and I’d have to repeat the scan. I tried to do some research on why some scans just don’t work, but I haven’t found anything to report yet. I’d just like to know what I’m doing wrong on those occasions and be able to prevent it. It would also be REALLY nice if the scans that did result in an error were not saved.
My main purpose in using the Magic Wand was to scan a few out-of-print books that I have that are literally falling apart and to scan certain chapters out of technical manuals so I focused my scanning on that type of target. But I also performed scans on what I thought others might like to see, including a magazine scan; recipes from a cook book; a regular 8×11 paper with a technical drawing; and a few other samples. All of the resulting images were fine. No complaints on the quality of the results. The following examples show some of these results.



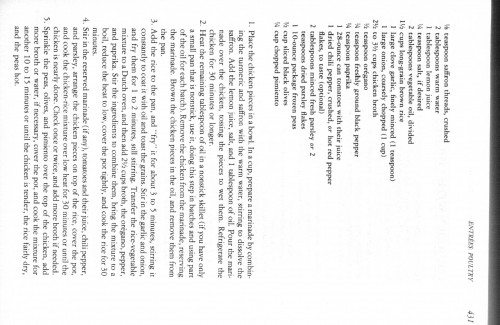

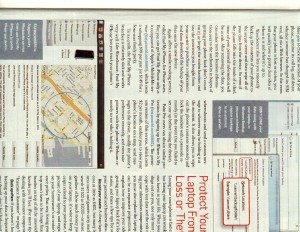

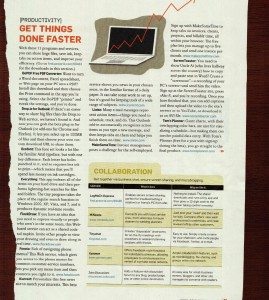
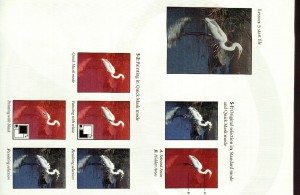
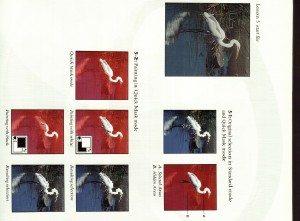
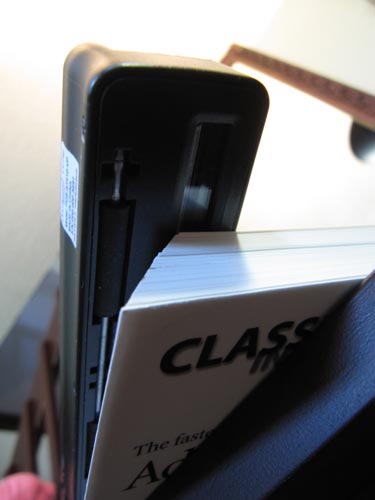
The biggest problem I had during scanning trying to get all of the information of a page into the scan on certain books that have the page numbers at the very edge of the pages. The reason that it was difficult to get the page numbers included on the scan is that the scan actually occurs only when the little rollers on the bottom of the wand are in motion. And, when page numbers are at the very edge of the page, the roller wheels roll off the page first, and the scanning turns off before it can read the page numbers. Note: this is NOT a fault of the Magic Wand; it is just a matter of book formats. Some books have page numbers in a nice place, others (in fact most of mine for some reason) have the page numbers way at the edge or nestled deep in the book crack (heh). This is a little hard to grok, so the following photos attempt to demonstrate the issue.

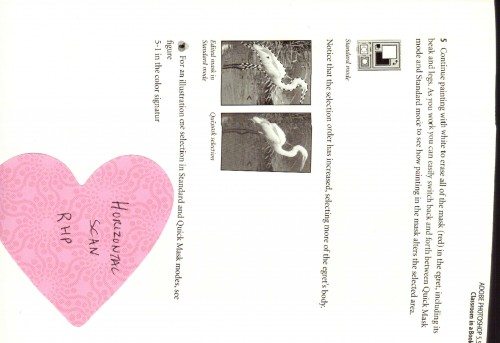
The reason that this is a problem for me is that when doing a large number of scans from a book (say, for example, that you wish to scan 100 or so pages),once the scanning is complete you then have to go back and “stich” the individual scanned pages into a complete e-book. You normally will want to take each image, rotate as needed, despeckle (as needed) and do some overall clean up. Having the page numbers on the scanned images helps you in this process in putting together the final ebook but also helps once the ebook is complete and you need to skip around pages; having the page number on the scan just makes that easier. I tried several configurations with the wand to attempt to get the entire contents of a page and the page numbers, but on some books this just was not possible. This is something to keep in mind if you plan on scanning many pages. My final decision is that when faced with these type of books (i.e. those that push the page numbers to the far edge or binding book crack [heh heh]) is to write the page numbers by hand in the book away from the edges before beginning the scan.
OCR
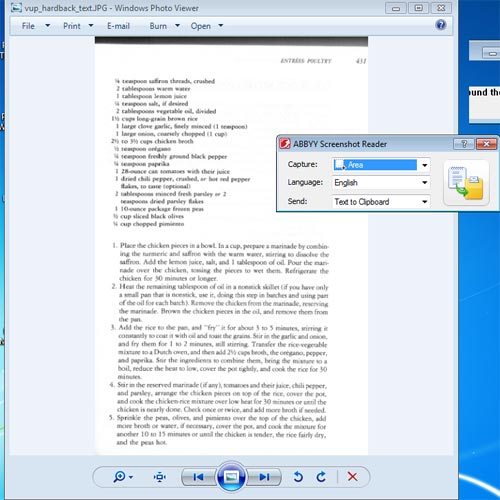
The ABBYY ScreenShot software that comes with the Magic Wand has an OCR engine and has the following user interface:
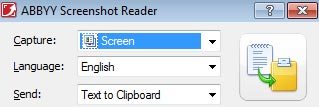
This version of ABBYY basically takes a screen shot of an image and performs an OCR. I used the following scanned image as the OCR candidate. You can see in the second photo how the image is a little skewed, has some bleed-through from the page in the book beneath it, and has a few speckles. I ran ABBYY against this image as-is when viewed inside of the Windows image viewer program.


ABBYY literally uses the screen as a way to capture its text, so if you run it against a full size image, as shown below, you’ll see the less-than-captivating results…
y vup_hardback_text.JPG - Windows Photo Viewer | cd S3
twMM evitrtr 4M
• Irnpuin uflroo thread*, crudied
2 tahie<p>-*m »«m - ir. .
1 (ablnpoon lemon jiuie
• trMpoon tall, it dewed
2 lablnpoora vir.ttah* oil. divided
\'i i       t. ii-, «nn hrmn m
I lat|K lUnr gaclic. baeli mimed (I icnpooo)
I large union, i narieli chopped 11 cup)
2*1 io 34 (apt <(talked broth
* icaapooo ire*hli ground black pepper
•* trii|"in paprika
I       ¦-!"( ean tomaioci miih I heir |u«e
1 dried thili prppct. iruihrd. »r h>H red pepper
Hj«tv lo Uilc   i pi i. ml
2 tahtnpiun mined frrih parelci at 2
KupmiiH dried pariley flake*
I 10-ounie package Iraien pea*
4 tup diied black oli»e»
M <up (hopped p.mierao
1 Plate ihr .h* ken panel inaboaiL In a tup, prepfe a ananaaiie by to—tun
in* the turmrtH and nil*, wuh ihe warn ereaer. ¦ 1 ¦ ¦ • to daaanhr (he
aaaTrun Add the lemon mate. aafc. and I ufclcapooa at ual Pour the nan
raadr ihr ihaihra towing ihr paexe* to wet mem  K.11.4.1.1. thr
thntkrn (or 30 an mi of loaajrr.
2 Ilea* the remaaaing iabte*pooai of oal ¦ ¦ wawmtk tatdart Irf yow bw .mh;
a mmI pan tkaa n nmtort. aac "t. dean* dm tarp in hatthr* and uung pan
tafraarodhwea^banch) Remove ft* chaifcra tr*»nihie minnaik.n- ¦ 1..
rhe wianna.tr Hnxm rhe chicken parte** ¦ ihr oil, and rteaam them from
the pan
S Add the rue to the pan. and "fry" it tor about 1 to ^ rnauttrv wirm* 11
mituantlv to 1 oat 11 »nh and i.uti the grain* Sail ir the garlii and imai.
and fry them (or I i<> 2 minuie-i. Mil inrring Trantfcr the rue vegetable
m unite 10a I>ut.h men. and then add 2Vi .uptbrixh. thc<«egan» peppvr.
and paprika the ¦ngredimn 10 tumhanr (hem. bring the mmurr hi a
boil, redutc the heaa ao loo. com oar pot nghih. and took the nee tor 30
minuan
•». Sorai the rruroed marinade (afaan; Lasnuai^aod chor >a*e. chdi pepper,
and pankn. arrange the (take* partn oa aunt** (he rxr. nmt the pi*,
and ma rhe 1 h« «*"» He niiture c»*r in* krat k« V> mavarl or anal the
chidM m eamrh; done Chart once or r**ce. and add more baodt at ae-rded
V Spnake- the- pern, olran, and paaaaraan over *W anp of *U chatkea. add
¦tore broth of »aacr d neiruari, com the pea. and took ake mature tor
antmSer lOao |] mi mm-* or until the chKfcm 11 arndcr, the ncc farl*.-dry.
and the pcaa hot
Results of ABBYY OCR of entire scanned image. This took about 40 seconds.
So I zoomed in on the page to increase the text size on the screen and re-ran the OCR with the following results . . .

1 28-ounce can tomatoes with their juice
1 dried chili pepper, crushed, or hot red pepper
flakes, to taste (optional)
2 tablespoons minced fresh parsley or 2
teaspoons dried parsley flakes
I 10-ounce package frozen peas
Vi cup sliced black olives
xk cup chopped pimiento
1. Place the chicken pieces in a bowl. In a cup, prepare a marinade by combin-
ing the turmeric and saffron with the warm water, stirring to dissolve the
saffron. Add the lemon juice, salt, and 1 tablespoon of oil. Pour the mari-
nade over the chicken, tossing the pieces to wet them. Refrigerate the
chicken for 30 minutes or longer.
2. Heat the remaining tablespoon of oil in a nonstick skillet (if you have only
a small pan that is nonstick, use it, doing this step in batches and using part
of the oil for each batch). Remove the chicken from the marinade, reserving
the marinade. Brown the chicken pieces in the oil, and remove them from
the pan.
Results of ABBYY scan after zooming in on the image.
So after zooming in, the scan went much better. But imagine trying to do this for multiple (maybe even hundreds) of pages. And you’d still have to go back and do a post-clean up of the text where the OCR was incorrect. On the plus side, ABBYY has quite a number of supported languages which I found pretty impressive.
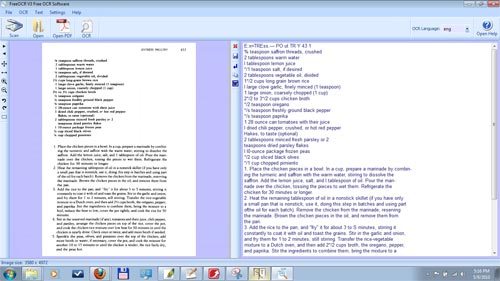
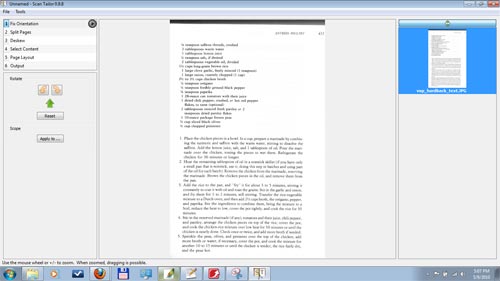
For batch processing, you might want to look at a combination of Scan Tailor (to rotate, clean up the images, and convert them to TIFF format) and then FreeOCR . These two tools could help a little with batch processing many pages. Following are a few screen shots of running just FreeOCR and its results.
ENTREESY FOUL TRY I
Vu teaspoon saffron threads, crushed
2 tablespoons warm water
1 tablespoon lemon juice
IA teaspoon salt, if desired
2 tablespoons vegetable oil, divided
1% cups long-grain brown rice
1 large clove garlic, hnely minced (1 teaspoon)
l large onion, coarsely chopped (1 cup)
2*/2 to 3*/2 cups chicken broth
% teaspoon oregano
IA teaspoon freshly ground black pepper
Vs teaspoon paprika
l 28-ounce can tomatoes with their juice
1 dried chili pepper, crushed, ar hot red pepper
Hakes, to taste (optional)
2 tablespoons minced fresh parsley or 2
teaspoons dried parsley flakes
l 10-ounce package frozen peas
lb cup sliced black olives
IA cup chopped pimiento
1. Place the chicken pieces in a bowl. In a cup, prepare a marinade by combin-
ing the turmeric and saffron with the warm water, stirring to dissolve the
saffron. Add the lemon juice, salt, and 1 tablespoon of oil. Pour the mari-
nade over the chicken, tossing the pieces to wet them. Refrigerate the
chicken for 30 minutes or longer.
2. Heat the remaining tablespoon of oil in a nonstick skillet (if you have only
a small pan that is nonstick, use it, doing this step in batches and using part
of the oil for each batch). Remove the chicken from the marinade, reserving
the marinade. Brown the chicken pieces in the oil, and remove them from
the pan.
3. Add the rice to the pan, and "fry" it for about 3 to 5 minutes, stirring it
constantly to coat it with oil and toast the grains. Stir in the garlic and onion,
and fry them for 1 to 2 minutes, still stirring. Transfer the rice-vegetable
mixture to a Dutch oven, and then add 21/2 cups broth, the oregano, pepper,
and paprika. Stir the ingredients to combine them, bring the mixture to a
boil, reduce the heat to low, cover the pot tightly, and cook the rice for 30
minutes.
4. Stir in the reserved marinade (if any), tomatoes and their juice, chili pepper,
and parsley, arrange the chicken pieces on top of the rice, cover the pot,
and cook the chicken-rice mixture over low heat for 30 minutes or until the
chicken is nearly done. Check once or twice, and add more broth if needed.
5. Sprinkle the peas, olives, and pimiento over the top of the chicken, add
more broth or water, if necessary, cover the pot, and cook the mixture for
another 10 to 15 minutes or until the chicken is tender, the rice fairly dry,
and the peas hot.
Results of FreeORC conversion, not bad but note all the extra line feeds
Finally, below is an example of clean up and conversion to TIFF through Scan Tailor followed by processing by FreeOCR.
E:x¤TREss.— PO ut TR Y 43 1
% teaspoon saffron threads, crushed
2 tablespoons warm water
l tablespoon lemon juice
*/1 teaspoon salt, if desired
2 tablespoons vegetable oil, divided
1*/2 cups long·grain brown rice
l large clove garlic, finely minced (1 teaspoon)
1 large onion, coarsely chopped (1 cup)
2*/2 to 3*/2 cups chicken broth
*/2 teaspoon oregano
*/s teaspoon freshly ground black pepper
*/s teaspoon paprika
1 28·ounce can tomatoes with their juice
l dried chili pepper, crushed, or hot red pepper
Hakes, to taste (optional)
2 tablespoons minced fresh parsley or 2
teaspoons dried parsley flakes
l l0-ounce package frozen peas
*/2 cup sliced black olives
*/1 cup chopped pimiento
1. Place the chicken pieces in a bowl. In a cup, prepare a marinade by combin-
ing the turmeric and saffron with the warm water, stirring to dissolve the
saffron. Add the lemon juice, salt, and l tablespoon of oil. Pour the mari-
nade over the chicken, tossing the pieces to wet them. Refrigerate the
chicken for 30 minutes or longer.
2. Heat the remaining tablespoon of oil in a nonstick skillet (if you have only
a small pan that is nonstick, use it, doing this step in batches and using part
ofthe oil for each batch). Remove the chicken from the marinade, reserving
the marinade. Brown the chicken pieces in the oil, and remove them from
the pan.
3. Add the rice to the pan, and "fry" it for about 3 to S minutes, stirring it
constantly to coat it with oil and toast the grains. Stir in the garlic and onion,
and fry them for 1 to 2 minutes, still stirring. Transfer the rice-vegetable
mixture to a Dutch oven, and then add 2*/2 cups broth, the oregano, pepper,
and paprika. Stir the ingredients to combine them, bring the mixture to a
boil, reduce the heat to low, cover the pot tightly, and cook the rice for 30
minutes.
4. Stir in the reserved marinade (if any), tomatoes and their juice, chili pepper,
and parsley, arrange the chicken pieces on top of the rice, cover the pot,
and cook the chicken-rice mixture over low heat for 30 minutes or until the
chicken is nearly done. Check once or twice, and add more broth if needed.
5. Sprinkle the peas, olives, and pimiento over the top of the chicken, add
more broth or water, if necessary, cover the pot, and cook the mixture for
another 10 to 15 minutes or until the chicken is tender, the rice fairly dry,
and the peas hot.
Results of FreeORC conversion after Scan Tailor clean up
Once you have your text, you can then convert it to PDF format. Of course you can also just convert the raw JPG files to PDF but then you can’t do any searching on the results.
SUMMARY
This is a nice scanner, well thought-out and at a nice price. (You can even get it at Bed Bath & Beyond, by the way). For batch scanning it could work out but you want to watch out for books with text near the edges of the page.
|
Model |
|
| Features | Fast and convenient way to scan, archive & organize for your personal use |
| Sensor | A4 Color Contact image Sensor |
| Resolution | Standard Reso: 300x300dpi (default); High Reso: 600x600dpi |
| External Memory | Support Micro SD card up to 32GB (Micro SD card not included) |
| File Format | JPEG |
| LCD | Scanning status display |
| Auto Power Off | Off/ 3 minute/ 5 minute |
| Scanning Speed | Approximate scanning speed (standard letter size) -High res. with color – 13 sec. -High res with mono – 6 sec. -Standard res. with color – 3 sec. -Standard res with mono – 2 sec. |
| White Balance | Auto |
| USB Port | USB 2.0 high speed |
| Power Source | 2xAA Batteries |
| Battery Life | Approx. 180 color or 200 monochromatic scans |
| Dimension(LxHxW) | 10” x 1.2” x 1.1” |
| LCD Display Size | 0.787” x 0.59” |
| Weight | 7.5 oz (with batteries) |
| Support System | Driver free to download for Windows® XP SP2/ Windows® Vista/ Windows® 7™ and Macintosh 10.4 or above ( direct plug-in, driverinstallation not required) |
| Accessories | USB cable, 2x AA alkaline batteries, OCR software CD, Pouch, Cleaning cloth, user’s manual |
Product Information
| Price: | $99 |
| Manufacturer: | VuPoint Solutions |
| Pros: |
|
| Cons: |
|

Gadgeteer Comment Policy - Please read before commenting
Doesn’t seem like the best solution for ebooks to me. The wand seems better for single page one offs of receipts.
When I make ebooks for myself, I first cut the binding off. For magazines I use a paper cutter for books I have Kinkos chop the binding off. Then I run them through my sheet feed scanner (Fujitsu ScanSnap, $420). The scanner produces PDFs, and for magazines for my iPad I don’t bother OCRing them. It takes 15min. For books, I OCR, proof, and make epubs. Those can take awhile but the scanning is less than an hour of the whole process.
Mind if I ask, I noticed the position of the roller is critical for the lights to actually work. With that in mind, are you limited to only scanning in one direction? Or can you flip the device around and change its orientation to ensure the rollers are always making contact with the page?
To further elaborate, say you were scanning the left side of a book. Can you start from the spine of the book, and scan from middle to left? Or would you have to scan from the left edge for a page, towards the spine?
Would seem really useful for textbooks since my plain flatbed scanner always curves any words near the spine of any book..
@Andy – yes you can flip it around. That’s what I did on several attempts in fact to get my book scanned in all the way. The problem is that when I did that for the particular book I was using, the text that was (of course) scrunched near the binding would then be cut off. I also tried scanning top to bottom (vertically) and that would sometimes work, sometimes not; the rollers tended to get caught along the sides of the pages.
Kewl ok q; that makes all my spined book scanning easier.
I just got a little worried with VuPoint’s customer rep’s told me it wasn’t feasible to scan from right to left. I thought it was some sort of mechanical issue where the roller would only shine their lights if rolled in one particular direction. I was also afraid of damaging the rollers by scanning differently from their youtube demonstration’s direction.
Ja, I used the scanner left, right, upside down and backwards. But I gotta say, more than three or four scans in a row was hard to do. I just kept getting scanning errors that I couldn’t figure out.
can this device be used as visiting card scanner
@vinod — you can scan just about anything that lies flat
I have never seen a more comprehensive review. Good job and thanks.
I wish every technical product was reviewed as thoroughly as your review. Thanks
Great review. Also one point, if you could slide a (larger than the paper being copied) piece of card stock underneath the page, then it would increase the total area that can be scanned since the rollers must touch something to roll, then you can crop out the excess afterwards.
I am having a hard time transfering scans to my computer from the wand-I use the scanner for basically receipts and single items that I would like to set up fiole on my computer-can anyone help?-thanks
@phil — what kind of problems are you having? You should be able to connect the USB port from the wand to the USB port of your computer. You’ll want to make sure the wand is in the ON state when doing this.
@Big Joe: that’s a great suggestion; I tried it out real quick and has potential. It still cuts off on some pages, but overall the card stock does improve the results.
I bought a Vupoint Magic wand & it is way better & cheaper than the Planon docupen that I bought last year.
I have found a way to get around the problem of the Vupoint cutting off the last part of the page of a book because the rollers have gone off the edge of the book. I went to the dollar store & bought a one dollar 8.5 x 11″ picture frame, took the glass out & thru the frame away. I just place the glass over the book page to be copied & since the glass is usually a little longer than most text book pages, the whole page with the page #comes out perfect. I have found that its better to scan the right page of an open text book with the wand vertical to the open book & using the glass on the left side of an open text book scanning it horizontally. It also works best to support the left side of an open text book with another book of about the same size.
The nice thing about the glass is that its cheap & you can put it inside a hard binder & carry it around in your book bag or briefcase.
Hope this info was more helpful.
@matt: another cool idea. I tried this and it worked great as far as getting the entire page (including the page numbers) in the scan, but my results were slightly blurry (I tried with both the low and high res settings). Maybe i’ll have to try it with a thinner piece of glass. Great idea in any case.
I have a question. Can you scan something larger than 8 12 x 11 and then stitch the image together? If you can does the scanner come with stitching software?
My Mom owns a t shirt store and sometimes has to copy t shirts directly.
@Nyxie – you’d probably be better off with a flat bed scanner for a t-shirt, I’m not sure the wand scanner would work all that well on fabric. That being said, your scan width is limited to the width of the scanner itself, but the length of the scan would depend on how long you can keep the roller in tact and rolling.
In any case, the software that comes with the scanner does not have the type of “stitching” that you’d need. The type of “stitching” that we referred to in this review was more for putting individual files together, but as individual pages. I think what you would need for your t-shirt operation is something more in the line with the “panorama stiching” capability in Photoshop or other such image manipulation software. Hope that makes sense.
So bottom line: you can scan images longer than 11 but not wider than 8.5 with the wand; and it does not come with stitching software.
Thanks for the info cobinrox. I was going to get her one, but it sounds like she might be better off sticking with her flatbed that she has been using. I may get one for myself for book scanning and let my Mom try it out for her t shirts.
Hey greetings from Argentina. Great review, i am currently studying for chef and there are a lot of cooking books i would like to have ,but since they cost a lot of $$$ i started to think of this as an option. Also because the library doesn´t allow to take the book home.
I just have 1 question, the errors that occured during scaning, did they happened when you scaned a lot? i mean, i want to scan 200 pages in a row, considering that i have to carry the scanner to the library would you say this is a good option?
@Mauro – wow that’s a great question. I have had much better luck in scanning multiple pages when I use Big Joe’s idea of placing a piece of card stock/tag board that is slightly larger than the page I’m scanning beneath the page I’m scanning. Without the tag board, the file error rate really goes up.
Another technique I’ve found is to first scan all the odd pages, then flip the book around and scan all the even pages. This saves a lot of scanner time because you keep the book and scanner physically in the same spot for the odd pages and then for the even pages (as opposed to scanning in a page, flipping the book, flipping the scanner and scanning the next page, then blah blah blah).
Also, to save even more time, I can actually slip the tag board underneath about 5 pages and be able to scan those 5 pages pretty well, without having to move the tag board between those 5 scans. Hope that makes sense. I’ll try and cobble up a video showing what i mean if it doesn’t make sense.
I have the VuPoint Scanner and have lost my owners Manual. I managed to find your helpful site. Thanks.
But I am at a loss as to how to delete files that are on the micro-SC card. I have tried pitting the SD card in the computer to delete files and in my camera. No Luck. Camera says it needs to be formated but will not format it for me. Thanks for any help you are able to give.
Gale
@Gale: not sure what the problem is, but am pretty sure it is not related to the scanner. The memory cards should act like any other external drive to your PC, allowing you to navigate through its contents. What type of errors do you see when you attempt to delete the files? If your PC cannot delete the files, can it at least “see” the files?
How kind of you to answer so quickly. I can actually read and save files to my pc. But then I do not know how to delete them from the micro/sd. I am quite sure it is an operators error. I have just used it to try to see how it works, then said maybe I should clean the sd so it will not have to many files on it. I simply do not know how to erase what I have on it at this time.
Thanks so much.
I don’t know if my scanner is the same brand as yours, but I was having the same problem until I noticed that there is a button at the very left end of the scanner that has 2 options JPG/PDF and DPI. When I press the DPI button before I download, I have no problem erasing the files from my SD.
@BayouG: Hmmm, can you, when viewing the files in Windows File Explorer, right mouse click on the files and then choose the “delete” option? Alternatively, when viewing the files in Windows File Explorer can you press the DELETE key?
I don’t understand why makers of handheld scanners still use rollers. In this age of ultracheap optical mice, it would seem cheaper to use a couple of laser assemblies instead for more reliable tracking. Better still, with 2-dimensional tracking, such pickups should be able to detect horizontal motion as you scan vertically down the page and automatically compensate.
I bought my wand 5 days ago. The first time I formatted and used the scanner I noticed that the create date was Jan 1, 2009. Now five days later the create date has updated to Jan 5, 2009. How do I reset the internal clock to todays date?
I also just got my wand a few days ago. After micro SD format I used the scanner & noticed that the create date was Jan 1, 2009. Now 3 days later the create date has updated to Jan 3, 2009. How do I reset the internal clock to the correct date?
My VuPoint Magic Wand won’t turn on even with fresh batteries.
How do I fix it? How can I find the user’s manual?
Bob
i am purchasing the magic wand as we speak, how often and at
what intervals does it require washing and rinsing? Thank you
Great site! Just bought the Wand but haven’t received it yet. Decided to see what info was available online in case I had any problems. Hands down best site for anything I’ve ever found. Now THIS is what we need for all products! Sure would save a lot of time and headaches. So, I’m thanking you in advance. Kudos for your thorough and understandable info!
I have this scanner and I am getting all kinds of light banding. Not one clean picture. It has light and dark bands across half the page. Whats wrong?
Okay, I’m an idiot. I must have messed up the white calibration, because I did it again and the banding is gone. My fault, I love this thing. It really works well.
Thank you for posting such a helpful site. I’m putting this site in my favorites. I had slight buyer’s remorse and found your site when checking on line to make sure it was a good product. You’ve put my mind at ease and now I can’t wait for it to arrive. The scanner on my 4 in 1 printer broke and I thought this would be a good replacement. It appears this will be more useful than my former scanner. I’m already thinking of all the applications. Thanks again for taking the time to provide such useful information.
I have had this scanner for months and it went really well in the beginning. I have done nothing different, however, over half of the scans come out reversed (like a mirror image). Anyone else having these issues? Any answers?
I’ve actually seen that reverse image problem too, though not on every scan, usually I’d see it occur once and then it’d be fine the next time. Did you try removing and re-inserting the batteries?
That didn’t work but thanks for the suggestion! Any other ideas?
I am more interested in scanning old photos of my children. I am ignorant when it comes to technology. Are you able to label each photo and group them in a folder, for example one folder for each year?
@Jen: sorry, no I don’t have any other ideas, but maybe some of the others do
@Strickler: You can’t do the labeling and stuff with the scanner itself, but you can either get software that will help you do that once you have made your scans and then connect the scanner to the computer in order to upload the photos to your computer. You can also just use Windows File Manager/Photo Viewer to do that, too. That’s what I do because I never know what computer I’ll be using and which software is available.
Just purchased scanner and my scans (my mom’s recipe box) 374, were all reversed. I did scan from top to bottom and now I cannot change mirror image. I don’t have access due to probate to rescan so can anyone tell me how to reverse these, please? It would mean so much to me and my daughters.
You might be able to use PhotoShop to invert them.
I’m thinking of getting one of these scanners and I love this website. Question….. Does the software work on an iMac running “snow leopard”?
Just got my scanner. How do you scan small pictures without the background showing the full size of the screen? The demo looked easy.
Need to know how to remove scans off the SD card. Clean it up for more space. I hate downloading all those pics every time I download too.
@Lee — you should just be able to delete them from the SD drive as if it (the SD Drive) were another external USB drive. Hope that makes sense and what you were asking about.
@MB: sorrry, I’m not quite sure what you mean, could you elaborate a little more on what you need? If I sort of understand the issue, you could use somehting like photoshop or paintshop to crop out unneeded areas.
@Dingo — the scanner is really just a USB drive so as long as your Snow Leopard can read USB ports you should be good to go
Hi…I just purchased the vuPoint Magic Wand & I am having trouble setting the time & date. According to the manual I am to press the Time Set button, which I did…but I do not get a display screen that will how “1 XX”, etc.
When I press the time set button, I get 1 09…..
I have no idea what to do…please help me.
Thanks
This sounds great for ebooks, but what about 4×6 photos which I want to conver to digital? Any ideas for that type use?
@Patty – sorry, a number of people have had that same problem and I haven’t been able to find an answer either. Bueler? Anyone?
@GV — works GREAT for that type of use, as well as for receipts, for example, I’m on travel right now for work and can easily tuck the scanner in with my backpack, scan in my receipts, read ’em in over USB and email ’em back to corporate for by expense report.
Hi…my very good friend has one of these Magic Wands & now I know how to set the date/time…and it makes sense.
1. Press the time Set button w/a blunt object (paper clip). After I did this, the window on my Magic Wand displayed a 1 on the left side & an 09 on the right side. The # 1 means that this is the first thing you have to do in order to change the year. The 09 in my window means 2009…to get the 09 to change to the year 10 (for 2010) press either the c/bw or the dip button…once you get to 10…press the scan button….then the number on the left will change to #2
2. #2 is the month…press the c/bw or the dip button until you get the month of 11…which of course is Nov. Then press the scan button & it will advance to #3.
3. #3 is for the date…press the c/bw or the dip button until you get the present date & for me it is 21…press the scan button to advance to #4.
4. #4 is for the hour….press the c/bw or the dip button until you get the present hour…it is after 1:00 so I pressed the button until I reached #13…if it were 2:00…I would want #14.
Press the scan button to advance to #5.
5. #5 is for the minute…press the c/bw or the dip button until you get the minutes you want…for me it is #43
6. After setting the Minute, press the TIME SET button again to complete the Time and Date setting.
Of course if you take out the batteries…you will have to reset the Time Date again.
I hope I have explained this well enough to understand ….
Have a good day….
oh, I need to correct something…the dip button should have been dpi….. I read & reread my message before sending it out…and I didn’t see this until now….sorry
Wow it works like something from a batman movie, I just bought one for 50 bucks off http://www.justdeals.com, its very convenient, as a journalist i have use for it every single day
I have the PDS-ST415-VP model, and every time I try to scan a document or photo, the hue is fushia pink. What causes this, and how can I fix it?
What is the difference between the 2 models, PDS-ST415-VP and the PDS-ST410-VP. I want to get one but don’t know which one! The “410-VP” model is being sold lots of places for about $99, but the higher numbered (and I assume newer) “415-VP” model is not easily found for sale anywhere. Does anybody know what the differences are? Thanks.
Great write-up. I’m a little concerned about the rollers not allowing scanning of the full page, but it’s a great option compared to a flat bed scanner. Thanks!
I just bought the device today at Bed Bath and Beyond ( weird place to buy computer peripherals, LOL ) . I am a financial planner, and I often meet with clients in THEIR offices and THEIR homes. having the ability to instantly scan their ORIGINAL documents without worrying about possibly losing them or having them stolen is the purpose that I bought the device for.
HOWEVER, it is absolutely RIDICULOUS that the manufacturer did not offer an option to save the scan in a .pdf format !!!!!!!!!! I did NOT know this when I purchased it, or I never would have!! First of all, saving a 300dpi ( Low Res) Black and White scan of an 8×11 document results in a file size of nearly 1 MEGAbyte !!!!!!! And that’s not even in color!!! If I have to scan a client’s tax returns, (often 15-30+ pages), that would be a file size of nearly 30 MEGABYTES that would be stored on my hard drive!!! Sure, I can convert the JPEG’s to PDFs, but they are a pain in the A@##@ to batch them and convert, etc., not to mention the fact that you then have to re-save the files in the new pdf format !!!
ALSO, the pdf format is MUCH less memory intensive, and that same JPEG file of nearly a Meg would only take up about 24 KILObytes !!!
(especially important if you are going to ATTACH the files as an attachment to an email !!! )
Anyway, sorry about the wordy essay, but I was really PI#@Sed about the storage format of the device. They should have made it with an option to store the files on the microSD card in a .pdf format. I will be trying to find a similar device that does just that.
Any thoughts ???
After reading all comments – very good info but the 410A has a time set button and the 410 does not. Still waiting to here from VuPoint. My guess is that you have to place the time/date on the micro sd with a editor like a spy camera. This is only for the scanners that don’t have the time set mutton near the usb port. I will check back later on this but the great thing about this is if for instance you wish to make a t-shirt print this device will scan a mirror type for you if you scan in the opposite direction. This is a GREAT effect . You can print it out yourself or upload it to CVS or Rite aid to make a cup or shirt or something. Will check back on the time set for the older [ purchased a month ago ] ones.
OK – found out a little more where this is made [ China of course ] but the real model number – TSN410 do a Google search with or without pdf and you will get a large result. More later as I continue to search.
Some more info about this item:
SKYPIX TSN410 CORDLESS HANDHELD SCANNER
– also known as :
VuPoint Magic Wand Portable Scanner and Digitalk HandyScan
http://www.dealextreme.com/details.dx/sku.33756
I have an old b&w photo of a 45th ID Company taken in April 1941 that is 8.25″ x 33″. The wand looks like it will handle the 8.25″ but will it be able to scan the 33″ length?
@DougT: it sure should; see the example above for the iron gym instruction sheet; that was actually abot two feet in length. The scan got gummed up because of the staples in the middle of the sheet.
Help! I just received the vuPoint scanner for Xmas and cannot get the battery cover off. lt won’t slide open. I press down on it and attempt to slide it with my thumb to no avail. I tried just pressing my thumb on the cover by the scanner button and pushing it forward but it won’t budge. It’s scanner model ST415BU.
HAD THE SAME PROBLEM WITH THE BATTERY COVER BUT KEPT TRYING UNTIL IT SLID OFF.. I GOT THE UNIT FROM HSN WITH NO DOCUMENTATION AND I WAITED TO INSTALL IT UNTIL I GOT MY NEW LAPTOP, THEN COULD NOT FIGURE OUT HOW TO WORK IT
THANKS FOR YOUR GREAT REVIEW. SINCE I READ IT, I ORDERED A LARGER MICROSD CARD AND A STORAGE CASE AND WILL BE TAKING IT ON ALL MY APPOINTMENTS. I AM ALSO A FINANCIAL PLANNER AND NEED TO COPY DRIVERS LICENSES AND OTHER ID AND TAX DOCUMENTS, AS WELL AS FINANCIAL STATEMENTS AND THIS MAKES A GREAT TOOL. IN ADDITION, I OFTEN HAVE TO SCAN CHECKS FOR ROUTING AND ACCOUNT NUMBERS AND THIS SAVES A LOT OF TIME AND TROUBLE.
COULD NOT HAVE UNDERSTOOD THE UNIT AND THE TIME SET MECHANISM WITHOUT YOU. IT IS IMPORTANT FOR COMPLIANCE TO HAVE SCANS TIME STAMPED SO THIS REALLY MAKES MY JOB EASIER.
after scanning picture or image with the vupoint scanner it sends the image to the clipboard. Where is the clipboard and how do you get to it.
I leave all scanned images on the micro sdcard and when i attach to the computer it reads the scanner like an additional data drive and you can save the images whereever you choose to. I happen to have a paperport application on one computer and microsoft photo editor on another so I usually use the paperport for documents and photo editor for scanned photos
Just got mine for Christmas. Took a liitle practice to get the scanning speed down. This portable scanner is greatness!
When I scan the images, nothing is recorded on the card. The count is always on 0. The card is formatted. The power is on. The green light is on. The rollers are rolling and the scan light on the bottom is on. Why will it not record images? I have used 2 different cards.
Do you know if this scanner can handle white text on dark gray / black background?
@terry: it only scans when you hold down the scan button and you are rolling the rollers; if it is not doing that then you need to take it back to the store or send it back
@john: yes
Black on white text … Will the subsequent OCR work.
BTW, are you on Mac or PC?
Any Mac problems that you know of?
Thank you… John
@John — you know I kind of knew you were going to ask about the OCR and the black on white text thing! It depends on the OCR software. What you could do to test out whether or not a given OCR algorithm will work is to take a b&w photo of the text that you are interested in and run the subsequent JPG/TIF through one of the open source/free OCR packages. That way you could get a feel for how well your situation will work.
My normal O/S is a PC, btw.
I agree that the scans are fine. But what type of software can “stitch” several pages of text into one file? I don’t need OCR as a rule, so is my best bet to convert to pdf? And how can that be done?
I have scanned about 200 color and black a white photos with my VuPoint Magic Wand. I now notice white lines on my scanned photos. The CALIBRATION thing??? That did nothing, unless I did something wrong. Instructions were a little vague and the white sheet included for calibration???? kinda lame. If this problem can’t be resolved easily, I am returning to VuPoint.
I was checking this scanner out at Sam’s Club today. I have many old black and white photos and color photos that I would like to scan. Has anyone had any experience scanning photos with this device? Want to eventually download photos to a webpage for the family.
What causes white lines on my scanned photos
@oscar: depends on what you want to do with the final product. Remember, the scans that you do are nothing more than JPG files; just as if you had taken a picture of them. So what do you want to do with all of the JPG files? Probably store them as one large file from the sounds of it. I’d recommend converting each to PDF and then use a product called PDF Free to munge them into on giant file. But you won’t be able to do any searching within the final PDF since they are still, essentially “photos”.
MaryAnne December 1, 2010 at 2:36 pm comment 62 stated the following but I do not see the answer given. Please let me know as well what is the difference between the 2 models, PDS-ST415-VP and the PDS-ST410-VP. I want to get one but don’t know which one! The “410-VP” model is being sold lots of places for about $99, but the higher numbered (and I assume newer) “415-VP” model is not easily found for sale anywhere. Does anybody know what the differences are?
The correct comment number was 52
MaryAnne December 1, 2010 at 2:36 pm comment 62 stated the following but I do not see the answer given. Please let me know as well what is the difference between the 2 models, PDS-ST415-VP and the PDS-ST410-VP. I want to get one but don’t know which one! The “410-VP” model is being sold lots of places for about $99, but the higher numbered (and I assume newer) “415-VP” model is not easily found for sale anywhere. Does anybody know what the differences are?
@norman: the scanned file goes into the memory card, not the cliipboard so not sure what you mean there
@sheila: yes, this is perfect (in my opinion, anyway) for scanning photos, be sure to scan at the higher resolution mode to retain quality; you can always reduce the res mode with photoshop or other photo software to reduce the size for the web
@gloria: re the lines showing up; that sound’s like a defect in the device; you might want to return it
@maria: sorry I don’t have access to all of the models, can you do a search on google for them at all?
Does the scan resolution deteriorate with the size of the image, say a smaller photo? or is the resolution set for A4. Also, do the rollers make contact with the actual surface, or are they positioned at the ends. I have some very delicate old pictures to scan. Thanks
I have just gone and bought a scanner from Maplins (UK), the only retailer here. Its called EasyScan N90HT and looks like the vupoint, for £70. The sales person tried to discourage me, as one was returned for wavy tracking. So here goes…
@sam: great questions; i believe it scales the size of the file with the length of the scan; if you have delicate photos I’d recommend what some of the others readers said: put a piece of glass over the photo to keep it safe; and yes, the rollers touch the surface — that (and pressing the scan button at the same time) is what enables the scanning process; the lines can get wavy if you are not careful so take a few practice scans first; good luck with the Maplins, let us know how it worked out
Thanks for your reply cobinrox, you are really patient with us. I will try those tips out. So far I am really happy with it. My great grandma comes out really good. Cheers. I’ll keep in touch.
Sounds good, but what’s the difference between the ST410 and the ST415 models?
Thanks,
Peter
The 410 you can’t set the time stamp…I am still working on that….on the 415 it has a time set hole opposite the reset.
I am torn between thisWand or the Brother dsmobile. I think the software may be better w/ the Brother, but not sure. I want to scan receipts, kids’ papers, documents, etc. Wonder which is better for odd/large or long sized documents- say a long receipt or kid’s drawing on a large paper. I figure the Brother is limited to the size of paper you can feed into it-width-wise, and I assume the wand would be more forgiving in that area. I have a lot of paper and receipts and I don’t want to have to sort thru them manually like looking at picture files on pc. I know Neat Receipts has software that auto sorts but reviews for that are all over the place and the price is higher. I like versatility of the free wand, but I just feel like the kind where you feed the document thru may make a better image and has a sorting software. Oh I’m getting yelled at got to go any help appreciated!!!
does the software also allow you to itemize scanned reports, kinda like what tryneat offers?
@jenraider: software with the wand is just OCR (and not that great)
@Erica: no, software is just OCR
Just bought a magic wand scanner, did not buy a micro SDHC.
Can anyone tell me what size I should buy, and how many pictures will it hold
It says it will support up to a 32 GB Card.
Thanks
@Micki – 32GB will hold about 16000 photos. The problem with super large cards is that you can’t organize them very well; the scanner doesn’t create sub-directories when it stores the files, so you might spend a lot of time trying to search through all the files.
The Brother Dismobile offers two advantages over a flatbed scanner and at least one disadvantage — no power cord needed, smaller size but you can’t scan books and other non-paper objects.
The Magic Wand is a different class of product since you can carry it with you to a friend’s house (or to a competing business) and surreptitiously scan all their documents, ledgers, menus, pricing structures and photos.
I already have a USB hand scanner but this Magic Wand could free me from having to carry an unwieldy laptop into the courthouse.
Hi, I added Abbyy to my computer, and it came up as a “trial”. I don’t know. I couldn’t get the images to upload to the computer by any means. My computer detected an SD card, but it wouldn’t open. How can I upload the scanned docs to my computer? HELP~!
I want to scan a label from a round bottle or can. Can I just hold the can and keeping the wand face toward the can, rotate it around the can and get a good flat, square image of the label? If someone has a wand, could they please try this and see if it works?
Thanks.
Best Regards, Ed Snarf
Yes, Ed Snarf it will do that.
I’m still mystified at how to set the time on the model without a time set button. Strange design.
When I search for micro “sd” cards for my new Magic Wand, I notice most of the results come back labeled micro “sdhc” and some of them state that they are not compatible with standard micro sd devices. Any advice on the best brand/model of micro sd/sdhc card to use? Did you find a great deal (price) anywhere? Any experience with how many images one can get on a 2gb, 4gb, 8gb, 16gb? Thank you!
HELP! Still can’t upload the images from the want to the computer. What program should i use????? i’m going nutz!
Used the wand on remote for the 1st time at the library & scanned 25 pages or so, got home, loaded to computer & 2 pages were in the reverse image that some users have mentioned. No error lights when I was scanning. Called VuPoint support & was told that I might have lifted the wand off the page briefly while scanning & that will cause the reverse image. I will experiment at home to see if that is truly the case.
Hi there,
Great review 🙂 Re: the difficulty of scanning up to the edge of a book – could you please put a figure on the closest to the edge you’ve successfully scanned (in mm, ideally :))
Thanks!
While checking the vupoint website and eBay it appears the ST415 weighs about .8 oz less and it comes in multiple colors. All other specs are the same. I want red.
http://www.vupointsolutions.com/
I am getting a message of U56. Any comments?
I have a VuPoint scanner and all seems in order except that no lights go on when I scan and when I connect it to my Mac nothing happens, which I assume is because nothing is getting scanned.
Batteries are fine–all the other features seem to work properly. Should I simply send it back, or is there something I’m missing?
Hi all,
Thanks for the very informative review and there seems to be a lot of active users here. I’m drawing portraits lately. I appreciate matt’s idea to use the glass from a picture frame.
I noticed that it has a usb connection. If you connect it to a PC
with a usb cable, will it be detected as a scanner and work with graphics applications (not a mass storage device)? If so, does it require batteries when connected to the PC? This just might be convenient feature.
What is the best website to buy this from if you are in Denmark? I couldn’t find it in ebay and amazon (just imitations).
Thank you!
I STILL have NO idea how to transfer the scans to my computer! no software that is on the computer works! And Abbyy won’t open, plus it’s a trial. HELP!!!!!!!!!!!!!!!!!!!!!!
When you plug in the usb cable and turn on the unit – you must use the batteries. – on windows based xp – It acts as a hard drive and will set it up plug “n” play as such – if everything is working NORMAL – it will ask you what you want to open the file up with. – look with ” START ” then click on ” MY COMPUTER ” and look for an unusual drive – in my cas it is J – and 2 folders are labeled DCIM and MISC – the scans are in the DCIM file – other versions may be different .
A way to use rechargeable lithium batteries – Please – you may need some electronic experience – I use 1 14500 trust fire in mine. Works great but you have to adjust a little – first – the battery is 3.7 volts – a little above the safe zone of 3.0 volts – so – 3.1 is ok. How we get 3.1 is easy – by using a wood dowel , a 1 amp rectifier diode , 2 flat head screws – now secure the diode with the screws at each end – the white band [ negative ] will be placed at the + end so mark this so you put in in right later – once this is done you have a dummy battery with a diode – the diode drops voltage .6 volts when properly biased and their by lets the use of the lithium battery at 3.1 volts. The reason I chose the li battery is they hold a better shelf life then nimh rechargeable and have a closer voltage then 1.25 nimh. Thus – you only need 1 battery. I also use this in my hiking camera that takes 2 aa [ but now just 1 lithium ] . The trustfire battery is a smart one that drops out at 2.75 volts so you don’t ruin the battery. I got 2 for about $4.25 shipped free but you will need a proper charger which are about $5.00 also shipped free from Deal Extreem.com. Have fun.
I made a mistake on comment 102 – you DO NOT need to have the batteries in while running off the usb cable – sorry for the mistake.
Thanks for clarifying Kevin.
Finally, does someone have scan samples not taken from magazines or books? The color examples above show patterns that are most probably caused by how the magazine was printed, not because of the scanner. This patterns nonetheless might make buyers think that the scan quality is poor. I hope someone would scan something “real” like a clean table or artwork (not printed) behind a glass picture frame, then share the links.
To avoid unnecessary scan movement, I suggest guiding the scanner with a straight edge, such as the edge of a book.
Thank you!
Ok, I bit the bullet and bought one (mainly so I could scan and OCR a favourite book of mine which is likely to never be released as an eBook).
The book itself has text ending ~15mm from the edge of the page, and I found it very hard to consistently capture the text up to this edge, making scanning the book very frustrating.
Thankfully, I’d previously ordered a 1mm thick, A4-size sheet of Lexan (aka “polycarbonate”) from a UK eBay auctioneer for less than £3, including shipping. Covering the page with this allows me to perform full scans of a page and, though I think the scan is worse quality than without the sheet, after running it through ScanTailor’s (automatic) clean-up and contrast enhancement, the difference in quality becomes thoroughly unimportant with respect to OCR.
In fact, using Google’s open-source “Tesseract” OCR engine, I quite often get a completely error-free OCR of each page scanned with the Lexan sheet, which is a much better result than I was hoping for! Tesseract does *not* appear to (correctly) identify italics etc, however, even when using the “hocr” output method.
Its entirely possible that using a thinner sheet of Lexan (I saw some that were 0.75mm thick) would get better quality scans if you are more interested in image quality than OCR’ing.
I’ll see if I can put up some sample scans from my copy of Moby Dick (which is public domain), with and without the Lexan sheet, and show the OCR’d output from it later.
I’ll also see if I can sort out some scans of “real” things for Andrew, though I don’t have any paintings handy (though I do have an Egyptian papyrus that someone bought me as a gift, which might be interesting to scan :))
All-in-all, I’m very pleased indeed with my purchase 🙂
A handful of samples:
http://www.etotheipiplusone.com/vupoint-scanner/samples.html
The error light only turns on if I scan too fast. I didn’t figure this out at first. I kept getting errors. It thought it was caused by scanning surface. I tried different surfaces and still got errors all the time. I almost wanted to return it. Then it occurred to me that if I scanned just slower, I would not get any error. Now I’m happy. But this should be noted prominently on the box.
Hello,
I see that many many comments have evaporated. Is there somebody – I’m thinking of our excellent moderator – who can summarize the main points (do’s and dont’s) re operating this scanner?
Thanks
Thanks MrTeatime, those samples were very helpful. I just got an st415-vp last Saturday. On the first try, there was a streak which was brighter than the rest of the scanned image. But this was solved by the calibration feature. I wonder if the st410 also has one. With lcd monitors typically at 96 dpi, I’m happy with the resolution and quality of my scanned images.
the overall performance is alright but if you wanna buy one of these definitely checkout http://www.justdeals.com they have the vupoint scanner on sale for only 50 dollars
Hello:
At present, I’m watching the Home Shopping Channel in Canada (thehomeshoppingchannel.com) … They’re featuring the EasyScan Scanner… Looks pretty good. No mention of OCR. It comes with 1GB SD card, software, carrying case. Cost $89.46 Canadian. Returnable within 30 days. Looks like the VuPoint, but is it the same as the VuPoint? If it’s different, which product is better?
THanks.
You can find videos for the EasyScan scanner and the VuPoint Wand on YouTube.
I just bought the VuPoint Magic Wand, and installed software, tried sending to computer. Works fine for the stage of learning yet that I need to master (steadying scanner etc. The problem I have is that the printer yields only a portion of the entire image (fom upper left) and regardless of my trying to adjust the print size on the printer options, I still get only that portion (about 15%) of the original picture scanned. The entire picture is of course in place as a file on the computer, but regardless of printer-adjusted size, I get only that 15% block printed. Any ideas?
Denis
Hello;
Thanks for the info. I received my vu-oint for Xmas. Doesnt seem to work at all. Everything come out black although at the very end of the pg, I can see that there is some color of what I was trying to print/copy. If you have any suggestions, please let me know.
Thank you and look forward to hearing from you soon.
Donna
You may need to do a white balance as instructed. I had the same problem and then looked at the instructions – did the white balance and worked fine after that.
I have loved this gadget- color and quklaity excellent and simple to transfer- BUT it now no longer starts up- I canl;t find where battereis are and am unsire how to recharge them- have connected USB to computer and hope that is solution
– mine might be an older version -says 415 vp
The batteries for the model in this review are underneath the large silver blob which is actually the cover for the batteries. Hope that helps.
Just received by VuPoint Magic Wand – cannot get the microSD card to register on the screen to even begin to do the white scan…please help. Looking from the top of the wand(led screen facing up), the SD card is inserted with the contacts also facing up………….
Have you formatted the sd card ?
May be in upside down – however I don’t see that happening – you may have a bad micro sd card – try it in your computer first?
The scanner will format it for you as you may know by reading –
Would anyone be willing to actually TALK to me with a real live phone with some help using my VuPoint ST415 scanner? Basically I just need software help. Nothing fancy. the ABBA that came with it is not working
Donna Hammel
Having problem pairing my EVO-HTC
4G smart phone with Vupoint magic wand scanner, instructions say, 0000 or 1234, please help.
I have this scanner and am struggling to get multiple pages into one file. I hate it that the scanner automatically puts each page into individual files, especially when you are scanning a journal article or book. Has anyone else run into this problem and/or have suggestions about how to manage this? Thanks in advance!
@NiVOnne:
I think most scanners work like that (one file per page/scan). You will need software like http://scantailor.sourceforge.net/ . You would also like to align or post process each page before combing them.
I don’t know of any scanner that could automatically do what you want. Otherwise, the pages will accumulate in memory (not good for a compact scanner), or a saved file will be appended with new pages (not good if you made a mistake, you’ll have to go back to the first page, specially with this compact one which is much less stable than flat beds). I guess there is also no way to tell a scanner that you’re scanning the same book.
You sure did a lot of work for a lazy guy. Thanks for all the great info. Thanks to all contributors even the ones that had issues and asked questions. Every comment/question posted here has helped to better understand this product.
What’s the difference between models 410 and 415.?
Their more models now as you can see at this site with specs.
http://www.vupointsolutions.com/browse.php?cat=scanner&page=PDS-ST410A-VP
Unforgivably my 410 does not have a time/date setting [ small left of the sd card ] just a format hole. The 410 is no longer in production. I suggest the 415 but go to the site above to see whats new. If you wait long enough you can find them new for about 50.00. Mine was 99.95.
Here is a comparison chart:
http://www.vupointsolutions.com/comparison_chart/index.html
I have a vupoint magic wand scanner and I love it. The only problem is I don’t know how to erase the card after I download the pics to the computer. can you help me?
Treat it like a hard drive. In Windows XP – right click on the start , then
click on explore , then click on my computer and look for which drive is the sd card , you can right click on this to format it or just click on it to open up the file and delete which ever items you wish, it is eaiser to just format it. Hope this helped.
Also, their is a format button on the device – read the instructions to clear the sd card even when the device is not attached to the computer.
I am so interested in buying this scanner however I’m not sure if I will be able to use it for my project. I have diaries from my grandfather from the years 1910 thru 1980 which I wanted to scan & put on CDs for my relatives. I tried using the “old” way & used my desk top scanner but it is way too slow to get all done. I thought this would be a good scanner but if I am reading correctly it only scans 8×10 pages and nothing smaller. Is there anything I can do to make the scan “think” the book pages are larger? Am I reading this correctly? Thank you
If your doc’s are smaller than 8 x 10 you can ” crop them ” after loading them into something like Microsoft photo editor.
I recently bought one of these and it worked great at first but now anything over a 4 X 6 photo has one side of it washed out. Has anyone else had the same problem or is mine just messed up? For instance: I tried to scan a B&W chart that was 7″ by 7″ on a flat piece of paper laid out on my kitchen table. The first 4 inches of it came out fine but the rest is kind of like faded. Any ideas?
Scans work great. The only problem is that when I try to print a file, I get blank pages. I do not need the OCR, I just want to print the page. I’ve tried Corel, pasting into word, Presto Page manager etc, but the print problem is still there. Is there a way, just to print the file (on the screen) without using software to convert an item that is perfectly visible on my monitor? And yes, same thing with the Abbey software.
@Joann: could your scanner tube/window on the bottom of the scanner be smudged or scratched?
@Georg: that’s weird, when you are viewing your scan on your computer, what software is displaying it? Since the files are just jpgs, you should be able to open MS-Word, and do an Insert File, then navigate to the scanned image files to pull them in.
Before buying it I would like to know if there’s a way I can use it WITHOUT BATTERIES… Is it possible to plug it to an external power supply? Does it work and scan without batteries if it connected to the pc with the usb cable? If you use batteries, what is the minimum mAh it can work with?
Thanks a lot to all the people that already have one and can help me on this!!
I stated earlier on that you can use it without batteries but that was not the case after trying it for a second time so no . I use 1 3.7 volt lithium and a dummy battery which you can make out of a piece of aluminum tube from the hardware store or a wooden dowel with 2 small screws at each end with a wire from end to end, I have also tried 2 – 1.25 v at 2.5 amp nimh batteries but doesn’t appear to work as well with the lower voltage. The lithium batteries have low current – you wont get as many scans but I have not been able to kill the batteries under normal use. Another solution if you wish is to take 2 dummy batteries but don’t short them together – 1 screw only per dummy battery – 1 at the west end of one dummy battery and one at the east end of the other dummy battery – attach a wire to both screws – 1 red and the other black – assuming you know a little about electronics – use some type of adjustable power supply to dial in a 3 volt supply. I can go a little further on explaining this if you need.
I recently bought an officially refurbished VuPoint scanner. But I can’t get it to work! At first all my scans were just solid black images. So I tried the calibration, which didn’t want to work at all, and when it finally did and I tried scanning with it again it was still very dark, had light streaks across the image (even after cleaning it) and was completely unreadable! (I was scanning a white sheet of paper with text.) So I tried doing the calibration, once AGAIN. I followed the instructions on the sheet, the green and red lights came on…and they just stay there…the red one never goes off so I can do the calibration. Am I doing something wrong? Or is there a problem with the scanner? (Also, when doing the calibration, do you keep holding the C/BW button, or let go of it after pressing scan? I’ve tried it both ways though and the lights never change.) Could anyone here offer me any advice or help?
I just bought a new magic wand, and I need it to scan an enormous library archive (many thousands of pages) into my laptop. I am driving over 150 miles to the library on monday, and need for everything to run as smoothly as possible. My biggest concern is that The ABBYY OCR software says it is only compatible with Windows. I use a new MacBook Pro, and need to drop each book or reference material into individual word files (could be between 150-400 pgs each). Do I need to buy additional software for maximum efficiency? If anyone has used this product for an enormous text only job like this, I would greatly appreciate your advice. Thanks
I received notification re: the IRIScan Book 2:
http://www.irislink.com/c2-2005-189/IRIScan-Book-2.aspx
Hi,
I just purchased a vupoint magic wand. I manage to scan a few images… like 10 or something. And dint use it for a week. Trying to use it today.. and it wont start up! I had put in new batteries that came with the scanner. it reads on the computer when attached but thats about it.
How do you delete what you have copyed so far?
How do you delete scans off smart card?
@Rich:
You mean micro SD Card? Eventually you’ll have to connect that card to a computer to copy the scanned images. You might use a USB cable or card reader. Once the card is connected to the computer you can do the usual file management stuff, just like with a normal disk.
Hi- I would appreciate some advice. I am really a novice at this. I have had no problem scanning and opening a jpeg image. However, I would like to edit the image- especially crop the passages I need to create a source page. What software is good that I may either download, or is probably on my computer where I may edit the image in the easiest way possible.
The ABBY software I have found to be confusing.
Fred
I just scanned 20 some images and went to upload them to the computer I get a message saying I need to format the sd card. Now I have viewed the images on a digital photo frame, but I want to put them on the computer so I can clean them up. Can anyone help.
I’ve had my scanner for about 6 months and love it. I was reading through the posts and didn’t see this (hope I didn’t miss it – if so, sorry for the double post), ** Tip 1 – The scanner can scan in both directions, so, if you want to scan something that is close to one of the edges (aka a page number) hold the scanner upside down (as it were). Then the rollers will be “behind” the scanning window and allow you to scan to (and pass) the edge of the page / book. granted your document will then be upside down, but you can fix that with a photo editor. ** Tip 2 – try and scan on a flat (smooth) surface, if it’s not smooth you can get distortions on the scanned image. I use newspapers or sometimes a piece of poster board to scan on a textured surface. Tip 3 – you can scan documents up to 25″ long (600 DPI mode) or 50″ long in 300 DPI mode. I like to scan newspaper articles and you can get a whole column in one swipe. ** Tip 4 – be careful with the white balance. If you are not paying attention, you can accidentally be in the “white balance” adjust mode and think you are getting errors in your scan when in fact you are setting the white balance mode. If you do this, your subsequent scans will (at least in my case when I was newspaper scanning) be dark and difficult to read. It’s easy to fix (the scanner settings) by using a white piece of paper (or the supplied card) and following the directions (scan back and forth a few times untill the light goes out), fixing your scans will need Photoshoping or something. ** Tip 5 – If you scan a large document and try to OCR it all at once you may get poor results (or if you have scanned 2 or 3 columns and try to OCR them as one the software will try and make it a continuous (across the page) document. You may need to zoom in (to make the letters “bigger”) and OCR small blocks of text at a time. ** Tip 6 – the weaker your batteries, the slower you will need to scan to keep from getting a error. ** Tip 7 – If you scan a lot of newspapers (like say a Sunday paper) you can get ink transfer to your hands and the surface you are scanning on – black ink smudges – don’t scan something like this on a light colored surface (like a table cloth) as the stains are difficult to get out sometimes 🙂
Hope these help someone.
Huge help re: changing the batteries LOL
I got my Magic Wand from HSN. It seems to work in everyway for the Scanning. But I can not transfer it to a computer.
I attach the USB cable to my computer(Win XP) and turn on the Scanner. My Computer does not recognize it. I select Start and find the Removable Disk and can open the files.
I first tried scanning into a PDF format. My computer saw the files but when I clicked to Open it said the File does not exist. Tried on another computer and it said to Reboot your computer(expecting it to reset the software) but the computer didn’t reboot with Scanner attached.
Next I tried scanning and saving as JPEG file. Thought I had success as the Puter recognized the scanner. But again it gave me an error message when I opened files and selected the JPEG file.
And the ABBYY software doesn’t help. It wants to open a scanner so it says I have no scanner attached. If I do attach it, it says I need a Driver for my uninstalled scanner.
Back to basics:
How do I download my images or PDF files to my computer?
Steve
Continued…
I also tried attaching the Magic Wand scanner to my 1-month old Windows 7 Laptop. A window opens up announcing for a new device that says “USB Device Not Recognized = One of the USB devices attached to this computer has malfunctioned, and Windows does not recognize it.”
PS:
I have a newer model Magic Wand II.
It is very similar but has a Round scan button and is platinum grey—but is marketed in 4 colors.
Fred,
if you haven’t already found a solution to image cropping, an excellent free image editor that is great for cropping images and all other editing chores is paint.NET found here: http://www.getpaint.net/
I posted back on March 15 and said I could not get the Computer to recognize the Scanner. After a couple of days and maybe 2 or 3 re-boots, the computer finally recognized it as a memory device. All three computers learned how to “see” it.
Now it works great. Not bad for general scanning documents and photos.
However, the other day I was scanning from a book and being a little quick with it and got a Yellow scan fail light. Now this Yellow light will not go out. It comes on every time I turn it on even if I’m not scanning.
I think the problem is that the scanner needs Re-calibrating of the colors/brightness. But I forgot how to re-calibrate it. The Magic Wand II is recalibrated by pushing 2 buttons at once. I hope this website would tell me how.
No one answers my posts.
Steve
http://www.vupointsolutions.com/downloads.php?d=manuals
Here you will find the manual on how to calibrate your viewpoint. Mine is not listed – PDS-ST410-VP however the PDS-ST410A-VP is still about the same – it has a clock setting , mine does not – that is the only difference…….5.7 How to calibrate the scanner
NOTE: Perform calibration only when white balance needs adjustment
1. With the dry cleaning cloth provided, clean the scanning lens located on
the bottom of the scanner.
2. Turn on the scanner by pressing the [POWER] button. Place the scanner on the white area of the White Balance Calibration paper
provided.
3. Press and hold the [JPG/PDF] button. While holding the [JPG/PDF]
button, press the [POWER] button and then release both buttons to
enter into auto-calibration mode. SD symbol will flash and then stop.
“GREEN” and “RED” LED light will turn on.
4. Do not move the scanner. Wait until the “RED” LED turns off. “GREEN”
LED will stay on.
5. With only the “GREEN” LED light on, start scanning the white paper by
sliding the scanner across the paper until the “GREEN” LED light turns
off. (Slide the scanner backwards if necessary).
6. Press and hold the [POWER] button to power off the scanner.
Calibration is complete
I upload to Dropbox from my computer and then my scans are on my iPad and iPhone. Sweet.
Do you know were I can find a company that makes these wands?
It would be nice if I could see what I scanned on my computer, Ipad or Iphone. None of these brought up the images when I went onto the ISP address site and clicked on FILE. Sending this piece of junk back!
Instead of going to some mysterious ISP, why not use its micro-SD card slot or USB connection? Many modern gadgets use these interfaces too.
I did!!! I used the ISP they gave me in the instructions. I even typed in magic.wand like they instructed, but the site did not come up, so that’s when I used their ISP. The site came up but when I clicked on “FILE”, nothing happened. No pics came up! I used the card. I did not use the USB connection, because the whole purpose for me getting this, was to use it as a wireless.
So you were using PDSWF-ST44-VP (http://www.vupointsolutions.com/browse.php?cat=scanner&page=PDSWF-ST44-VP)
not the one mentioned here which has no wireless. That was quite confusing.
Either you received a defective product or the wireless mode is not very user friendly (http://www.vupointsolutions.com/manuals/PDSWF-ST44-VP_Manual.pdf).
Since you can access the site, it means the wireless is working.
Have you tried using different web browsers? A lot of things may go wrong depending on your browser/network settings. It can be a script that is not supported or being blocked.
That’s the reason I returned it – too complicated. I had everything working right and it scanned 2 photos. If something is this hard to figure out, I don’t want it. They made it sound so easy on Home Shopping.
I bought the vupoint wand on e-bay and loved it. But now i have a terrible problem….i put in the micro-sim card and scanned 400 images…it worked great. I plugged into one computer and could read and save the images….i did this a few times. I never deleted the images cuz i wanted to move them to a new computer. A few days later i tried to plug it into the other computer and it would not even recongize it. The LCD screen says the card is “full”. and i cannot get it to recongize the wand so i can delete the images and start over! I dont’ know what to do….please e-mail me at [email protected] thanks!!
I have used my scanner for about one-year and sometimes half of the scan would come out purple and the other half was fine.
Also, I have another problem. I put in new batteries but the scanner will not turn on. Before this happened I would turn on the scanner and the red light would come on. I then turned it off and started it up again and the green light would come on. Do I need to send the scanner to the company? Could a local computer man know how to fix the problem? I really need help.
Donna
I have really enjoyed the Magic wand but I am having a very unusual problem. When I press the scan button the green light come on as it should. Then I scan but the scan light never goes off & the wand does not register that it scanned the item (the number of scanned items never changes).
I looked at the manuel but I do not see anything to help me.
What can I do?
Dede
I do a lot of genealogy research and need to scan documents that are 14 x 17, please tell me how to get the scan to show all of the information on the document on the screen.
can someone tell me how to undo the deleted photos from the scanner
Where can I get a manuel that I can read that isn’t written in such teeny tiny writing?
This product has almost 200 comments…not good.
What is the email and or address of the manufacture of this product…and how can I contact them?
I didn’t have a USB cable in the box when I bought this from Office Depot…now they want to sell me one…not happy happy happy..
I have 2 computers and the instructions for each of them wasn’t as difficult as this Magic Wand…sorta makes it not so Magic after all…I ddin’t realize that there wasn’t a place where I could contact the company of this product..not good!
The device has so many comments because it is so good OR people simply do not know how to read instructions. I’ll give you a pass because evidently you have 80 year old eyes and no eyeglasses and this prevents you from reading the instructions. Or wait, you did read the instructions and it’s difficult? Look, if you have a ten year old child, have them set it up for you.
Greetings all-
The-Gadgeteer is a really a gadget review site, not really a tech-support site although there are a lot of helpful folks who do contribute to solving others’ problems when they can.
Basically think of the scanner in a manner (ha!) similar to a digital camera.
A camera has a memory card just like the scanner and, when you are ready to view the pictures, you have to connect your camera to your computer; usually through a USB cable from the camera/scanner to the USB port of your computer. Some computers are obstinate when recognizing new USB devices, though. This can happen just as easily when connecting a camera, a USB stick, a USB drive, or even the scanner wand.
When the computer does cooperate and recognizes the USB device, it will normally show up looking like an extra hard drive or “folder” and you should then be able to navigate down into the folder to find your pictures/scans.
Additionally, just like most digital cameras, you can remove the actual memory card and, if your computer is equipped with on, stick it into the computer’s memory card slot. Again, the computer should recognize the card as just another drive or folder.
As for problems with the scanner such as it not scanning or scan results turning purple, that sounds like a defective device and you’d be best served by returning it. Office Depot, Staples, WallyWorld, etc. are all very good at allowing you to return defective equipment.
I unfortunately don’t have the latest version of the scanner so can’t comment specifically on its current idiosyncrasies.
@Dede: That does sound like a defective unit; have you tried removing and then re-inserting the batteries? That’s the only think I can think of other than getting a replacement device.
@Margie: In the original review, you can see that I was able to scan a pretty long document (the “Iron Gym” thing). To see the whole thing on your computer screen, you’d probably want to decrease the resolution on your computer; or if on a Windows machine use the Ctrl- keystrokes to zoom out; or use another viewer such as Paint or PhotoShop, again to zoom out (not sure if that is what you were asking though).
@ivette: Depending on how your computer is set up, you may be able to use the “recycle bin” to retrieve the deleted files. Windows 7 also has a feature called “Restore previous versions” when you right mouse click on a folder and you may be able to use that to revert to an earlier version. I’m not sure if it works on USB drives or memory sticks, though.
@Jo: Yep, you will need a USB cable to connect the scanner to the computer (not sure if the latest version of the scanner comes with a cable) just like you would with a digital camera. Alternatively, depending on your computer, you might have a memory stick slot that you could use: remove the memory stick from the scanner and place it in the memory stick slot of the PC. But you might need a micro-to-non-micro adapter if the memory stick of the scanner is still the micro type.
@Michael: If I were 80 years old it’s doubtful that I’d have a 10-year old child!
I got the ST-415 scanner off Amazon, good price, that’s it. EATS BATTERIES! First I used Sanyo NiCad rechargeables and I managed to make 3 (three!) scans before scanner was dead. Then I used Duracell NiMh 2650 mAh batteries, so scanner made 13 (thirteen!) scans and went dead. I paid a lot for overseas shipment, so sending back the unit is not feasible for me. Toy for children (nice toy), not tool for professionals.
i had not used the scanner for a while. despite having fresh batteries, wheni try to scan it switched off within 2 seconds. the rollers seem to move alright. what else should i be doing?
I have the VuPoint Magic Wand, model PDS-ST450-VP. I want to scan on the fly when the USB connection is enabled(ie: The Magic Wand is connected to my laptop by USB). When I turn the Scanner on, the USB connects to my laptop(displays in the windows explorer window). On the magic wand LCD it just display’s USB. When I press the SCAN button on the magic wand, it is not engaging/switching to scan mode. Is there a way to scan while the USB cable is plugged into the laptop? Be able to see the images right after I scan too see if there are good scans or not?
May I request some help, I have the st 415 and get an error signal after
holding down the on off button for 3 seconds.
Any help is greatly appreciated.
Thank you, Larry
I have the 415 model. Had a couple yrs. Used it early Dec 2014 to scan photo from the 80s. Great results.
Used yesterday to scan photo. Lines running through the color scan result. Tried several times. No luck. Calibrated using white paper – no help.
Now… yesterday the scanner fell off table to cement floor. Don’t know whether the fall occurred after 1 pic scanned or before ‘any’ photos scanned! In any case, do I have a flickering hope of getting rid of the lines happening during scan??
I have the same problem as Cindy – it worked fine at first then scans started showing black lines through the image. I would guess it needs cleaning but other than clean with a dry cloth, which I did, there are no other suggestions on the instruction card for PDS-ST415-VP. Any ideas? But, over all it is a neat little gadget for genealogy research.
Definitely Not a techie. 2 questions. Have magic wand ST470-VP. (not 1st time being used) This time I didn’t let the battery fully charge before deciding to scan photos. I was able to scan 23 photos-then hooked the docking station with wand attached to my windows 8.1 pc. the external device icon showed up briefly on pc then disappeared. How do I find the photos? 2nd Quest: Did I make an error in not letting the wand fully charge? If not, the wand is correctly placed in docking station & attached to usb cable. how do i now charge battery.i.e. how many times to hit scan? during prev charging saw battery icon blinking in display window. (blinking not showing now) manual only says plug unit into pc or ac/dc power adapter using usb cable. tx for help
Sounds like you have a different wand than the one discussed in the review.
First question: if it’s not the first time having been used, then, as you know, the photos should be in the same place as the last time you used it; i.e. in a folder on a mounted disk drive. At least that is how most USB photo devices work.
Second question: No, I don’t think you made an error in not letting it charge; you mention that you were able to capture 23 photos so the batteries were charged enough for that. To charge the batteries, just leave it plugged in to the PC USB port (with PC on) or to another AC-to-USB brick (like this thingie: http://www.amazon.com/ZipLinq-Home-Charger-USB-Converter/dp/B0014JJWM8). Not sure what you mean by “how many times to hit scan”.
my problem is when i on the scnner the error led light popup n after scanning it comes black not coloured
George, sounds like you should recalibrate your vupoint scanner.
Read Kevins post above, about recalibrating instructions.
Kevin April 12, 2012, 11:41 pm
http://www.vupointsolutions.com/downloads.php?d=manuals
Here you will find the manual on how to calibrate your viewpoint.
Just checked for Magic Wand Download Manuals online. Here is updated URLs.
http://www.vupointsolutions.com/?d=manuals#!download/gcpp8
http://www.vupointsolutions.com/#!magic-wand/veryy Current Magic Wand Products
http://www.vupointsolutions.com/ Home Website
Just got my Magic Wand and am still trying to figure it out. Have good photos, but today they are coming out HUGE. What did I do?
I just realized that every scan I do is a lot bigger than the one previous to it. Do you think the scanner might be faulty?
when I turn the vupoint magic wand on it keep telling me usb. I have it connected to my lab top I have no instruction. I don know what to do next. can you help.
Aloha gang! We just received the VuPoint PDSDK-ST470-VP and I’ve already used it to scan legal documents at the court. It’s been working fine (still need to get the edges right) but I just ran into a problem. I pieced together a 52 page document and it’s giving me an error message “the following document was not released from the Application.” It gives me options what to do but it does not say which document won’t be released. I don’t understand why this has happened. I have a theory. I copied and dragged all the scanned documents from the scanner to a folder on my hard drive and worked from there because the scanner’s icon disappeared from the desktop so therefore, so did the list. I later retrieved it and moved them to a folder. I’m thinking I shouldn’t have moved those documents off the scanner? Help!!! The attorney needs to see this yesterday! Thanks for your help in advance.
As it turns out, my boss figured out the problem. She basically sent the pieced document via email to me, then I opened the attachment and voila. I was able to save it to the DM. Has anyone else had this issue?
Ok. New challenge. I am scanning a rather thick document, and what’s happening is that the last few lines are not getting picked up because the scanner just slips off the page. Has anyone figured out a way to work this out? Thanks again.