REVIEW – There are a lot of gadgets designed to help us take more and better pictures with our phones while on vacation, things like power banks, lights, and tripods. Moonside is trying to combine several of these into one convenient gadget called the MagLight (not to be confused with the oversized flashlight with the similar name). Before my wife and I head out on our next vacation, I’m testing the MagLight to see if it’s worth bringing along.
What is it?
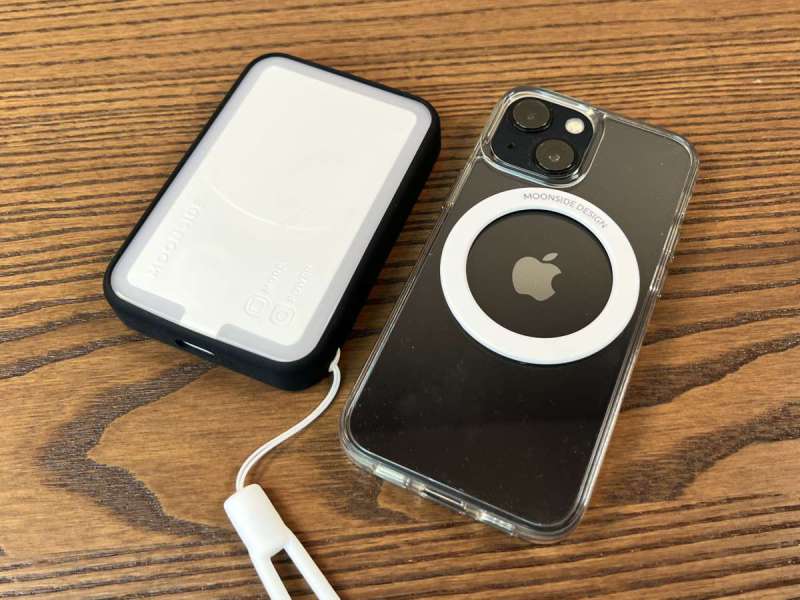
The MagLight is a power bank with a wireless charger and a set of LED lights on the front and back that can be controlled via an app. It is compatible with both MagSafe and Qi. A stand and a tripod are also available.
What’s included?

The standard pack includes:
- The MagLight
- Two magnetic ring stickers
- A wrist strap
- A bumper guard
- A USB-A to USB-C cable
The creative pack adds:
- A tripod
- A shoe mount
- A phone stand
- A soft carry bag
Moonside graciously sent me both the standard and creative packs.
Tech Specs
- Dimensions: 3.8 x 2.6 x 0.5 inches
- Weight: 108 g
- Bluetooth: 5 BLE
- Wi-Fi: 2.4 GHz
- Battery: 4000 mAh
- LEDs: 67 RGB LEDs (59 on front, 8 on back)
- Brightness: 680 lumens
Design and features
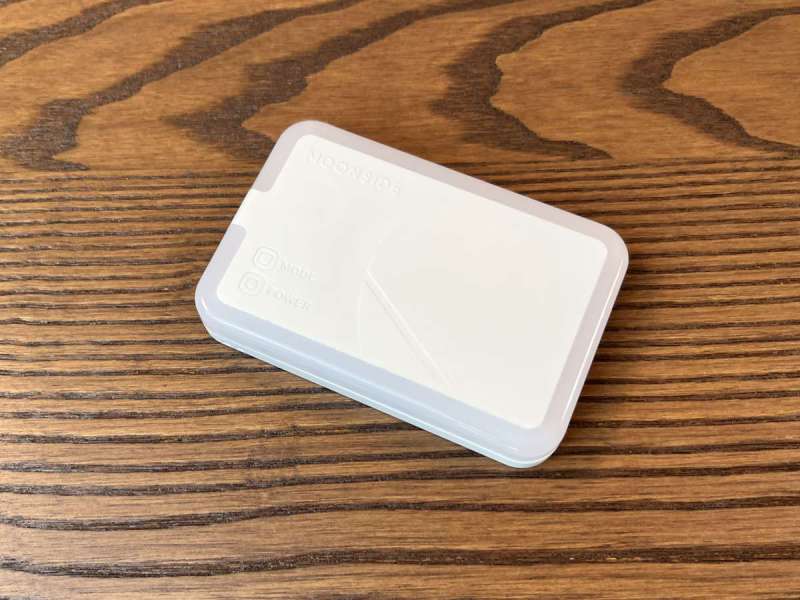
The MagLight is a smallish power bank that is shorter and fatter than my iPhone, similar to other MagSafe power banks on the market. While most are grey or black, the MagLight is white. There are two small buttons, the outside is ringed with LEDs, and there is a short strip of them on the back. On one end is the USB-C port for charging. It’s a simple yet practical design.
Assembly, installation, and setup
The MagLight does not come with a manual; instead, I scanned the included card and found the manual to be online. The manual is easy to read, though it skips some details, like instructions for installing the magnet ring and purpose of the little metal piece that came with the tripod adapter.
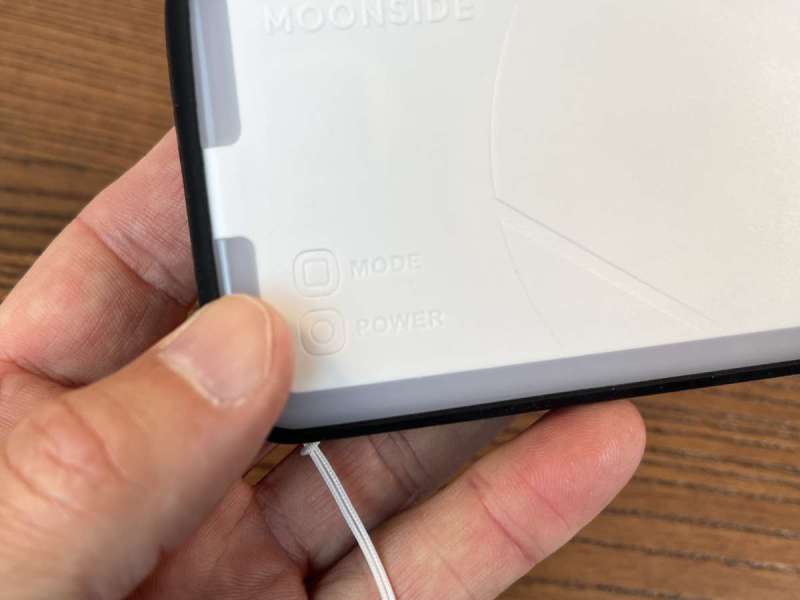
The MagLight only has two buttons, Mode and Power, and I’m not a fan of their design. They are white-on-white and flush with the surface, making them a challenge to find and see, especially when it’s dark and the LEDs are on. I would like to see them completely redesigned to have both color and tactile feedback. When I hold the Power button for two seconds, it turns the MagLight on and off.
The Mode button has three functions:
- If I single press, it cycles through the five default color patterns.
- If I double press, it turns the wireless charger on or off. The charging status is indicated by a faint LED on the side.
- If I press and hold, the MagLight cycles through its brightness levels (off, low, medium, high, and very high). Off is required whenever I want to recharge my iPhone and don’t want the lights to be on.
I have an iPhone 13 Mini with a simple case. Even though it’s thin, the magnets in the MagLight don’t work through it. I removed the case and found that the magnets worked but only barely. If I hold my phone and give it a gentle shake, the MagLight falls off. My wife has an iPhone 13 with a different case, one with a MagSafe-compatible magnet built-in, yet I found the same issue: The MagLight’s grip is not very strong, and it falls off too easily.
I decided that I would try to stick one of the magnets on the back of my case to see if that would work better. Oddly, there are no instructions on where to place the magnet. Looking at one of the pictures on the website, it seems that the magnet is centered over the Apple logo, so that’s what I did. The MagLight can now be attached to the phone, which is good, but it ever so slightly blocked the view of the camera. Arrgh! This sticker is stuck on there good, so I had to order a new case from Amazon. Since one of my dogs ate the other sticker magnet, I had to order more of those as well.
It turns out that I got lucky and ordered an amazing product from Amazon. The magnets in this kit are larger and more powerful than the ones that Moonside included. Additionally, it comes with a template that makes sure the magnets are placed in the right spot. If you need to add a magnet to your case, I recommend this little kit from ESR.
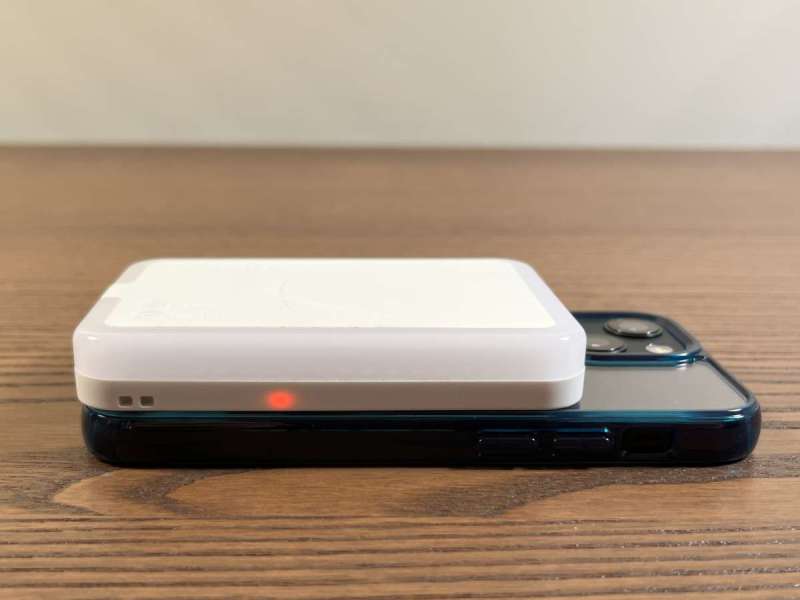
To charge my phone, I place the MagLight against my case, press the power button to turn it on, hold the mode button for two seconds to enable wireless charging, and then press and hold the mode button until the lights turn off. Wow. It seems like that could be simpler, especially since dedicated chargers like this one I own from Anker automatically charge when placed against my case. Maybe Moonside should add a “charge” button that does those steps all at once.
I tested the wireless charging and found that it took my iPhone 13 Mini from 20% to 80% in two hours, but doing so completely drained the MagLight’s battery. This is good to know, because it tells me that I can either use it to recharge my phone, or I can use to supply lights to my photos, but it doesn’t really have the battery life to do both. The battery in the MagLight is 4000 mAh, a relatively small size. There are plenty of other options on Amazon that have anywhere from 10,000 to 25,000 mAh and can charge my phone multiple times.
I was not able to get the MagLight to recharge my wife’s Apple Watch, but I think that’s because the watch is picky about what can charge it.
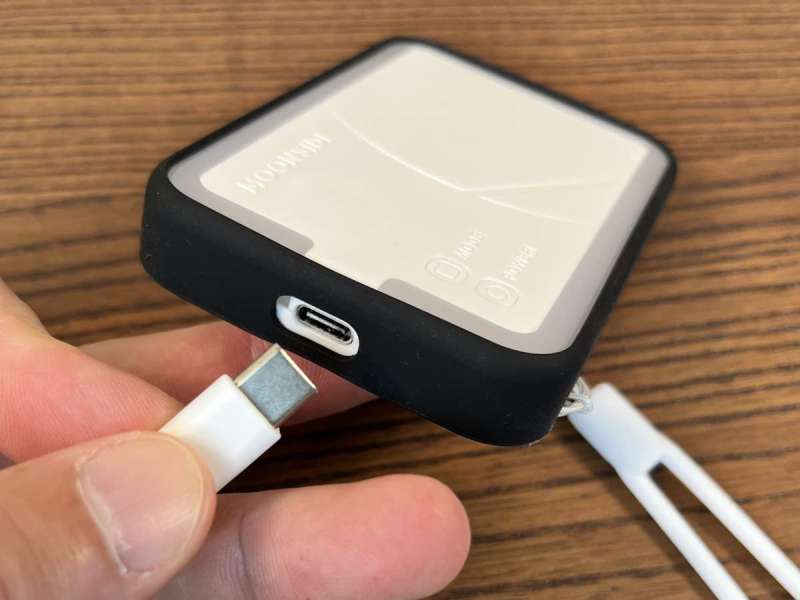
Recharging the MagLight is easy. I plugged the USB-C side of the included cable into the MagLight and the USB-A into my SoundCore Wakey, and it started charging.
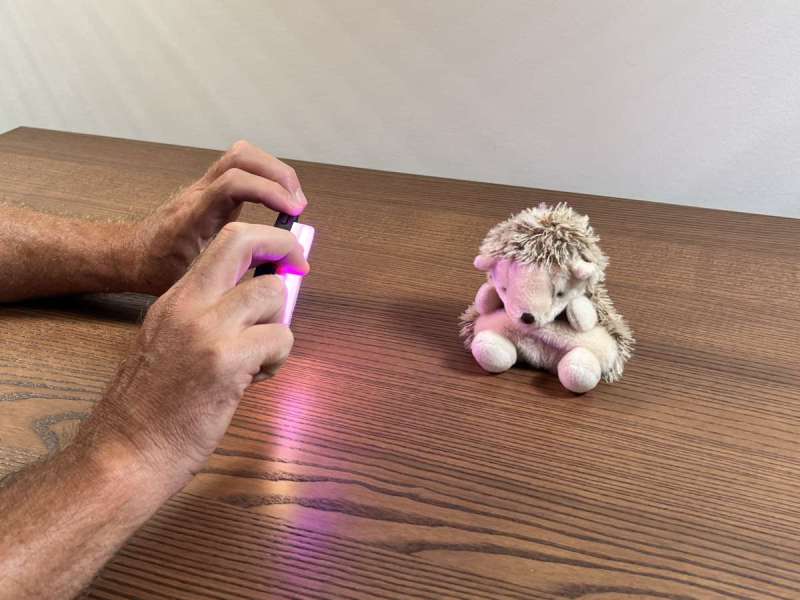
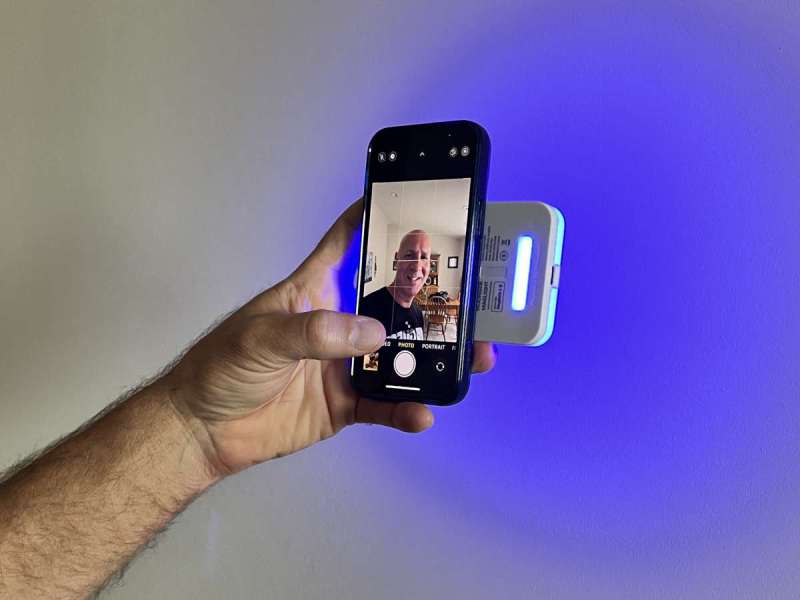
There are five ways to use the lights to take pictures. The first way is to attach the MagLight to my phone and take a picture from the front camera. This is the typical way to use it, as it takes advantage of the most LEDs and the better camera on my iPhone. In the right lighting, it can add a fair amount of color to a picture.
The second way is to attach the MagLight to my phone, rotate it 90 degrees so the small strip of lights pokes out on one side, and take a selfie. While this is a clever idea, there aren’t many LEDs here, so it doesn’t impact the photo much.
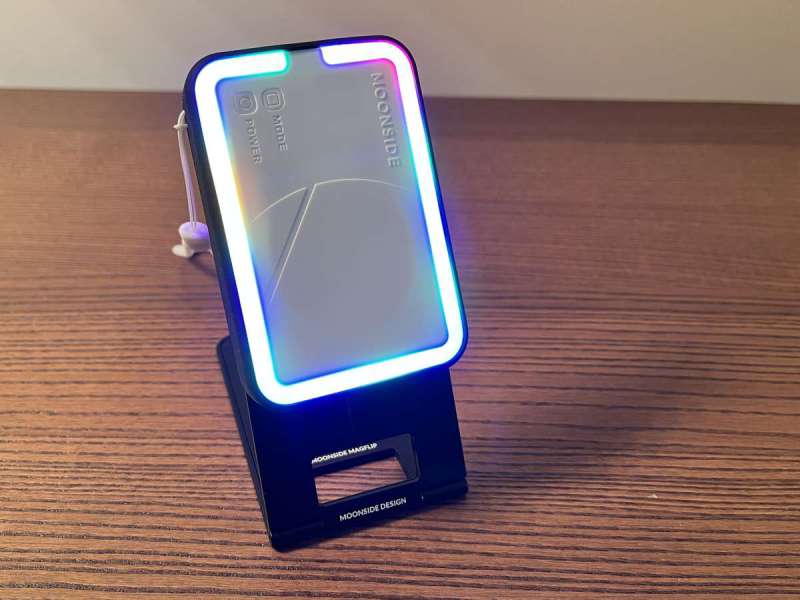
The third way is to attach the MagLight to the MagFlip and set it on a flat surface. This is a simple stand whose primary advantage is that it can be folded flat when not in use.
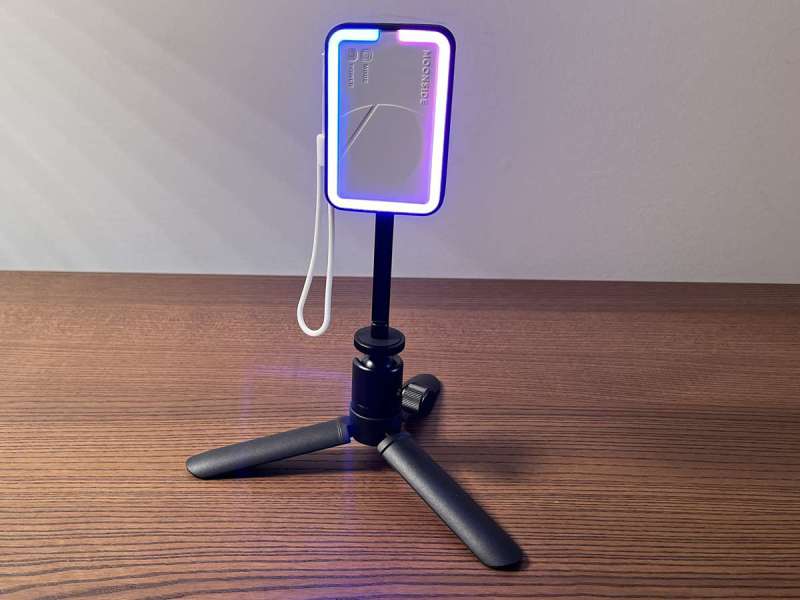
The fourth way is to attack the MagLight to the MagPod, a short tripod. It has a ball socket, which allows it a full range of motion for positioning the tripod to provide lighting to a subject.
The fifth way is to attach it to the shoe mount — this is the little piece of metal that came with the tripod adapter — and mount it on a DSLR camera. I’m not sure how useful this is, as I would expect that higher end cameras would use professional lighting.
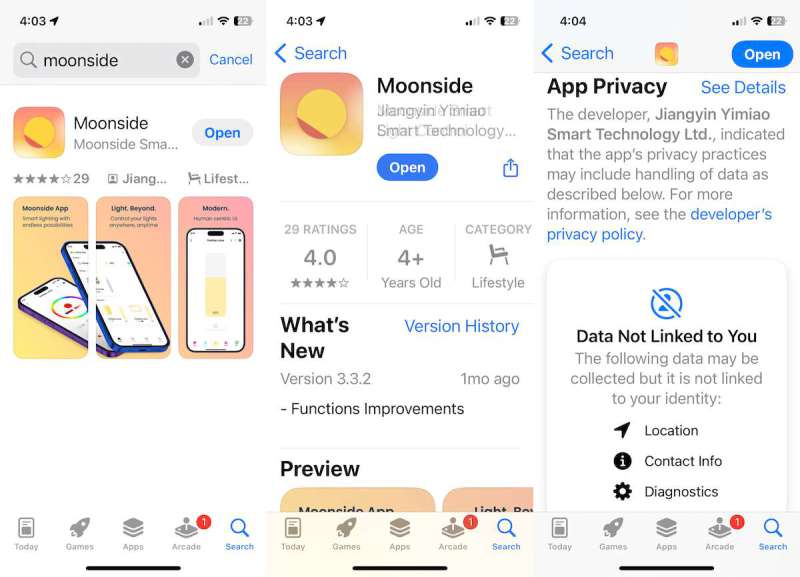
To really take advantage of the LEDs, I installed the Moonside app. Unfortunately, this app collects a lot of my personal data that it does not need to collect, and I’m not a fan of that.
Pairing the app with the MagLight was super easy as it uses Bluetooth.

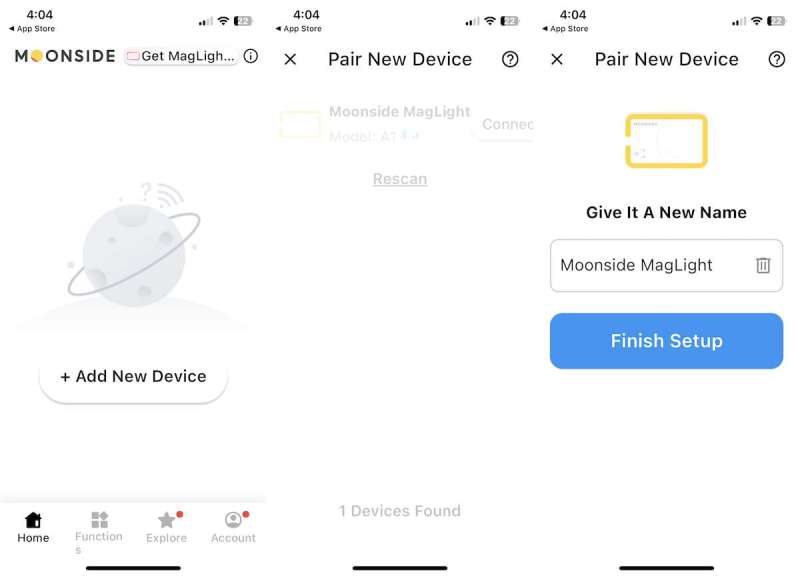
Once paired, the app uses three primary screens to interact with the MagLight, which are shown above. The home screen is like a mini-overview, where I can see the battery, turn the light off, change how bright it is, and turn on the wireless. The UI is very difficult to use, as everything is way too small. I can move to the second screen by clicking on the word “device.”
The second screen duplicates the information already found back in the first. The only purpose at this point is pairing with additional MagLights using plus button. I can move to the third screen by clicking on the right arrow.
The third screen lists all the various settings for the gadget. It displays the firmware version, the MAC address, the connection mode, and the battery level.
Moonside’s webpage shows an outstanding array of color options: single color, multiple colors, moving colors, and flashing colors. It even shows the ability for me to change each LED individually! This flexibility is the real power of the MagLight. How do I configure this in the app? I found four different ways:
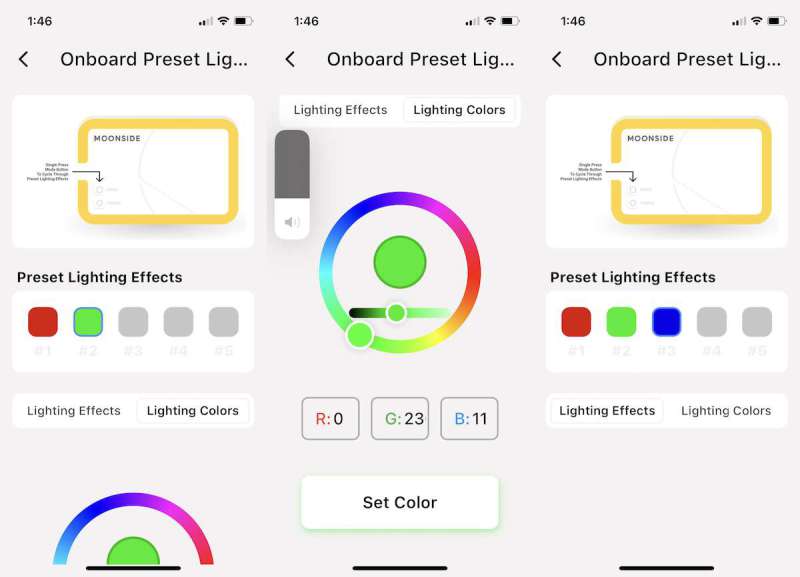
First, from the Device Settings page I can click on Onboard Preset Lighting. This page allows me to change the presets on the MagLight. I can use the Lighting Colors button to set a specific color, like red or green. The Lighting Effects button, however, appears to be broken. There is no way to set or change any lighting effects. All I can do is set one solid color, which replaces one of the default presets. By the way, once you change the default preset, there does not appear to be any to get it back, so be really sure you want to do it.
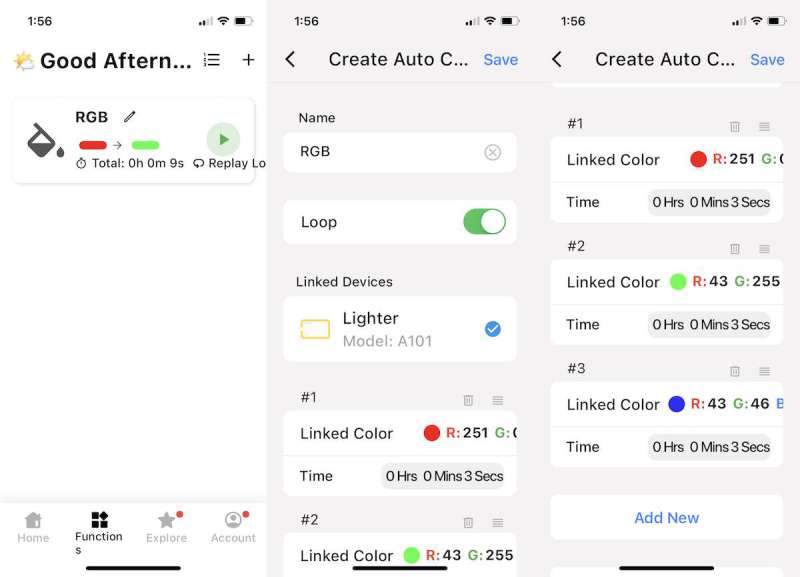
Second, on the home screen, I can select Function at the bottom to create a function. There are a number of capabilities in here, most of which I can’t imagine using. It can turn the lights on based upon my location or the time of day or turn them off after a certain time or when I want to wake up. While these are mildly interesting, they are not helpful for cool photography lighting effects, which is the primary purpose of these LEDs. The coolest features were the Auto Scene Player and the Auto Color. Both of these allows me to change the color and brightness of the lights for a period of time and then loop over the set of all changes. For example, I set up an Auto Color to change between red, green, and blue every three seconds.
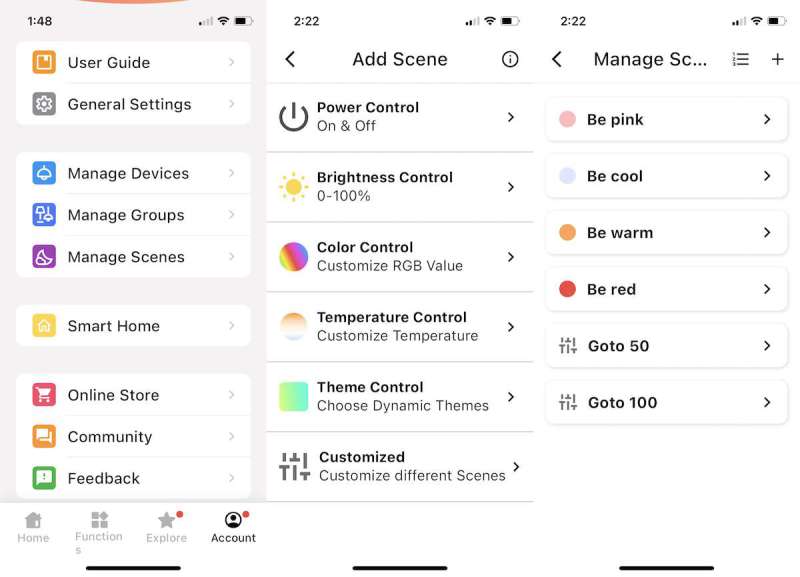
Third, on the home screen, I can select Account at the bottom, then create Scenes, which seem to change one aspect of the lights, such as its color or brightness. I created several scenes, which in turn show up on the home screen. Of all the ways to changes the lights, scenes seem to me to be the easiest.
Fourth, I can add themes that can be added to a scene using Theme Control. It sounds like these are preset lighting effects that I could download from Moonside, but I can’t find any way in the app to download theme; perhaps themes are left over from a previous version of the app.
UPDATE (Aug 31, 2024) – Moonside replied to let me know there’s actually a fifth way to configure the lights, a way that I did not find when reviewing the MagLight. On the home screen, I can press and hold the device card, and it takes me to another screen that MagLight calls the Control Page where I can change the color, temperature, and brightness of the LEDs. This is also where themes can be downloaded and where individual LEDs can be configured in the LED Painter. (I’ve updated other parts of this article to reflect this new information.) On the one hand, this is great! Here’s where some of the missing features were hiding. On the other hand, this simply reenforces the problems that I mention below: The documentation needs to the updated to match the app so that all features can be easily found, and the app needs to be completely redesigned so that there’s one place to configure the lights on the MagLight instead of five different places.
What do I think of the app? I think it’s a disaster.
- Some of the features in the app, such as Light Effects on the Onboard Preset Lighting page do not work.
- The features for configuring the lights are scattered all over the app. Presets, functions, scenes, themes, and the LED Painter are different ways to do the same thing, so they should all be grouped together and work together.
- The UI needs help in several places, as controls are often too small or wander off the edge of the screen.
This app feels like it was put together piecemeal by several developers, each who put features wherever they could. One person needs to redesign the entire app from top to bottom to give it a consistent and capable look and feel.
There is a page on Moonside’s website that provides help in using the app, but the information on that page looks nothing like the app. I can only assume that this help was for a prior version of their app, and Moonside hasn’t bothered to keep their documentation current.

The final question is this: Does the MagLight work? Yes, it does! It takes a bit of creativity, but in the right setting and with the right lighting, the MagLight can definitely add a splash of color to a picture. In the photo above, which I took in a Mexican restaurant, the red adds a bit of a diabolical look to this picture of my son-in-law. Either that or the salsa was too spicy for him!
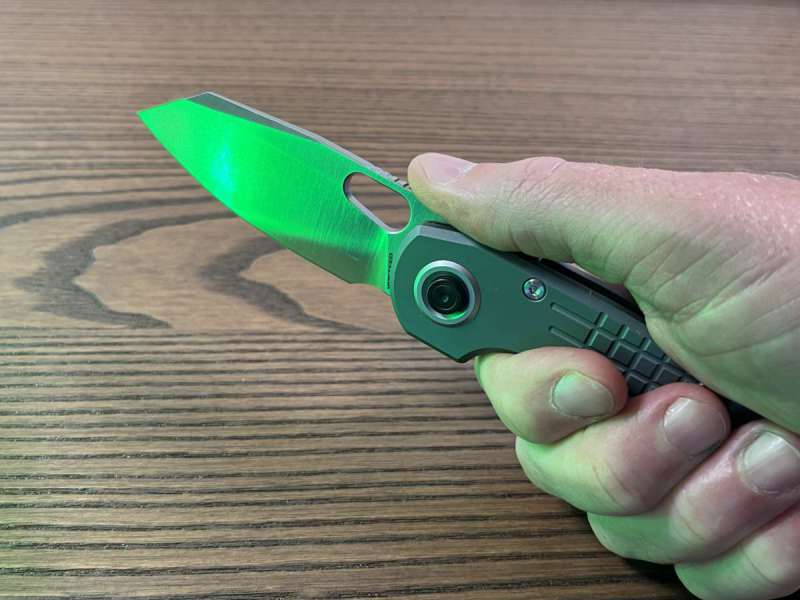
In this shot, I used the MagFlip and added a splash of green to the Vosteed Ankylo pocket knife. The color certainly makes the blade pop in this otherwise dull picture. I can see myself using this in future gadget reviews.
What I like about the Moonside MagLight
- Extra lighting for photos
- Various ways to secure and position the lights
- An app for customizing the lighting effects
- Wireless recharging for my iPhone
What needs to be improved
- Make the buttons easier to see and use
- Rewrite the instructions to include all features and components in the kits
- Completely redesign the app so that it’s unified and coherent
- Update the app documentation to match the app
Final thoughts
By combining a power bank with a set of LED lights, Moonside has designed a gadget that can add a creative touch to my pictures while topping off my iPhone’s battery. The MagLight’s hardware is pretty impressive, but unfortunately, other issues have let it down. The documentation for the hardware is lacking, and the documentation for the Moonside app is non-existent. The app should be the source of the MagLight’s flexibility and imaginative powers, but it’s disorganized and has broken features. As it stands now, I cannot recommend this gadget to you.
If, however, this hardware has peeked your curiosity, as it did mine, keep an on eye on the Moonside app. Software is just software, and all of the issues that I found with the app can easily be fixed, if Moonside so chooses. Documentation is very easy to write and keep current. With some good updates, it’s quite possible that I could change my mind and recommend this gadget in the future.
Price: $87 for the standard pack, $135 for the creative pack
Where to buy: Moonside
Source: The sample for this review was provided free of charge by Moonside. Moonside did not have a final say on the review and did not preview the review before it was published.

Gerber Gear Suspension 12-in-1 EDC Multi-Plier Multitool with Pocket Knife, Needle Nose Pliers, Wire Cutters and More, Gifts for Men, Camping and Survival, Grey
(as of June 14, 2026 18:43 GMT -05:00 - More infoProduct prices and availability are accurate as of the date/time indicated and are subject to change. Any price and availability information displayed on [relevant Amazon Site(s), as applicable] at the time of purchase will apply to the purchase of this product.)