REVIEW – As I mentioned in my review of Jackery’s power station, my wife is a direct seller. Part of selling things at craft shows, church bazaars, and holiday fairs is making sure that everything she sells is appropriately labeled. Ideally, each label would include my wife’s name, the type of product, the price, and a QR code for my wife’s website. While she could mostly do this by hand, I think a label maker could do this job faster and better. I’m hoping that the Marklife P11 label printer will be the right tool for this job.
What is it?
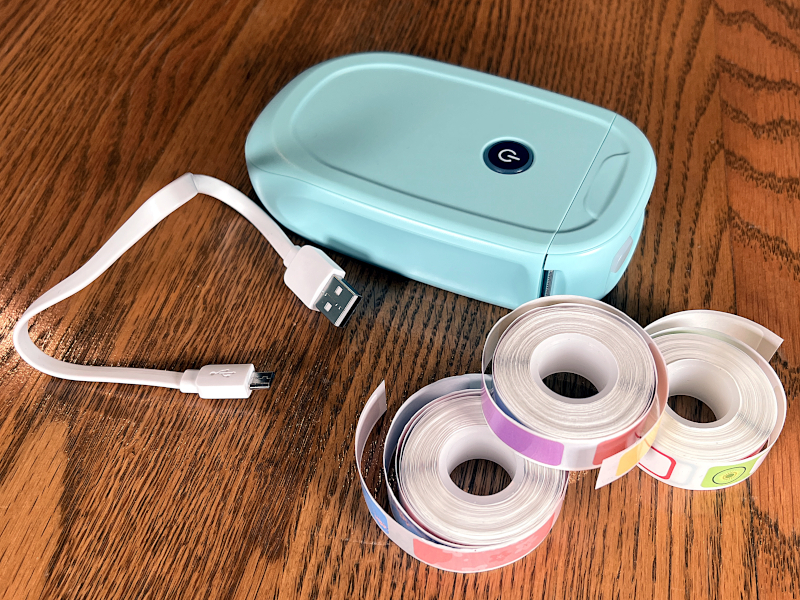
The Marklife P11 is a small, portable, thermal label printer that connects via Bluetooth to a phone, where a free app is used to design the label. There are iOS and Android versions of the app, and the P11 comes with four different rolls of labels. Marklife is a brand of Shenzhen Yinxiaoqian Technology, a Chinese company. Their mission is “to produce technological innovation and development, creating high-quality products to solve your toughest label challenges.”
What’s in the box?
- Marklife P11 label maker
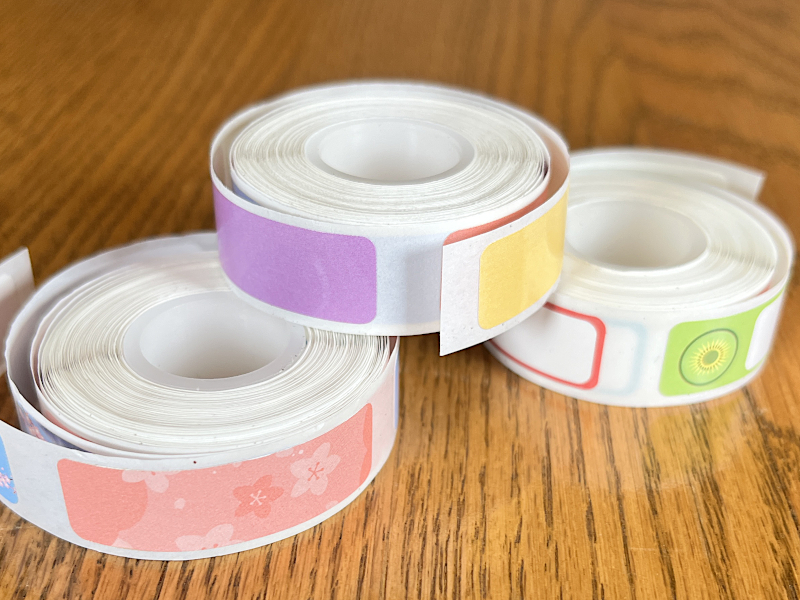
- Four rolls of labels
- The manual
- USB charging cable
Hardware specs
- Printing Width: 12-15mm
- Printing Speed: 60 mm/s
- Battery: 1200mAh rechargeable lithium battery
- Printing Resolution: 203 dpi
- Weight: 5.1 oz
- Size: 5.25 x 3 x 1.25 inches
- Labels: Laminated plastic
- Colors: White, white and pink, blue
Design and features
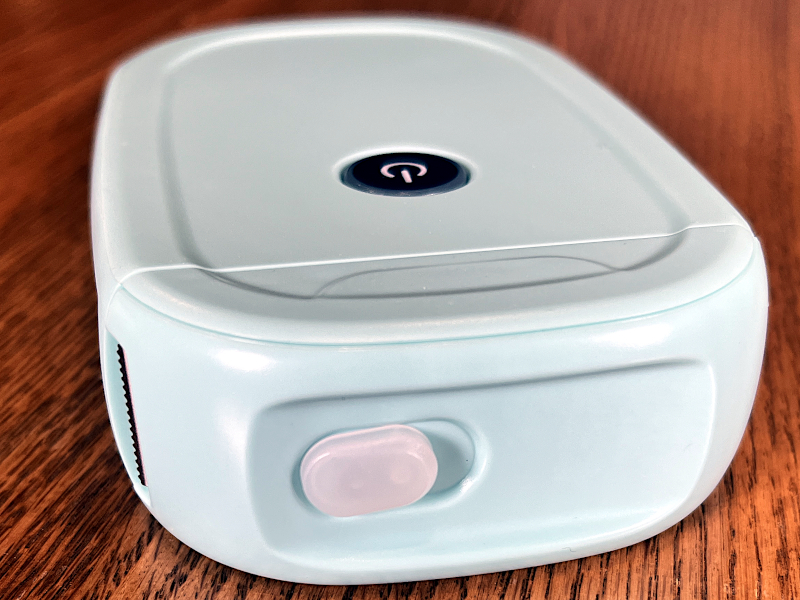
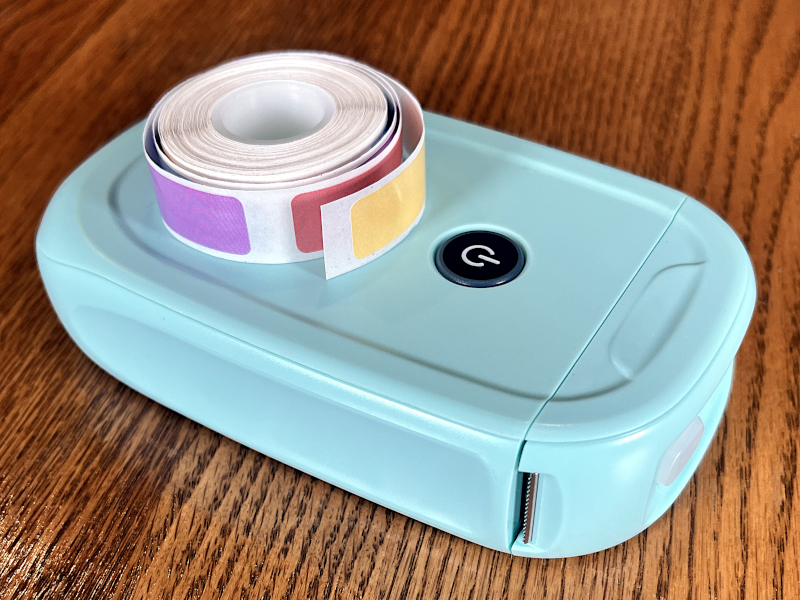
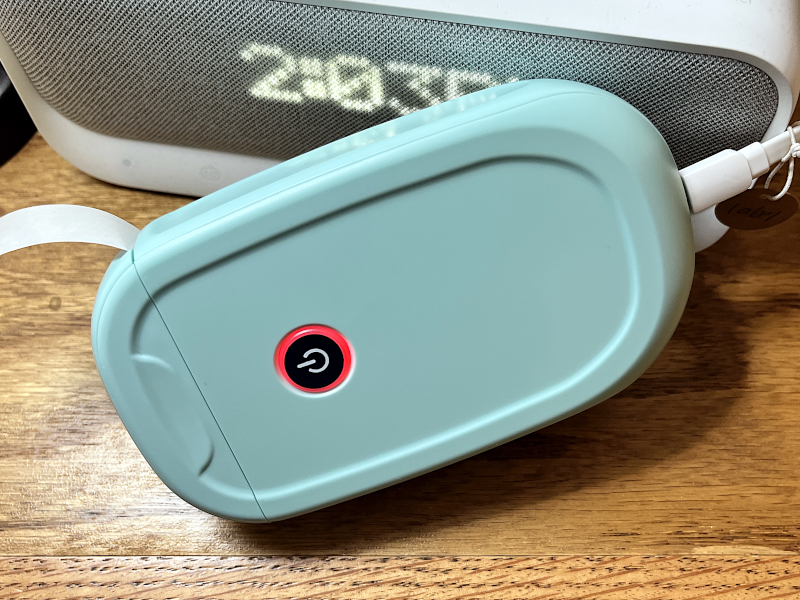
The Marklife P11 label maker is small, roughly the size of two iPhones stacked one top of the other. Its small size and light weight make it very portable. The P11 is made entirely of plastic, yet it doesn’t feel cheap or flimsy. The edges are rounded, the sides are indented for easy holding, and the external interfaces are at a minimum. It’s a clean, simple, no-nonsense design, one that I like.
On their Amazon store, Marklife only sells the P11 in white or white with pink sides. My model is powder blue, which is available on Marklife’s store.
Installation and setup
The P11 arrived in a sturdy blue box.
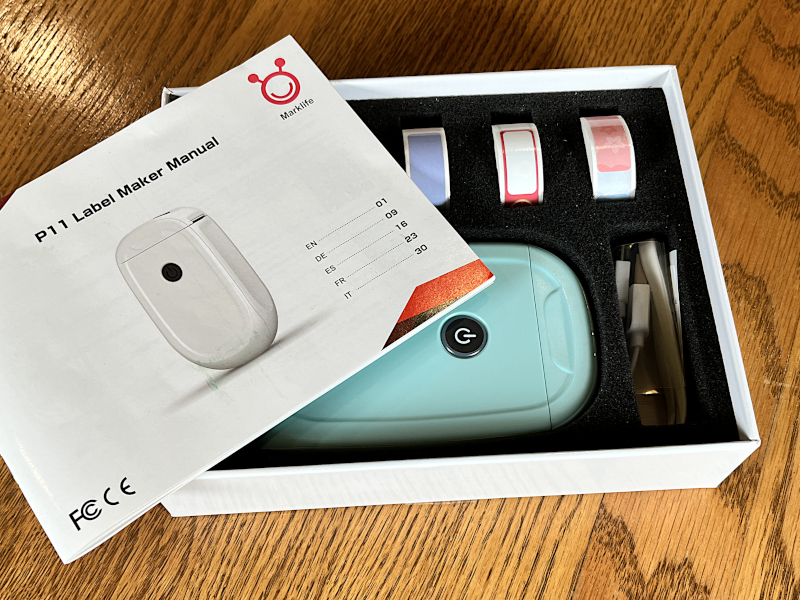
Inside I found everything to be held in place by custom foam inserts. I appreciate Marklife’s attention to detail here, ensuring that the label maker and the rolls of labels are well-protected.
Marklife included four rolls of stickers, three of various color and patterns and one white one. The first thing I did was read through the manual. The English section, which has nine pages, is very poorly written; Marklife needs to hire a native English speaker to proofread its manual (and its website, too). To prepare the P11 for printing, I followed the steps that are laid out in the manual.

I slid the release button on top over to reveal the inside of the Marklife P11 label printer, which contained the white labels. At this point, I could have swapped out this roll for a different one, but I choose to leave it as is. I made sure the labels were facing the right direction, pulled a small amount out past the edge, then closed it.
I pressed and held the on/off button until it lit up green, about two seconds. I then double-tapped the on/off button, which calibrated the P11 and printed a QR code on a label. I will need to do this calibration again every time that I swap out one roll of labels for another; if I don’t, the printing will not be centered properly on the labels. This process does waste a label, so I will need to think ahead to minimize swapping.
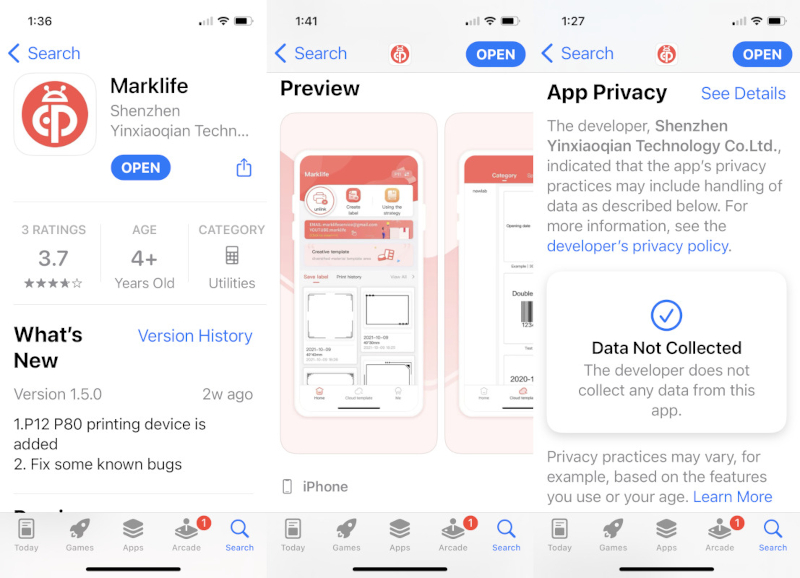
I then went to Apple’s app store and searched for Marklife. I was super pleased to find that the app’s privacy policy states that they do not collect any data; too many gadget makers hoover up a lot of personal data that they don’t need. I installed the app on my iPhone 13.
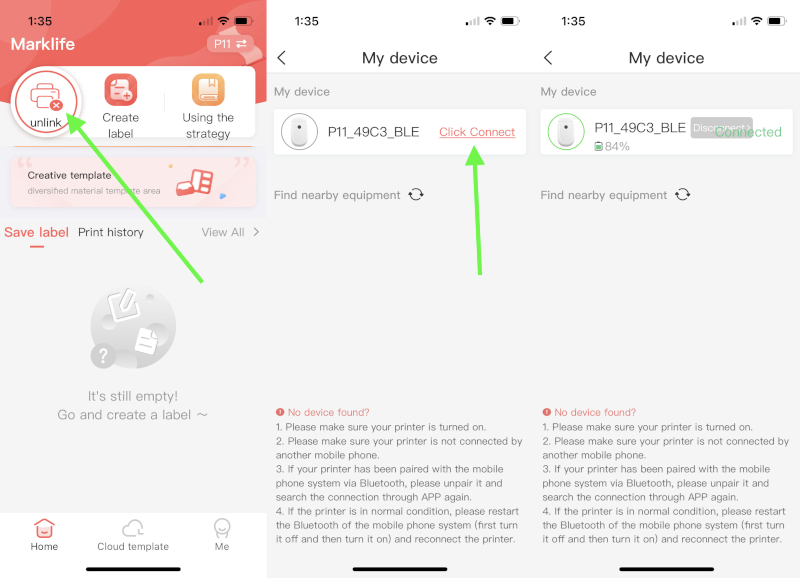
When the app first started, I had the option to create an account and sign in or use a guest account. I chose the latter. Then, I selected the unlink icon. On the My Device screen, I then clicked “Click Connect” while making sure that my iPhone was near the P11 (which must be on). When they paired, the ring around the P11 icon changed to green. I was now ready to create a label.
Software Performance
Let me go ahead and get the ugly part of this review out of the way: The user interface (UI) for this app is horrible. It’s sloppy, cluttered, and unintuitive, and it has lots of poor English. Marklife needs to hire an expert in app design to redo the look and feel of this app. Having said that, the app is not so poor that it would stop me from buying the P11; in other words, I’ve learned to focus on the parts of the app that I need to design labels and ignore the rest. The good news is that it’s not hard at all to design decent labels with this app.
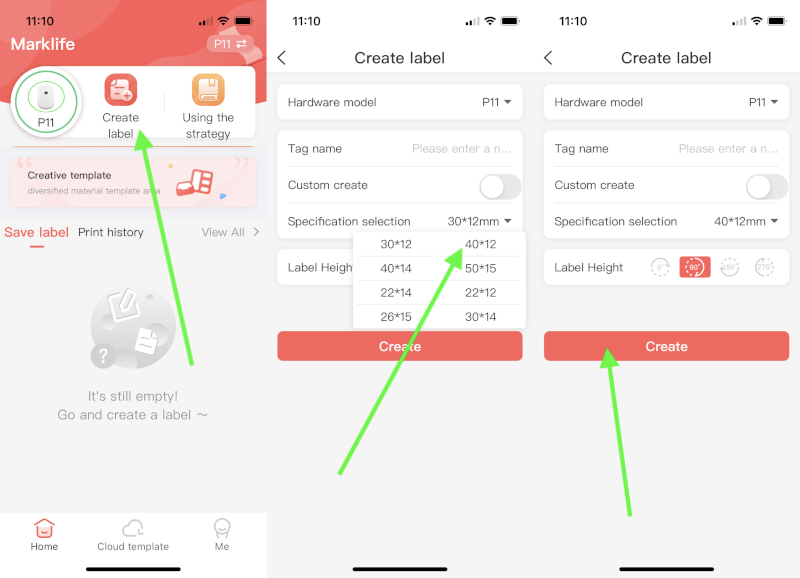
After connecting the app to the P11, the first step is to click the “Create Label” button. The second step is to select the size of the label. All four rolls of labels included with the Marklife P11 label printer sent to me are 40×12 mm. I couldn’t find a way to save this as the default size, so I have to remember to reselect this every time. The third step is to select the “Create” button.
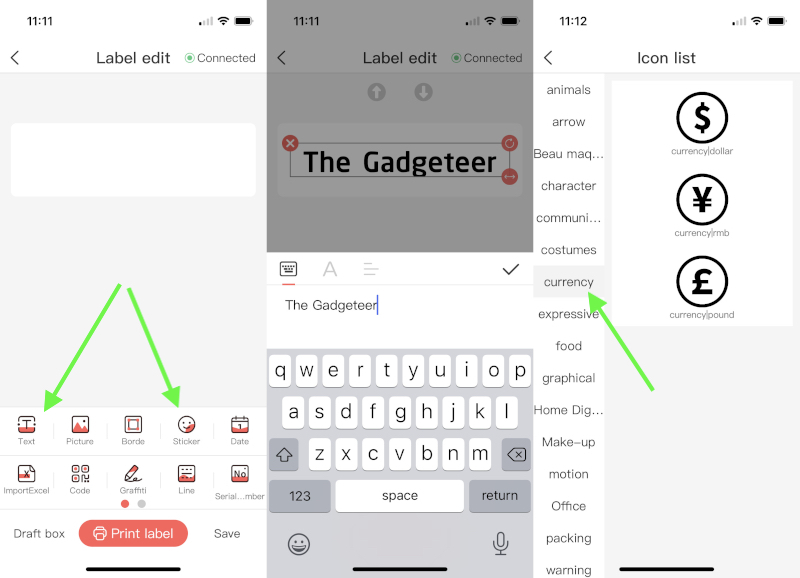
The fourth step is to design the label using the various features at the bottom of the screen, such as the “Text” and “Sticker” options. With text, I can select a font, a size, and alignment. I can reposition the words and make them flow down to the next line. It’s pretty easy to use. With stickers, I select the category on the left, such as currency, and then select the actual sticker that I want, such as the dollar sign. The stickers are uneven and sometimes hard to find, but there are a lot of options. I tested most of these features, and most work just fine. I was especially pleased to see how easy it was to create a QR code.
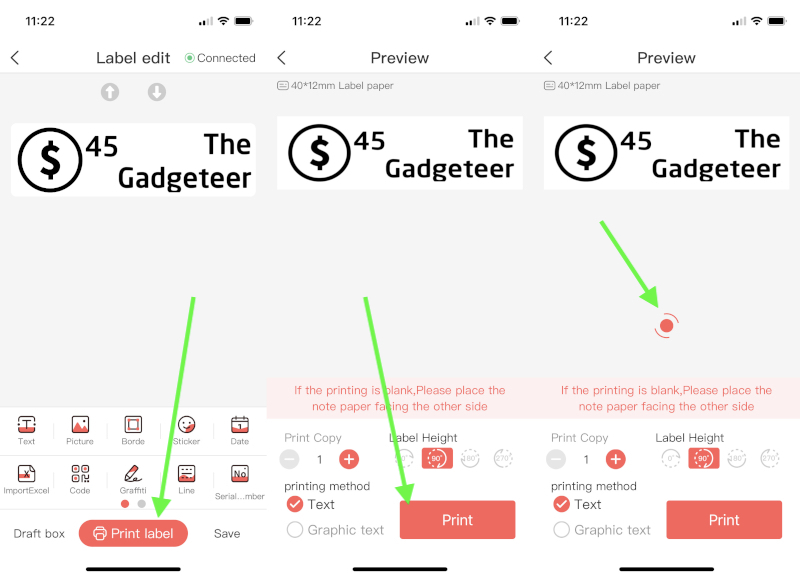
Once I have finished designing my label, the fifth step is to print it. I click the “Print Label” button, click the “Print” button, and then watch the spinning icon while the label prints, which only takes a couple seconds. Note that I could set the P11 to print multiple copies of the same label.
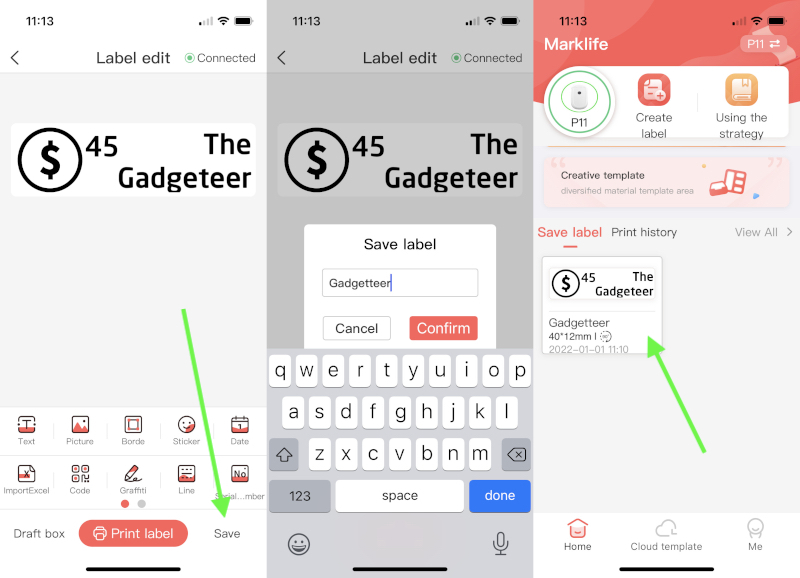
After the label is done, I return to the “Label Edit” screen, where I have the option to save the label, if I want to use it again in the future, a handy feature. To do this I click the “Save” button, enter a title for the label and click “Confirm.” The resulting save will appear on the main page.
Like I said, this is not too difficult to use, and I can create simple labels in under a minute. You can watch this entire process with this helpful video that Marklife posted on YouTube.
Hardware Performance
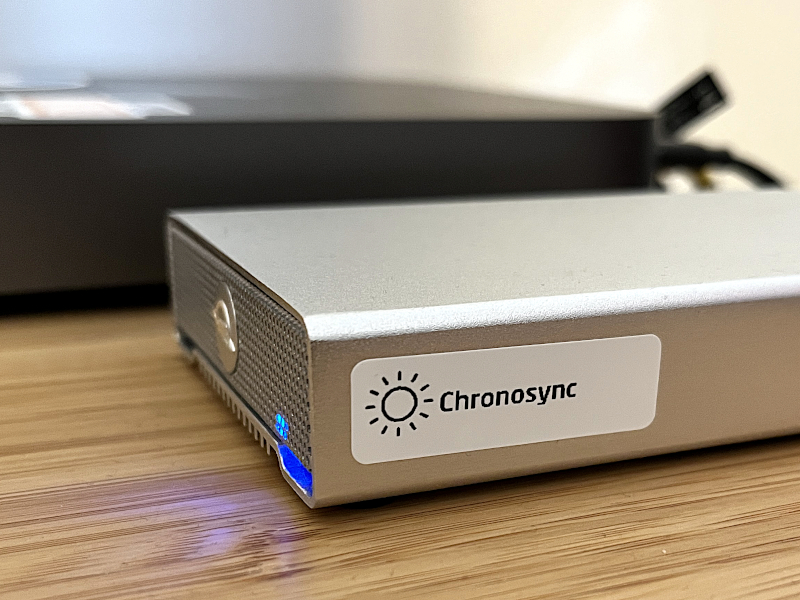
The printing is decent. With a resolution of only 203 dpi, the letters do have a noticeably jagged edge if I look closely; even so, they are more than clear enough for labels. The stickers and QR codes and other outputs are also quite readable. I’m happy with the output, so happy that I began labeling various things around my home office, including the backup drive from OWC that I recently reviewed.
Marklife claims that its stickers are waterproof, oil-proof and tear-proof. I admit I was skeptical of this claim, so I tested all of these, and I found they were absolutely right. The thermal printing results in a label that I could not smudge when I rubbed my finger over it, even when I used water, oil, or soap. Because the label is made of laminated plastic, I couldn’t tear it in half. Despite all this, it pulls up fairly easy from glass, metal, and plastic surfaces. I really like these labels.
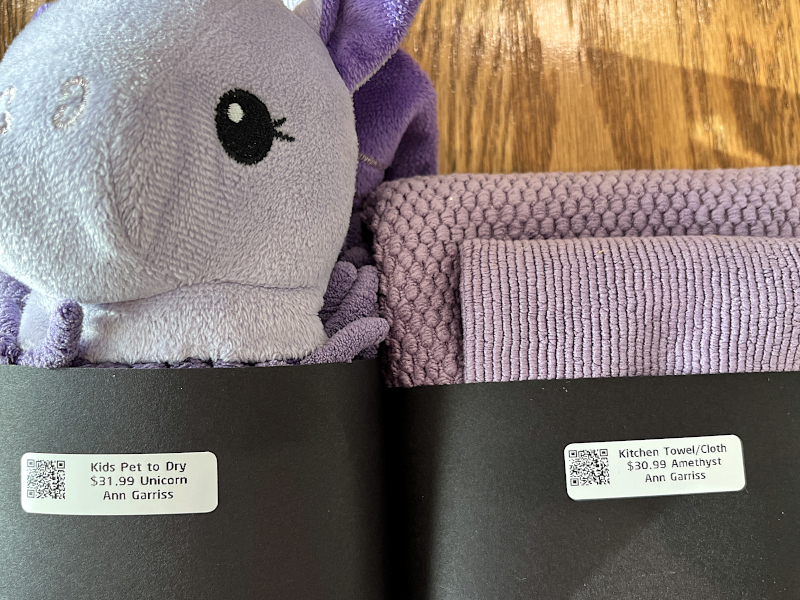
Once I got the hang of printing, I gave the label maker to my wife, and she began labeling her products. It worked perfectly, allowing her to fit everything she needed for each item.
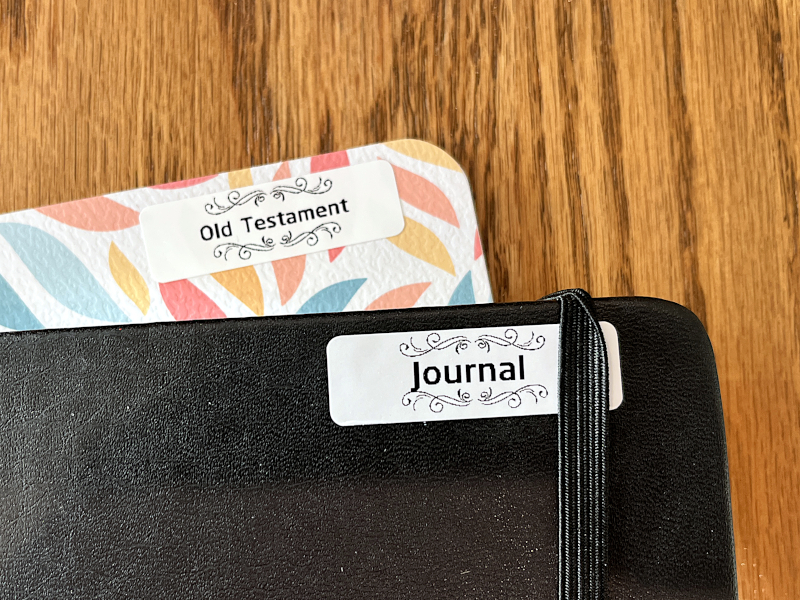
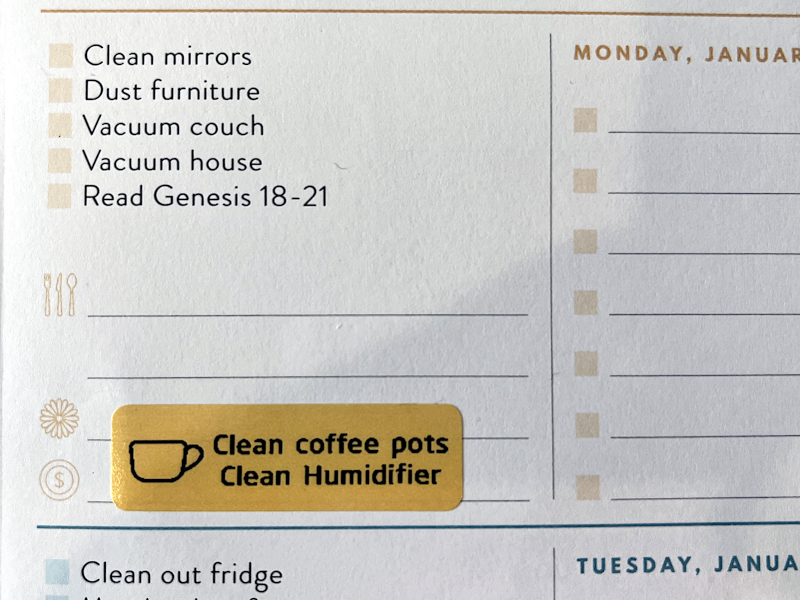
My wife loves this label maker a lot—the quirks of the app didn’t bother her so much—and she began labeling everything, including her journals and her daily planner.
Extra Features
When I connect the app to the P11, a small icon shows how much battery life remains. Mine arrived charged at 90%, and after all the testing I did, it was still over 80%. Whenever it gets low, I only need to connect the included USB cable to the bottom of the P11 and then plug it into a charger, such as my trusty SoundCore Wakey. The light on the P11 turns red while charging and then returns to green when fully charged.
Each 12×40 roll has 150 labels, so there’s a total of 600 labels in the box I received. If I run out of labels, I can purchase more from Amazon, including white ones, transparent ones, or colored ones. There’s even one designed for labeling cables.
What I like
- Light and portable
- Flexible label design options
- Quick and easy printing
- Durable labels
What I’d change
- Rewrite the Marklife app
Final thoughts
The Marklife P11 is a lightweight, battery-powered label printer from Marklife that can be taken anywhere. It pairs with an app on either an iPhone or an Android phone, which is used to design the labels. Although the interface of the app is pretty bad, it is functional and allows a user to quickly create labels with text, icons, QR codes, and other images. The labels are strong and smudge-proof and can be easily applied and pulled back up. I was hoping that this gadget would be helpful to my wife as she labels the products that she sells, and the P11 did not disappoint. I commend it to you.
UPDATE (Sept 14, 2022) – My printer developed a small problem. It appears that one of the heating elements in the print head is no longer working, which leaves what appears to be a “empty stripe” through everything that is printed. I sent an email to Marklife’s support, but it bounced. Also, Marklife’s website is no longer available. It appears that Marklife has folded, so I recommend that you look elsewhere for your label printing needs.
Price: $35.99
Where to buy: Amazon or the Marklife online store
Source: The sample for this review was provided by Marklife.

2-Pack LED Video Light Kit, NiceVeedi Studio Light, 2800-6500K Dimmable Photography Lighting Kit with Tripod Stand&Phone Holder, 73" Stream Light for Video Recording, Game Streaming, YouTube
(as of June 10, 2026 13:02 GMT -05:00 - More infoProduct prices and availability are accurate as of the date/time indicated and are subject to change. Any price and availability information displayed on [relevant Amazon Site(s), as applicable] at the time of purchase will apply to the purchase of this product.)
Gadgeteer Comment Policy - Please read before commenting
I bought a white one from Amazon and it just arrived today. The box was much smaller than the package reviewed and it held only one roll of plain white labels – already installed in the printer.
It’s quick to get started, even with the quirks in the manual and the iOS app.
This might be handy.
Bonjour, je recherche comment télécharger moi meme des polices d’écriture ? svp merci
I am sorry, but I am not aware of any way to download new fonts to this label maker.
I set mine up and it works except when the paper comes out there is nothing printed on it.