REVIEW – The term ‘Smart Home’ is a bit of a loaded catch-all. Whether it’s an alarm system, connected audio or controllable lights, if the products don’t fit into how you use your home, it may not make life easier which doesn’t sound all that smart. X-Sense sent out their Smart Video Doorbell and their XC01-WR Carbon Monoxide Detector to review right as I was preparing to move to a new home. It forced me to think about how I connect to and use my home tech and how a prospective buyer might want something different. Let’s dive in shall we?
What is it?
There are two separate X-Sense products in this review…
The Smart Video Doorbell connects to your home WiFi giving you access to video, notifications, and two-way audio communication with anyone standing outside your front door.
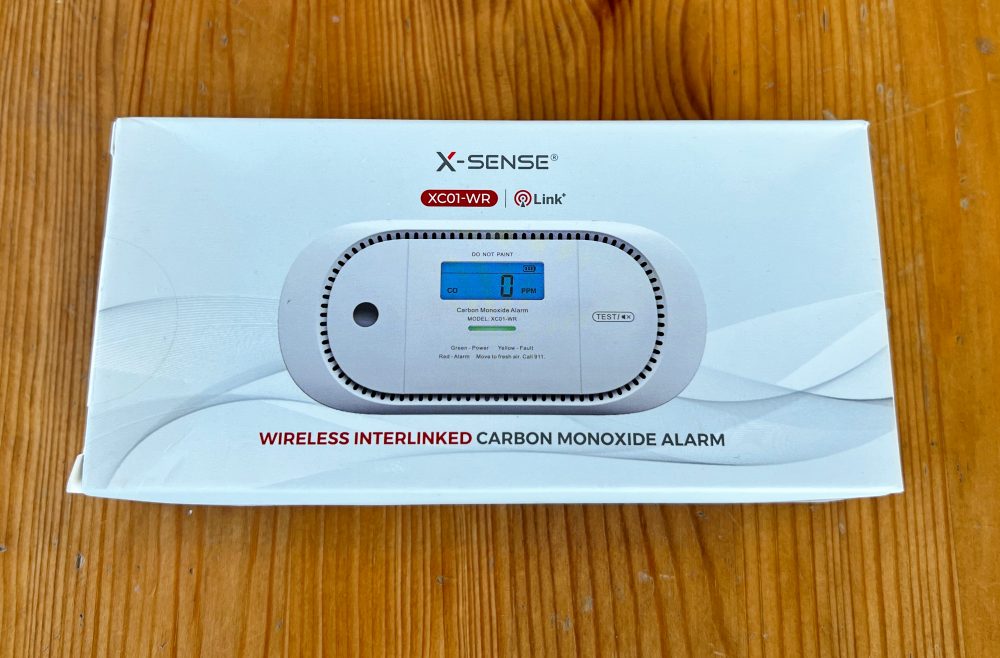
The XC01-WR Carbon Monoxide Detector is a battery-powered, networked sensor that works in conjunction with X-Sense’s other detectors to alert you to the presence of carbon monoxide in your home.
What’s in the box?

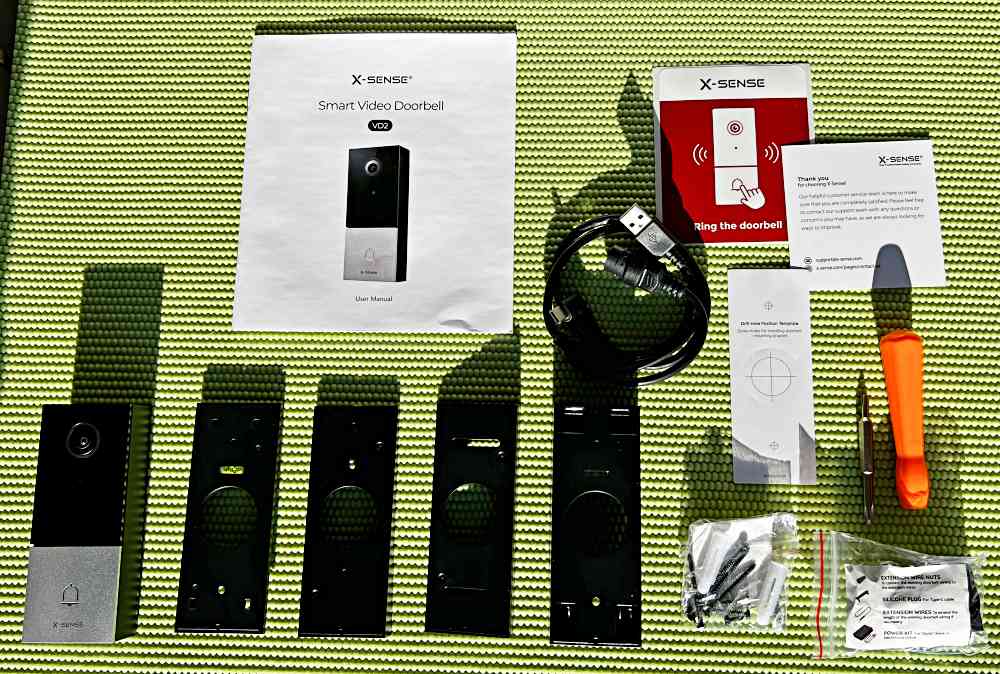
X-Sense Smart Video Doorbell
- Smart Video Doorbell
- Mounting plate and angled shims
- Mounting hardware and template
- Power cable
- Screwdriver
- Extension wire and power kit
- Instructions and Thank you card
X-Sense XC02-WR Wireless Interconnected Carbon Monoxide Detector
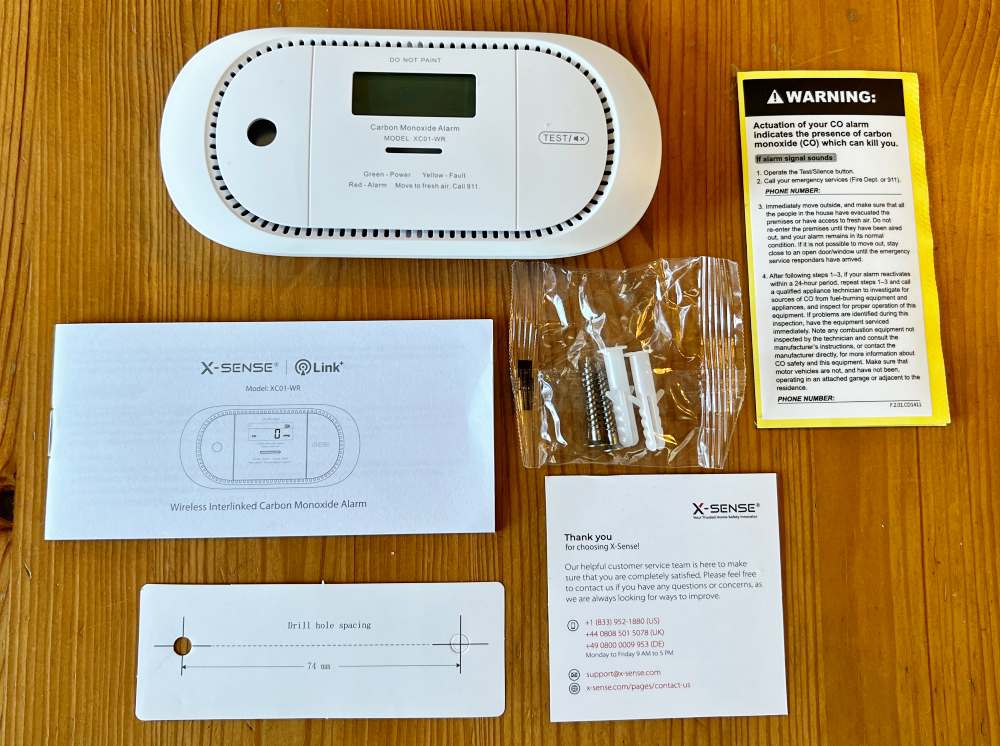
- XC02-WR Carbon Monoxide Detector
- Mounting hardware and template
- Instructions, Thank you card, and Warning sticker
Hardware specs
X-Sense Smart Video Doorbell
Lens: Viewing angles – Diagonal: 170°; horizontal: 152°; vertical: 81°
Lens: Resolutions – 2K (2560 x 1440), 1080p (1920 x 1080), 720p (1280 x 720) | Supports HDR
Video: Manual and automatic modes, Can flip vertically and horizontally, Night Visibility 16.4 ft (5 m) range
Audio: Built-in mic and speaker; supports full duplex real-time 2-way audio
Connectivity: 2.4 GHz & 5 GHz, IEEE 802.11b/g/n/ac
Power: AC 8-24 V or USB Type-C 5-30 V
Software Features: Face recognition for up to 20 faces | Supports up to 128gb Micro SD Card
Weatherized: IP65 Waterproofing | Operating temperature range -4–122°F (-20–50℃)
X-Sense XC02-WR Wireless Interconnected Carbon Monoxide Detector
Battery: 3V CR123A lithium battery / 5 year lifespan
Sensor: Electrochemical
Safety & Certs: UL 2034, EN 50291-1:2018 | TÜV and CE listed
Current: Standby < 15 uA (avg.) | Alarm < 90 mA (avg.)
Operating Temp/Humidity: 40–100°F (4–38°C) | 10%–85% RH (non-condensing)
Volume: ≥ 85 dB at 10 ft (3 m) | Silence Duration ≤ 9 minutes
Operating Freq: 915 MHz (UL), 868 MHz (TÜV)
Max Linked Units: Up to 24 wireless X-Sense units
Dimensions: 5.3 × 2.5 × 0.9 inches and 0.2lbs (135 × 63 × 24 mm and 92g)
Design and features
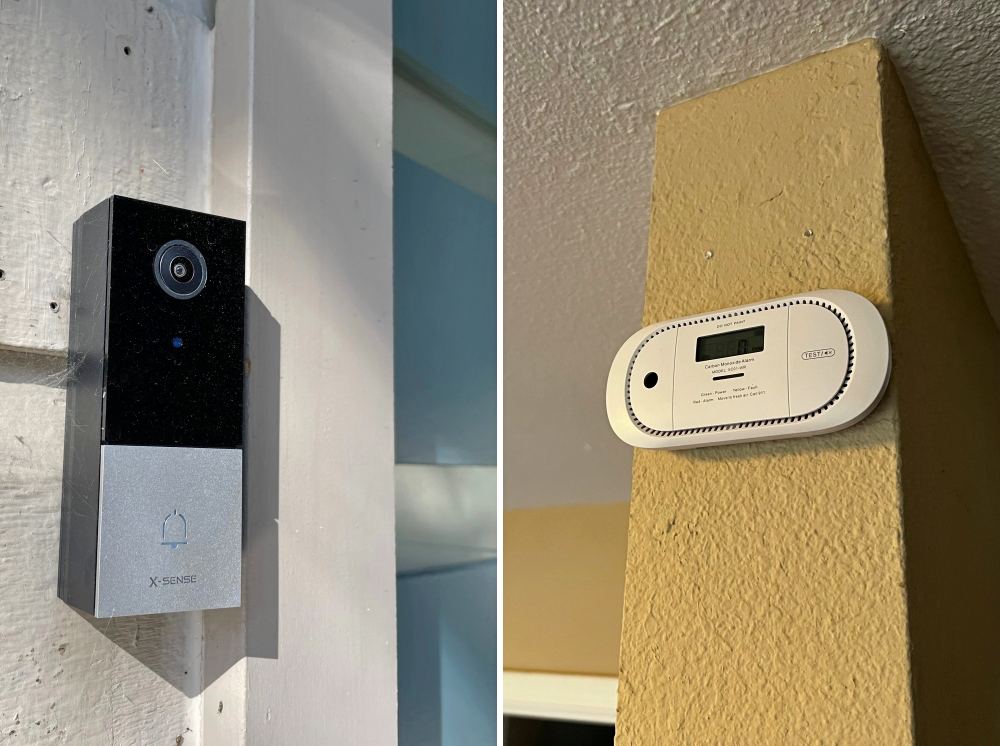
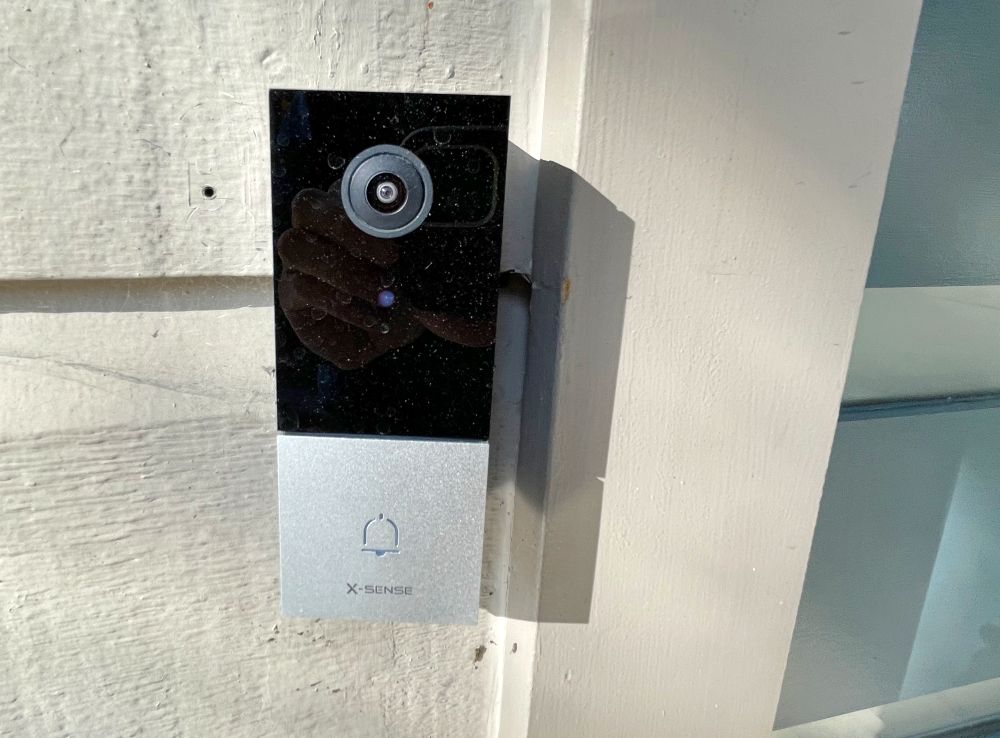
The Smart Video Doorbell is designed with a neutral black and silver aesthetic that should blend in with most homes. When set up with the App you’ll have access to a live video feed, automatic recording based on events, and the ability to talk directly to anyone in proximity.
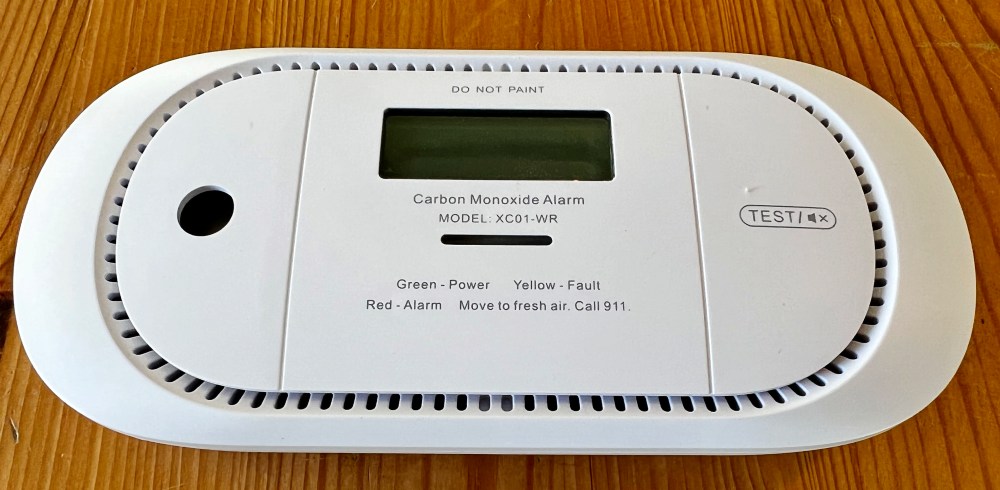
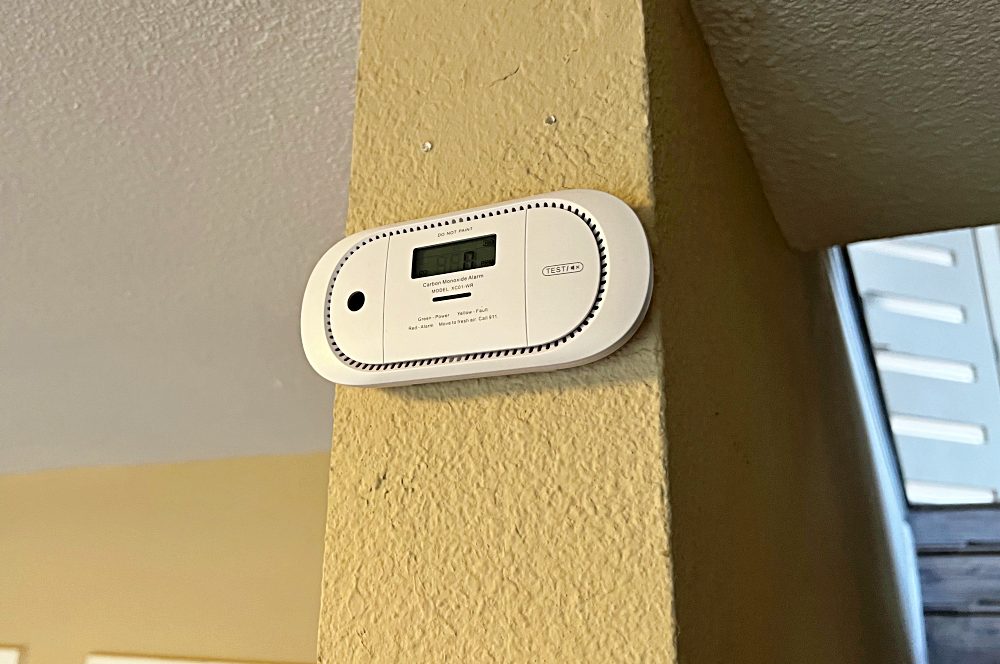
The XC01-WR Carbon Monoxide Detector is also a neutral color, but this time it’s an off-white. As you can see in the image below you should not paint this to match your walls as it could affect its function. The button on the right is for running a test and for muting an alarm in progress. The LED screen in the center will display the peak CO concentration since the previous reset. The horizontal bar below that is a color LED indicator that will display Green, Yellow, or Red depending on the current status. Those are helpfully printed directly below, so nothing to have to remember. The circle at the left houses the speaker.
Setup
Let’s walk through the setup of the Smart Video Doorbell first.
If you’re replacing a wired doorbell, the installation is pretty straightforward. I was replacing a different video doorbell for which I already had a compatible AC adapter running from an outlet inside the front door. Either way, there are a few initial steps to follow that are the same.
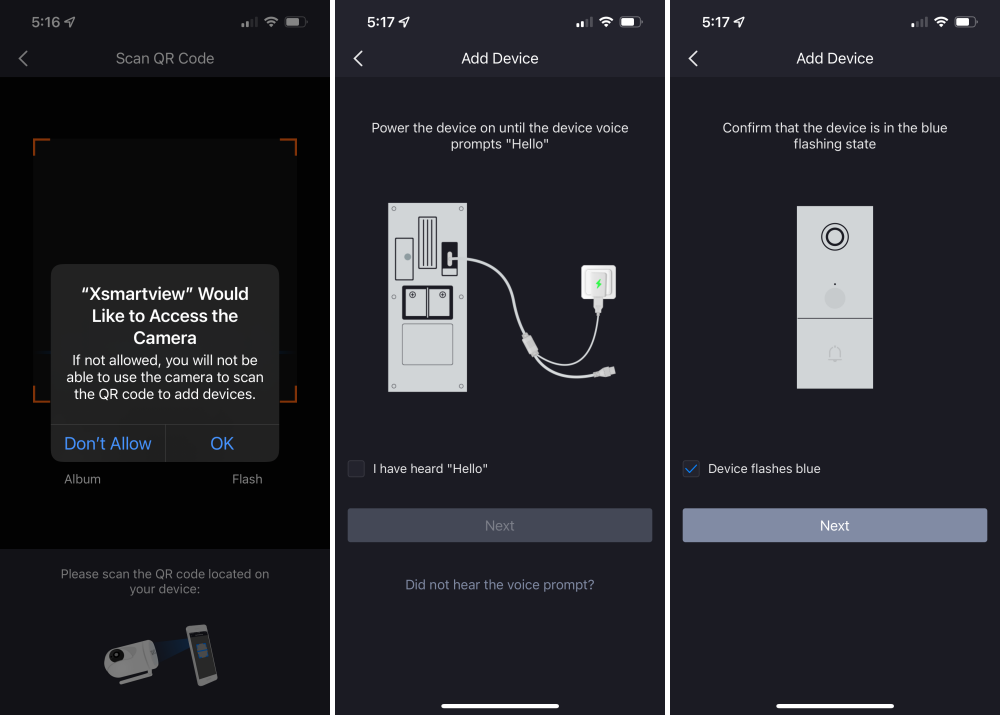
First, download the Xsmartview app from your favorite app store. It’s available for iOS and Android. You’ll also want to reconfirm that your phone is connected to WiFi before starting to set up the doorbell.
Next, it’s easiest to attach the doorbell to a typical USB wall adapter to connect it to WiFi. That way you can lounge in your living room during this step instead of standing around the front door.
Follow the steps in the app to connect the doorbell to WiFi. They’re well detailed and should have you up and running quickly.
Now you’re ready to physically install the doorbell. Make sure your electricity is turned off and/or the adapter you are using is unplugged. Route your power cable through the hole in whichever baseplate works for your setup. For me, that was the horizontally angled one. The built-in level makes it easy to square up. Screw it into place in whatever way works with the materials you’re dealing with.
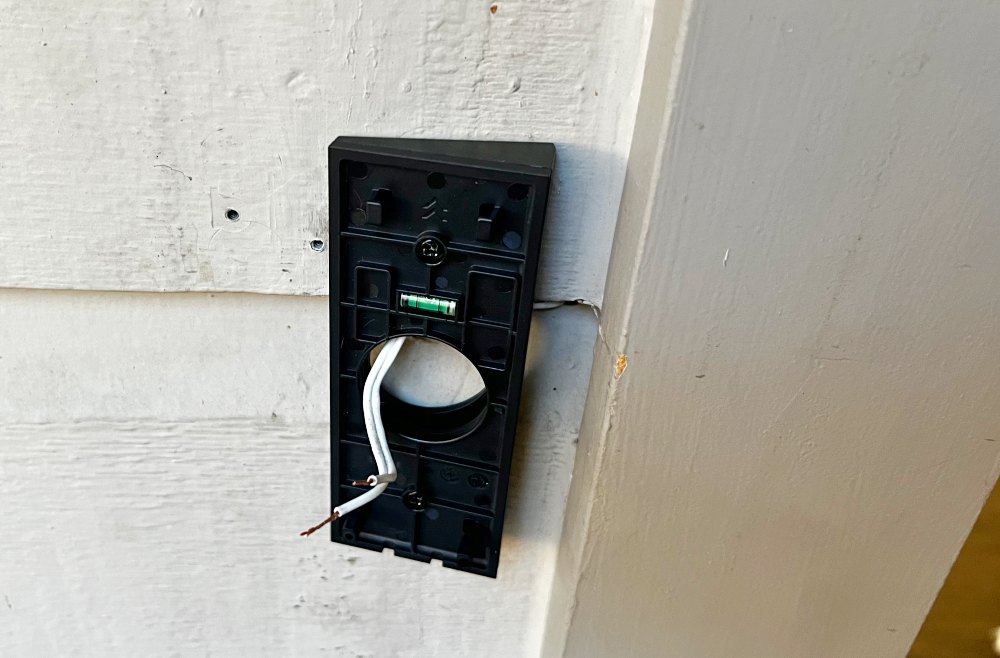
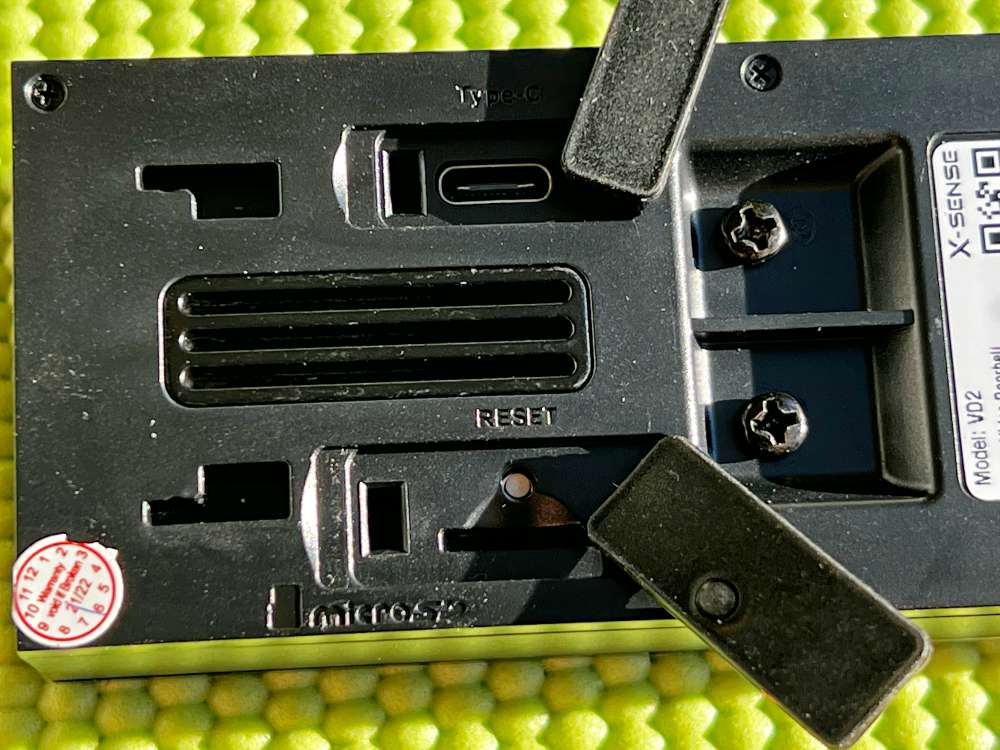
As for the power cable, you’ll either want to directly connect the leads from your power cable or use the included USB power cable depending on your source. Depending on your chime scenario, there may be another step here with the included power leads. I don’t have a chime so the two AC leads in the photo above attach directly to the two screws at the back of the doorbell. In this photo, you can also see the USB-C connector as well as the hiding-in-the-shadows reset button and MicroSD card slot in the bottom center. The two weird cut out shapes at the far left are the mounting cavities for connecting it to the different wall mount plates.
Once your power connection is solid, push it onto the wall plate and slide down to seat. Turn your power back on and confirm that it powers up and the doorbell is visible in your app. If all is good, use the included screwdriver to tighten two screws underneath to make sure no one accidentally dislodges (or worse, steals) your new doorbell.
Any remaining setup will be in the App such as adjusting the zones to monitor and recording settings.
Now we’ll tackle the setup for the Wireless Interconnected Carbon Monoxide Detector.
The setup of a single unit is pretty straightforward. I mounted this one just down the hall from our gas furnace and in the landing area between the bedrooms. There are a few rules about height and proximity you’ll want to read about, but once you’ve got it in the right place, it mounts with two screws and you’ll want to pull the strip that allows the included long-life battery to connect.
Should you not want to attach it to a wall, it has small designed-in feet that allow it to stand up as well.
If you’re setting up more than one, these have a built-in interconnect that lets them talk to one another. More on that in a bit.
Performance
So I mentioned in the opening I was prepping for a move and the home I was moving out of was almost empty when I received these products. It was actually perfect timing and I purchased some additional X-Sense products from Amazon to be able to create a whole-home solution. For reference, I picked up a 2K Outdoor Spotlight Camera, 3 of the Wireless Interconnected Combination Smoke and Carbon Monoxide Detectors as well as 6 Wireless Interconnected Smoke Detectors.
The Smart Video Doorbell works as you would hope. The Xsmartview App opens quickly and shows an image from any X-Sense video cameras you have installed in alphabetical order according to the name you assigned them. In my case, that’s the Driveway and Front Door.
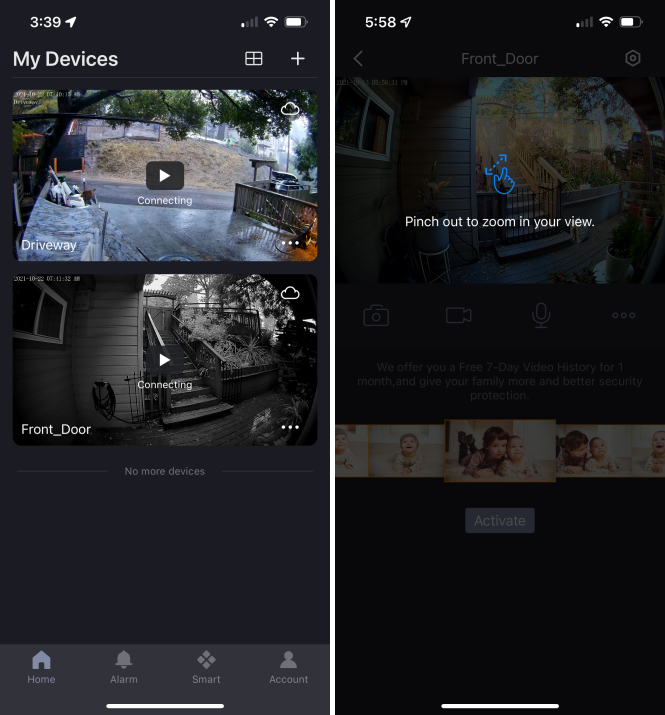
Clicking into either one provides a live view where you can adjust the zoom to see exactly what you want. Here’s an early morning view where the camera is still in night mode but is a great example of the camera’s clarity.
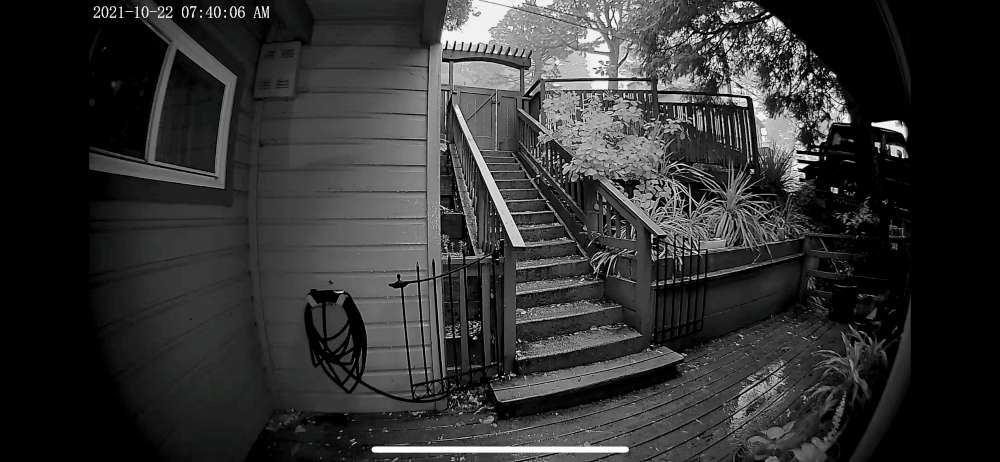
The Smart Video Doorbell works as I had hoped and didn’t require any additional WiFi repeater box like some other brands. When someone pressed the doorbell, my phone alerted me within a few seconds. It wasn’t instantaneous, but it also wasn’t too long. It’s going to depend on your network congestion. However, my scenario is unique in that I do not have a door chime that would ring instantly for most installs.
As for the Wireless Interconnected Carbon Monoxide Detector, the install was easy, and while I didn’t try to trick it into activating there’s peace of mind of knowing it’s set up and that it’s ready. The coolest thing about X-Sense’s system is the ‘Interconnected’ part. All of X-Sense’s Link products have built-in RF transmission that lets them communicate with each other. After setting up one unit in the app, the rest are activated by quickly pressing the button 4 times on an activated unit, and then quickly pressing the button 2 times on the unit you want to set up next. It’s super fast and then they’re all ready to go. Now that they’re interlinked, if one is triggered, they all respond so it’s impossible to miss.
It’s worth noting that the RF is not WiFi or even an open standard that you can connect beyond X-Sense’s proprietary products. It works well and again, the setup was super easy. But, I would have like to see these support WiFi so that I could see the status of the detectors in the Xsmartview app that is required for the Smart Video Doorbell. To further that line of thinking, it would be fantastic to be able to use the interconnected detectors (10 for my install) to ring when the doorbell is pressed since I do not have a doorbell chime. I get that these products weren’t conceived as a system, but why not?
What I like
- Easy installation and setup for both products
- Doorbell looks good, works well and has an excellent image
- Carbon Monoxide Detector interlinks to X-Sense’s other detectors for a unified alarm
What I’d change
- Add Wifi and App monitoring to the detectors
- Allow detectors to also function as a door chime
Final thoughts
X-Sense has some solid products here. The Smart Video Doorbell is worth a look if you aren’t already locked into a Ring or Google Nest system. While Nest has a dominant name in the detector space, the XC01-WR Carbon Monoxide Detector has a better shot at cutting through the noise with its interlink system and significantly less expensive options, but it’s not going to alert your phone if you’re not home.
Prices: $139.99 Smart Video Doorbell | $39.99 XC01-WR Wireless Interconnected Carbon Monoxide Detector
Where to buy: X-Sense Official Site (xc01-wr, video doorbell) and Amazon
Source: The sample of this product was provided by X-Sense.
L39 Ultra Slim UV Protective Filter for Leica Q3 43 Q2 Camera with Moisture-Proof Case & Removal Tool 19 Layers Mulit-Coated UV Ultraviolet Filter 99.3% Light Transmission Water Oil Scratch Resistant
(as of June 19, 2026 00:58 GMT -05:00 - More infoProduct prices and availability are accurate as of the date/time indicated and are subject to change. Any price and availability information displayed on [relevant Amazon Site(s), as applicable] at the time of purchase will apply to the purchase of this product.)