REVIEW — Pour-over coffee can consistently offer a delicious brew and bring out the best in your coffee. And thanks to Wacaco’s Cuppamoka, you can easily make yourself a single-serving at home or on the go.
What is it?
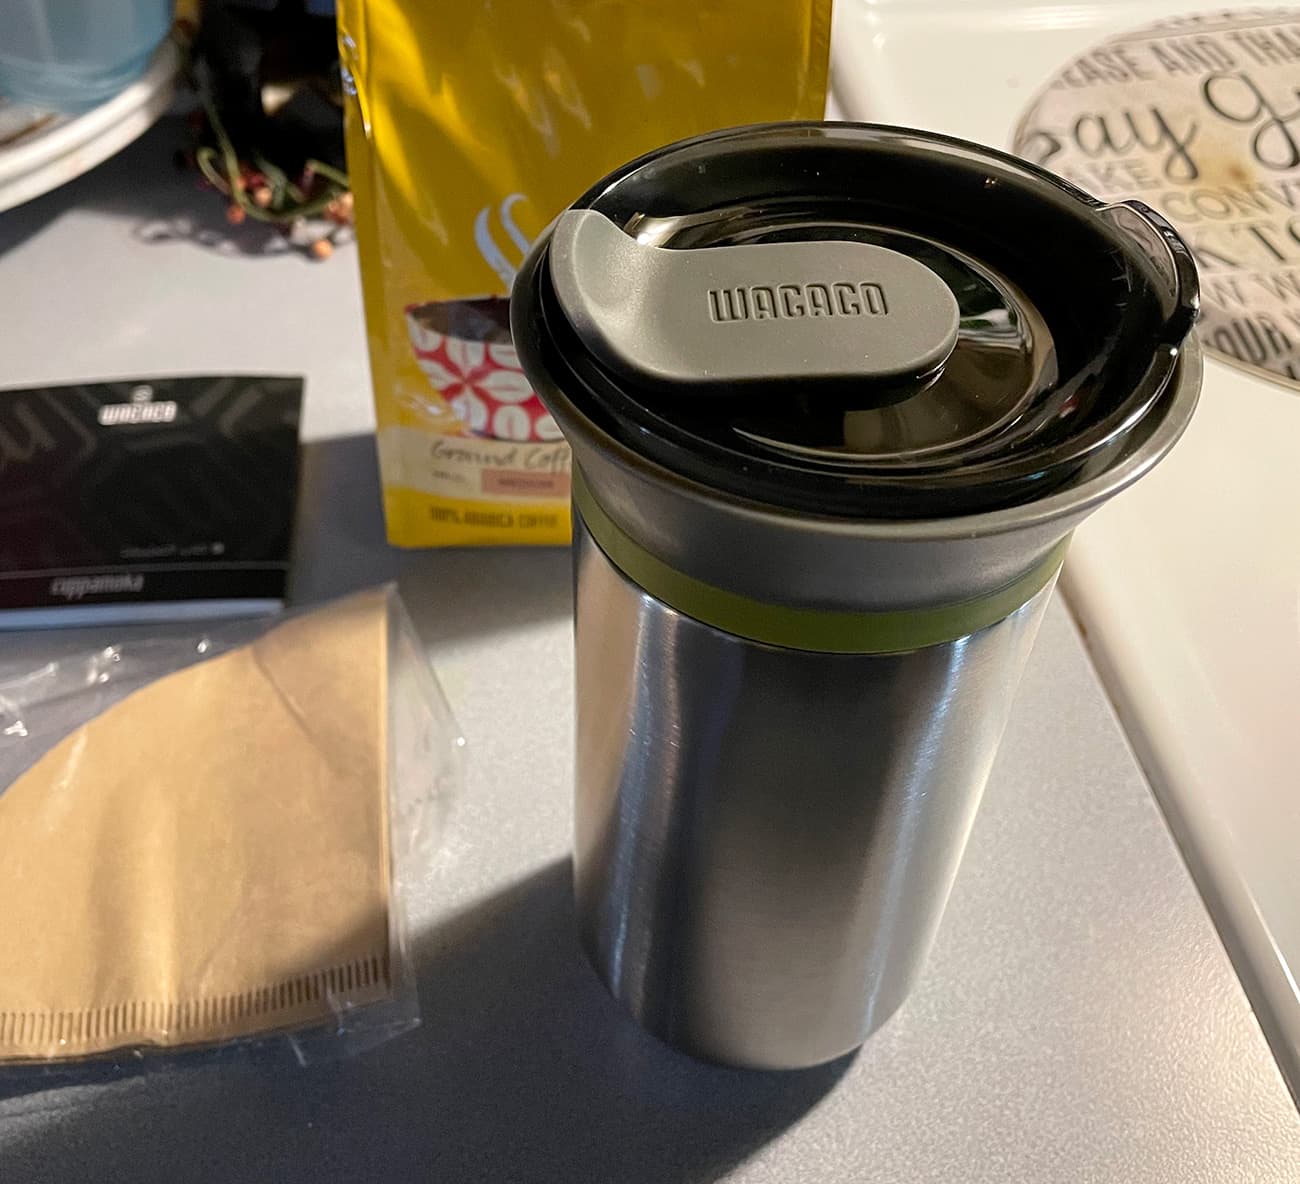
The Cuppamoka is a compact, travel pour-over coffee maker system that combines a double-walled stainless steel mug with a pop-up cone filter coffee dripper.
What’s in the box?
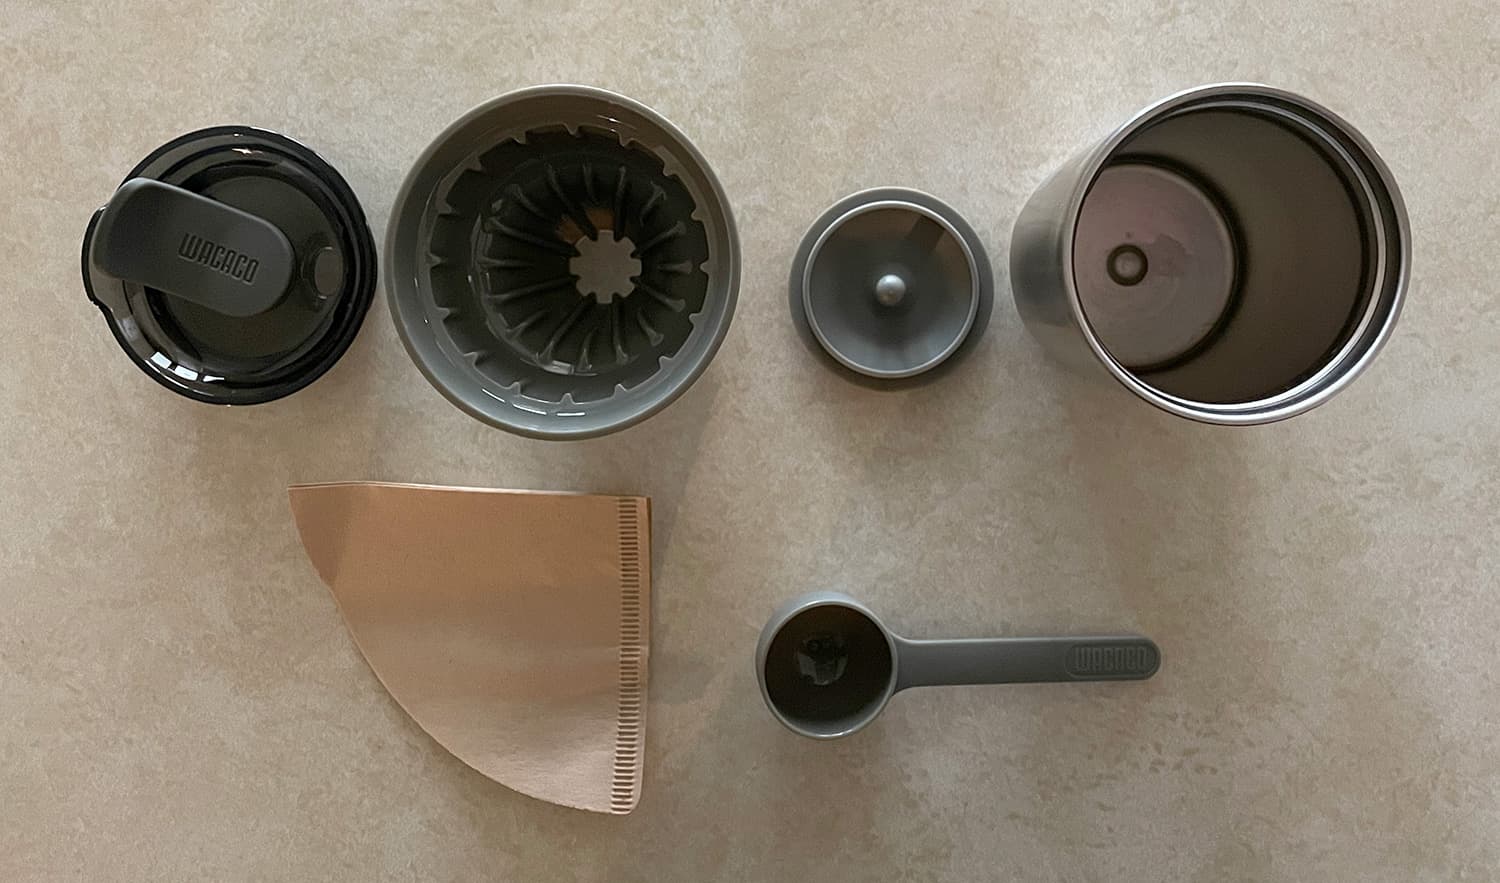
- 10 fl oz (300mL) isothermal stainless steel mug
- collecting pad
- 10 paper filters
- scoop
- multi-languages instruction book
- warranty card
Hardware specs
- Dimensions: 3.52” x 6.65” (89.5 mm x 169 mm)
- Weight: 0.7 lb (316 g)
- Mug capacity 10 fl oz (300 mL)
Design and features
Pour-over is one of the simplest ways of making coffee. The process is precicely what it sounds like… you get ground coffee, put it in a filter, and pour hot water over it, allowing the brewed coffee to drip down into a carafe or cup.
Wacaco’s Cuppamoka is a compact pour-over system that has everything you need to make a single cup of coffee using this method.
The first time I made a cup, I followed the directions to a T, but the subsequent times after, I more or less eyeballed and it came out fine.
Basically, the process is simple. Outside of the Cuppamoka itself, all you need is ground coffee — medium grind, as fine espresso grind probably won’t work well with the filters — and some hot water.
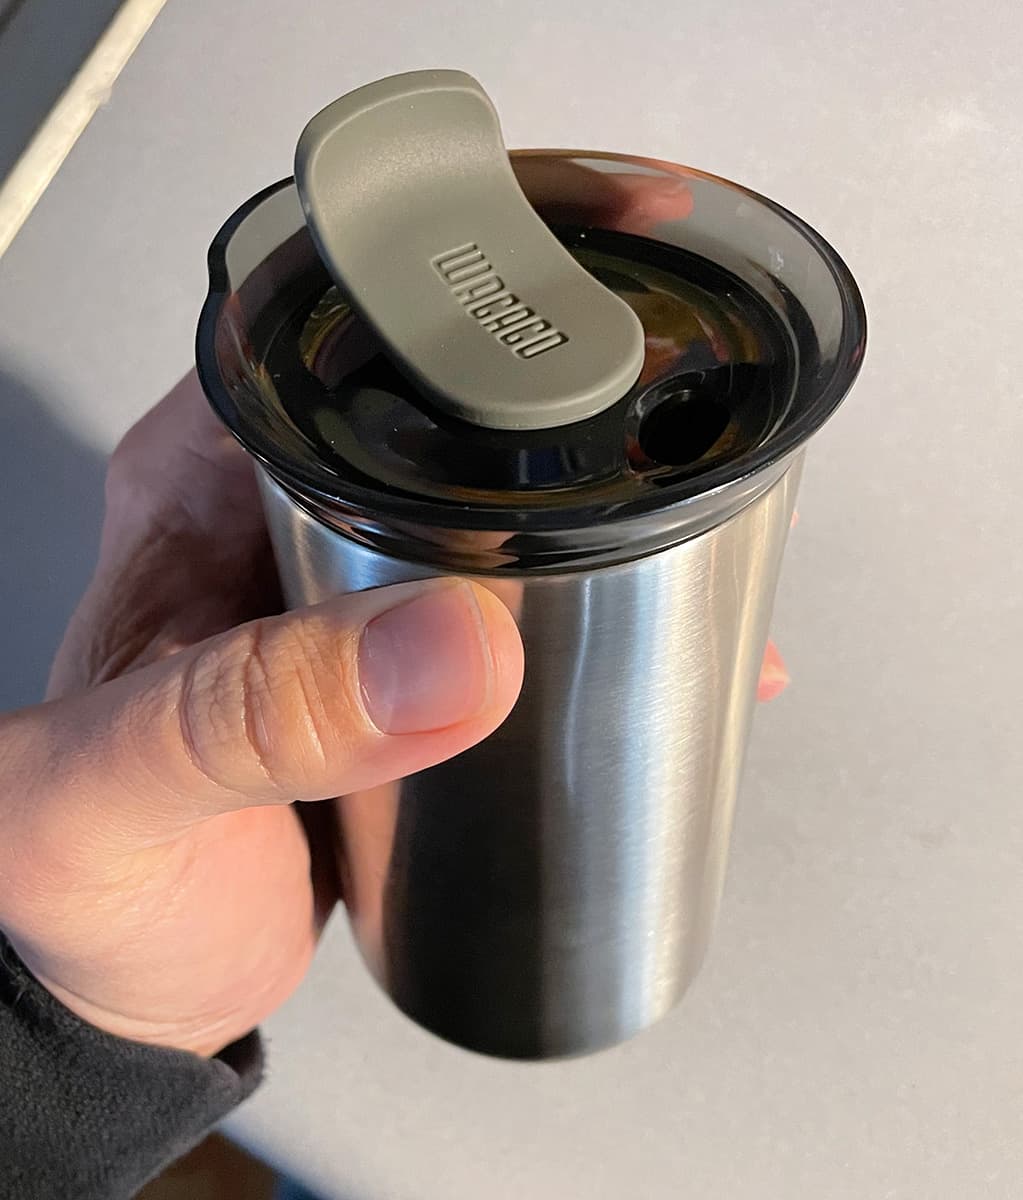
First, get the insulated mug and the expandable filter holder set up with a simple twist. The filter holder locks into place in its expanded state.
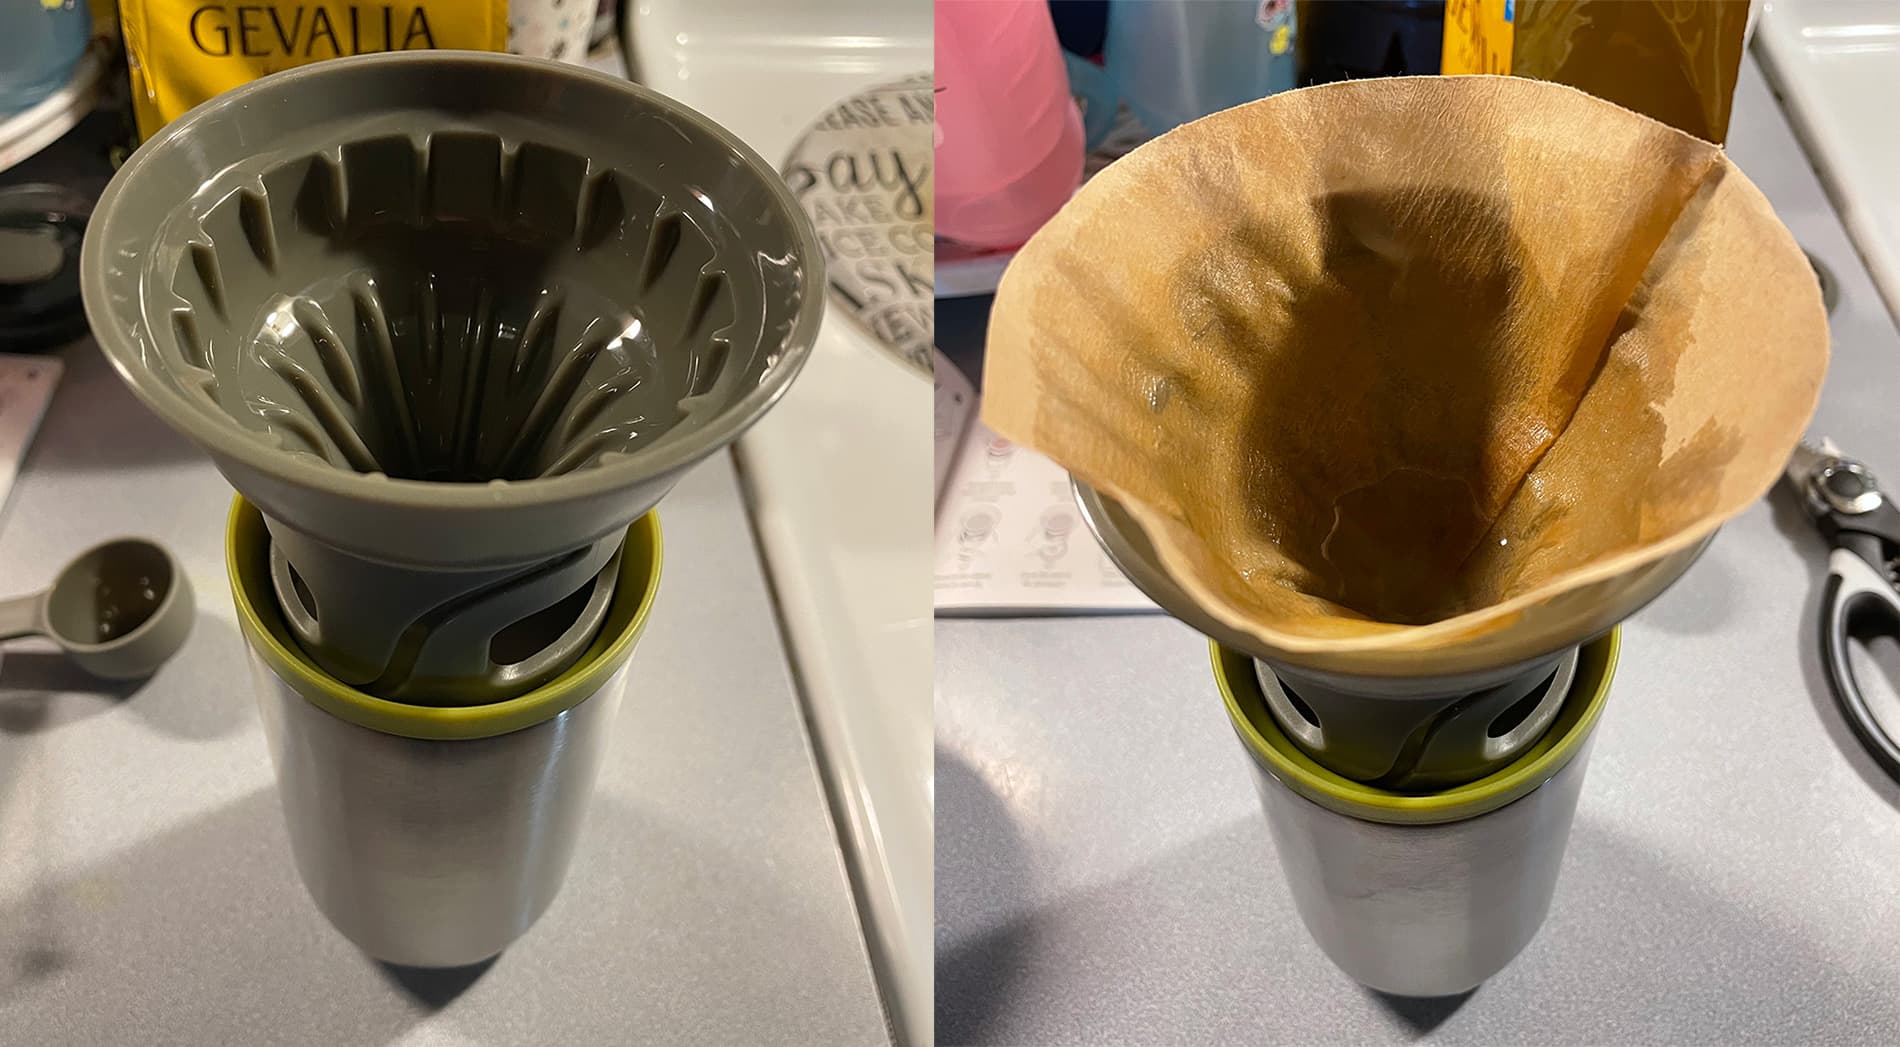
Unfold a cone filter and set it in place. Run some hot water through the filter. This helps reduce some the paper flavor and also anchors it in place for when you add the ground coffee. Don’t forget to remove the filter holder and empty the hot water from the mug.
Place the filter holder back on the mug and add two and a half scoops of medium grind coffee to the filter. I don’t know why they didn’t make the scoop larger or smaller to make it an even number of scoops, but 2.5 scoops it is.
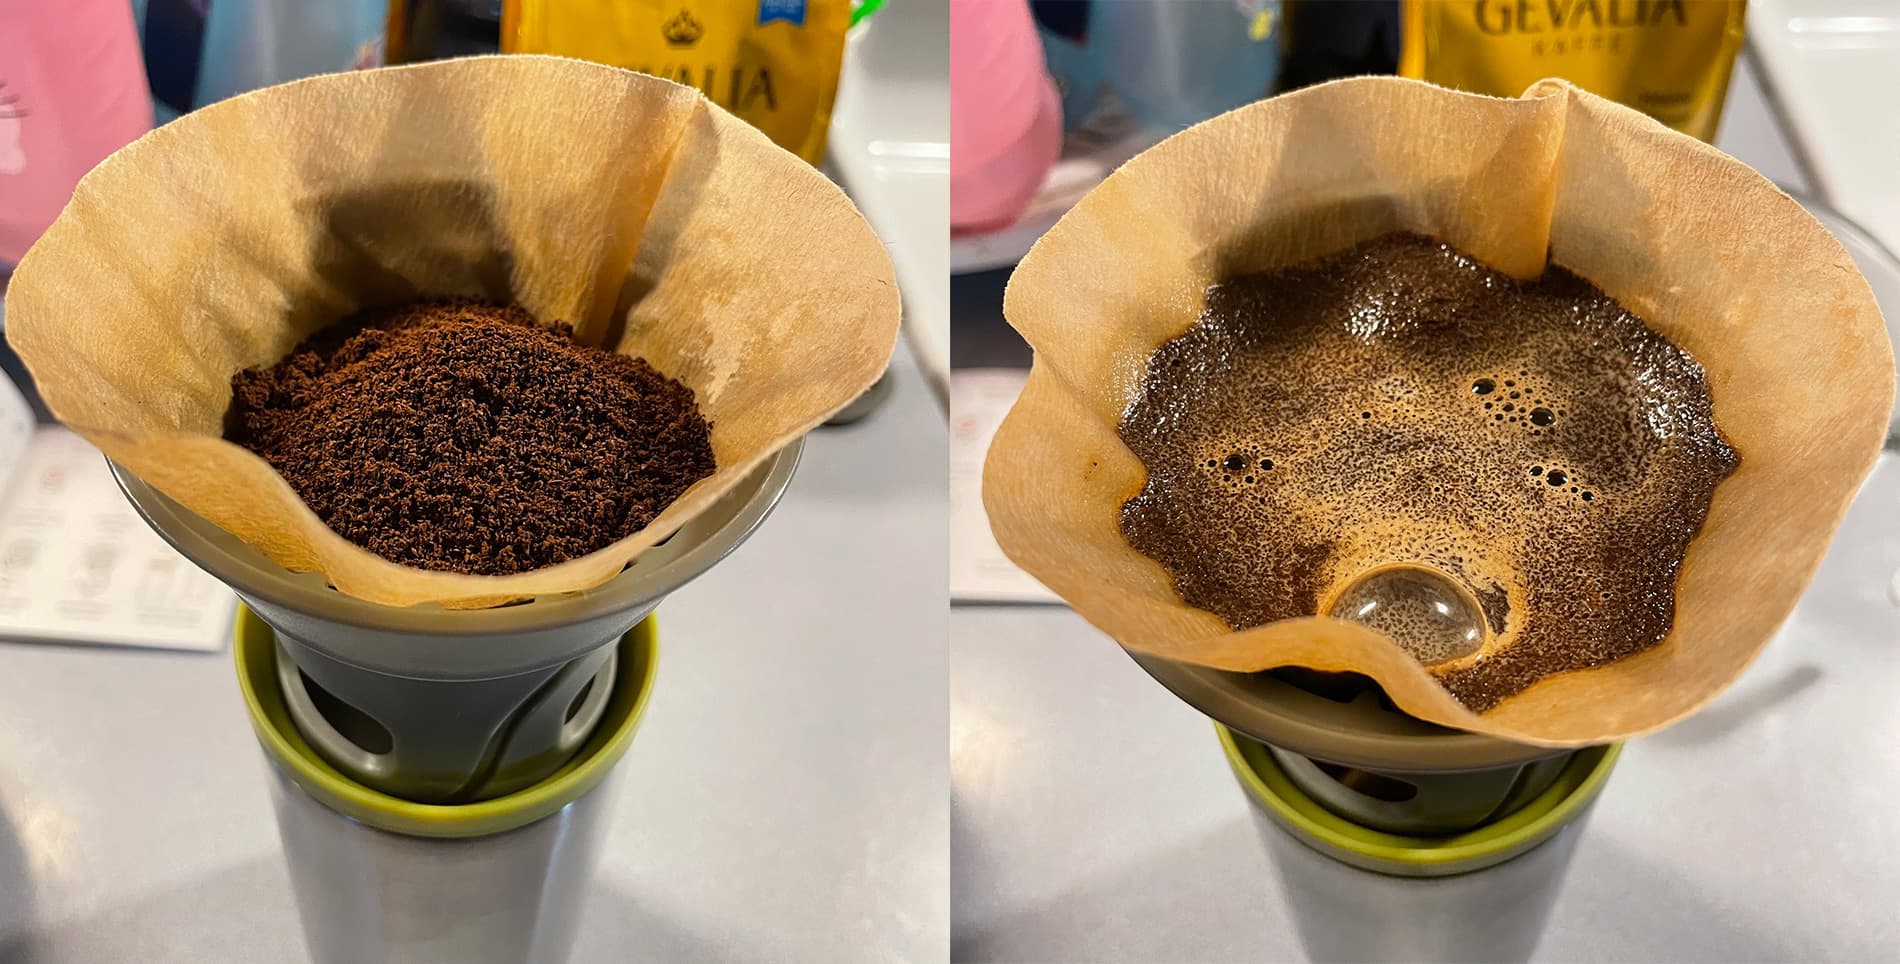
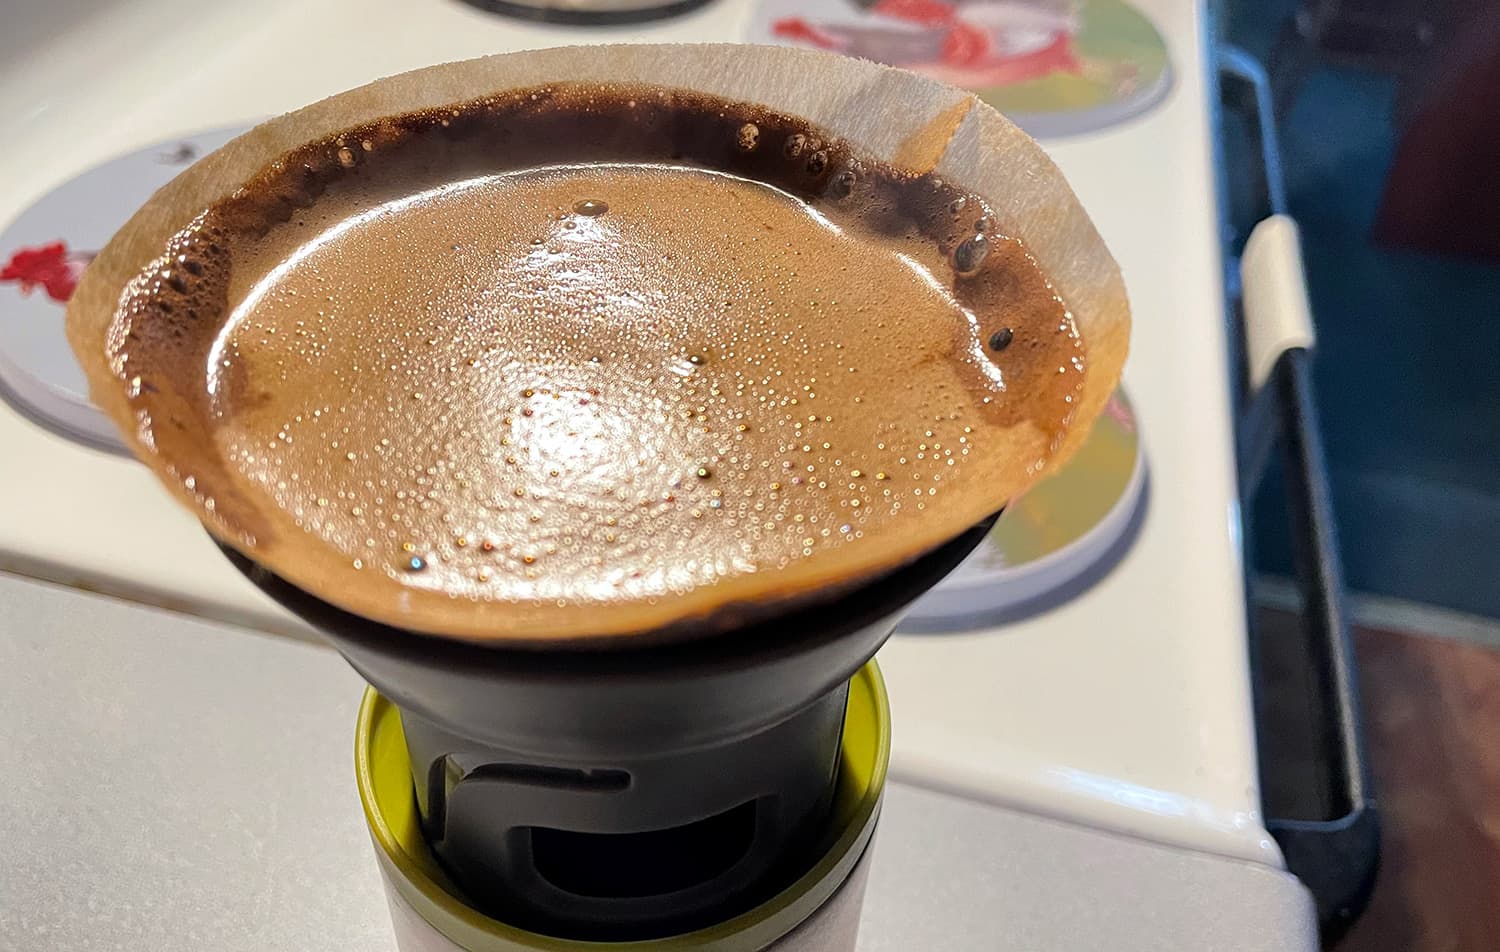
Then, pour a little bit of hot, not boiling, water into the grounds to make them “bloom.” Boiling water will scald the coffee and alter the flavor. Once the grounds expand, you can start pouring more water into the filter. I just poured water into the filter until it was almost full, and it never spilled over or made a mess.
You can get fancy and add the exact amount of water that the instructions call for, or simply fill up the filter about 3 times, letting the coffee drip into the mug for a minute or two in between each fill.
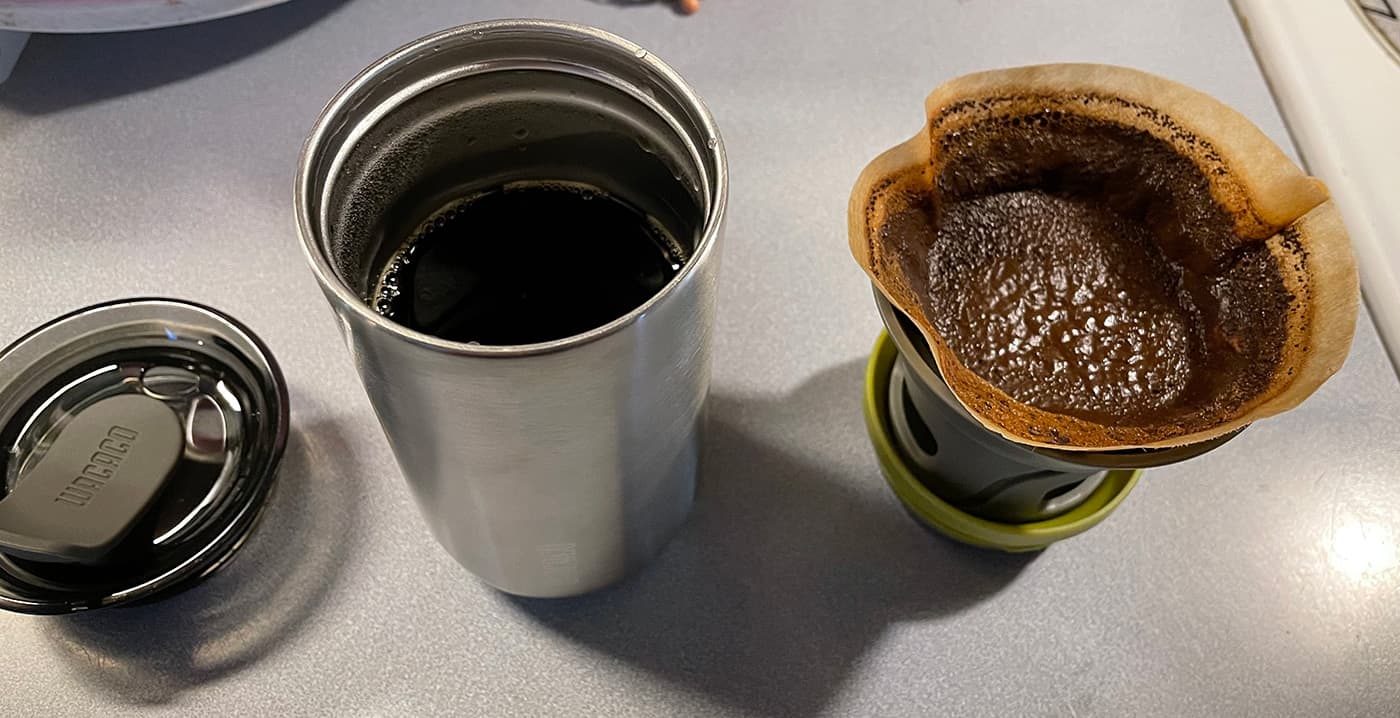
Once you’ve filled the cone a few times, you’re going to have about 6-8 oz. of coffee in the insulated mug, and you can simply unscrew the filter holder, toss the filter and grounds, add your cream/sugar, and pop the lid on top.
You can choose be super-precise about your coffee and water measurements, but I found that as long as you’re using enough coffee in the first place, you’ll end up with a decent brew.
The entire process took me about 10 minutes for one cup of coffee, which is an eternity compared to a Keurig. But I like using fresh ground coffee, and to be honest, the process is meditative, allowing me to catch up on news or email while I let the coffee slowly brew.
The insulated stainless steel mug is spill-proof and keeps the coffee hot for quite some time. Although, you’re really only making at most 8 ounces of coffee, which probably won’t take you a long time to drink.
One of the overarching purposes of the Cuppamoka is to be able to pack an entire coffee-making system into a small space. If you can find room in your backpack or suitcase for some ground coffee, the Cuppamoka will fit as well.
I wish that Wacaco would have included a reusable wire filter as well. I’m not sure if the filters they included (only 10, mind you) are a standard size or not, but remembering to pack some filters, and the resulting waste, is the worst part, for me. If I were to use the Cuppamoka regularly on camping trips, I’d look into finding a reusable filter.
I’d also be happy with a slightly taller or wider mug, and larger cone filter, to be able to make more coffee at once and really take advantage of that insulated mug. It’d be great to make a large 12-16oz mug of coffee that will last through the morning.
What I like
- Everything you need to make a quick, hot coffee
- Mug stays warm a long time
What needs to be improved
- I’d love a larger mug
- Would be great if it came with a reusable filter instead of paper ones
Final thoughts
The Cuppamoka successfully integrates a full coffee-making kit into a tiny package, providing you remember to pack enough filters and the proper grind of coffee. It’s perfect for camping, travel and single-shot cups at home.
Price: $34.90
Where to buy: Wacaco’s website and Amazon
Source: The sample of this product was provided by Wacaco.
L39 Ultra Slim UV Protective Filter for Leica Q3 43 Q2 Camera with Moisture-Proof Case & Removal Tool 19 Layers Mulit-Coated UV Ultraviolet Filter 99.3% Light Transmission Water Oil Scratch Resistant
(as of July 4, 2026 18:49 GMT -05:00 - More infoProduct prices and availability are accurate as of the date/time indicated and are subject to change. Any price and availability information displayed on [relevant Amazon Site(s), as applicable] at the time of purchase will apply to the purchase of this product.)