REVIEW – I have always been a weather nerd. From my earliest memories, I remember watching the sky hoping and praying for a good thunderstorm to roll across the area. I had even originally planned to be a meteorologist until I found out how many calculus classes were required for the degree! That being said, the lack of a degree in meteorology never kept me from being fascinated by the weather and capturing the data associated with it. Hey, my real job is a data analyst so go figure! When the Gadgeteer offered up the opportunity to review the Govee Wireless Thermo-Hygrometer with WiFi Gateway I jumped at the review. Read on to see how well it worked out for me.
What is it?
The Govee Wireless Thermo-Hygrometer with WiFi Gateway is exactly what it says it is. It comes with a wireless hub you plug into the wall and connect to your home’s WiFi. Then you can attach multiple of their Thermo-Hygrometer units to the gateway and monitor the temperature and humidity in various places around your home. You just need to be sure you place the sensors where a WiFi signal is available. You can then install the Govee Home app on your IOS or Android device and see the values those sensors are returning anywhere your phone gets a cellular signal.
They mention monitoring a baby’s room or maybe a wine cellar for those who are lucky enough to have one. Another good place to put one if there is enough room is a cigar humidor. Basically put them anywhere you want to monitor the temperature and humidity. I placed one on my back deck on a side rail (it did not blow off in 45 mph wind gusts the other day so I put it in a good spot) that was out of any direct sunlight but had good airflow. The other I placed in my living room.
I have owned what I call a professional weather station and have learned a lot about where you should place temperature sensors outside. Ideally, they should be 6 feet off the ground in a well ventilated spot not in direct sunlight. Way back when I first got my original weather station I had the temperature sensor mounted under an eve on the side of my house. Yes, it was in shade, but all the heat rose and was trapped under that eve so my temperature readings were a good 10 degrees or more than they should have been!
What is in the box?
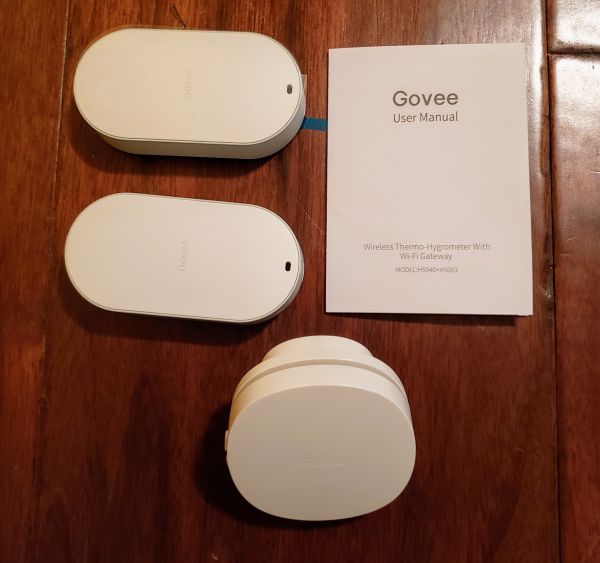
The box was very plain and simple, but it may have been because I received this device for review and it was not the true public packaging. That being said, there were only four things in the box.
- Two wireless temperature and humidity sensors. They both had a pair of triple A batteries inside and I simply removed the cover and pulled a tab to make the batteries touch the contacts.
- One user manual
- One gateway hub that plugs into a standard US socket. It only works with 2.4 GHz WiFi not 5 G.

Setup and Use
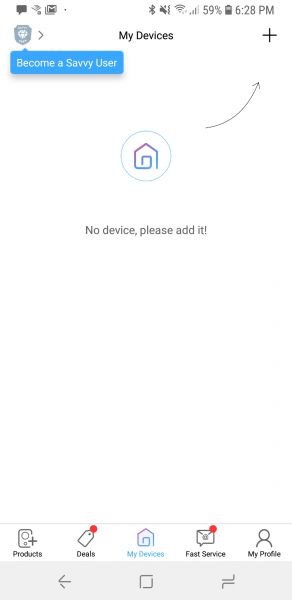
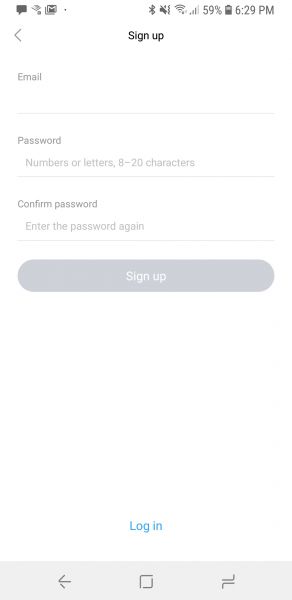
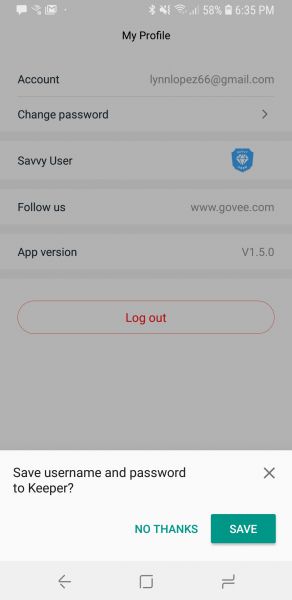
Setup for this set of sensors is pretty painless. The first thing you do is to install the Govee Home app on your phone. It is available for both Android and IOS. The next series of screens will take you through the setup starting with the 4 screenshots above. When you first open the app you are presented with this screen. I clicked on the top left blue badge titled ‘Become a Savvy User’. It took me to the next screen explaining the benefits of becoming a Savvy User. I like discounts and I like voicing my opinion (go figure!) so I joined. The next page is the signup page where you enter in your email and pick a password. The fourth screen shows me logged in and now a Savvy User.
The next four screens now show the steps I went through to set up the gateway and temp-humidity sensors. I clicked on the home screen icon at the bottom of the page. From the home screen, I then clicked on the plus sign on the top right hand of the screen to add a device.
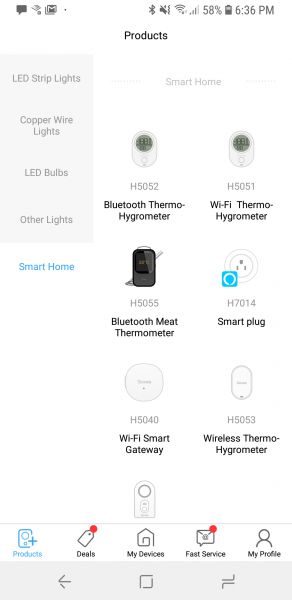
The first screen above shows the plethora of devices they offer. This particular screenshot is on the second page of products and I picked the Wi-Fi Smart Gateway. The user product manual that came with it specified that I was to add the gateway first so that is why I picked it instead of the Wireless Thermo-Hygrometer.
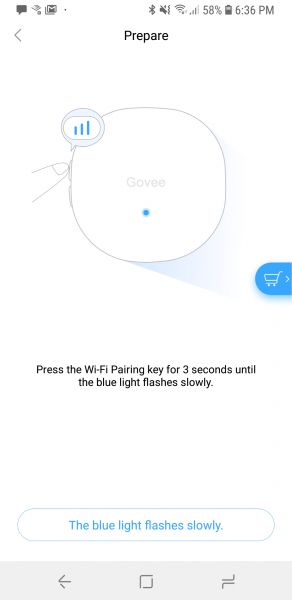
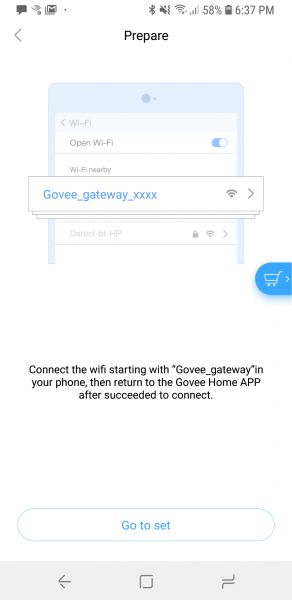
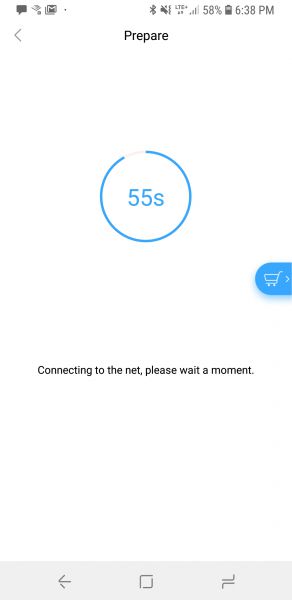
Once I picked the gateway, I was presented with the second screen. I followed the instructions after plugging in the device into an outlet that was in the same room as my router. The third screen popped up quickly and I switched over to my phone’s WiFi connections and connected to the Govee Gateway. I then went back to the app and saw the 4th screen above. What you don’t see is the next screen where I had to enter in my WiFi password and connect the gateway to my router. Now the gateway is on my WiFi network.
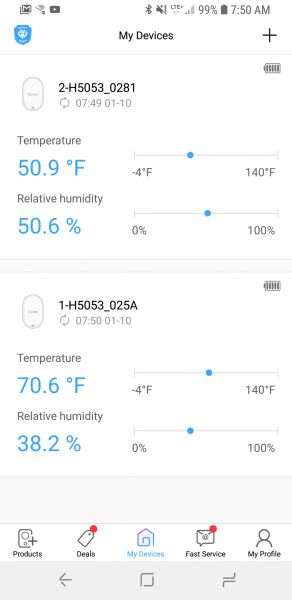

Immediately after I was connected to the network I was presented with the top left screen above. I was happily surprised to see the Gateway found my two sensors and immediately connected to them. The top one is the one outside and the bottom one is the one in my living room. Note that I have since changed the name of both devices to something meaningful through the settings screen offered on each device. You can see the main screen gives a nice overview of the current temp and humidity of each device. If you click on any one of the devices you are presented with the second screen which is the hourly screen.
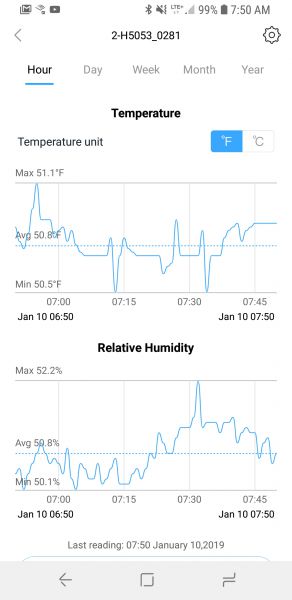
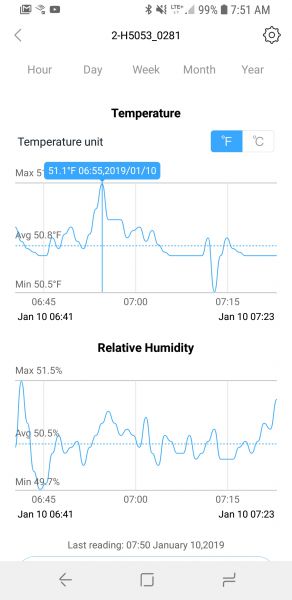
The detail screens (these are the ones you get when you click on a device from the main screen) all default to display the hourly screen. From there you can pick day, week, month or year. You can also see the settings icon on the top right of the page. The second screenshot above shows the hourly screen. The third and fourth screens show you the popup that happens when you touch one of the points on the screen. I like how it pops up the detail to show the temp and time/date it happened. This works for both temp and humidity.
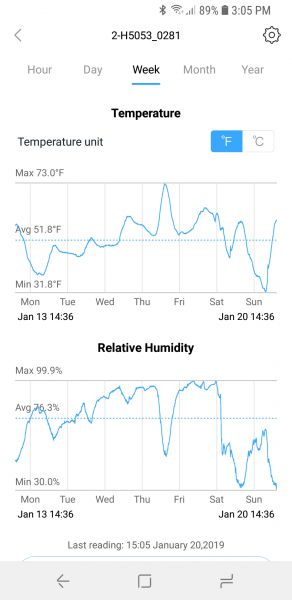
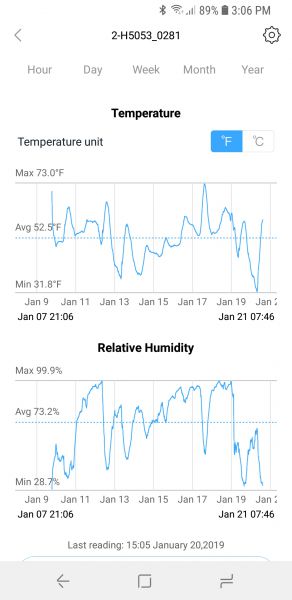
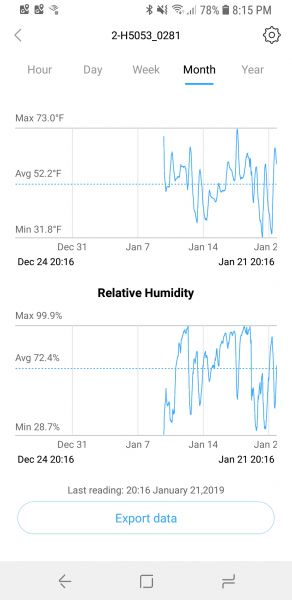
The next screenshot above is the weekly screenshot. We had a front come through early Sunday morning and you can see the drop in temperature and humidity. The next two screenshots are the monthly displays. The third one is how it pops up very compressed. The app lets you use two fingers and expand the data points which is really cool.
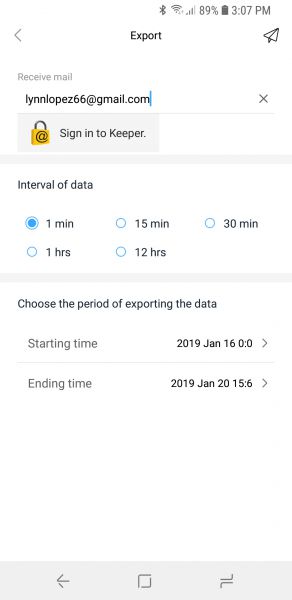
The second screenshot is the month expanded. Something else that is really cool for a data nerd like me is the export data button you can see on the bottom of the third screen. If you click on that you get the fourth screen. You can specify intervals down to the minute and then pick start and end times. When you click the little paper airplane up top the app will send you a CSV file in the mail with all of the detail. Very cool!!
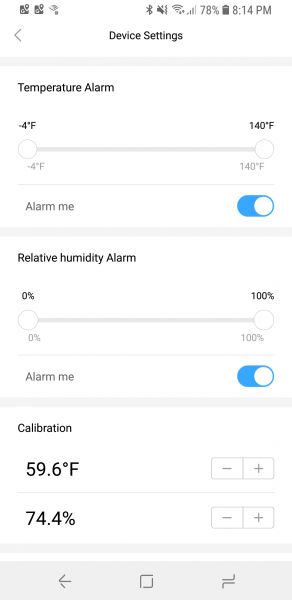
This last screenshot shows you the devices settings page. I have scrolled down a bit, but at the very top is where you can give the device a meaningful name. The rest of the screen is dedicated to alarm notifications. You can set the min and max temp and humidity and if the device exceeds either one you will get a notification from the app. This works exactly as it should. I set the min temp for outside to 57 degrees and I started getting notifications the moment it dropped below that. There are also calibration options which I also think is a nice feature. If you have another thermometer that you trust implicitly, you could use it to calibrate the ones from Govee.
What I like
I love how easy the device is to use. The app is very flexible allowing you to see temp and humidity values across any number of time periods. I also find the ability to export the data into a CSV file a big plus. Being able to set alarm notifications would also be a big plus for anyone putting these sensors in sensitive areas like a baby’s room, greenhouse or cigar humidor. They also offer a fast return service. If you ever experience a problem with the device, the app lets you put in your Amazon order number and they will send you a replacement right away with no need for you to send the old one back. They have a two-year replacement warranty. I personally never tried that feature, but it seems to be a cool option to have.
What needs to be improved
I cannot find anything that needs to be improved. What can I say, I love this device.
Price: $79.99
Where to buy: Amazon
Source: The sample for this review was provided by Minger.

Gerber Gear Suspension 12-in-1 EDC Multi-Plier Multitool with Pocket Knife, Needle Nose Pliers, Wire Cutters and More, Gifts for Men, Camping and Survival, Grey
(as of June 6, 2026 18:39 GMT -05:00 - More infoProduct prices and availability are accurate as of the date/time indicated and are subject to change. Any price and availability information displayed on [relevant Amazon Site(s), as applicable] at the time of purchase will apply to the purchase of this product.)
Gadgeteer Comment Policy - Please read before commenting
It would be nice if it integrated with Alexa.
Hi, do you know if it does have any on-board data storage capacity? I am concerned on loosing data due to power failure
Sorry, but I do not know. I am actually not running them anymore. I don’t know if it is my mesh router causing issues, but at least twice a day I would get notifications that the bridge could not contact one or the other sensor. Finally one of the sensors quit working. This was the second set I had tried. Govee was really good about sending another whole set out to me when the first one failed.
You basically give Govee ( in Honk Kong) your WiFi password.
Really don’t think that’s safe.
Thanks.
great site but is it safe ??