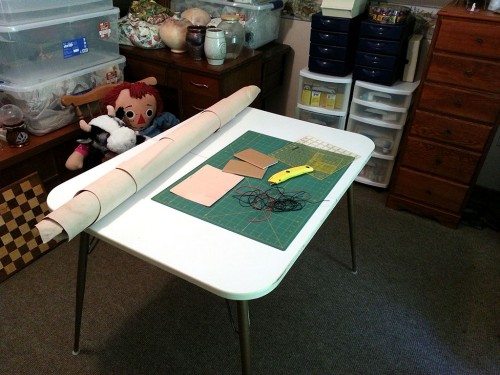
A couple years ago I reviewed the Midori Traveler’s Notebook and commented that it was too expensive at $60 and that I could easily make one of my own for $20 or less. After I posted that review, I ended up buying all the supplies I needed to make my own covers. The next year I made about 20 of them and sent them as Christmas gifts to all my writers here at The Gadgeteer. The other day someone left a comment on the Midori review asking if I had ever made a cover for less than $20. That question prompted me to write up this short how-to article. I hope you find it useful.
Note: Images can be clicked to view a larger size.
If you don’t think you are crafty enough to tackle this project, I’m here to tell you that you can do it. It’s not hard at all. The hardest part is getting the supplies… and even that is easy thanks to the internet.
Instead of making the weird sized Midori notebook, I opted to go with a size that I could easily find refills for. Moleskin Cahiers, Field Notes and similar 3.5 x 5.5 inch sized notebooks are the perfect size, so I went with them.
Shopping list
Mandatory:
3 oz leather – I ordered a 20-24 sq. ft. piece from Leather Unlimited that will last for a very long time. I’ve made 25 or so covers and still have a LOT left over. ($80)
Utility knife – I suggest a utility knife over scissors because they are sharper and cut much better. ($10)
Ruler, square, or some sort of straight edge – You should already one of these (Free)
1/16 inch elastic cord – You can find this in the sewing areas of Hobby Lobby, Joann Fabrics or Amazon ($4 for 5yds)
Nail / hammer – to make holes in leather (Free)
2 Moleskin Cahier or Field Notes sized notebooks ($8 for a pack of 3 from Amazon)
Total: $102.00
Optional:
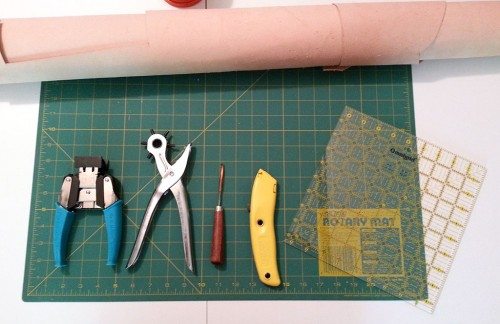
Omnigrid – It’s designed for quilters and it works great for cutting leather squares. Much easier than using a standard ruler. (12 or 15″ size about $20 from Amazon)
Leather hole punch – Easier to use than a nail ($10 from Amazon)
Awl – Makes reaming holes easier ($4 from Amazon)
Corner cutter – Adds a finishing touch to the corners of the cover ($20 from Amazon)
Total: $54.00
Yes, I realize if you buy all of these supplies including the optional items, that it costs $156 which is much more than the $60 Midori Traveler’s Notebook, but the bulk of the price is the leather and if you think you’ll enjoy making projects like this one, it’s worth it to buy a large piece for future projects. You also might be able to find leather for a better price if you shop around. I am really happy with the leather I purchased from Leather Unlimited. There were no blemishes and it was easy to work with.
The first step is to cut an 8 x 6 inch rectangle of leather. That size is assuming you’re going to make a cover for two 3.5 x 5.5 inch size notebooks. If you’ll be using different sized notebooks, you’re on your own to figure out the leather size.
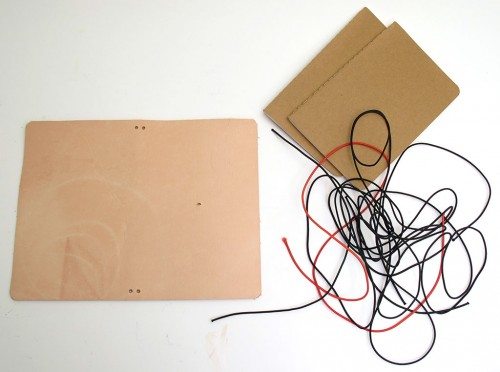
The next step is to punch 5 holes for the elastic cord. To figure out where to put the holes, just lay your two notebooks on the piece of leather and mark the top two and bottom two inside corners. I use a leather hole punch for these two holes.
You’ll also need a hole for the elastic loop which will hold the cover closed. That one should be centered on the right side as you’re looking at the raw/rough side of the leather. You can use an awl or nail to make that hole.
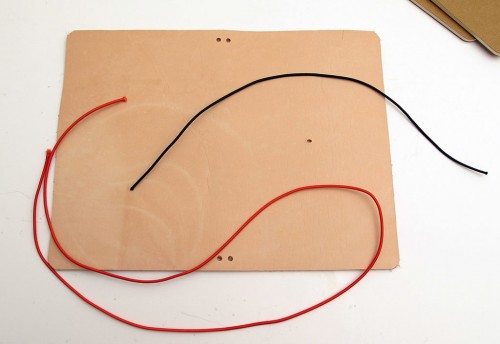
Cut a 26 inch length of elastic cord and a 10.5 length of cord. Set the shorter piece aside. Take the longer piece and thread it through the bottom two holes so that the loop is on the “good” side of the leather.
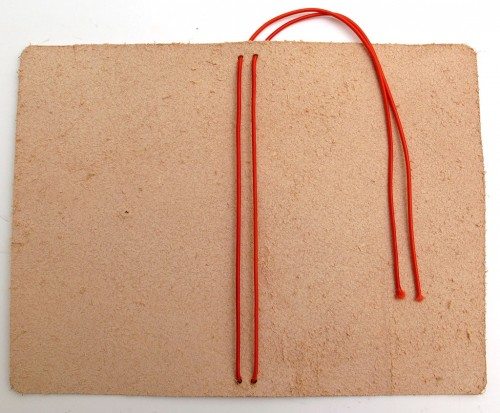
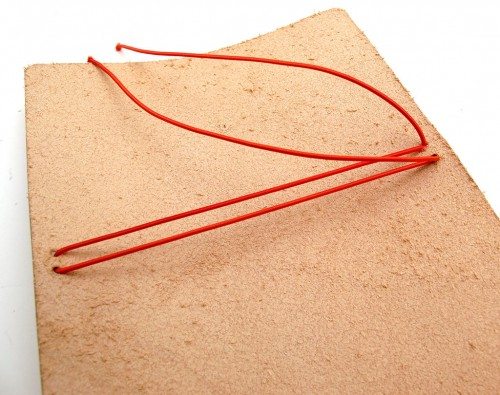
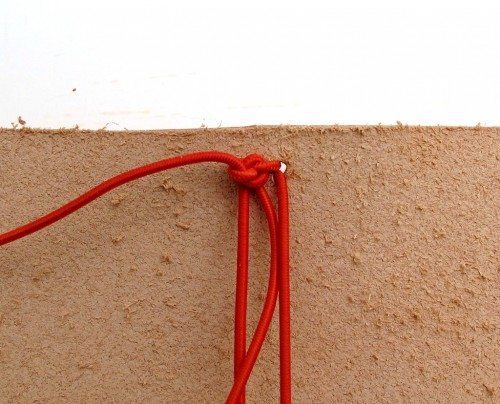
Thread the cord through the top holes as shown above. You should now have two long sections of elastic on the raw side of the cover.
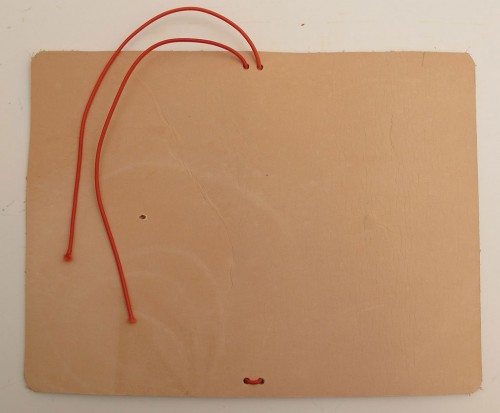
Flip the leather over to see the cord on the good side. The hole for the closure loop should be on the left side.
Thread the elastic back through the top two holes so that the cord coming from the left hole threads through the right hole and visa versa.
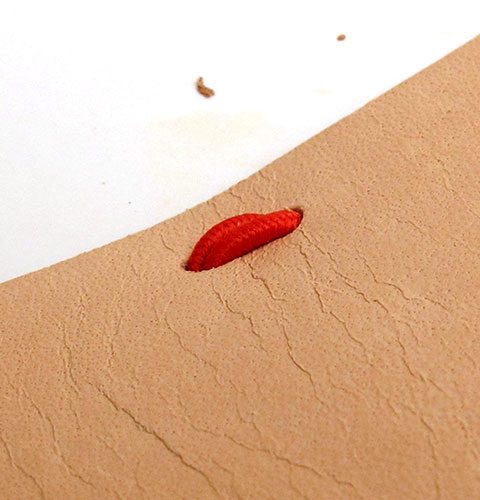
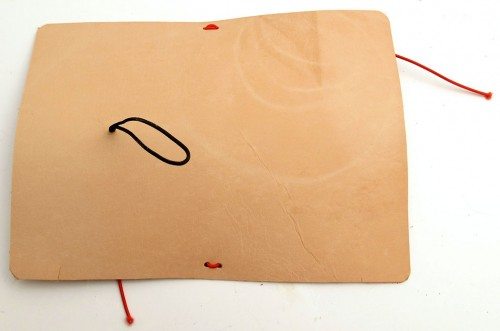
The good side will end up having a double loop at the top as shown here.
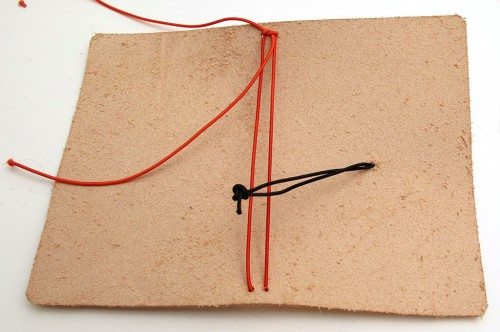
Flip it to the raw side and it should look like this. Adjust the cord tension so that it’s slightly bowing the leather. This will help hold the notebooks in place.
Then tie a simple knot. Don’t cut the ends yet…
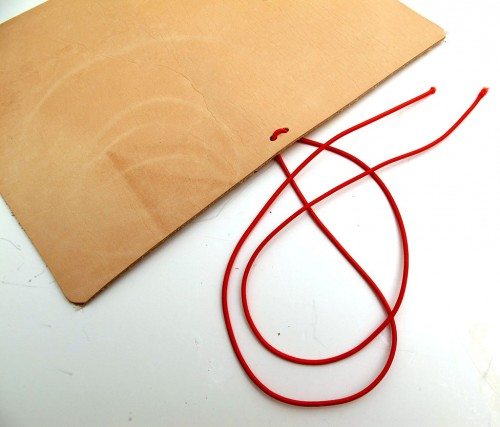
Take the shorter 10.5 inch piece of cord and tie a knot in the end. Push the loop end through the hole so that it comes out on the good side of the leather.
This is what it should look like. You’re almost done!
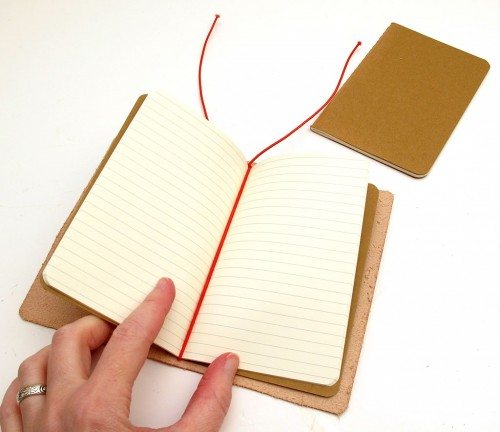
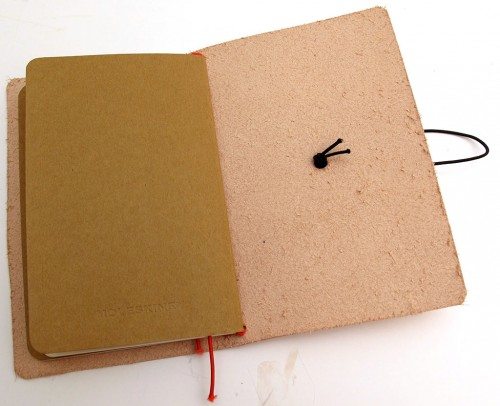
Grab your 2 notebooks, and open one of them to the center and slide it through one of the cords so that the cord rests between the center pages of the notebook.
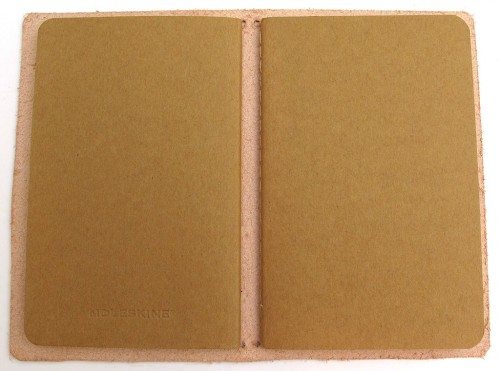
Do the same thing with the other notebook on the remaining cord. You now have 2 notebooks and can close the cover with the elastic band.
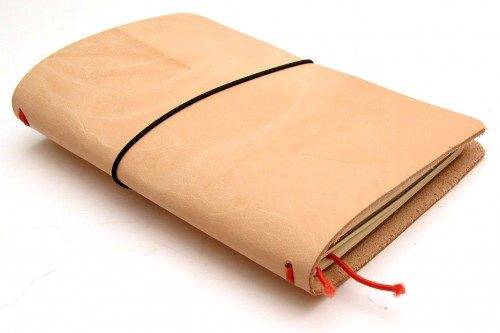
The final product should look similar to this. The ends of the cords can be used as a book mark – one for each notebook. Or if you don’t like that, you can cut them off. You could also make the cord longer than 26 inches and tie a bead to the end. Some people even add beads and charms to the elastic that holds the cover closed. It’s up to you to customize it however you would like.
I have made enough of these covers that I can make one start to finish in less than 20 minutes. I should go into business shouldn’t I? 😉
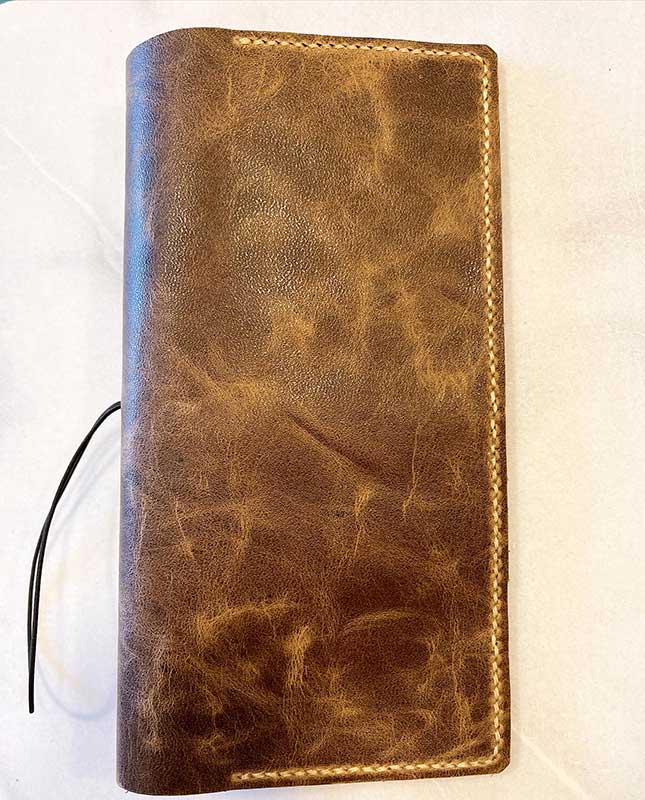
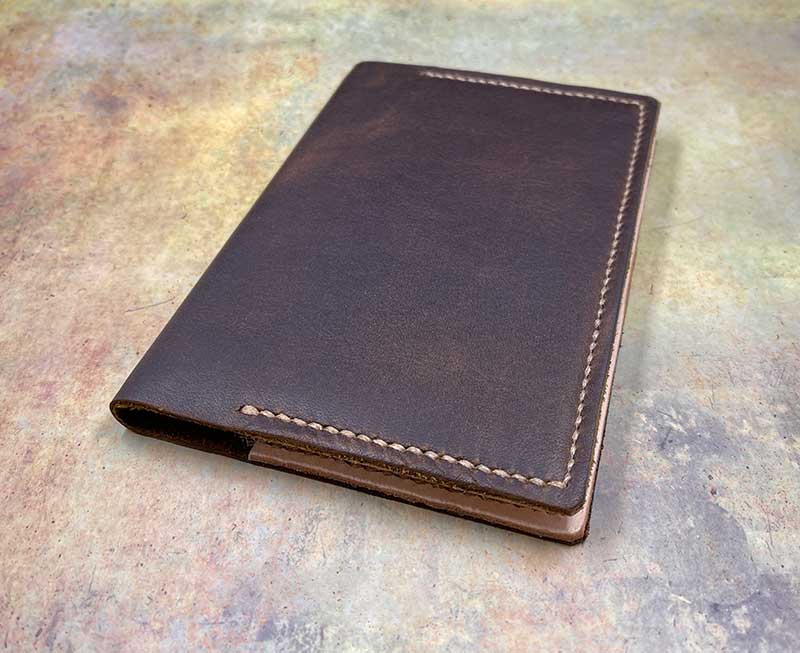
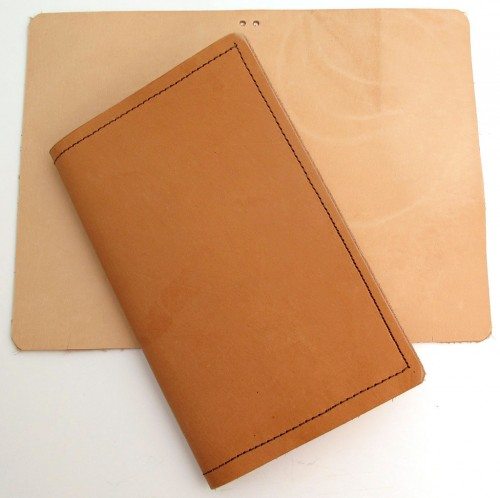
If you don’t like the look of the raw leather, you could dye it with leather dyes or do what I do and put it out in the sun a couple days to tan it naturally. The cover you see above is one I carry with me everyday. It’s different than the one I’ve shown you how to make because it is sewn… but it used the same leather which browned naturally in the sun. I just laid it flat on my deck for a couple days.
I’m not a math whiz, so I can’t easily tell you how much one cover really cost me to make due to the large piece of leather that I purchased. But I have a lot of leather left and more projects to come, so I don’t mind.
Let me know what you think about this article and if you would you like to see more how-tos.
Updates 05/02/16
I had been using the sewed version (pictured above) of the homemade Field Notes cover until last summer when I moved everything into one notebook (an Evernote Smart Notebook) and started using my own version of the Bullet Journal system. I only have a couple page left in that journal and am considering making an A5 size (8.27 x 5.83 inch) homemade Midori Traveler’s notebook style cover or some type of leather cover for another large sized Moleskine grid notebook.
Update 6/30/21
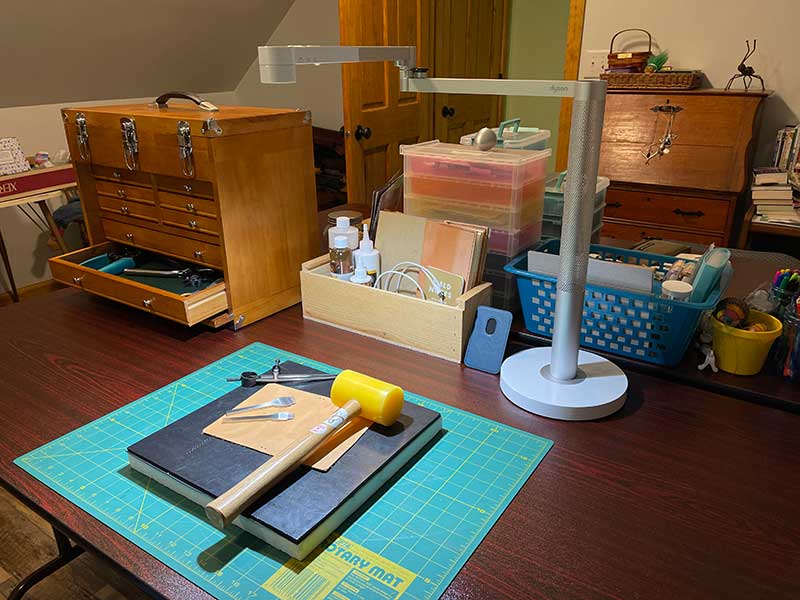
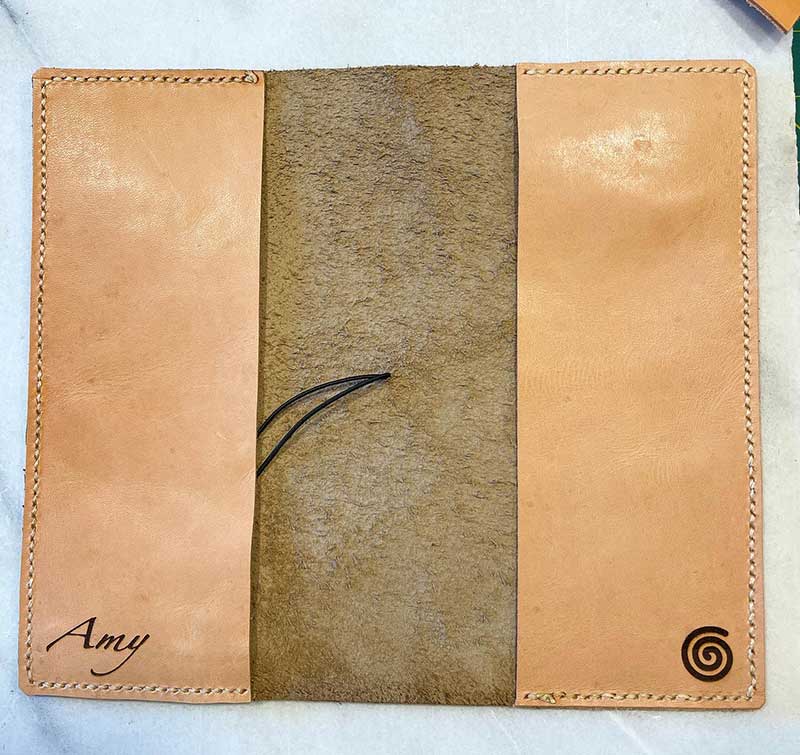
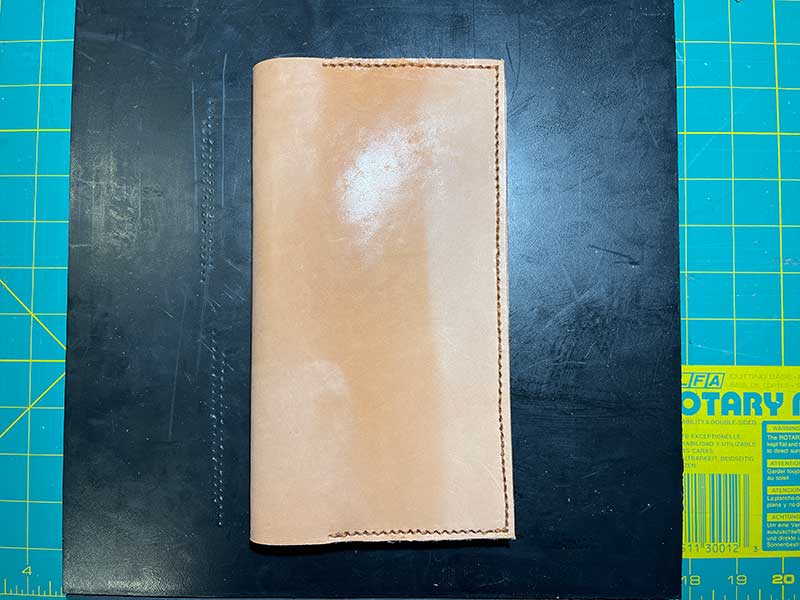
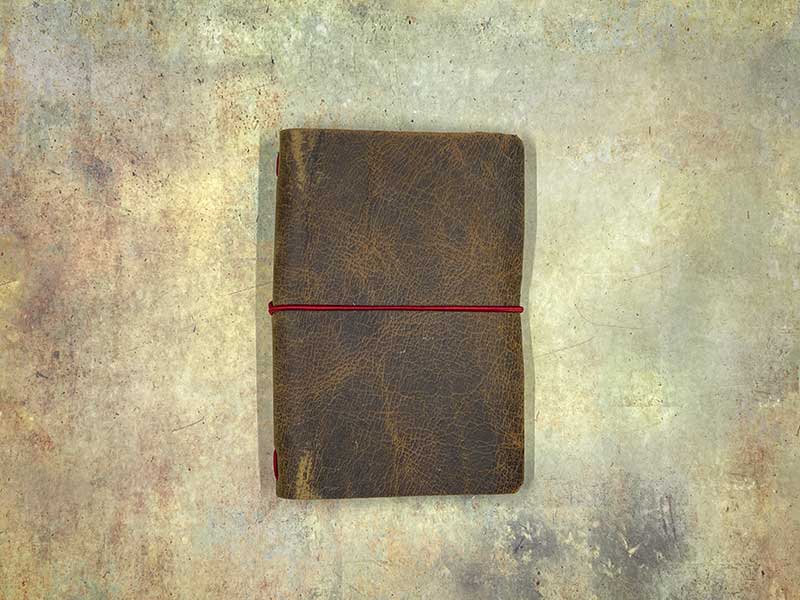
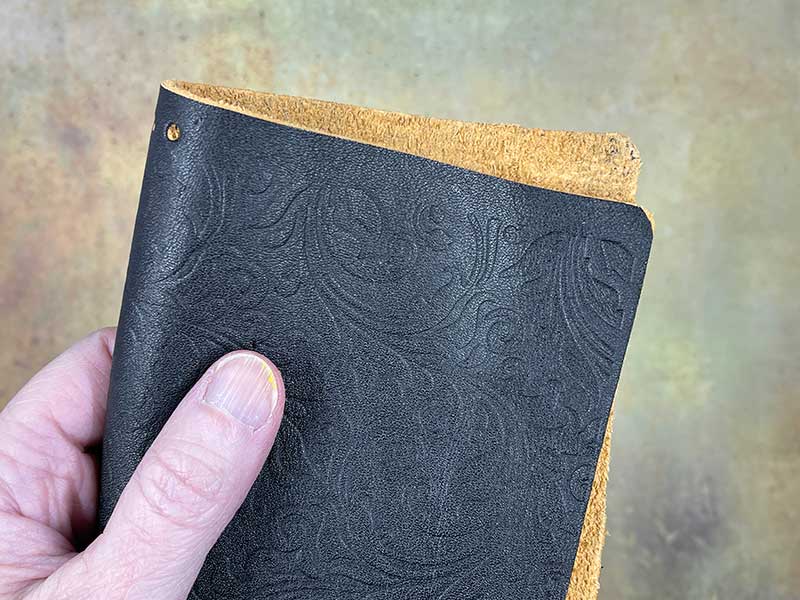
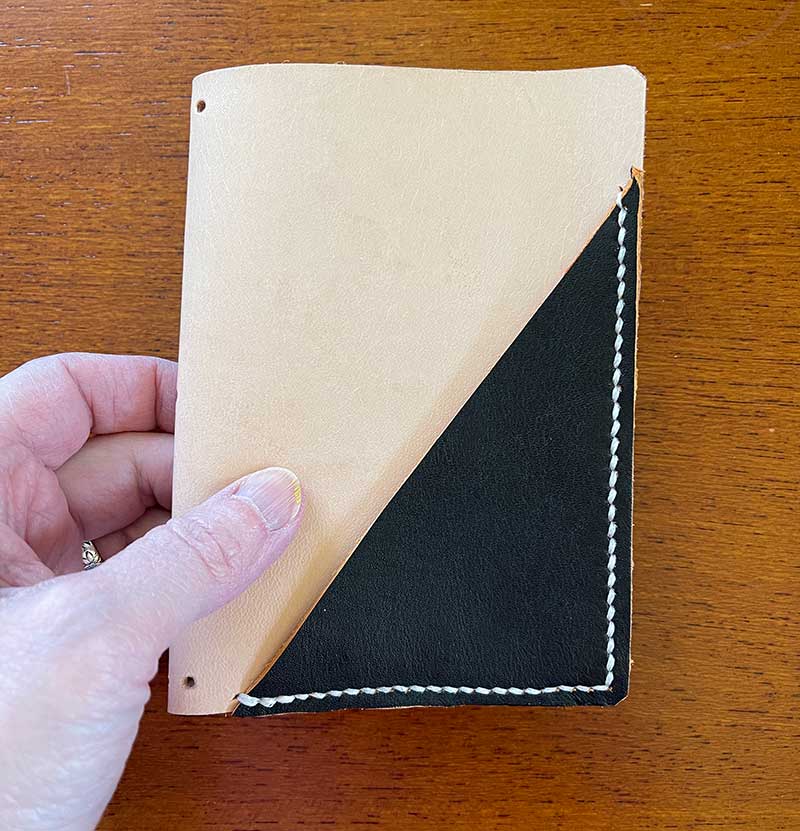
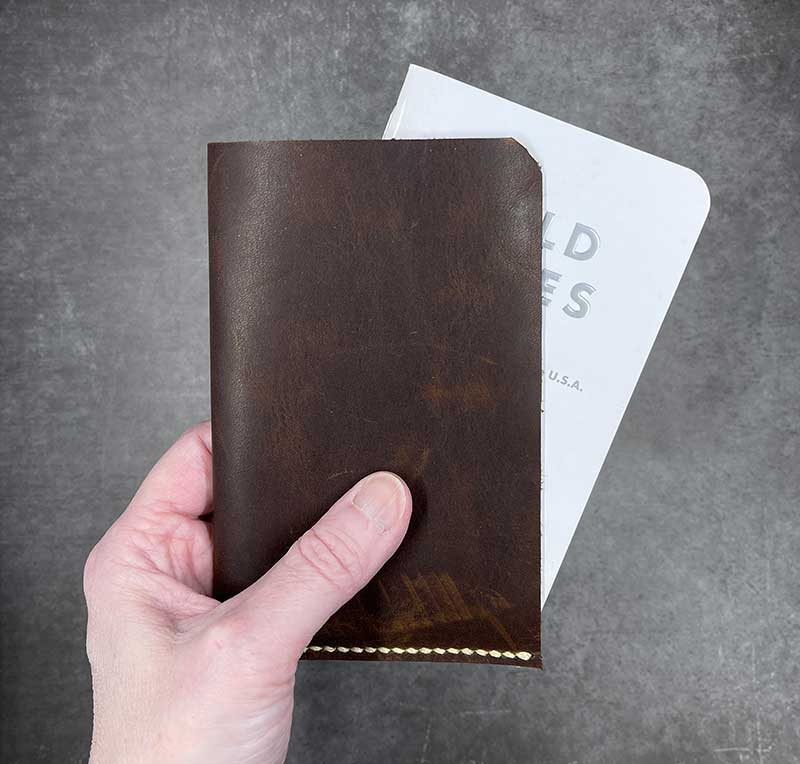
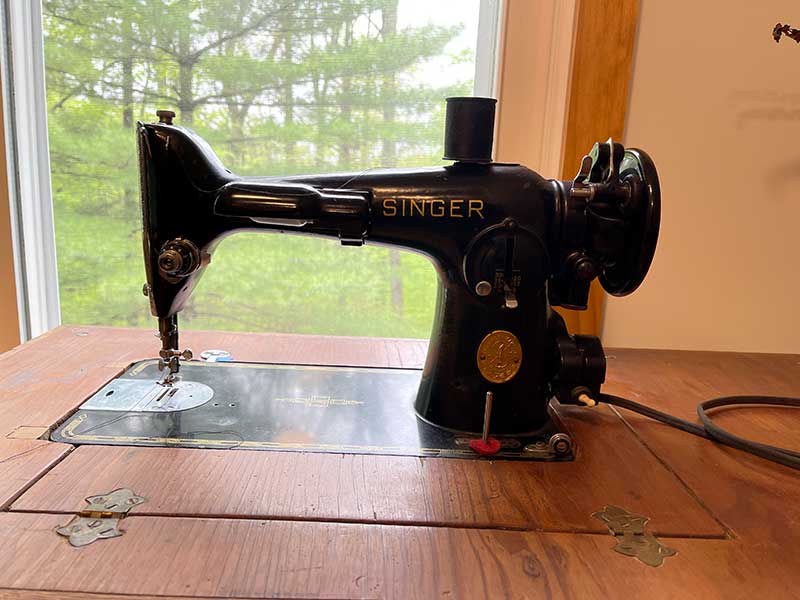
One good thing to come out of COVID/staying at home for the past year and a half is that I have started working with leather again. In the past year, I’ve made close to a dozen different covers. Some as simple as the one I showed you how to make above, to more complex covers that required me to learn how to saddle stitch. I even sent off a 74yr old Singer Sewing machine that was my spouse’s grandma’s machine to be refurbished so that I could use it to sew leather covers and pouches. I’m waiting for it to ship back to me and will probably go a little crazy making things. Here are just a few pictures of some things I’ve made in recent months.


![[Strong Magnetic Lock]:Built-in magnets, offering a magnetic force of up to 3000g. Ensures the magnetic wallet fits tightly and attaches securely to the back of your iPhone. [Smart Card Storage]:The magnetic wallet is designed ingeniously to hold 5 c...](https://m.media-amazon.com/images/I/41SFnxrNs0L._SL160_.jpg)
Gadgeteer Comment Policy - Please read before commenting
Hi Julie,
if you do decide to sell them, I’d love to buy one.
Julie,
Is that leather thick enough to cut a pattern into, or do you need something thicker?
Dad still has all his leather working tools, and I might give it a try. I’d have to edge it with a whip stitch, but just because I like that style!
Too bad Rattle snake hide isn’t wide enough! 😉
@David The 3 oz piece of leather that I bought is called “tooling leather”, so it should be fine for carving or stamping.
Do you have a leather-capable sewing machine then, for the stitched one?
I recently noticed American Science & Surplus sells bags of scrap leather, as well as hole and letter punches – I’m going to check that out.
@Betty I have an old Singer sewing machine from the 70’s (I think) that is capable of sewing two pieces of 3 oz leather… barely. I have trouble getting the tension set correctly and sometimes end up with a mess of thread on one side. I’d love have a better heavy duty machine because I have always wanted to make my own messenger bag.
Would you say the 3 oz leather is thick enough/stiff enough for the cover or would heavier leather be better?
@Andrew I think 3 oz. is thick enough for a small cover like the one I show here. If you want to make something larger, you might go up to 4-5oz.
I have to echo the other comments. How much would a pink leather one cost? I am interested.
@Kimberly I don’t make these covers to sell. I just make (made) them as gifts. They are easy enough to make on your own, so that’s why I made this little how-to article.
What a great idea! I’m going to do this. However, I think I would like to try waxed canvas instead. Do you have any experience working with that material? It seems like it’s pretty durable stuff and it might save a little money.
@Trent No, I don’t have any experience with waxed canvas, but I’ve wanted to try to make my own waxed canvas messenger bag for a long time. If you end up making a cover, please do come back and share the results. I for one would love to see what you can come up with!
@Julie You’ve got a deal!
Hi, I went to the website you ordered your leather from. However, theres is so much to choose from….which one did you buy exactly? Please help me out! 🙂
@veronica Looks the price has gone up. I got the oak cowhide A grade 3 oz. AE1503 $109.95.
Once I got started and figured out the right size hole to punch for the elastic it took me about 30 minutes. Not bad and my son loves it. I made it to fit a couple of mini composition notebooks. They are smaller than the field notes ones.
@Jennifer That’s great! I’d love to see a picture of it 🙂
Great tutorial! is the type of leather you use similar to vegetable tanned leather? I just ordered a vegetable tanned leather and i was wondering if i can tanned it naturally like you did. And if you put the leather in the sun much longer, would it be darker brown? sorry for my bad english!
@Eunike Lovely I’m not sure about the type of tanning that is used on the leather I purchased, but if the leather hasn’t been stained, the sun should darken it. Yes, leaving it in the sun longer will make it darker.
Welp… I know what my summer project will be. This is brilliant! Thank you for laying it out so simply. Can’t wait to experiment with leather dyes!! I’ll be sure to share pics of the finished project!! <3
@Keelin Yes, please do share what you’ve made. I’d be very interested in seeing what you come up with 🙂
I really like my Moleskin however want something smaller and have been suprised like you over how expensive covers are for the smaller books.
Very tempted by there phone case that includes a cashier however might do what you have done and make my own to hold 2 cashier or Field Note sized books.
Thank you Julie for sharing! The best for you
Very nice design. Tandy Leather Factory often has a sell on single and double shoulders in the 3-5 ounce range. I want to say they range from about $30 to $60 each. They also offer some textured leathers at affordable prices too.
If you looked around you could find cheaper leather is suppose. This design is very affordable to make. If one wanted they could use contact cement and glue a section of swede leather on the inside.
You could go together with friends and but a huge piece of vegetable tanned leather, 3/8 letter stamps, and a couple border tools and make custom covers for the whole gang. I would say you total cost each would be about $10 to $12 at most.
I fell one of these being made tonight when I get home……
@Gary I love Tandy Leather. I remember many years ago we were on vacation in Nashville, TN. Our car broke down and we had to take it to a shop there in downtown Nashville. While we waited for them to fix it, we walked across the street to check out some shops and happened into a Tandy Leather shop. We were so interested that we bought a few things, went home and really got into leather working. Even joined a club for awhile.
Hi, thank you for the tutorial. Just did a piece myself, following your advice. Just got a question: my covers ended up pretty “floppy” and a bit awkward. Did the same happen to you, and did you perhaps do something to correct this?
@Perttu I’m guessing that you used a lighter weight (thinner) piece of leather to make your cover. You need to use at least 3 oz. leather. One idea to fix it would be to cut two pieces and glue them together.
Hi,
I thought I had used pretty thick leather (3 or 4 mm.. 1/8 – 1/6 inch?), at least it was thicker than the leather in my softcover book covers. But they’re still pretty floppy so I thought perhaps there was some treatment for this.. Will have to look for it.
Thanks for the article and help 🙂
Nice post. Its really looking very attractive. Thanks for sharing.
Thanks for the clear pics. I plan to really stuff my notebook full, would you recommend building in an extra inch to that 8 inch side to make more of a spine?
Ameli, If you already have a stack of notebooks that you know you’re going to be using, you might want to cut a template from paper before you cut the leather. That way you can get a better idea how it will wrap around your stack of notebooks.
Thank you, this is EXACTLY what I was looking for! Well done, they look beautiful. I have 3 Moleskin Cahiers, as I find the size much better to work with than the Midori, but no cover yet. Another summer project to add to my list!
I actually found swatches of leather the same quality as yours on Amazon for $16 for a piece 1 foot by 2 feet. Plus I found 864 feet of elastic cord for $4 on Amazon. Then for the inserts, I work a job that gets me free printing, cardstock paper is cheap everywhere (but I had some at home), and I have a sewing kit with needles at home, so I printed normal printer paper in ruled and dotted, and plain, high quality paper. Then, I saddle-stitched the printed paper with the cardstock as binding, and came up with three mini inserts. Add my moleskine journal I had laying around to the midori, and I actually DID make my own midori for $20.
That’s excellent! I’d love to see a picture of your notebook cover. 🙂
Best how to I’ve seen so far on this. Thank you! Might be an obvious question, but if I wanted to add three field notes I would just center a 3rd hole correct?
Yes you could add another hole or you could put an elastic band in the center of two notebooks and then use one of the cover’s bands for them and use the other band for another notebook.
Thanks for the tutorial. I’ve seen a few others, but I like the way you created this cover. However, I read this article all the way to the end just to find out how much it cost you to make your own Travellers’ Cover. I’m crafty so I’ve thought the same thing. I already own many of the supplies.
Since I have experience (budget and cost analyis management in cancer research), I did a very quick and dirty estimate of the cost of 1 cover. I made some assumptions based on the information provided in the post: 25 covers from your hide (you don’t say how much hide is leftover, so I can’t estimate how additional covers can be made); I assumed one would just go all out and buy both the required + optional supplies for $156; 20 minutes time spent to make 1 cover. You admitted to being new to this type of work, so I assumed you work in my home state where minimum wage is $11/hour. I didn’t try to separate consumable supplies or depreciate tools because I just wanted a very rough estimate of cost.
The covers (materials & supplies) = $6.24 ($156/25); time spent is worth $3.33 (1/3 of an hour’s wage). Total cost for you to make a single cover = $9.58.
You don’t say how many you gave as gifts. However, if you sold 7 covers at cost x 3 ($29.72 each), you would recover the cost of the initial investment of the leather, required, and optional supplies. Not bad!
Wow, that was excellent figuring 🙂 I think I’ve made 20-25 covers which I gave away and still have quite a bit of leather left. I want to make an A5 sized cover soon.
If you want to calculate exactly what it cost to do each one it is pretty easy. This is a great rough estimate but it doesn’t take into account the number of covers you can get from each item listed (i.e. you cant get 25 books for the cost of 1 pack of inserts, you can get 1.5 books from that initial $8). So…
If you assume that the piece you get is on the smaller side (20 square feet) then that means you have about 3456 square inches to work with. each book is 48 square in. so 3456/48 = 72 books. Leather is of course not perfectly square and is subject to flaws (it is skin after all) so lets say you can get a total of 60 (being conservative) out of one of these pieces of leather. So now you know about how many books you can get $80/60 books = $1.33/book
Each pack of elastic is $4 per 5yds the measurements given above call for 1yd +0.5in of elastic. I rounded to 1 yard per book so that gives you a cost of $0.80 in elastic.
Finally Inserts quoted above are $8 for 3 inserts and you need 2 to complete the project so 1.5 completed books per pack of inserts gives you $8/1.5= $5.33
Now, a craftsman’s time is worth way more than minimum wage in my book. So i would double minimum wage… at least. So lets say $20 per hour (minimum wage in my state is $7.25 per hour). Gives us a cost of $6 in time.
So adding all of that you get 13.46 per book in materials not including your equipment. Your Equipment for the 25 you have made so far is costing you $2.56. The more you make with the same set of equipment, the lower this will be.
Hello! Do you need a special type of sewing machine to sew the leather? I’m really wanting to make my own traveler’s notebooks and possibly some other leather goods. Thank you for the tutorial! I look forward to your reply!
I used a regular sewing machine but bought some heavy duty needles. I really depends on how thick the leather is though…
Not necessarily. I have a Baby Lock Journey that i can sew light weight / apparel weight leather on as long as i use a leather needle. I use these: https://www.sewingpartsonline.com/schmetz-leather-sewing-machine-needles.aspx
Personally, i would not tempt anything thicker without an upholstery machine.
But it also depends on your machine. My Journey is a big machine that can stand up to a lot, but i have an old Hobby by Phaff that i would never sew leather on just because it is not powerful enough and i know i would throw out the timing.
A few notes on getting good results on leather –
1. Lengthen your stitch length. remember you are sewing on a skin so you are actually punching holes in the fabric as opposed to moving individual threads out of the way and if your stitches are to close together you will perforate the leather and it becomes weak and susceptible to tearing.
2. Test your stitching on a scrap piece first to make sure you will be happy with the result. Leather is very unforgiving as a fabric and therefore you only have one shot to get it right. Once the holes are there, they are there and that’s it.
Jennifer, thank you for your tips!
Thank you for the tutorial and your reply! Are the needles specifically made for leather? I really want to give this a shot! 🙂
I just bought heavy duty needles on Amazon. I’m wondering now if I need to just sew by hand because using a sewing machine is tricky and error prone.
Yes they make needles specifically for working with leather. I use these: https://www.sewingpartsonline.com/schmetz-leather-sewing-machine-needles.aspx
Good Luck!
Are you on Facebook or any other social media? I would love to chat with you sometime!
Yes. http://the-gadgeteer.com/subscribe/
Here’s a video tutorial on making a similar “faux-dori”. Made mine this way and have used it for years.
https://www.youtube.com/watch?v=hCYAnmQnn6w
a couple of things besides I like what you did
snoseal will darken your leather (yes, 3oz. hide is just about ideal) and if you use a heat gun, hairdryer or just hold it over your stovetop, the product will melt and be absorbed making the leather stiffer
you can buy leather needles for consumer machines
industrial machines work better on thicker material…in a pinch I’ve done about 3/8″…you might look at sailrite for the kind of machine you need…if you do get the monster wheel option
I still handstitch but arthritis is winning
good luck!
I would like to know if you still have the travelers notebook you made with the red string? It’s so cool and so basic.
I don’t think I do. Back when I wrote that article, I was making those covers for all the writers here on The Gadgeteer as a holiday gift. I’m not sure that I even kept one for myself.