
Laptops are fantastic for all your on the go computing tasks, but when you use them at home, they tend to become a magnet for cables connected to all the ports. When you want to go mobile, you have to unplug everything and then reconnect when you return. An easier way around this hassle is to connect all your cables to a docking station and then connect the docking station to your laptop with just one or two cables at the most. The Aluminum Mini Docking Station from Satechi looks like a nicely designed solution that provides the ports you need without taking up much space on your desktop. Let’s take a look.
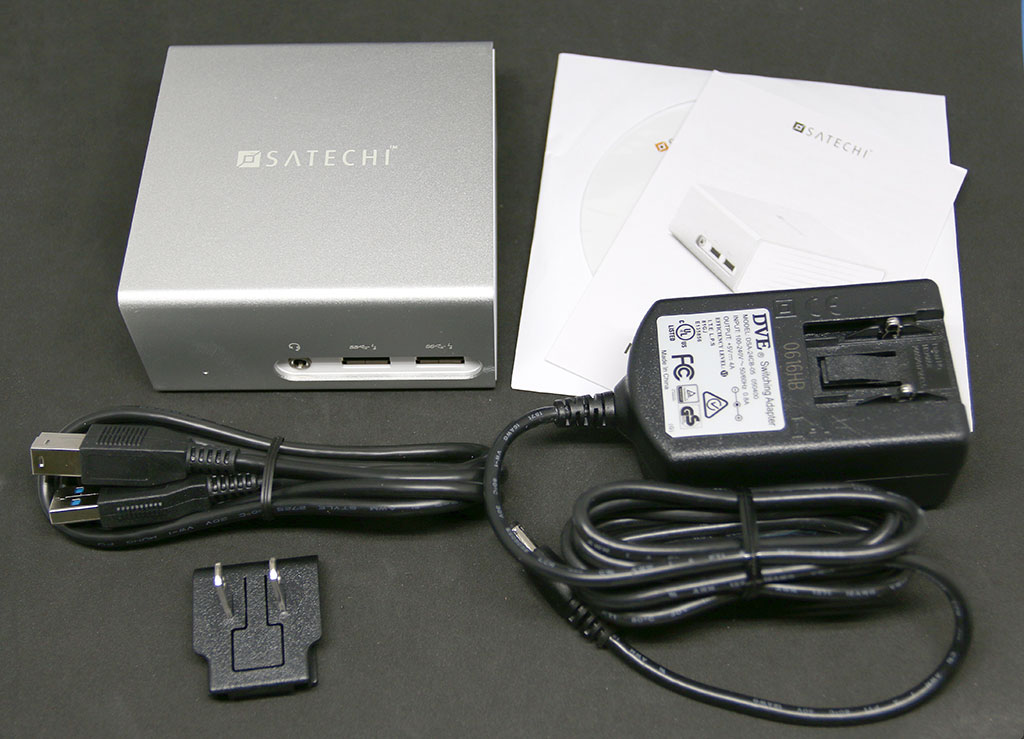
What’s in the box?
Satechi Aluminum Mini Docking Station
USB Host cable
AC adapter
Instructions
Driver CD
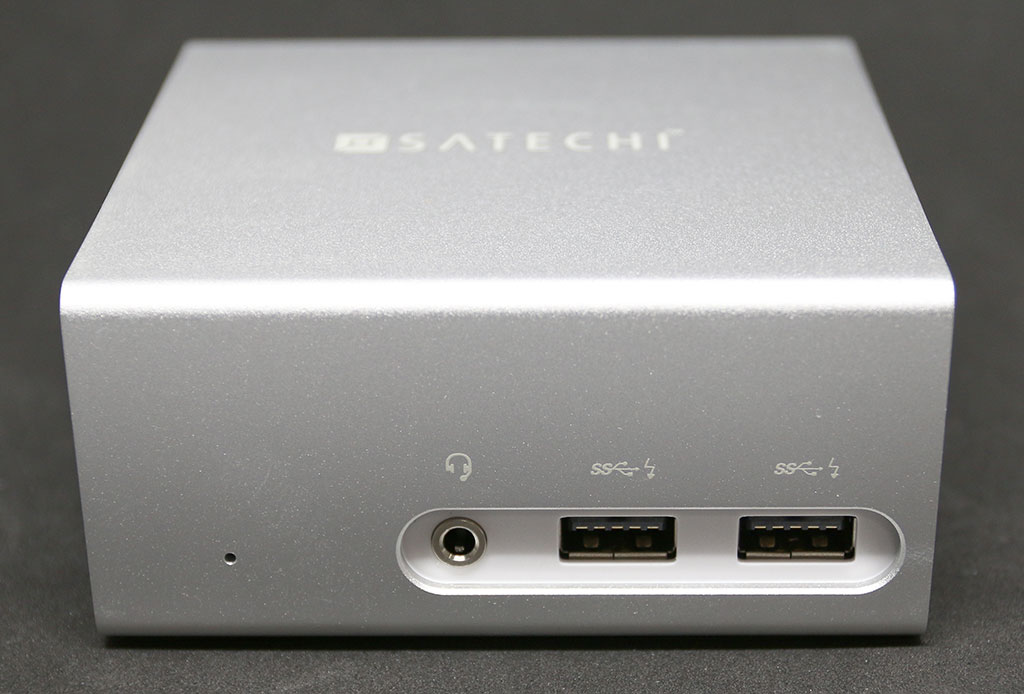
The Satechi Aluminum Mini Docking Station is available in Silver, Space Grey and Gold. I was sent the Silver version that matches the look of my MacBook Pro.
On the front of the docking station you’ll find a small LED that lights up in Blue when it’s attached to your computer with the included USB host cable. There are connections for headphones and two USB 3.0 ports.
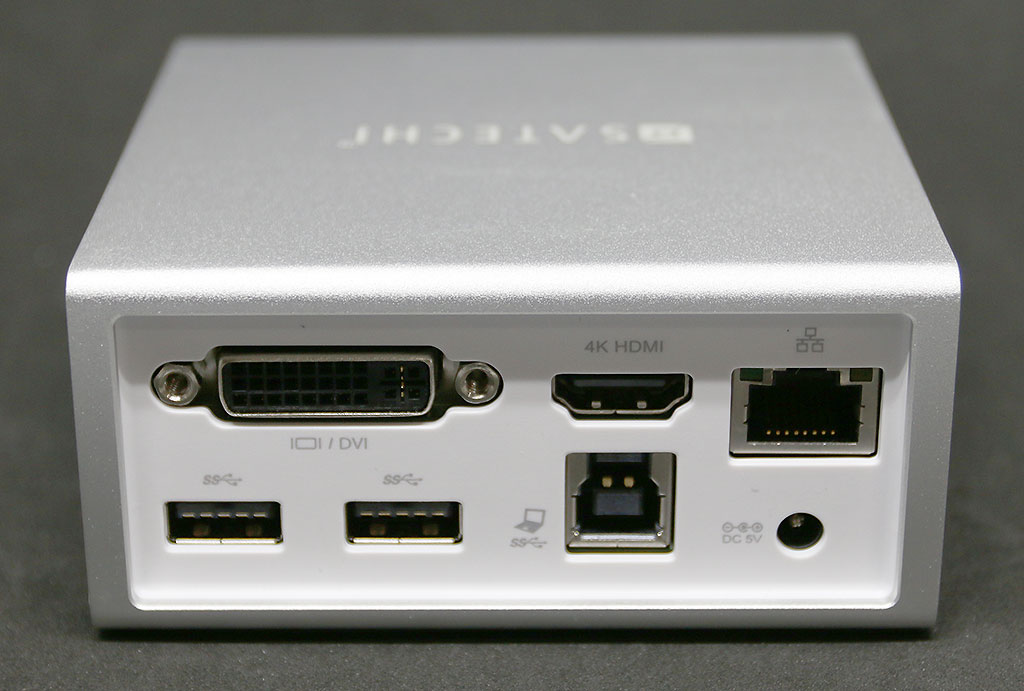
On the back of the dock there is a DVI port, 4K HDMI port, gigabit Ethernet, two more USB 3.0 ports, a USB host port and the power connector for the included AC adapter.
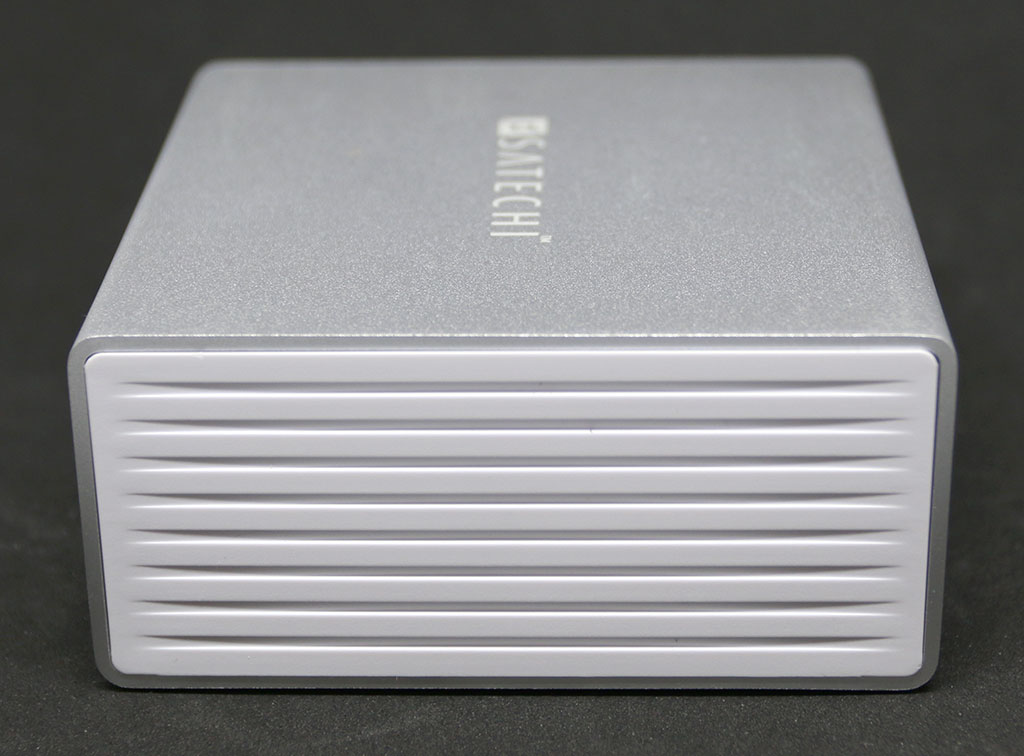
The sides of the dock are made of white plastic with grooves.
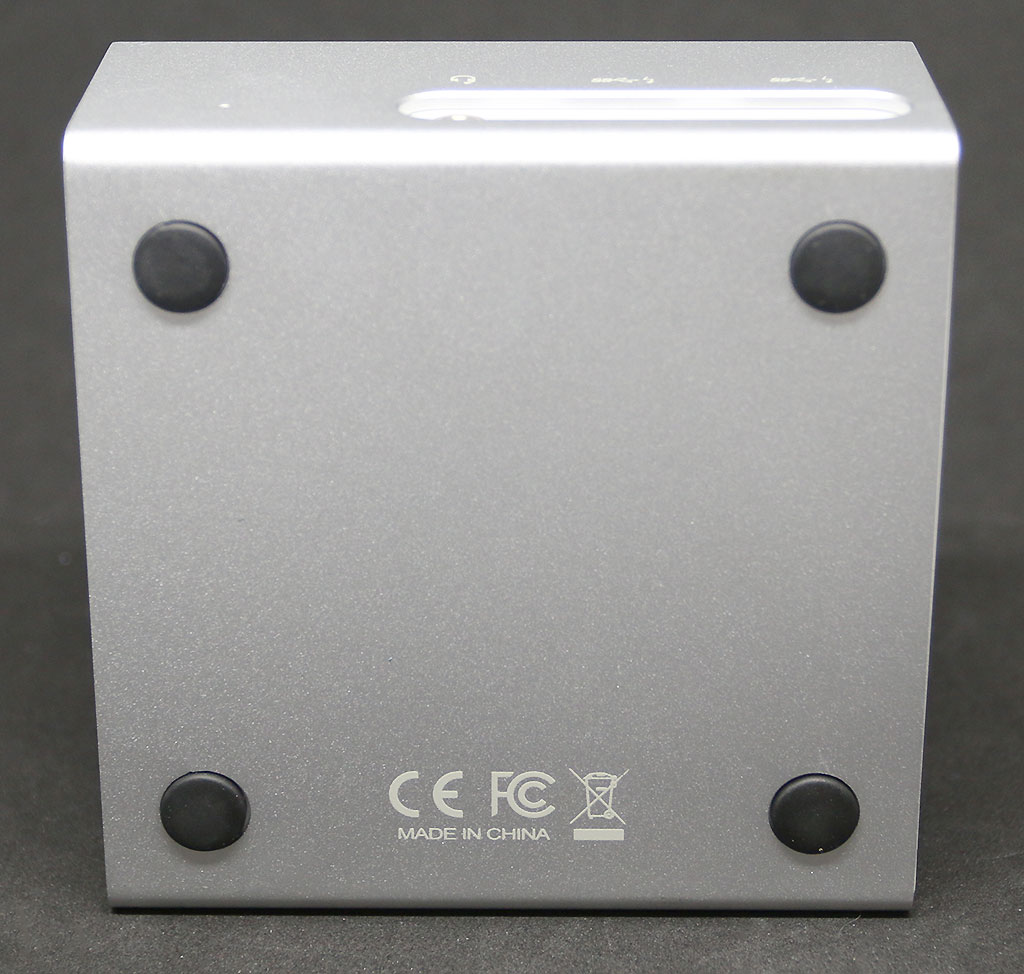
The bottom of the dock has rubber feet that keep the dock from sliding around on your desk.
I’m not new to docking stations because I’ve been using the LandingZone DOCK with my MacBook for the last year and a half. While I have no big complaints about the DOCK, I was hoping that the Satechi mini dock would make things even easier and eliminate the extra time it takes me to line up the connectors when inserting my MacBook in the DOCK.
There is no need to line up connectors with the Satechi. You just plug in the HDMI or DVI cable if you have an external monitor, Ethernet, your USB peripherals, the included USB host cable, and the included AC adapter. Then you plug the other side of the USB host cable into your laptop and connect your laptop’s power cable. Done! At least I thought I’d be done. But after plugging in all the cables, my external monitor’s display remained black. I then remembered the included driver CD. But since my MacBook doesn’t have a CD drive, I went to Satechi’s site to see if I needed to install a driver. I didn’t remember needing do that with the LandingZone DOCK… Sure enough, there was a link to install DisplayLink drivers for Windows or OSX.

Once the driver was installed, my MacBook’s screen displayed on my external monitor. Yay! Another yay moment came when I was able to change the volume level using the volume keys on my Apple wireless keyboard. I’ve not been able to do that with the LandingZone DOCK because it uses the HDMI connection to route audio through the monitor’s built-in speakers. The Satechi mini dock does not send audio through the HDMI connection, so audio comes through the MacBook itself.
I thought everything was fine and dandy till I actually started doing work. Then I began noticing small graphic glitches.
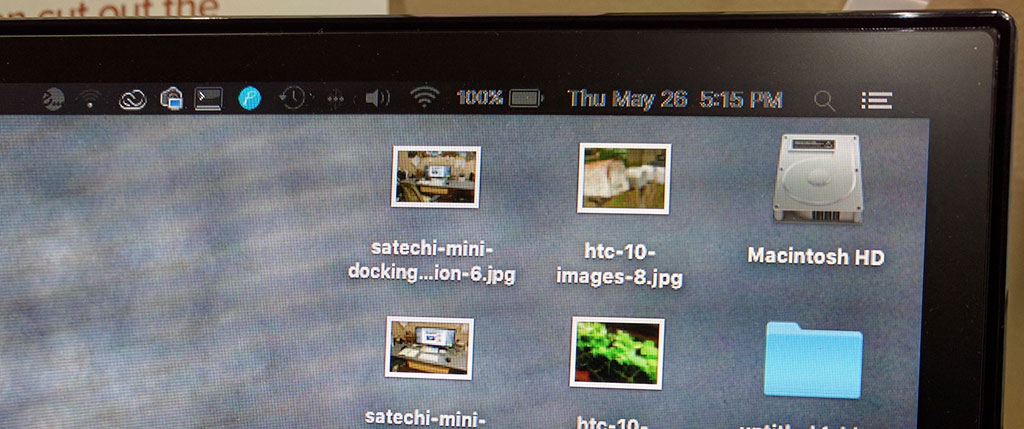
Check out the top menu bar. For some reason it has a black background when it should be white.

The letters also look strange.
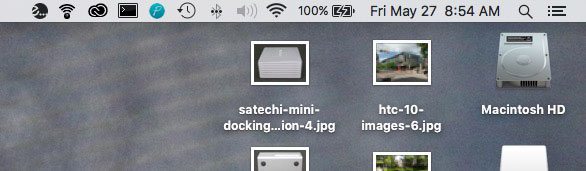
Here’s how my screen looks when I’m using it undocked or through the LandingZone DOCK. See the difference?
Then I noticed some glitches when I moved windows around on the desktop. Check out this short video showing the behavior.
Although these glitches are annoying, they weren’t a complete deal breaker for me. That came later when I was working on some Photoshop image editing.

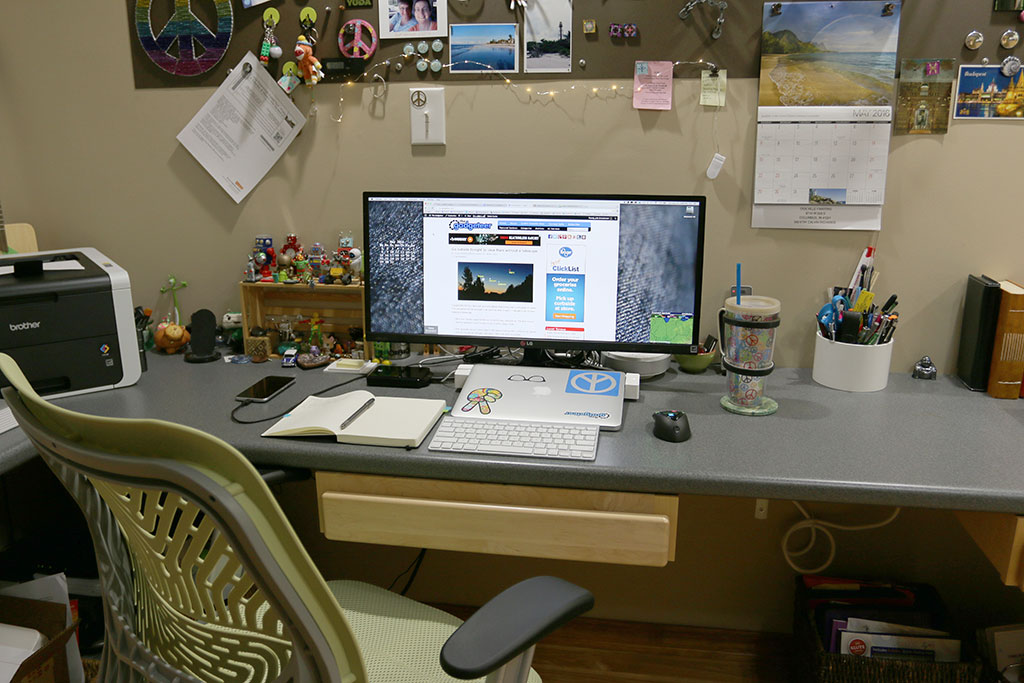
In the image above, you see that my MacBook is connected to my LG monitor via the HDMI cable through the Satechi mini dock. On the monitor, the image I’m trying to edit is showing up in a blank window. But if I opened the MacBook’s screen and looked on the display, the image showed up. Weird right?
The final deal breaker happened when I stopped working and came back hours later and tried to get the computer to wake up by pressing one of the keys on my Apple wireless keyboard. Nothing happened. I wasn’t able to get the HDMI monitor connection to wake up. It kept saying no signal. So I unplugged the HDMI cable from the back of the Satechi dock and plugged it directly into the right side of the MacBook. It immediately mirrored the MacBook’s display. But when I would unplug it and plug it back into the dock, it would turn off again. After minutes of fiddling around, the screen would show up again when connected to the dock, but I would have the same problem once the computer when idle for awhile.
Then I decided to try the dock with my Dell XPS laptop and had zero issues with the HDMI connection using the same cable. I did have to install the DisplayLink drivers, but once that was done everything worked flawlessly.
I’ve always liked Satechi’s products, but I am sad to say that I was disappointed with this one. It’s unusable with my MacBook Pro and while searching for more info on Amazon, I noticed that this exact same dock is rebranded and available from StarTech and Plugable. If you’re interested in giving it a try (I recommend a Windows laptop and not a MacBook), the Plugable version is $30 cheaper than the Satechi version. As for me, I’m sticking with my LandingZone DOCK.
Update 05/28/16
It seems that the issues with my MacBook can be attributed to known issues with El Capitan and the DisplayLink drivers. See these DisplayLink support notes for more info.
Source: The sample for this review was provided by Satechi. Please visit their site for more info and Amazon to order.
Gadgeteer Comment Policy - Please read before commenting
I am ecstatically happy with my Thunderbolt Dock from OWC: https://goo.gl/Q8BpOC
Have never had a problem with it; works like a champ.
They also have a USB-C model for the newer MacBooks: https://goo.gl/pKtC0S
Do you have to use the DisplayLink drivers with either one? The USB-C dock looks really attractive since it only requires that you plugin one cable. Unfortunately, my MacBook Pro doesn’t have a USB-C connector.
No drivers needed insofar as I know; I just hooked it all up and everything worked. I have an LG widescreen (UM95 34UM95) hooked up to it via DisplayPort.
My MBP is a Late 2013; I hook up to it via TB2. That and the power cord is all that’s hooked up to my MBP — everything else on my desk (display, speakers, 3 external drives, ergo keyboard and trackball) are all hooked up via the OWC dock.
Unfortunately, I doubt they have a USB3 only version in the works. I’m looking forward to more adoption of USB-C in the future; I believe the prevailing rumor is that much of the Mac line (portable and desktop) will get it over the coming year.
Which MBP are you running? (Sorry if you have that mentioned above; I’ve skimmed the article a couple more times and don’t see)
I have a 13″ MacBook Pro w/Retina that I bought last fall and am using with with a 29″ LG monitor that I reviewed two years ago.
If it’s a 2015 model (not sure if you bought it used or new), it should have a Thunderbolt port (you’d want to confirm this first) and the OWC Dock should work like gangbusters with it. Again, I’m really, really happy with mine.
FWIW, you can look up exact specs for your Mac by going to EveryMac.com and entering either the full name from your “About this Mac…” dialog under the Apple logo in the menubar (mine is “MacBook Pro (Retina, 15-inch, Late 2013)” or (for a quicker find) the Model Identifier (e.g., mine is “MacBookPro11,3”) that shows up when you click the “System Report…” button on that first “About this Mac…” screen.
Mine does have a thunderbolt port, but the MacBook can’t charge through that port though… That’s the only reason why I’d get rid of the LandingZone DOCK… if there was a dock that required only 1 connection to my MacBook. With my model that’s not possible.
And regarding the “new or used” comment I made; I just mean that in regards to the model — I’ve had friend/family tell me they “just bought a new iMac” and ask me what will hook up to it, etc., and then when I go see, it turns out it was actually a much older model that they just recently bought as a refurb. It’ll still work great, but it does affect what system will run on it, what peripherals will hook up, etc.
That’s why knowing the model identifier (per my other post) of your Mac is so important.
“I have an LG widescreen (UM95 34UM95) hooked up to it via DisplayPort.”
That is to say; the monitor itself has DisplayPort connection, and the TB Dock has Thunderbolt ports. So it goes Thunderbolt (on the dock) to DisplayPort (on the display).
> Mine does have a thunderbolt port, but the MacBook can’t charge through
> that port though… That’s the only reason why I’d get rid of the
> LandingZone DOCK… if there was a dock that required only 1 connection
> to my MacBook. With my model that’s not possible.
Unfortunately, yes; there’s no other option for earlier models. That’s one of the reasons I’m looking forward to USB-C: single cable connection.
Still, with the Thunderbolt Dock, you only add the power cable to that equation. Everything else connects to the Thunderbolt Dock.
My LandingZone DOCK has a pseudo one cable connection because you just place it between the connectors and close the latch. When you have it lined up right, it’s quick and easy. So I am not compelled to change right now.
According to the DisplayLink folks, There are known problems with OSX compatibility. http://support.displaylink.com/knowledgebase/articles/528023-known-issues-with-displaylink-on-os-x-10-9-10-10
My experience is that it works okay as a secondary monitor, but the glitches prevent me from using one as primary. (I have a portable usb external monitor I use occasionally.)
Thanks for finding that. I’ve added an update to the review.