
Only a few years ago, my personal computer was a large tower unit that took up way too much space in the corner of my office (aka Gadgeteer HQ). That computer had all sorts of peripherals attached to it including a monitor, mouse, keyboard, speakers, external hard drive, scanner, printer and more. These days I prefer a 13″ Macbook Pro with Retina display instead of a desktop computer because I like portability and minimal space requirements. At least that is how things started out with my Macbook, but before long it too had an external monitor, full sized keyboard, speakers, USB hard drives and other devices connected to it. That means when it comes time to enjoy the portability feature of my laptop, I am required to unplug several cables. Then when the laptop returns to home base, those cables have to be plugged back in. Can you say “hassle”? One way to make it much easier to hook and unhook the Macbook from my peripherals is to use a dock like the LandingZone DOCK for 13″ and 15″ Apple Macbook Pros with Retina display. Let me show you how it works.
Note: Images can be clicked to view a larger size.
Hardware Specifications
3 Built-in USB 3.0 ports
2 Built-in USB 2.0 ports
Gigabit Ethernet port
Supports most Thunderbolt® monitors and devices with Mini DisplayPort or Thunderbolt connections
Supports HDMI monitors directly (no adapters necessary)
Built-in Security Slot compatible with most Kensington® Laptop Locks (ClickSafe® Locks may not be compatible) to secure your MacBook Pro®
Power adapter with wide range of input voltage (100~240 VAC)
Supports two-way audio for speakers, and headphones
On/Off LED Status Indicator Light
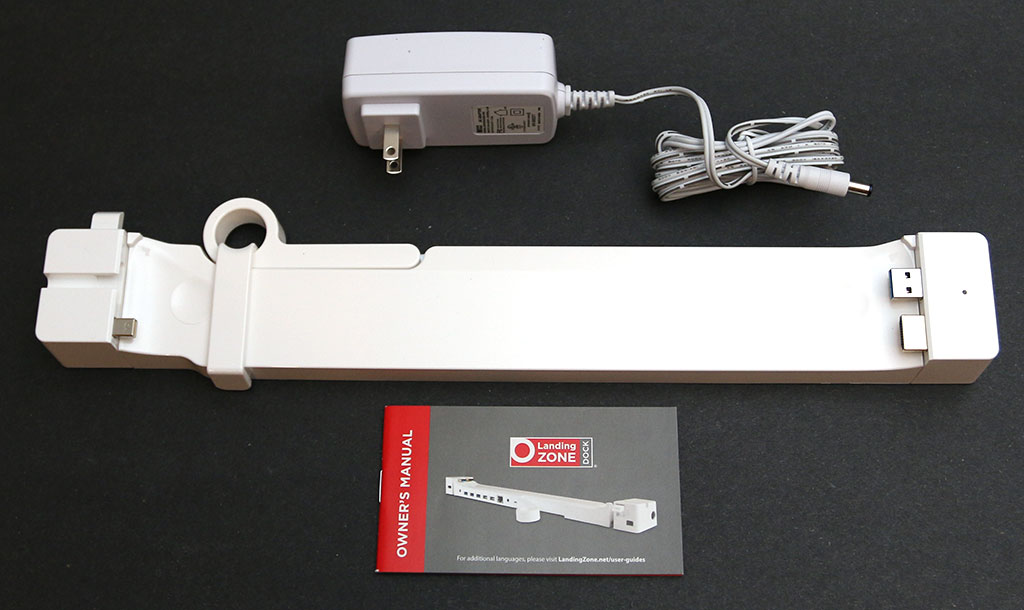
Package Contents
LandingZone Dock
User Guide
AC Adapter

The DOCK is a bar shaped device made of white plastic which has been designed to be compatible with 13″ and 15″ Apple Macbook Pro with Retina display laptops.
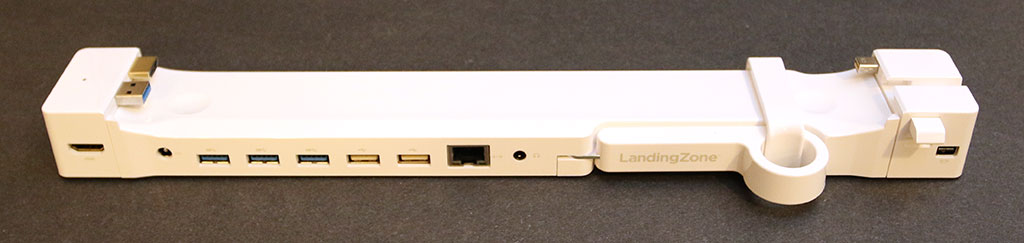
The DOCK provides a nice assortment of connections shown above from left to right: HDMI, power, three USB 3.0 ports, two USB 2.0 ports, Gigabit Ethernet, 3.5mm headphone jack and a mini DisplayPort.
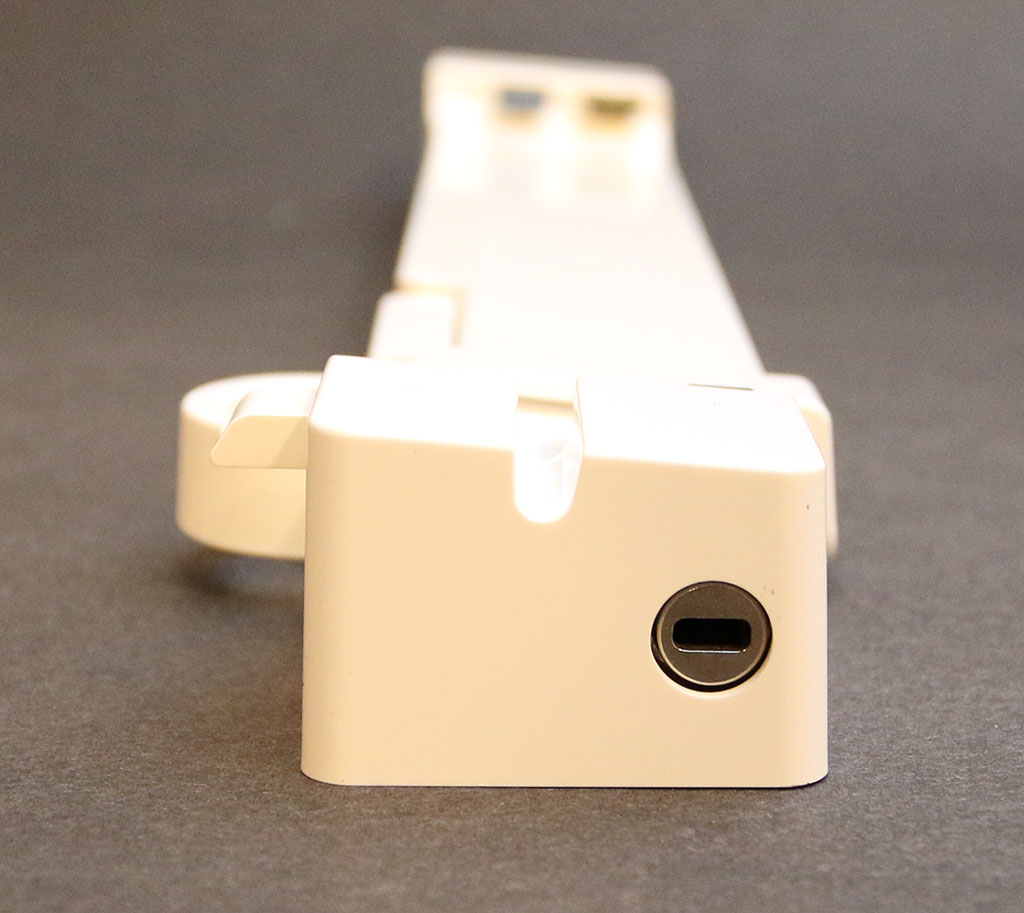
On one end you’ll find a security slot that is compatible with Kensington locks.
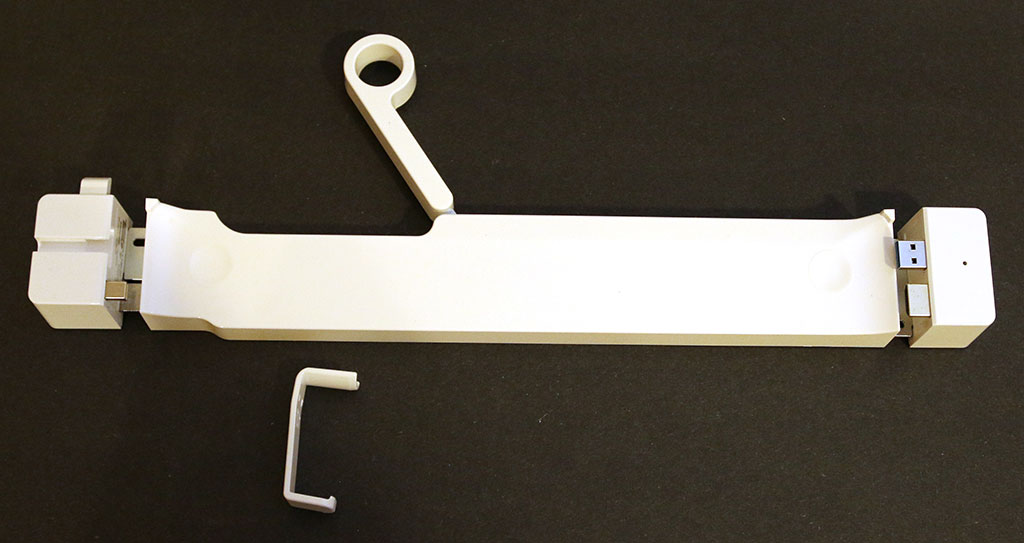
To begin using the LandingZone DOCK you will first need to remove the travel clip that holds the release lever in place. Then you can open the release lever which spreads the two wings.
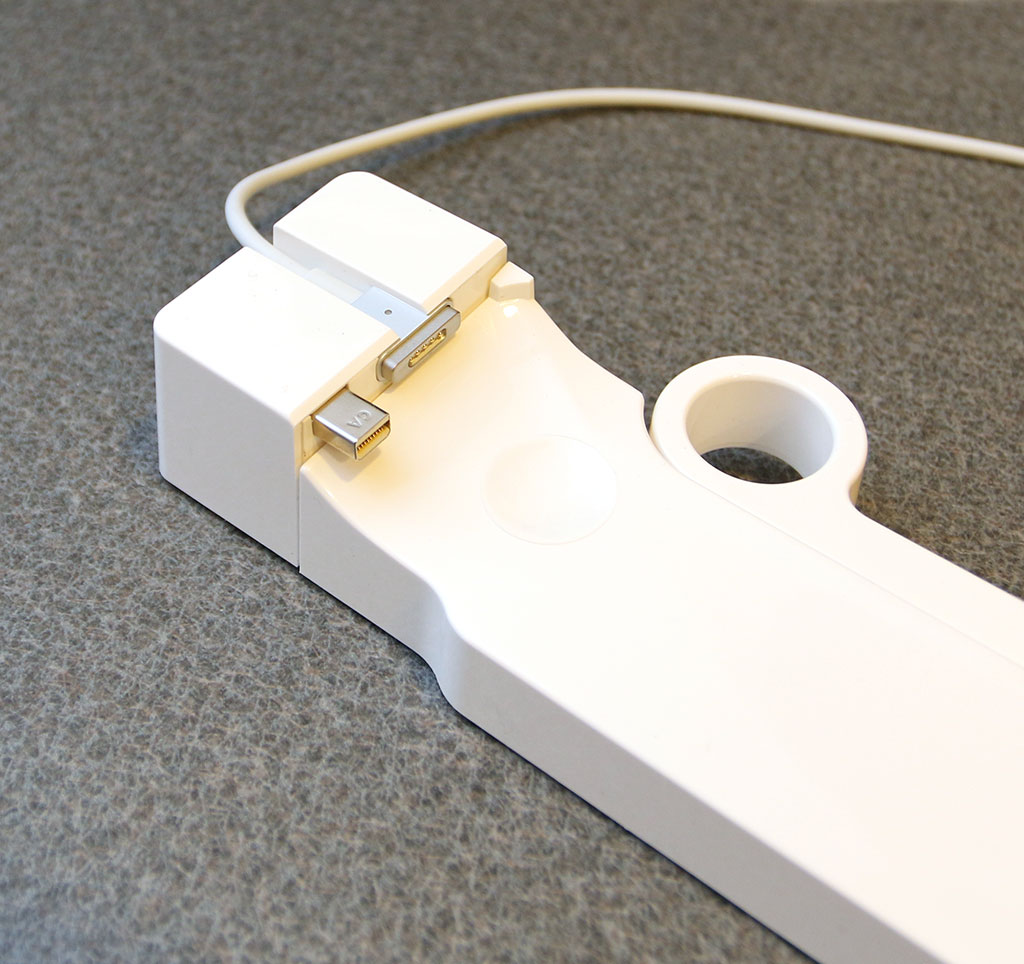
On the left wing of the DOCK there is a slot for the Macbook Pro’s MagSafe power plug. That plug slides into the slot and is locked in place with a tightening switch on the back of the dock. Next to the MagSafe is a Thunderbolt plug that connects to the Thunderbolt port on the left side of the Macbook Pro.
With the release lever fulling opened, the Macbook Pro sits on the elevated dock so the rounded corners at the back of the computer sit flush in the matching curved guide posts (shown below).
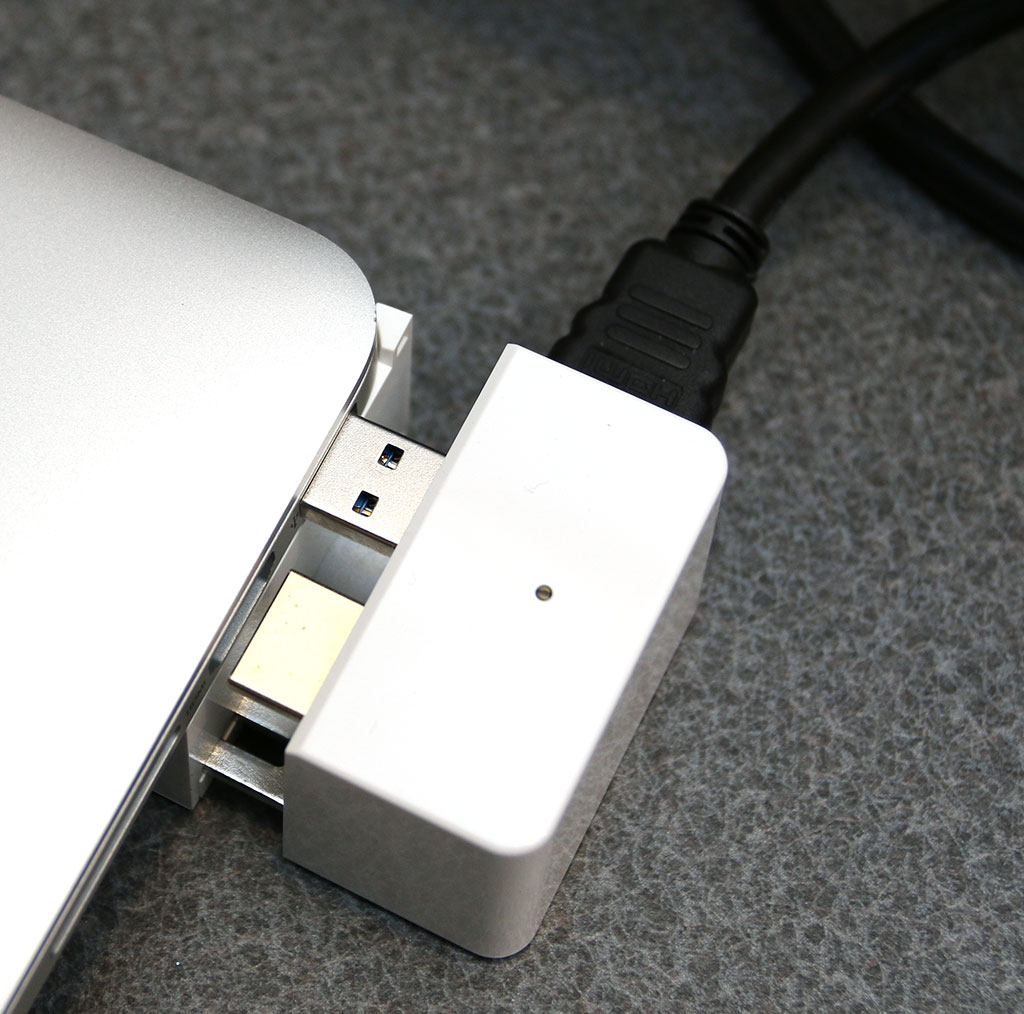
The USB and HDMI connectors are built into the right wing of the dock and mate with the existing ports on the right side of the Macbook Pro. This side of the DOCK also has an on/off status LED. You’ll notice that the DOCK does not block the SD card slot on the right side of the Macbook, so it can still be used without any issues.
With the Macbook Pro lined up against the DOCK’s guide posts, you can then slide the wings together so the connectors plug into the ports on the sides of the laptop. When everything is lined up, it’s a smooth and easy action to dock the computer.
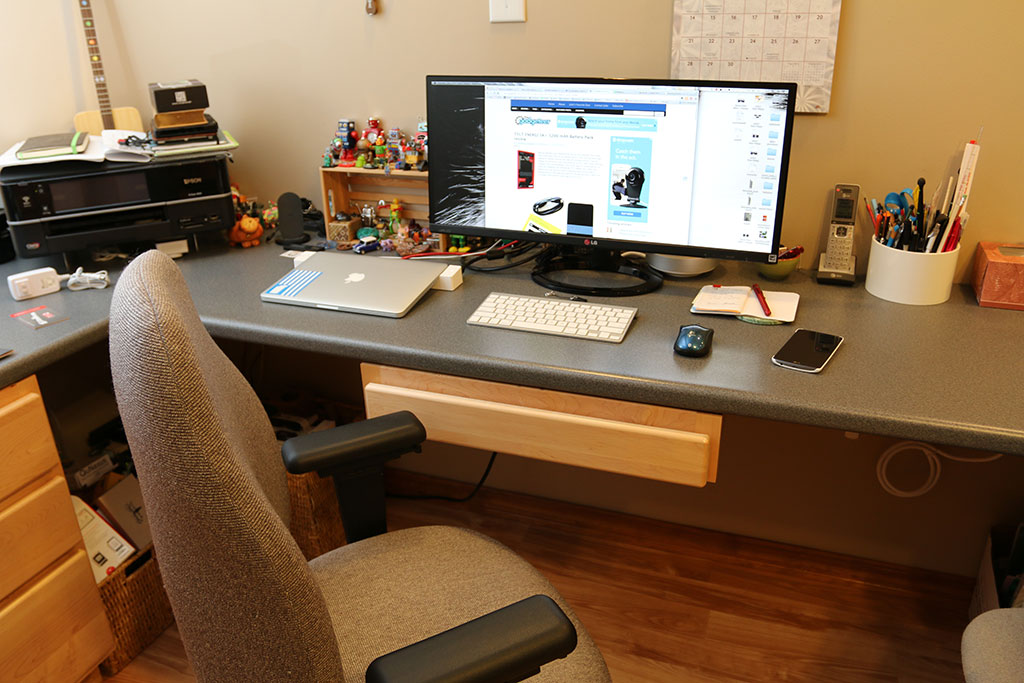
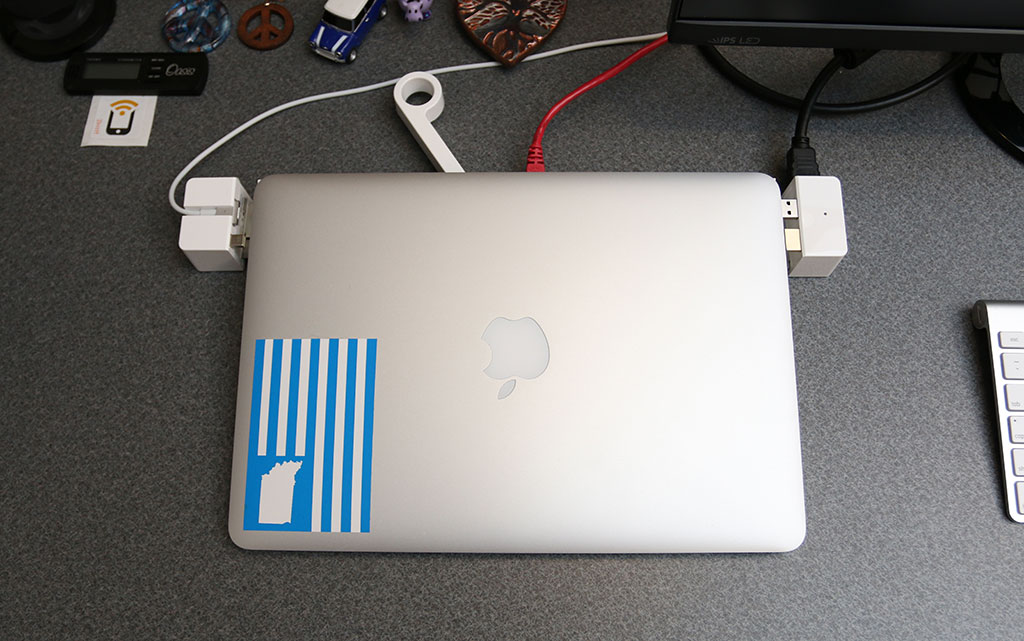
An added benefit of the DOCK is that it raises the back of the laptop to make it more ergonomic to type on. Or you can do like I do and keep the Macbook connected a large monitor via the HDMI port on the DOCK and use an Apple wireless keyboard. In that configuration I just leave the cover of the Macbook closed.
When you’re ready to take your Macbook to another location it’s just a simple manner of flipping open the release lever on the back of the DOCK so the two wings spread open. Then all you have to do is grab your Macbook and go. This is by far the easiest Macbook Pro dock that I’ve tested so far. It doesn’t take a lot of fiddling and fidgeting to get it to open and close. Both actions are smooth and fluid.
I like everything about the LandingZone DOCK, but the only issue I can see with it is the price. At $200 it is on the expensive side. However, it’s definitely the easiest and nicest of the docks that I’ve used so far. I have no problems recommending the LandingZone DOCK to anyone with a 13″ or 15″ Macbook Pro with Retina display. This DOCK will keep your desk neat and tidy and allow you to quickly and easily dock and undock it when you need to work or take it to another location.
Update 02/05/15
I am still using this dock on my desk at Gadgeteer HQ. Unlike other docking stations that I’ve tried, this one is very easy to dock and undock my MacBook Pro. It’s pricey, but I think it’s the best MacBook Pro dock you can find.
Update 08/17/16
In just a few weeks, I’ll have been using the LandingZone DOCK every day for the past 2 years. It’s working as perfectly today as it was the day I took it out of the box. It lets me quickly and easily detach my MacBook without fumbling with multiple cables.
Source: The sample for this review was provided by LandingZone. For more information visit http://landingzone.net/ and order from Amazon.

Ruilogod 32" 2-in-1 Light Mulit Collapsible Disc Reflector 80cm Silver Gold
(as of June 25, 2026 19:08 GMT -05:00 - More infoProduct prices and availability are accurate as of the date/time indicated and are subject to change. Any price and availability information displayed on [relevant Amazon Site(s), as applicable] at the time of purchase will apply to the purchase of this product.)
Gerber Gear 22-47162N Fast Draw Folding Assisted Opening Pocket Knife, Fine Edge, Black
(as of June 25, 2026 19:02 GMT -05:00 - More infoProduct prices and availability are accurate as of the date/time indicated and are subject to change. Any price and availability information displayed on [relevant Amazon Site(s), as applicable] at the time of purchase will apply to the purchase of this product.)Product Information
| Price: | $199.00 |
| Manufacturer: | LandingZone |
| Requirements: |
|
| Pros: |
|
| Cons: |
|
Gadgeteer Comment Policy - Please read before commenting
Shame you still have to buy a second Apple charger too. Since you have to sacrifice your current charger to use in the dock.
It would be even better if this dock includes a cooling fan.
@Ed I disagree. I wouldn’t want a fan and the fact that the DOCK raises the back of the Macbook so that there’s airflow under it works great for keeping the computer cool.
So you prefer this to the Henge vertical dock?
@DStaal yes I do. For two main reasons.
1. Unlike the Henge vertical dock, Macbook can still be used / cover opened.
2. It’s easier to insert and remove.
I agree with Julie — the Henge vertical dock is quite nice, but you lose the functionality of the MBP as a second display.
whoa super neat. at this price it should be crafted in aluminum though!