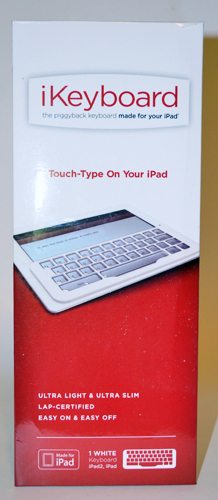
 I’ve started a quest to find a way to touch-type on an iPad without having to use a heavy case with a non-standard keyboard in it. I already wrote about my attempt to hack my own case/lapdesk for the iPad and Apple Bluetooth keyboard. Today, I’ll be looking at something completely different. The iKeyboard started its life as a Kickstarter project last year. It was successfully funded, and it has undergone some tweaking from the original design. The iKeyboard isn’t a keyboard at all. It’s an overlay for the iPad’s virtual keyboard that’s supposed to add tactile feedback to make touch typing possible. When I finally got an email saying the iKeyboard was ready for purchase, I ordered one from Amazon.
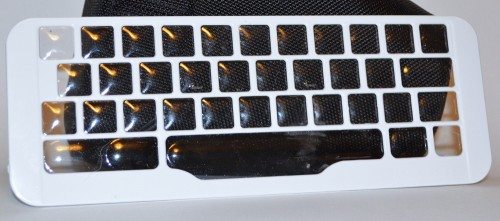 The iKeyboard is a thin, flat overlay for the iPad screen. It measures about 8.6″ long X 3.1″ tall X just over 0.1″ thick. It weighs 0.75 ounce. It’s available in either black or white. I purchased the white to match my white iPad. The size and shape of the iKeyboard limits its use to the landscape orientation of the iPad.
There’s a thin, clear plastic sheet adhered to the back of the plastic grid. The plastic isn’t electrically insulating, so you can operate the capacitive touchscreen through it. The clear plastic has been shaped, so that “bubbles” extend through the grid’s openings to form the “keys”. There are small, raised bars to identify the F and J home keys for touch typists. Pressing on the keys causes the bubble to collapse so your finger puts pressure against the screen. The plastic travels to provide physical feedback, and sometimes you can hear a faint “click” as you press the key.
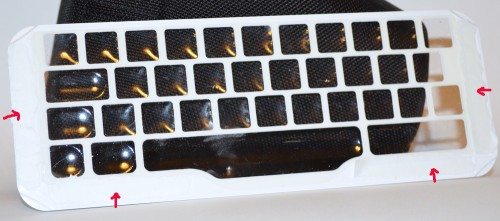 The original version, as shown on Kickstarter, snapped over the sides of the iPad. The version I purchased uses four sticky pads (locations shown by the red arrows) to adhere the iKeyboard to the iPad’s screen. Because the size of the screen has remained unchanged through all the versions of the iPad to date, this means the iKeyboard will now work with any version of the iPad.
The adhesive sticks well, and it can be removed and reused without leaving sticky residue behind. The idea is that you leave the keyboard adhered to your iPad’s screen at all times. It’s thin enough that most cases close over it.
You can also see in the above photo that the corners are thinner than the rest of the frame. You slip your fingernail under the corner and lift to remove the iKeyboard from the screen.
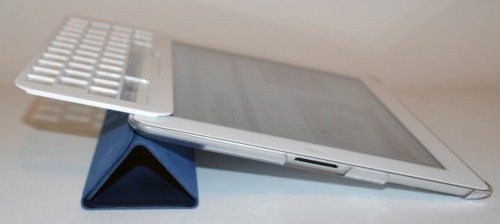 When you don’t need the iKeyboard, you can lift it off and stick it on the bezel.
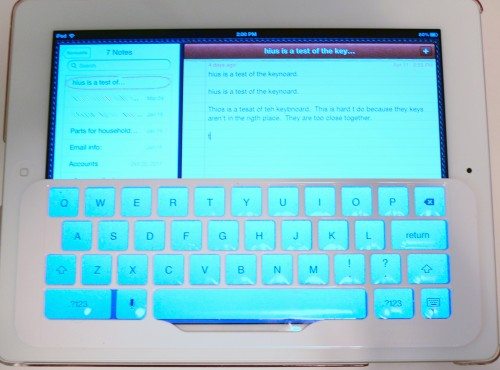 This is the alphabetic on-screen keyboard. You can see that the grid lines up well with the on-screen layout, even when the dictation button is showing.
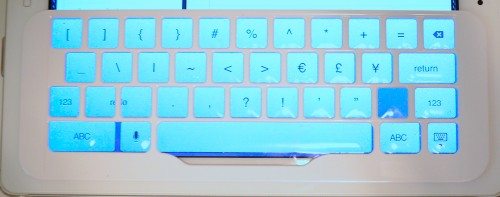
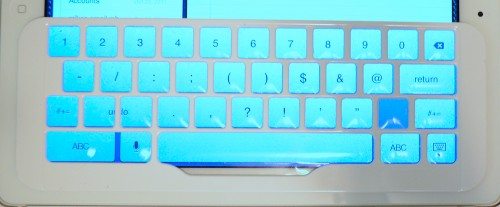 It lines up well with the numeric and punctuation keyboards, too.
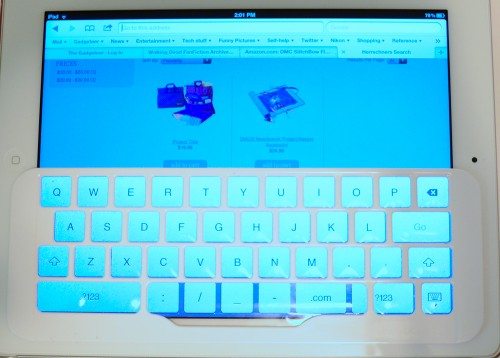 When you have the URL entry keyboard in Safari, the space bar is replaced by a several keys and a .com key that aren’t commonly found on the alphabetic keyboard. You can use these keys easily, but not while touch typing.
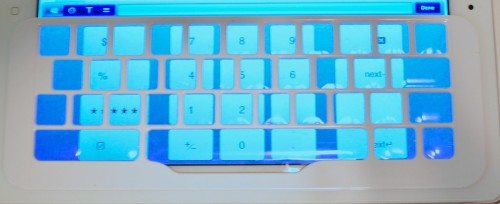 The data entry keyboard in Apple’s Numbers app doesn’t match up at all.
Because of the non-static nature of the on-screen keyboard, changeable depending on the context, the virtual keyboards don’t lend themselves to touch typing anyway. You can have a different layout – with subtle or drastic differences – depending on the application you’re using.
Even allowing for the inherently unfriendly touch-typing atmosphere of the iOS virtual keyboard, I found that the iKeyboard doesn’t improve my ability to touch type even on the virtual alphabetic keyboard. To touch type, you have to rest your hands on the keys. The plastic bubbles aren’t able to support the weight of resting fingers, and I found that I often selected the wrong key accidentally. The space bar was especially sensitive to accidental strikes because of the shape of the bubble over it.
I could feel the keys move as I pressed them, but I didn’t always feel the movement from accidental touches. You can see the results of one of my typing sessions in the photo showing the alphabetic screen. Lots of typos!
Despite any other problems I may have experienced, the iKeyboard suffers from the complaint common to all the Bluetooth keyboard cases – an undersized keyboard. The keys are too close together and my hands have to be held at a strange, strained angle to fit my fingers on the home keys.
I find the iKeyboard to be an ineffective tool for the touch typist. It looks nice, and it’s by far the most convenient keyboard option for the iPad, but it just doesn’t work for me.
Gerber Gear 22-47162N Fast Draw Folding Assisted Opening Pocket Knife, Fine Edge, Black
(as of February 11, 2026 17:35 GMT -06:00 - More infoProduct prices and availability are accurate as of the date/time indicated and are subject to change. Any price and availability information displayed on [relevant Amazon Site(s), as applicable] at the time of purchase will apply to the purchase of this product.)Gerber Gear EVO Jr. Folding Knife - Serrated Edge [22-41493]
(as of February 11, 2026 17:35 GMT -06:00 - More infoProduct prices and availability are accurate as of the date/time indicated and are subject to change. Any price and availability information displayed on [relevant Amazon Site(s), as applicable] at the time of purchase will apply to the purchase of this product.)Product Information
| Price: | $35.00 |
| Manufacturer: | iKeyboard |
| Requirements: |
|
| Pros: |
|
| Cons: |
|


Gadgeteer Comment Policy - Please read before commenting
dead at arrival
🙂 nice
I missed the boat on another Kickstarter Project, the TouchFire overlay but it looks to be a very polished solution. Maybe see of you can get one for a comparison?
http://www.touchfire.com/
My major issue with the on-screen keyboard is the location of the apostrophe on the second layer of the keyboard. As a touch typist who uses a LOT of contractions, it’s just too much work to constantly tap to another display, hit that key, then tap back to the letter keyboard.
I ended up with the Logitech Tablet Keyboard for iPad http://www.logitech.com/tablet-accessories/for-ipad/devices/8214. The way the keyboard case becomes a nice iPad stand that doesn’t even require me to remove the iPad’s cover makes it worth the extra effort to carry it around.