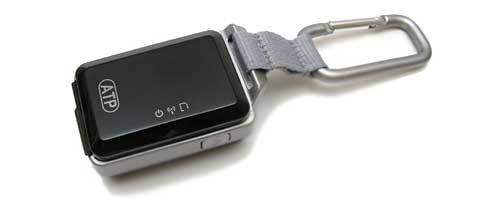
I have a nifty little gadget for avid photographers that have a less than stellar memory. If you’ve ever looked back at your old photos and wondered where you were when you shot them, the PhotoFinder Mini from ATP will cause you to wonder no more.
These days a lot of the newer cameras and even cellphones have the ability to geotag images. What is geotagging? It’s a method of writing the longitude and latitude coordinates into a JPEG image’s EXIF-data. With this extra bit of information, you will never have to remember where you were when you shot that perfect sunset because the image itself will have that information embedded in it.
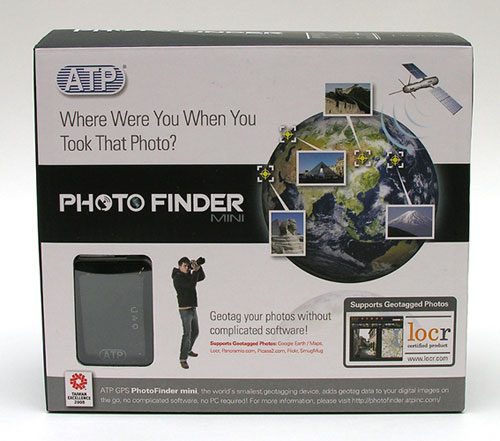
A little over a year ago, William Ray reviewed the first version of this product. He had a few complaints with it, so I was curious if this new version would work better for me than the old one did for him.
Specifications
Chipset: SiRF Star III
Channels: 20
Sensitivity (Tracking): -155dBm
Reacquisition: 0.1 sec typical
Maximum Altitude: 18000 m
Maximum Velocity: 514 m/s
Update rate: Continuous operation: 1Hz
GPS Frequency Response: 1575.42 MHz (L1 Band, C/A code)
Operating Time: More than 16hrs
Memory card: 128MB MMC Micro memory card
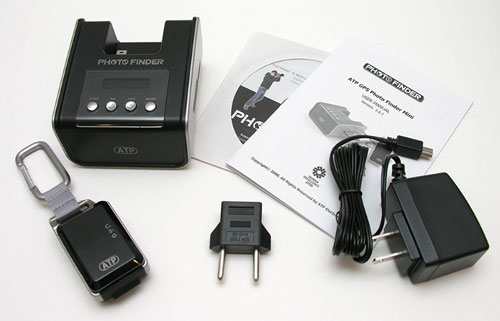
Package Contents
PhotoFinder mini GPS device
Dock
AC Adapter with plug adapter
User Manual
CD with user manual
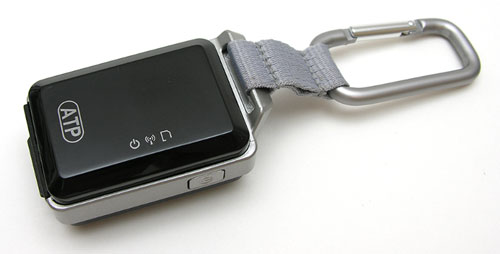
The PhotoFinder mini is a small block shaped fob with an attached metal carbiner. It doesn’t have a display, but has three status LEDs and one button on the side that toggles power.
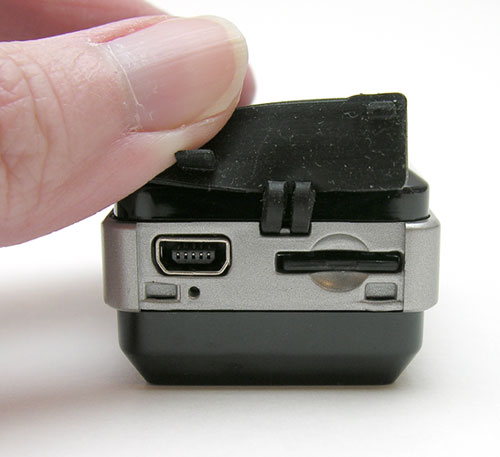
A rubber flap on one end covers (badly) a mini USB connector and an MMC micro memory card slot. I have no clue why ATP decided to go with an MMC micro card instead of the much easier to find microSD card.
The mini USB connector is used to charge the internal batteries and for connecting to the dock.
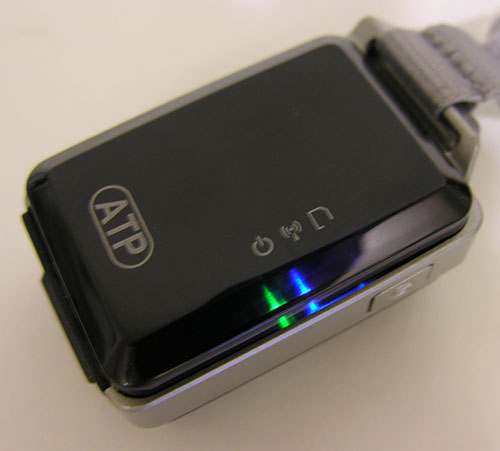
Three LEDs on the face of the module show the status of power, GPS and memory.
To use this product to geotag your images, all you need to do is to correctly set the time on your camera. It doesn’t have to be set to UTC time, which was required for the original PhotoFinder device.
Then you power on the PhotoFinder mini by pressing the side button. After a few seconds, it will start trying to acquire a GPS signal. That means that you’ll need to be outside, with a view of the sky. Sorry, this device won’t work inside a building. It should work fine in a car as long as you put it on the dash and don’t have heavily tinted windows.
Approximately every 10 seconds, the PhotoFinder will check the current GPS coordinates and write a log entry to the MMC micro card. The card can hold approximately 1000 hours of log entries. When you return home, you connect the PhotoFinder mini to the dock.
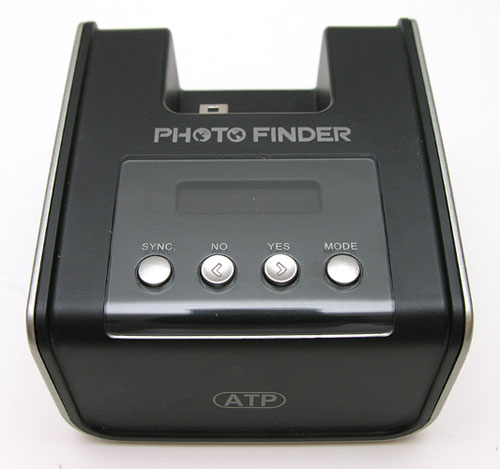
The dock has a small backlit LCD display and four buttons to navigate menu options.
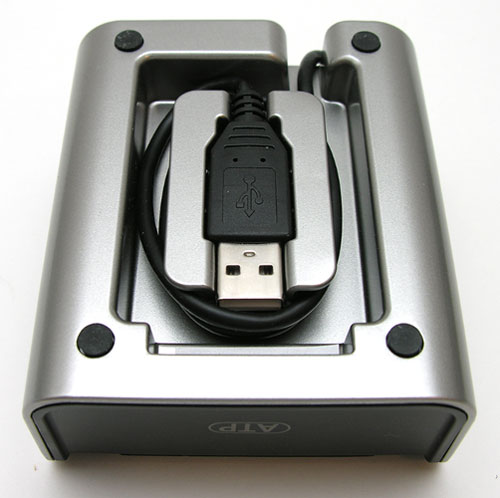
It uses USB for power and has a cord built right in, that be stored in the bottom.
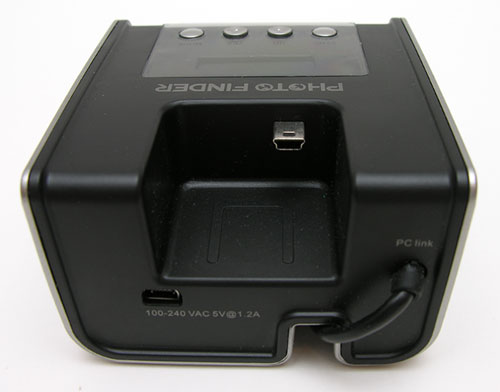
If you don’t want to use a USB slot on your computer, you can use the included AC adapter to power the dock.
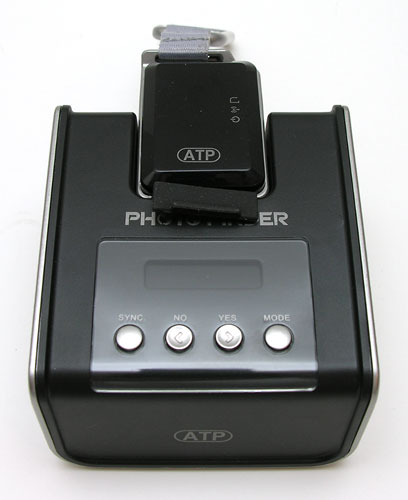
The PhotoFinder connects easily to the dock. Just lift the flap and plug it in.
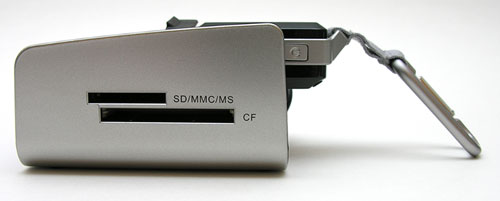
On the Right side of the dock is a SD/MMC/MS card slot and a CF card slot.
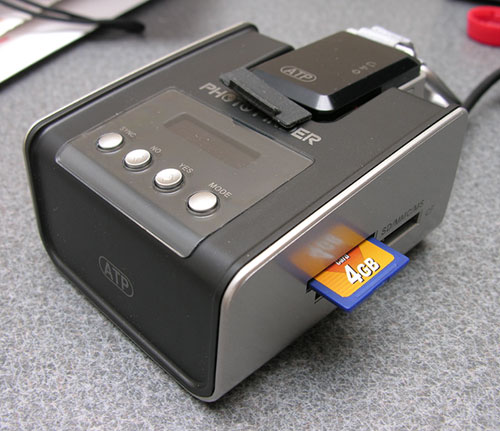
Take the memory card out of your camera and plug it into the appropriate slot.
One surprising thing about the dock is that it can NOT function as a card reader when plugged into your computer. Although you can use the USB cable to plug it into a free port, it will not be recognized by the OS. It just uses the connection for power. Kind of a bummer…

Once everything is plugged in and connected to power, you can start geotagging your photos. Pressing the mode button will cycle between options for Mapping GPS Data, Self-Test, Format System, and Generate KML Data. I’ll talk about KML data later. At this point you want to select is the Mapping GPS Data option. The dock will then check the PhotoFinder mini’s MMC micro card for log files and will check for an inserted memory card from your camera in the dock.

It will then show you the message shown above. This is a VERY important step. You must set the correct GMT offset for your time zone. This wouldn’t be any big deal except for the fact that this message only stays on the screen for about 10-15 seconds. Once that time has elapsed, the message disappears and it will use default setting of GMT+0. Why is that important? Because this is how the dock will match the images on camera’s memory card with the log files in the PhotoFinder mini. If the times aren’t set correctly, you’ll have images with the wrong GPS longitude and latitude settings added to the EXIF-data. I learned this lesson the hard way… I took the PhotoFinder mini with me on vacation to Florida last October. I thought it would be cool to be able to include some fun images showing the places I visited. But when I came home and did this process, I got distracted and didn’t set the Time Zone setting. As a result, I ended up with .jpgs that had the wrong locations associated with them. :o(

Assuming that you didn’t screw up like I did, the next step in the mapping process shows the number of files that the dock will try to map GPS data to.

It will then begin the process of writing the EXIF-data into each image on the card that you plugged into the dock. This is a surprisingly slow process. Too slow I would say. I think it took about 15-20 minutes to tag 70 images. Maybe I’m just impatient…

You’ll receive a message telling you how many images were successfully and unsuccessfully tagged. What would cause an image to be unsuccessfully tagged? No log file with a time that also matches the time an image was saved. This can easily happen when the PhotoFinder mini loses its GPS signal acquisition. If you go into a building and take pictures, they won’t be tagged. That’s the nature of this type of product though.
When the tagging operation has completed, you can remove the card and view the EXIF-data.
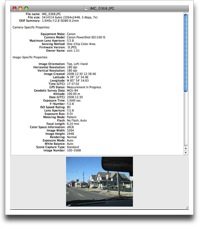
Click thumbnail to see full size image
I just googled for an OS X EXIF viewer and found a free tool that shows the info that you can see in the image above. That data is all well and good, but unless you’re some kind of GPS savant, seeing longitude and latitude coordinates are not going to mean all that much to you. That’s where Google Earth, Picasa and a service called Locr come in.
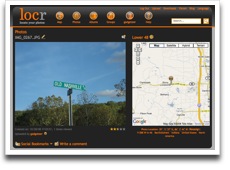
Click thumbnail to see full size image
These services will allow you to upload your photos and view their location on a map.

The PhotoFinder mini dock has another feature that will create KML files from the logs. KML files (Keyhole Markup Language files) are special files that Google Earth and other applications can read to show the path that you’ve traveled with the PhotoFinder mini.
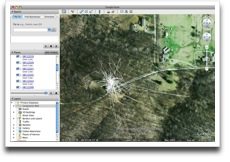
Click thumbnail to see full size image
Hmmmm, looks like I was busy walking all over my property. Pretty cool…
While it isn’t perfect, I think that the PhotoFinder mini has been improved from the previous version that Bill reviewed. I really only have two main complaints about it. The mapping operation and KML file creation processes are too slow and need to be sped up considerably. My only other complaint is that the Time Zone setting part of the process needs to stop and wait for you to enter something instead of timing out. It would be nice if it saved your time zone setting as well. Other than that, the PhotoFinder mini is easy to use and will make your photos remember things that you will never remember on your own.
Right now the PhotoFinder mini is only available in Europe at Amazon.co.uk and soon Expansys.
Product Information
| Price: | £97.28 |
| Manufacturer: | ATP Inc. |
| Pros: |
|
| Cons: |
|

Gadgeteer Comment Policy - Please read before commenting
If you use a Nikon Pro SLR camera and got a Bluetooth GPS then this is the ultimate solution:
Foolography Unleashed, I use it with my Holux 240 for almost a year and there is nothing I have to do to get the GPS data to the exif files Just turn the GPS on and start taking some pictures :)..
Foolography also have the Holux 240 in a slightly modified version that fits to the Nikon Pro SLR with a special cable called Geotrigger 240.
here´s some pictures
My main complaint regarding the original product still stands (at least I hope it made it into the review). Why can’t they simply assign the last GPS fix to any photos shot after GPS signal is lost? This would just be a software fix.
For example, if I walk into a gym in Knightstown, Indiana, all the shots I take inside would be assigned the location fix I got in the parking lot just before I went inside.
While this could result in shots getting assigned a bad location, in my case, the vast majority of the pictures I take will never get a location assigned. If the potential for bad data is the holdup, make it a switch in the program. Let me opt to “Assign last known position”
Just sayin’
I found a better link: http://photofinder.atpinc.com/
Does anyone know if it would work with RAW images? I use an Olympus DSLR and tend to save everything in their .ORF raw format. (For those of you who don’t know, using RAW gives a bit more exposure latitude and prevents ruined photos from WB errors, at a cost of disk space, shorter bursts, and slightly more post-processing.)
Seems overly complicated. Suggest you look at the Eye-Fi. It does geo-tagging using wifi hotspots. I have one, but don’t use the tagging feature. The auto upload feature is fantastic though.
Bill
Don’t buy the Photofinder mini.
No support at all from ATP, 3 emails without response.
No manual that explains in detail on how to use the device (see your problem with the time zone) or the software.
Does not recognize memory card larger than 2GB.
Too slow – for 900 pictures of a wedding it took several hours.
And worst of all – it screwed up 1/3 of the photos by overwriting some photos with another photo or just erased them completely (fortunately I had transferred the photos to my laptop before!).
Do not buy this product. It is not easy to use. Support from ATP is not satisfactory at all. Lastly brand new product I bought first was defective from the start. It is a waste of money.
Looks like it won’t be device I will buy..
I have owned this device for almost two years now and it has let me down every single time I have used it. I can not stress enough for people to look else where for their GPS tagging needs.
I have have had the Photofinder Mini since it came out. I had the predecessor as well. I agree that the interface is clunky, and that support from ATP is minimal. However, the device works perfectly for me. I recognize the limitations of GPS technology (must have clear view of the sky) and time zone problems.
My solutions: I always set my camera to Universal Time. That way I can travel wherever I want and there is never doubt about what time I actually took a picture. That also solves the geotagging timezone problem.
I use software in my computer to tag all my photos after backing them up using the log files from the Photofinder. I use “Geosetter”. this goes much faster than the mini dock.
I prefer using Photofinder to using a GPS inside a camera. I tend to turn my camera off to preserve battery life. That will confuse a GPS inside the camera. The battery in the mini lasts plenty long enough for a full day’s shooting.
Finally, since all GPS receivers need a direct line of sight to at least 4 or more satellites, a GPS inside a camera on a camera strap is often blocked by the photographer or his paraphernalia. I put the mini inside my hat. This gives the best sky access and nearly perfect records of my movements. BTW, in cities with big buildings, GPS reception is also sometimes not perfect. Automobile GPS systems guess under those conditions based on speed being driven and location of roads. Hand carried devices tend not to do that, since the carrier is usually not on a road anyway.
Hi, a lot of time have gone by since this post was written. I was wondering if you had any new recommendations for GPS tagging in 2020… well, almost 2021 🙂
Thank you
The advice above still holds. I still have and use the ATP. However, I have also acquired in the meantime several more GPS devices: one by GSat and two by Canmore. All work about the same and can be recommended. I carry one, and leave one on board a ship (if we are on a cruise) so I can map out what the ship is doing while we are on land. And I will also leave one on a tour bus while we are walking around for the same reason.