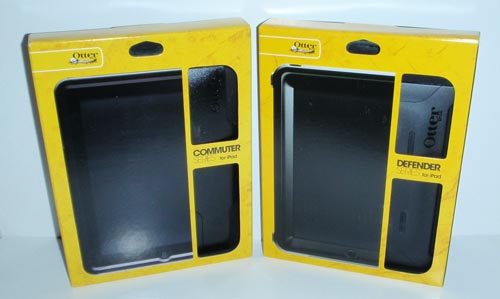
I reviewed OtterBox’s Commuter and Defender cases for the Storm 2 earlier this year. They are rock-solid cases that provide uncompromised protection for my Blackberry. To this day, I use them regularly, switching between the two (and other cases as well) depending on what I am doing and the level of protection I want to give my phone. So, when OtterBox came out with iPad versions of their Commuter and Defender cases…..I jumped at the chance to try them out.
OtterBox is known throughout the tech-world for producing cases that do a great job of protecting your electronic gear. Cases well designed and perfectly fitted for their intended device.
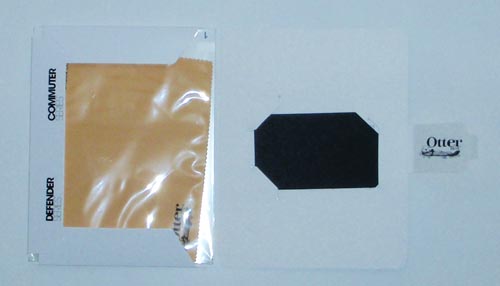
To begin, both cases include a screen protector and installation kit. The screen protector needs to be installed prior to putting either case on your iPad. This is due to the edges of the screen protector sit under the rim of both cases.
OtterBox Commuter Case
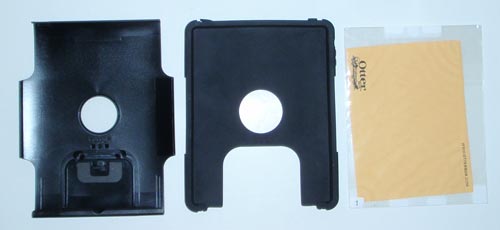
The OtterBox Commuter case consists of three (four if you count the screen protector OtterBox includes) pieces; soft, inner silicone wrap, hard plastic outer shell, and removable access panel for syncing/charging your iPad.
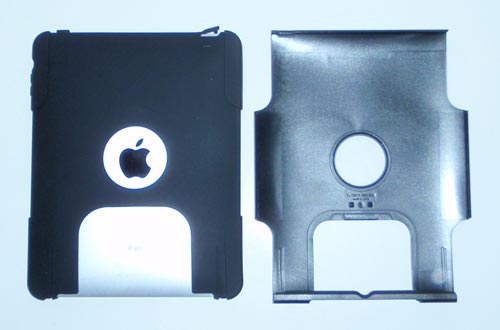
The form-fitted silicone wrap is installed first with the rigid hard plastic shell placed on top of the wrap to hold it firmly in place. The silicone wrap is designed for the shell to sit snugly into it’s cutout space, gripping all four sides of the wrap to the iPad.
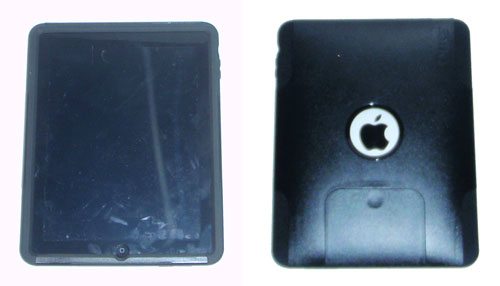
It takes a fair amount effort and a bit of TLC to get the Commuter on the iPad but once in place the case fits extremely well. The Commuter does a much better job of holding the inner silicone portion of the case in place than the case-mate iPad Hybrid Tough Case I reviewed a few months ago. The Commuter weighs 7.2 ounces and measures 9.84 x 7.73 x 0.79 in; adding a bit of weight and bulk to the iPad….but a fair trade considering the protection it provides.

The top of the case allows access to the earplug port, a cut-away for the mic, and push-thru for the power button.

The right side has a cutout for the screen rotation lock and push-thru for the rocker volume button.

The bottom has a cutout for the speaker grill and back access panel.

As with the iPad, there is nothing of note on the left side of the case.

As you can see, the cutouts, push-thru buttons, and access ports are very well designed and will definitely stand the test of time.
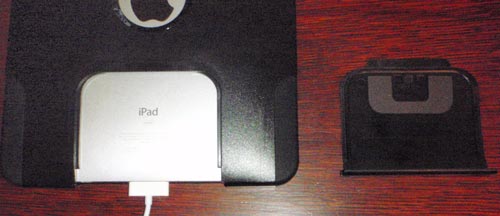
The back access panel allows for you to charge the iPad without having to take it out of the Commuter. This cutout also allows for the iPad to sit in Apple’s charging/keyboard cradle.
OtterBox Defender Case
The Defender case for the iPad provides unparalleled protection. As a comparison, the Defender is the Commuter’s big brother who works out a lot and might use steroids on occasion. If you take your iPad into rough and tumble situations, this is the case for you.
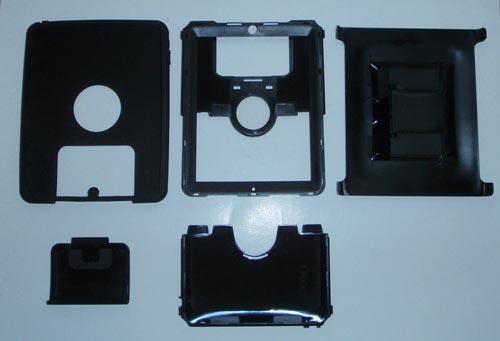
Putting the Defender on your iPad is similar to doing a jigsaw puzzle. Unlike the Commuter case, the hardshell plastic layer goes on the iPad first, followed by the silicone wrap.
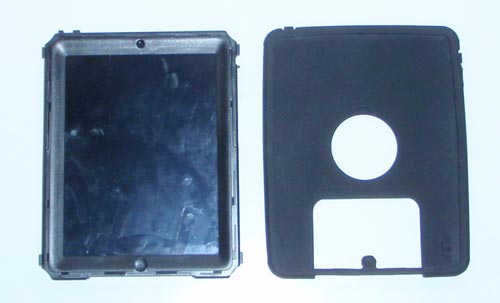
The interior case has two pieces that click together and is extremely form-fitted and snug on the iPad (so much so, I had to remove the ZAGG full-body invisibleSHIELD I had installed to get the iPad to fit….I was quite bummed). Then the silicone exterior wraps around the hard inner pieces, locking everything in place.
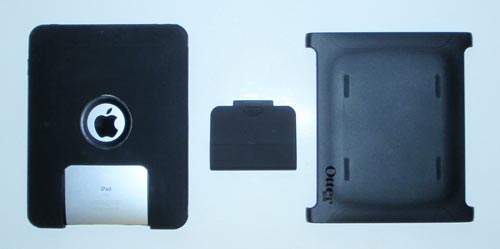
From an operational standpoint, once installed, the Defender has three pieces; the main case, back/bottom access panel, and front cover.
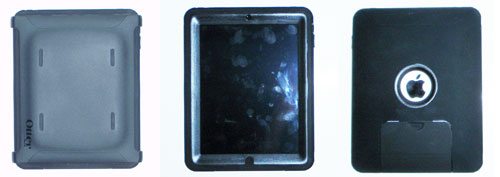
The Defender weighs about half as much as the iPad itself, at 12.0 ounces and measuring 9.99 x 7.89 x .094 inches it definitely adds weight and bulk to the iPad. The combination weighs almost as much as a MacBook Air.

From a usability/functionality point of view, the Defender allows access and use in the same ways the Commuter does. The top of the case allows access to the earplug, a cut-away for the mic, and push-thru for the power button.

One difference between the two is that OtterBox engineered four hard-points, two on each side, for the hard plastic screen cover to attach to. The cover clicks securely into place. The right side has a flap covering the cutout for the screen rotation lock and push-thru for the rocker volume button.

The bottom has a cutout for the speaker grill and back access panel.

Other than the cover’s attach points, there is nothing of note on the left side of the Defender.

The access points on the Defender are hardier than the Commuters. The earplug port is more or less the same but the rotation lock/switch has a silicon flap cover. Both flaps do a great job protecting those critical points on the iPad.
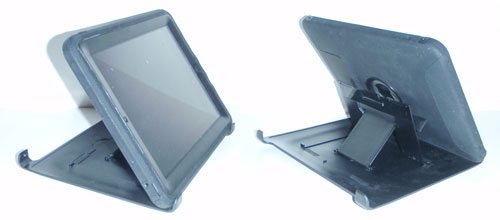
OtterBox engineering the front cover to double as a stand is shear brilliance!!! Not only does the cover do a great job of protecting the screen but is a nice enough iPad stand/holder as well. The stand/cover only holds the iPad horizontally (but not vertically)….which is fine enough.

There were several places on the Defender where I could not get the silicone exterior to fit perfectly into the slots of the inner hard plastic layer.

It was a minor irritant that did not distract from the Defenders ability to protect your iPad, but it will allow dust and materials to more readily get between the case’s two layers.

The back access panel of the Defender works the same way as the Commuter’s does. It allows for charging and ability of placing the iPad vertically on Apple’s iPad charging and keyboard cradles.

I like and will continue to use both cases to protect my iPad from the perils of daily life. Which I choose will depend on how much protection I need. The Commuter is ideal protection for the day to day grind; a nice weight/bulk vs protection ratio. The Defender does provide a great deal more protection than the Commuter. But that added protection comes with a price of a lot of extra weight and bulk. The Commuter and Defender cases are not inexpensive, $65 and $90 respectively, but you definitely get great protection, perfect fit, and good quality for the money.
Gerber Gear 22-47162N Fast Draw Folding Assisted Opening Pocket Knife, Fine Edge, Black
$41.21 (as of January 28, 2026 17:22 GMT -06:00 - More infoProduct prices and availability are accurate as of the date/time indicated and are subject to change. Any price and availability information displayed on [relevant Amazon Site(s), as applicable] at the time of purchase will apply to the purchase of this product.)Gerber Gear EVO Jr. Folding Knife - Serrated Edge [22-41493]
$28.99 (as of January 28, 2026 17:22 GMT -06:00 - More infoProduct prices and availability are accurate as of the date/time indicated and are subject to change. Any price and availability information displayed on [relevant Amazon Site(s), as applicable] at the time of purchase will apply to the purchase of this product.)Product Information
| Price: | Commuter: $64.95 Defender: $89.95 |
| Manufacturer: | OtterBox |
| Pros: |
|
| Cons: |
|


Gadgeteer Comment Policy - Please read before commenting
I’ve used the Defender since it came out and after a little wiggling got all the silicone places to lay down flat. It is HEAVY. But it offers alot of protection — enough I let my 4 and 7 year old play pretty rough with my iPad without worry and so far no problems. My favorite feature is: I don’t worry about dropping my iPad, as the cut out for the Apple logo on the back give a much better ridge to hold onto. The stand built into the cover works great for watching movies on an airplane and is surprisingly solid.
I got the defender a few months ago. Great product. It is heavy, but well worth it for the protection and functionality I got my at amazon for like $60. Commuter was $40.
The Defender’s a HEAVY beast – and a thick one, but provides quite a bit of protection. But it’s a little heavy to be carrying day-in and day-out, unless you’re going into areas where you know it’ll be rough and your iPad and screen need the very best protection. The Commuter’s a lot thinner, but feels like a better balance of weight-versus-protection, although the silicone skin is applied before the frame unlike the Defender.
One thing I noticed with the Commuter when seeing it in-store was that it did have the top lip (unlike the case-mate Tough), but it still doesn’t cover the corners. How easy is it to roll the corners up, or the edges which aren’t clamped down, as a result? I’m worried about things getting into the corners there to infiltrate the device.