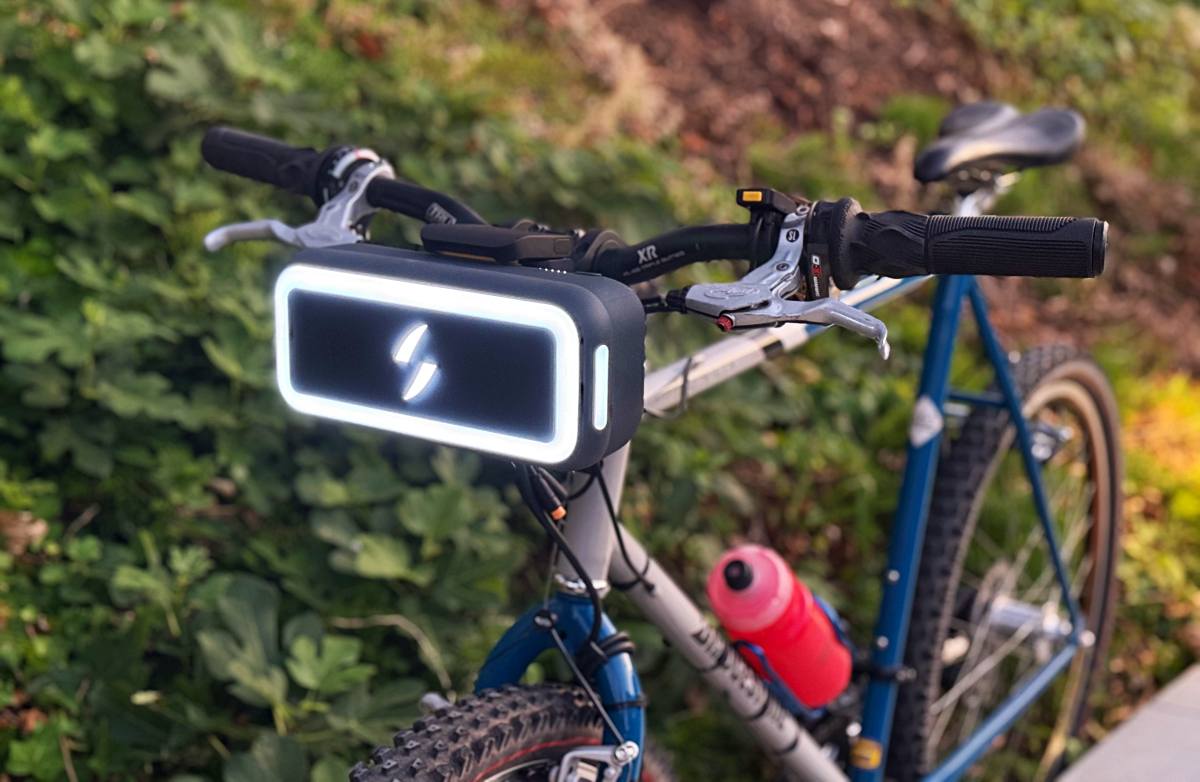
REVIEW – If you that review headline seems familiar, you’re not imagining things. In July ’24 I reviewed the Swytch Go, further back was the Swytch Air in January ’23, and in November ’19, the Swytch Universal eBike Kit, AKA the one that started it all. This time around Swytch has evolved the battery system that started with the Air, while keeping many of the familiar components that continue to keep working just fine. One of the big changes here is the headlight built into the battery. Let’s dive in.
⬇︎ Jump to summary (pros/cons)
Price: from $1,300 (£1,000) depending on battery size and component selection. Big discounts (like up to 50%) can be had by pre-ordering for their next production run, so don’t let that price scare you too much.
Where to buy: Swytchbike
What is it?
The Swytch Max+, also called a Universal eBike Kit when browsing their site, is a comprehensive kit that converts an existing bicycle into an eBike. It’s a relatively simple assembly process that almost anyone will be able to do. The full kit includes a wheel with hub motor, a small display, and a handlebar mounted controller/clamp that securely holds one of the Max batteries and a cadence/pedal sensor.
What’s included?
Since I’ve reviewed a couple of these Swytch system now, I only needed the parts to convert a prior build to the new tech. As a result I received…
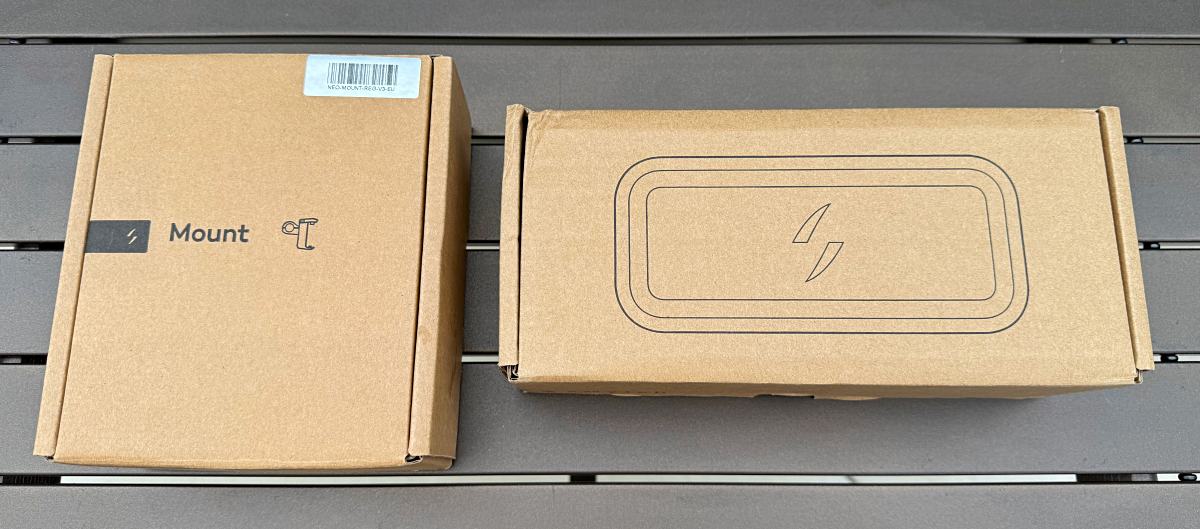
- Max + Battery
- Handlebar Battery Mount
If you were to order a full kit, you would also receive a wheel with integrated hub motor, electronic display/switch with thumb controls, and a pedal sensor with cabling. You can see all of these in the Assembly section below.
Tech specs
Max Battery Pack Options
– MAX: 180 Wh | 228mm x 100mm x 35.5mm | 2.5h charge from standard 2A charger
– MAX+: 274.5 Wh | 228mm x 100mm x 74mm| 4h charge from standard 2A charger
– MAX+: 361.8 Wh | 228mm x 100mm x 74mm| 5.4h charge from standard 2A charger
Spec4
Design and features
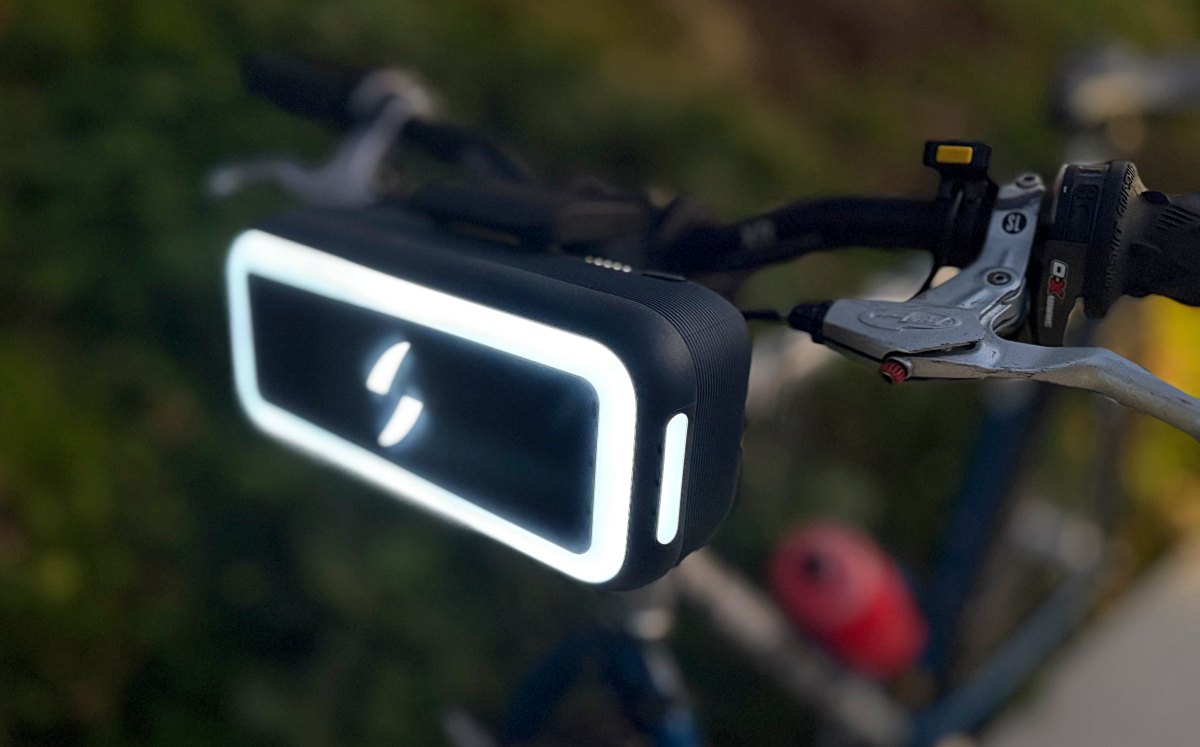
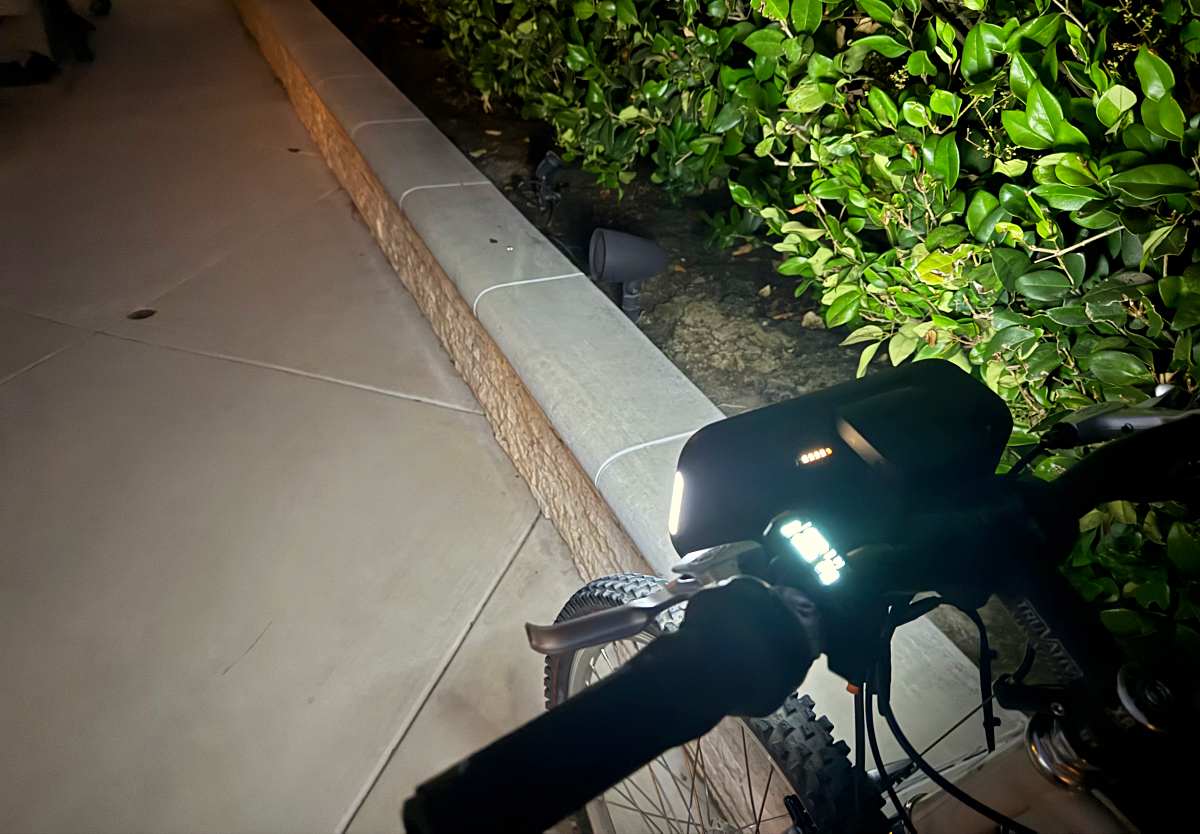
As mentioned up above, the big update is the inclusion of the headlight. It’s pretty bright, and between the forward illumination and the light bar on each side, it will definitely aid in making sure others (especially cars) see you.
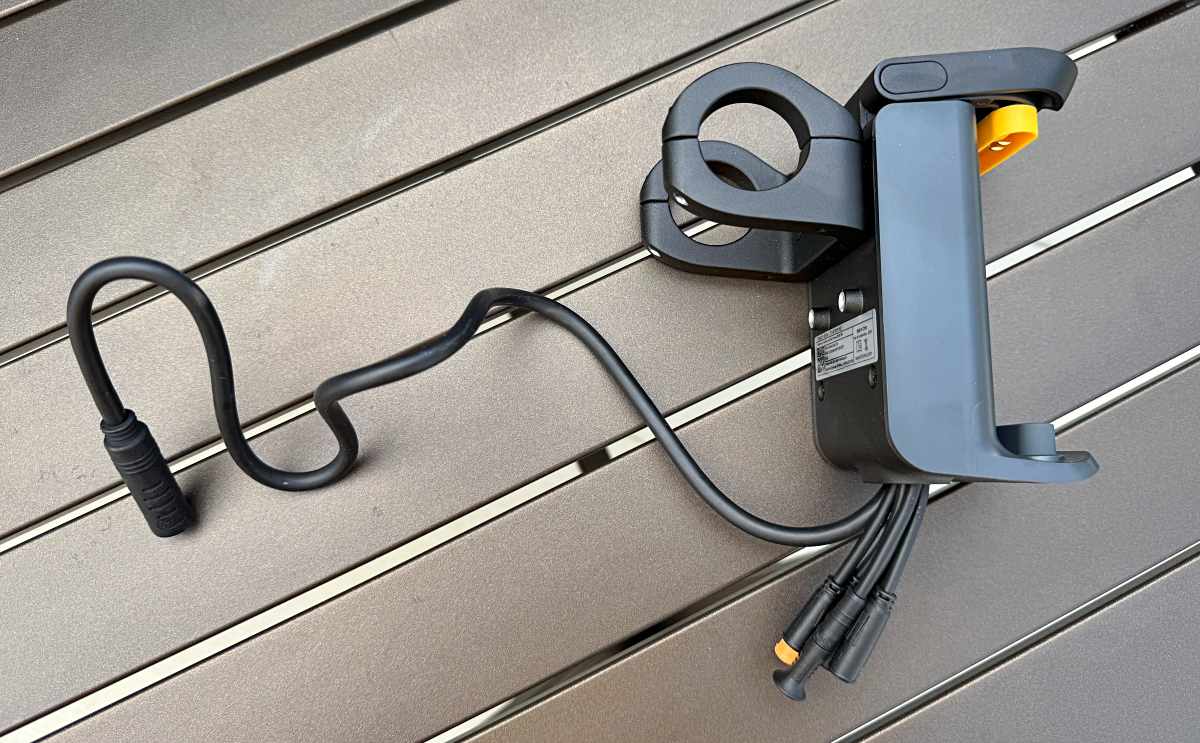
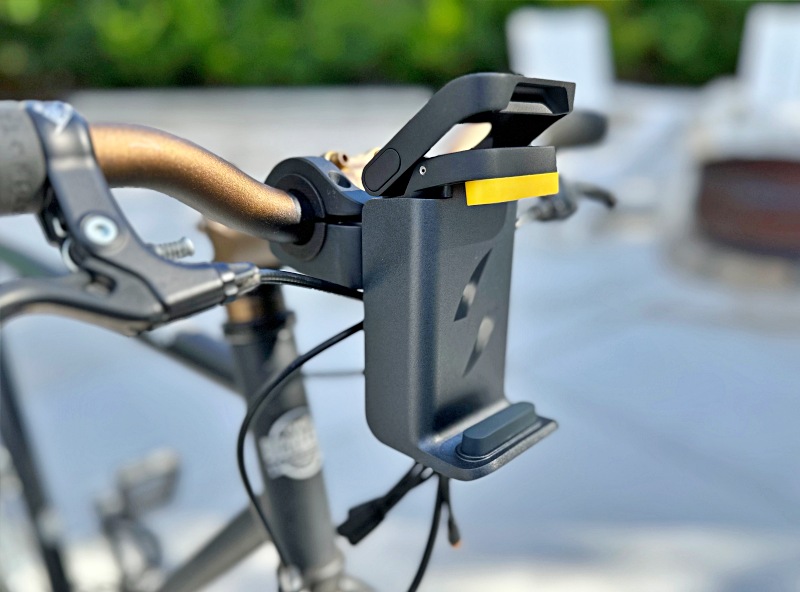
The mount houses the controller and installs onto your handlebars, connecting to the motor and your cadence/pedal sensor letting the system work as a whole. The additional cables hanging down allow for the addition of brake sensors and/or external lights.
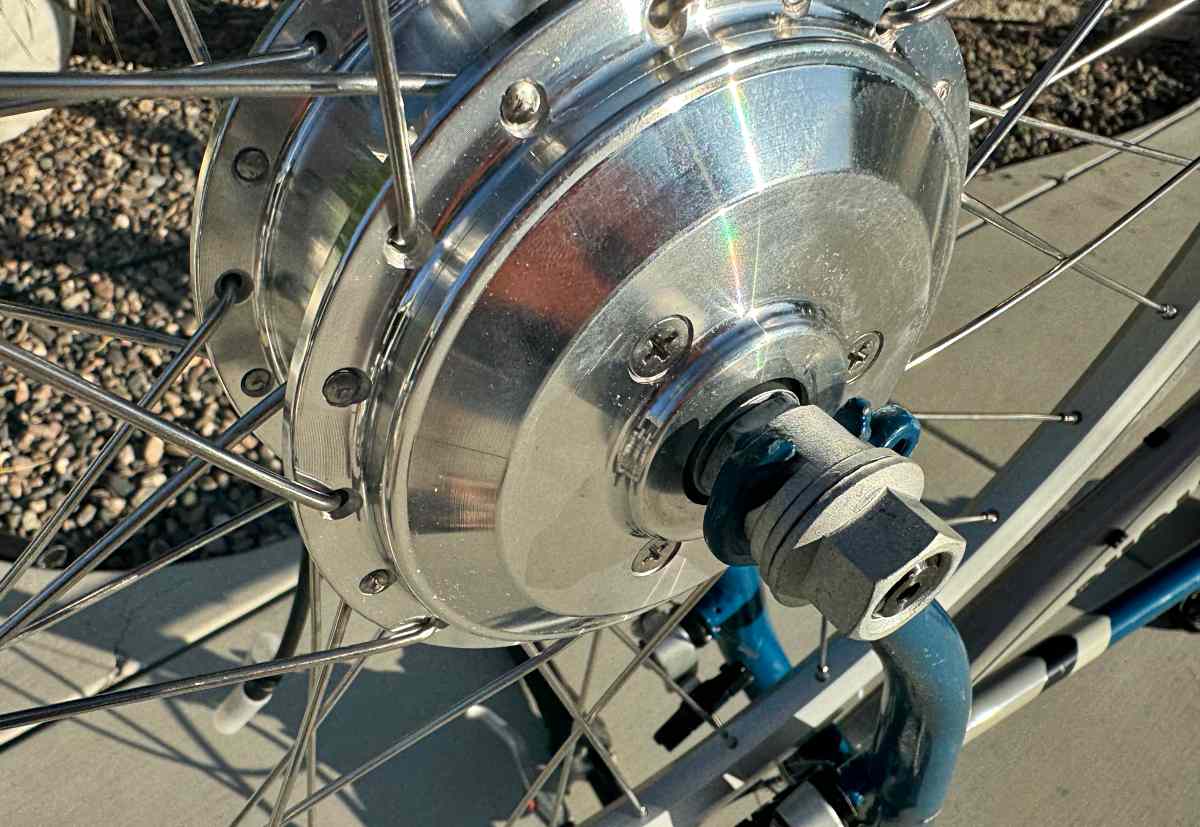
A front wheel with integrated motor hub is part of the full kit. This is a wheel I received with a prior kit. It’s super clean polished silver installed into a silver 26″ rim to facilitate a vintage build I was doing at the time. When you order, you’ll specify wheel size and brake type. The universal nature of their wheel options allow support for almost any bike.
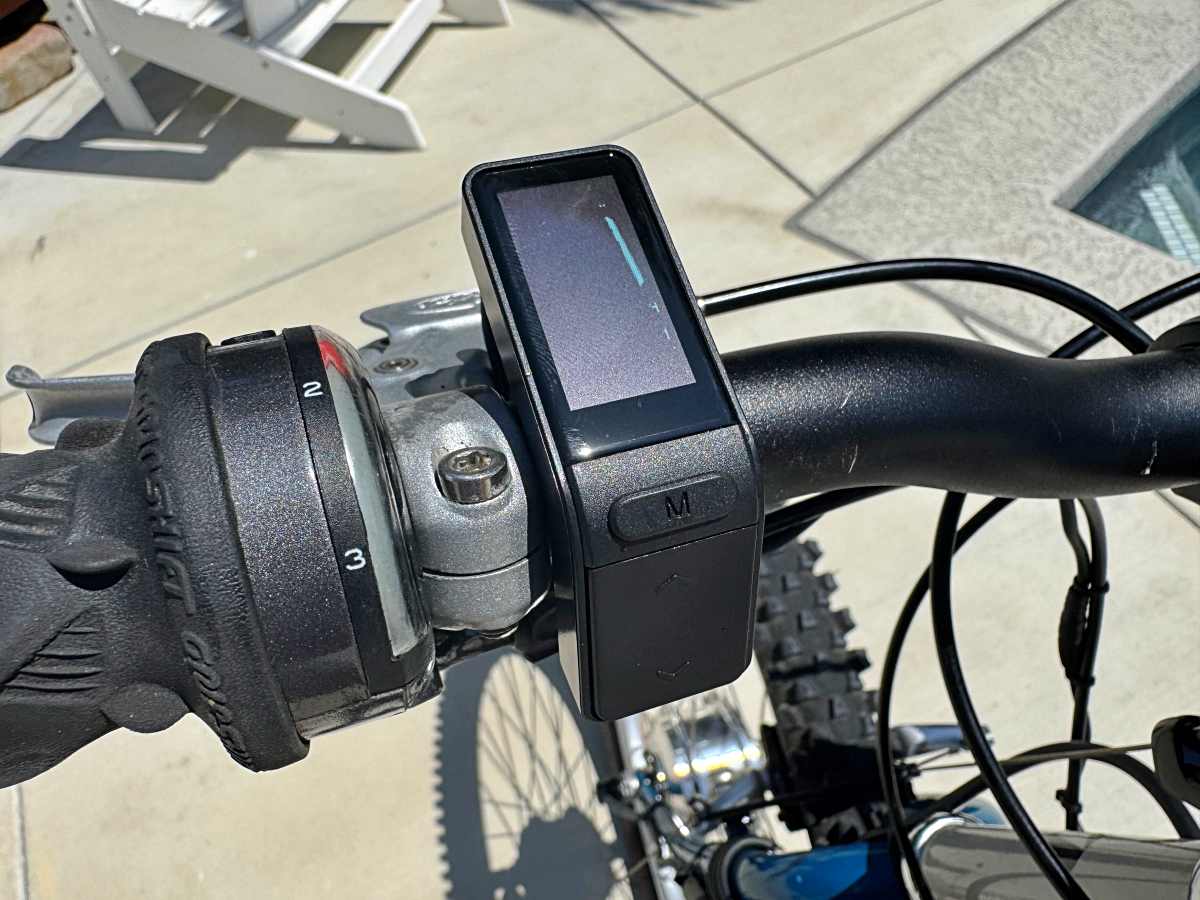
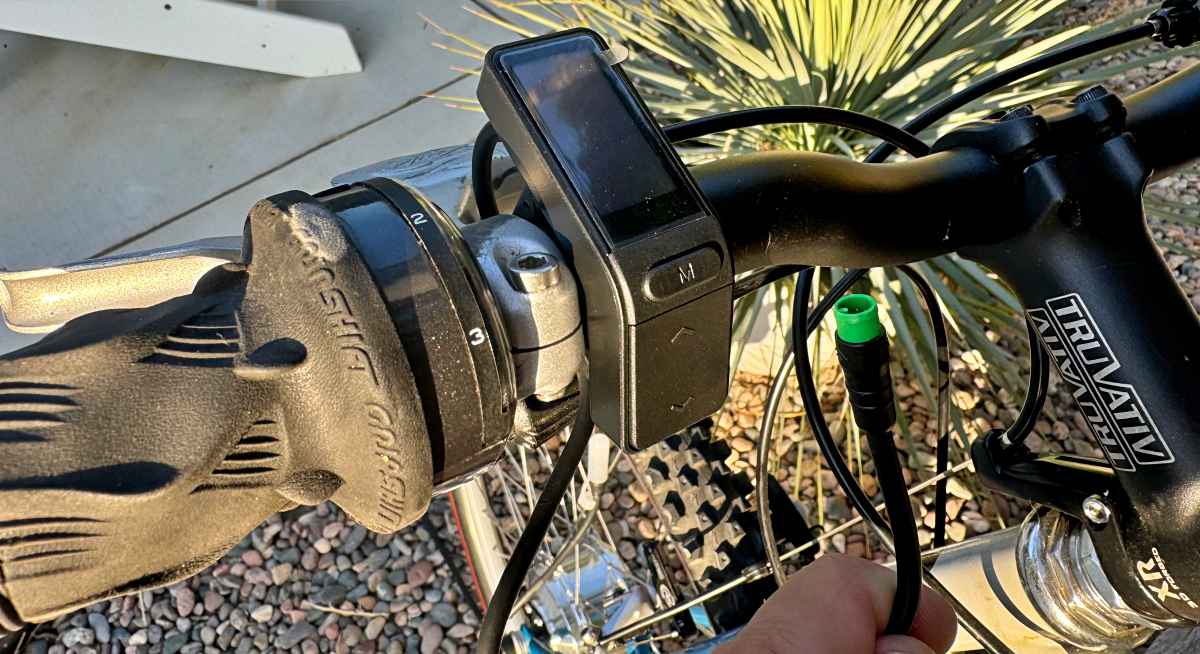
The other key piece you’ll receive is the handlebar display. This lets you power on/off, adjust your assist levels, and provides key data like speed and distance. The refresh rate of the display makes it really tricky to take photos of while on (so that’s not a glitch in the photo).
Assembly, Installation, Setup
Let’s set it up. If you’re starting with your favorite “analog” bike, you’ll start by removing the current front wheel and taking that tire and tube off. Install those on your new front wheel with the hub motor.
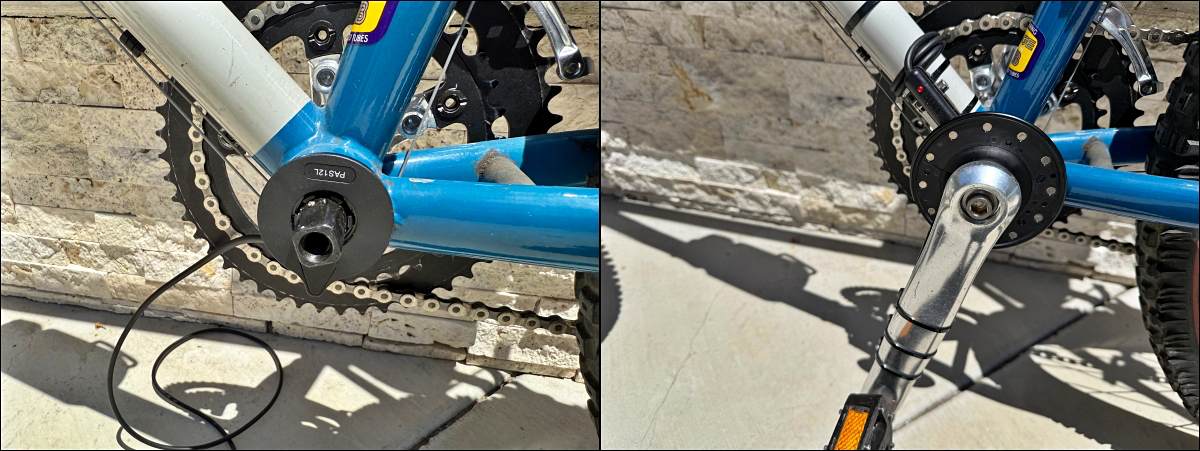
You’ll then install the pedal sensor. There’s a universal version that looks like this. A magnet ring clips around your bottom bracket spindle without needing to remove the crank and then the arm gets secured to the crank arm with cable ties. Additionally, you’ll mount the sensor to the down tube or seat tube and position it so that the sensor sits very close to the circular path of the magnets.
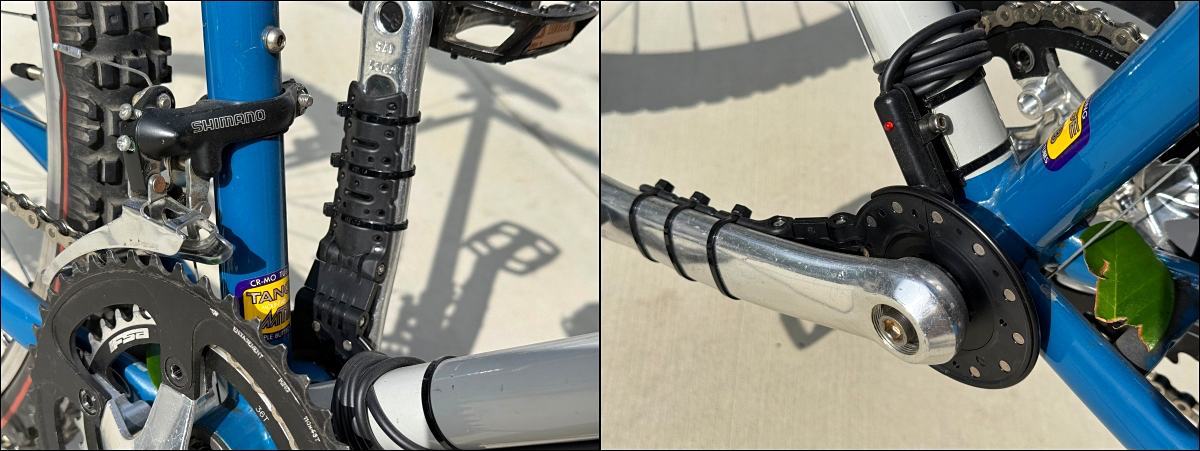
That’s shown on the left below. There’s also a second option if you have a compatible Shimano bottom bracket shown on the right below. It’s an all-in-one sensor, but it does require that you remove the left crank to install.
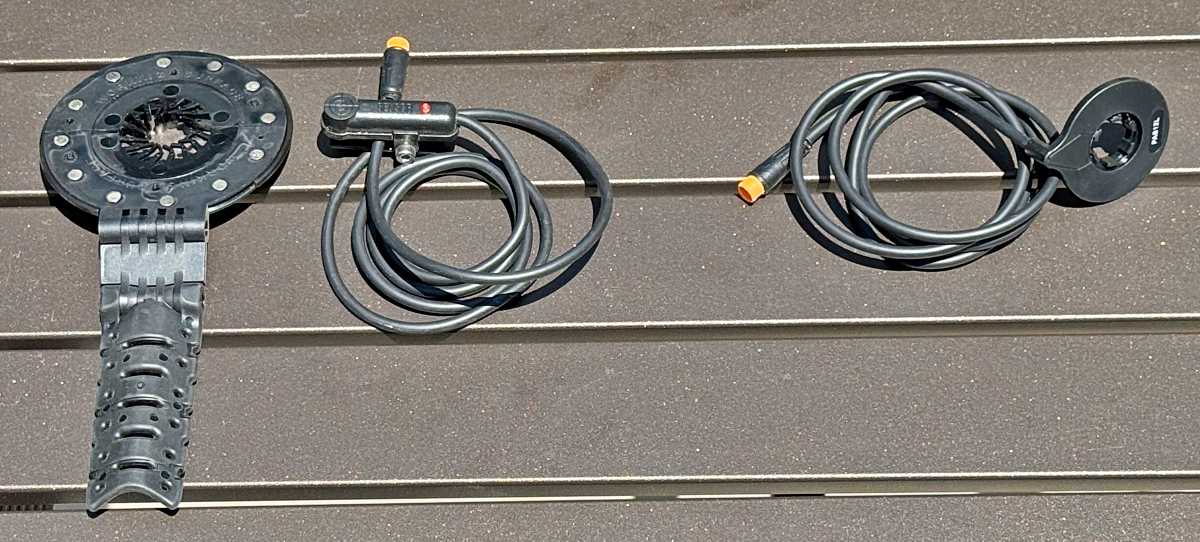
While the circle itself is close to the same size, you lose that separate sensor and all the extra cabling that goes with it shown on the right.
Now you’ll want to install the mount on the handlebar for which you will likely need some handlebar diameter adapters to get the right fit. Those are included for 3 different sizes including 22.0 and 25.4 which are the most common sizes. The clamps on the mount are installed with 4 bolt, two that remove down and two that remove up.
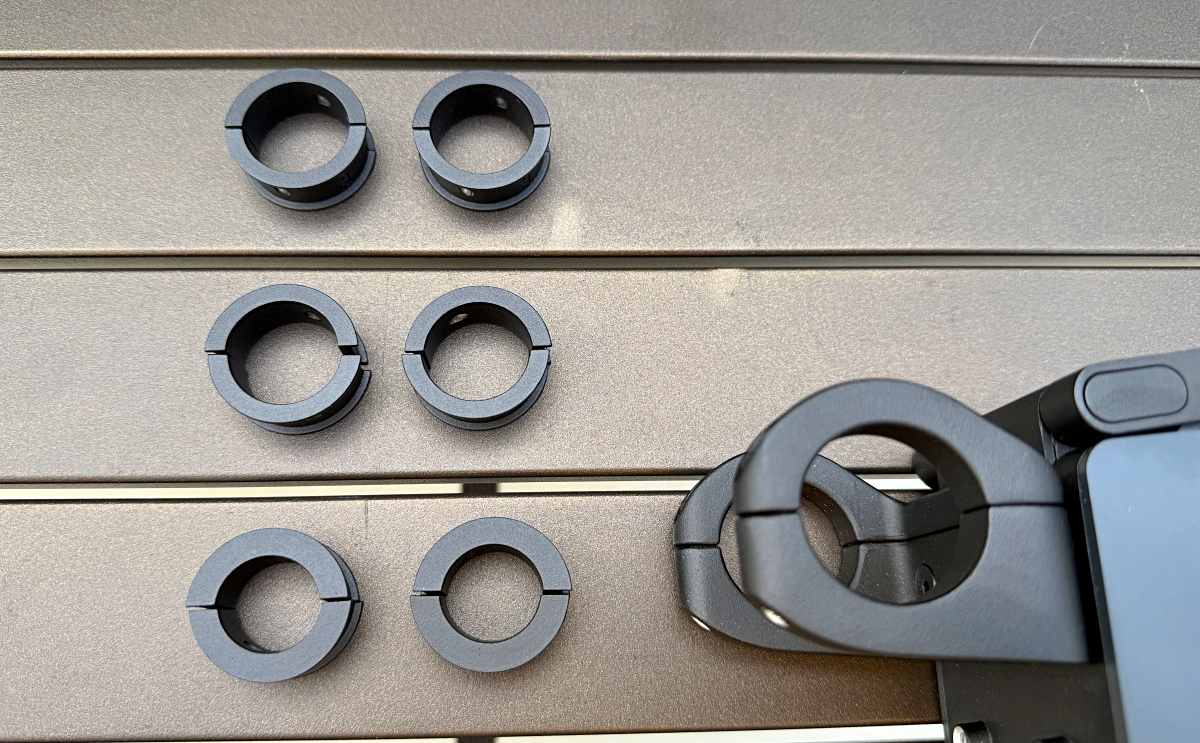
I needed the 25.4 adapters.
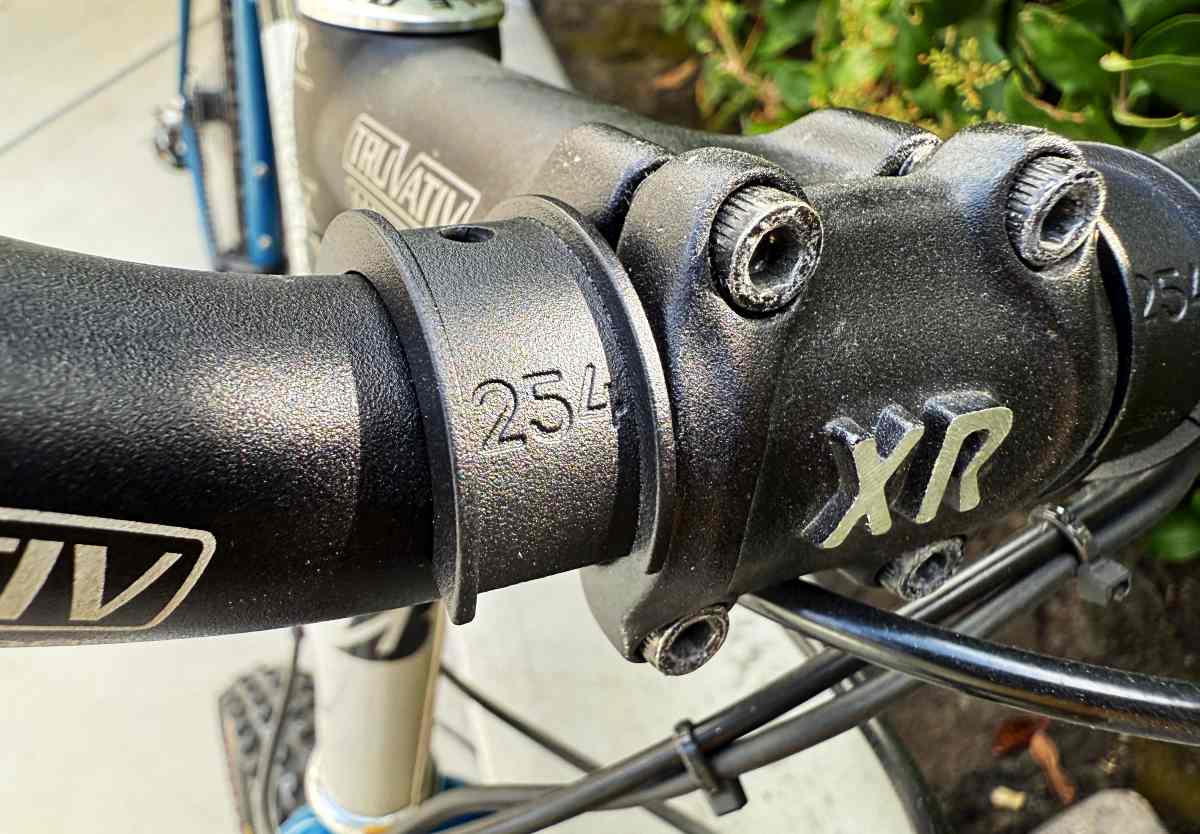
Here’s an image of the mount from a previous install. Works exactly the same way.
The last part of any custom install like this is cable management. Below are a few examples. From left to right…
- Mount to motor. Critical to keep the cable safely out of the way of the wheel, so wrap creatively and use cable ties. Handlebar and forks turn in unison so there doesn’t need to be too much slack in that connection.
- Green connectors are the mount up to the display. Line up the keyed protrusion and push till you hear the snap.
- That connection is next to all these others. One yellow is for connecting the pedal sensor while the others can be used for external lights or brake sensors (available separately)
- This is that motor cable wrapped twice around the fork crown and securely cable tied.
- Further down the fork leg, a few cable ties to really lock down this cable and large connection

Here’s the minimal display and its green connector. It’s one of my favorites due to its small size and very bright display. Installation Note: When installing, do not over-tighten the hex screw. The hinge pin is a weak point on this controller design. It’s used by a lot of different bike companies, so just want to call it out, and I’m not faulting Swytch for that design defect.
Performance
First up, let me drop some links to the previous Swytch reviews where you might be able to pick up some tips if any of the above felt like it was glossing over something or missing a key bit of information. Swytch Go review | Swytch Air review | Swytch Universal review
Those should help as well as showcase how long Swytch has been at it. The components, including wheels, motors, controllers, and sensors from all those kits, are still kicking around here on various bikes. Now lets tackle what hasn’t really changed.
The universal approach has stayed the same. This is key as there’s a lot of customization to any bike to get it to fit properly and work well for you. That’s what makes adding an ebike kit to a bike you already have and love such an attractive proposition. It’s also why this time around I only needed the battery. I asked for a new handlebar mount because the Air system I reviewed is still on my son’s bike. So in this case I was able to update the build from the Go review. Let’s look at that comparison.

On the left is the GO battery and on the right is the MAX+. They are both effectively 280 Wh batteries. but there’s a pretty big difference in size. Here’s what you need to know. The GO battery enclosure is also hiding the controller, which the MAX+ system moves into the mount. Even though the MAX+ has a built-in light, those LEDs don’t take up a significant amount of space.
The other main difference between these two is ease of charging. The GO is easily charged while still on the bike. Yes, you can remove it, but it’s a lot of Velcro to undo, and depending on your cables, it might not be worth the time. The MAX+ on the other hand is removed with a lever flip letting you leave the bike in the garage while you charge conveniently indoors. I think this also makes the bike less attractive to thieves as it’s clear there’s something missing when you see that empty cradle with charging contacts.
So about that headlight. It’s a really cool feature and it’s pretty bright. It’s not going to replace a long-range cycling specific light, but it is absolutely going to make you very visible to cars in front or behind as well as those approaching from the sides since there are side LEDs.
There’s also a USB-C port on the back of the battery for charging your phone if needed. Pretty handy.
Everything else works the same way Swytch systems have from the beginning. Power on/off from the display, set your assist level and start pedaling. It couldn’t be much simpler. Adjust the assist as you go from the display and you’re good to go. If a throttle is of interest, you can order one of those to attach to the extra connection points.
Final thoughts
Swytch continues to do what they already do well while innovating where it will make a difference. This new MAX+ or MAX++ battery is far and away the easiest battery system to use, AND it has a headlight, AND it can charge your phone. You just need to bring a bike to the party and their kit will do the rest.
What I like about the Swytch MAX+ eBike conversion kit
- Absolute simplest battery system out there for ebikes
- Built-in headlight is a great feature
- Simple install to turn your favorite bike into an ebike
What needs to be improved?
- Website could better explain pricing for pre-orders
Price: from $1,300 (£1,000) depending on battery size and component selection. Big discounts (like up to 50%) can be had by pre-ordering for their next production run, so don’t let that price scare you too much.
Where to buy: Swytchbike
Source: The sample of this product was provided for free by Swytch whom did not have a final say on the review and did not preview the review before it was published.


