REVIEW – 3D printers have exploded in popularity in the last few years, and the range of choices on the market can be staggering to newcomers and seasoned 3d printers alike. From the early days when hobbyists were creating their printers from parts and code, they wrote themselves, to the current market where prebuilt printers can have one of many options for nearly every part, it can be hard to know where to start. If you’re looking to print very large items though, your choices narrow considerably. For me, I’m looking for something that is reliable and accurate without costing a fortune. The Mingda Magician Pro 3D Printer has the largest print bed and overall printable volume area of any that I’ve tested yet and doesn’t skimp on other features like auto-leveling and a double-gear direct drive extruder.
What is it?

The Mingda Magician Pro 3D Printer is an FDM (fused deposition modeling) printer capable of printing very large 3D models from plastic and other materials. It turns spools of relatively inexpensive plastic into figures, parts, or doo-dads.
What’s in the box?
- Test PLA Filament
- User manual
- Filament holder
- Installation screws and tools
- SD card with ready-to-print models, manuals, guides, and software
- Extra 0.4 mm nozzle
- Power cable
Hardware specs
- Print volume: 400 x 400 x 400mm (15.7″ x 15.7″ x 15.7″)
- Calibration: Automatic 36 points and/or manual adjustments
- Filament diameter: 1.75 mm
- Materials supported: PLA/ABS/PETG/TPU
- Nozzle: 0.4 mm installed, wide range of nozzles supported
- Extruder: Direct Drive, Double Gears
- Filament runout protection: At the print head
- Power loss resume support: yes
- Max nozzle temp: 260 °C/500 °F
- Max heatbed temp: 110 °C/230 °F
- Heatbed material: coated glass
- Average speed: 80-100 mm/s
- Control panel: 3.5 inch color LCD touch screen
- Print interface: SD card, USB-A drive, and USB-C data link
- Z-axis: Double threaded rod with synchronous belt
- Weight: 14.5 kg
- Dimensions: 65×58.6×67.5cm / 25.5*23.0*26.5in(X×Y×Z)
Design and features
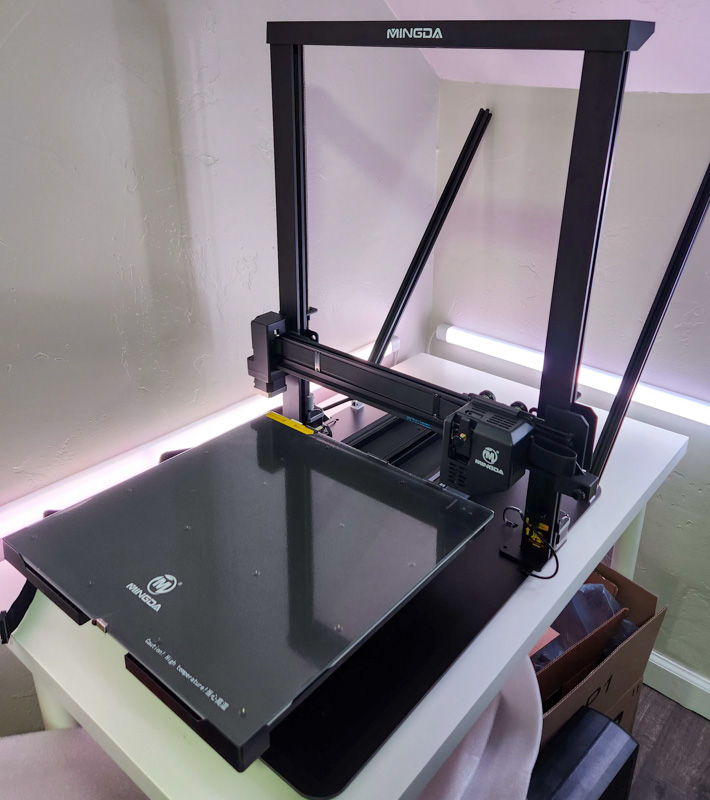
The Mingda Magician Pro 3D Printer feels like a variation on the designs of the past few 3D printers I’ve reviewed. It has the typical Z-axis overhead frame that allows the print head to move along the X-axis, then the Y-axis movement is accomplished by moving the entire bed along that axis. The power supply is contained within the printer itself, along with the touchscreen up front and the motherboard buried within. The entire frame and body is metal and feels very sturdy and solid. I really like the large flat base for stability and will be printing out custom-sized tool bins to sit under the edges of the bed to hold the tools and parts for storage.
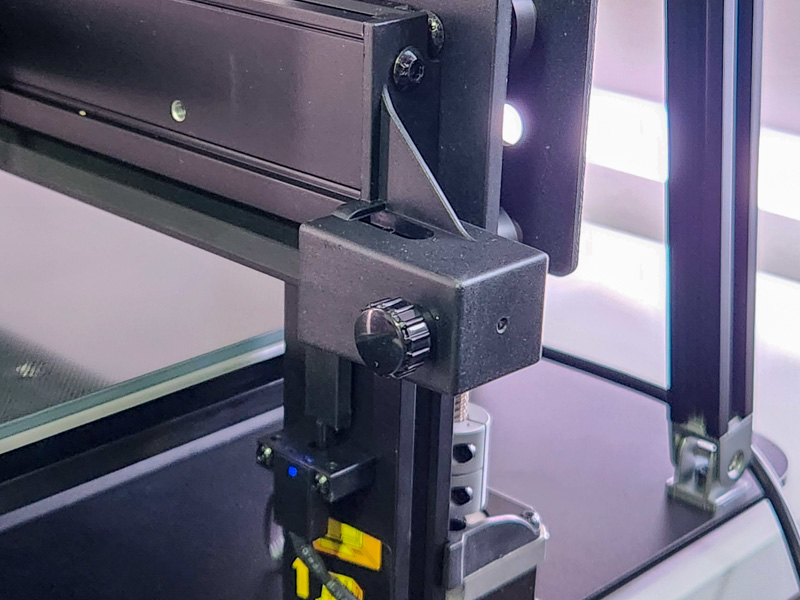
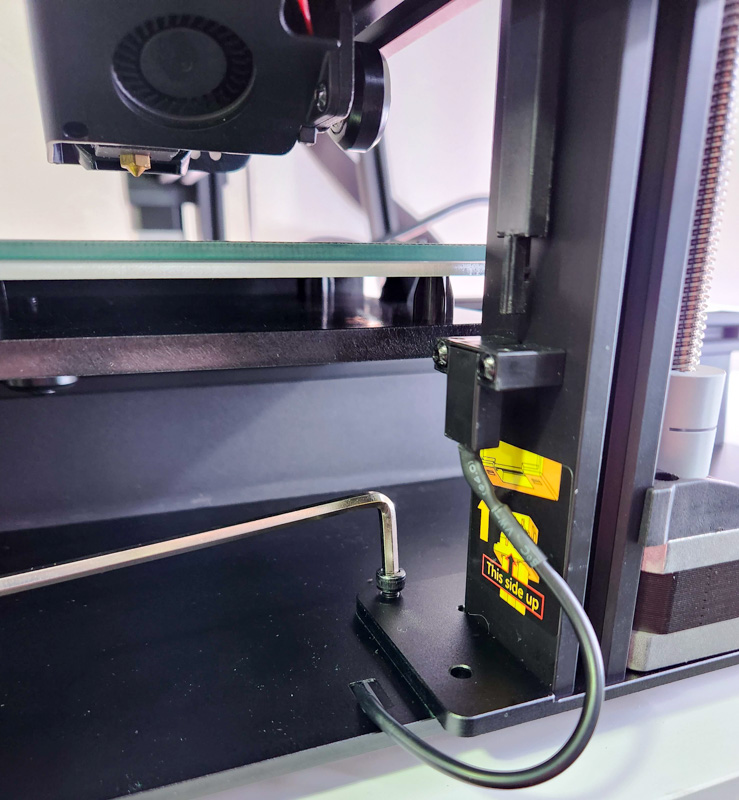
All of the belts can be tightened and loosened with knobs which is very handy. You can also see the Z-axis sensor with the blue light that stops the print head when it gets too low.
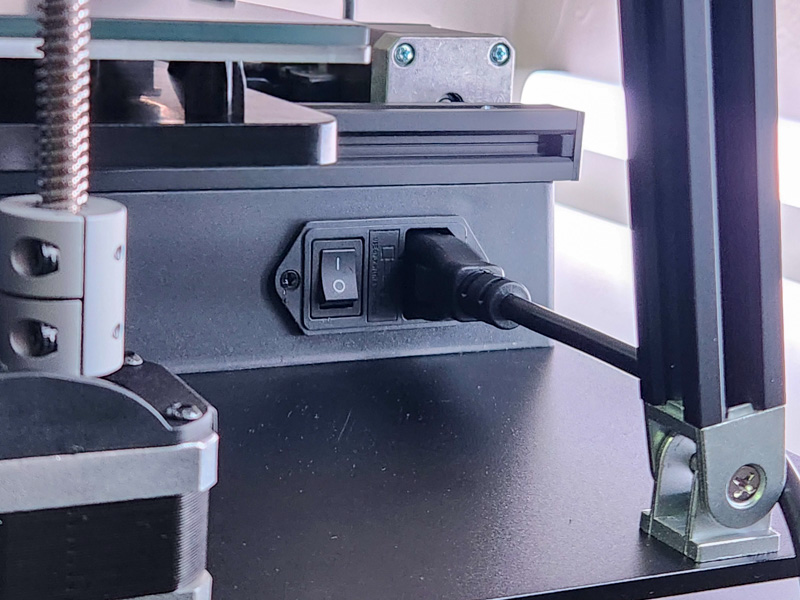
On the back right is the power connection and on/off switch. You can also see the stabilizer arm on the right side of the above picture, and the Z-axis rod at the left side. The Z-axis rods were steady with no wobble or wiggle (which can cause print degradation if present).
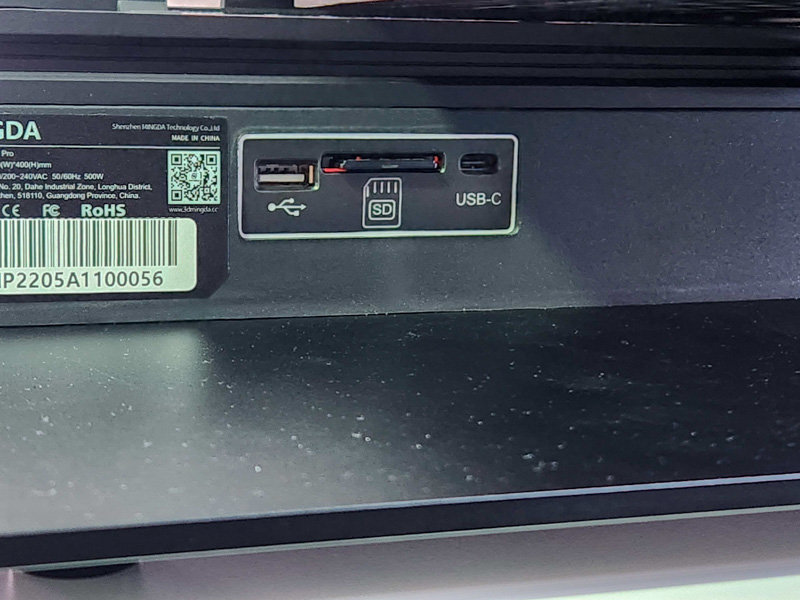
Under the bed on the right side near the front are the 3 options for printing: USB-A flash drive, SD card (4 GB card included with test models, software, and guides and the manual), and USB-C for direct printing control from a computer.
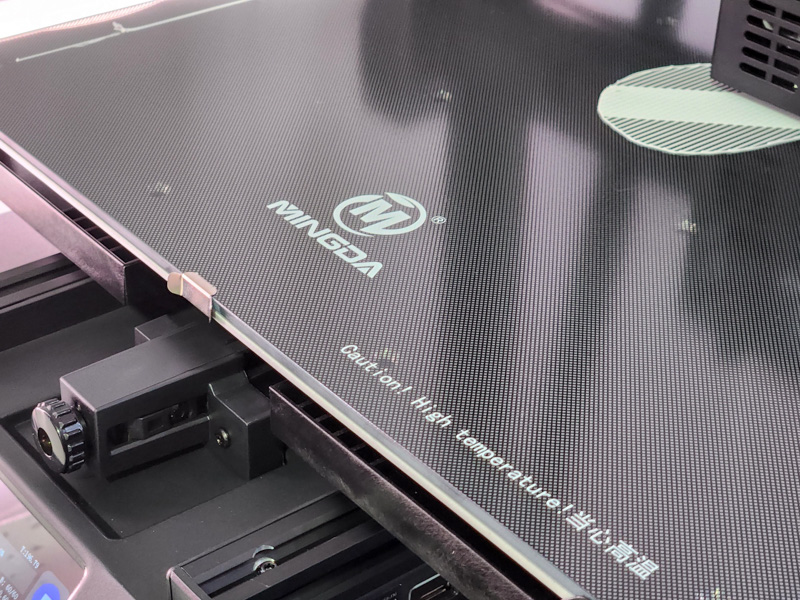
The print bed itself is glass, coated with a sticky texture. I also used gluesticks during testing just to be safe (I hate large prints failing after a day or two of printing if the bed adhesion is lost). After many prints, it doesn’t seem like the original texture is wearing quickly, so hopefully this lasts a while (replacement bed plates are available from Mingda if you do have issues).
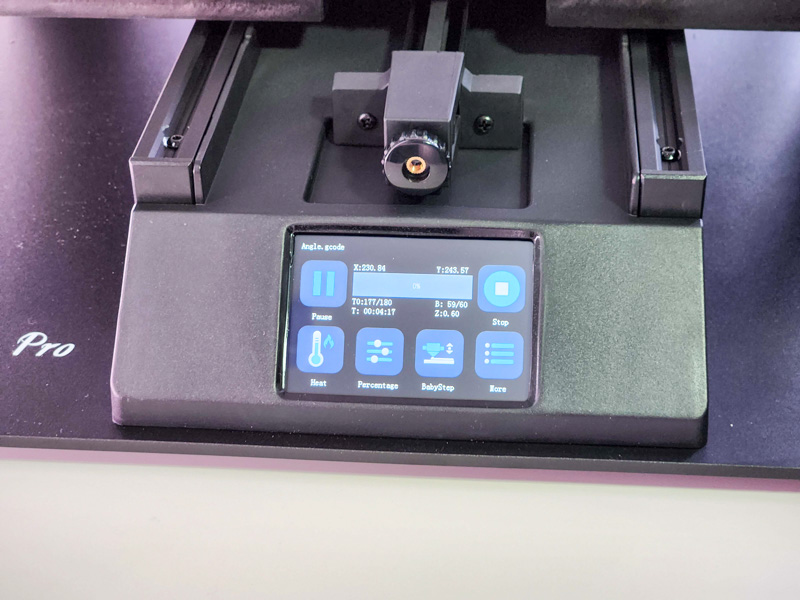
The touchscreen is big enough to see easily and has a fairly intuitive interface – no better or worse than the other couple of brands I’ve tried. The only complaint I’d have here is on the manual leveling screen, the 36 buttons to select different points to adjust are pretty small and I often tapped the wrong one and had to try again. Not a big deal and I think the only solution would be to fit a larger screen in somehow.
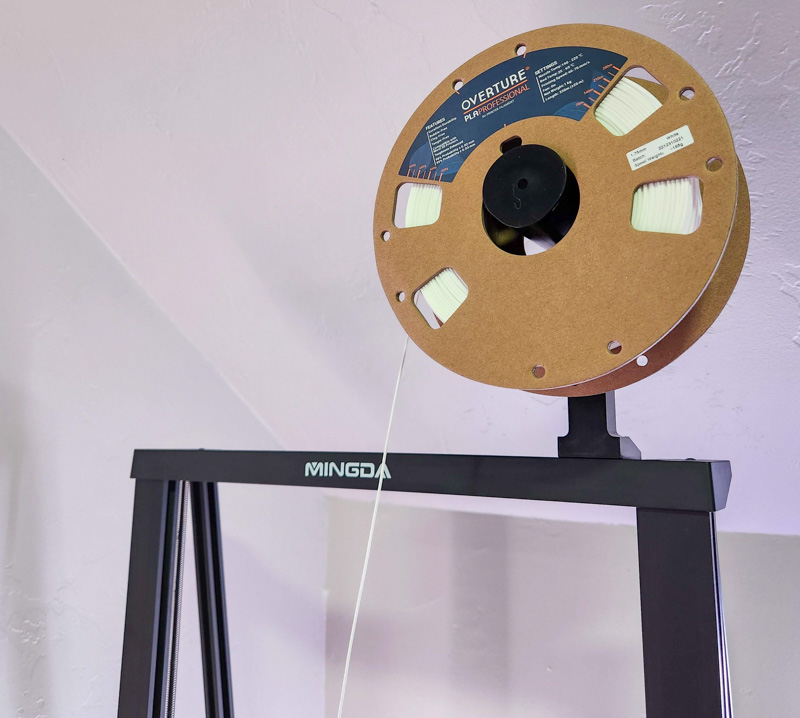
The filament spool holder is located up top and can be on either the right or left side (doesn’t affect functionality either way). This worked well, and I had no issues with filament feeding with various brands and types.
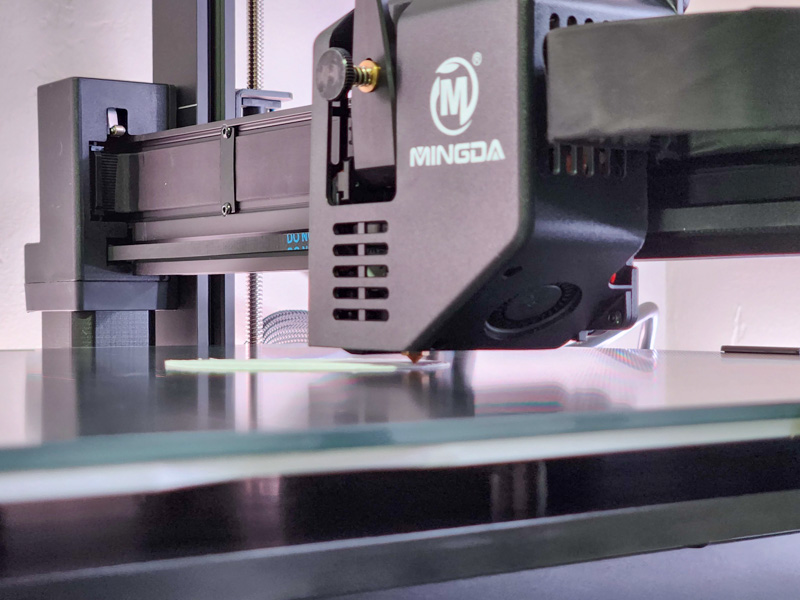
The print head itself is an imposing block of metal, with the nozzle just peeking out under. I love that the filament sensor is right where you feed filament into the head, on all the other printers I’ve tested it’s usually closer to the filament itself, which has resulted in failed prints for me several times when the filament breaks between the sensor and the print head (word to the wise, invest in a filament dryer and dry out your filament if it’s been on your printer a few days – my broken filament was always PLA left out for a week or two that snaps because it becomes brittle).
Setup
Setup was surprisingly the easiest I’ve done so far, given the size of the Mingda Magician Pro 3D Printer.
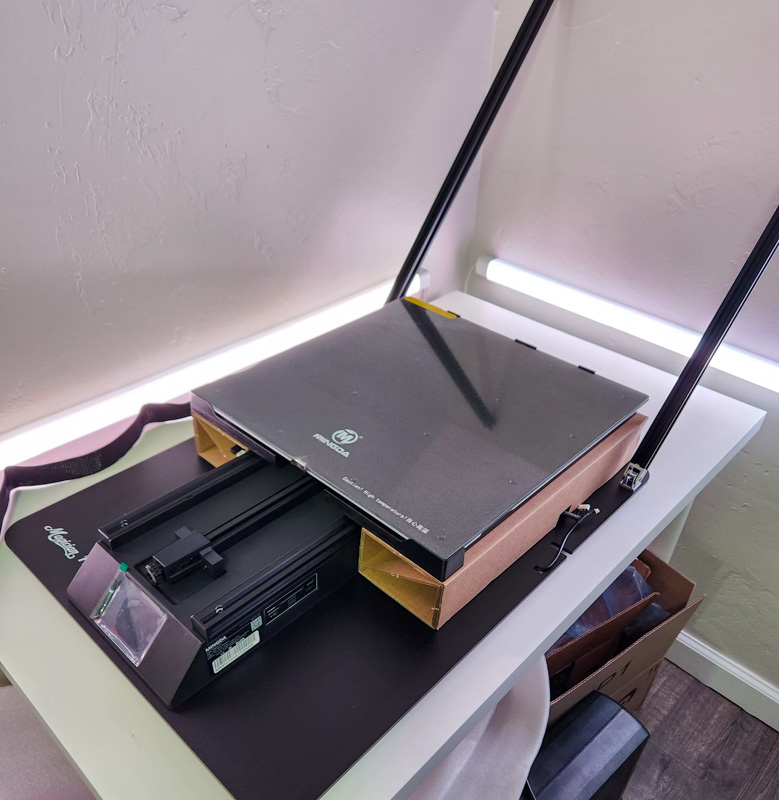
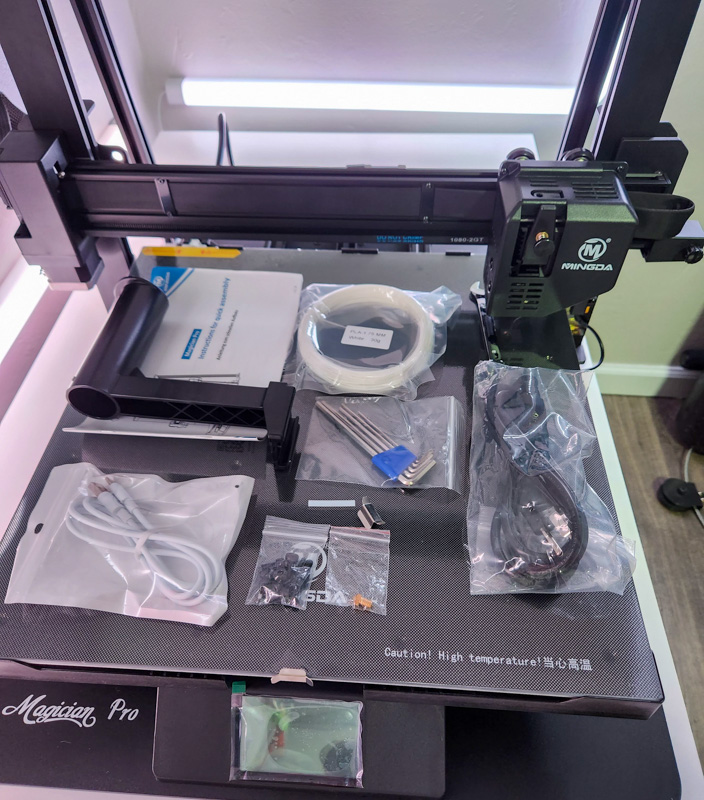
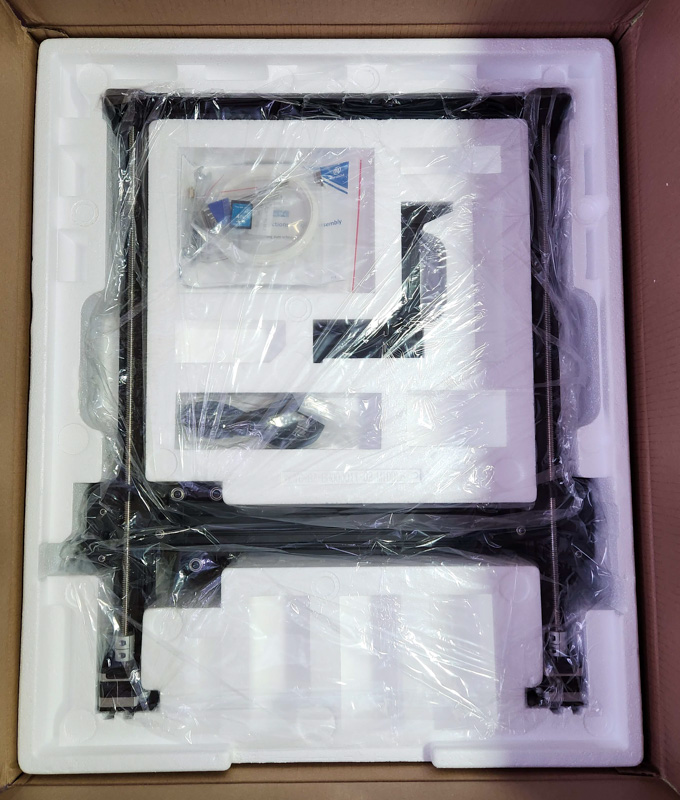
Most of the printer is preassembled, as shown above. The two support braces are folded out of the way to the back, and the cardboard under the bed must be carefully removed (watch the wires under each, I’m glad I looked instead of just yanking them out as it might have pulled the wires too if I wasn’t aware).
Next, you simply place the gantry on top, which slots into place, and then you screw from above instead of beneath (every other printer I’ve done has been screwed on the bottom). This step is what made the assembly so easy, especially for one person since I didn’t have to lift up the large heavy base in order to screw the gantry on top.
As you can see above, in 5 minutes or so you’re already nearly finished.
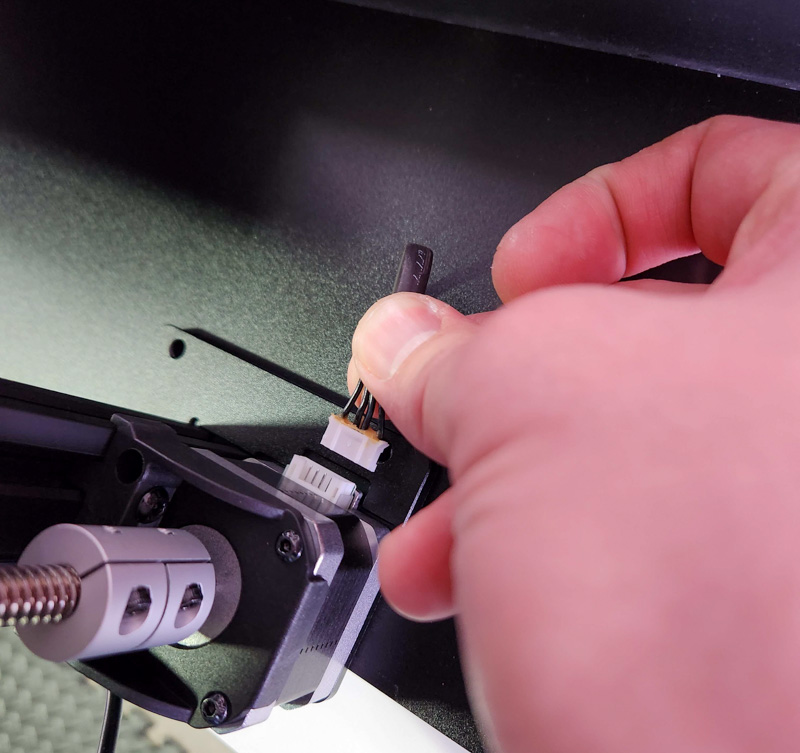
The next step is to find and connect all the plugs and wires. They were all easy to find by following the manual, with no ambiguity on which ones went to which spots.
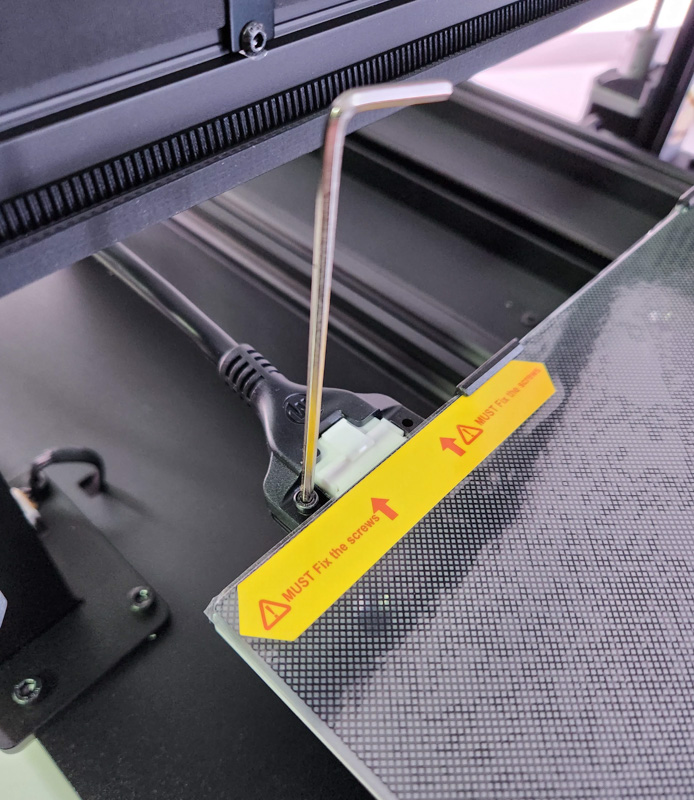
This cable plugged into the back of the bed requires screws. The warning label advising you about this was annoying to remove, it left the classic sticker residue that’s hard to get off:
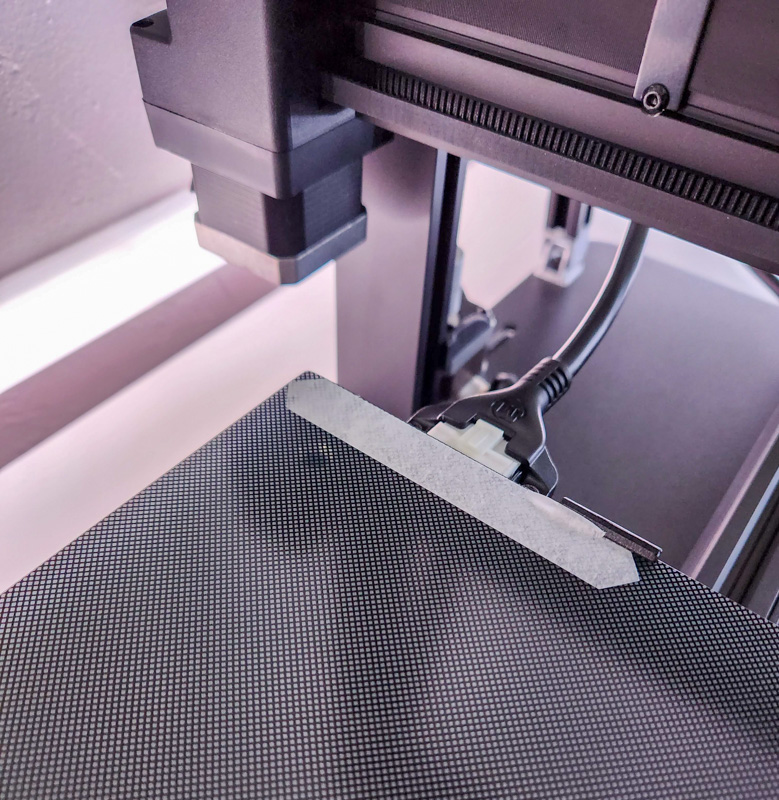
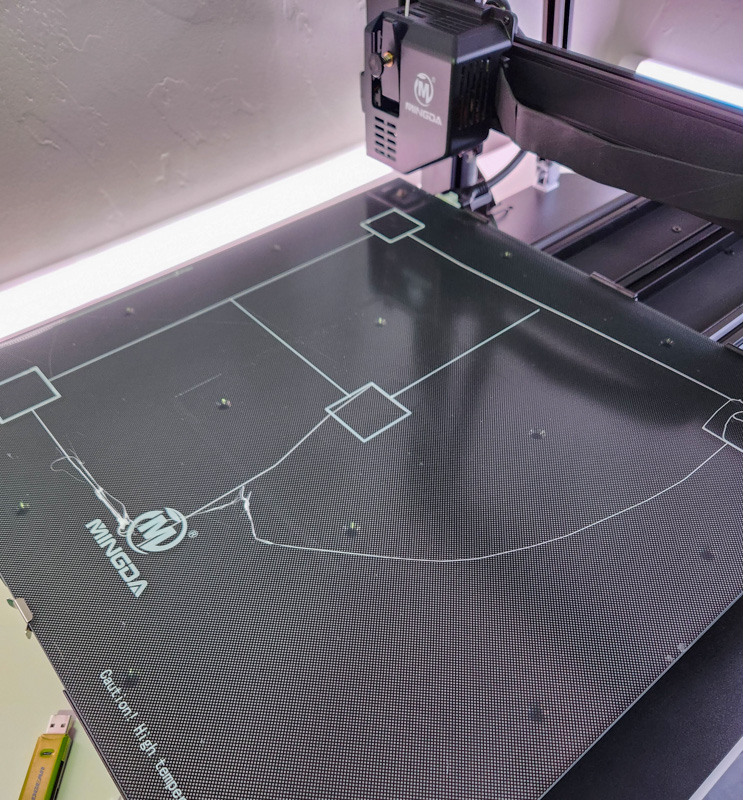
With that, you’re ready to auto-level the Mingda Magician Pro 3D Printer! This takes a few minutes, and the printer gingerly taps the nozzle into 36 points on the bed in order to compensate for any unevenness on the surface. An important note: after auto leveling, I highly advise doing the manual leveling process as described in the manual. Once you navigate to this in the menu, you can tap on each of the 36 points, and use an index card or something a little thicker than normal paper to gauge the distance between the nozzle and the bed. Ideally, you’ll adjust the nozzle up and down for each point until you can just barely feel a bit of resistance. As long as you are consistent with where you level it, you can later adjust the “baby steps” which will globally bring the nozzle up or down to get just the right first layer adhesion. The below picture shows what happens when you don’t take this manual leveling step.
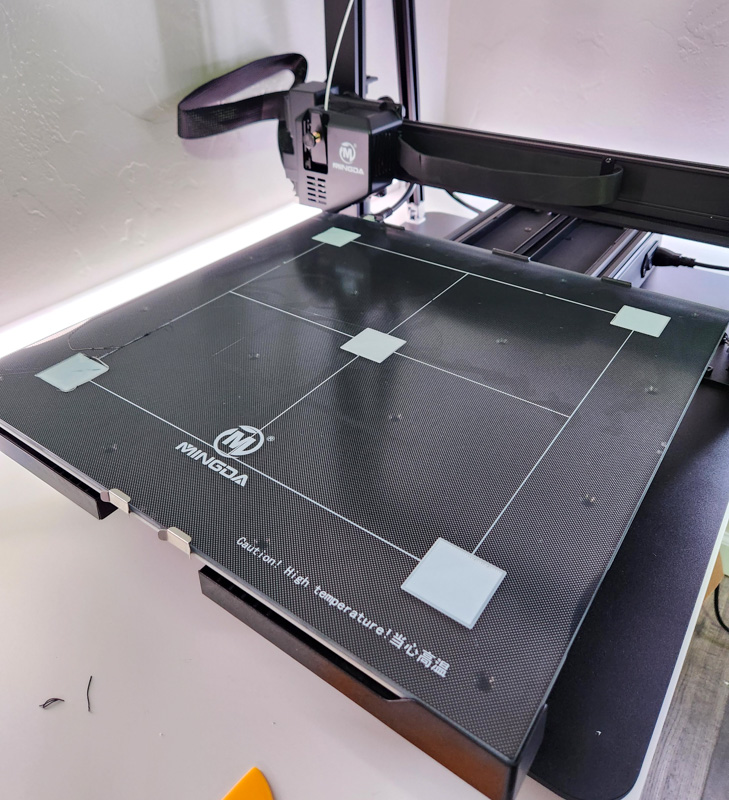
After manual leveling, I got a perfect first layer (at least for height, this was before calibration and after a filament change so you can see some other flaws but at least the layer height was spot on):
Finally, you’ll want to install a slicer to convert 3D models into actual printing code. CURA is included on the SD card, but the latest version from CURA’s website has new features and a built-in profile for the Magician Pro, so I’d skip the one on the SD card and just download it from Ultimaker.
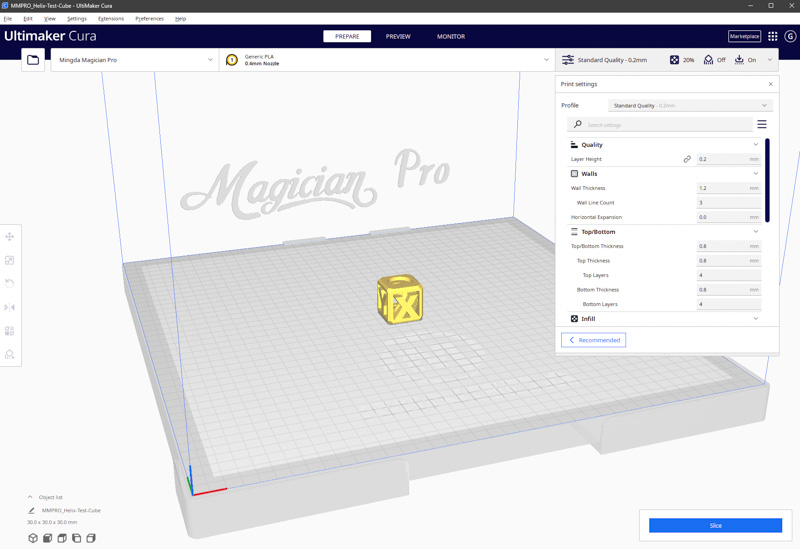
The calibration cube I tested with is hilariously small on the Mingda Magician Pro 3D Printer’s bed. The CURA defaults worked well for the printer, I tweaked some minor things for calibration and then just specific settings for various models I tested with.
Performance
The video above shows the Mingda Magician Pro 3D Printer in action. It’s the quietest printer I’ve tested yet, with the spool making more noise unwinding plastic than the printer itself most of the time.
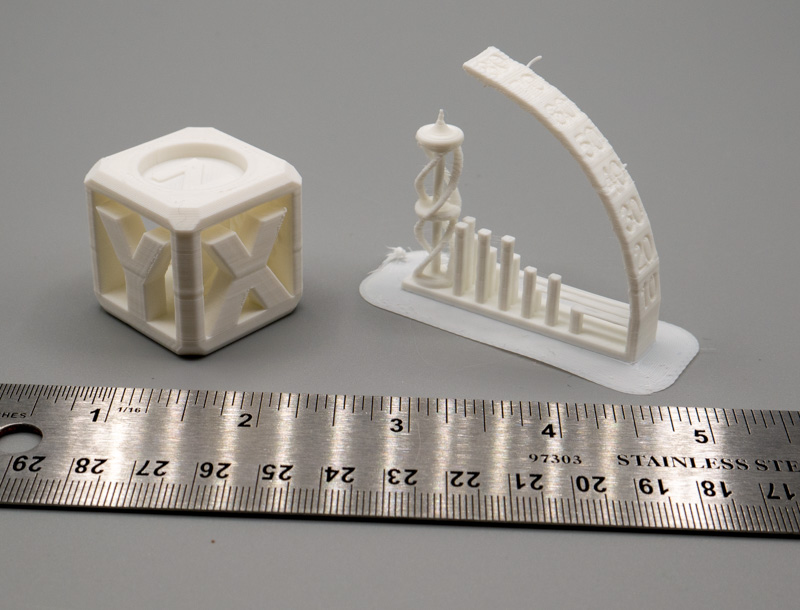
The above shot shows my first calibration models using the CURA Mingda Magician Pro 3D Printer default profile and the original 0.4mm nozzle. I was impressed with the results, they’re as good as any other first print on the other printers I’ve tested. I had minor things to calibrate and tweak, but this is something you have to do for every printer and every different filament you use, each can have different properties you have to compensate for.
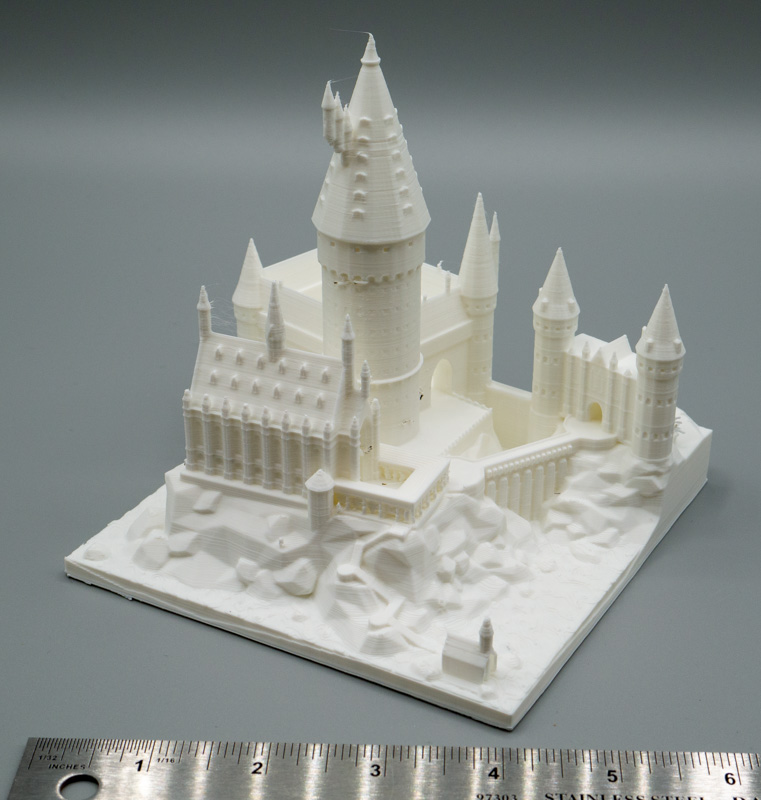
The next print I did was a bit larger, of a certain wizard themed school. Details turned out great, though at 80 mm/s speeds it did take 8-10 hours to print.
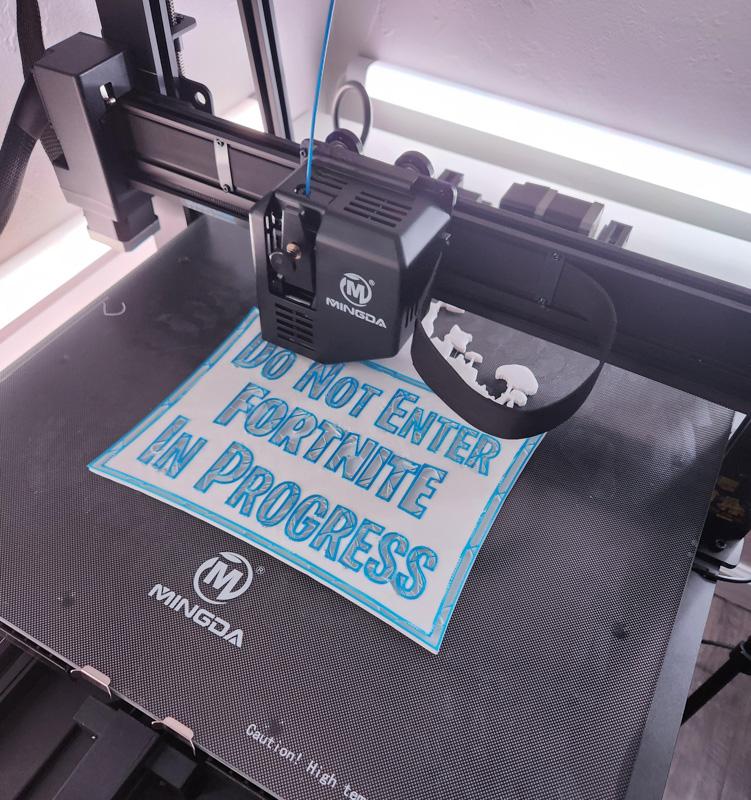
Next up, I tried a flatter print: a door sign for my nephew. I programmed in a couple of filament changes for different colors (the printer will pause and you can swap out colors at predefined layers). I was specifically testing for any issues with large flat pieces curling up away from the bed, which has been a problem for me on previous printers.
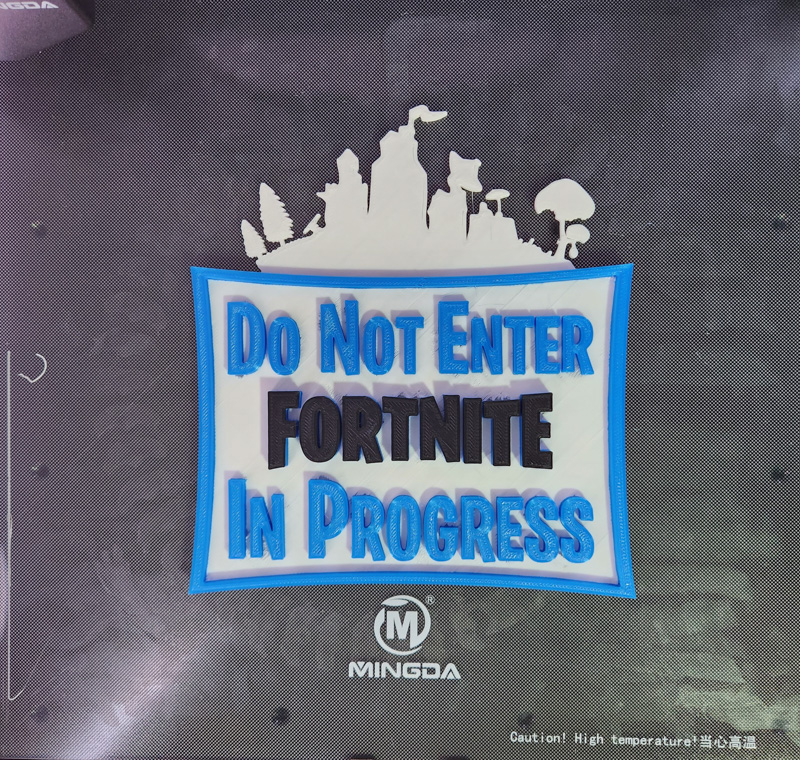
Above is the finished product of my large flat test, and it turned out great! Despite the lack of an enclosure and 10 degree temperature swings and breezes in the room (all sources of corners peeling up on prints), it all stayed flat throughout.
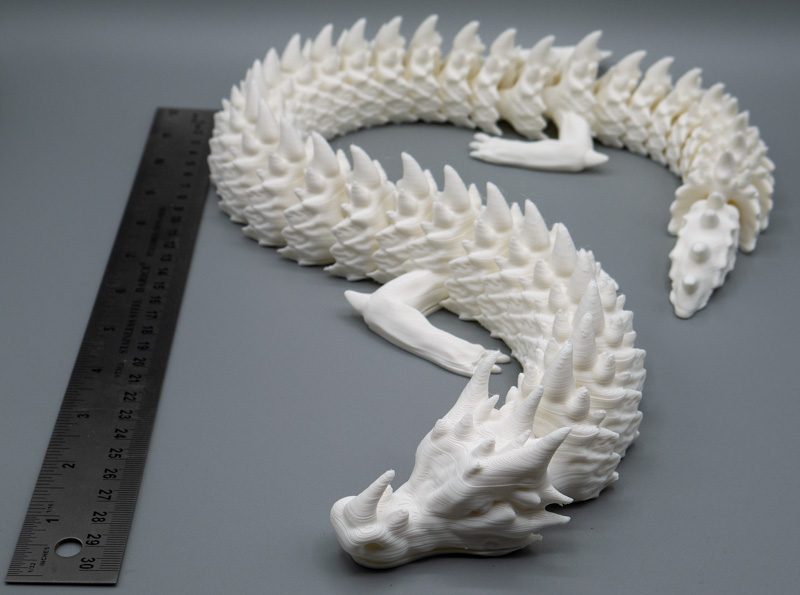
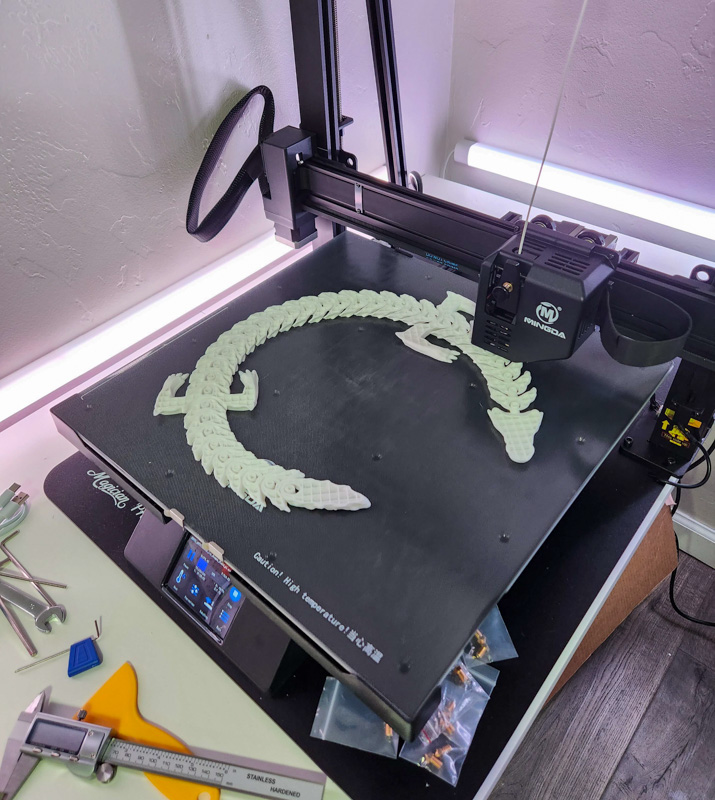
Another finished print, this dragon is nearly 3 feet long end to end. The detail is great, though it was done with a 0.6 mm nozzle that I switched to for faster large prints so you can see the layers a bit more defined as opposed to the 0.4mm models above.
What I like
- Large print volume while still retaining the quality of printing
- Direct drive extruder
- Filament sensor right at the head
What I’d change
- A bit larger screen would be nice, and if it was removable on a cord it would be perfect – if I end up moving this to my closet it’ll have to go sideways and I won’t be able to operate the screen very well.
- Based on past printers I assumed I’d be ok printing after auto-leveling, but my prints failed. You will probably need to do the “manual” leveling process after auto-leveling to get best results.
Final thoughts

After great initial impressions, I decided to change out the nozzle of the Mingda Magician Pro 3D Printer to a 0.6 mm (purchased by me from Mingda in a pack with a variety of nozzles). I did this because some larger prints (like a Mandalorian helmet) were going to take about a week to print on the 0.4 mm with my desired quality settings. The process to change the nozzle was fairly simple: heat up the nozzle, remove the filament, carefully grip the heat block with a vice grip or pliers, then unscrew the old one and screw in the new one.
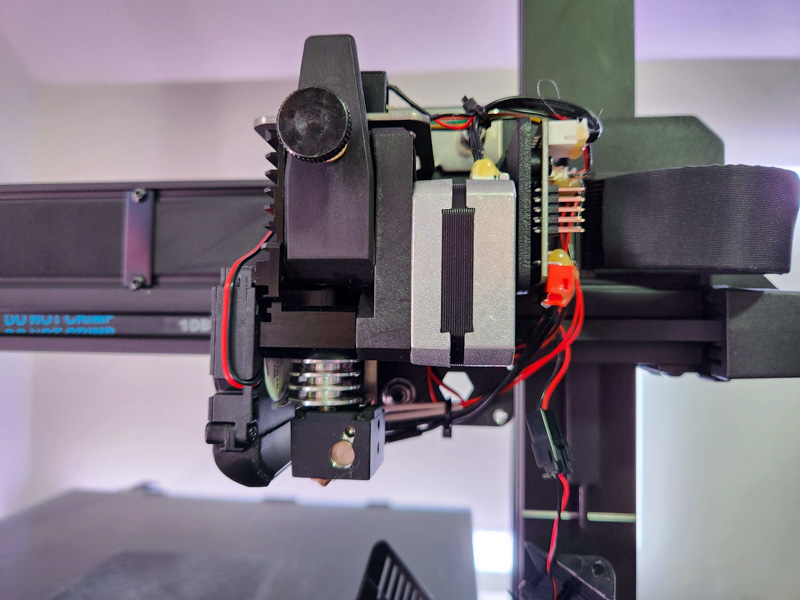
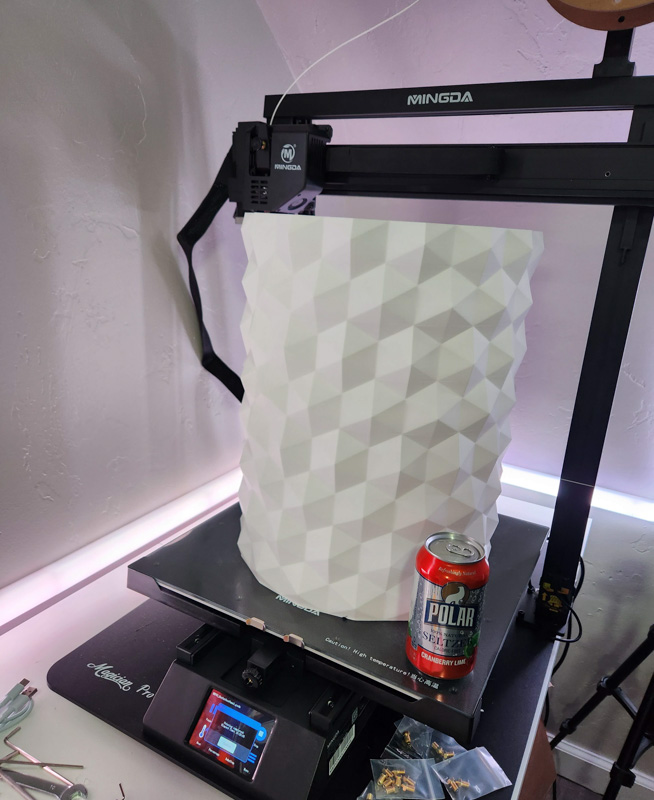
Above is another angle of the exposed print head. My last print was designed to push the Mingda Magician Pro 3D Printer to its size limit:
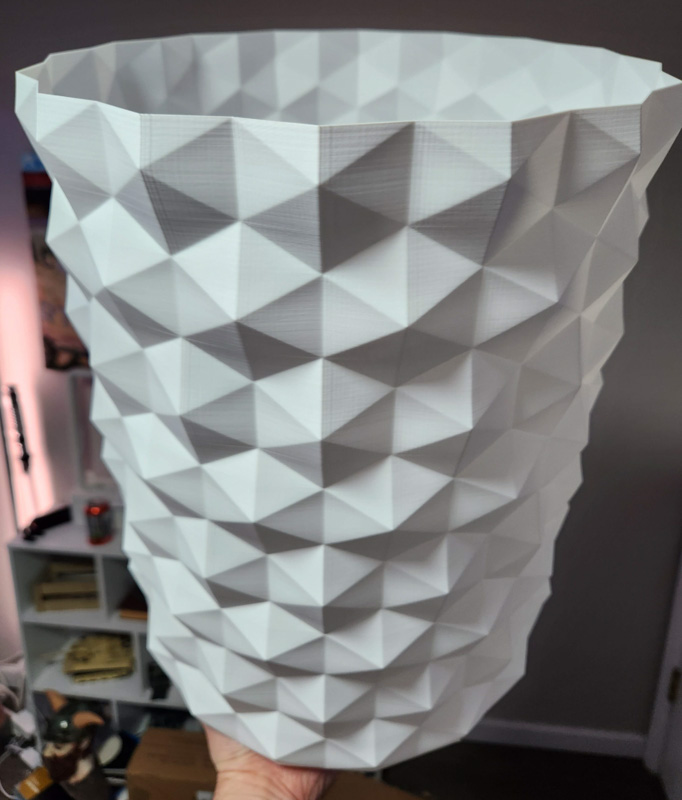
Behold, my new trash can for my office! At almost 16 inches tall and 14 wide, it’s roughly the same volume as my previous full-size trash bin. I’m in the process of printing two more out in different colors now for recycling and 3d-printing plastic collection (to be sent in and re-used later). If you’re looking for a good quality 3D printer with a huge build volume, I think the Mingda Magician Pro 3D Printer makes a compelling case for your wallet.
Price: $639.99 ($599 sale at the time of review)
Where to buy: Mingda
Source: The sample of this product was provided by Mingda

Google Review Tap Cards (3-Pack) by TapFive - Tap for Instant Reviews - All Phones Compatible - Reusable Smart Tap NFC & QR - Boost Business Reviews - Powered by TapFive (3 Card Pack)
(as of June 27, 2026 19:23 GMT -05:00 - More infoProduct prices and availability are accurate as of the date/time indicated and are subject to change. Any price and availability information displayed on [relevant Amazon Site(s), as applicable] at the time of purchase will apply to the purchase of this product.)
Gadgeteer Comment Policy - Please read before commenting
Nice review. Though your comments on manual levelling confused me somewhat.
I’ve had this printer for 8 months now. I do an occasional auto levelling, and it’s been pretty much perfect. In fact, it has even made me enjoy 3d printing and even inspired me to experiment with weirder things I dared not previously.
The detail is great, the layers are fantastic and I even started using ironing as a finishing technique, which produces astounding results.
All without manual levelling. So do you think there was something wrong with your model, or have I just been incredibly lucky with mine?
Oh and BTW, I use a stylus I got with my Samsung Galaxy S8 ultra tablet on the touch screen, which works great.
Out of the several 3D printers I’ve reviewed, the Mingda Magician Pro is the one I keep returning to for nearly every print! I’d imagine I probably had a slightly warped bed or something, glad you got a nicely flat one!
I have a Pixel 3D MAX printer, very similar to Mingda Magician Pro, it’s as if only the name is different else everything is identical.
I would like to upgrade my complete extruder kit, ie along with the hotend & nozzle.
Any idea which one would be better than the existing setup ?
Thanks in advance 😃
Sorry, I’m not sure! I ran out of room in my little printer farm and ended up giving this one away to make room for faster/multicolor printers. I see from quick googling that Mingda seems to sell replacements, but not upgrades.