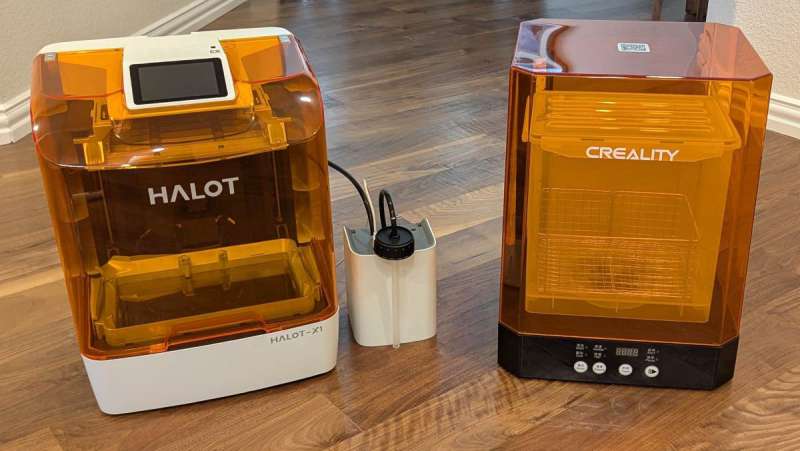
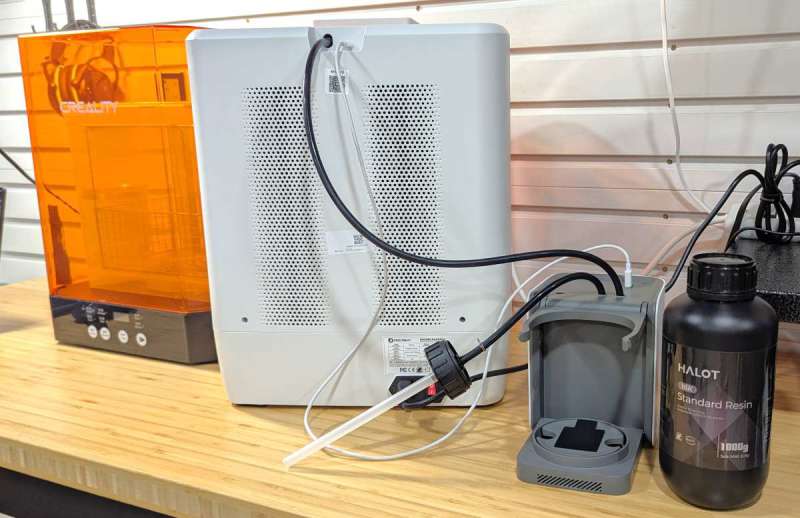
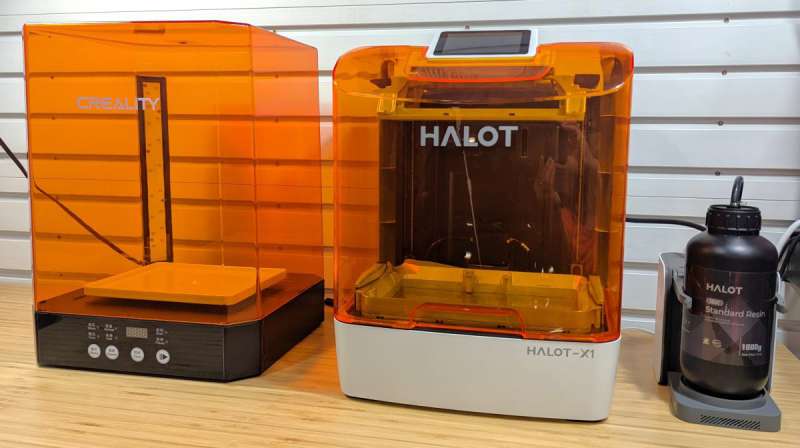
REVIEW – I love that companies are developing a variety of hobby 3D printers for makers. Being able to bring my ideas to life is amazing! PioCreat is a subsidiary of Creality and recently completed a successful Kickstarter campaign for their new HALOT-X1 resin 3D printer, and I was given the opportunity to review it, the Auto Feed Unit (AFU) for resin management, and the Creality IW-03 Washing/Curing Machine.
What makes this printer unique among the others currently out there? It has a 10.1-inch 16K ultra-high-resolution mono LCD screen to print incredibly detailed miniatures, it doesn’t require any leveling (the resin vat moves not the build plate), it has a quick-release build plate, it has a latch system to easily release or secure the resin vat, and it has an optional Auto-Feed Unit that automatically dispenses the correct amount of resin needed for the project (it automatically adds more if necessary during the printing) and recovers the excess after completing the print. The addition of the washing/curing machine makes quick work of washing and curing resin prints.
⬇︎ Jump to summary (pros/cons)
Price: $599.00 – Printer; $619.00 – Printer + Auto Feed Unit; $149.00 – Washing/Curing Machine
Where to buy: piocreat3d.com
It’s another long review, so here’s a table of contents:
Table of Contents
What is it?
The PioCreat HALOT-X1 is a Liquid Crystal Display (LCD) resin 3D printer, which means that it is a device that uses a masked LCD screen to illuminate the layer of photosensitive polymer to harden or cure it layer by layer until you have a complete model created.
This type of 3D printing is called additive manufacturing (AM) because material is added or deposited in layers to build an object, rather than subtractive manufacturing (SM), where material is removed (machined) or sculpted to create the object (All3DP).
Resin toxicity and precautions:
I’ve read widely differing opinions on the internet about the toxicity of 3D printing resins. So I asked PioCreat for a Safety Data Sheet (SDS) on the Halot 16K Standard Resin (be sure to ask for an SDS for your resin). Following the Globally Harmonized System of Classification and Labeling of Chemicals (GHS) (East Carolina University has some great information about this classification system), the SDS reports the following:
- Acute Toxicity:
-
- Propenoic acid polymer: Rat Oral LD50: 1500 mg/kg; Rat Inhalation LC50: > 5.1 mg/L -4h
-
- Health Hazards:
-
- Acute toxicity – Oral Category 4
- Serious eye damage/eye irritation Category 1
- Skin sensitization Category 1
- Specific target organ toxicity – Single exposure Category 3 (Respiratory tract irritation)
-
- Hazard Statements:
-
- H302 Harmful if swallowed.
- H318 Causes serious eye damage.
- H317 May cause an allergic skin reaction.
- H335 May cause respiratory irritation.
- H400 Very toxic to aquatic life.
- H411 Toxic to aquatic life with long-lasting effects.
-
According to the Cornell University website:
The LD50 describes the amount of chemical ingested or absorbed by the skin in test animals that causes death in 50% of test animals used during a toxicity test study. Another common term is Lethal Concentration 50 (LC50), which describes the amount of chemical inhaled by test animals that causes death in 50% of test animals used during a toxicity test study. The LD50 and LC50 values are then used to infer what dose is required to show a toxic effect on humans.
As a general rule of thumb, the lower the LD50 or LC50 number, the more toxic the chemical. Note there are other factors (concentration of the chemical, frequency of exposure, etc.) that contribute to the toxicity of a chemical, including other hazards the chemical may possess.
While exact toxic effects of a chemical on test animals cannot necessarily be directly correlated with toxic effects on humans, the LD50 and LC50 can give a good indication of the toxicity of a chemical, particularly in comparison to another chemical. For example, when making a decision on what chemical to use in an experiment based on safety for the lab worker, a chemical with a high LD50 or LC50 would be safer to work with, assuming the chemical did not possess multiple hazards and everything else being equal.
In general terms, the resource Prudent Practices in the Laboratory lists the following table for evaluating the relevant toxicity of a chemical:
Relevant Toxicity of a Chemical Toxicity Class Animal LD50 Probable Lethal Dose for 70 kg Person (150 lbs.) Example Super Toxic Less than 5 mg/kg A taste (7 drops or less) Botulinum toxin Extremely Toxic 5 – 50 mg/kg < 1 teaspoonful Arsenic trioxide, Strychnine Very Toxic 50 – 500 mg/kg < 1 ounce Phenol, Caffeine Moderately Toxic 0.5 – 5 g/kg < 1 pint Aspirin, Sodium chloride Slightly Toxic 5 – 15 g/kg < 1 quart Ethyl alcohol, Acetone

(from unece.org or other languages from ucece.com)
Since the Halot 16K Standard Resin can cause skin irritation and lung irritation due to inhalation, the following Personal Protective Equipment (PPE) is appropriate when handling the resin:
- Wear nitrile gloves (disposable or reusable) when handling 3D resin. I used disposable vinyl gloves, but apparently, nitrile gloves are a better barrier – the thicker the better.
-
- Both types of disposable gloves eventually allow resin to seep in through the glove when given enough time, so it’s best not to reuse them unless they are specifically sold as reusable, chemical-resistant gloves (they’re much thicker nitrile gloves).
- You may have gotten resin on your skin in the past with no apparent negative consequences. However, if you repeatedly expose your skin to resin, you can become allergic to it. And depending on how allergic you are, you may need to limit your exposure or even avoid it altogether.
- NOTE: The Halot-X1 comes with latex gloves (not a good barrier for resin).
-
- Wear a respirator rated for Volatile Organic Compounds (VOCs) – e.g., a paint respirator. You’ll want to wear it even when using low-odor resin. Low odor doesn’t necessarily mean the absence of volatiles in the air.
-
- You can try the 3M Half Facepiece Disposable Respirator, Organic Vapor, NIOSH Approved, or the 3M P95/OV Paint Project Reusable Respirator 6211, NIOSH approved, medium (or the large one) on Amazon.
- Also, print in a well-ventilated room.
- NOTE: The Halot-X1 comes with a thin, dust-type mask (doesn’t protect against VOCs emitted by the resin).
-
- Wear the proper safety goggles:
-
- to avoid resin splashes (use ANSI Z87 or EN 166 goggles for chemical splashes, e.g. 3M Professional Goggles, 3M Goggles, MELASA Safety Goggles)
- to avoid UV when curing your models with UV lights (however, I think the curing is performed at 405 nm, which is not UV but near UV; regardless, you should still wear protection)
-
- FreeMascot OD 6+ 190nm – 490nm Wavelength UV light / Violet & Blue Laser Safety Glasses (CE EN207 certification – European laser eyewear standards for laser safety eyewear). These block the wavelength used to cure resin prints.
-
- to avoid flying plastic when clipping off supports (same goggles listed in the first bullet above)
-
- Wear an apron to protect your clothes from resin splashes. I found this nitrile apron available at HomeDepot.com.
- NOTE: Everything that contains uncured, liquid resin (including water-washable resins) needs to be cured for safe disposal. All your cleaning materials, including paper towels, microfiber towels, gloves, uncured model pieces, etc., need to be cured (in the sun or using UV lights) before disposal.
What’s included?
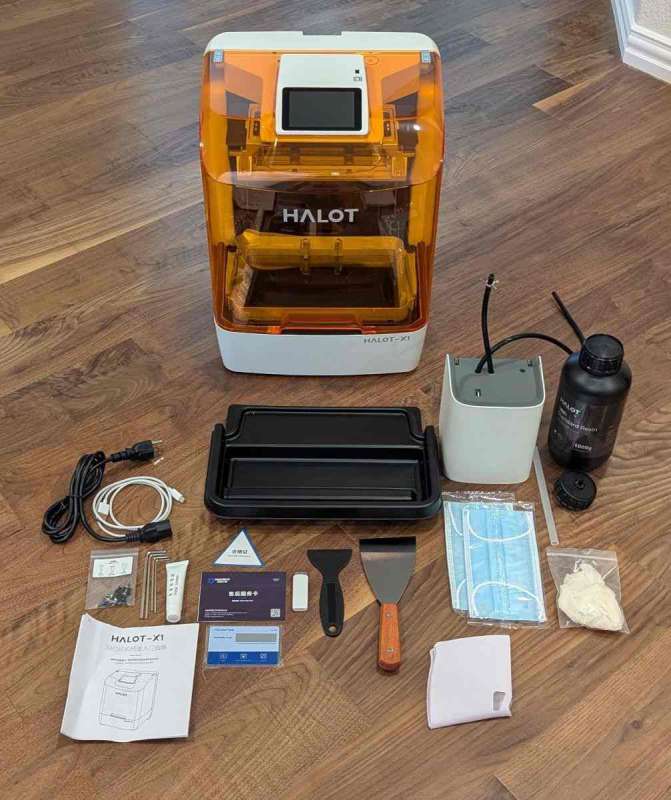
- Halot-X1 16K resin 3D printer
- Power cable
- USB cable for the Auto Feed Unit
- Plastic tray
- Auto Feed Unit (AFU), tube for the AFU, and resin bottle cap for the AFU (sold separately)
- Halot 16K Standard Resin (sold separately)
- Extra screws
- Allen wrenches
- Lubricant
- Info cards, 3-month trial for Chitubox Pro
- USB drive
- Plastic scraper
- Metal scraper
- Two masks (these will NOT protect you from the resin fumes)
- Two pairs of gloves (latex?)
- Resin filters
- Quick Start Guide (mine was in Chinese)
- Halot 16K standard resin (sold separately)
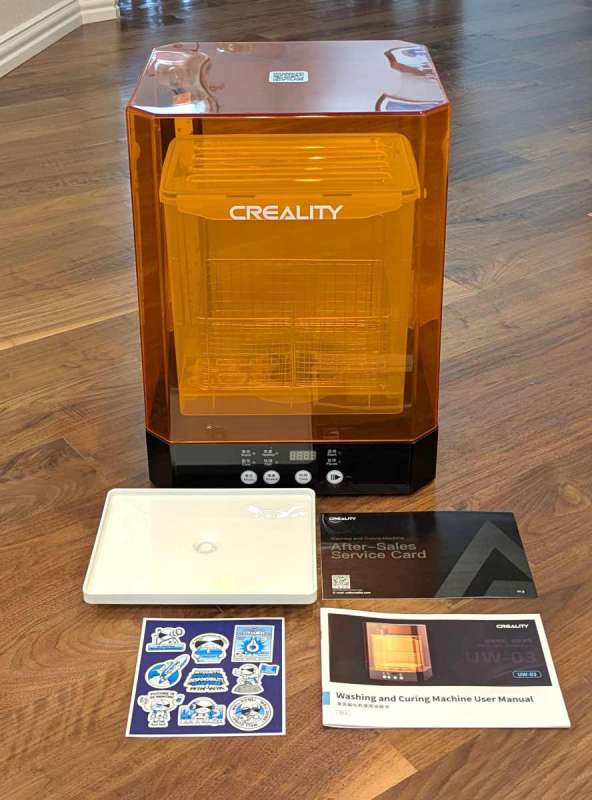
- Creality UW-03 Wash/Curing machine
- Washtub with lid and metal basket
- Plastic turntable
- Service card and stickers
- Power cable
- User Manual
Tech specs
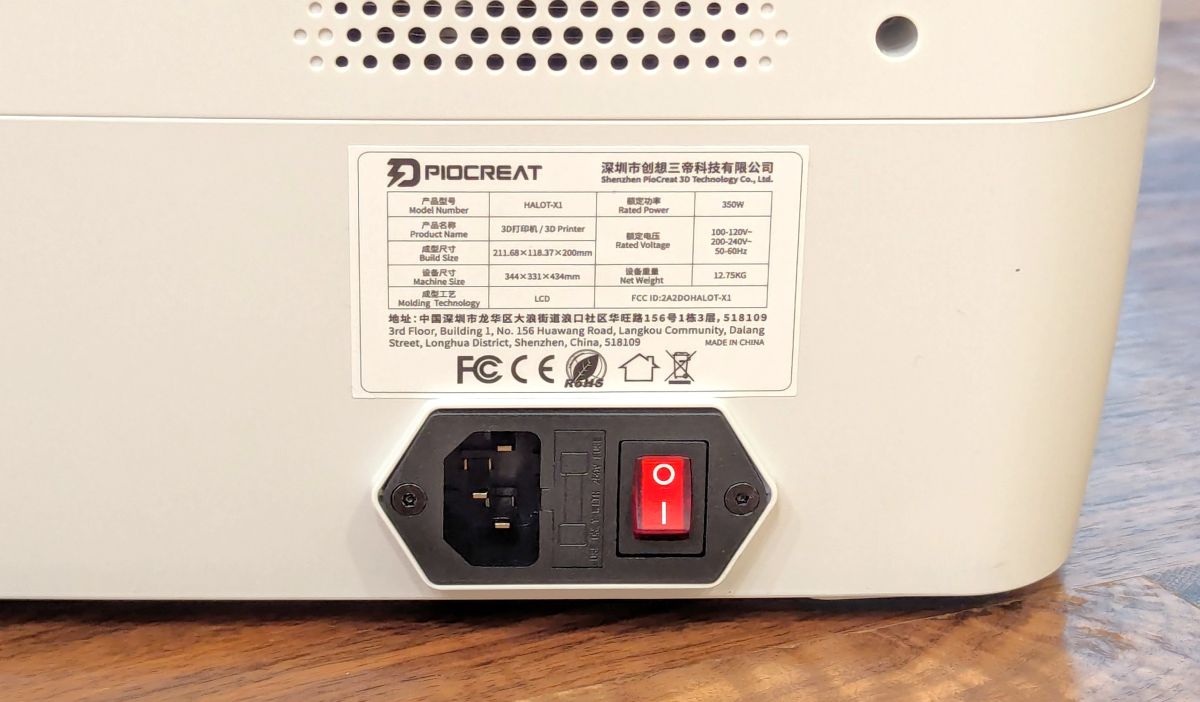
- Build Volume (WxDxH): 211.68mm x 118.37mm x 200mm
- Printer Size: 344mm x 331mm x 434mm
- Package Size: 430mm x 420mmx 535mm
- Net weight: 12.75kg
- Gross weight: 16.01kg
- Printing Technology: LCD
- Light Source: Honeycomb Matrix Light Source
- Exposure Intensity: 6500±10%μW/c㎡
- Resolution: 16K(15120 x 6230 PX)
- Pixel Size (XY resolution): 14 x 19μm
- Z-axis Accuracy: 0.01mm
- Layer Thickness: 0.01~0.02mm
- Printing Speed: Max. 170mm/h
- Touch Screen Display: 3.98-Inch Capacitive Touch Screen
- Slicing Software: HALOT BOX/Chitu Box
- File Formats: STL/OBJ
- Data Transmission (File Transfer): USB/WIFI
- Input Voltage: 100-120V~200-240V, 50-60Hz
- Power: 350W
- Resin: 405nm Resins
- Additional Features: Print Failure Detection / Power Loss Recovery
Design and features
Definitions
Before I dive into the review, if you’re new to resin 3D printing, here are a few terms to know (from 3dprintknowledge.com).
Build Plate – The surface that the hardened resin attaches to during the build process. The print bed is usually made of metal, which allows for a good suction force from the resin.
Cover/Lid – The top of a resin printer is made of colored acrylic that is treated to keep out UV light. The most common colors for lids and covers are red, yellow, and orange
Cure/Curing – Exposing the resin to a UV light source causes the resin to undergo a chemical process and harden, and is referred to as curing.
DLP – Digital Light Projector works by shining a light source through an LCD screen to expose resin in the printing vat.
Exposure Time – The amount of time that a layer of resin is exposed to the UV light. This time is set in the slicer.
FEP Film – Fluorinated Ethylene Propylene film is used on the bottom of resin printing vats. The material is a transparent non-stick material that allows the UV light to pass through and expose the resin. Because the FEP is non-stick the resin has a stronger adhesion to the build plate and so the print will release from the FEP film while staying attached to the build plate.
LCD Screen – The Liquid Crystal Display that is used to mask the UV light source and project the layer shape onto the uncured resin.
Model – Digital object designed for 3D printing. Typically saved as an STL file.
Post Processing – The tasks necessary to prepare the print for use after the printer has finished.
[Post processing includes washing newly printed models in a solvent, curing the models with UV light, sanding, priming, painting, etc.
Every model needs to be washed of the uncured liquid resin covering the model after printing. If you don’t have a machine to do this, you need to do it manually using isopropyl alcohol (IPA) and a toothbrush or other equipment.
Then you need to do a final curing of every model to harden the outside of it. If you don’t have a curing machine, you’ll need to set the model out in the sun for several hours until it’s fully hardened. This means that you’ll have to take into account things like cloudy days.]
Printer Board – This refers to the electronic circuit board that controls the printer.
Resin – The printing medium for resin printers. Made of photocuring monomers that bond to form polymers when exposed to UV light.
Resin Vat – A tank [or pan] that holds resin in the printer for the printing process. The bottom consists of a clear sheet of FEP film that allows the UV light to expose and cure the bottom layer of resin in the tank.
STL – This abbreviation can have many meanings, such as STereoLithography, Standard Triangle Language, or Standard Tessellation Language. STL files are how most 3D models are stored in digital format. It contains data that describes the surface geometry of the object.
Wash – The act of rinsing a 3d resin print in a solvent such as isopropyl alcohol to remove any residual resin from the print before the final cure.
Three basic technologies that are currently used are stereolithography apparatus (SLA), digital light processing (DLP), and liquid crystal display (LCD), which is also known as masked stereolithography (MSLA).
The HALOT-X1 is an LCD resin 3D printer that uses an LCD screen to mask areas to provide light only to the desired cross sections of the model.
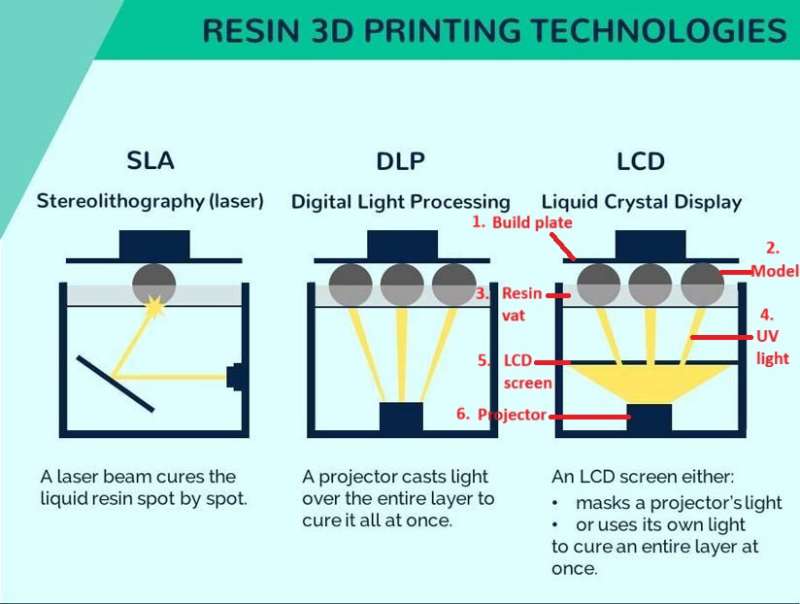
The above illustration shows generally how the different resin technologies work (Creality).
Here’s a video from Mad Jackalope that animates the resin 3D printing process for a clearer understanding. Note that resin printers print models upside down.
The Halot-X1 has 92 Intelligent Light Zones to target only those areas that need curing.
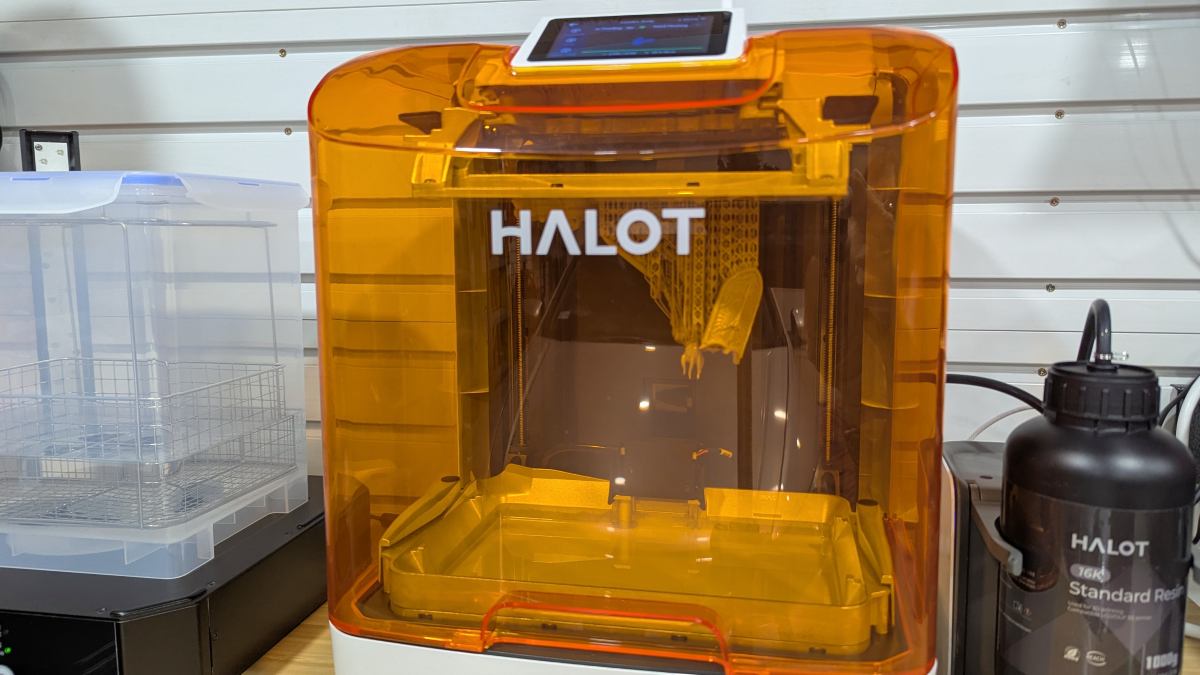
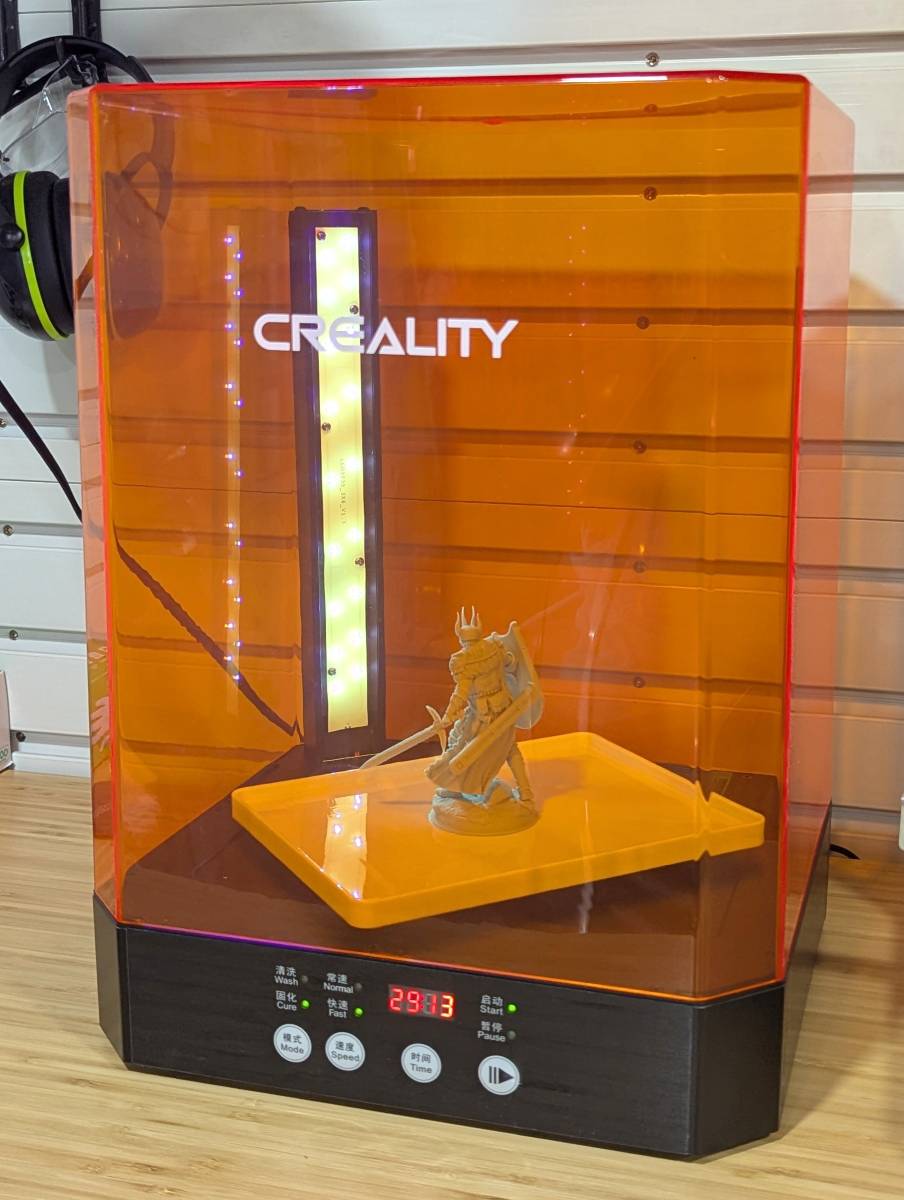
Printer: The Halot-X1 is an attractive, compact 3D resin printer. The body of the printer is made of white matte plastic, and the lid is orange transparent plastic.

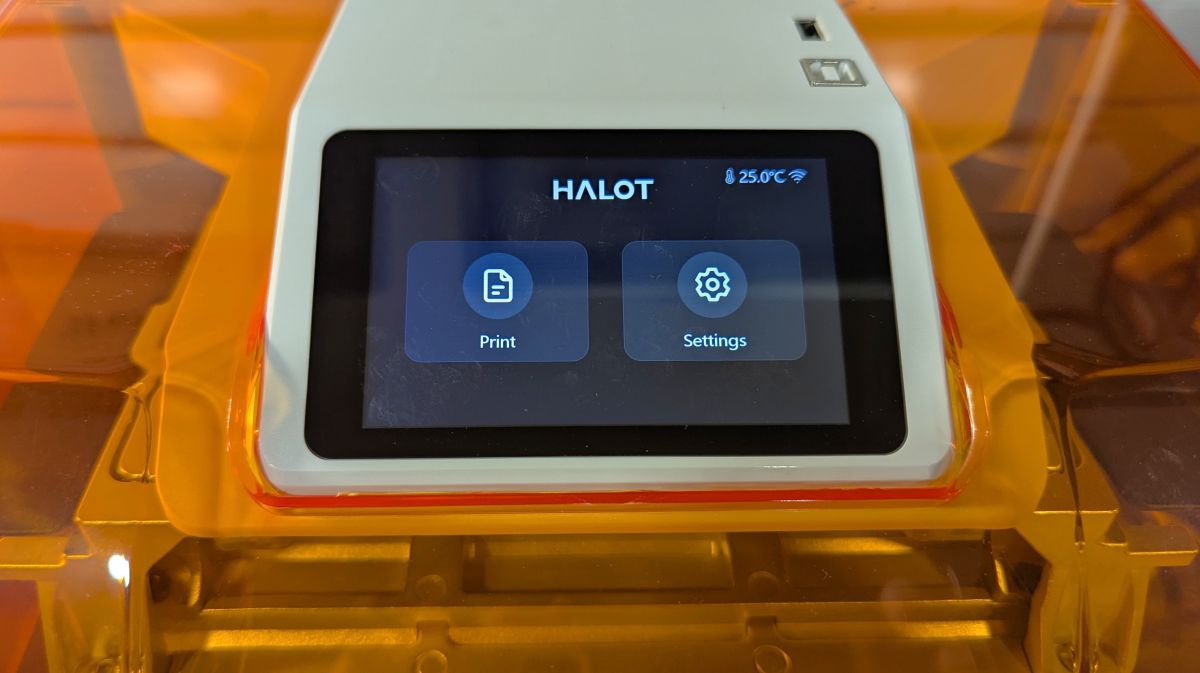
The touchscreen control panel is located on the top of the printer, which makes it easily accessible. The cover is made to help block UV light from entering, which could prematurely harden (cure) the resin. Also, notice how the USB port is located on the top of the printer.
The base of the printer has indentations for handholds on each side that make carrying the printer easy. Very nice!
The back of the printer has vents. There’s no single exhaust area to connect an air purifier to handle any fumes produced by the resin while printing.
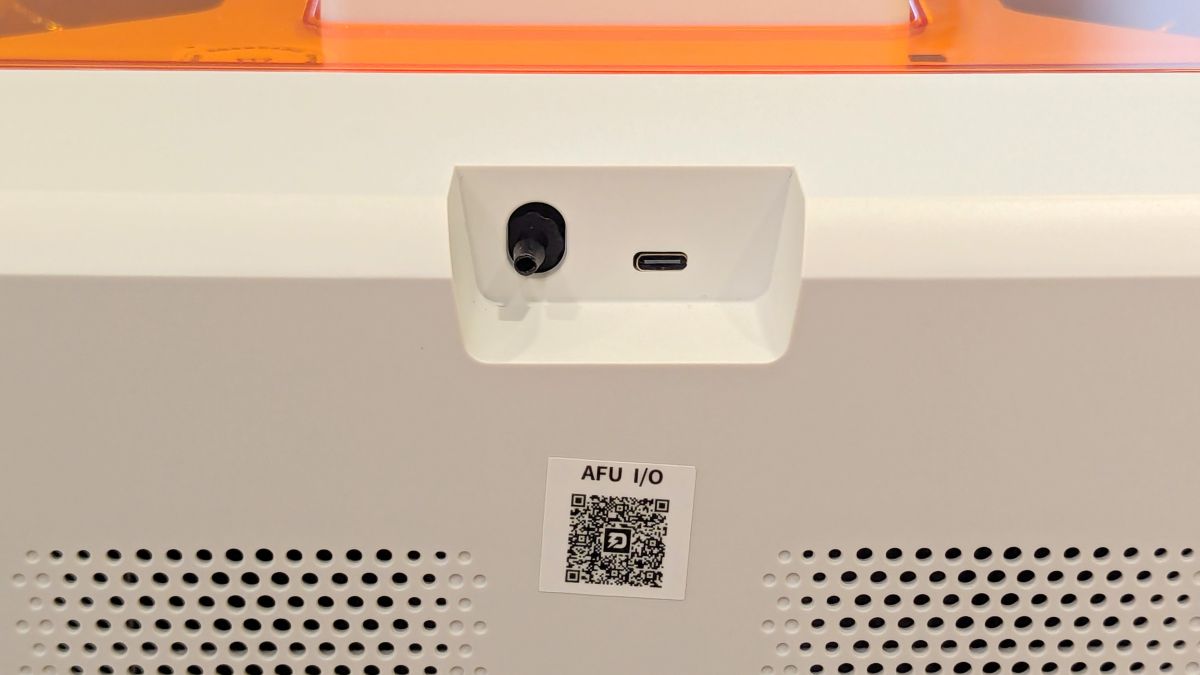

There is a port on the top back of the printer to connect the Auto Feed Unit (AFU) hose, which automatically dispenses your resin. The USB-C port next to it provides the power for the AFU.
Also on the back of the printer are the power port and a power switch.
The bottom of the printer has rubber pads to protect the surface it sits on and to help prevent movement.
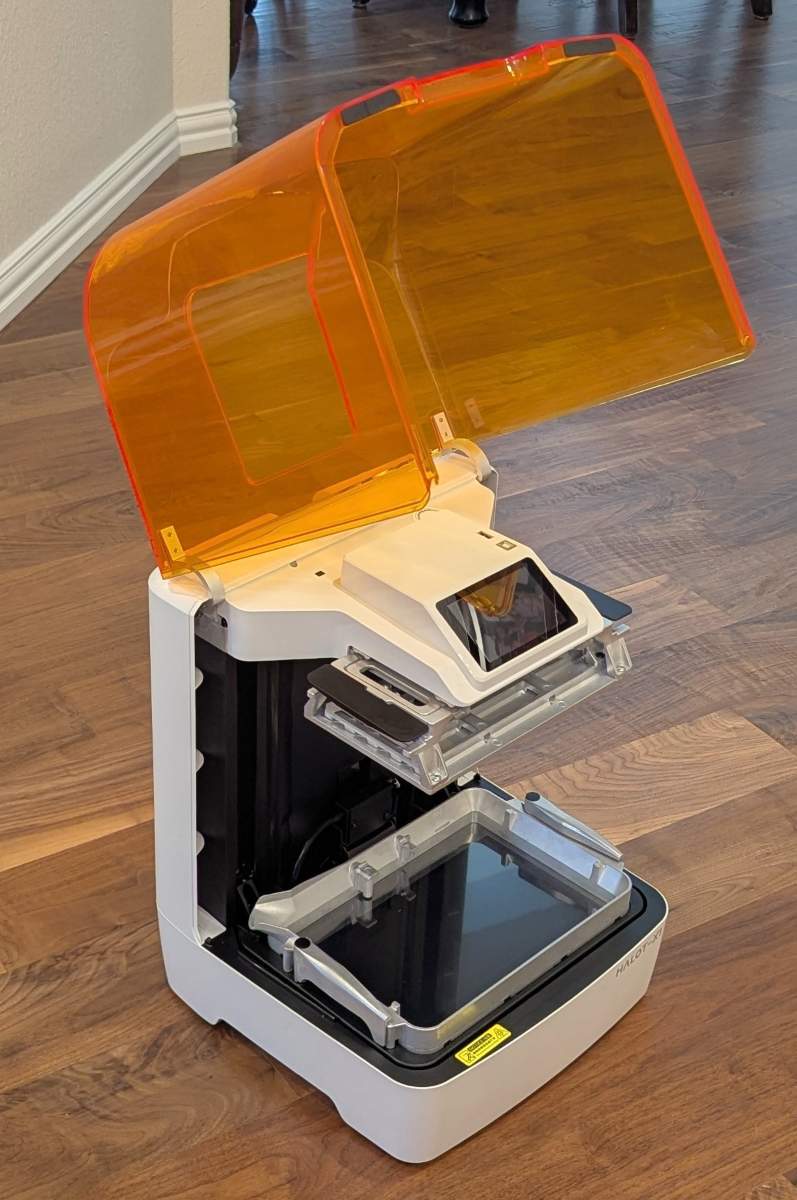
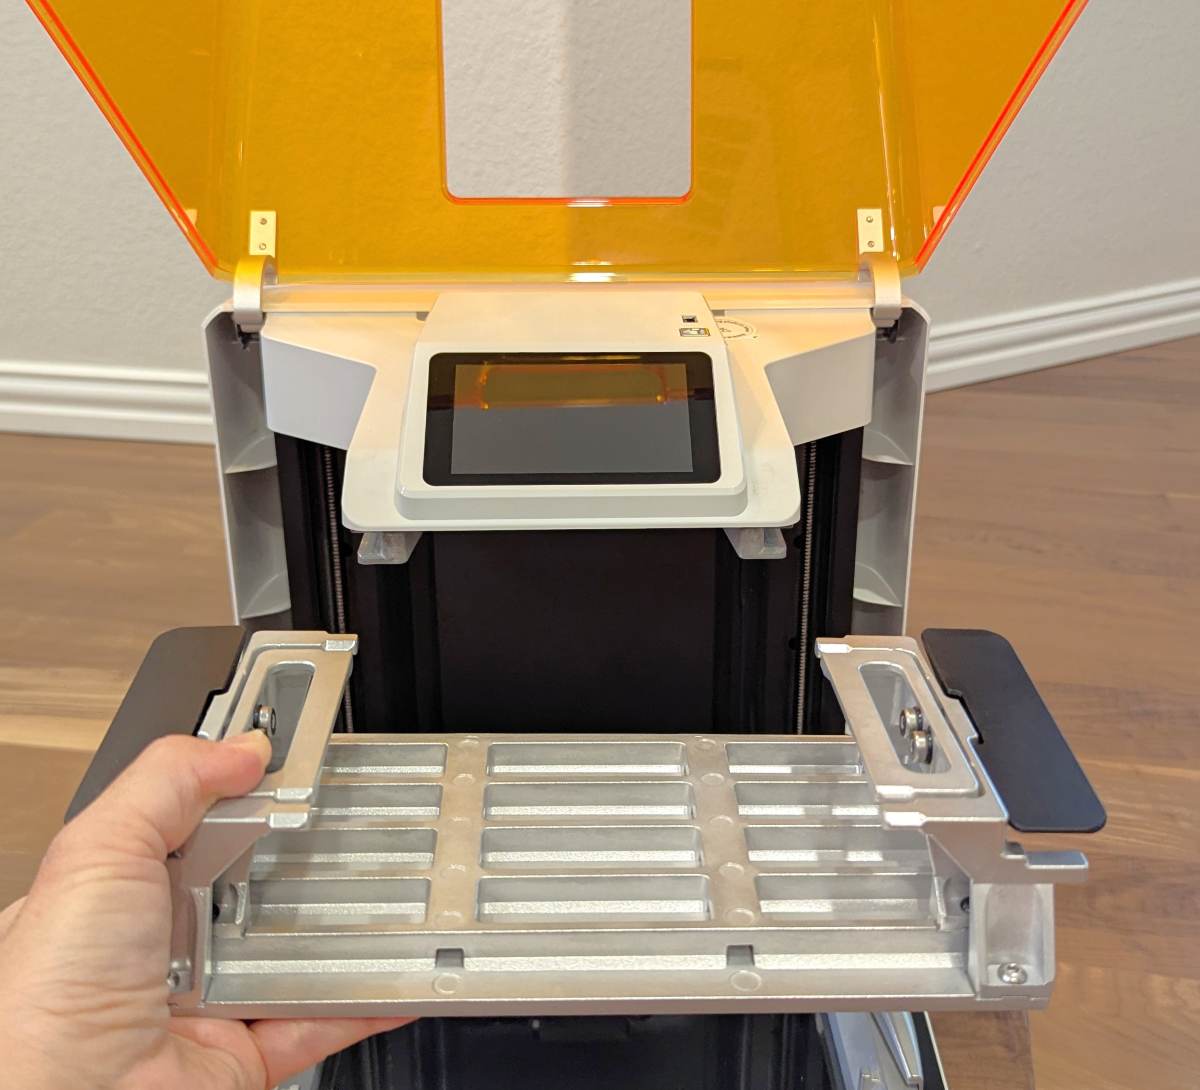
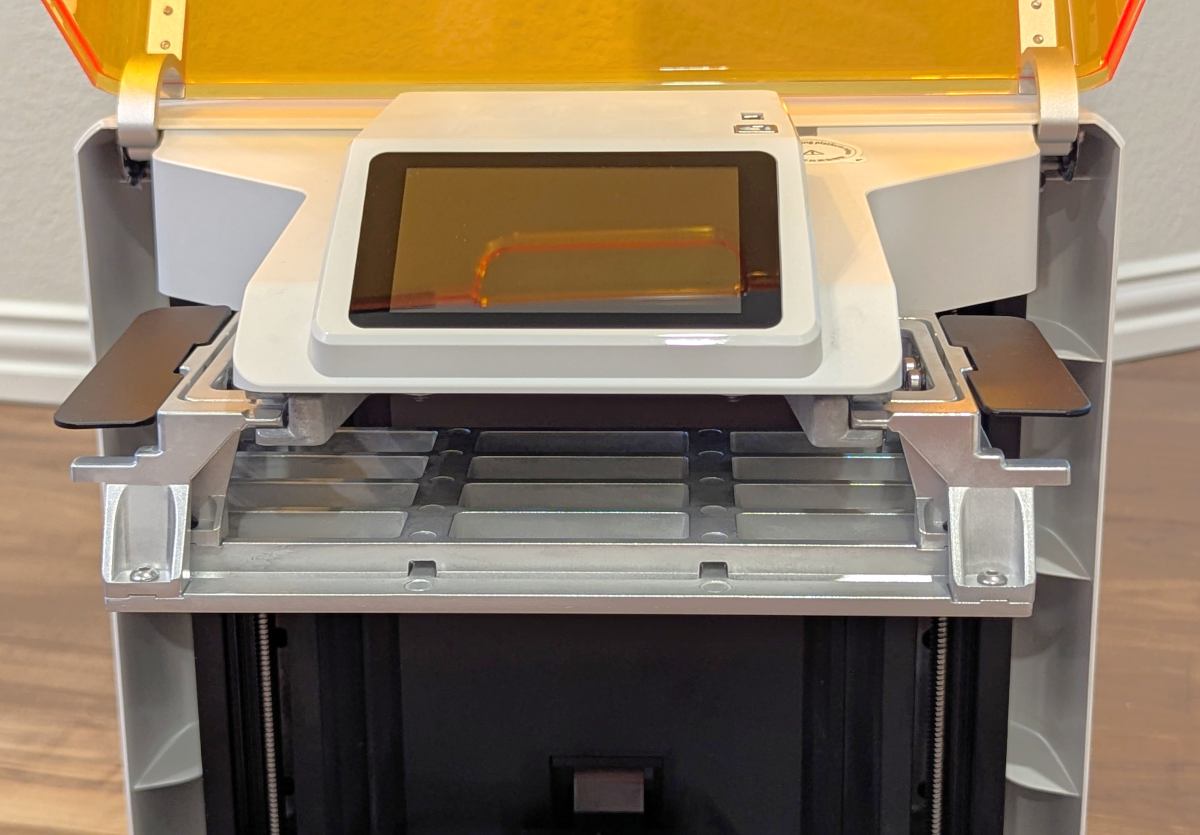
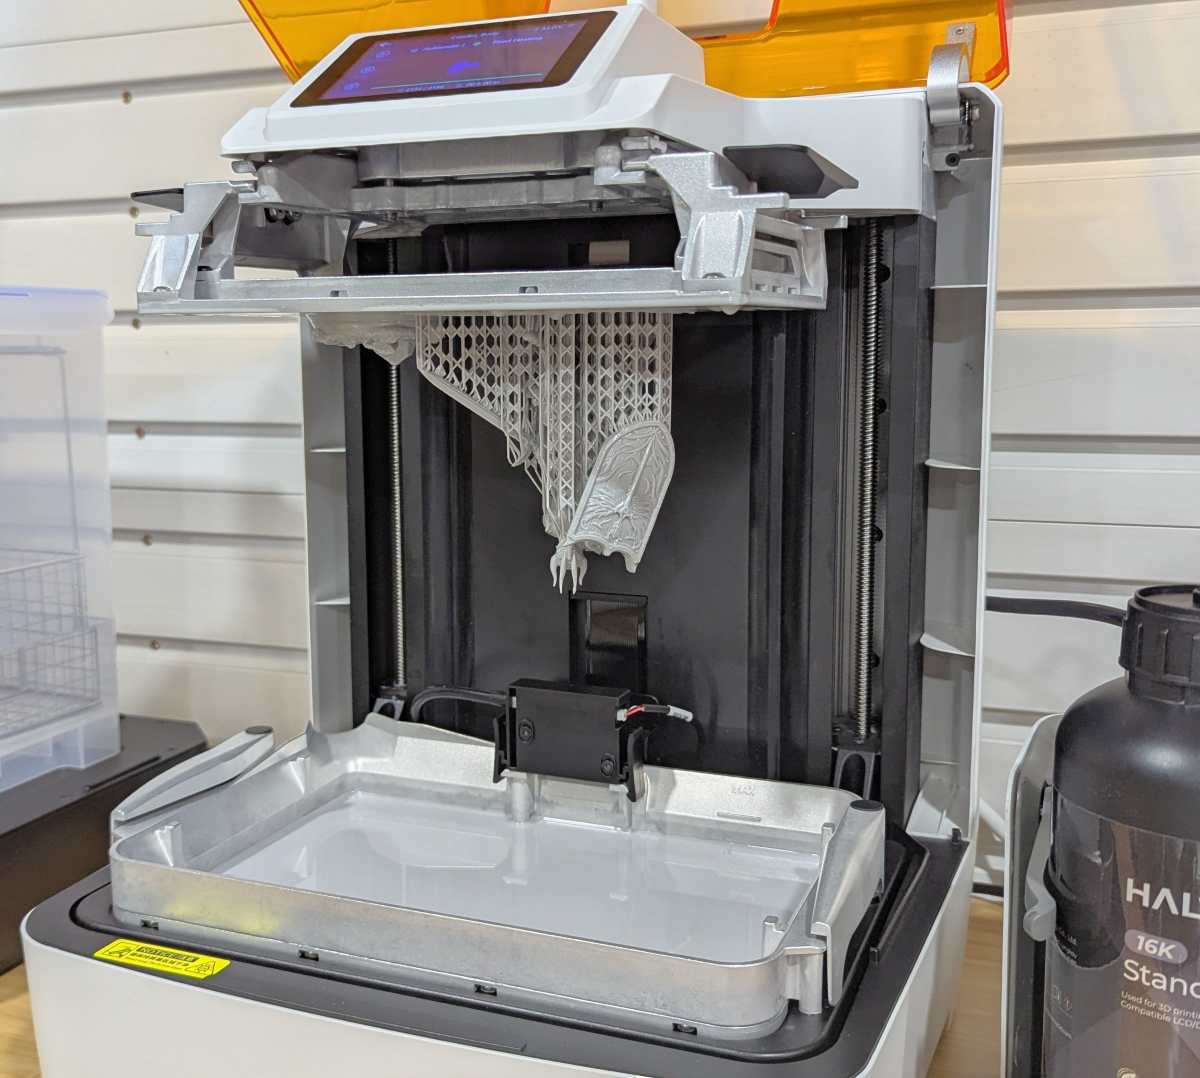
The hinged lid is so handy, you can use it one-handed, making the build plate and resin vat easily accessible. The quick-release build plate slides onto a bracket inside the upper part of the printer.
The build plate is rather unique. It’s made up of a metal grid in which half of it is movable while the other half remains stationary. The black handles you see in the second photo above are the quick-release handles. Twisting them back and forth pushes out the movable part of the grid to pop off the model. No more scraping! Well, at least a lot less of it.
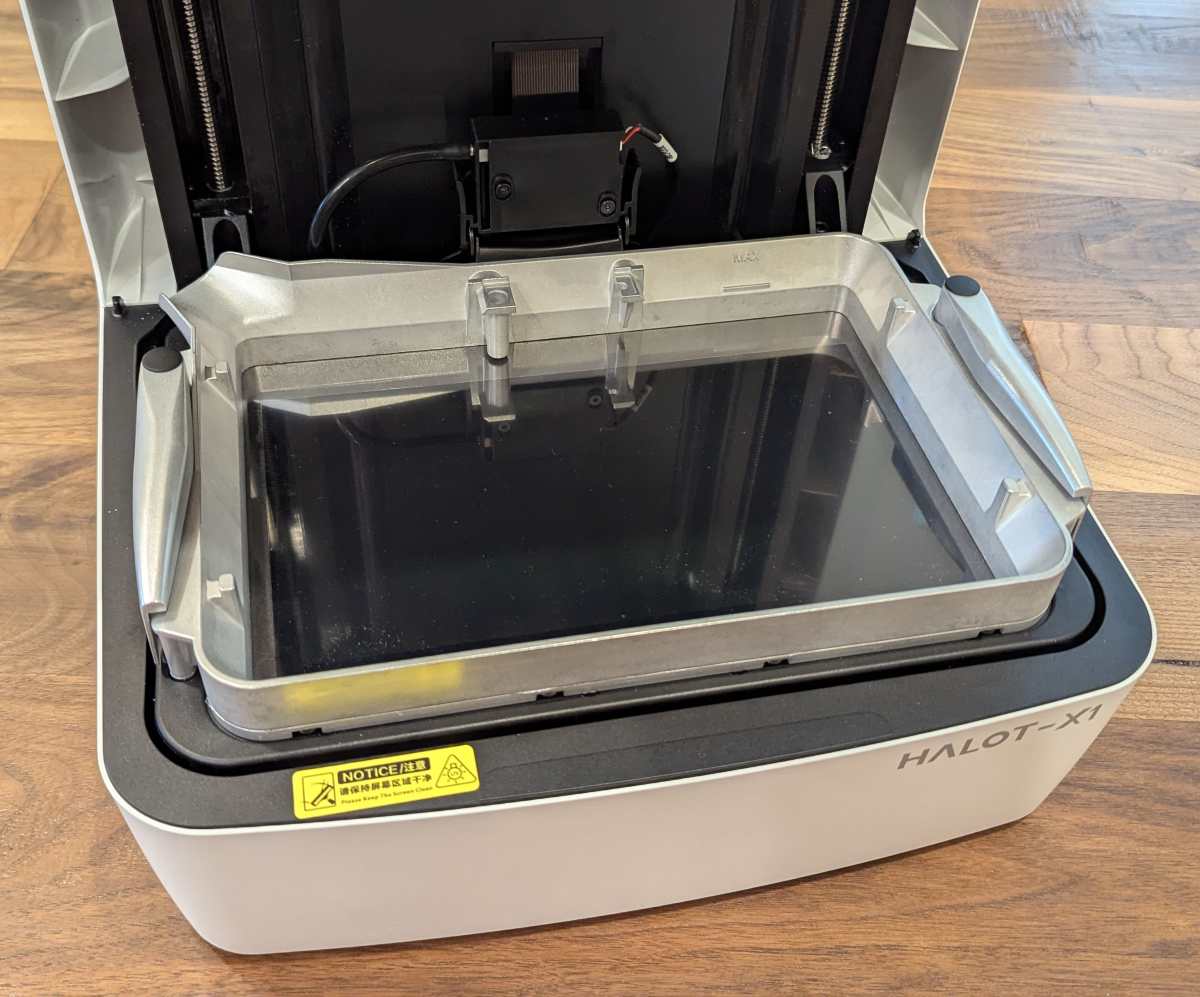
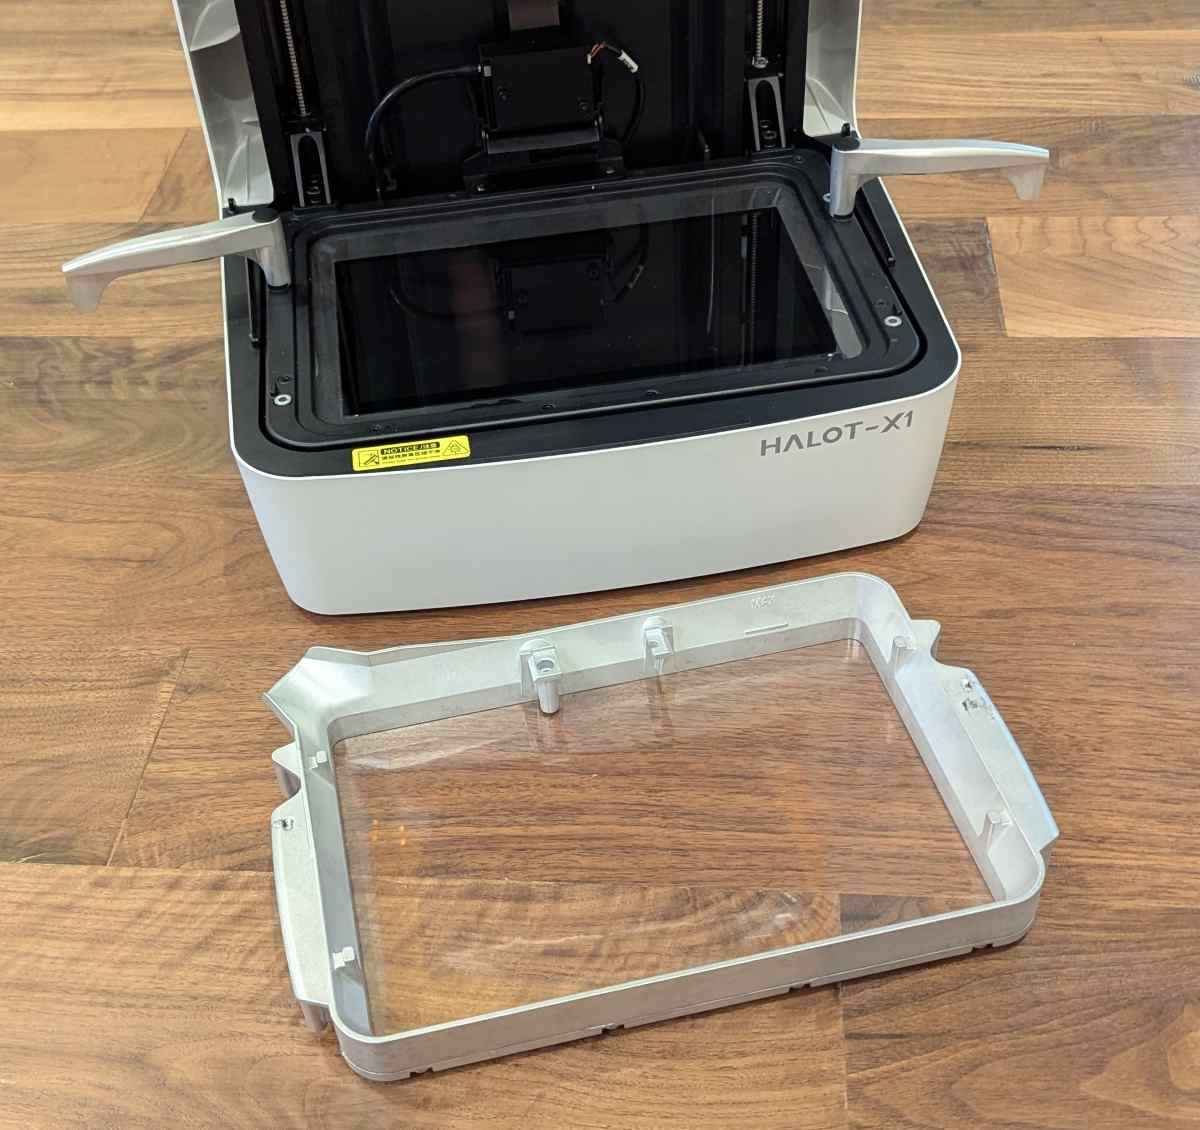
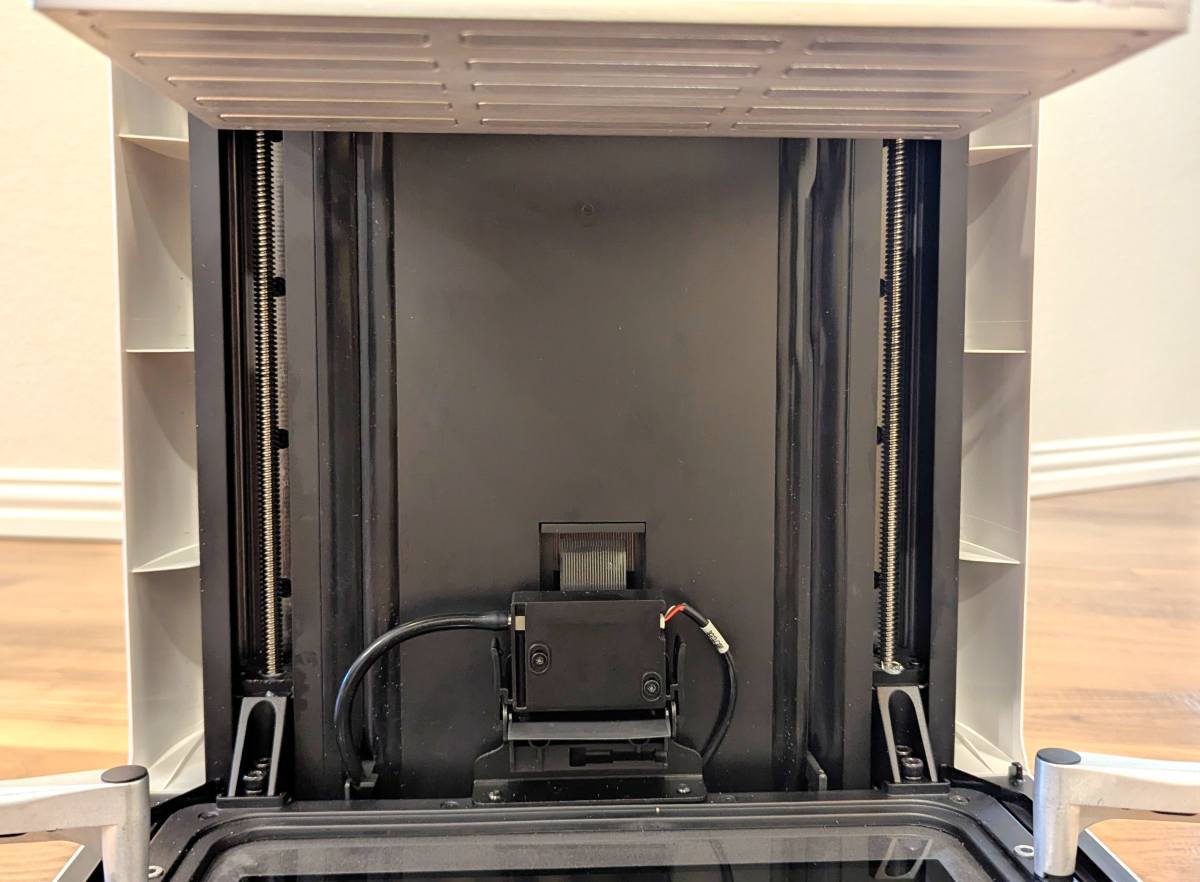
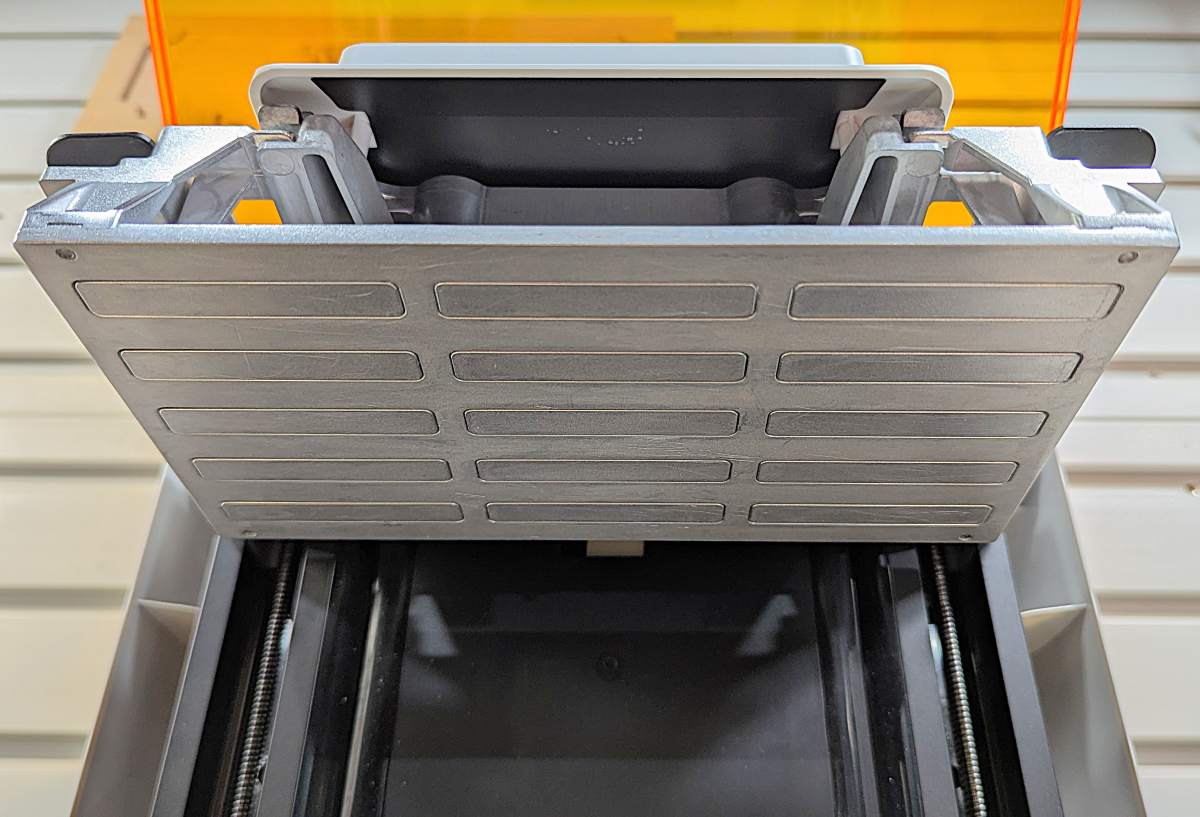
The resin vat locks in place using latches that swing out to release it and swing in to lock it in place. No more screws! The resin vat moves on the Z-axis rather than the build plate. It uses dual linear rails and dual lead screws located at the back of the printer to ensure Z-axis stability when moving the vat up and down.
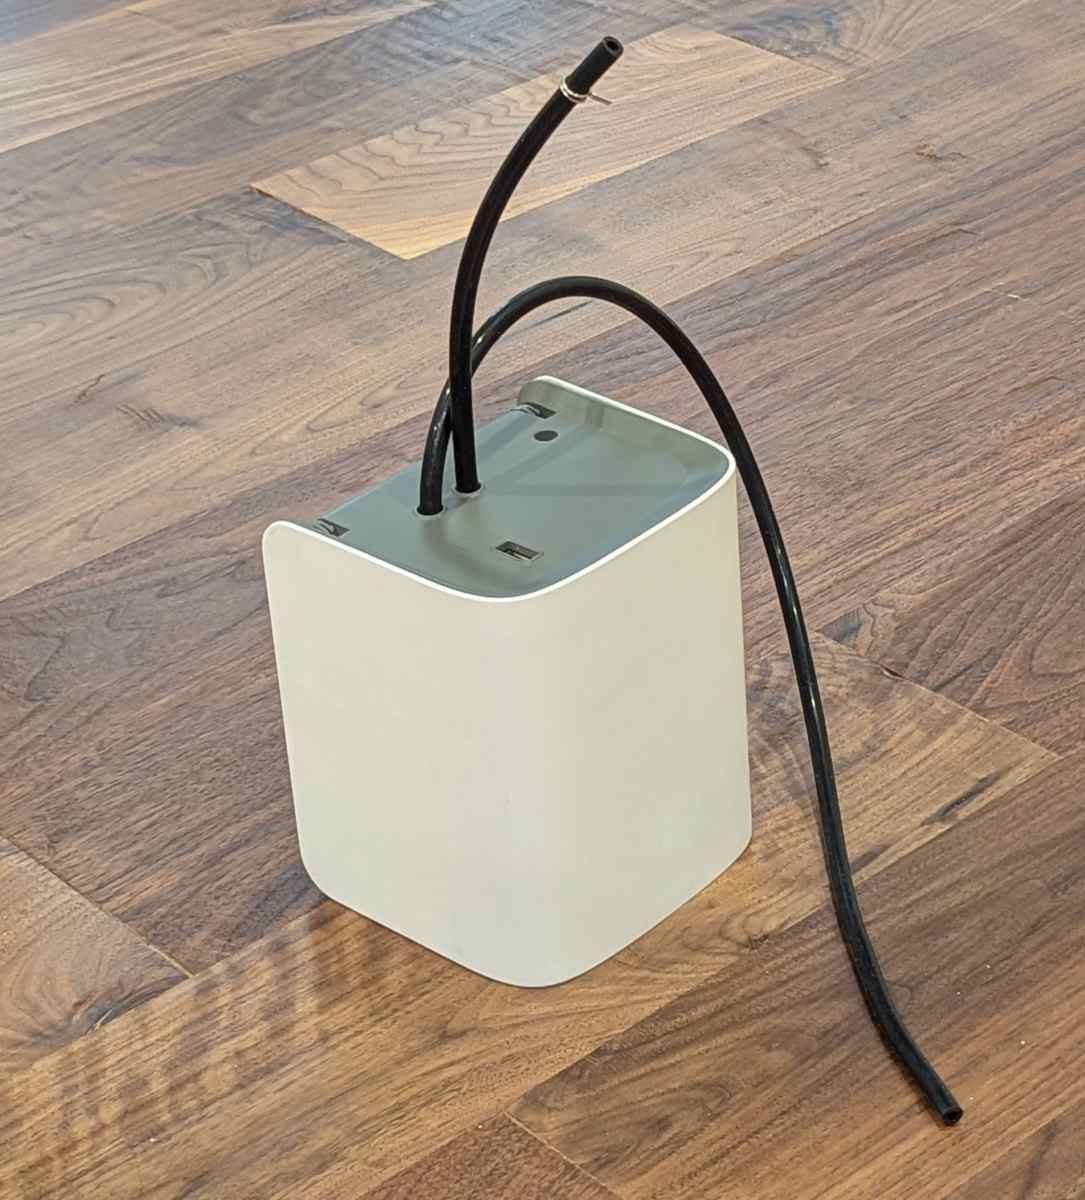
AFU: The AFU has tubes that connect the resin bottle to the printer. As the resin makes its way through the AFU, it can heat the resin to decrease the viscosity (after adjusting the settings) before pumping the resin into the printer.
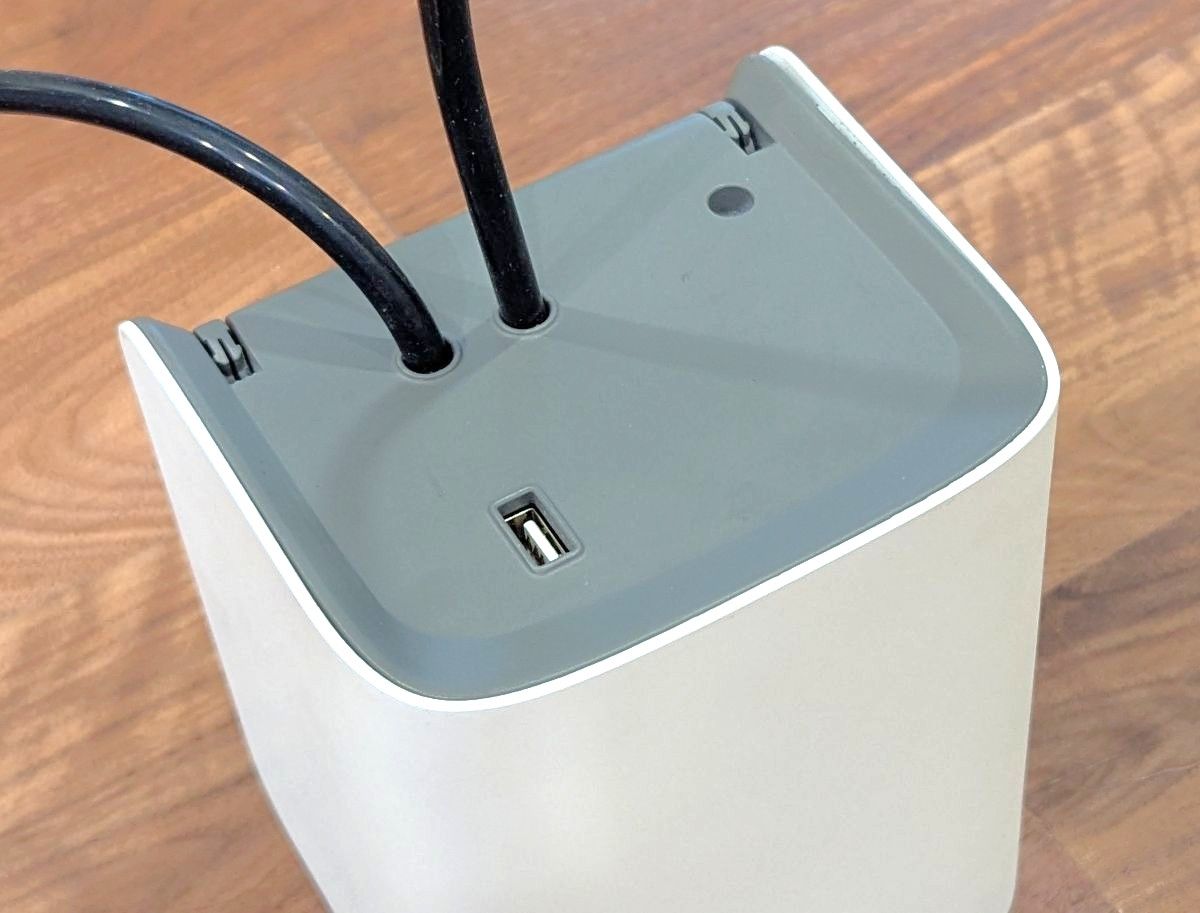
The top of the AFU has a USB-A port to connect it to the printer for power.
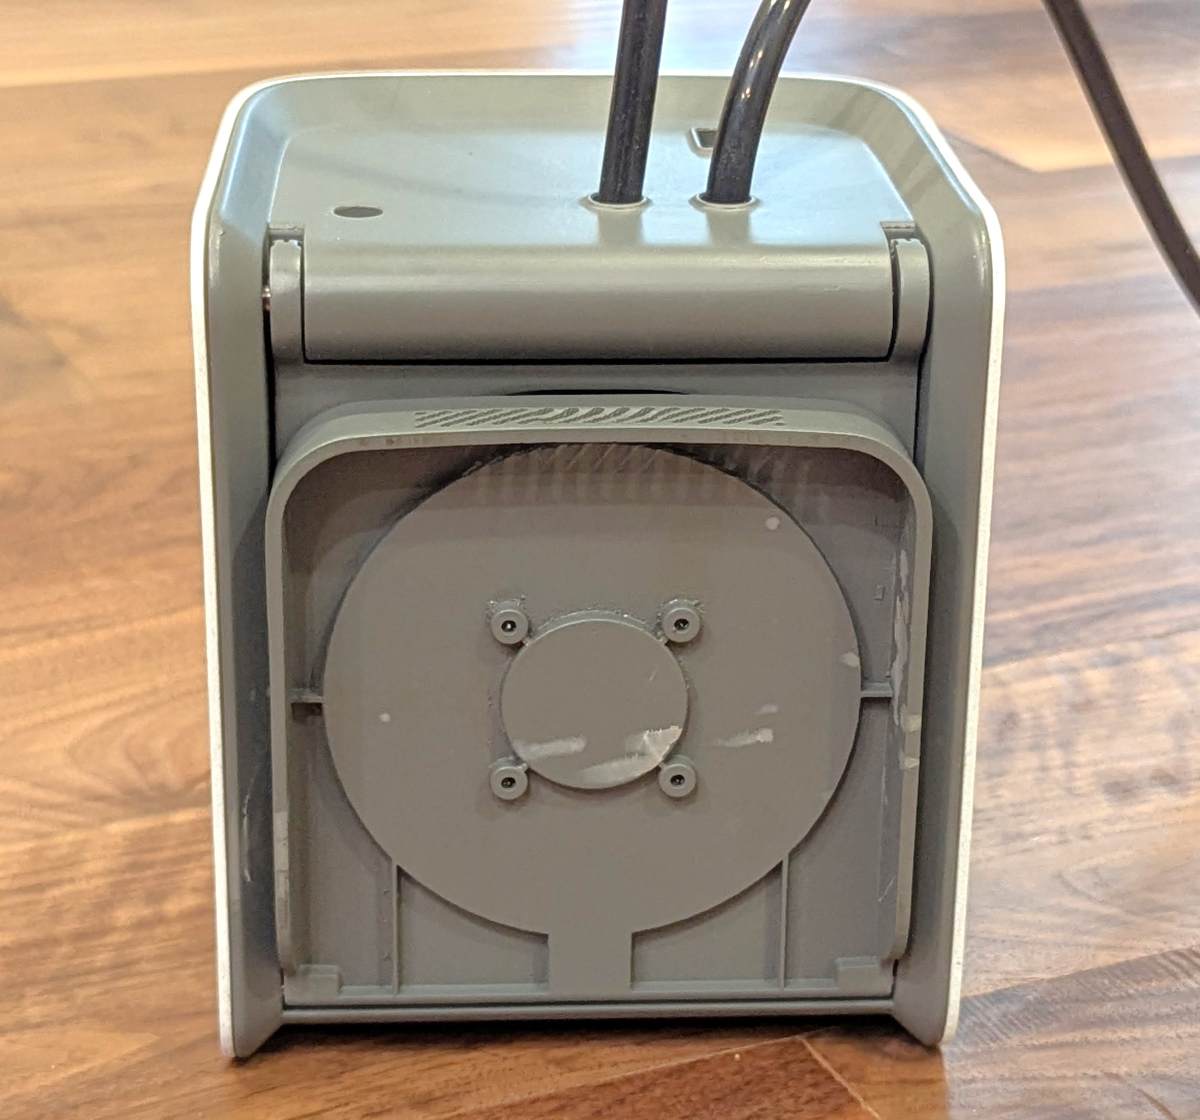
The base of the AFU reads the RFID tag on official Halot resins to identify them. “After placing the resin bottle in the feeding module, the module automatically reads the tag and retrieves the corresponding print parameter package from the cloud, eliminating manual configuration.” Other manufacturers’ resins won’t have RFID tags, so you’ll have to manually enter the resin parameters into the printer or slicer software when using them.
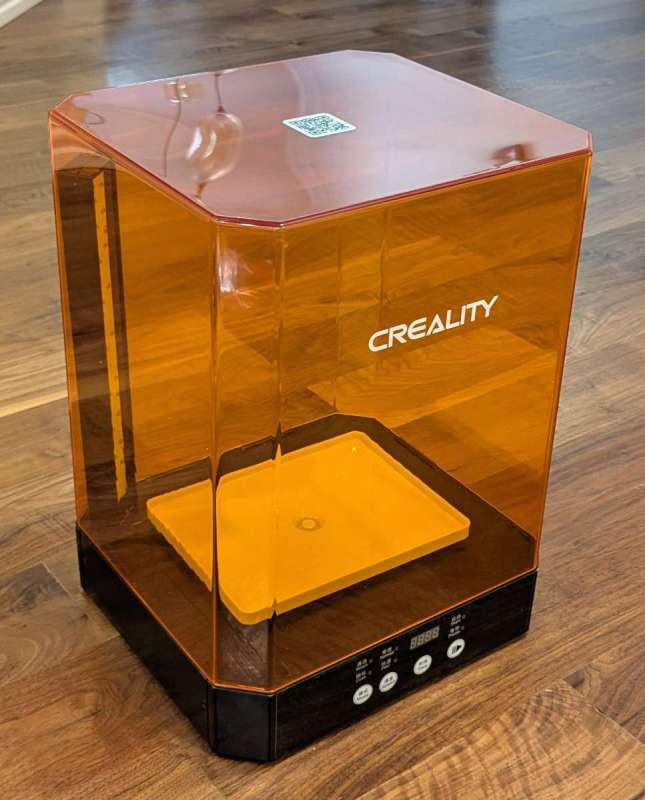
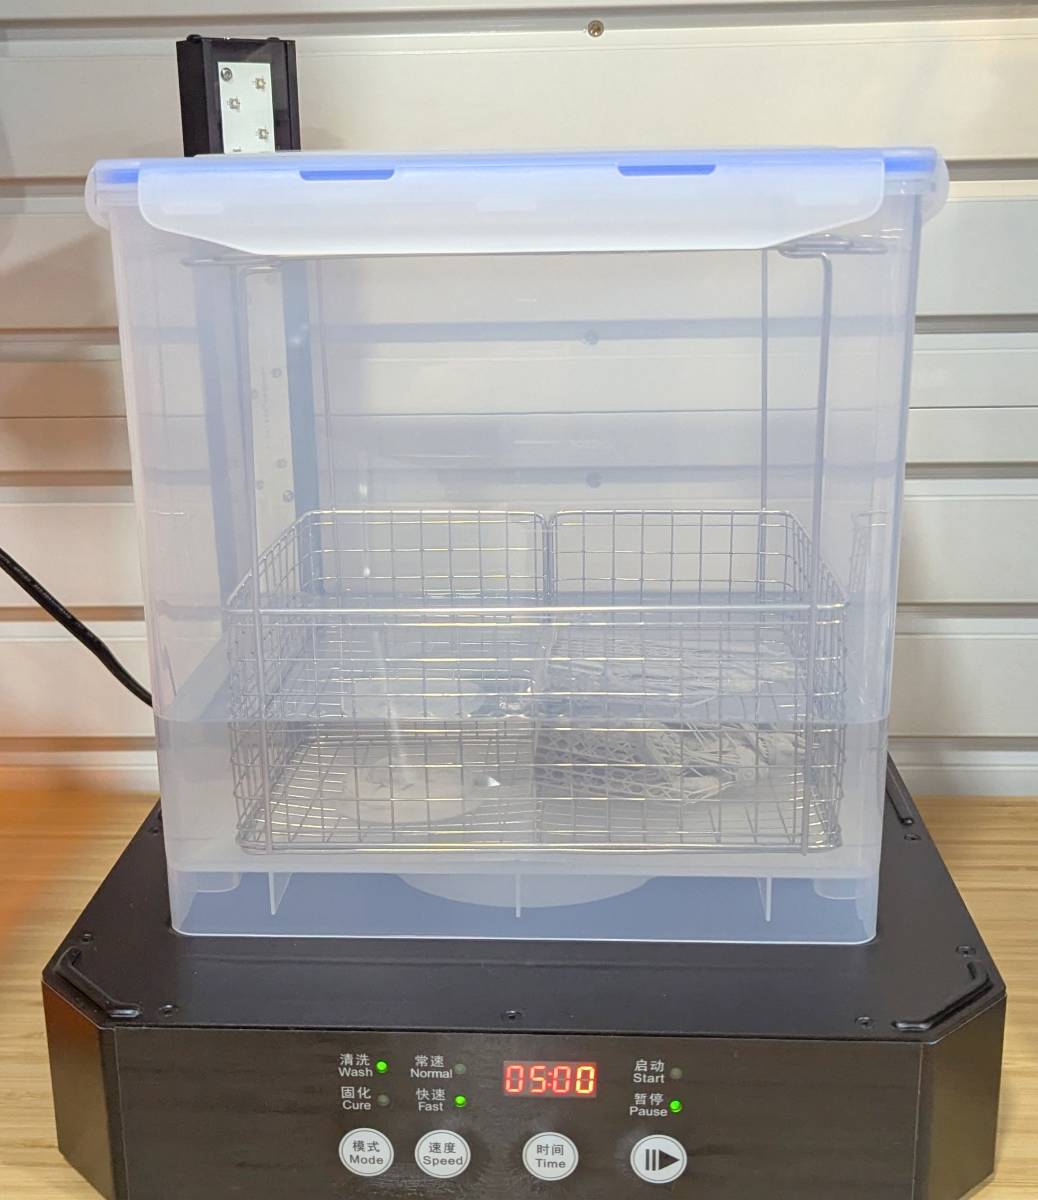
Washing/curing machine: The Creality UW-03 Washing/Curing Machine helps make quick work of washing and curing your models. The base is made of metal and contains a push-button control panel. I wish the base had handholds like the Halot-X1 to make it easier to carry.
The orange plastic lid is made to protect you from the UV lights located on the upright arm of the machine. It would be nice to have a hinged lid on this device like the printer.
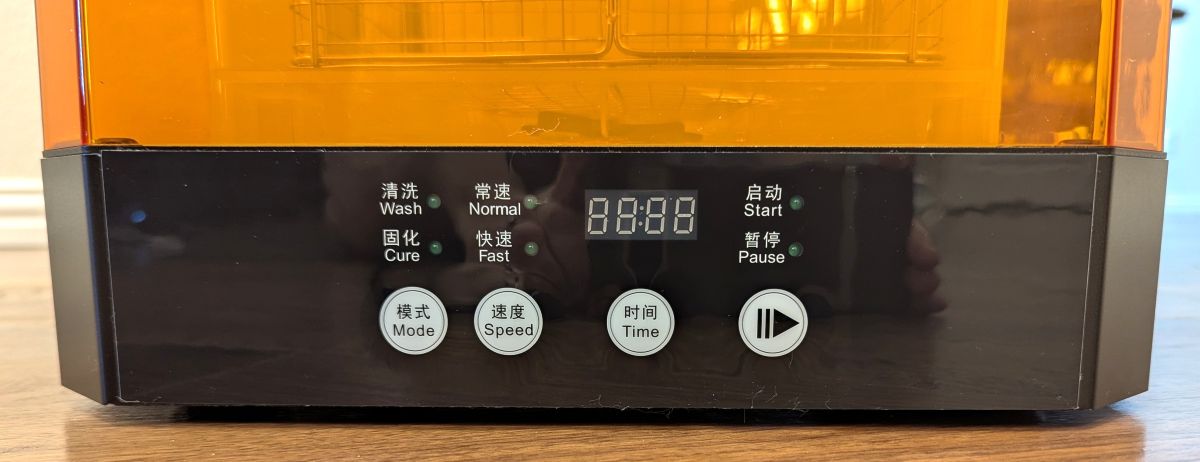
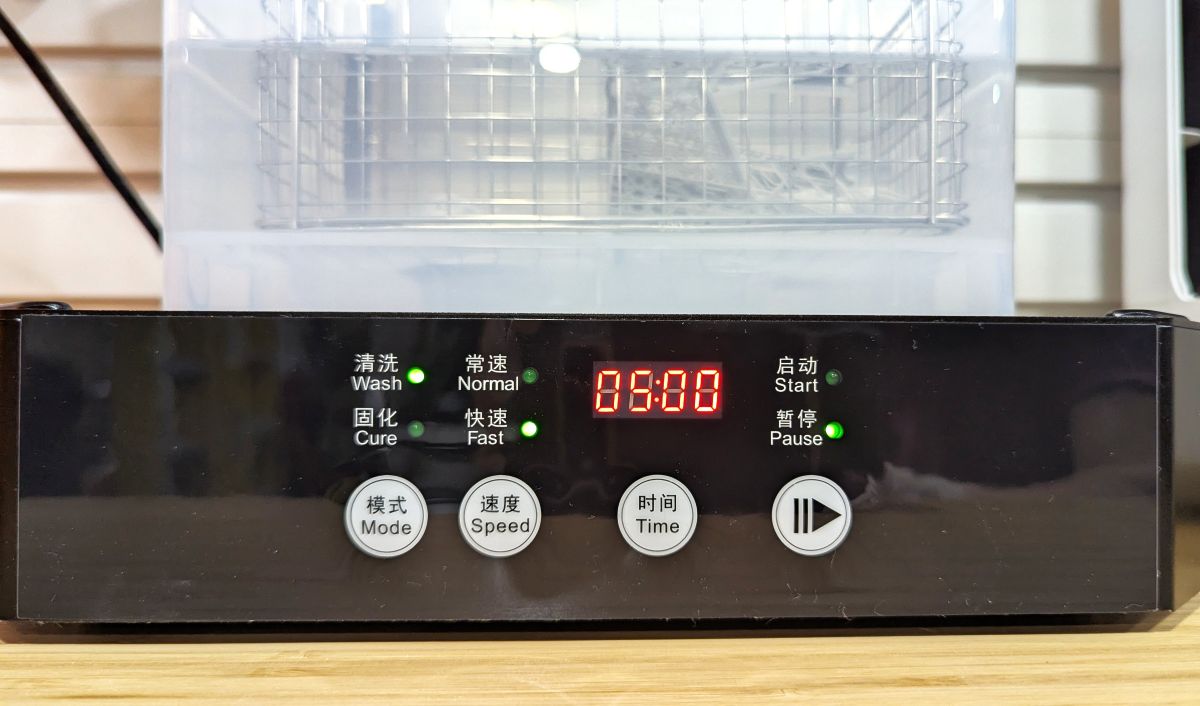
The UW-03 control panel is straightforward. There’s a mode button that switches between “Wash” and “Cure”, a speed button for “Normal” or “Fast” modes, a “Time” button to adjust the amount of time washing or curing your models (5-30 minutes, adjustable in 5 minute increments), and a “Play/Pause” button to start or stop the washing or curing cycle.
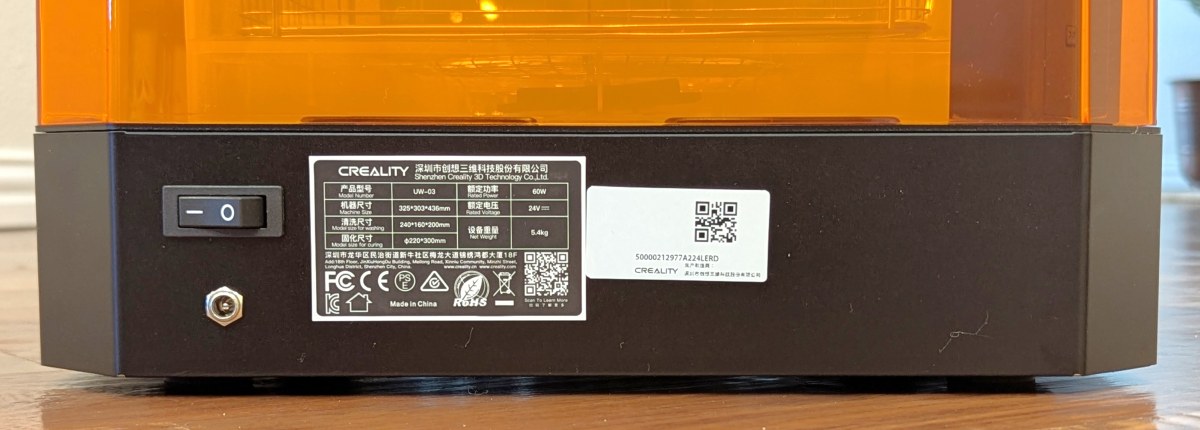
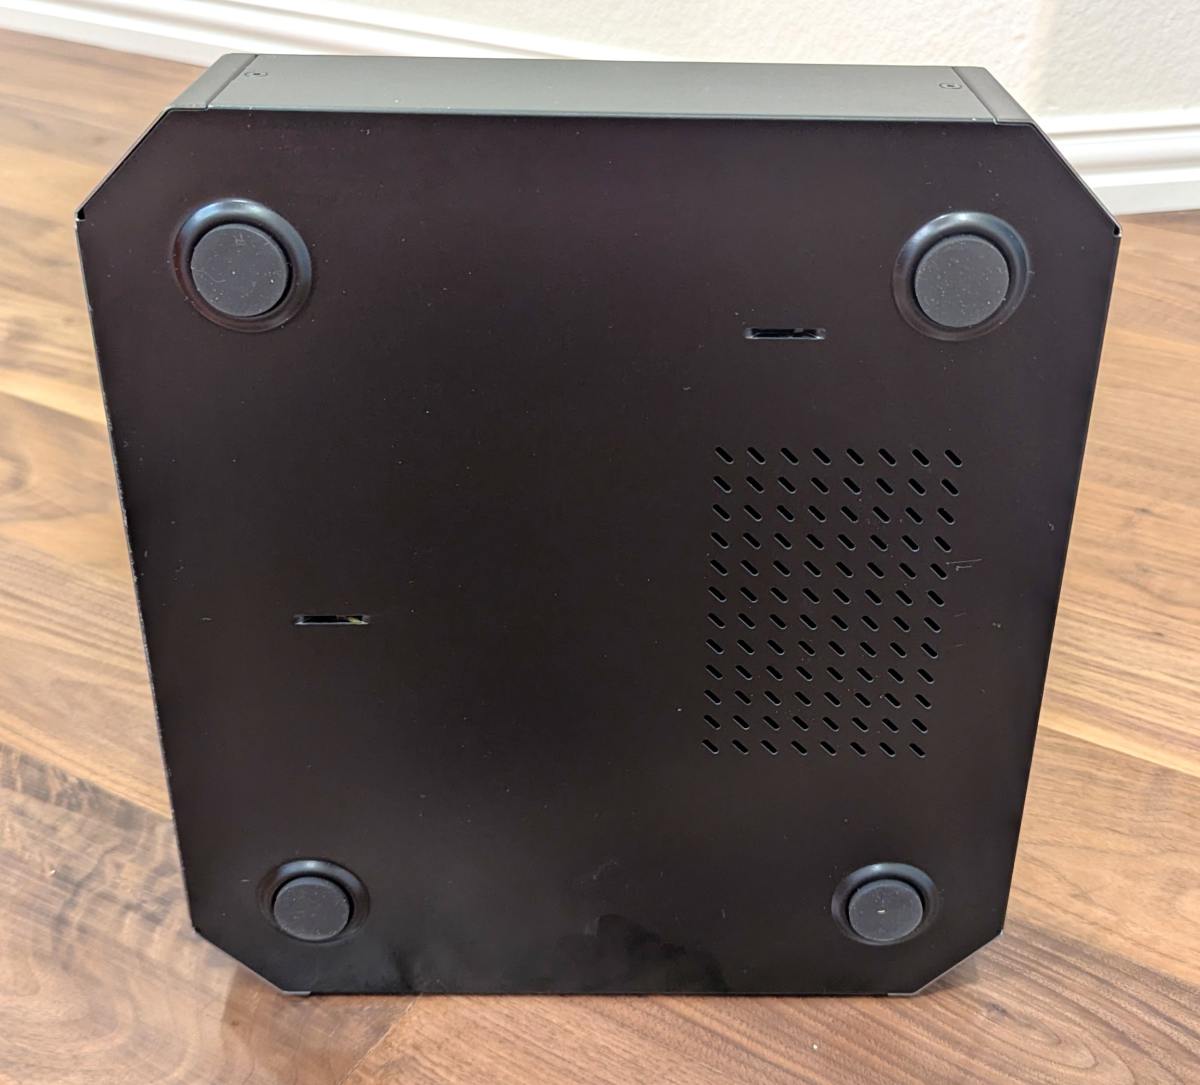
The back of the machine has a sticker containing more details about the machine, and the bottom of the device has rubber pads to protect the work surface and prevent the machine from moving.
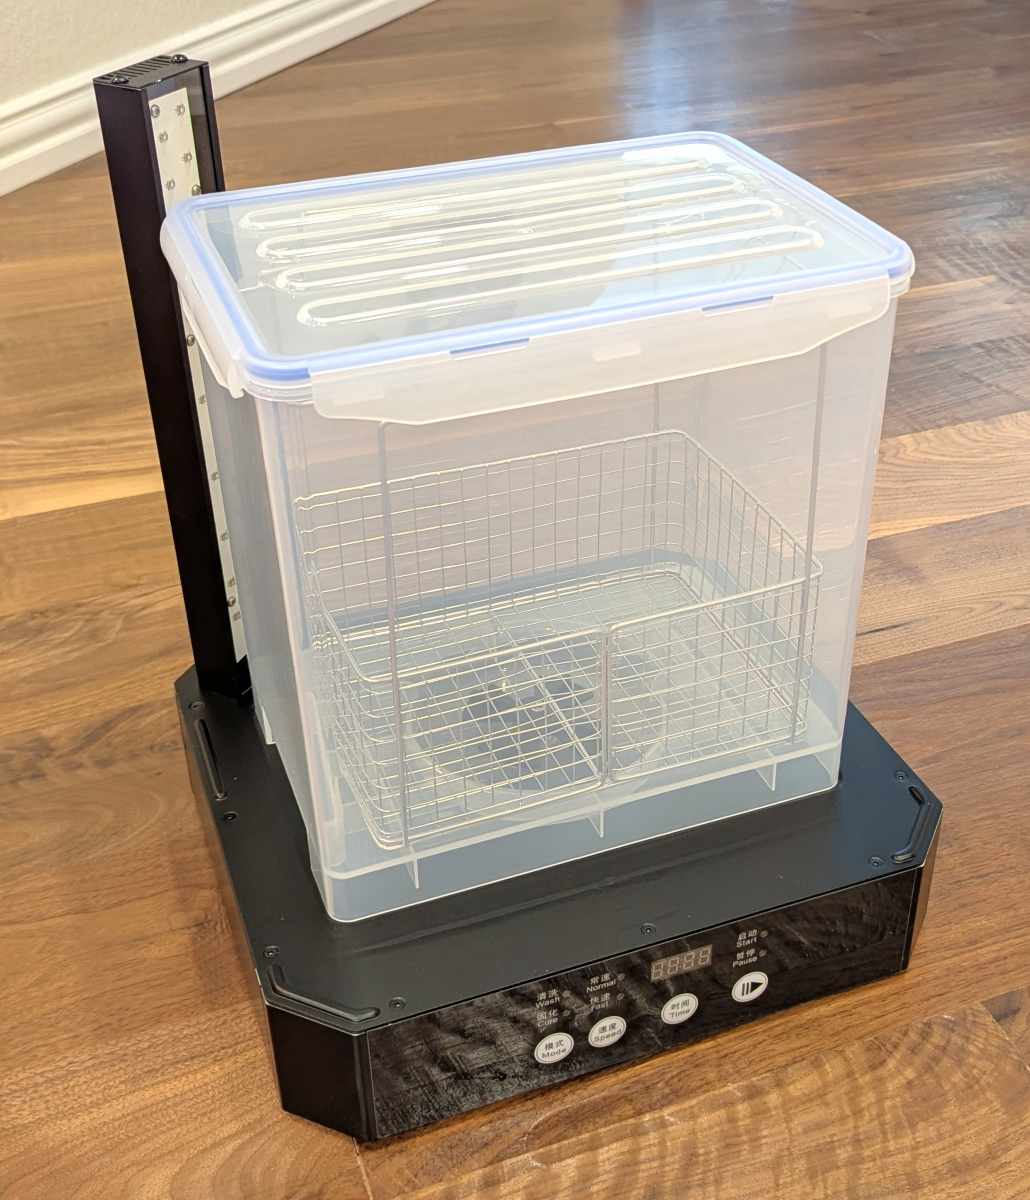
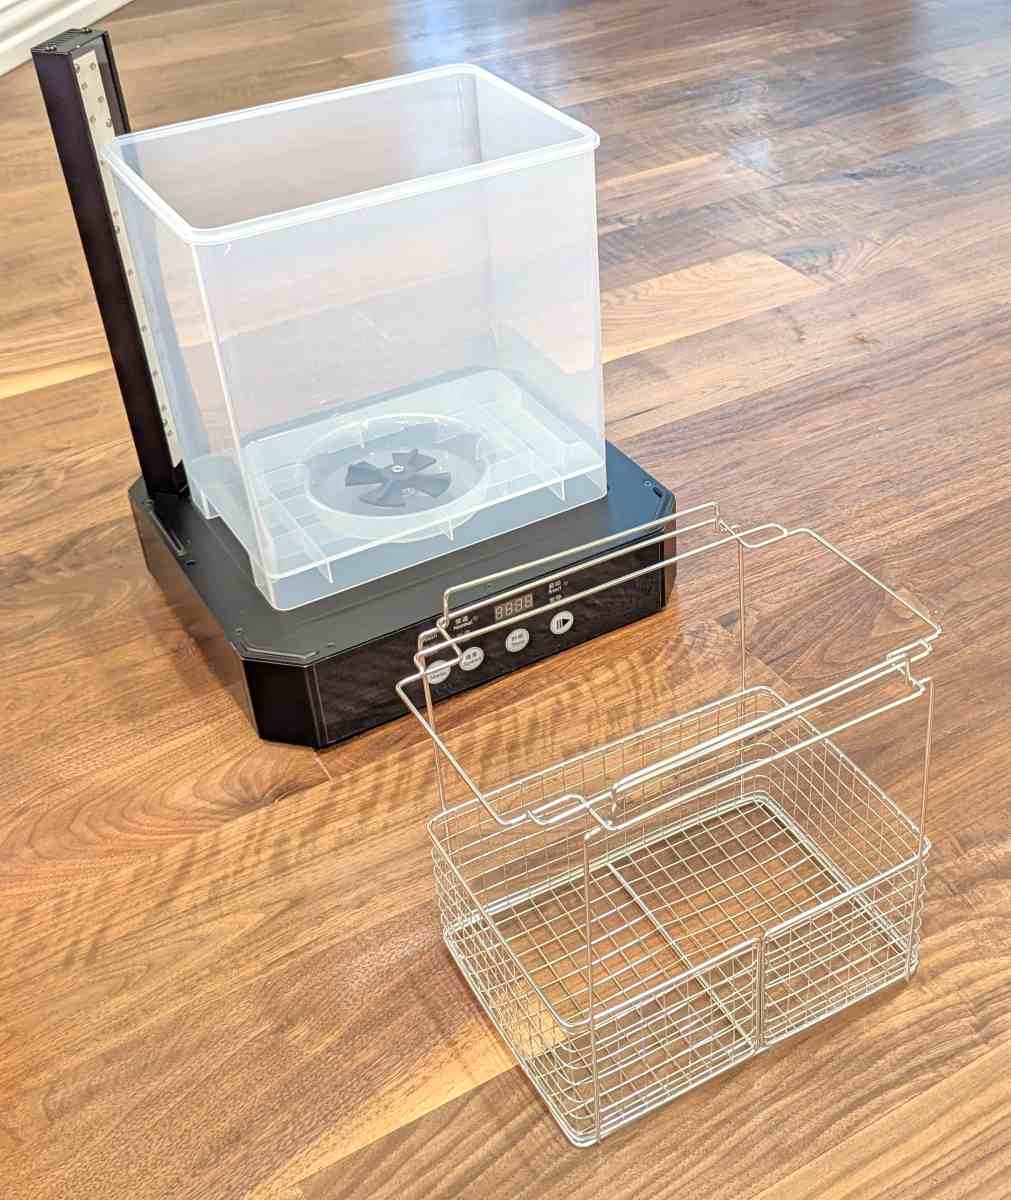
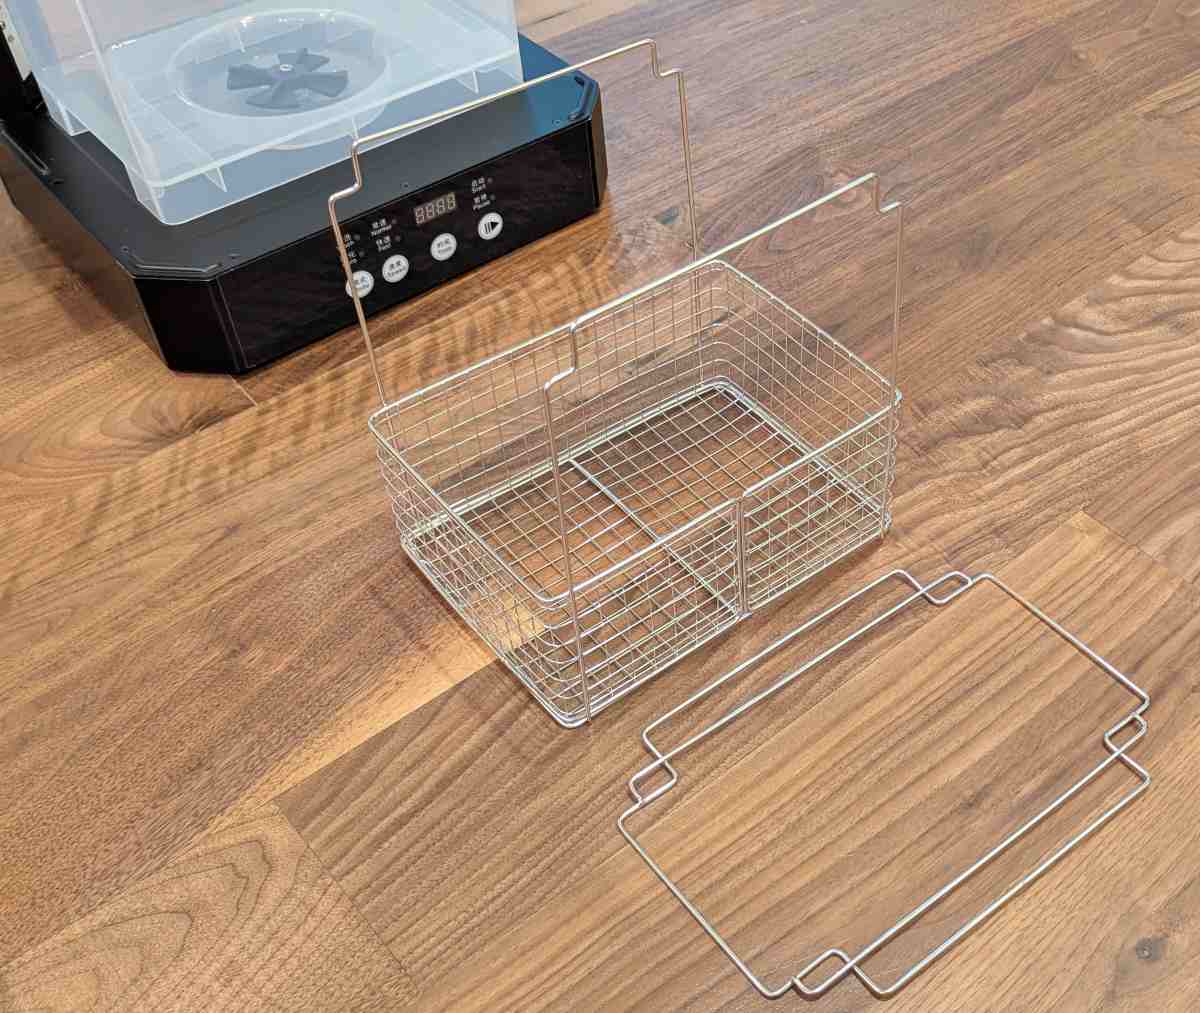
The machine’s washtub is a sealed plastic container that can hold up to two gallons of solvent to clean your resin models. Its lid has four flip-up handles and comes with a wire basket to easily extract your resin prints from the washing fluid (usually isopropyl alcohol (IPA)).
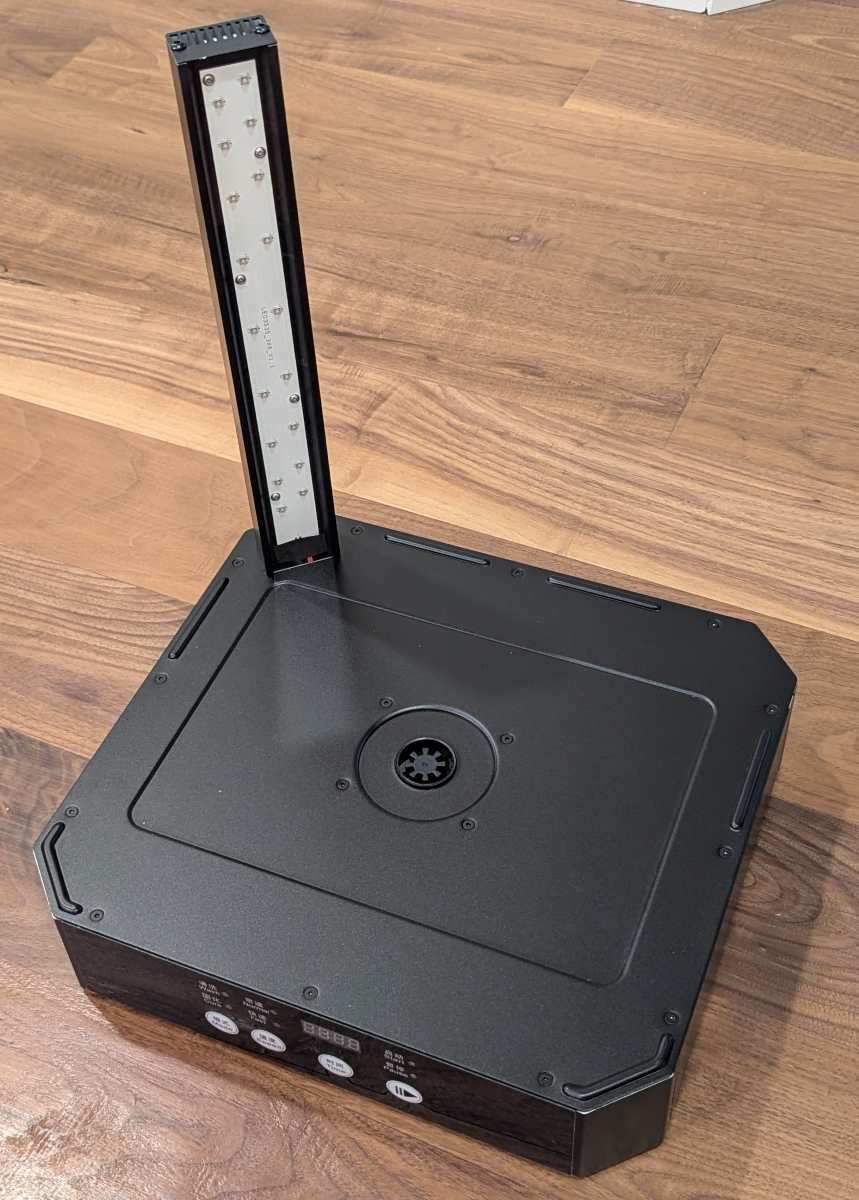

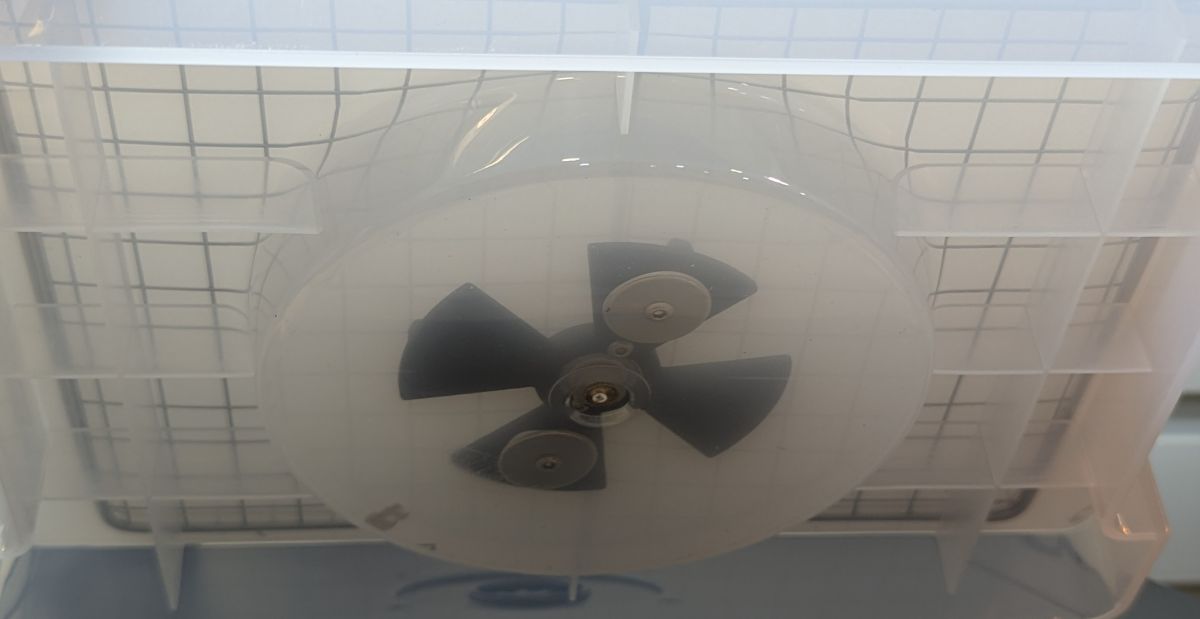
There is a strip of UV lights on the upright bar of the wash and cure station. The washing/curing station functions as a large magnetic stirrer and turntable. The washtub has a black propeller located at the bottom of the tub. Two propeller blades have magnets on the underside (third photo above). The base of the machine contains magnets that are attracted to the magnets on the propeller blades and move them to stir the washing fluid.
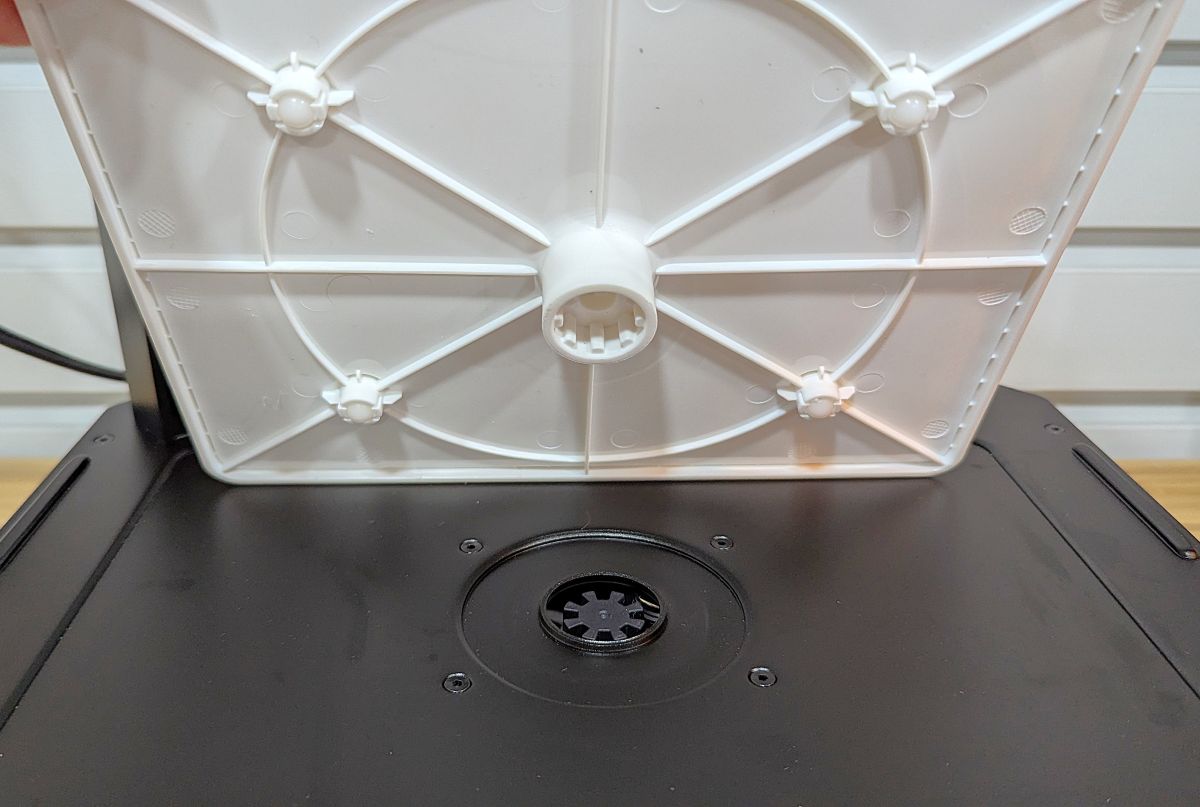
The bottom of the curing turntable fits into a gear in the UW-03 base that turns it while your model is curing (shown in the last photo above).
Assembly, Installation, Setup
Printer: Setting up the Halot-X1 was super easy – barely an inconvenience. I installed the build plate by sliding it into place, made sure the resin vat was locked in, and plugged in the printer. Quick and easy!
AFU: Attaching the AFU was equally easy. The short black tube attaches to the specially-made cap for official Halot resin bottles. The cap has a hole in the center containing a short, rigid tube. The tube on the underside of the cap attaches to a longer translucent tube that goes inside the resin bottle. The other end of the short tube on the top of the cap attaches to the short, flexible black tube located on the top of the AFU. The long, flexible black tube on the top of the AFU connects to the port located on the upper-back portion of the printer. Lastly, attach the USB cable from the top of the AFU to the port on the upper-back portion of the printer.
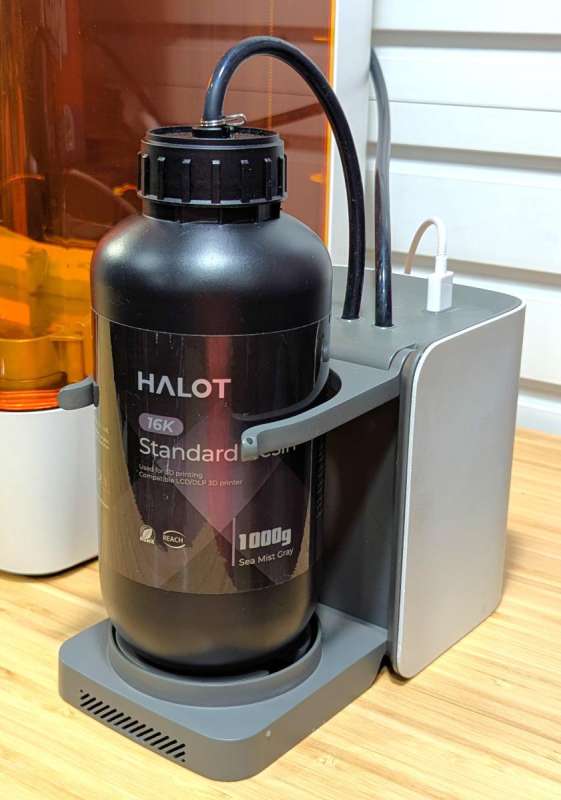
The AFU has a base that flips down and arms that flip up to hold the bottle of resin. The base of the AFU reads the RFID tag on the bottom of the Halot 16K Standard Resin bottle to correctly identify the resin and its parameters and dispense what is needed for each print.
Here’s my setup in the garage so I can open the garage door and have plenty of ventilation.
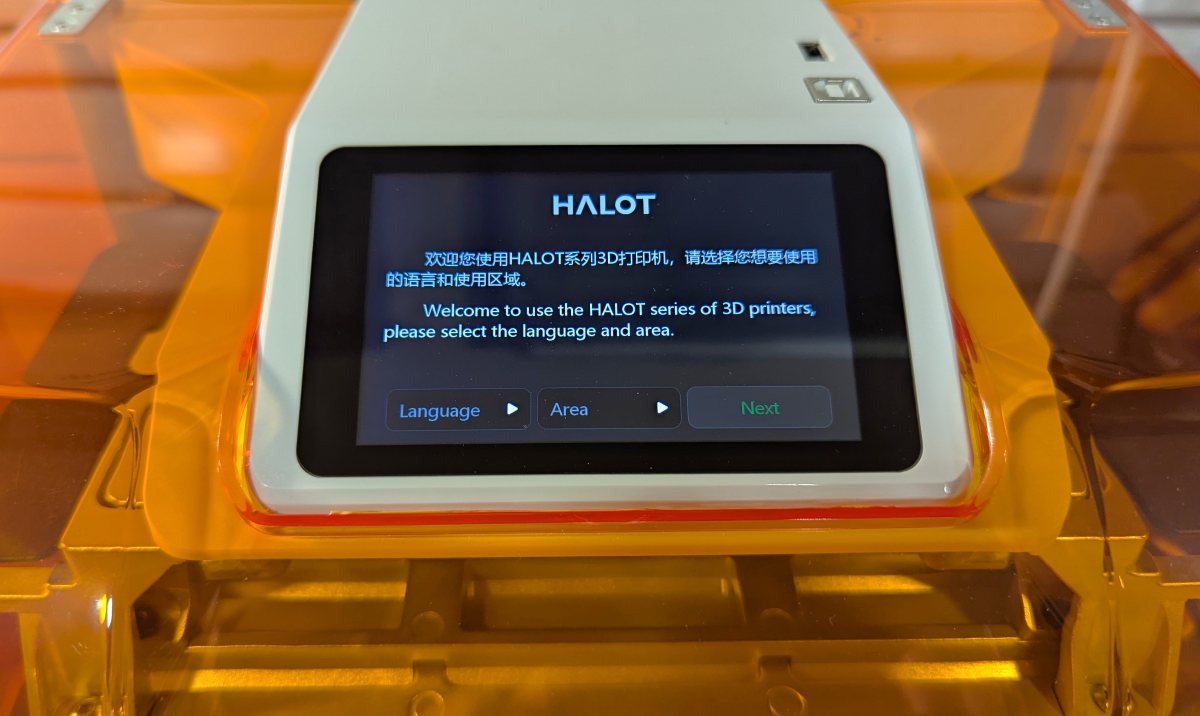
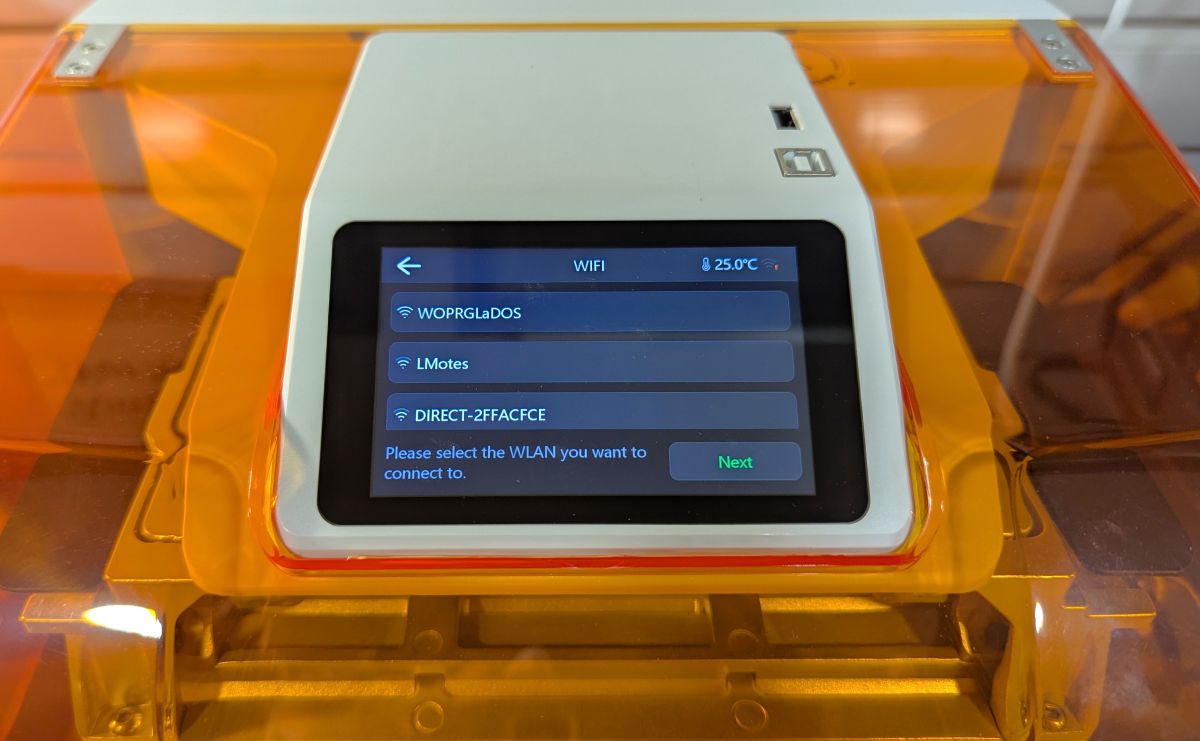
When powering up the printer, you are prompted to select a language, go through their privacy policy, and connect the printer to WiFi.
Washing/curing machine: Setting up the UW-03 only required plugging it in and filling the washtub with IPA. Done and done!
Performance
After setting up the machine, I was eager to print a sample file, but had a couple of important questions that needed to be answered before starting. Where was the file, and how do I clean up the machine and the AFU after I’ve finished printing? There was nothing in the documentation about cleaning the printer or AFU.
When I sent my questions to PioCreat, they told me the following:
- The Auto-Feed Unit – do I need to remove the bottle of resin to store it between prints, or can I leave it connected?
“You don’t need to remove the resin bottle from the AFU between prints (unless you are switching to a different type of resin). It can remain connected. If there will be a long interval between prints, you can choose to automatically recycle the resin from the vat back into the bottle.”
I also noticed that all parts of the AFU shield the resin from UV (black tubing, black resin bottle, and the pump and heater are encased in opaque black plastic). Thus, it makes sense that you don’t have to clean it for a little while.
- How do I clean the AFU and the tubing? “To clean the AFU and its tubing, you can use an empty bottle filled with a small amount of [isopropyl] alcohol. Connect the bottle to the AFU and manually operate the feed/reverse function to flush out the system.”
I’ve learned that cleaning with 90% IPA or above is suggested – the higher the percentage, the better. The Halot 16K Standard Resin can’t be washed with soap and water.
Printing the sample file
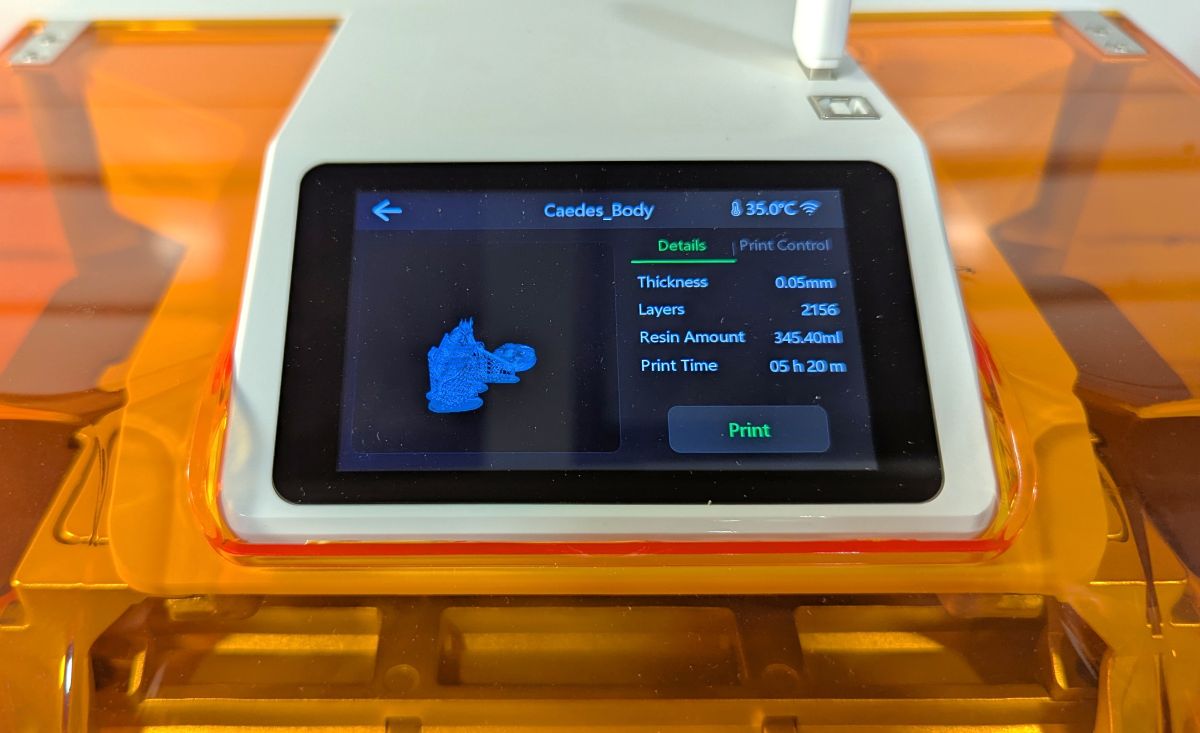

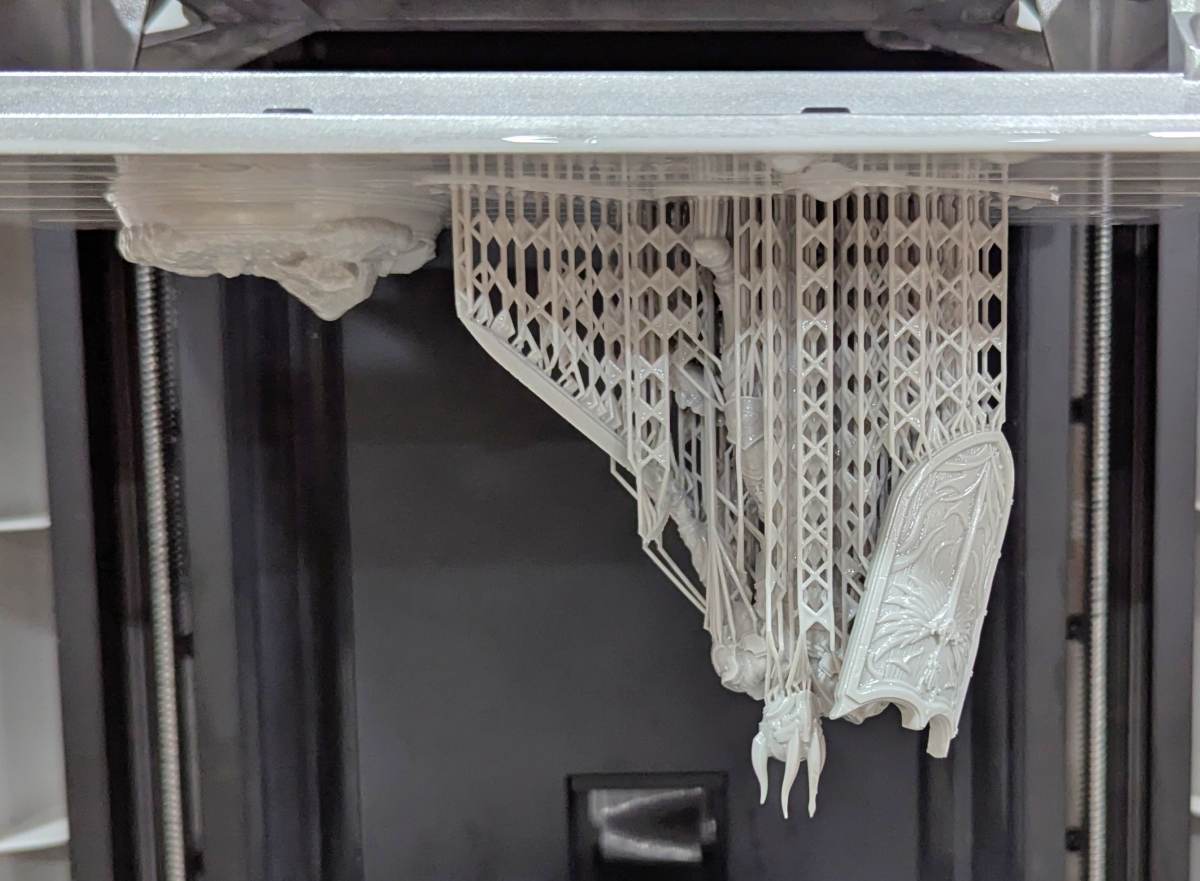
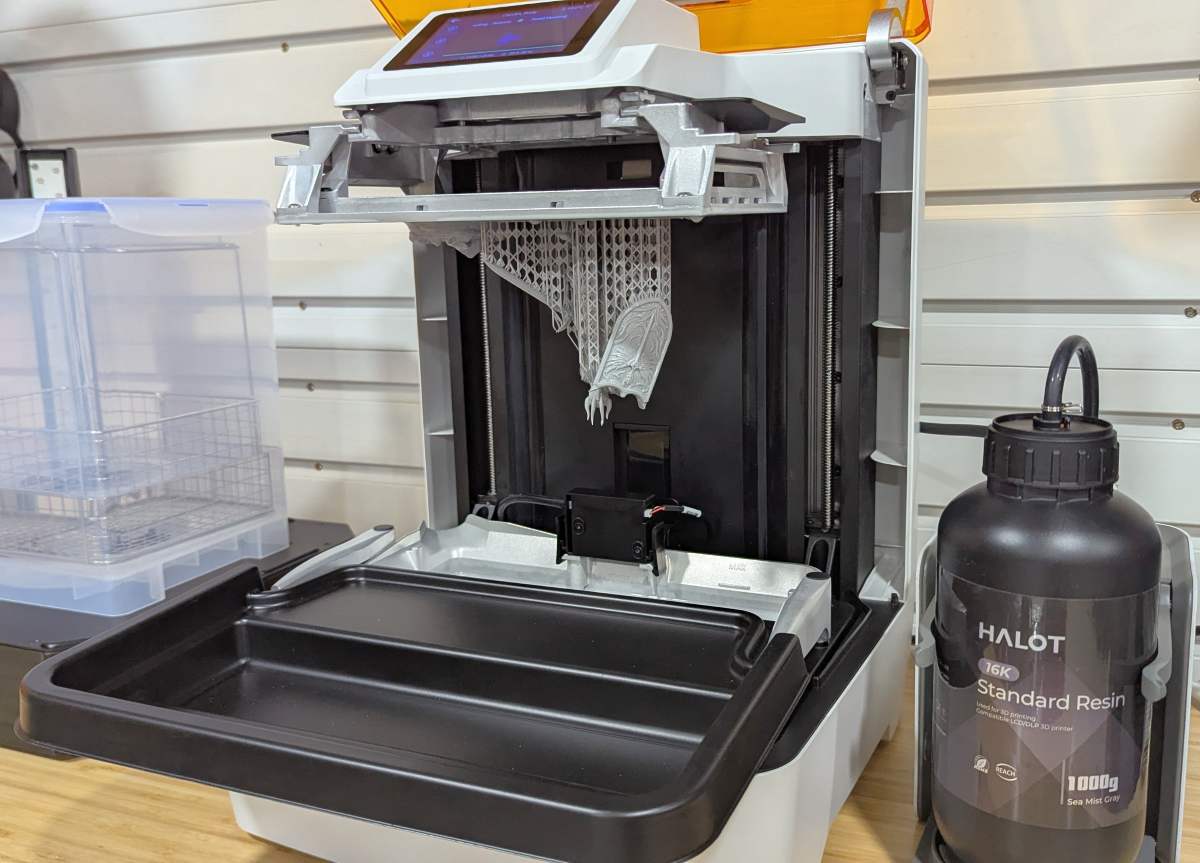
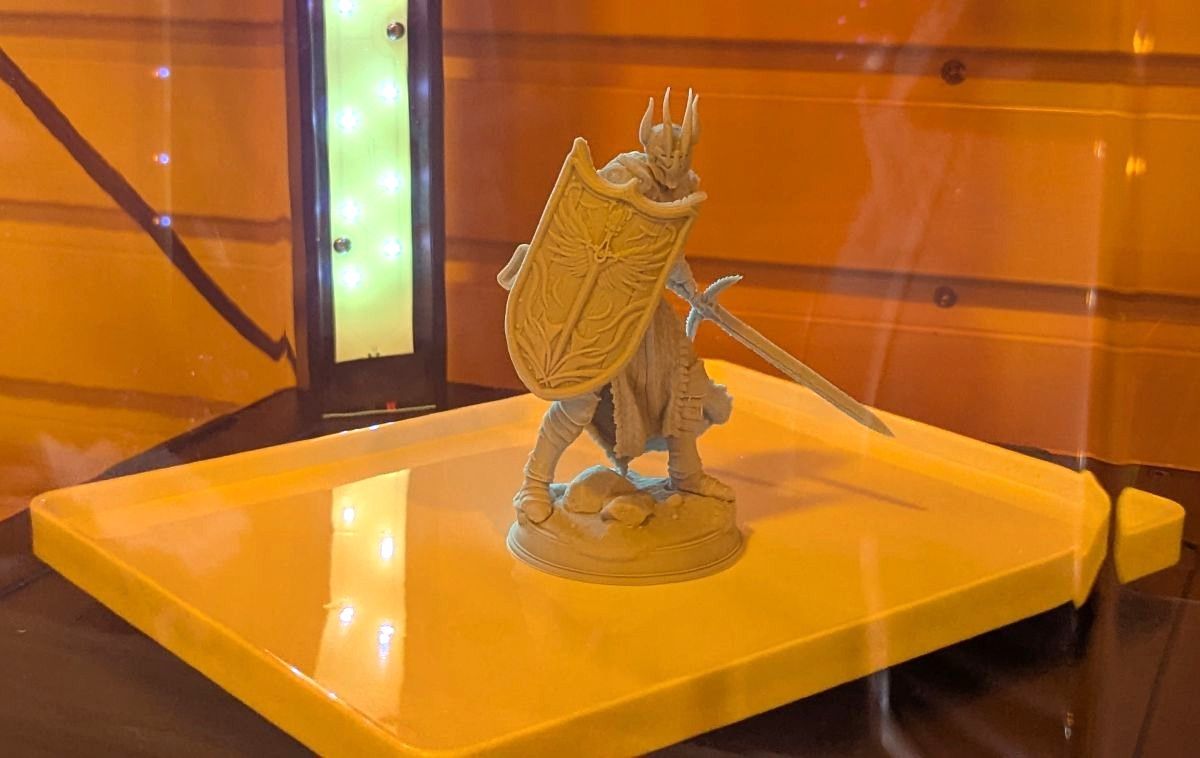
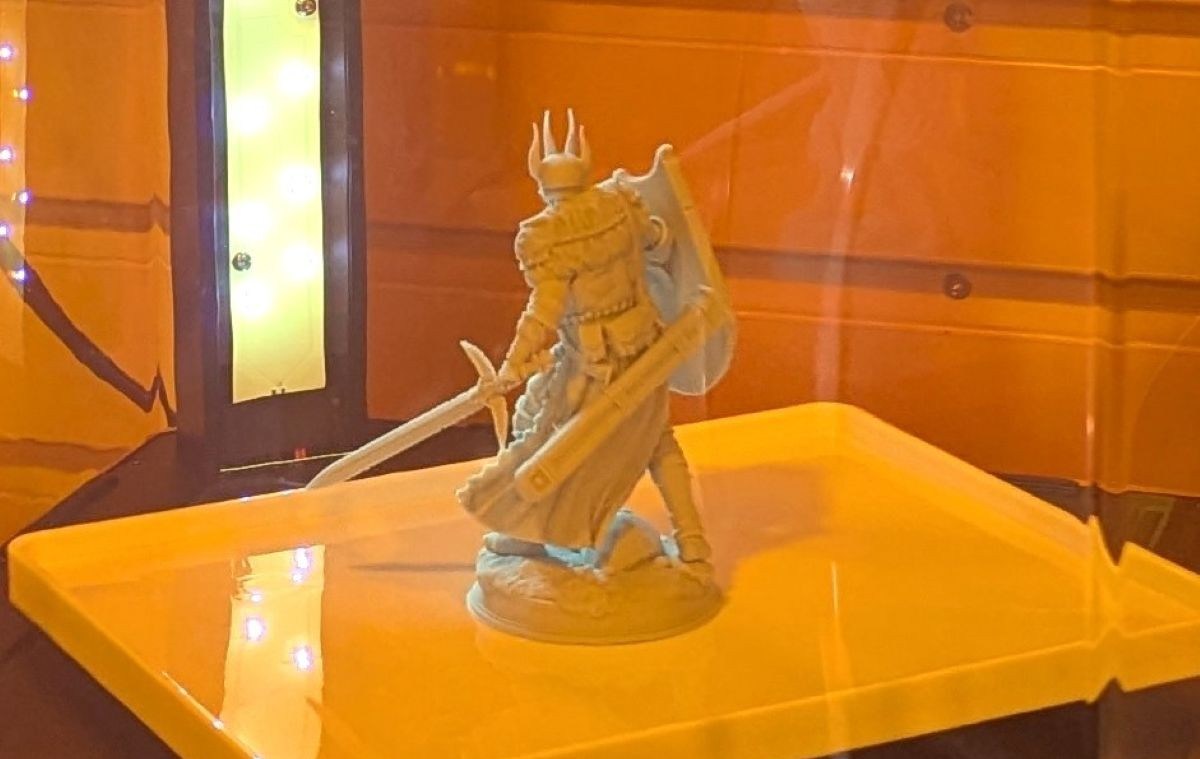
I had to request the sample file from PioCreat as I couldn’t find it on the flash drive they sent me. They sent me a link to the file, “Caedes body”, which was already sliced, supported, and ready to go.
To print the sample file, I did the following:
- I tapped the “Print” button
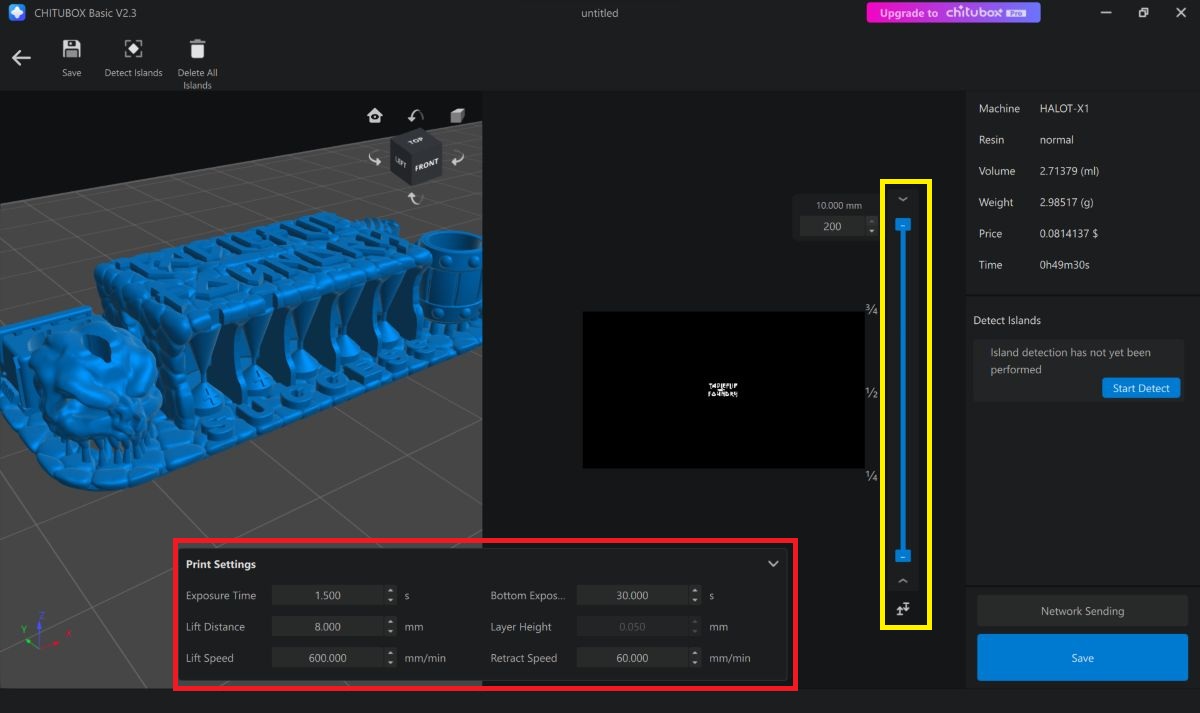
- I selected the “Caedes body” file. The following information popped up:
Details tab (second photo above):
-
-
-
-
- Thickness: 0.05mm
- Layers: 2156
- Resin amount: 345.40ml
- Print time: 5 h 20 m
-
-
-
- Tap the “Print Controls” tab and check the following:
Print Control tab – Local Parameters tab (third photo above):
-
-
-
-
- Initial exposure: 30 s
- Bottom exposure layer: 4
- Exposure time: 1.5 s
- Light off delay: 4 s
- Rising height: 8mm
- Motor speed: 5mm/s
- Cushion layer height: 5.0mm
- Cushion layer motor speed: 2mm/s
- Cushion layer turn off delay: 6.0 s
-
-
-
Print Control tab – File Parameters tab:
-
-
-
-
- Initial exposure: 60 s
- Bottom exposure layer: 4
- Exposure time: 1.5 s
- Light off delay: 4 s
- Rising height: 8mm
- Motor speed: 3mm/s
- Cushion layer height: 5.0mm
- Cushion layer motor speed: 2mm/s
- Cushion layer turn off delay: 6.0 s
-
-
-
- I used the “Local Parameters” and not the “File Parameters” when I printed Caedes, mainly because I missed the “File Parameters” selection since this was my first time printing (the printer defaults to using the local parameters on the printer).
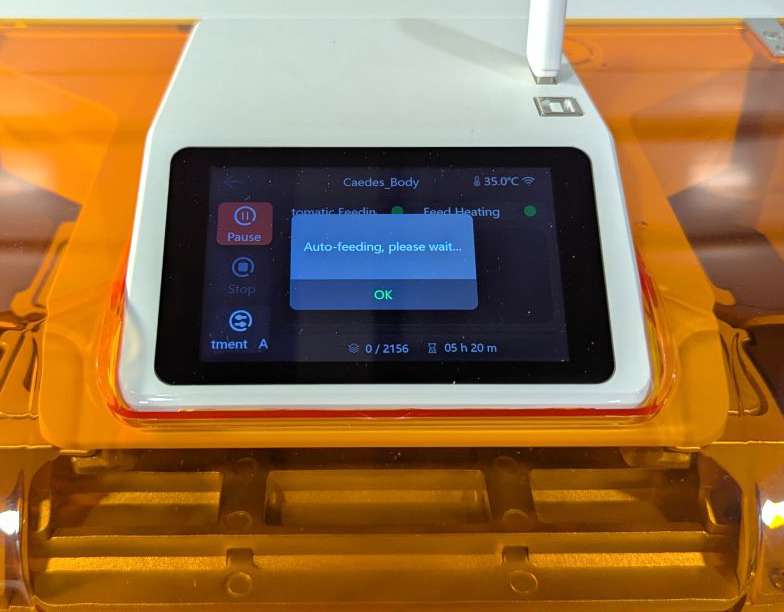
- I tapped the “Print” button
- I tapped the “Start” button

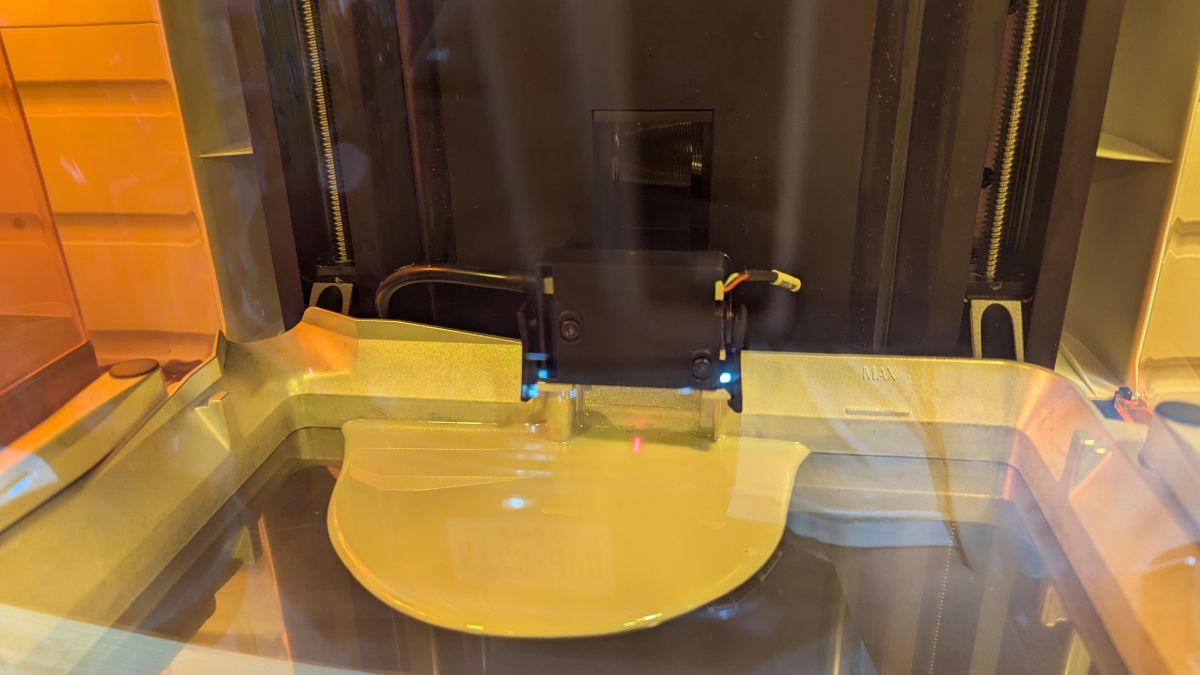
The first time I tapped “Start” to print the sample file, none of the resin was being dispensed into the resin vat. My husband figured out from the AFU User Manual illustrations that you need to remove the small module that sits in a docking station at the back of the printer to a location on the back of the vat to start dispensing resin (first and second photo above).
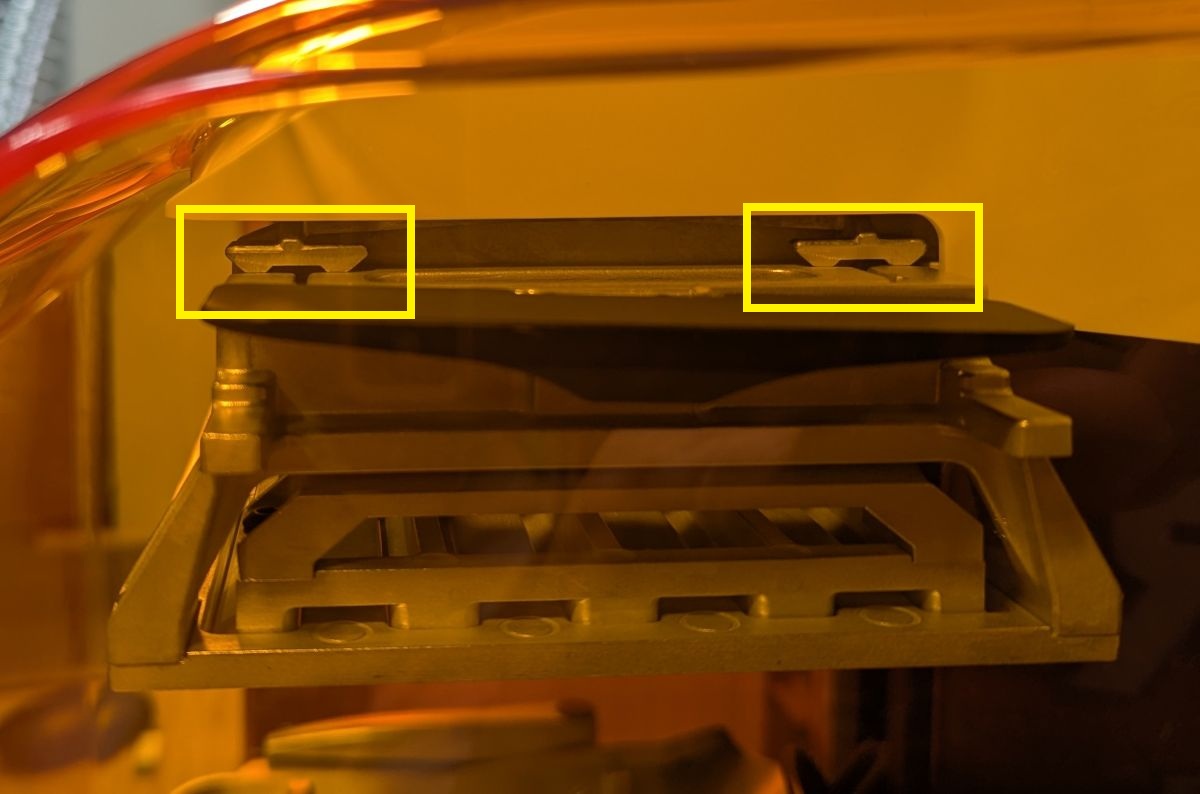
The last photo above illustrates how the build plate locks in place with locking feet (in the yellow boxes shown above) that press down on the plate when printing and lift when the print finishes.
I pressed “Start” and let the machine do its work. I kept checking in on it impatiently to view its progress. I was so elated that it was printing successfully, but I learned quickly that the time estimate on the control panel screen is a rough estimate. It actually took a couple of hours longer to print the sample file.
Once the model was finished printing:
- I inserted the black plastic tray under the latches that lock the vat in place (shown in the first photo above).
- I then slid the build plate off the upper bracket of the printer.
- I removed the model from the build plate by twisting the quick-release handles. The model popped off so easily! It was awesome.
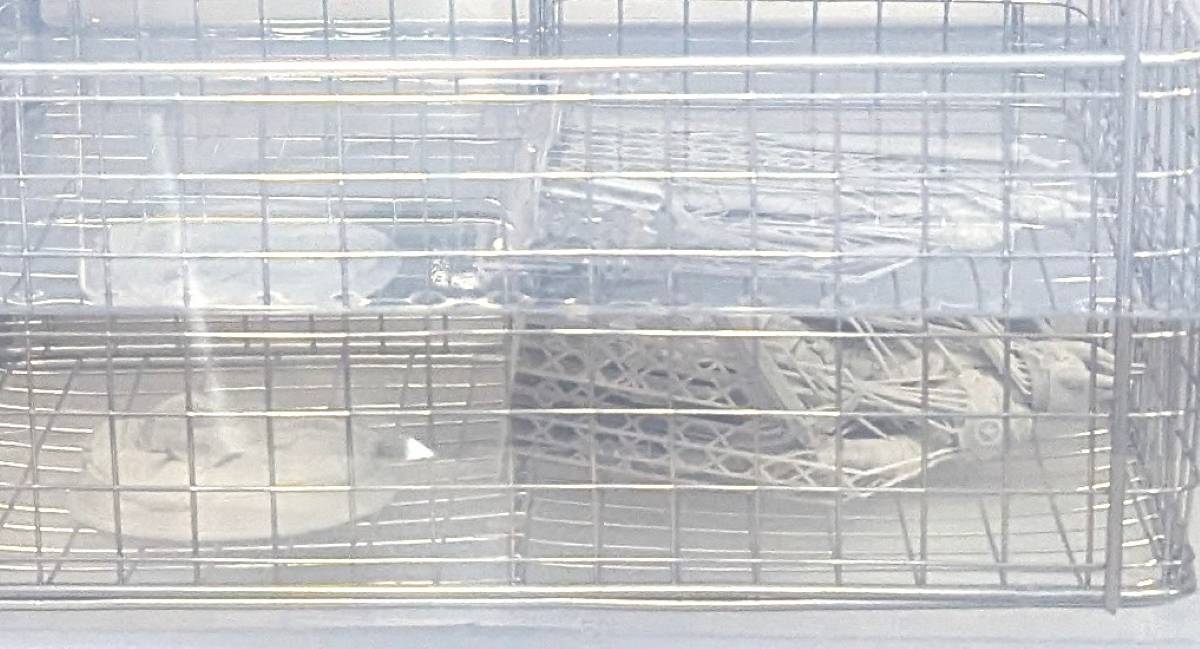
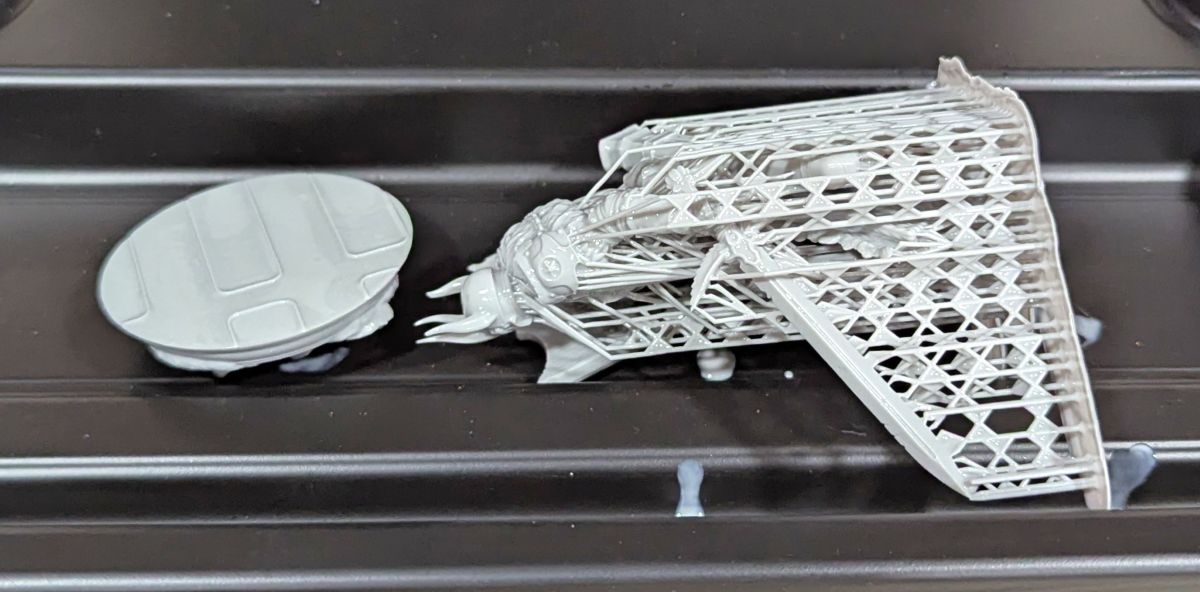
Next, I needed to wash it in IPA (I used 99% IPA purchased from Ace Hardware in the UW-03 washtub). I opened the washtub (already filled with IPA) by lifting the four washtub handles. I had some resin on my gloves from handling the build plate, and thus got some on the washtub handles. After that, I learned to open the washtub before removing the model from the build plate. I then dropped the model into the tub.
To wash my model, I did the following:
- I turned on the machine – it defaults to the “Wash” mode, so I didn’t need to use the “Mode” button, which selects either “Wash” or “Cure”.
- I tapped the “Speed” button to select my desired stirring speed (normal or fast).
- I tapped the “Time” button to set the time (5-30 minutes). Push the button to change the time in 5-minute increments.
- I tapped the “Play/Pause” button to start. Tap again if necessary to stop.
I was unsure how much time the model needed during the washing cycle, so I randomly picked a time. I think I chose 5 minutes.
After washing the model, I did the following to cure it:
- I removed it from the washtub.
- I removed the supports. This sometimes requires tools like mini flush-cutting pliers to remove them. Most miniatures only need medium to light supports and are often easy to remove with your hands. The supports need to be cured to dispose of them safely in your normal trash, but they’re easier to remove before curing.
- I then placed the model on the curing table.
- I powered on the UW-03.
- I tapped the “Mode” button to switch to the “Cure” mode.
- I tapped the “Speed” button to select my desired rotational speed (normal or fast).
- I tapped the “Time” button to set my desired time.
- I tapped the “Play/Pause” button to start.
Again, I wasn’t sure how much time was needed to cure the model, so I just picked a time. If I remember correctly, I think I chose 10 minutes.
I learned later that if the cured model has sticky areas, you didn’t wash it enough. No part of the model was sticky after I cured it, so I guess it was enough wash time. I’m still not sure if I chose the proper curing times for my models. I recall reading that if you undercure it, the part will be weak, and if you overcure it, it will be brittle.
Here’s the UW-03 in action (NOTE: The model being washed and cured is not the Caedes model).
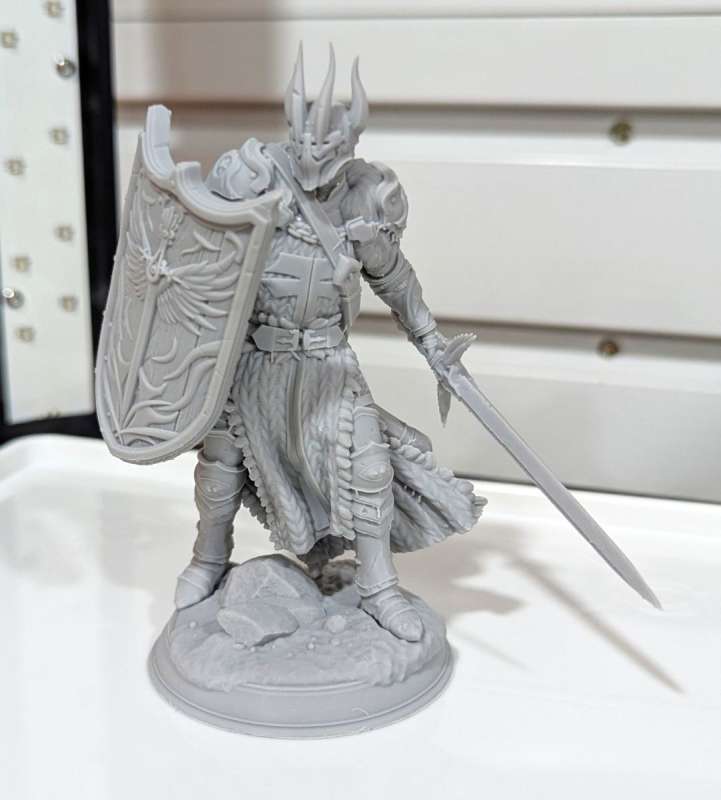
The sample file they provided was AWESOME! I liked the fact that it wasn’t a simple, silly thing, but a highly detailed, fascinating miniature. I’ve never used a resin printer before, so printing a cool-looking figurine was exciting and fun. It was impressive to see all the details you could get from the Halot-X1.
Printing STL files
So, I’ve successfully printed the sample file. Now I had to learn how to print my own files, so I went to Thingiverse, Cults3D, and Printables to download some 3D files (STL files) to get started. I downloaded some calibration files: XYZ cube with city inside, Amerilabs’ Town, Make: Rook, Tableflip Foundry’s Cones of Callibration, and Cones of Callibration v. 3. And for fun, I downloaded Pokémon’s Evee, Halo’s Master Chief, Ice Age’s Sid the Sloth, and Pixar’s Wall-E.
Next, I needed to slice the 3D files in a slicing application so the machine could print them.
What is slicing? Slicer software takes a file (a 3D design or image file, e.g. STL or OBJ file) and divides it (or slices it) into many horizontal layers and saves it in machine code so that the printer can print the 3D object.
So, now I needed to learn to use slicing software for my Halot-X1 machine. I used slicer software when I reviewed the Voxelab Aries 3D printer, but that printer was a Fused-Deposition Modeling (FDM) machine and not a resin one. Many slicers specialize in slicing files for one type of 3D printer or the other. Lychee Slicer happens to support both, but unfortunately, Lychee doesn’t have a profile for the Halot-X1 printer yet.
I installed an alpha version of Halot Box software and a beta version of Chitubox Basic, located on the flash drive that came with the printer. Yep, these are not final versions, and thus I expected some problems.
Halot Box slicer software
Various settings in Halot Box:
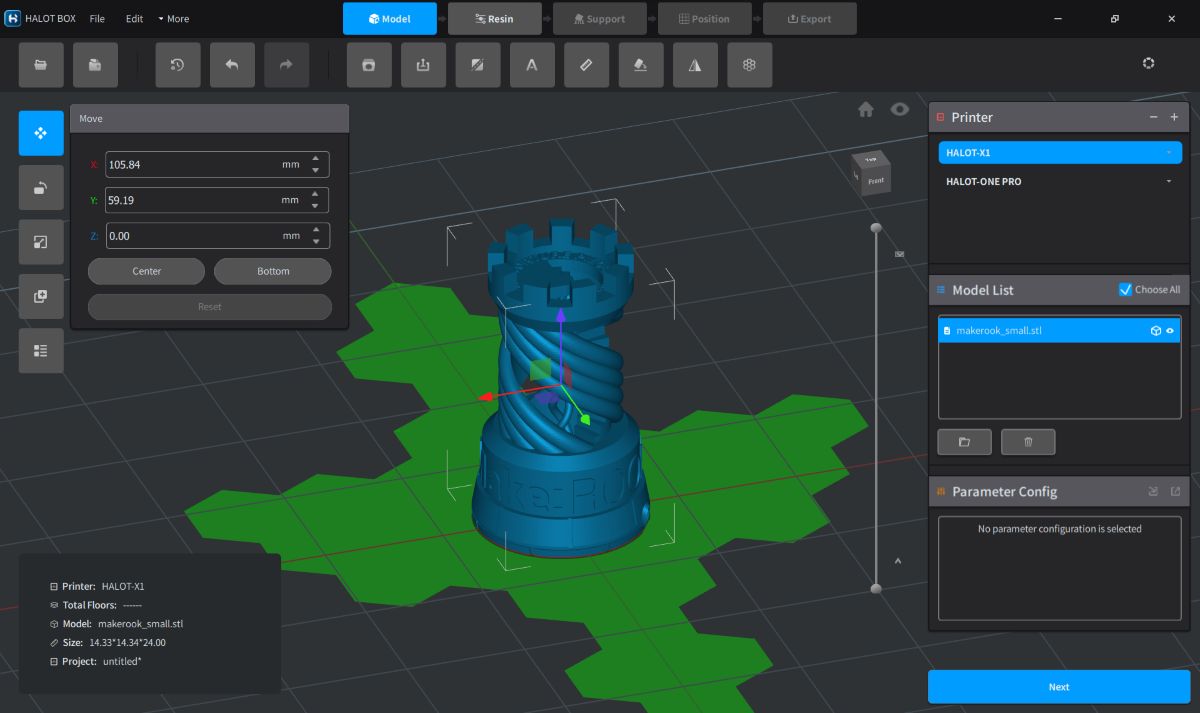
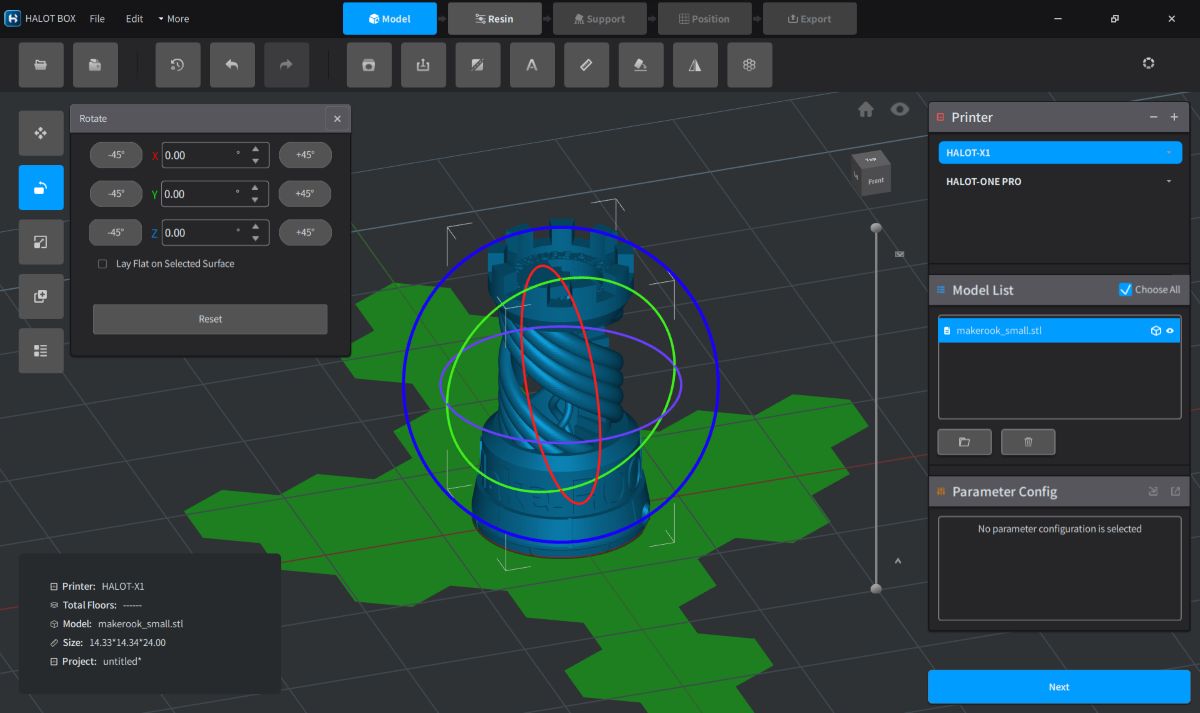
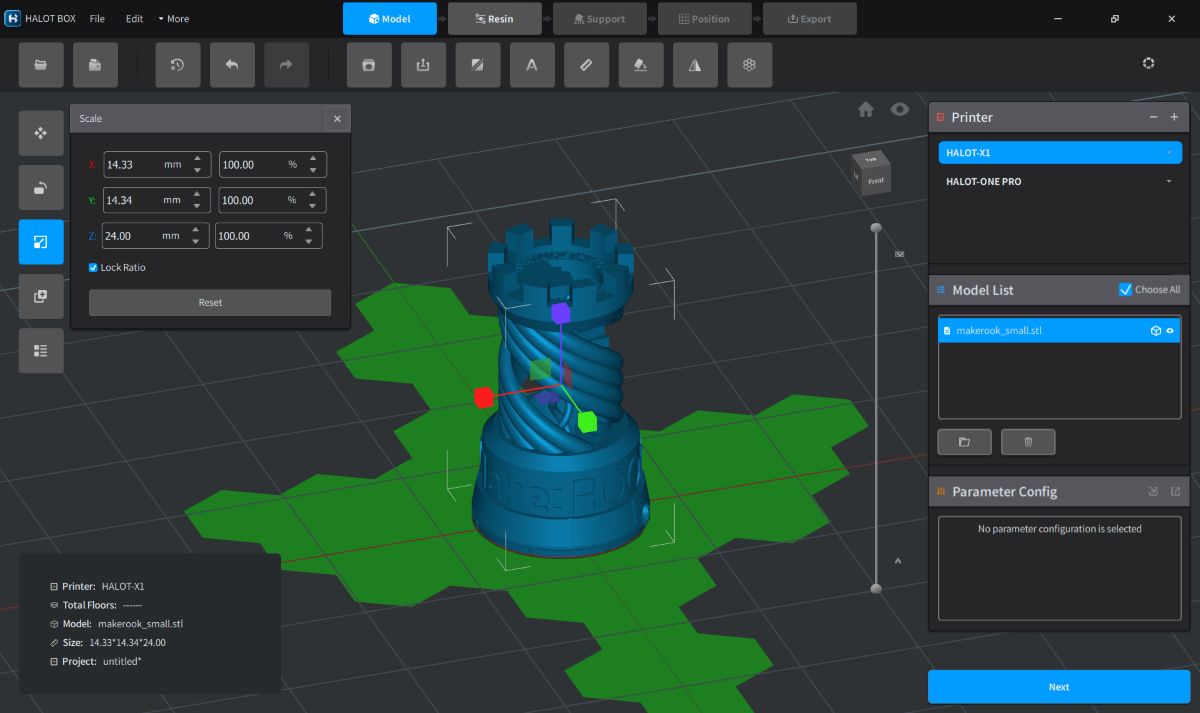
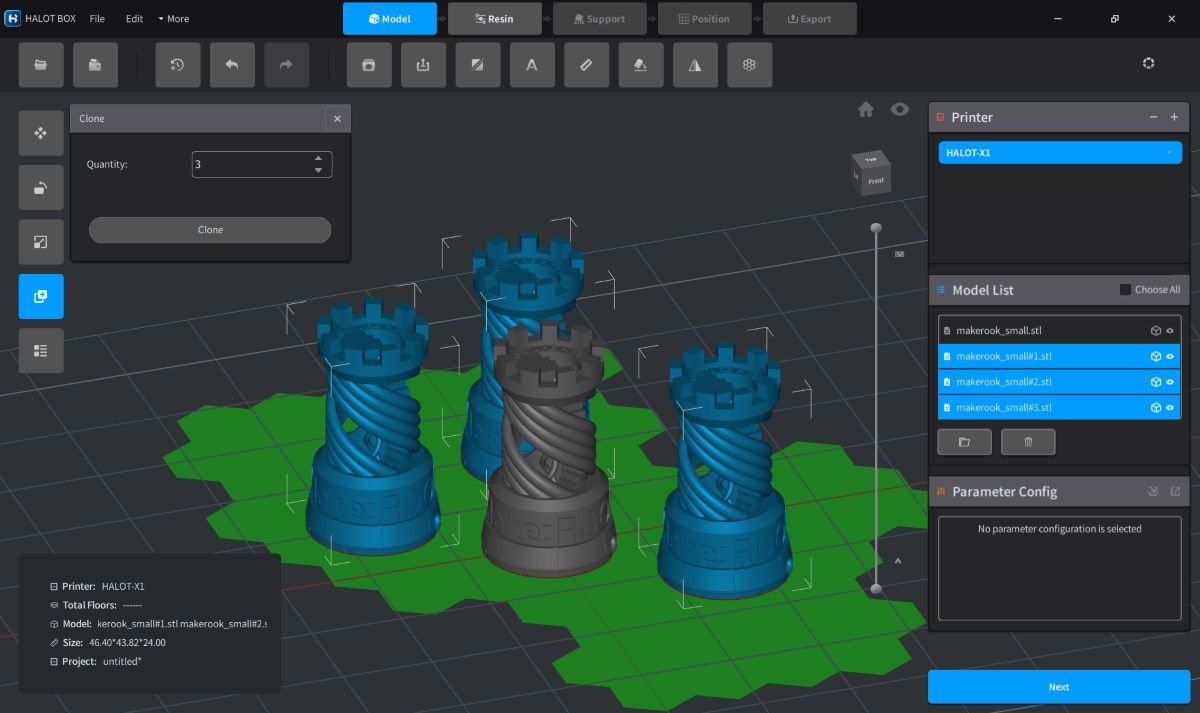
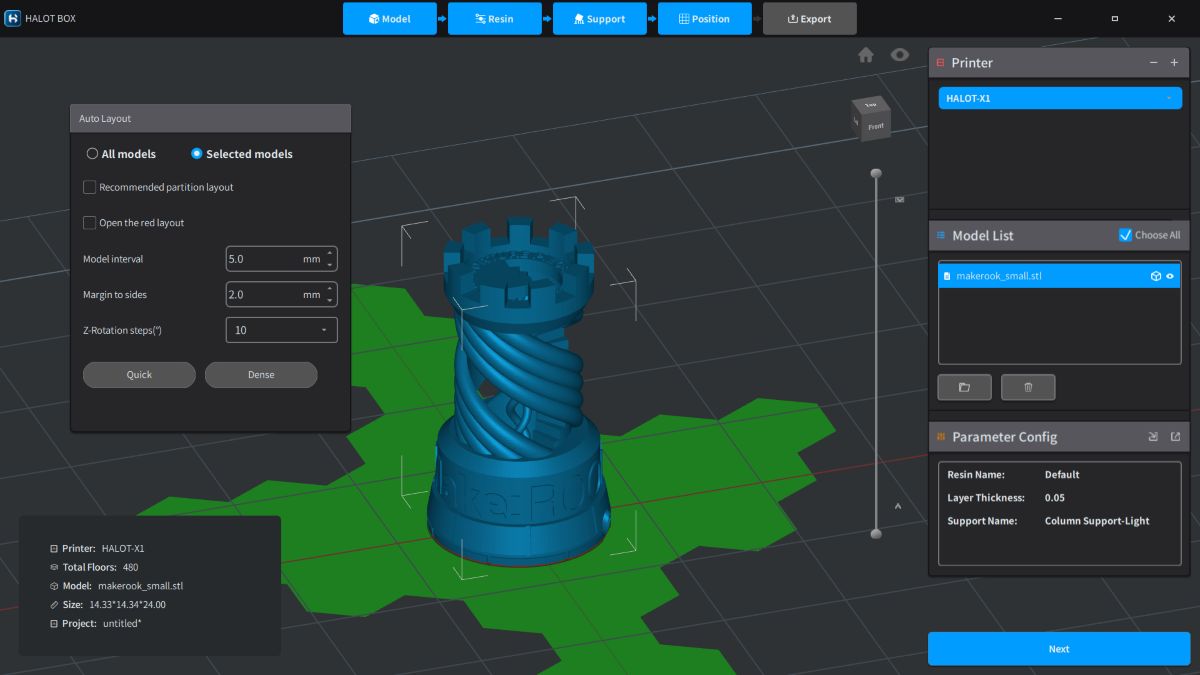
The alpha version of Halot Box allows you to open an STL (or OBJ) file, move it in the X, Y, and Z planes, rotate the model, scale it up or down, and clone it.
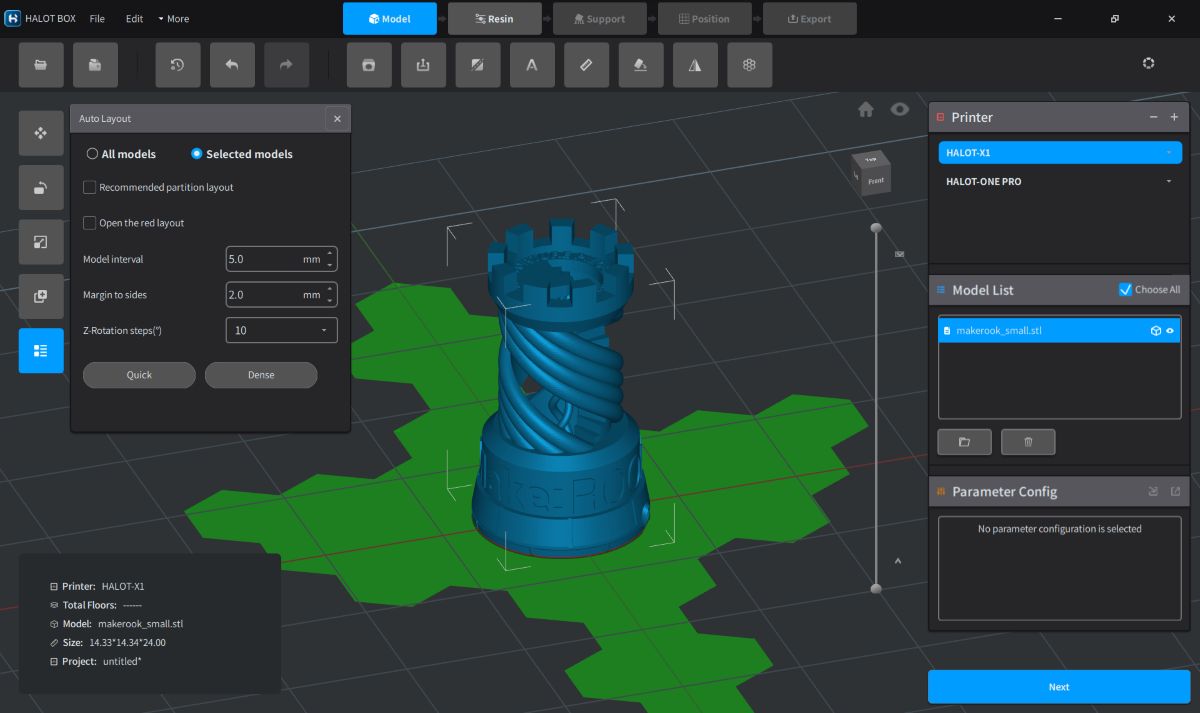
Cloning is useful when you want to print multiple objects at the same time. Unlike FDM printers, this doesn’t increase the amount of print time. It’s also handy to use the cloning feature after you add your supports, so you don’t have to add them again. After cloning a model, you can then “Auto Arrange” them on the build plate to make sure they aren’t overlapping.
Additional settings in Halot Box:
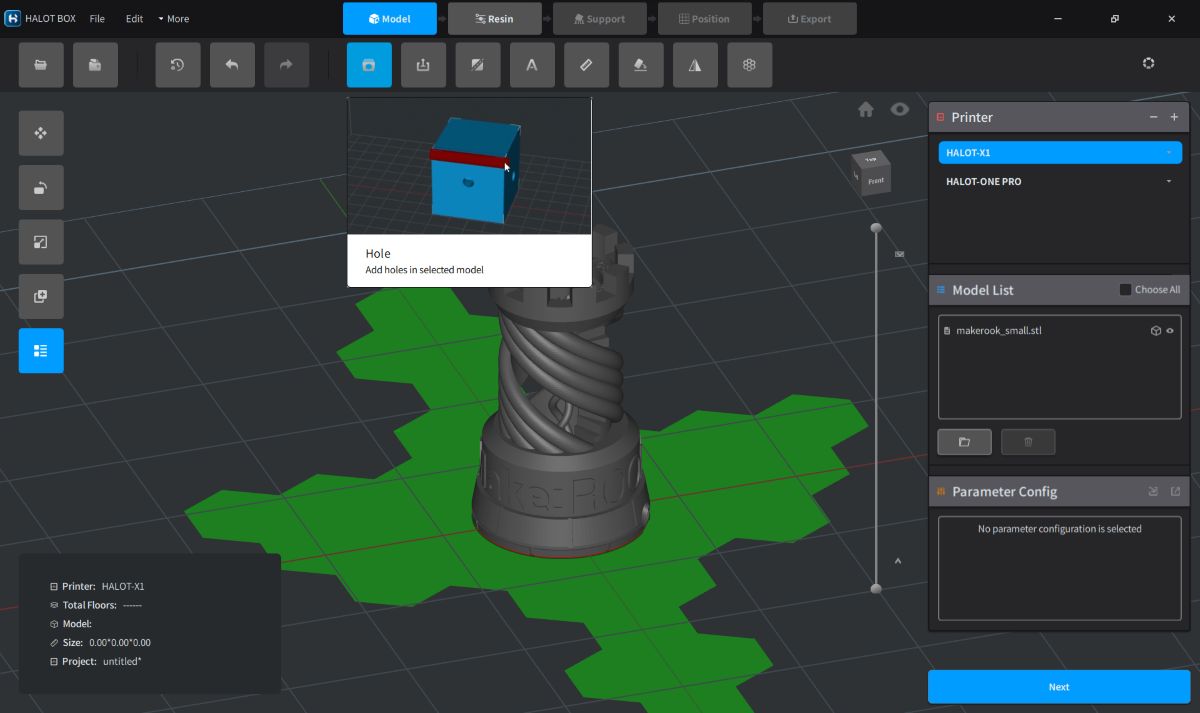
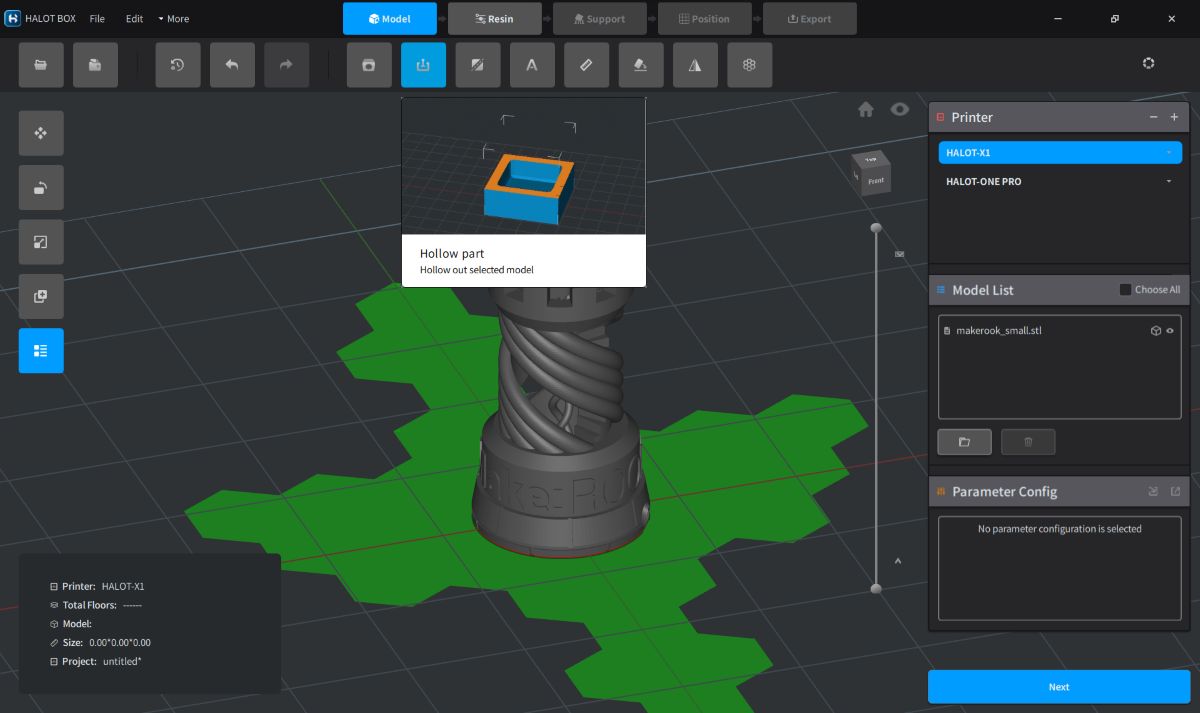
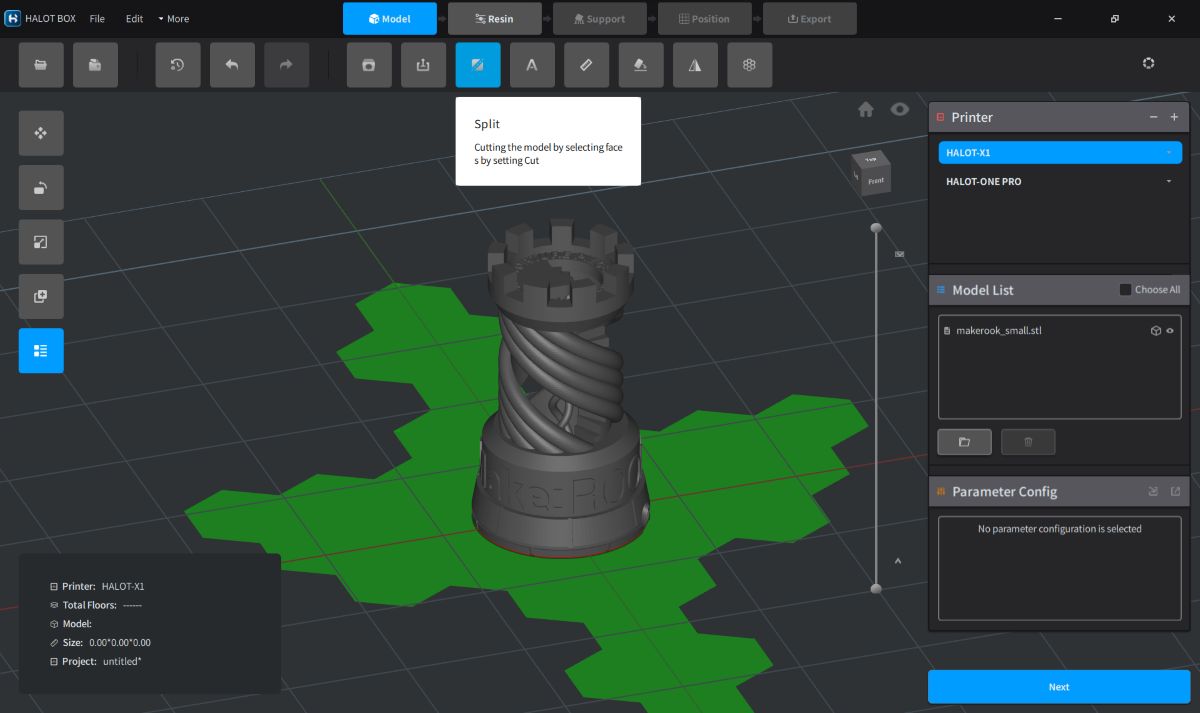
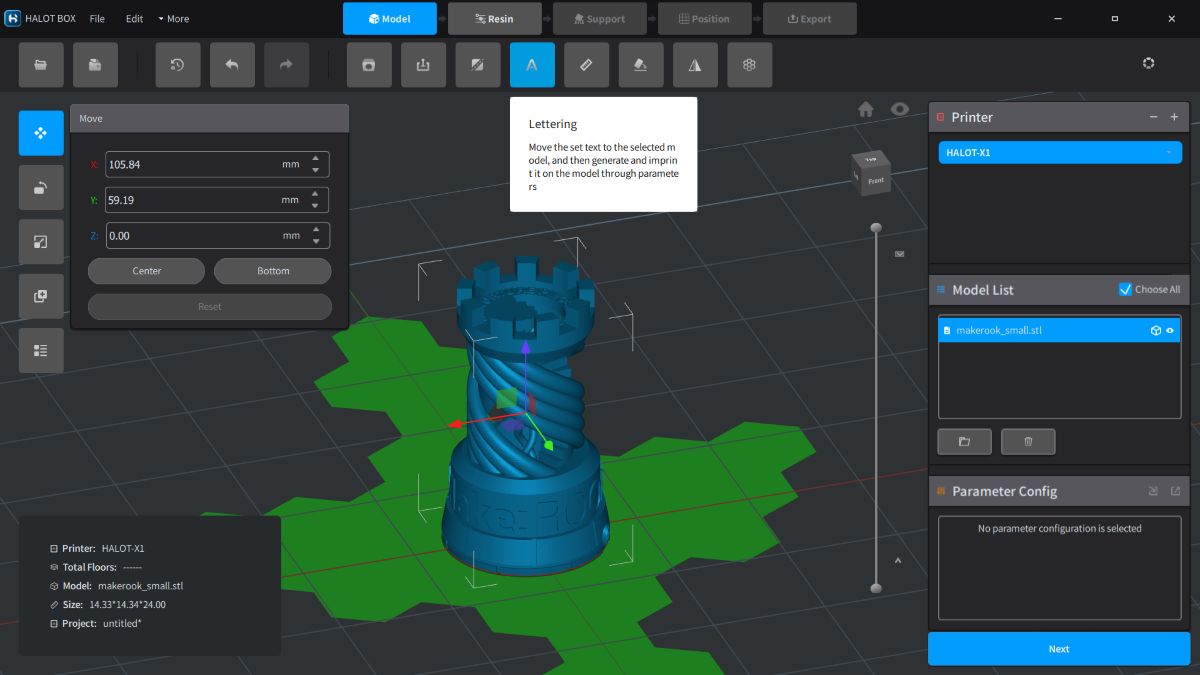
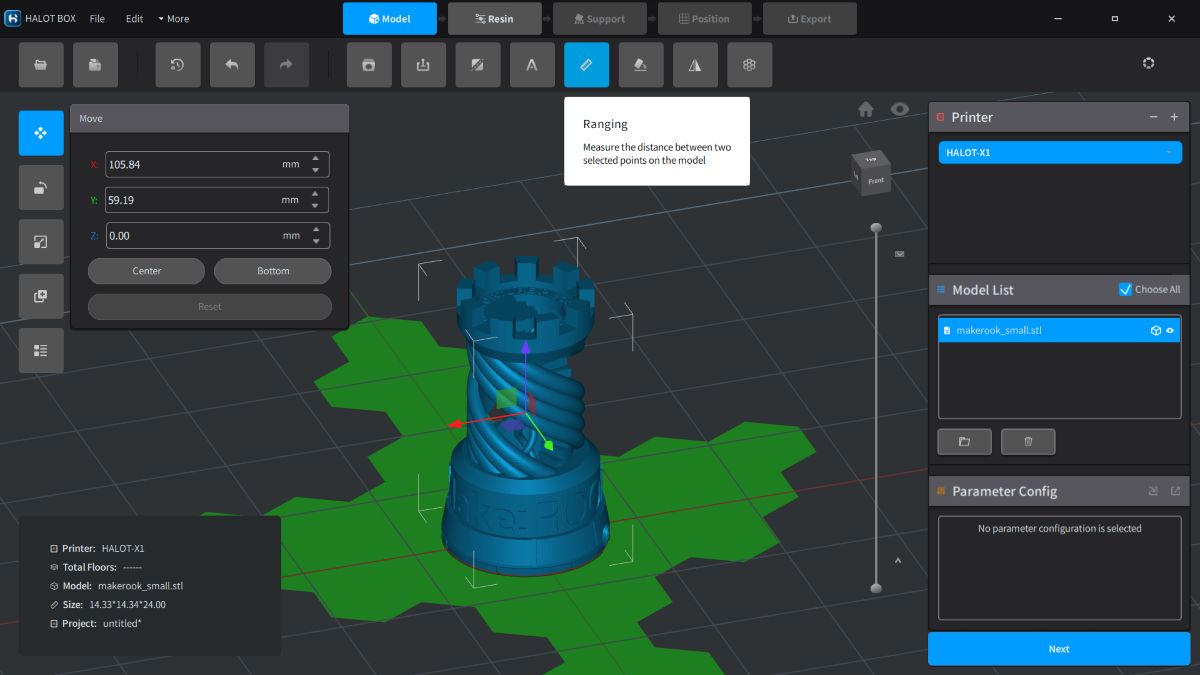
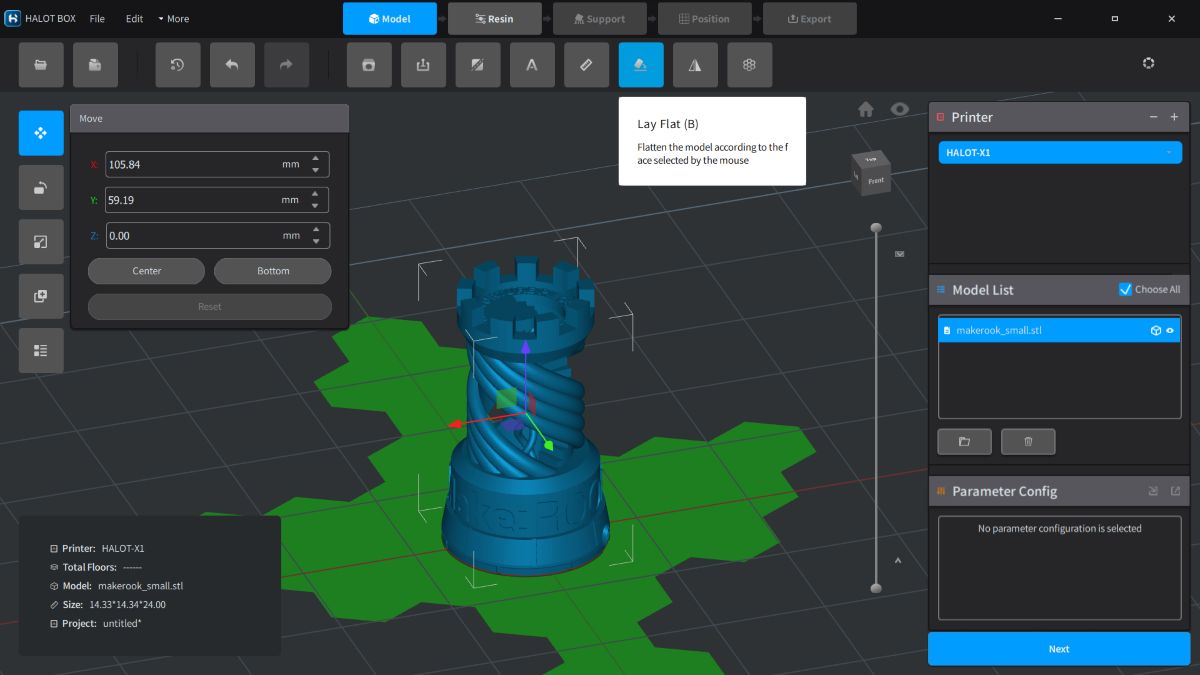
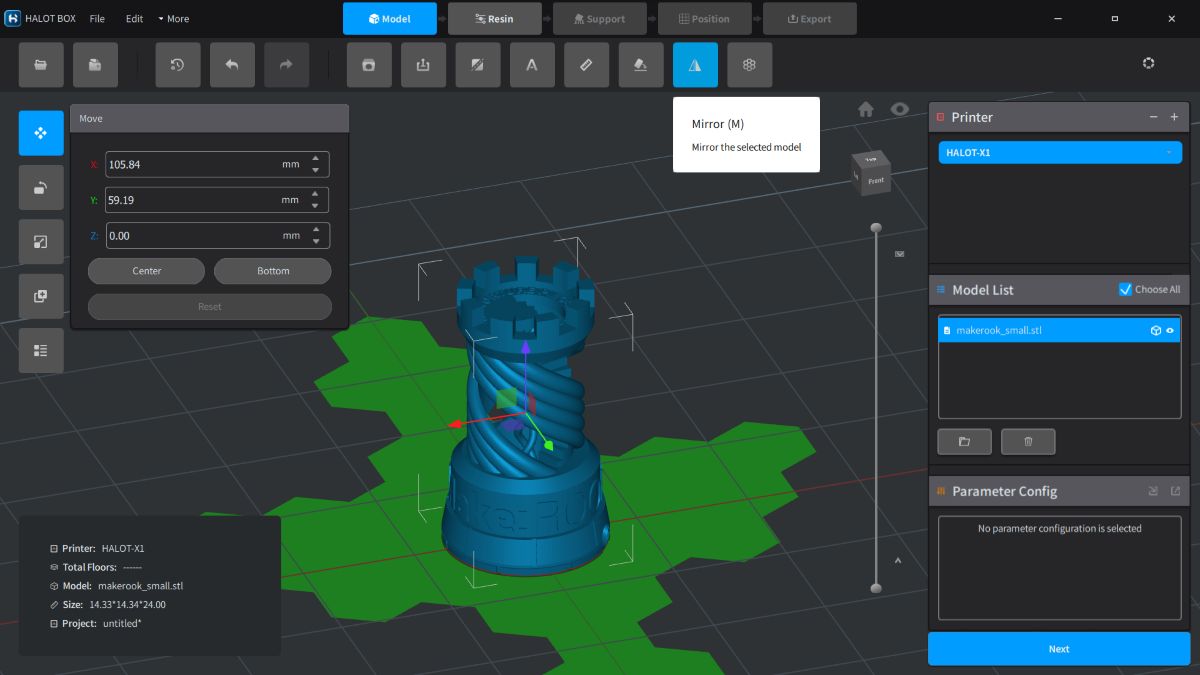
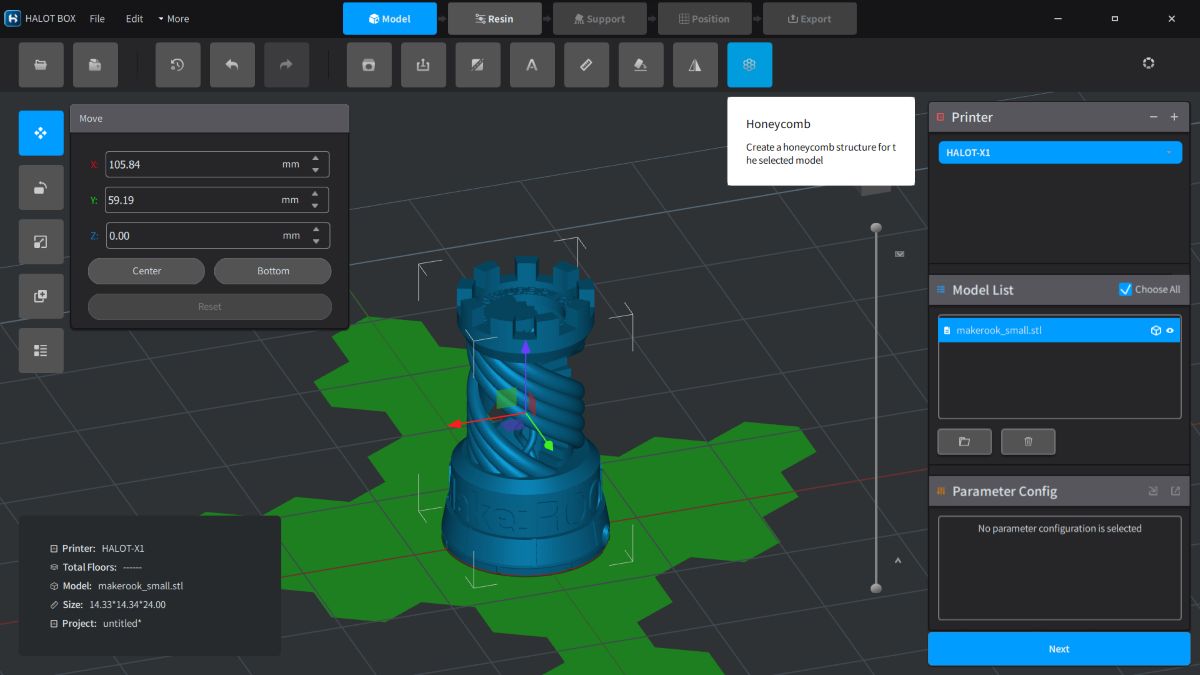
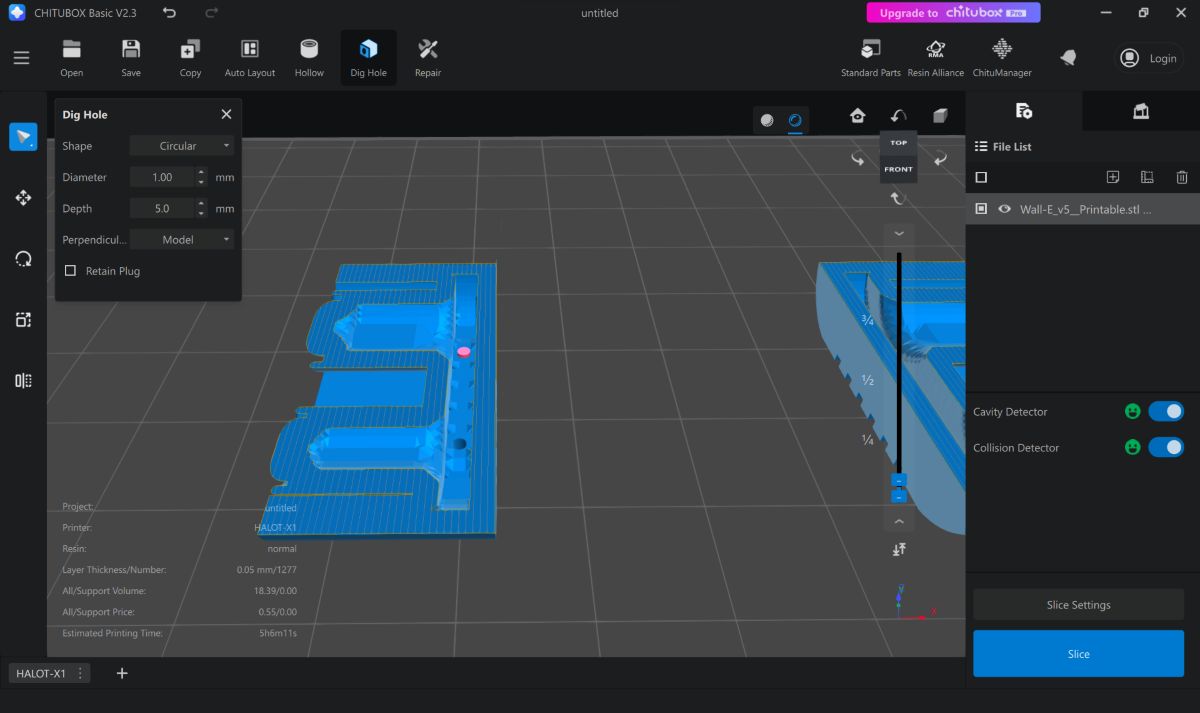
You can then add drain holes after hollowing out the model, you can split the model, add text to it, take a measurement between any two points on the model, lay the model flat, mirror the model, or create a honeycomb for the model.
Hollowing out the model and adding drain holes (shown in the first two screenshots above) were features I used frequently. While learning how to do resin printing, I found that you should hollow out your models whenever possible to avoid failures due to suction forces while printing (think of removing a suction cup from a surface). You should then add drain holes so that liquid resin on the inside of the model can drain out. If you don’t include drain holes, apparently, over time, the cavity’s resin will cause pressure buildup, and the model will split.
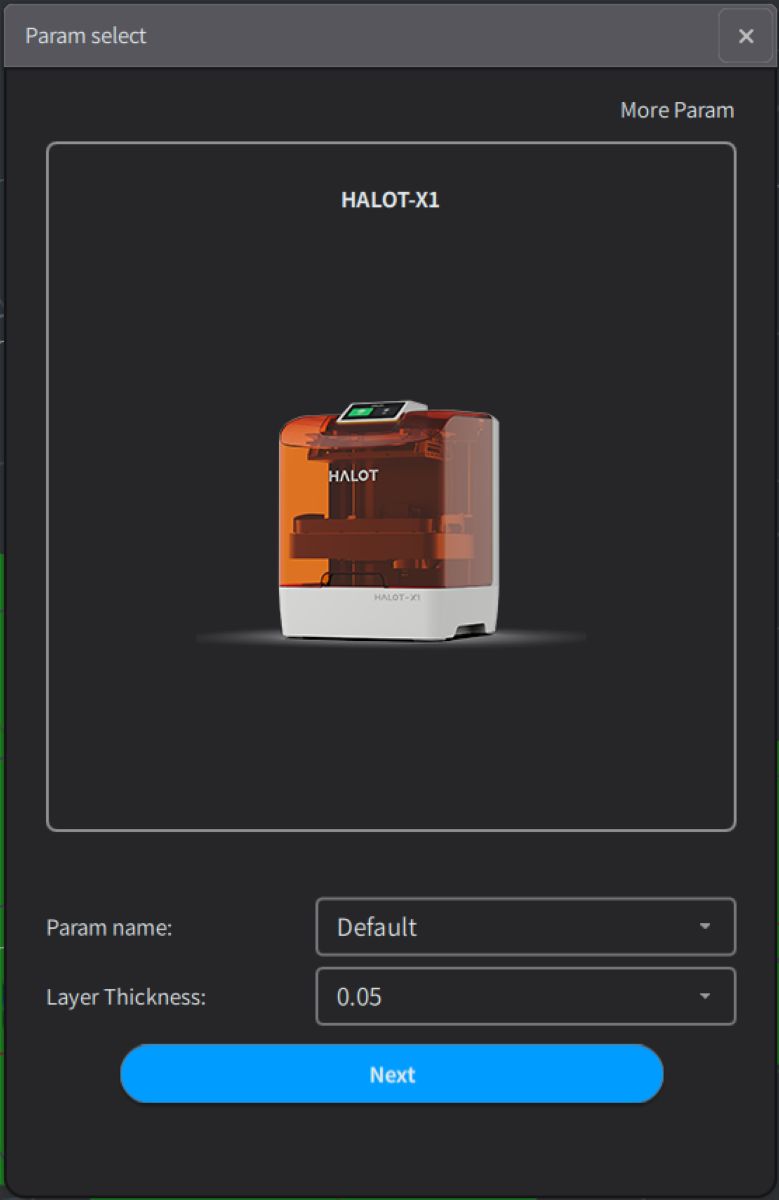
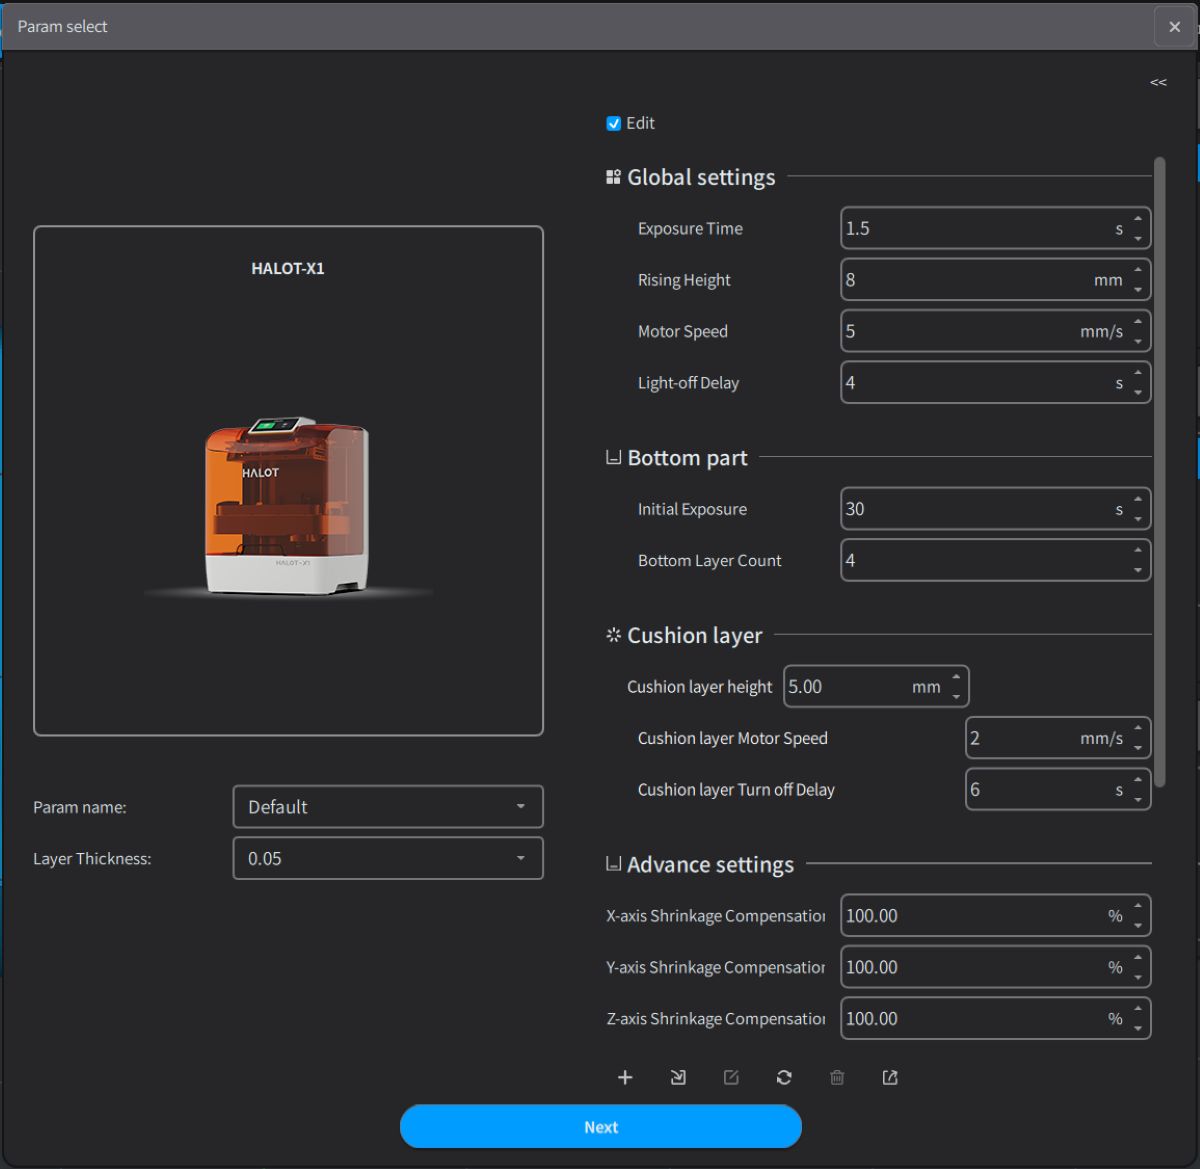
After importing your model, arranging it, scaling it, hollowing it, and adding drain holes, you need to select your resin parameters. If you have the AFU, the RFID tag on the bottom of your official Halot resin bottle makes this easy. My Halot 16K Standard Resin parameters are:
- Layer thickness: 0.05mm
- Exposure time: 1.5 s
- Rising height: 8mm
- Motor speed: 5mm/s
- Light-off delay: 4 s
- Bottom initial exposure: 30 s
- Bottom layer count: 4
- Cushion (Transition?) layer height: 5mm
- Cushion layer motor speed: 2mm/s
- Cushion layer Turn off delay (Light off delay?): 6s
- X-axis shrinkage compensation: 100%
- Y-axis shrinkage compensation: 100%
- Z-axis shrinkage compensation: 100%
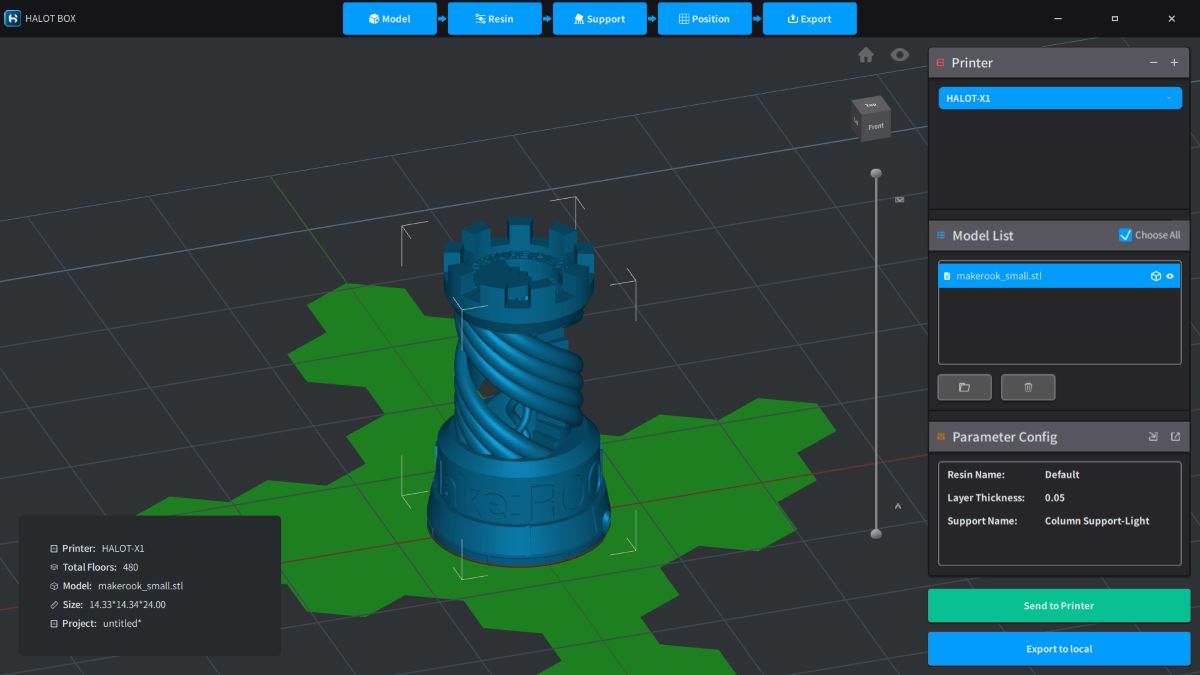
Next, you’ll add supports to your model, after which you can arrange multiple models on the build plate (if necessary), then slice the file and send it to the printer via WiFi or save it to a local drive.
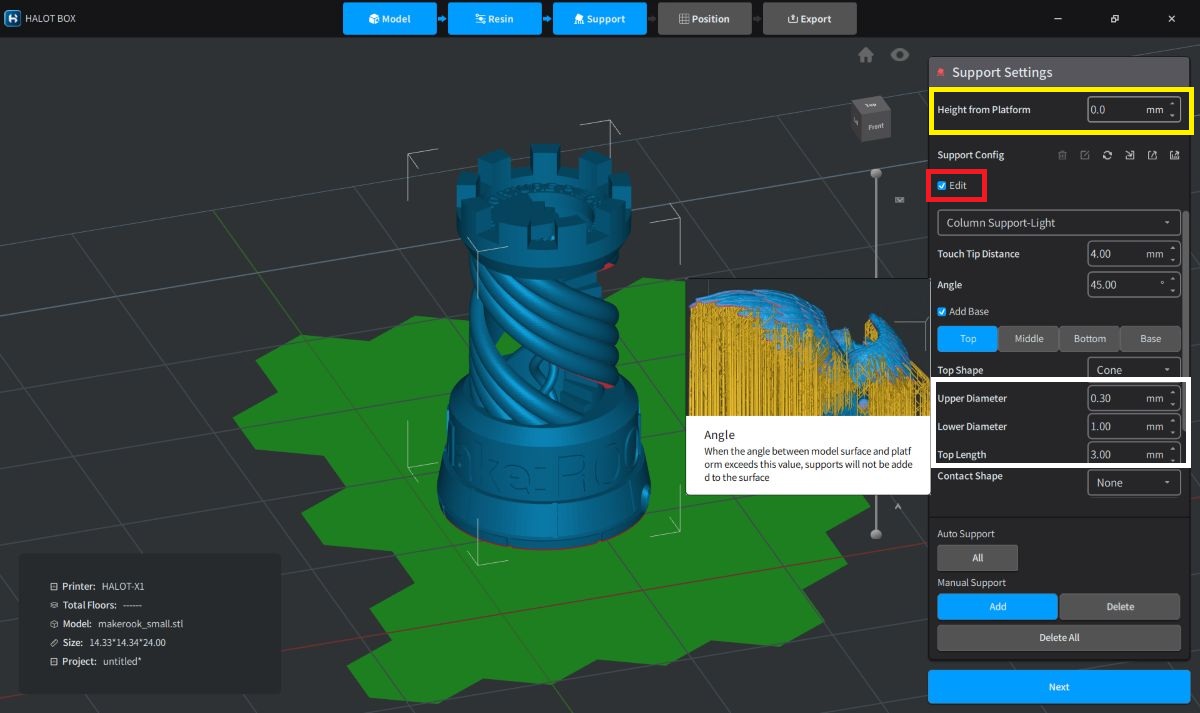
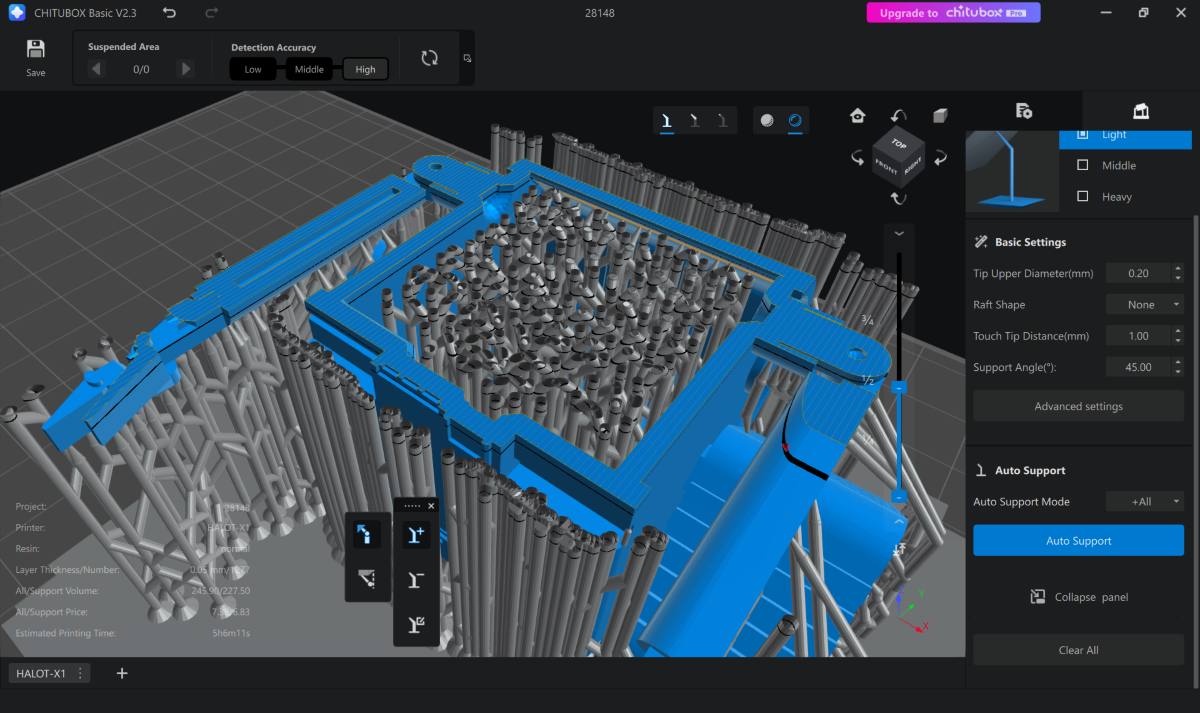
Most models will need supports, so I spent much of my time in this section of Halot Box learning how to add them to my models. How many is enough? Do I need heavy, medium, or light supports?
I tried using the Halot Box Auto Supports feature. It defaults to adding medium supports. Once these are generated, they can’t be deleted or edited.
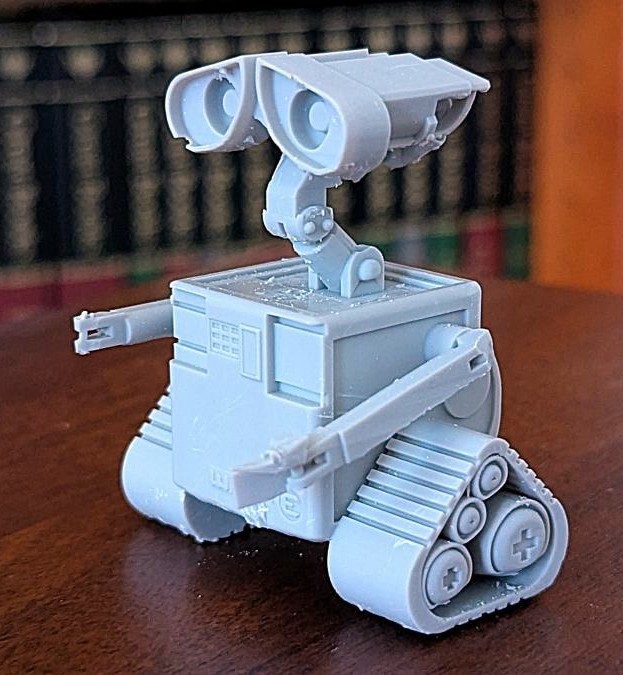
Having so many medium supports ended up damaging the model when I removed them. One of Wall-E’s hands broke off, and a chip broke off along the edge of his eye.
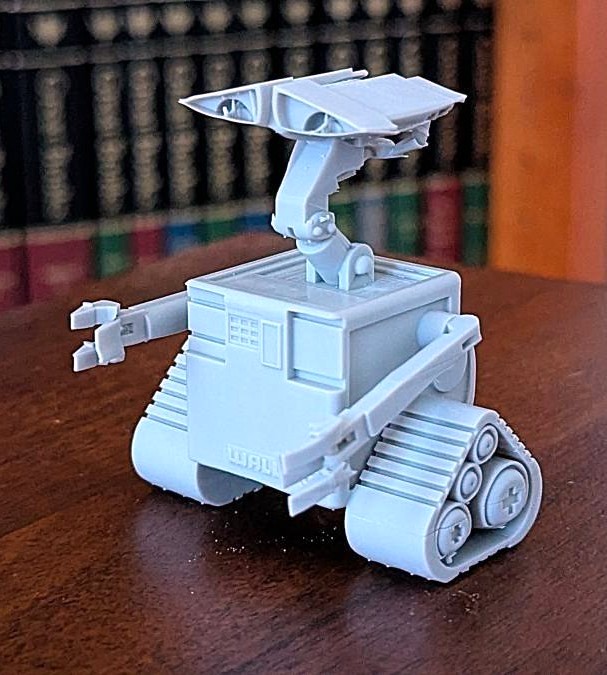
I tried manually adding light supports, but in some areas, I added too few, so Wall-E’s eyes, neck, and wheels (inside the treads) didn’t print properly.
Chitubox Basic slicer software
I thought I’d try Chitubox Basic slicer to see if I liked it any better.
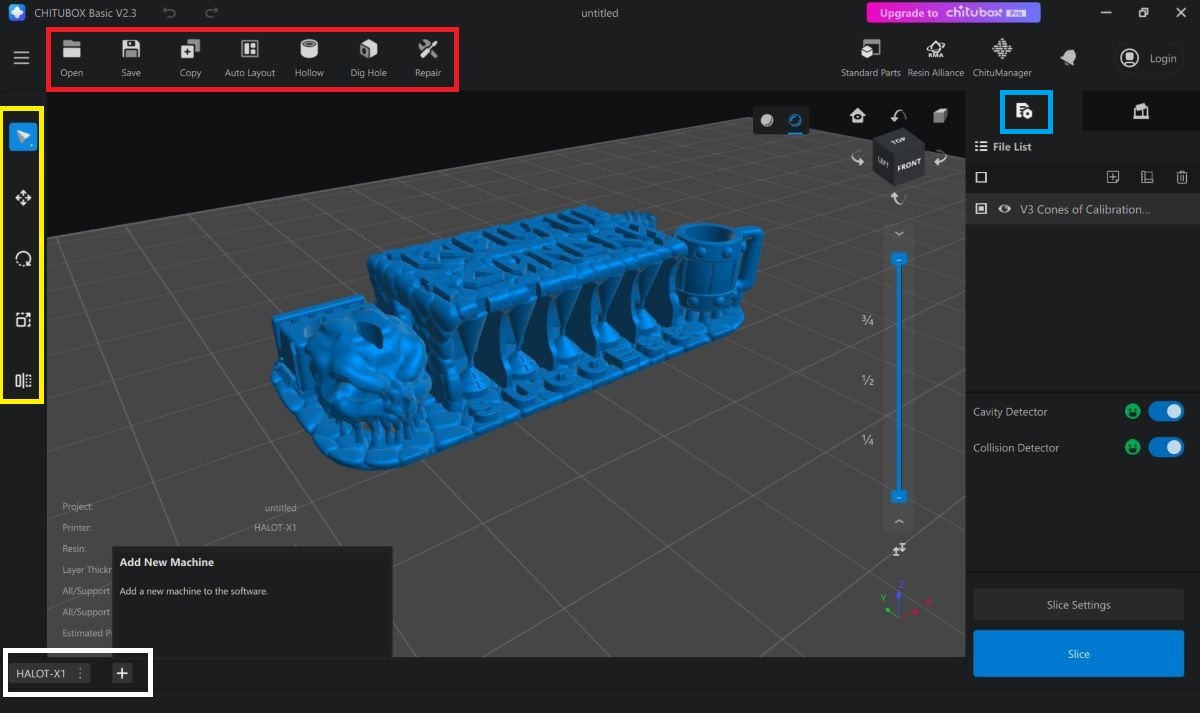
I really like the user interface much better than Halot Box; it’s more intuitive. The icons are labeled and clear.

I was able to print some things using Chitubox Basic, but other times, I couldn’t.
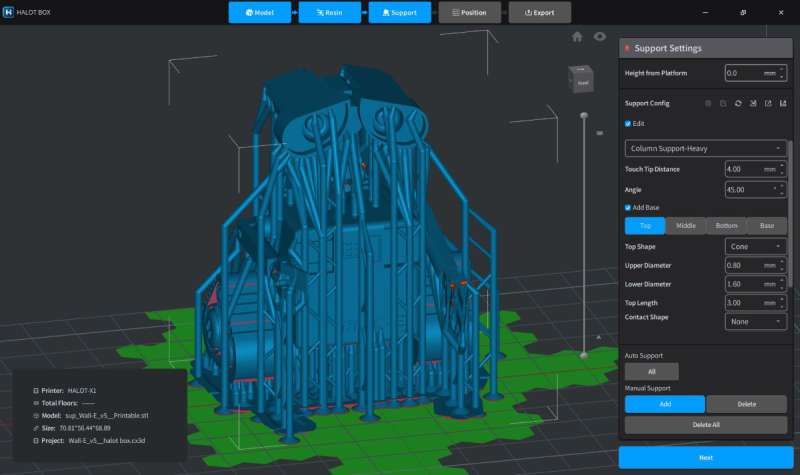
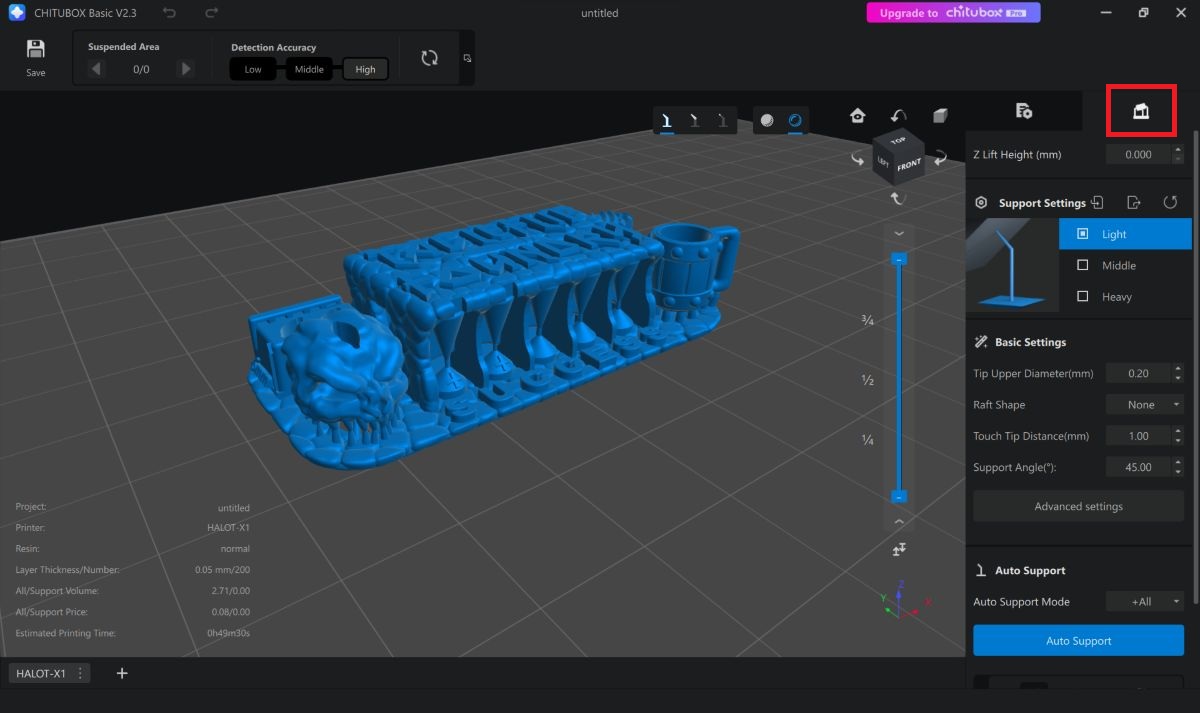
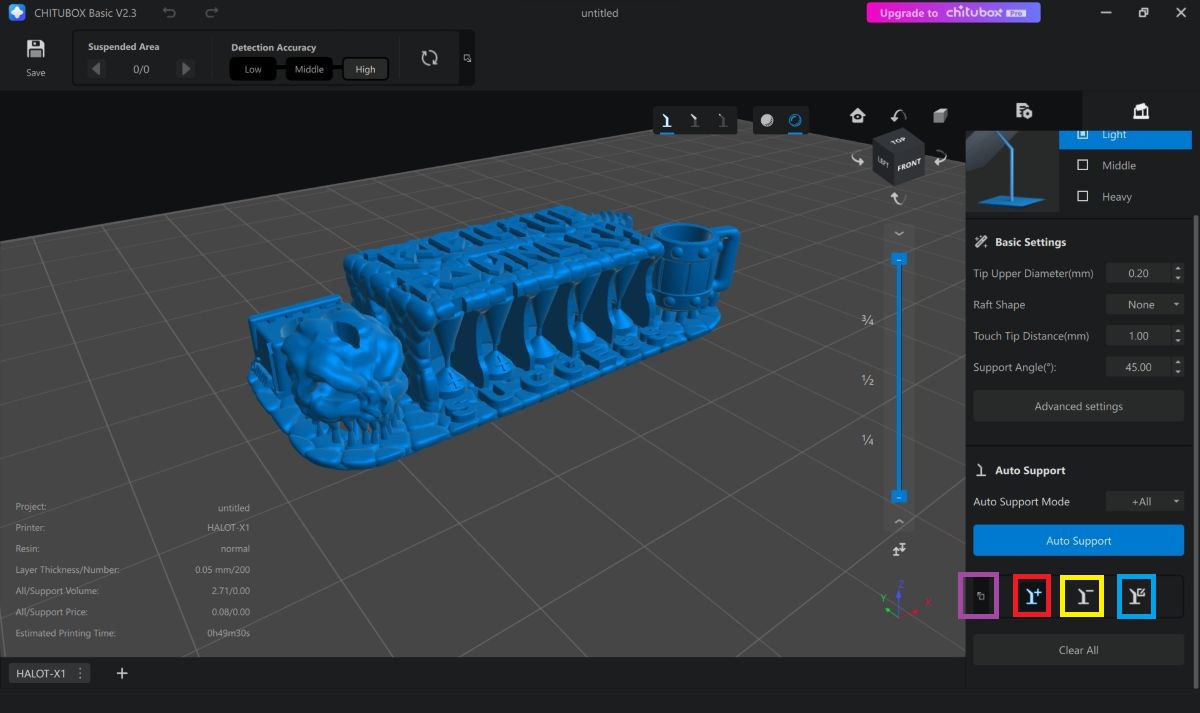
It’s intuitive and easier to use than Halot Box. After hollowing out my model, it was easy to add drain holes. When using the Auto Supports feature, it allowed me to choose whether to use light, medium, or heavy supports. Additionally, I could edit the supports that had been automatically added, which I couldn’t do in Halot Box.
If you study the second screenshot above, you’ll notice that the Auto Support feature added supports inside the model. When choosing to use the Auto Supports feature, you have the option to add supports throughout the model or add them so that they attach to the build plate only (so there wouldn’t be any supports in the hollow cavities of the model).
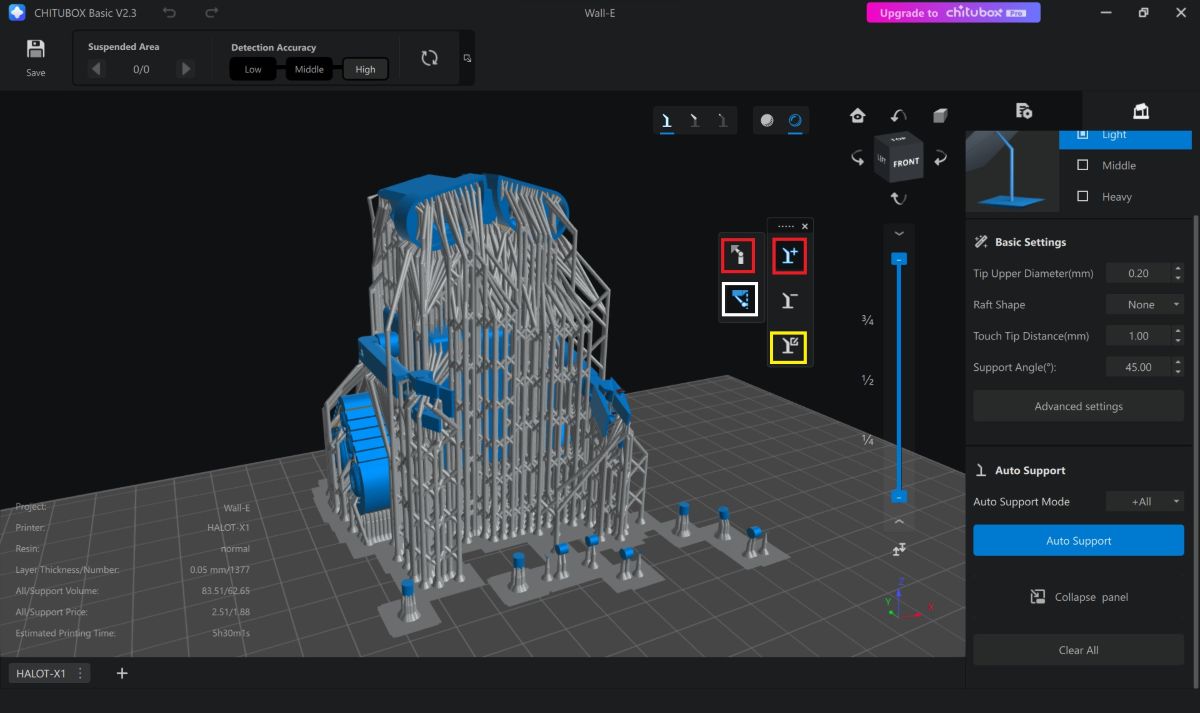
I wasn’t able to find out if the light auto supports would help me successfully print Wall-E because the sliced file caused the printer to freeze. I saved my sliced model, transferred it to the printer using a USB drive, tapped Print on the printer, selected the file, the AFU dispensed the resin, the vat rose, then the printer froze. When I canceled the print, it also froze. I had to turn off the printer to be able to use it again.
Another problem I had while using Chitubox Basic, was that it crashed right in the middle of manually adding lots of supports. Ugh.
The Halot-X1 came with a 3-month trial of Chitubox Pro, but the pro version doesn’t have a profile for this printer. I tried manually adding the printer parameters, opening an STL file, hollowing and placing holes in the model, adding supports on the model, then saving the file. However, it would only save as a CTB file that the printer doesn’t recognize (the printer recognizes CXDLPV4).
Calibration prints
I ran a bunch of calibration prints but didn’t realize that I could print them directly on the build plate. Thus, some of them I placed at an angle and added supports to them. At the time, I was still trying to understand when I could print directly on the build plate and when I shouldn’t. Many of the things I read said to always print at an angle. Well, I guess calibrations are an exception. It was a good learning experience, though. I started to understand that if you are supporting even small models, you need lots of light supports.
After printing the calibration models, I found that my exposure time was correct. However, some calibrations said my Z-axis was off (the calibration model was too short). However, I didn’t know what to change in my software to correct for it.

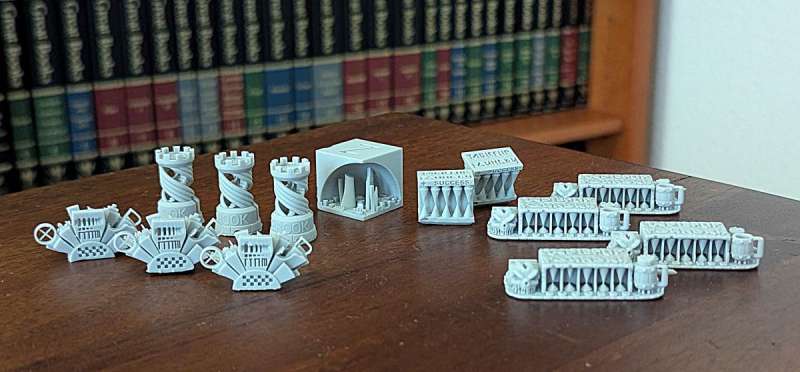
Additionally, I noticed when I printed the Make: Rook calibration model directly on the build plate (first rook pictured above), the lower ~1mm didn’t print. It still didn’t print even when I placed it directly on a raft (second rook pictured above). It only printed it when I angled the Rook and added supports (third rook pictured above).
I’m not sure why this happened. It seems to be happening with all my models printed directly on the build plate.
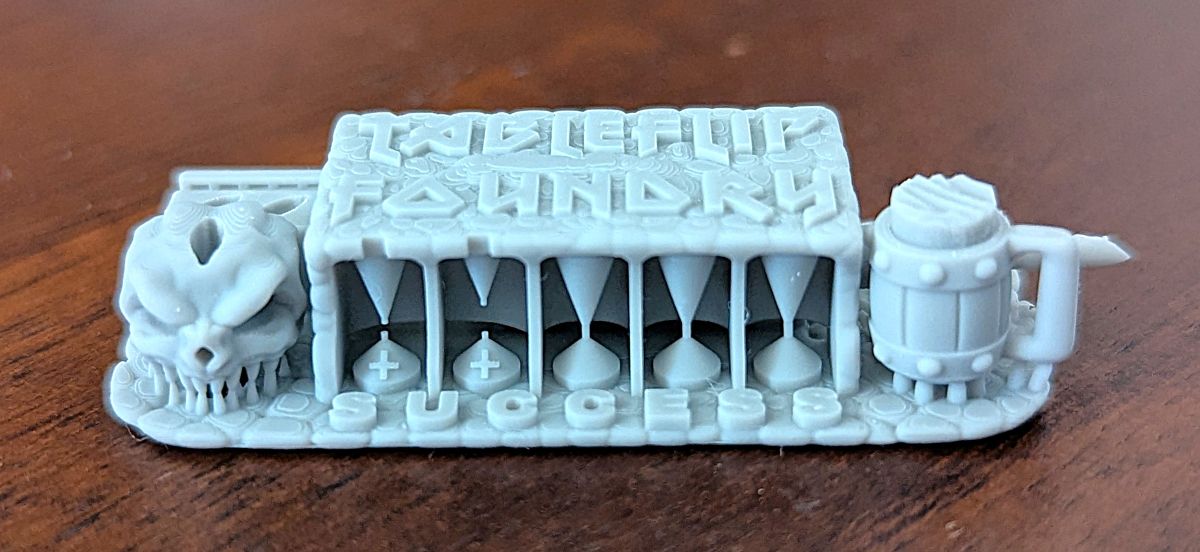
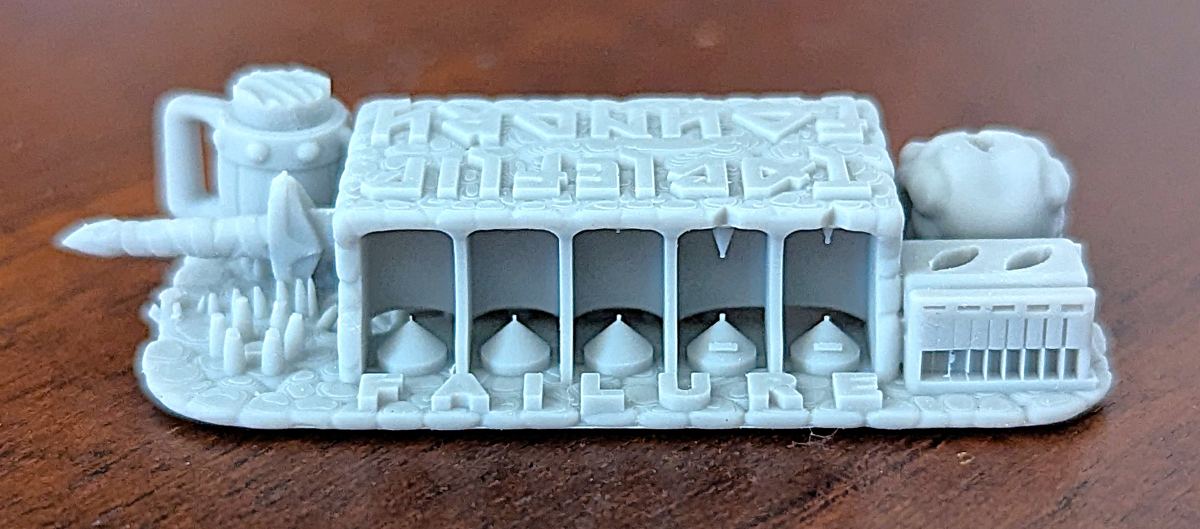
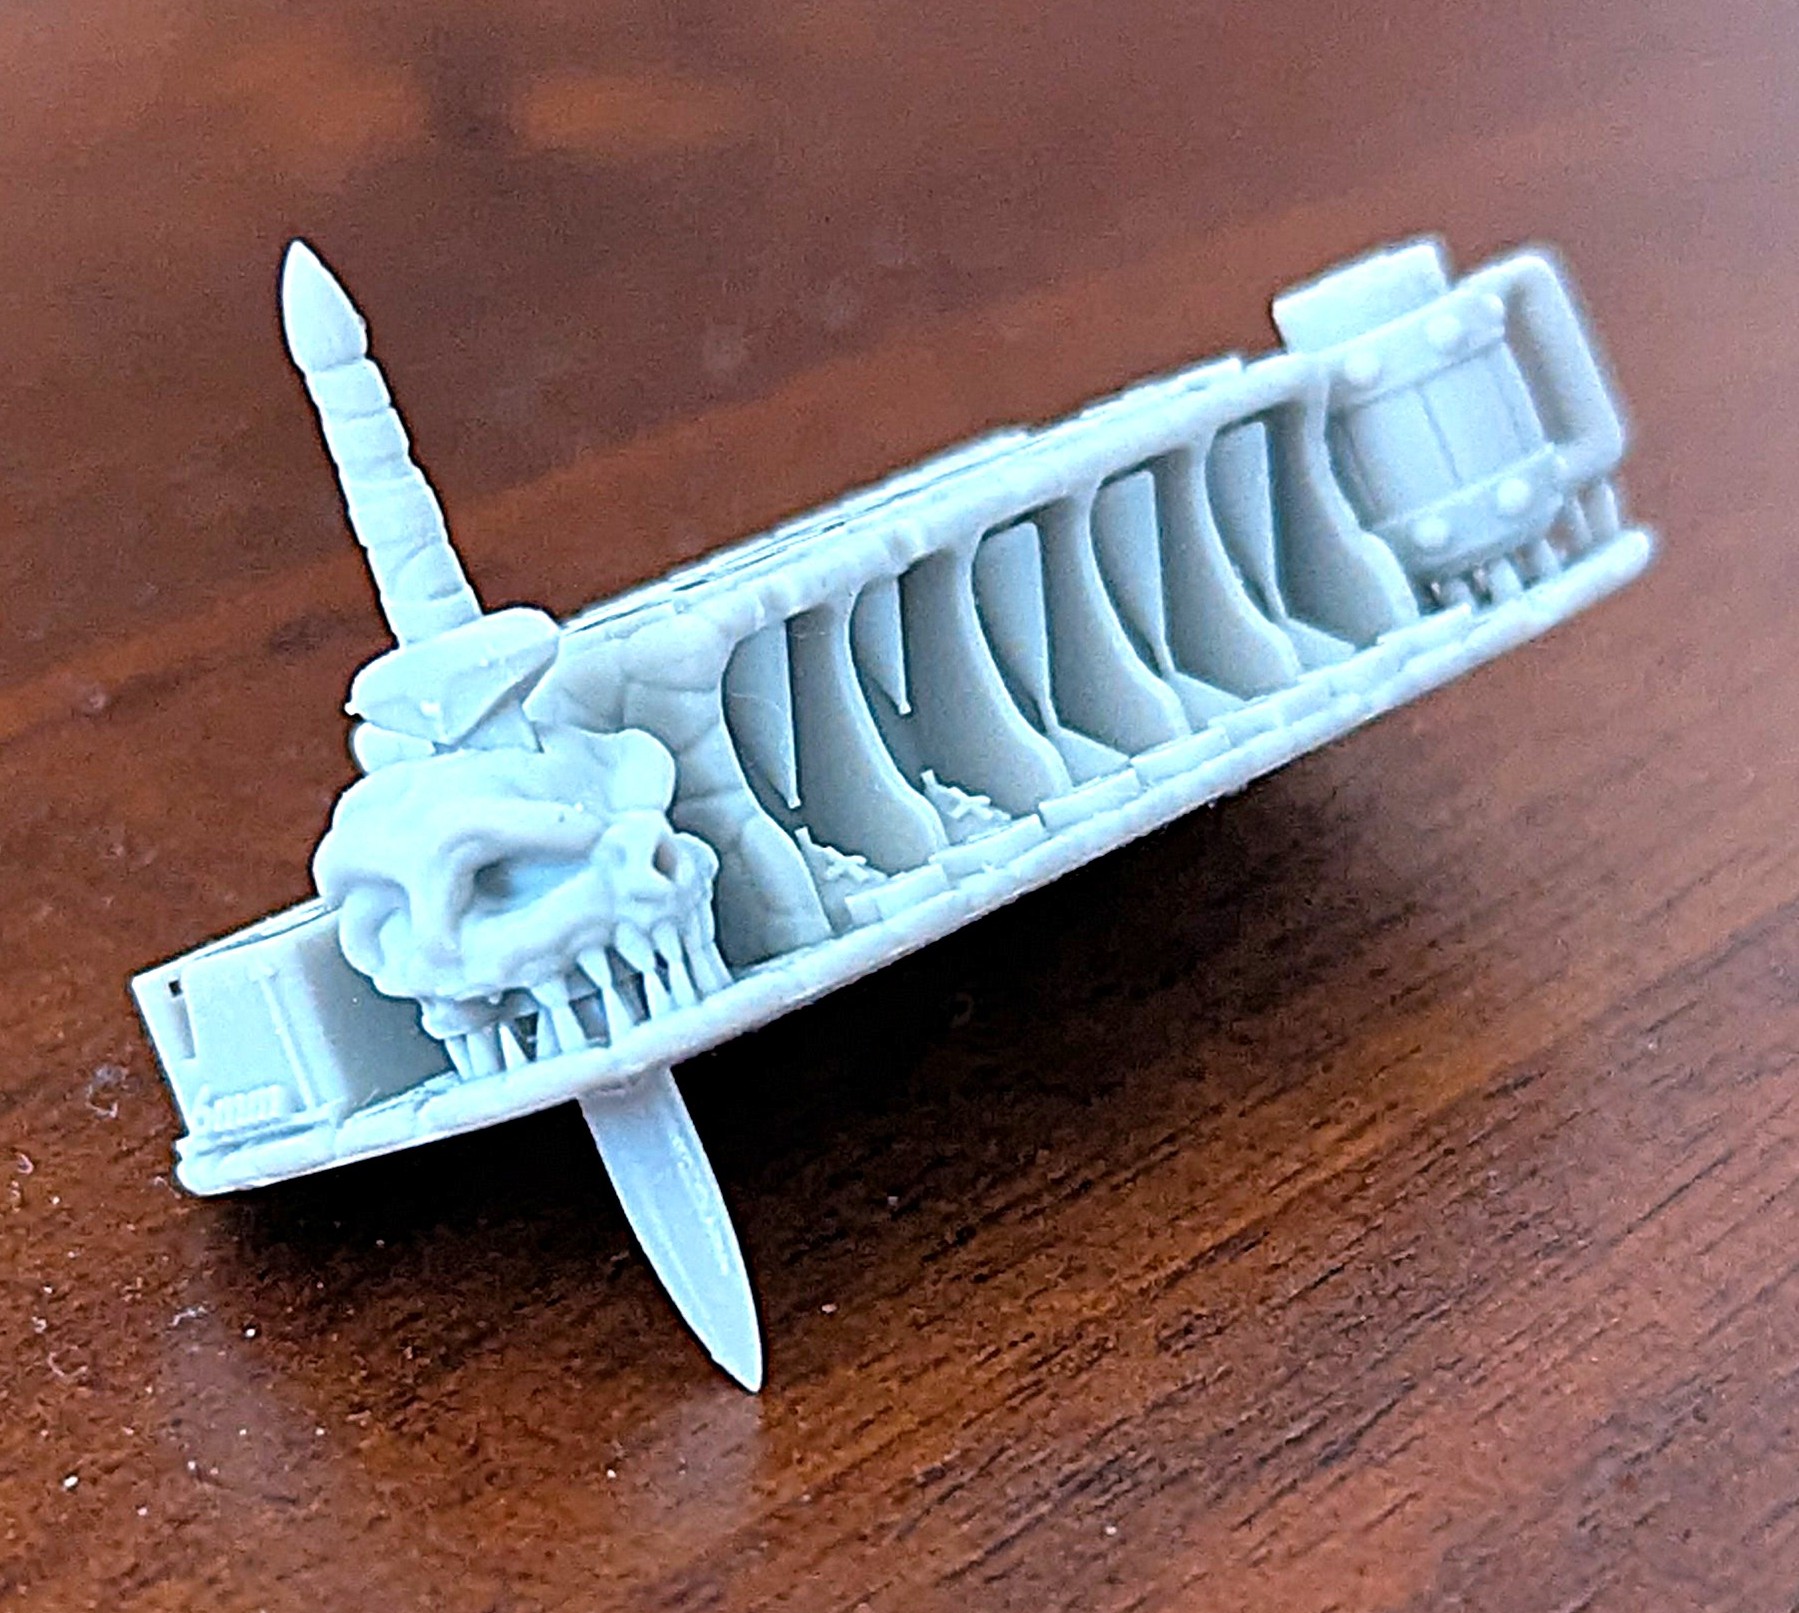
One of the most fun and interesting calibration models is Tableflip Foundry’s Cones of Calibration v.3. It’s interactive! There are the things it calibrates:
- The Ale of Accuracy should fit perfectly in the Mug. If it’s too loose, your exposure time is too low. My printer’s exposure setting was great.
- The Sword of Truth should fit perfectly into the Monster Skull, but shouldn’t be able to fit into the Atunement Block (the block behind the Monster Skull containing the fail holes). If it fits into the Atunement Block fail holes, your exposure time is too low. My sword fit in the skull but not the fail holes.
- The Atunement Block is exactly 6mm wide and tall. If the width is off, you may need to adjust your exposure settings. (My width was good). The height checks for Z-axis compression. I may have a compression problem, because my height was 5.33mm. I haven’t figured out what to do about that yet.
- The Cones of Calibration on the Success side should print fully, and the Failure side is designed to fail. If the Success side fails, you need to adjust. Well, a couple of the Success cones failed, but a previous print of the original Cones of Calibration printed successfully.
- The Visual Gap test shows how well your printer prints fine details.
Fun prints
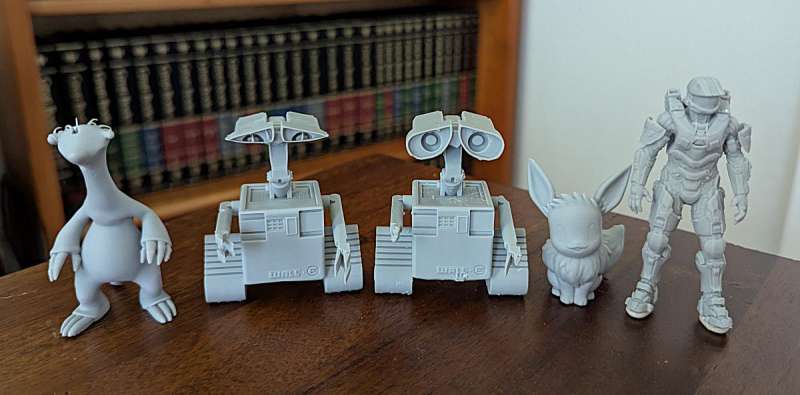
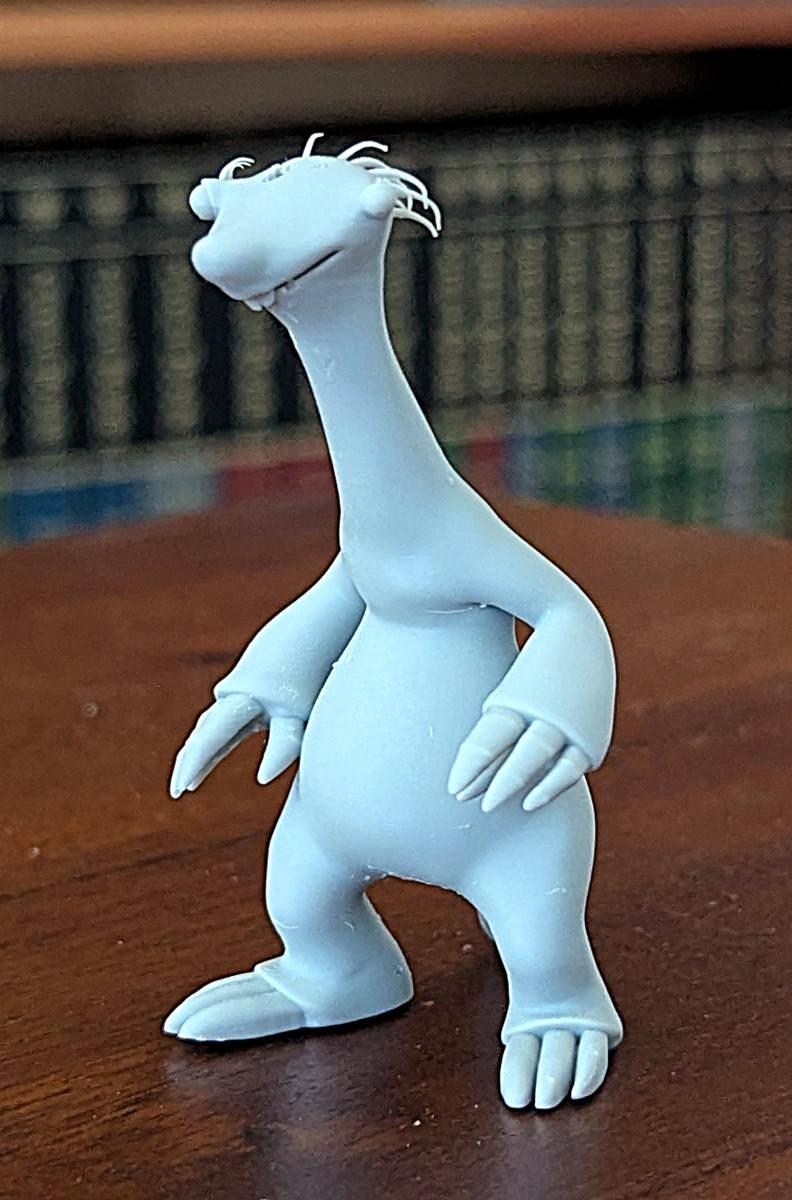
There were several models I printed for fun. I printed Ice Age’s Sid the Sloth, Pixar’s Wall-E, a Pokémon Evee, and Halo’s Master Chief.
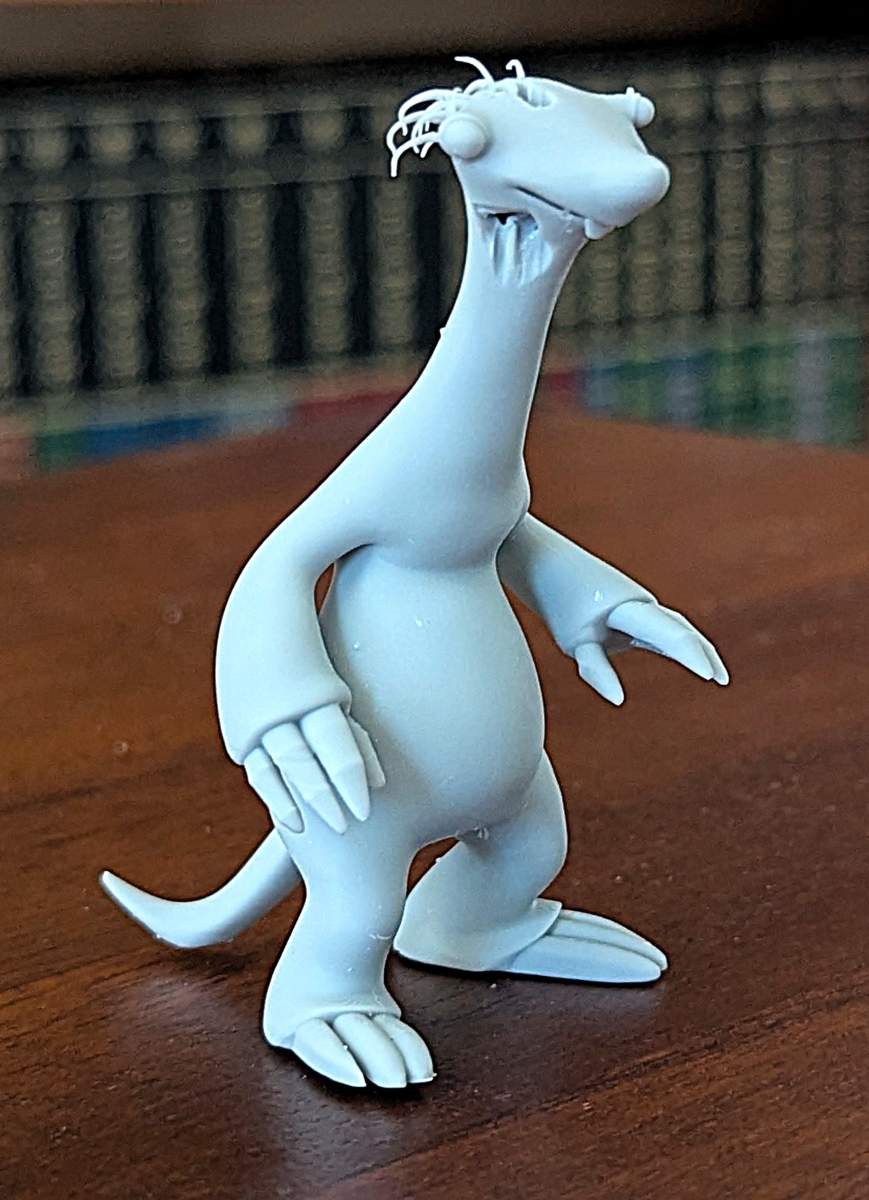
Unfortunately, most of the prints failed for several reasons. Sid failed because there was a hollow pocket that didn’t have a drain hole, so he seems to have suffered from cupping (the pressure inside the hollow area tears a hole in the model).


Master Chief almost made it. From the front, he looks perfect. But from the back, you can see that I didn’t have enough supports to completely print the shoulder gear.
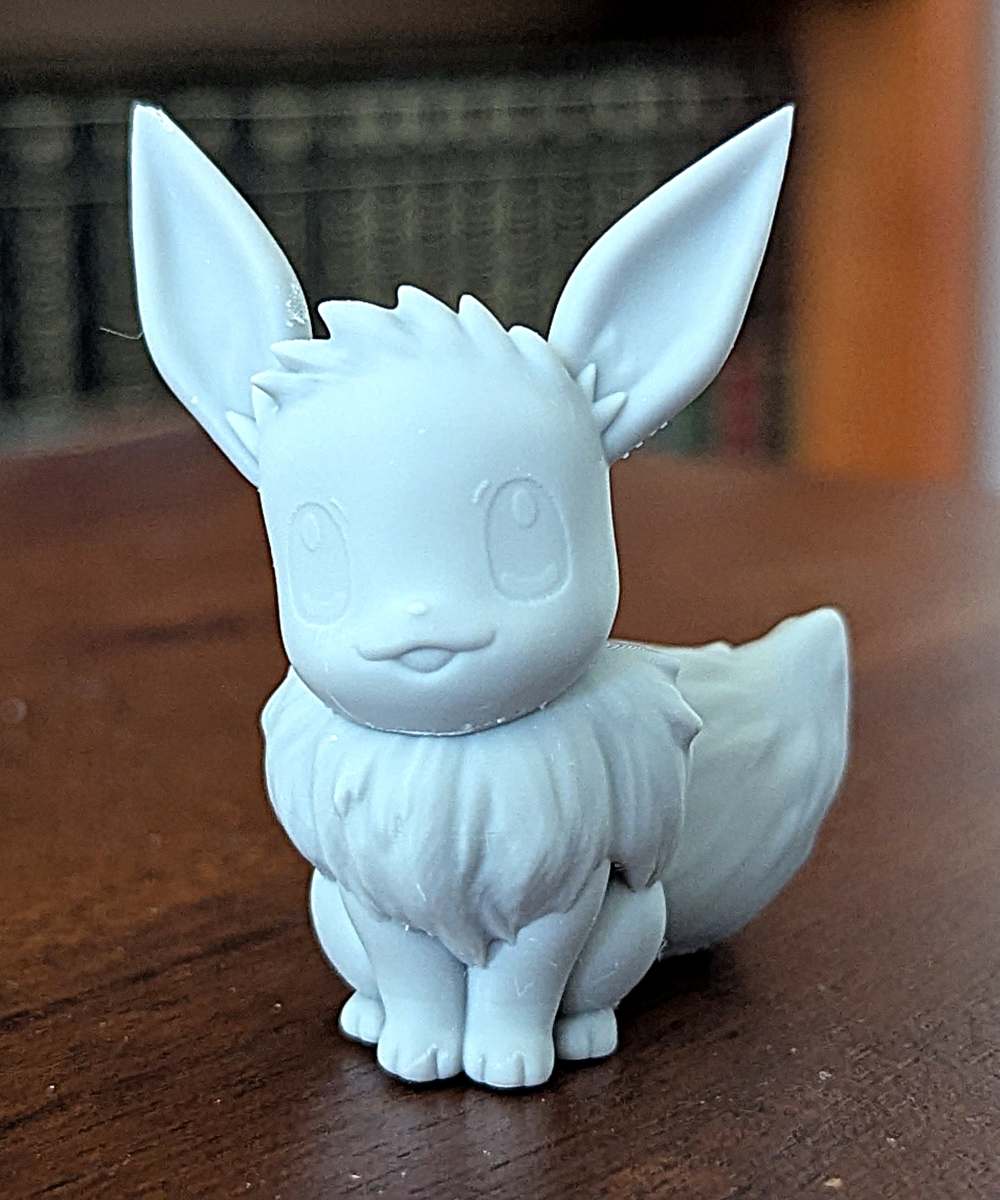
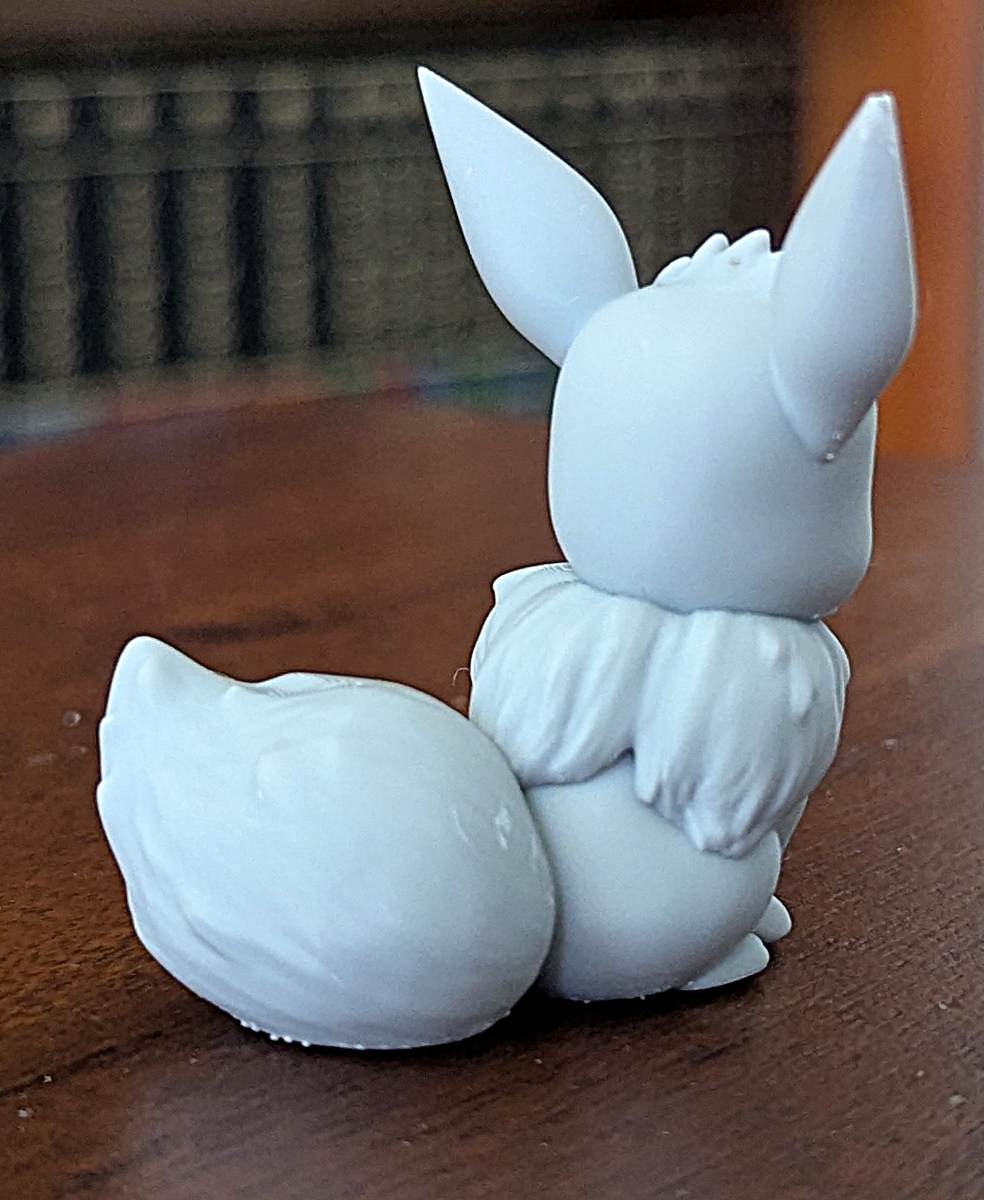
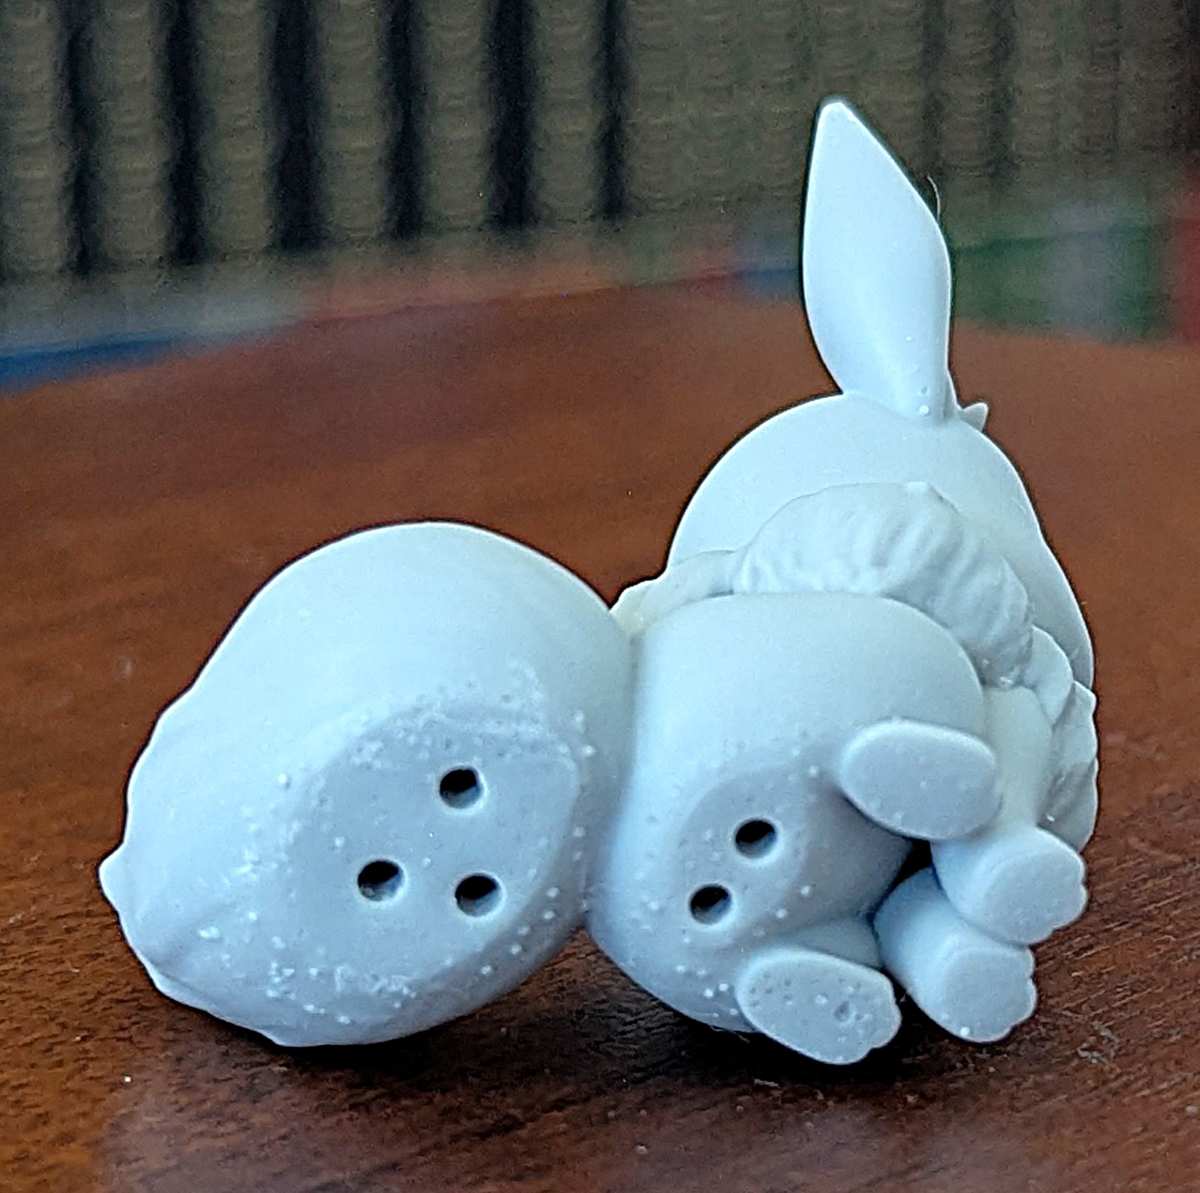
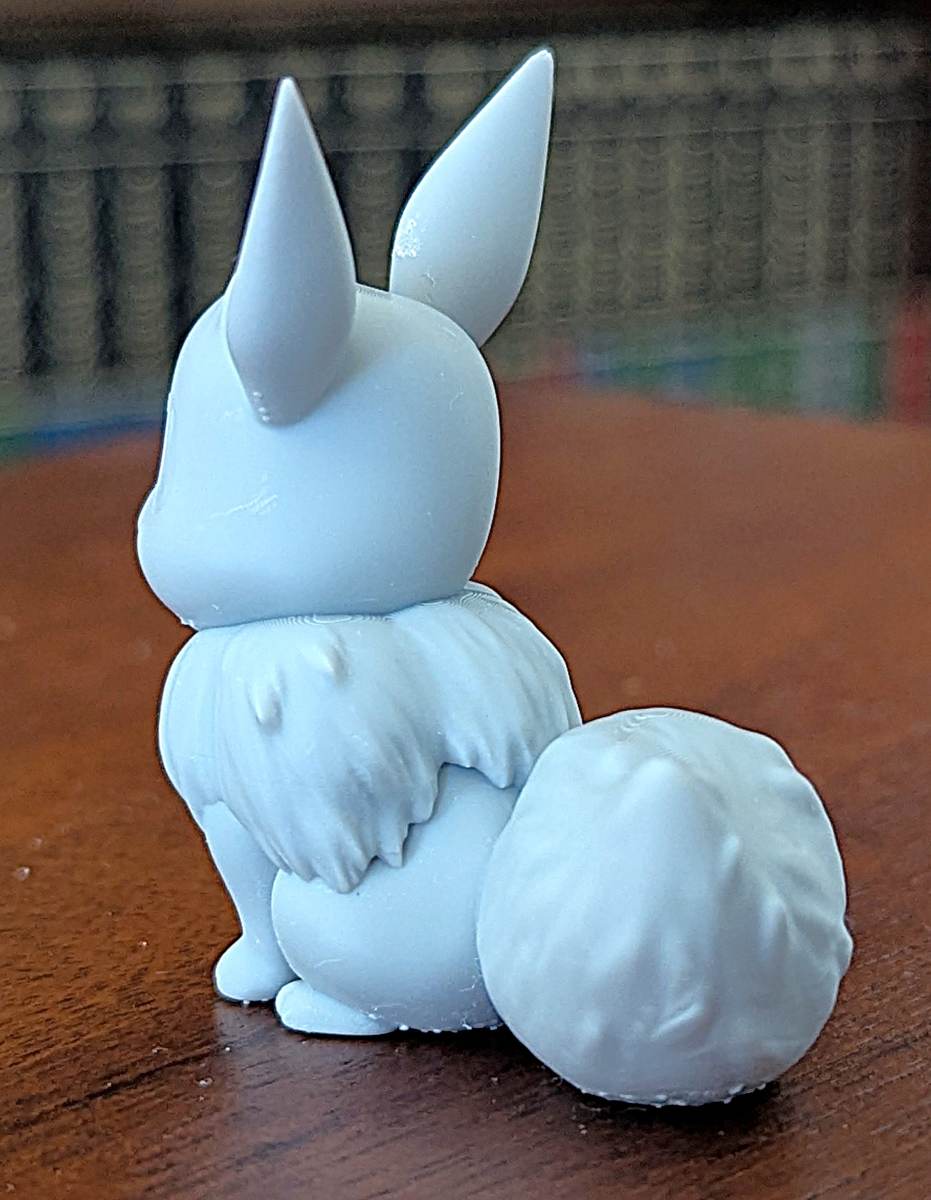
Evee was one of three successful prints out of about 25 prints I tried. I don’t think the failures have anything to do with the printer, but more with me and learning all the ins and outs of resin printing.
Our designed prints
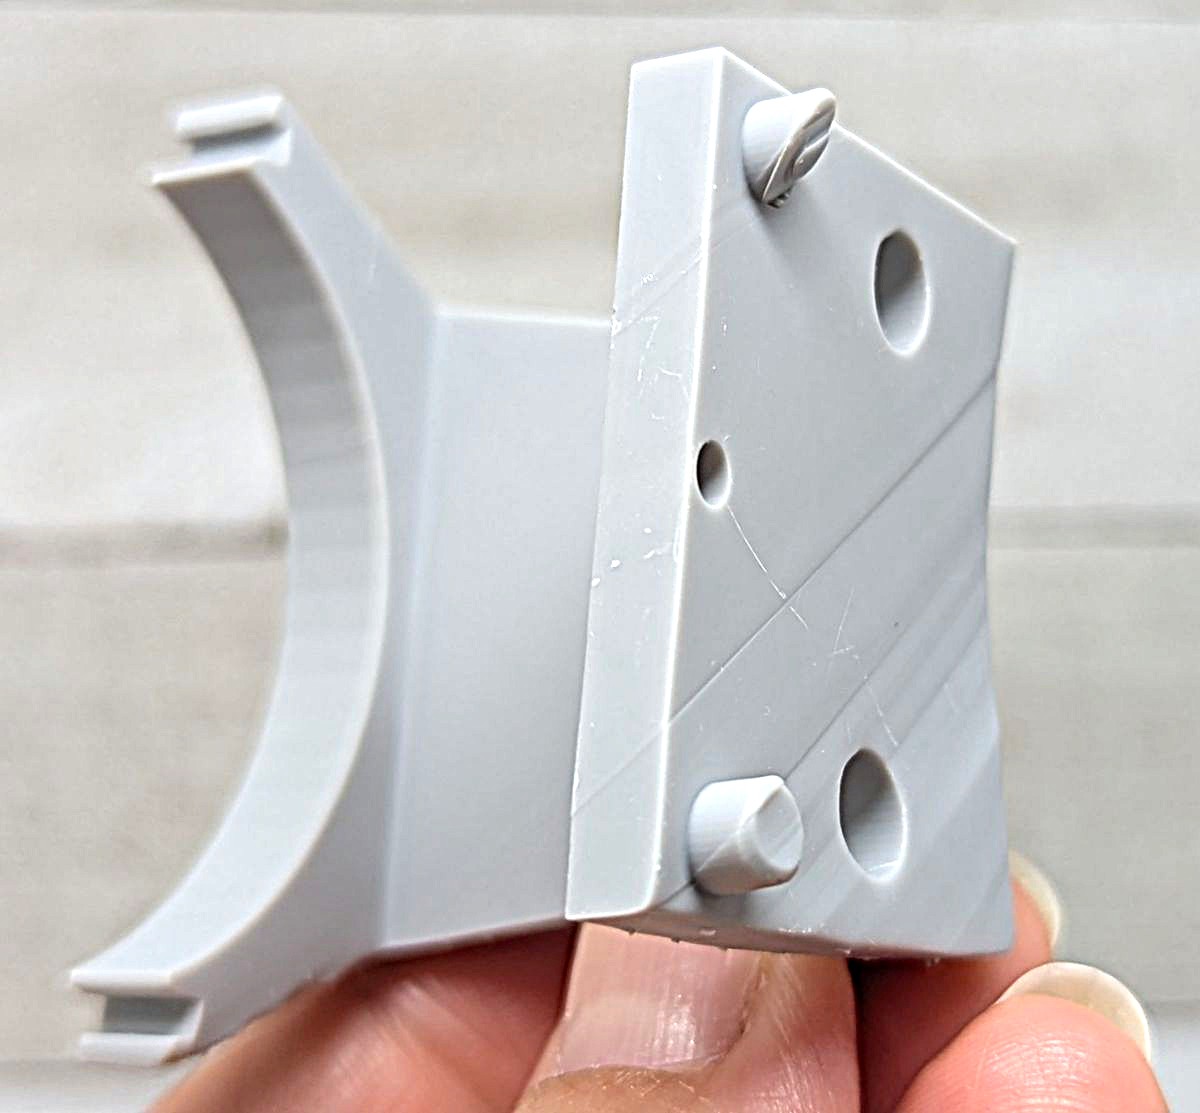
I tried printing some of my kids’ designs (they designed these for their respective college classes). Most of the prints didn’t turn out well.
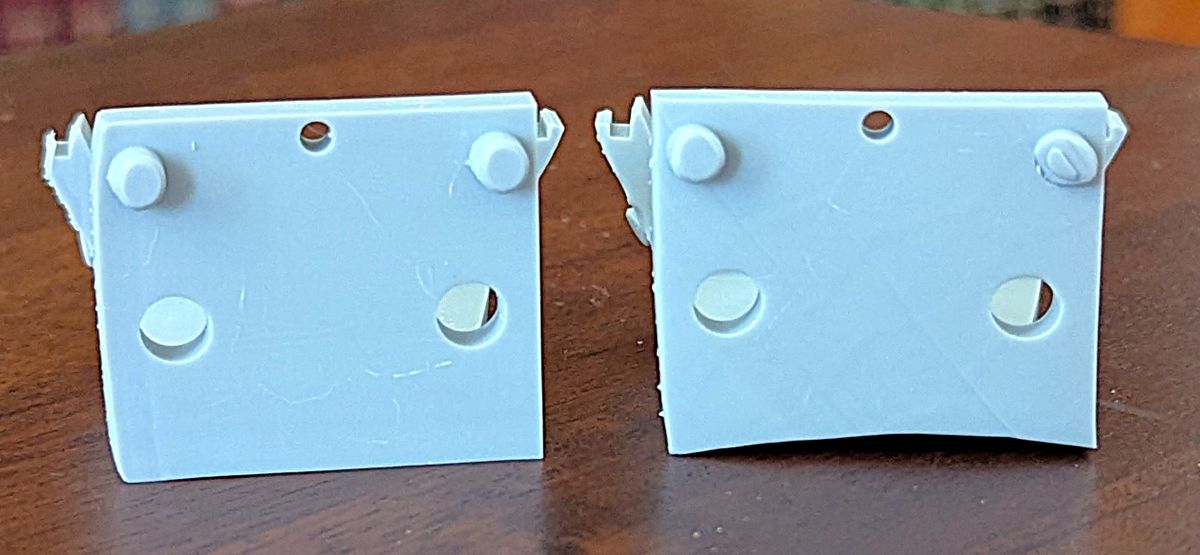
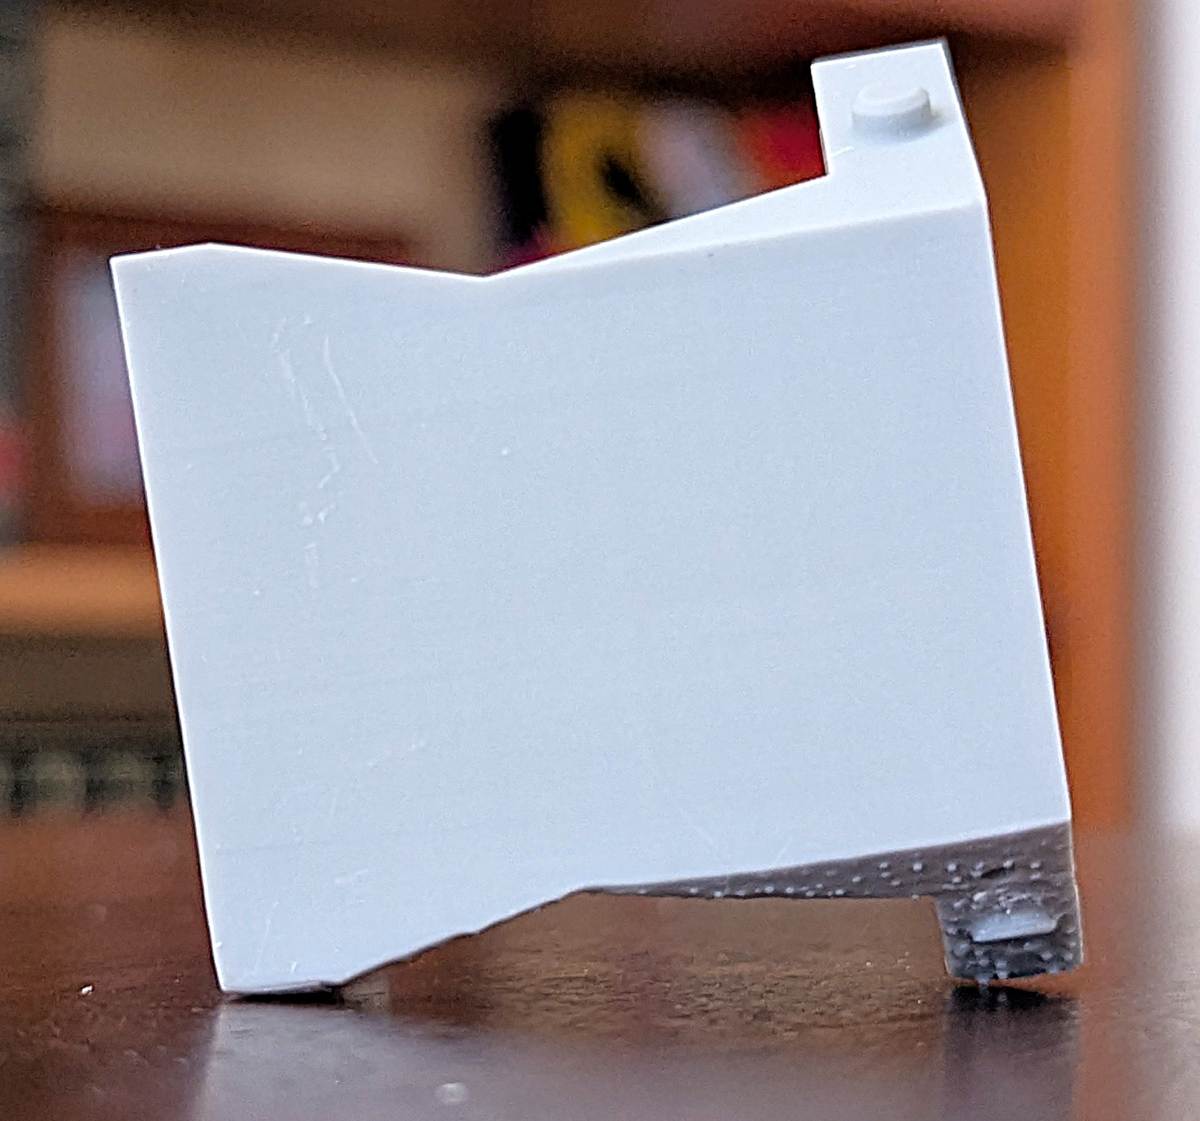
This is a prototype part designed for a machine. Unfortunately, the angles are off, some of the flat edges aren’t flat, and some of the pegs didn’t maintain their cylindrical shape. It looks like the side that had supports didn’t maintain the correct angles. If resin printers are supposed to be good for prototyping, how do you make sure everything comes out precisely and accurately?
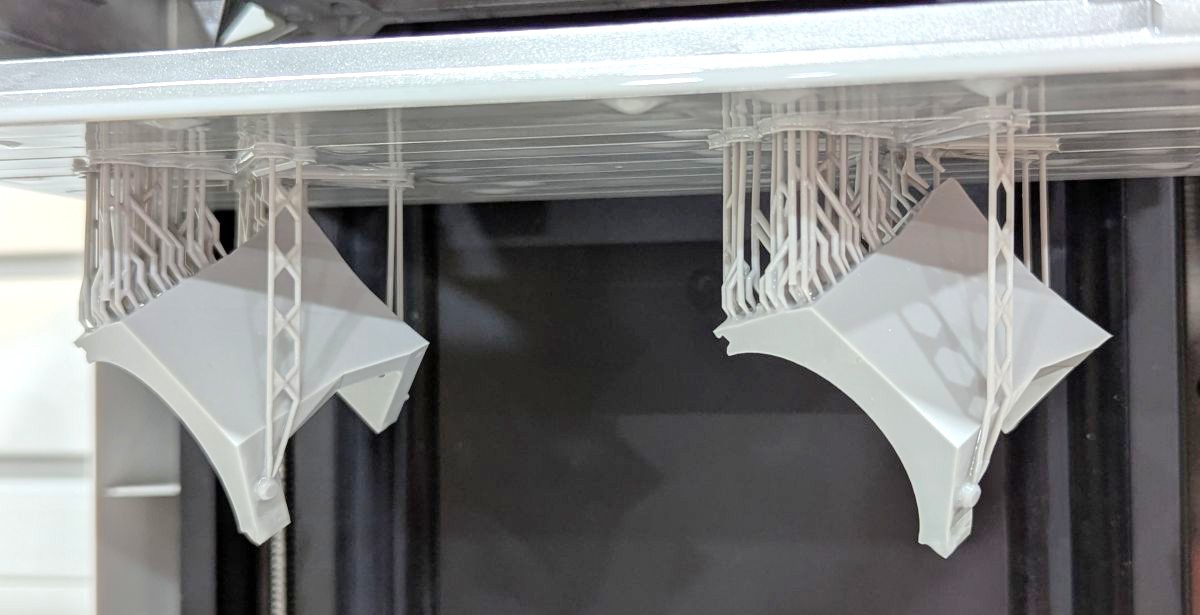
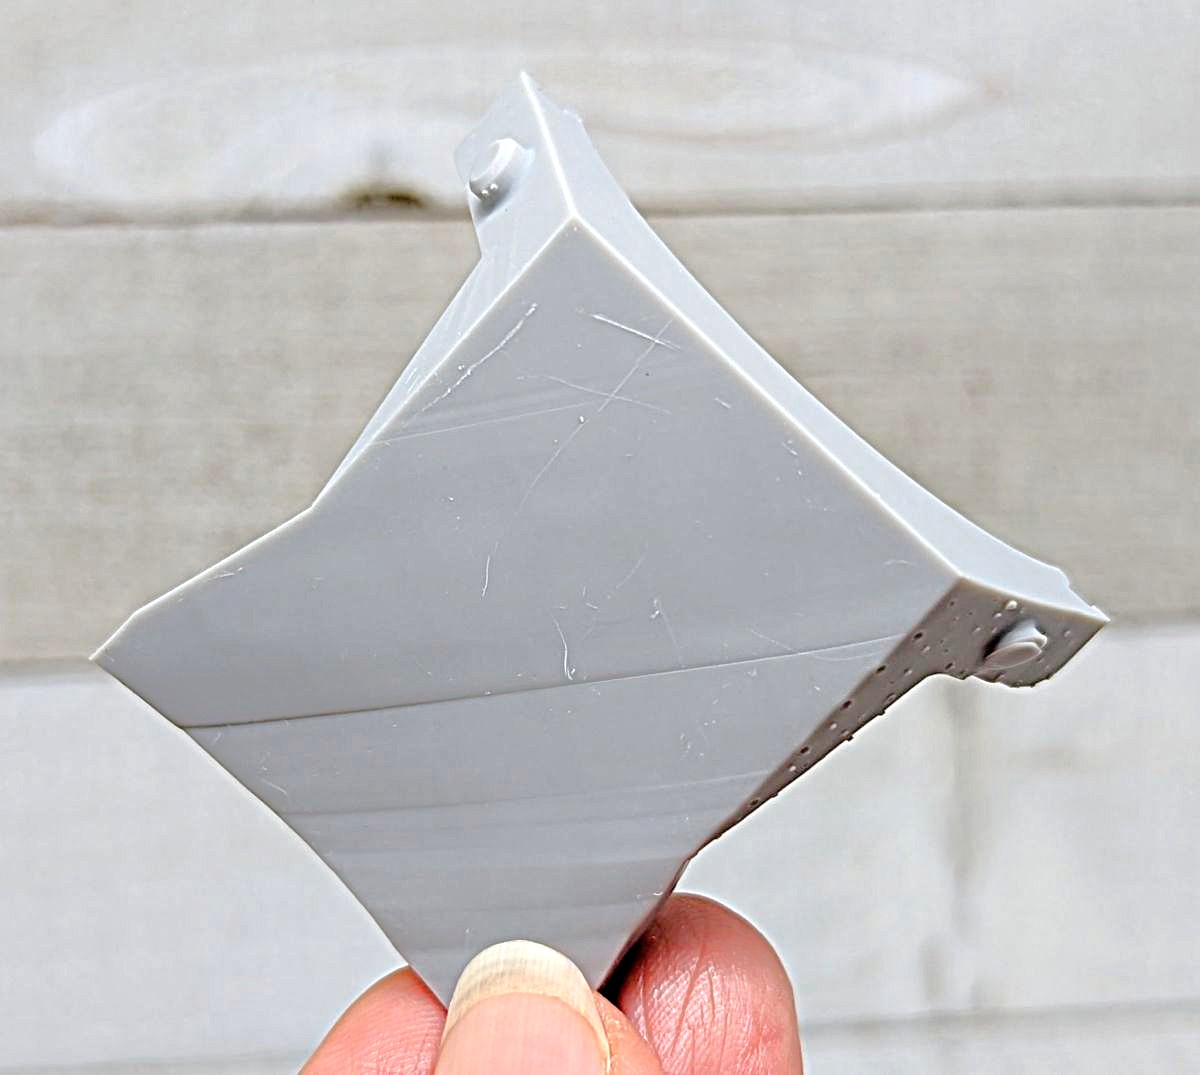
Here’s what the part looked like after printing. You can see that when I angled the print, one side was completely warped.
This last model was a simple medallion. I angled this and printed it, though I might have been able to print it directly onto the build plate (I was afraid that since it was so thin, it would break when trying to remove it from the plate).
When I first printed it, I didn’t have enough supports, so the printed results had an angled edge instead of a 90-degree edge. When I tried again, the print was better, but now I have to do some sanding to sand off the bumps left over from the supports.
Here’s the Halot-X1 in action, printing one of the prototype machine parts designed above (the rectangular part). The edges of the print didn’t end up being 90-degree angles. The whole part was slightly curved and didn’t sit flush with a flat surface.
Halot-X1 and UW-03 Washing/Curing Machine observations
The Halot-X1 Resin 3D Printer was easy to use. I like the way it’s designed. It’s compact and fits nicely on my workbench alongside the Creality UW-03 Washing/Curing Machine. The Halot-X1 also has an attractive white plastic body with a hinged orange cover, handholds on the sides to help carry it, a quick-release build plate, latches that swing out to release the resin vat and swing in to secure it in place, and connections for the AFU to automatically dispense the required amount of resin for each print and recover the unused portion when completed. I was able to tilt the vat and scrape most of the resin toward the collection port so the AFU could collect most of the leftover resin. I didn’t have to use filters!
While printing, I noticed that sometimes the vat needed more resin to complete the print, but the AFU took care of that and added more automatically when it was needed. I didn’t have to pause the print and manually add more resin.
However, almost all my prints failed in some fashion. These problems may be due to my inexperience, but were exacerbated by software limitations. There’s a lot to learn about prepping a model to successfully print. How many or what type of supports do you add? Are they even necessary? When can I print directly on the build plate? What angle is the best angle to print? Why are my angled prints warped? Why are some of my models not printing the first 1mm? I struggled with all of these. These are just some of the considerations that need to be addressed to get a successful print, and there are probably others I haven’t even thought of.
I seemed to have better success with miniatures than prototyped parts. I’m not sure why the parts aren’t printing accurately. It’s especially curious to me, since 3D printing was developed to do prototyping, and prototyping needs to be highly accurate and precise. So, if you want to print miniatures, they come out great on the Halot-X1 (many of my miniatures didn’t quite turn out, but I think I know why and how to address the problems in the future). However, if you need to do prototyping, you may have to do some research about how to get them to come out right. I don’t know why mine didn’t.
Software woes
Having only two slicers to choose from was a significant drawback when testing the Halot-X1. This was because only two had the Halot-X1 machine profile: the alpha version of Halot Box and the beta version of Chitubox Basic. Each application crashed a few times in the middle of adding supports to my models, and I had to start over. I couldn’t use Chitubox Pro or Lychee because they don’t have the printer profile yet.
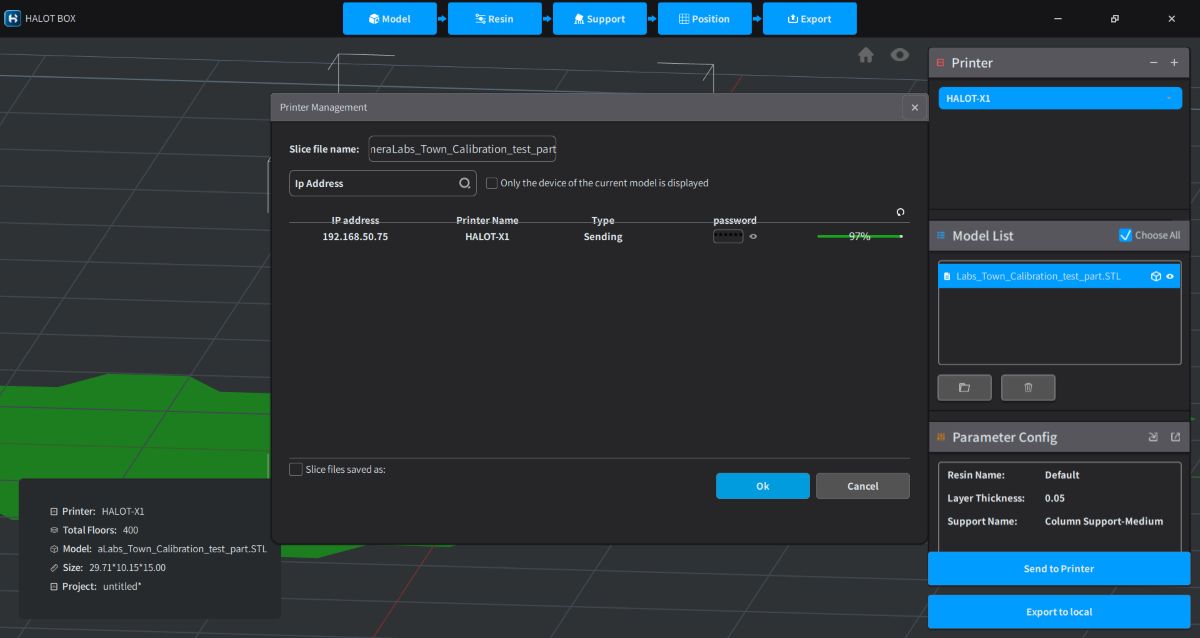
Halot Box seems to have fewer features than Chitubox Basic. I couldn’t figure out how to edit supports (e.g., move the tip of the support to another location) without deleting it and adding a new one. There doesn’t seem to be a feature that allows you to add multiple supports at one time to help save time. Halot Box does allow you to send your sliced file to the printer via WiFi when the printer is connected to WiFi. However, it was a little flaky when trying to find the printer. Most of the time, I had to either enter the IP address of the Halot-X1 or power cycle the printer before the application found it, and then I could send the file.
I also had some issues when working with Chitubox Basic. There were a few times when the sliced Chitubox files caused my printer to freeze. The printer seemed to recognize the file but wouldn’t print it. It said, “Auto-feeding, please wait.” The printer just sat there. When I tried to cancel the print, it froze again. I had to power off the printer to get out of this. After slicing the file in Halot Box, it printed. This issue led me to believe that maybe the files were somehow corrupted.
Hopefully, both applications will be stable when Halot-X1 is shipped out to customers.
Final thoughts
The Halot-X1 16K Resin 3D Printer is a compact, sturdy, attractive machine. It has WiFi capabilities, a fantastic, quick-release build plate, an easy latch system to secure or release the resin vat, a hinged lid to easily access the inside, ultra-high 16K resolution, and an awesome Auto Feed Unit (AFU – sold separately) that automatically dispenses the amount of resin necessary into the resin vat to do the print and recovers the remaining. If it needs more, the AFU will add more without you having to pause the print to manually add it. I loved using the AFU and can’t imagine not having it.
I was so excited when my 3D prints turned out well on the Halot-X1 and so frustrated when they didn’t. Since most of my prints failed in one way or another, I spent a lot of time investigating what went wrong, fixing it, and then reprinting. However, I can’t necessarily attribute those failures to the machine. This may be due to my inexperience. Setting up the model to print successfully is difficult for a beginner like me. So, once I become more familiar with how to prep my models for printing success, I’ll have a better idea of which issues are mine and which are the machine’s. But when you get a model to print successfully, it’s addictive, especially the miniatures! I’m still working out the kinks when printing prototype parts.
The Creality UW-03 Washing/Curing machine is a wonderful addition and makes easy, quick work of washing and curing. I wish it had indents for handholds on the sides so it could be moved more easily, and a hinged lid would make an awesome addition as well.
The Halot-X1, AFU, and UW-03 work well together and are a great way to get into resin printing!
What I like about the Halot-X1 printer and the AFU
- Successful, detailed prints were awesome because of the 16K mono LCD.
- No leveling required.
- The quick-release build plate is fantastic and worked almost every time for me.
- The latches that swing in to secure the resin vat in place and swing out to release it are awesome.
- The hinged lid is awesome and allows for one-handed operation. It lifts up and out of the way. I have a lot of vertical space and much less horizontal space, so this is ideal for me.
- The Auto Feed Unit (AFU) is a fantastic addition to the printer (it’s sold separately). It automatically dispenses the amount of resin necessary and recovers the remaining after the print is completed. It even adds more resin during the print without having to pause the printing. NOTE: It works with official Halot resins (I don’t know how it works with others, as they don’t have RFID tags on them).
- It’s compact, attractive, and fits nicely on my workbench.
- Having the touchscreen control panel and USB port on the top makes it easily accessible.
What needs to be improved?
- Having an area on the printer to connect an air purifier would be nice.
- The Halot Box (and Chitubox Basic) slicer software needs work.
What I like about the UW-03 Washing/Curing Machine
- Makes quick work of washing and curing – much faster than manually cleaning with IPA and curing in the sun.
- Nice size – it easily holds my models and fits right next to my Halot-X1 printer on my workbench.
- It’s so easy to use.
- I love the handholds on the base of the plastic washtub. It makes it really easy to move around.
What needs to be improved?
- Handholds on the UW-03 to make it easy to move.
- Add a hinged lid to the UW-03.
Price: $599.00 Printer only, $619 for Printer + Auto Feed Unit; $149.00 – Washing/Curing Machine
Where to buy: piocreat3d.com
Source: The sample of this product was provided for free by PioCreat. PioCreat did not have a final say on the review and did not preview the review before it was published.
Check out these other reviews!

INIU Mini Portable Charger, Small 45W PD Power Bank, 10000mAh USB C in&Out Fast Charging Pocket Size Battery Pack, Travel Essentials Powerbank for iPhone 17 16 15 14 Pro Air, Xiaomi, Samsung S24 etc
(as of March 7, 2026 08:11 GMT -06:00 - More infoProduct prices and availability are accurate as of the date/time indicated and are subject to change. Any price and availability information displayed on [relevant Amazon Site(s), as applicable] at the time of purchase will apply to the purchase of this product.)