REVIEW – Are you new to 3D printing? I am. As a beginner, you might ask things like, “Do you have to assemble the printer?”, “How much do I need to know about 3D printing to print my first object?”, “How much time do I need to spend learning about the printer before I can print something?”, “I’ve heard leveling a 3D printer can be difficult – how difficult is it to level the Aries?”, “What is slicing?”, and “How well does the Aries work?”. Join me on my first foray into 3D printing to figure out this and other things about the Voxelab Aries 3D printer.
What is it?
The Voxelab Aries 3D Printer is a fused-deposition-modeling (FDM) device that extrudes a layer of hot polymer (thermoplastic) on top of another; the two layers fuse to form a three-dimensional object. According to All3DP (an online magazine for all things 3D printing), FDM is synonymous with fused filament fabrication (FFF). This type of 3D printing is called additive manufacturing (AM) because material is added or deposited in layers to build an object rather than subtractive manufacturing (SM) where material is removed (machined) or sculpted to create the object (All3DP).
What’s in the box?
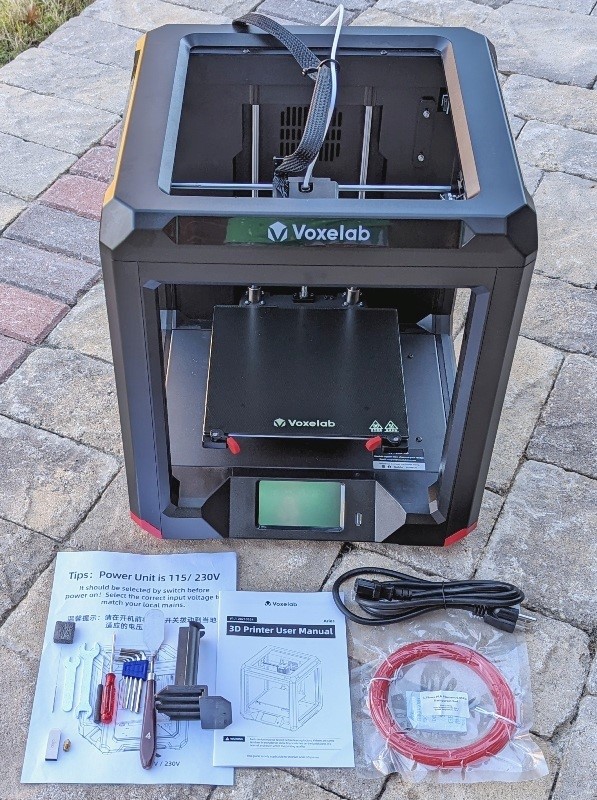
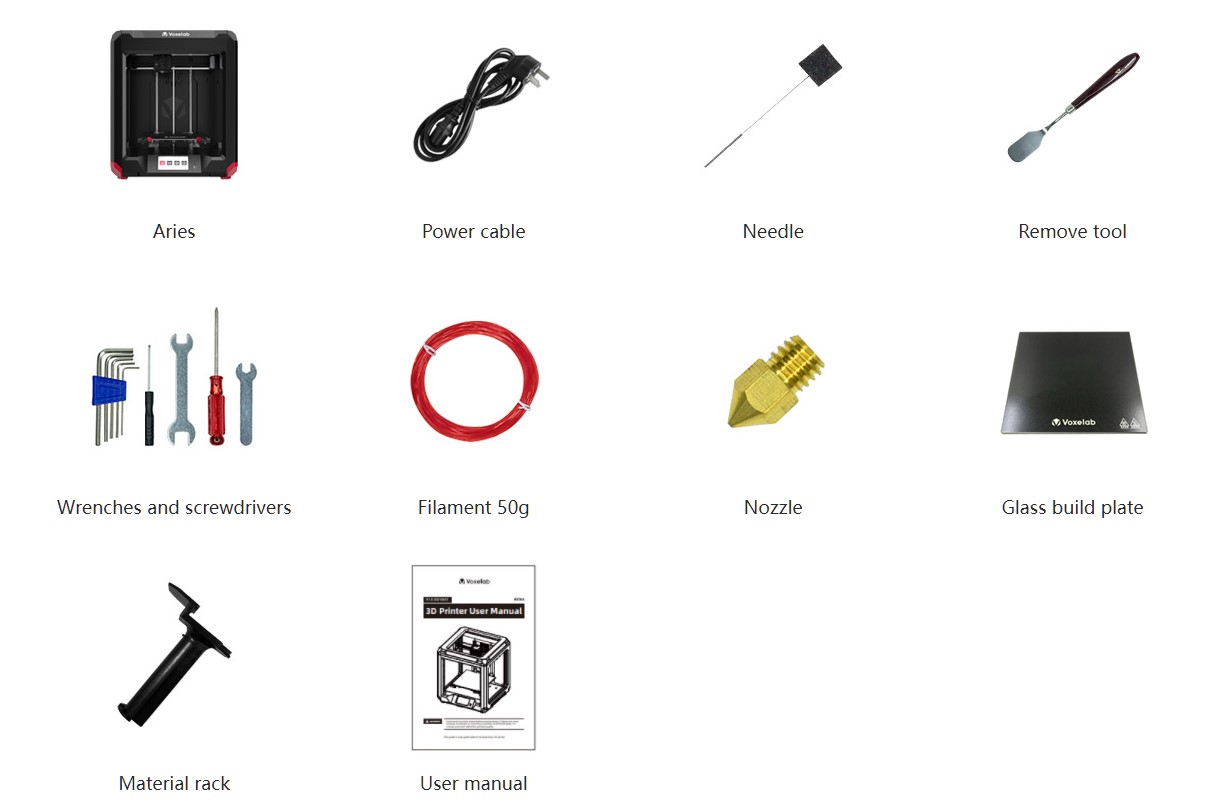
- Voxelab Aries 3D Printer
- Needle (attached to a square dark gray piece of foam)
- Flash drive (contains VoxelMaker slicer software, User Manual, and sample files to print)
- Nozzle
- Wrenches (2)
- Black-handled flathead screwdriver
- Red-handled Phillips-head screwdriver
- Hex-head screwdrivers (5)
- Spatula (removal tool)
- Material rack
- Power cable
- Red PLA 1.75 mm filament (50 g)
- User Manual
- Sheet warning you to flip the switch for the appropriate voltage before powering on the printer (115 V or 230 V)
Hardware specs
- Extruder Number: 1
- Extruder Diameter: 0.4 mm
- Maximum Set Temp. of Extruder: 250 ℃
- Maximum Set Temp. of Platform: 110 ℃
- Print Speed: ≤180 mm/s, 50-80 mm/s normally
- Supported Filament Types: PLA, ABS, PETG; 1.75 mm diameter
- Print Size: 200*200*200 mm
- Layer Resolution: 0.05-0.4 mm
- Print Resolution: ±0.2 mm
- Position Precision: Z-axis 0.0025 mm, X/Y-axis ±0.011 mm
- Device Size: 406*424*469 mm (16.0″ x 16.7″ x 18.5″)
- Package Size: 486*486*540 mm
- Screen: 4.3” touchscreen display
- Net Weight: 12.2 kg
- Gross Weight: 15 kg
- Input AC: 115/230V 50/60Hz
- Output DC: 24V
- Power: 350 W
- Working mode: USB offline printing or WiFi online printing (using VoxelMaker slicer software)
- Software: Cura / Simplify3D / VoxelMaker
- Output: G / GX / GCODE File
- Input: STL / OBJ / AMF / 3MF / FPP / BMP / PNG / JPG / JPEG File
- Windows 7 / 10 / 11 / MacOS
- Running Noise: 50dB
- Working Environment: 15-30 ℃
- Resume printing function: Yes
- Filament sensor: Yes (detects presence/absence of filament)
- Language switch: English / Chinese
Design and features
In general, a 3D printer will have the following components (3DInsider):
- 3D Printer Frame: Holds the machine together
- 3D Printer Head [printhead] movement mechanics: Moves relative to the print bed in all directions
- 3D Printer Head [printhead]: Nozzle that deposits filament or applies colors and liquid binder
- 3D Build Platform or Build Bed: The part of the printer where the object is printed
- 3D Printer Stepper Motors (at least 4): Used for precise positioning and speed control
- 3D Printer Electronics: Used to drive motors, heat the extruder, and much more
- 3D Printer Firmware: Permanent software used to control every aspect of a 3D printer
- 3D Printer Software: Not part of the actual printer but still needed for the printing process

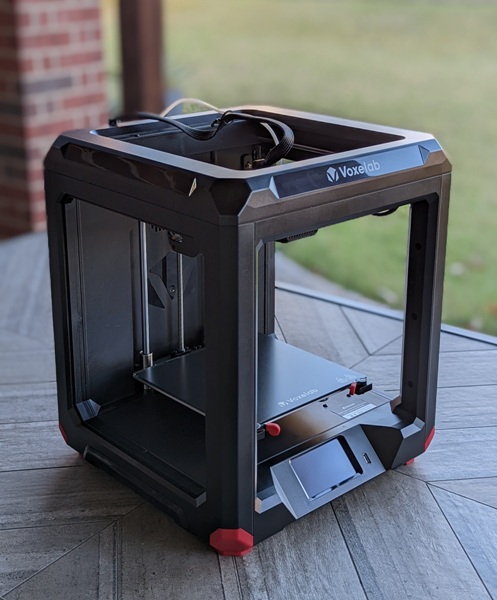
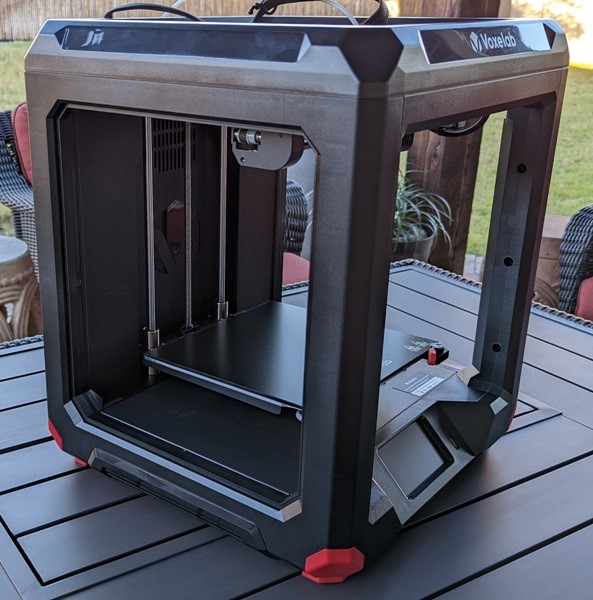
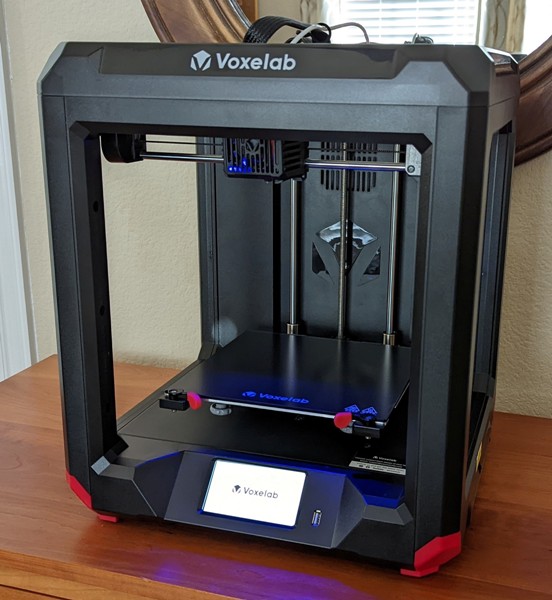
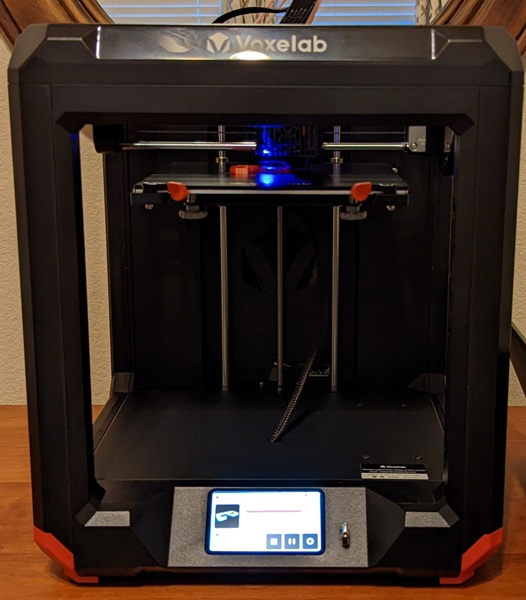
The Voxelab Aries is a stoutly built 3D printer. And in answer to the question “Do you have to assemble the printer?”, the answer is that it comes fully assembled (except for the material rack which takes two seconds to install) – YAAAY!
NOTE: Even though the printer is fully assembled, the unpacking was a little more involved. Before you start using the printer, it is necessary to remove all the cable ties that hold the belts, rods, and motors in place. The user manual helps you locate those to remove them.
Our printer came with the glass build plate attached to the platform and secured with a very large cable tie. After cutting the cable tie and trying to remove it, the temperature sensor underneath the platform got snagged on the tie and was pulled out. It was necessary for my husband to remove the platform to get access to the underside so he could reinstall the temperature sensor.
Also, there were several cable ties wrapped around the drive belts, and it was necessary to be very careful when cutting those to avoid damaging the belts.
The frame is really rigid and made of hard black plastic but is not enclosed. The build plate is made of lightly textured glass and is large enough to allow you to build 3D objects up to 200 mm x 200 mm x 200 mm in size. This printer has a touchscreen display built into the bottom of the frame. The red feet on the bottom of the printer are made of a firm silicone type of material to prevent scratching your furniture.
The Aries is WiFi capable thus you can send your 3D print files to the printer wirelessly (using the VoxelMaker slicer software) or you can choose to use the onboard USB port located next to the LCD screen.
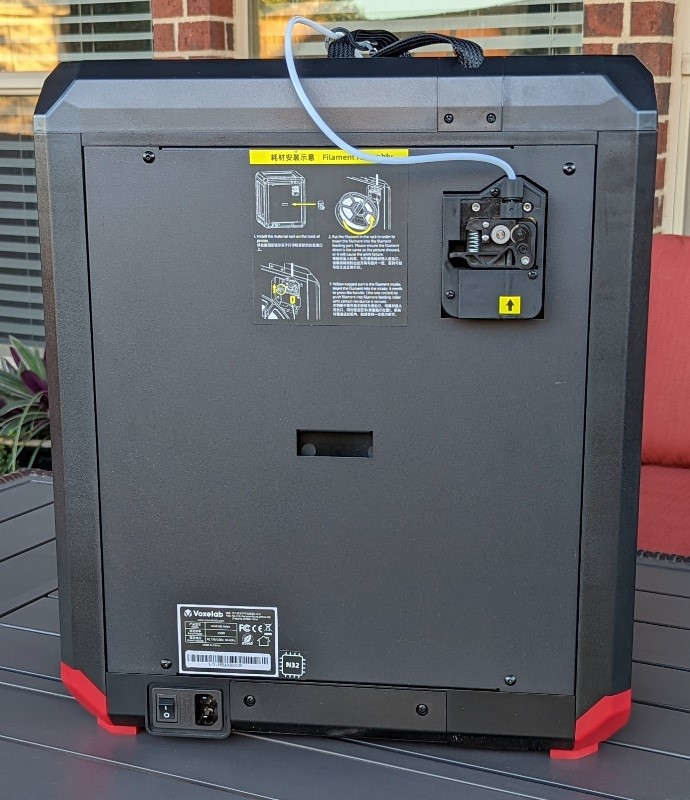
The photo above shows the back of the printer. You can see the On/Off switch and the port for the power cable located at the bottom left. You can also see the extruder (the part that moves the plastic filament to the hot end of the printer) in the upper right corner. The hole in the center of the back of the printer is where you insert the material rack which supports the filament.
The above photo shows the left side of the printer.
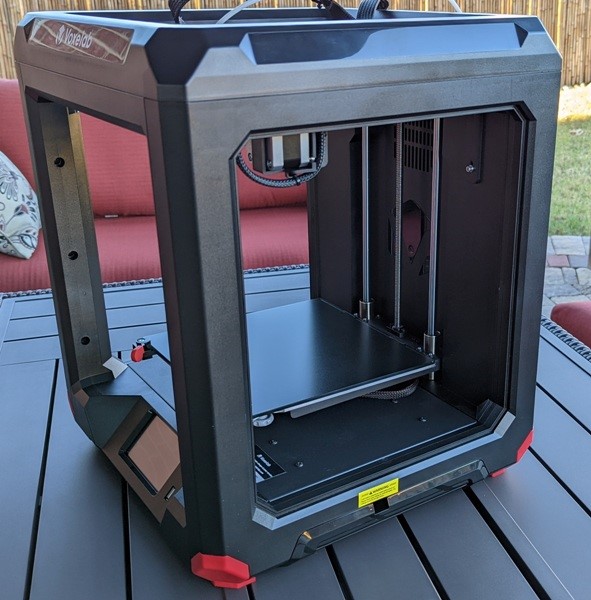
Above is the right side of the printer. The hole located just below the bright yellow sticker is where you flip the switch to the correct voltage, either 115 V or 230 V, BEFORE you power up the printer. According to the yellow warning label, this is important to avoid damaging the printer.

The voltage switch is recessed rather far into the frame – I guess to help prevent accidentally flipping it to the incorrect setting.
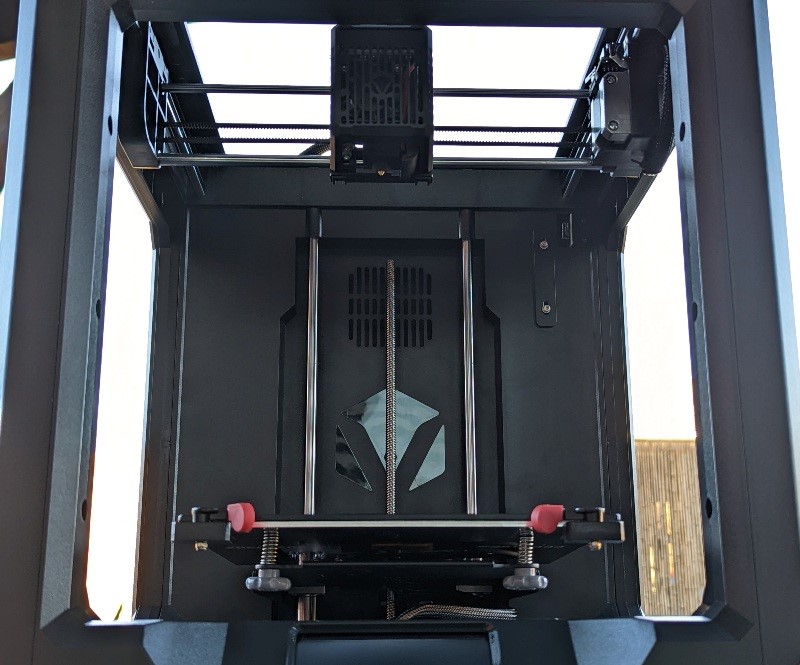
At the base of the printer, you can see two gray knobs used to level the build plate. The red tabs above the gray knobs rotate outward to allow you to easily extract or insert the glass build plate from the printer (rotating the tabs inward locks the plate in place).
The build platform only moves up and down on the Z-axis.
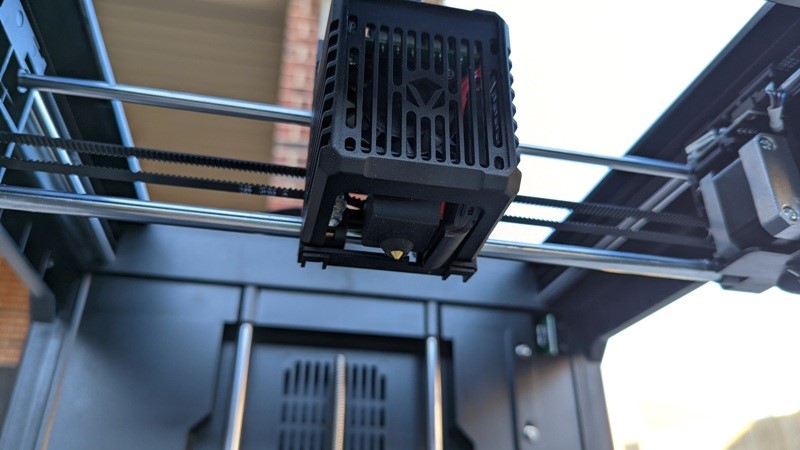
The printhead has a nozzle diameter of 0.4 mm.

The printhead moves side-to-side on the X-axis…
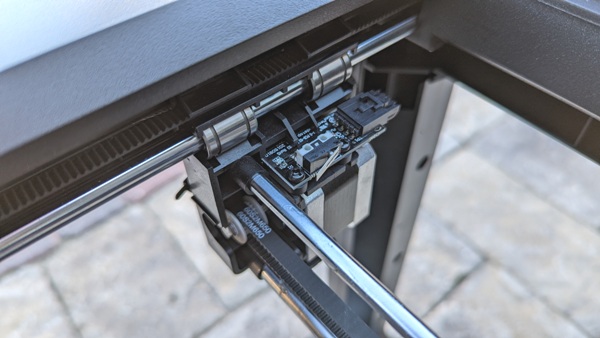 …and front-to-back on the Y-axis along metal rods with the aid of belts and stepper motors as shown in the photos above.
Setup
When I first powered up the Aries, I was a little worried because the boot sequence got stuck on the Voxelab logo screen. I had to reboot the printer two more times for it to finally show me the homescreen. I haven’t had any other boot issues since.
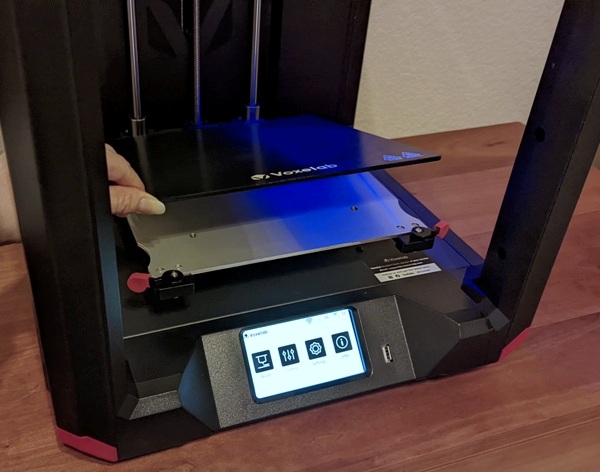
The above shows how easily you can remove or insert the build plate using the red locking tabs. The plate slides snuggly into two metal tabs located toward the back of the printer and is locked in place by rotating the red tabs inward.
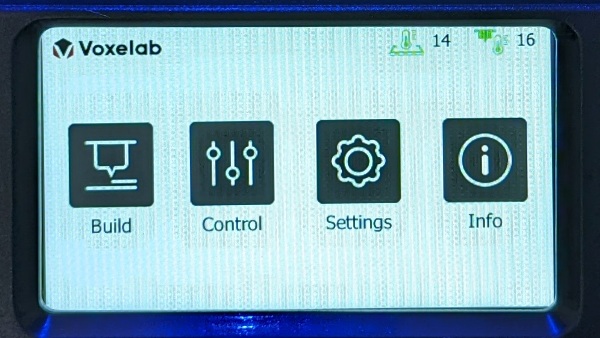
The homescreen of the printer displays four icons (from left to right): “Build”, “Control”, “Settings”, and “Info”. I will first cover “Settings”, then “Control”, and finally “Build” (“Info” contains information about your printer like the model, IP address, firmware number, etc.).
Settings Menu Options
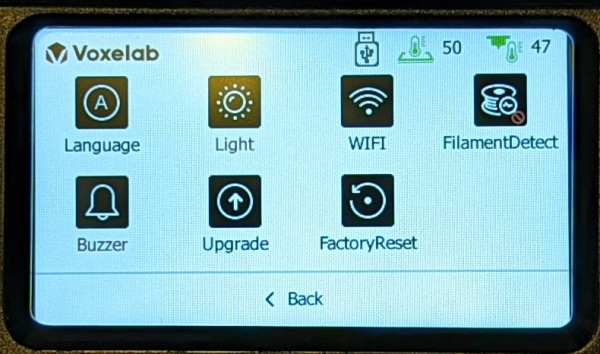
The Aries Settings menu allows you to alter the settings of the following:
- Language: choose your language (English or Chinese)
- Light: turn off/on the light near the nozzle
- WiFi: connect to your WiFi network
- Filament Detect: turn off/on the Filament Detect setting (detects when filament runs out)
- Buzzer: turn off/on the printer’s notification beeps (these are quite loud so I turned them off)
- Upgrade: update your printer’s firmware
- Factory Reset: perform a factory reset of the printer
WiFi Setup
I wanted to set up my Aries to connect to my home’s WiFi network so that I could transfer my printer files wirelessly.
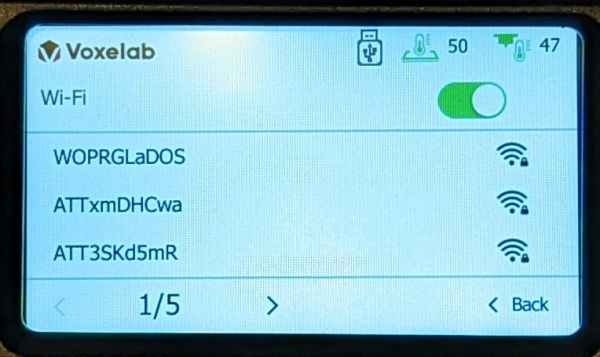
After tapping on the WiFi setting, I was able to find my network and enter my password, however, I was only able to successfully connect after about 10 tries. The Aries was right next to an access point in my home so that wasn’t the issue, but then I remembered that some of my IoT devices needed my router to be set on WPA2 instead of WPA2/WPA3 like its current setting. So, I switched my router settings from WPA2/WPA3 to WPA2 and then was able to connect the Aries. I then switched back to WPA2/WPA3 settings afterward and thankfully it was still able to connect to my network.
Control Menu Options
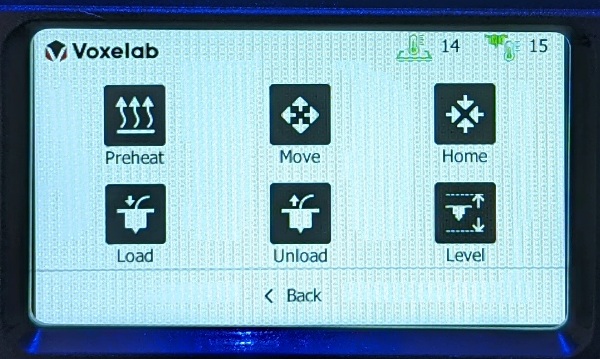
Tapping on the Control menu from the homescreen allows you access to the following:
- Preheat: You can preheat your build plate and your printhead to any desired temperature up to the printer’s maximum temperatures (max extruder temp: 250 degrees C, max build-platform temp: 110 degrees C). Note: this immediately shuts off when you back out of “Preheat”.
- Move: You can move the print head by adjusting the X, Y, and Z coordinates.
- Home: This moves the build plate to its home position.
- Load: Tap on this to start loading your filament (but first place your filament on the material rack and insert it into the extruder on the back of the printer before tapping on the “Load” menu option – I will discuss this in more detail later).
- Unload: Tap on this to unload the current filament.
- Level: Tap on this to start leveling your build plate.
Since most of the Control Menu items are self-explanatory, I will only be addressing “Level”, “Load”, and “Unload” settings.
Leveling
In answer to another of the questions that I posed earlier – “I’ve heard leveling a 3D printer can be difficult – how difficult is it to level the Aries?” – leveling your build plate is pretty easy, thank goodness. It’s not quite as easy as a self-leveling 3D printer, but it is only a 3-step manual process.
By tapping on the “Level” option under the Control menu, the printhead moves to three different positions, one at a time, while the build plate moves into position just under the nozzle. You’ll need to slide a piece of paper between the nozzle and plate.
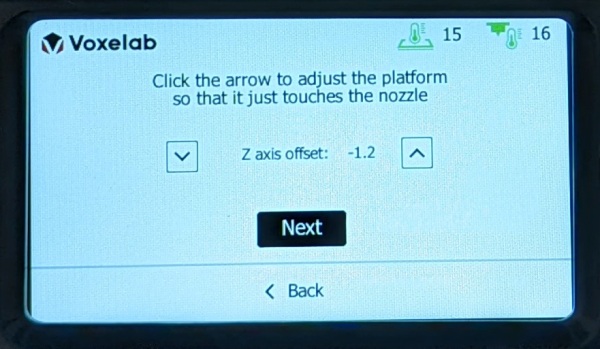 The goal here is to adjust the platform height so that the nozzle scrapes the paper as you move it around. To fine-tune the platform’s height, you either use the Up/Down arrow keys on the touchscreen (at the first position at the back center of the printer)…

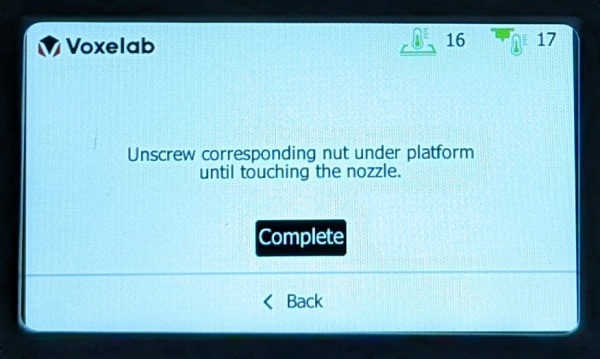
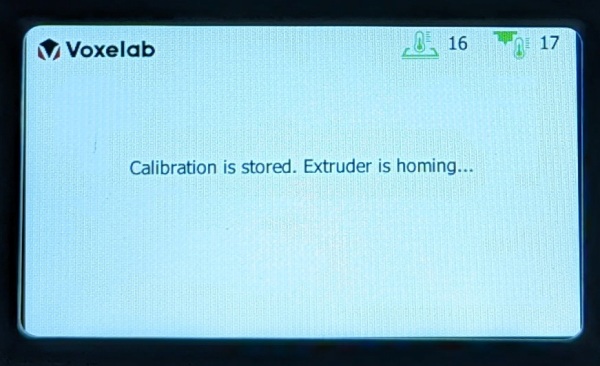
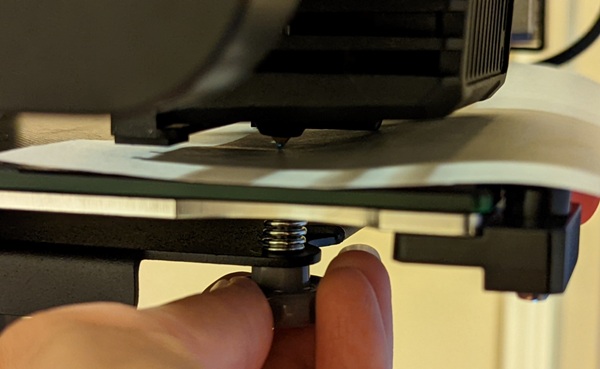 …or rotate the gray knobs under the platform (at the second and third positions located at the front corners of the build plate). When finished, the Aries stores the leveling parameters and moves the printhead and build plate to the home position.
Loading Filament
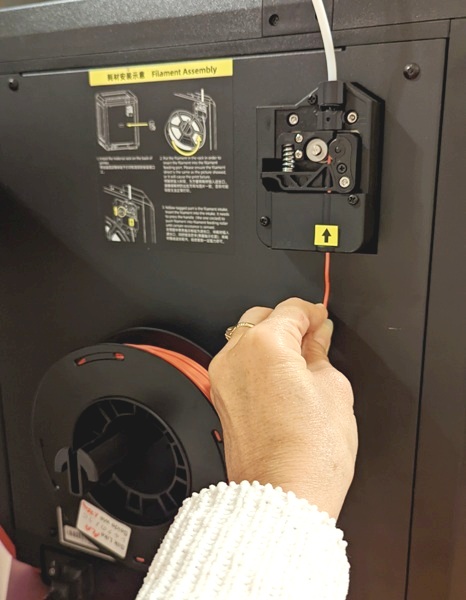
Loading filament is nice and easy as well. You simply place your spool of filament onto the material rack on the back of the printer so that the filament dispenses from the bottom of the spool. You then insert the end of the filament into the extruder where the yellow arrow indicates. Continue to insert the filament…
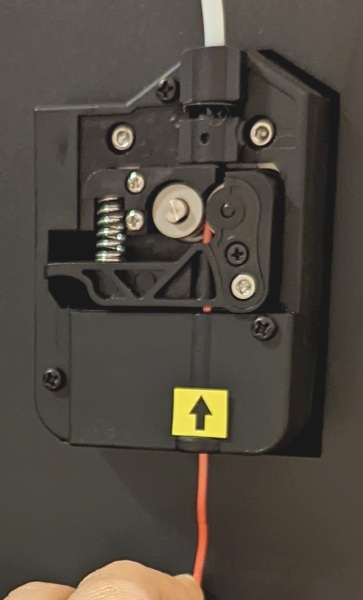
…until you see the filament positioned at the wheel of the extruder as shown in the photo above.
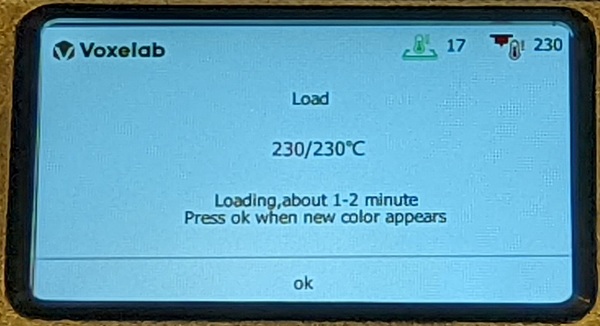
Next, you tap on the “Load” icon under the Control menu after which the extruder feeds the filament to the printhead as the hot end heats up. Once it finishes heating up, you’ll start to see melted filament extrude from the nozzle.
If you are changing filament colors or types of filament, you’ll want to wait until you see that the filament type or color coming out of the nozzle is that of the new filament and not a mix of the old and new.
Types of Filament
There are different types of filament that the Aries printer can use to print objects: PLA, ABS, and PETG. Each has different characteristics and pros and cons. And each requires different 3D printer settings to print an object well. The following briefly lists some of the characteristics of each type of filament according to All3DP.
-
- PLA – This stands for polylactic acid. It’s strong and easy to print with, requires lower temperatures than ABS to print, but is brittle and can’t withstand high temperatures.
- ABS – This stands for acrylonitrile butadiene styrene. It’s strong, withstands high temperatures, and is a little more flexible than PLA. However, it requires higher temperatures to print (it also needs a heated build platform unlike PLA) and is prone to warping.
- PETG – This stands for polyethylene terephthalate glycol. It is “a good middle ground between ABS and PLA … it is more flexible and durable than PLA and easier to print than ABS” (All3DP).
Performance
“How much do I need to know about 3D printing to print my first object?” and “How much time do I need to spend learning about the printer before I can print something?”
The answer to those questions is that it is very quick and easy to do your first print job (easier than I thought it would be) especially when the 3D files are ready to print (.g, .gx, .gcode files) like the test print models provided by Voxelab. It takes only the time necessary for you to read the very short Aries User Manual, level the build plate, and load the filament to print your first object. This takes about 30 minutes or less. Additionally, several websites have free ready-to-print files too. There is a list of these on All3DP’s website.
However, to create your own designs and fine-tune or troubleshoot your print jobs requires lots of investigation, patience, time, and practice. I’m not quite at that level but I have begun that journey.
And something worth noting is that a 3D print job can take many hours to complete depending on the printing speed, infill settings, etc. as well as the complexity and size of the object being printed.
You can print files that are stored on a USB drive or send files to the printer via WiFi using the VoxelMaker slicer software (more on this later) where they will be stored on the printer’s drive.
To do my first print job using the PLA filament provided with the printer, I did the following:
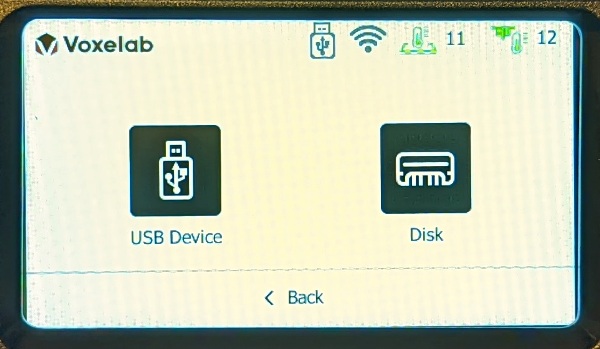
- Inserted the USB flash drive that came with the Aries into the USB port on the front of the printer
- Tapped on the “Build” icon on the homescreen
- Selected “USB Device”
- Tapped on the “Model” folder
- Selected the “TestHook.gx” file to print
While doing these steps, I noticed that the touchscreen did not always register my taps. It’s a little finicky.
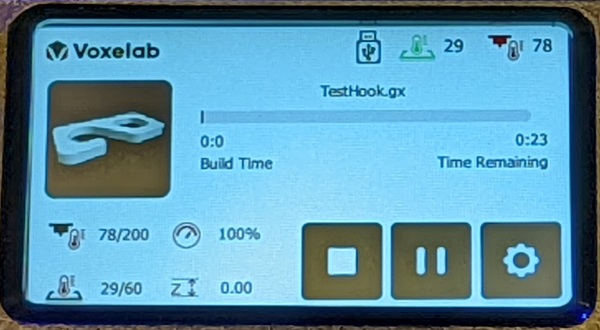
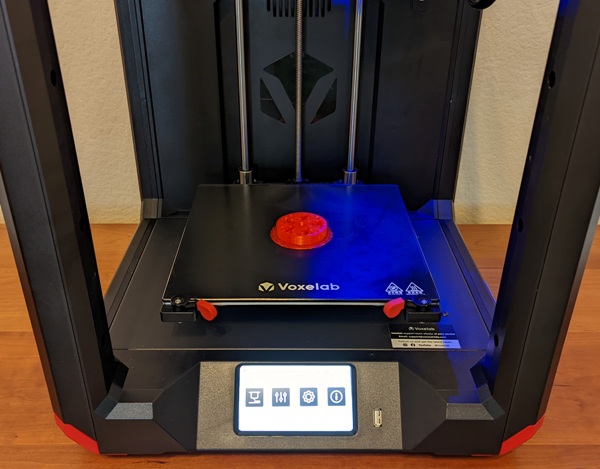
Before the Aries printer can print anything, it first heats the build plate, and then it heats the extruder.
Once both of those are at temperature, the build platform rises and the printhead positions itself to start printing.
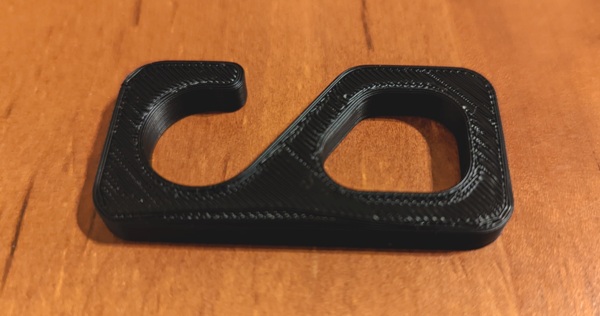
Having never printed anything on a 3D printer, it was fascinating to watch as the printer worked to build my test hook as shown in the photo above. I noticed that the cooling fan was rather loud when printing.
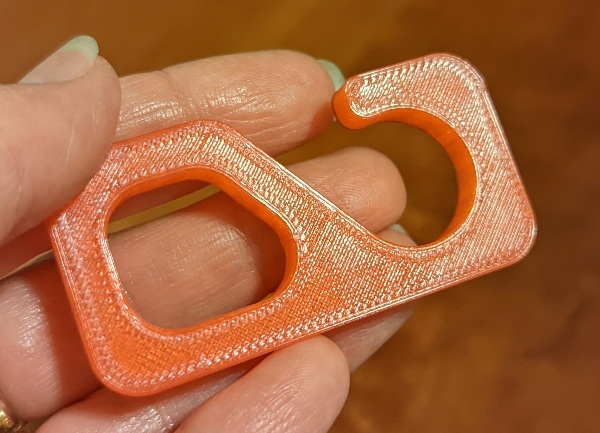
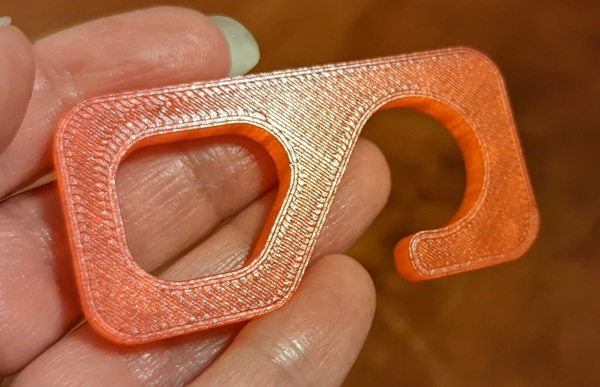
This was the finished product.
Another of the test files that I printed was the “bearing.gx” file.
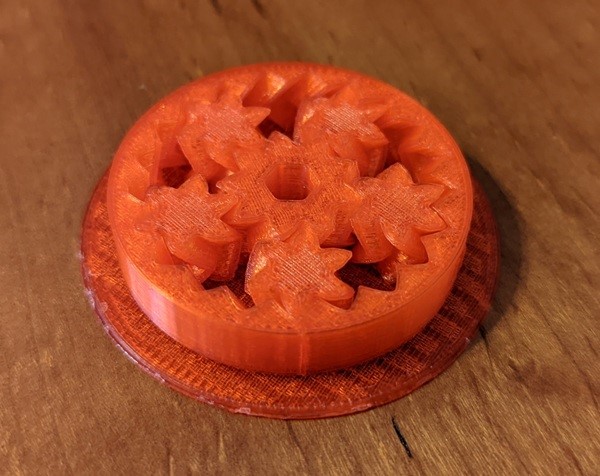
This one was printed on a raft. A raft is something that the printer prints first before printing your object on top of it to help increase adhesion to the build plate. This was probably necessary to build the bearing because it has moving parts (the cogs).
Since the build platform only heated to about 60 degrees C (140 degrees F), right after it finished printing, I let the build platform cool for about 15-30 seconds then tried to remove my bearing (I was so eager to play with it!). It was a little bit of a challenge to peel it off the build platform. I later learned that if you let the platform cool completely after several minutes, your object is easier to remove (*sigh* patience is a challenge for me).
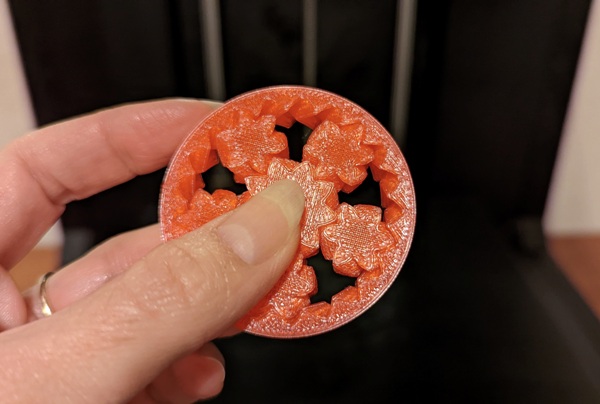
Ha! The cogs move! My own homemade fidget toy!!
After having successfully printed a couple of things, I was curious about how to clean the printer before shutting it down. Unfortunately, there were no instructions on how to clean it. I had to search online about what to use to clean my build plate. There were suggestions to use soap and water, isopropyl alcohol, window cleaner, etc. I ended up using a microfiber cloth and some Windex to clean the build plate between prints.
What is Slicing?
I was curious to find out what kind of software the Aries printer uses to create its print files. The USB flash drive provided by Voxelab includes the VoxelMaker slicer software (but no guide about how to use it).
What is slicing? Slicer software takes a file (a design or image file) and divides it (or slices it) into many layers so that the printer can print the 3D object. The software then saves the file as a .gx, .g, or .gcode file that the printer can read.
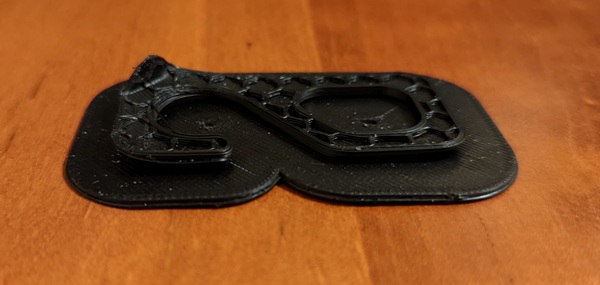
To print any object using ABS filament, I quickly found out that I needed to use a slicer to alter the file to increase adhesion to the build plate so that my object would print. But first I tried to simply print the test hook using ABS without any changes just to see what would happen.
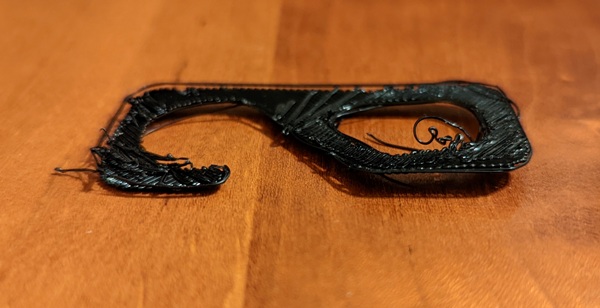
This was my result (shown in the photo above). The ABS had difficulty adhering to the build platform. Without any other inputs, the printer defaults to settings appropriate for PLA, which obviously don’t work for ABS. It is necessary to adjust the settings for a successful ABS print since higher temperatures are needed. The temperature can be adjusted manually from the touchscreen on the printer, but only after the print job has started. A better method is to use the slicing software to control the settings.
In addition to changing the temperature settings, it was also necessary to add a raft to the “TestHook.stl” file to help the hook adhere to the build plate.
Thus, it was time to dive into VoxelMaker to make these changes to the “TestHook.stl” file.
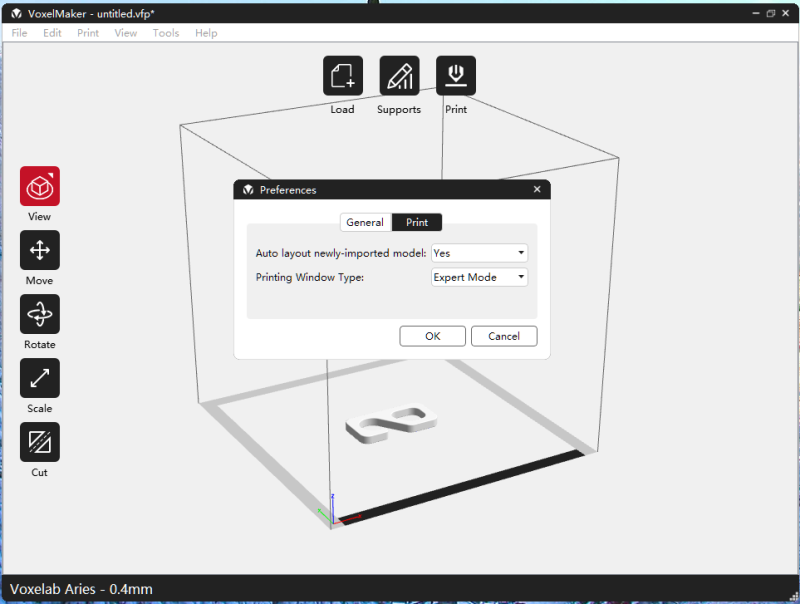
I installed the VoxelMaker software from the flash drive that came with the printer. I then loaded the “TestHook.stl” file in VoxelMaker.
This software has an Expert and Basic Mode setting. I found this out from Guanshan Fix’s review on the Voxelab Aquila 3D printer review. Mine was set on “Expert Mode” (File > Preferences > Print tab > next to “Printing Window Type”, select your option from the dropdown menu).
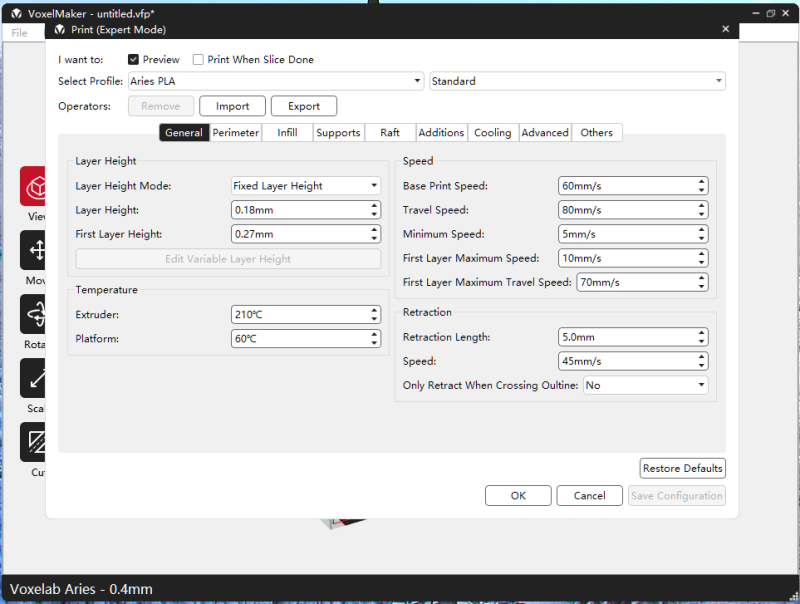
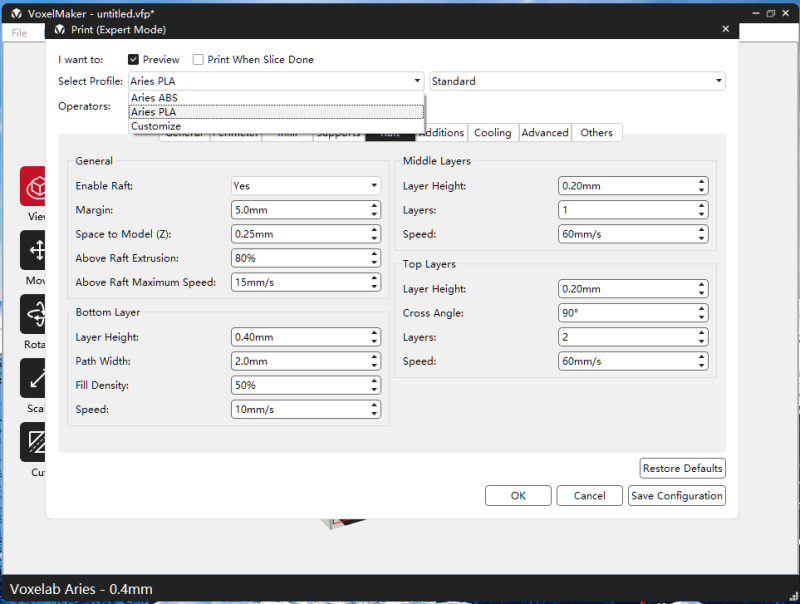
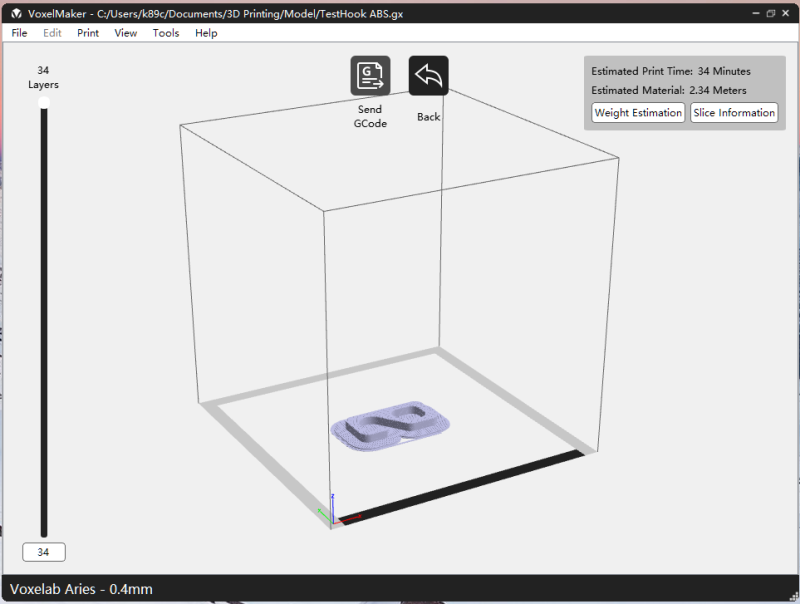
I clicked on the Print icon located at the top of the homescreen which then brought up the screen as shown in the left screenshot above (click on the images to view larger sizes). I selected the “Aries ABS” profile from the dropdown menu at the top of the screen (as shown in the right screenshot above).
Next, I clicked on the “Raft” tab. Next to the “Enable Raft” setting, I selected “Yes” from the dropdown menu.
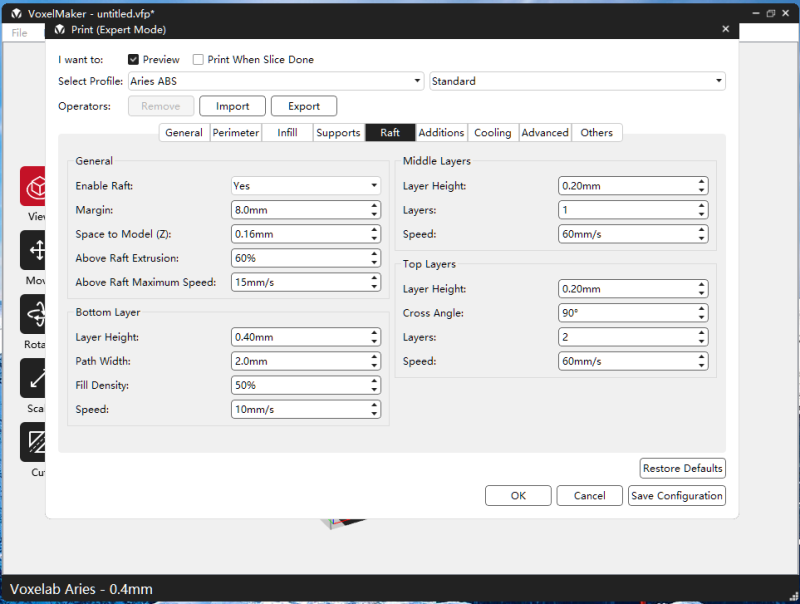
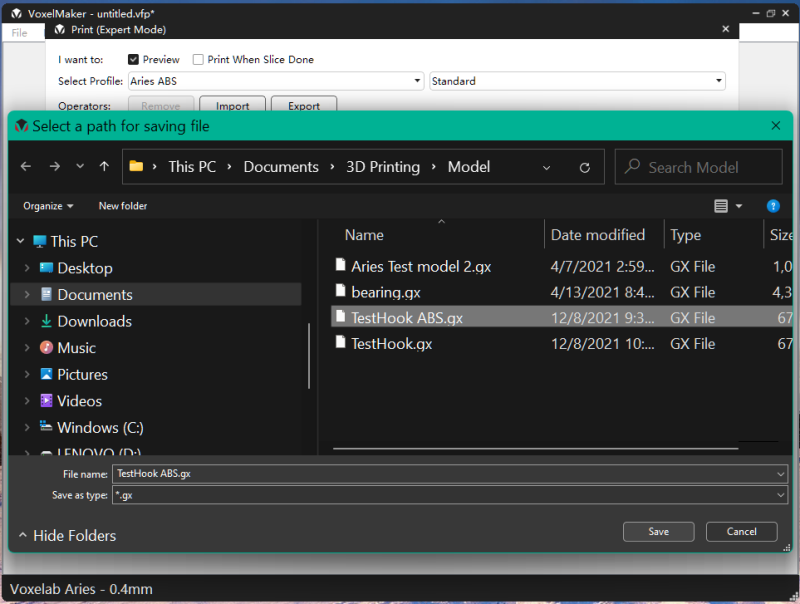
After I finished selecting my settings, I clicked on the “OK” button at the bottom of the screen (first screenshot above). Another screen popped up to prompt me to save my test hook as a “.gx” file (second screenshot above).
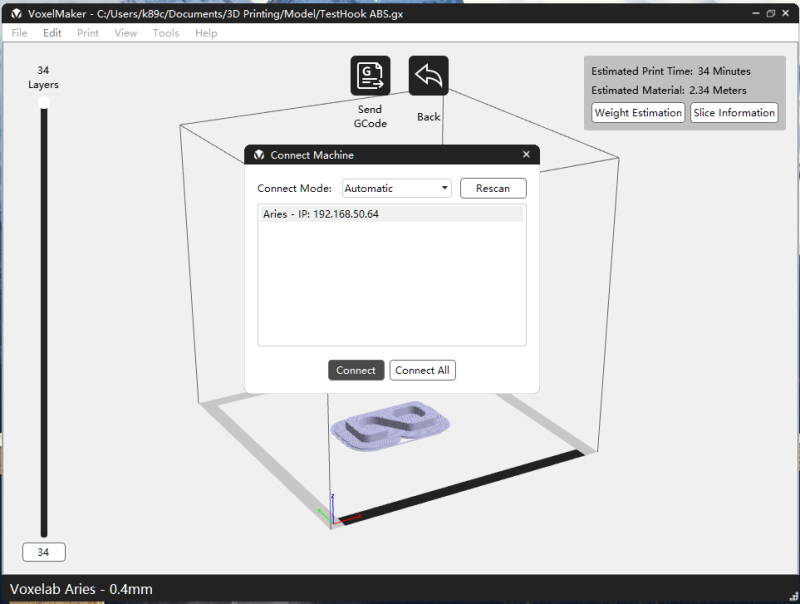

After saving the file, I then needed to click on the “Send Gcode” icon (first screenshot above) which brought up the “Connect Machine” screen (second screenshot above) which listed the 3D printers that were found on my network (there’s only one). I clicked on the “Connect” button which then sent the “TestHook.gx” file to my printer and started the build process. (Note: I noticed that if my printer had been left on before printing, VoxelMaker wouldn’t be able to detect it anymore thus requiring me to power off then power on the printer which solved the issue.)
 As you can see from the photo above, the first layers of the hook seemed to print okay but even then the hook started to peel away from the raft. When the corner rolled up as shown in the photo, the nozzle bumped into it and the whole thing came loose from the platform. Another failed print job.
That’s when I took to the internet to see what I could do.
Several sites said to make sure that the build plate is level – check. Some also suggested that you could use various types of tape to help with adhesion to the platform but others suggested using glue or a glue stick. I decided to try the glue stick. I applied some glue to the center of the platform where the build would take place and used enough to fit the approximate size of the hook.
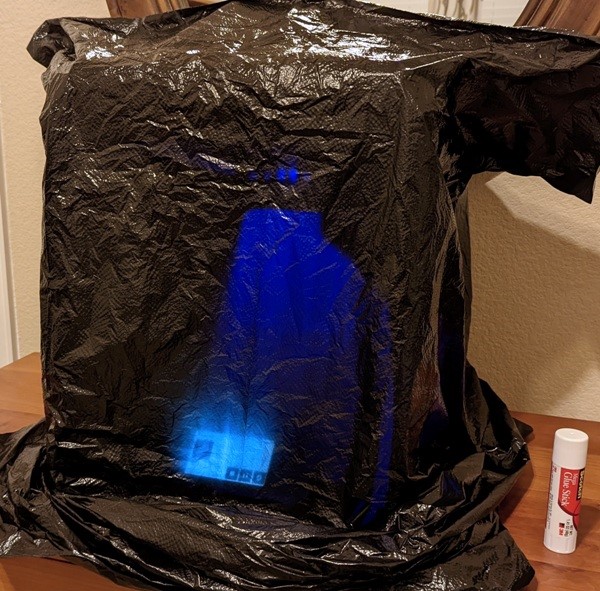
I also tried one other thing. I read online that ABS prints are less likely to warp in higher ambient temperatures. You can decrease the fan speed or turn it off in your slicer software or you could cover the printer with an enclosure or even a trash bag. I chose to use the trash bag to trap in heat as shown in the photo above. This worked with the Aries printer because it has a box frame that prevents the bag from touching any hot surface or obstructing the moving parts of the printer.
Success! Yay! And the glue from the glue stick was easy to wash off the platform with a wet soapy paper towel. There was no residue like I might expect from using tape.
At this point, I decided that it was easiest to print using PLA filament and forego any ABS prints for the time being. So I purchased a variety of colors of PLA for my future prints.
3DBenchy Prints

My next goal was to print the 3DBenchy which is a benchmark test file created by Creative Tools to run your 3D printer through its paces and help you troubleshoot printing problems.
In my web searches about 3D printing, the Benchy was everywhere and caught my eye. Apparently, everyone and their grandma is printing this cute little boat. So I printed my Benchy using my new red “silky” PLA filament made by BOSOKU. The above photo shows the “spectacular” results. And yet another failed print job.
Initially, my red Benchy seemed to be printing just fine. The print time was estimated to be about one hour 40 minutes and since the first few layers printed fine, I left it alone to do its thing. But then the Benchy slipped off the platform and thus the printhead kept trying to print on top of nothing resulting in a tangled mess before I caught it and stopped the print.
Because adhesion to the platform was a problem for the silky red PLA filament, I opened the “3DBenchy.stl” file in VoxelMaker and selected the raft setting then saved it as a “3DBenchy.gx” file to try printing it again. The raft was a success! It allowed my Benchy to stay put and fully print. Yay!
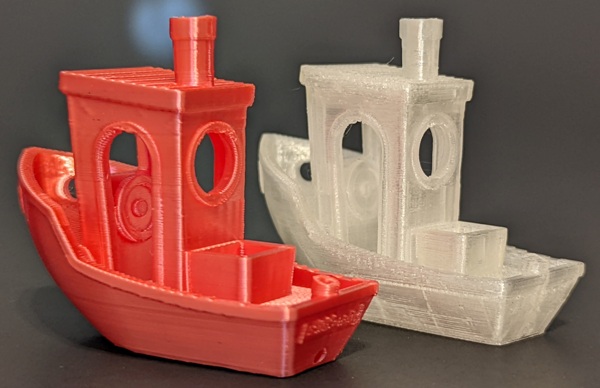
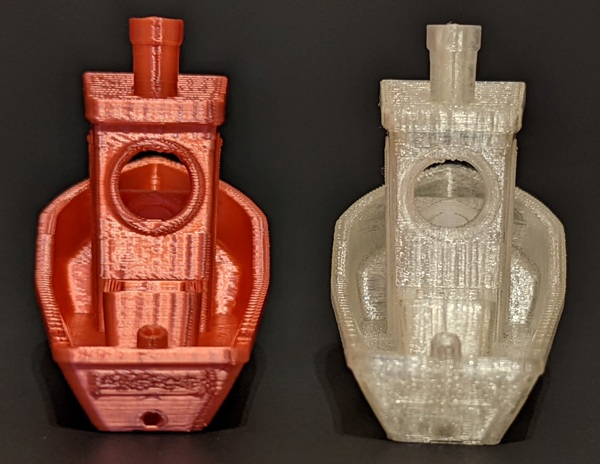
One of the other PLA filaments that I purchased was a clear filament made by SUNLU. Surprisingly, it allowed me to fully print my Benchy without a raft and any noticeable flaws (to my amateur eyes, at least).
The one obvious flaw in the red Benchy print can be seen on the front of the boat. The lower part of the bow on the red Benchy is not a reflection of something – the print is a little skewed and flattened there.
This, however, did not happen when I used the SUNLU clear filament. Except for using a raft to print the red Benchy, no other settings were changed between the two prints. Is this evidence that SUNLU makes better quality filament or could this be evidence that shiny “silky” filament requires more changes to the printer settings to print well?
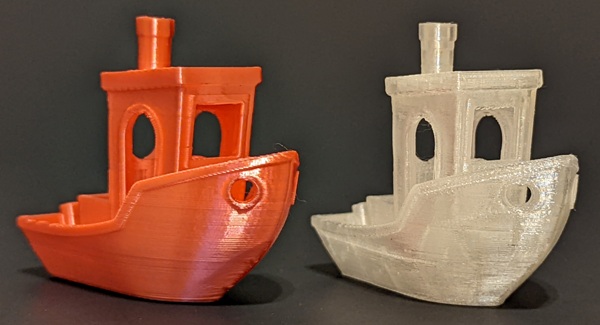
You can see the flaw on the red Benchy a little better in the photo above.
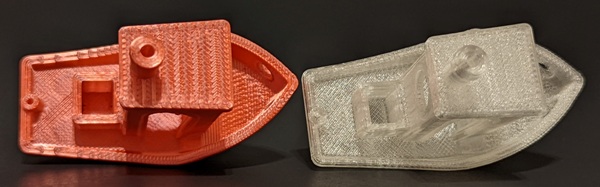
Here is a view of the rear of both Benchys.
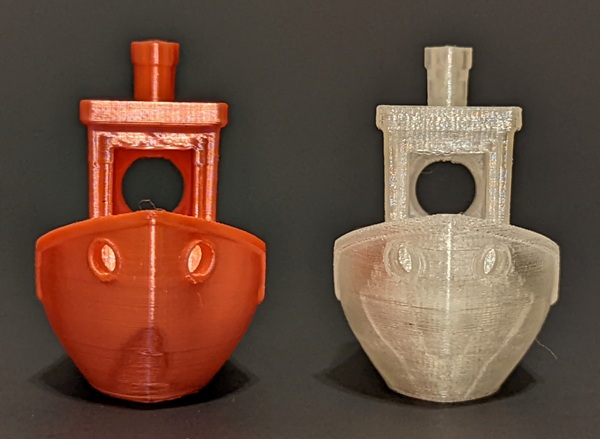
This is the view of the tops of the Benchys.
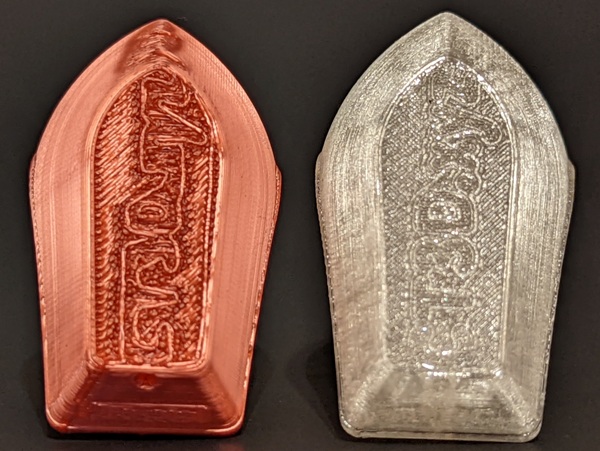
This is the view of the bottoms of the Benchys. The red one was built on a raft and thus resulted in a not-so-clear view of the letters “CT3D.XYZ”.
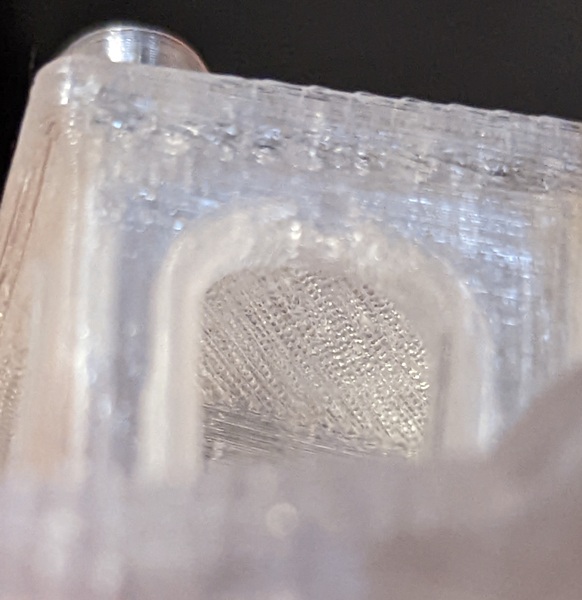
This is the view of the underside of the roof of the clear Benchy.
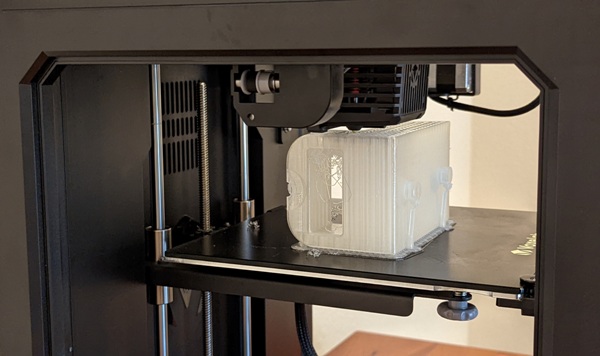
We’ve got kids who are in beginning design classes in college that designed a couple of things using CAD software (SolidWorks and Tinkercad) for us to print. The above photo shows one of those designs which was created using SolidWorks then converted to a 3D printer file using VoxelMaker.
The above photo shows a “base” that was designed to be placed on top of a cart with wheels. It is a sleigh-like object that is meant to hold a small motor.
I considered this a successful print even if it was a bit messy. The “base” was printed just as pictured above.
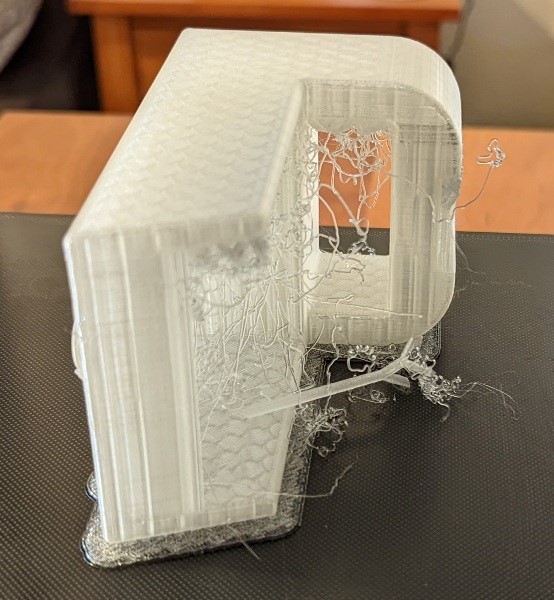
One of the things I needed to consider before printing the “base” was that it has a large empty space in the middle. How does the printer print that first layer of plastic over that space? When you have a print job with an overhang like this, you need to provide supports so that the printer has a place to deposit the filament. Slicer software allows you to include supports for your print jobs. VoxelMaker allowed me to select a setting that automatically adds tree supports for the above “base” print which used the default settings for the placement and robustness of those supports. The software also allows you to adjust those settings based on your design’s needs.
Notice that several of the tree supports fell over before the print was finished as shown in the photo above. Fortunately, the first layers of the overhang had successfully been printed to support the rest of the layers.
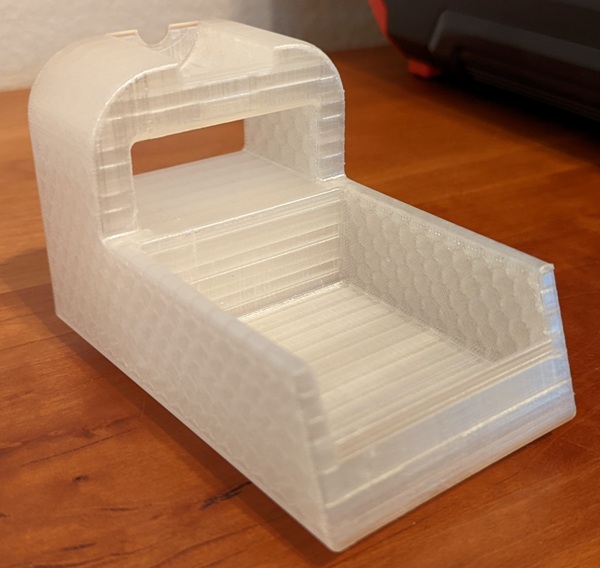
Once the “base” was cleaned up, it looked really good!
You’ll notice in this review that I didn’t use any other slicer software. The Aries can use Cura and Simplify 3D slicers. When I tried using Cura, I found that the Aries printer was not on the list of available printer profiles, so I had to contact Voxelab support via email about it. They got back to me that same day (at night) and sent me the profile file as well as directions on how to add a custom printer profile to the Cura software (wow – great customer service!). Unfortunately, that’s as far as I’ve gotten with Cura at this time.
So, “How well does the Aries work?” – well, I think it’s a really nice inexpensive 3D printer that is great for beginners like me. I was able to print my first 3D object within 30 minutes of setup which included reading the manual, leveling the build platform, loading the filament, then selecting the test print object. The printer is also sturdy and relatively inexpensive. I think the few printing problems I had stemmed from needing to tweak certain settings to improve the quality of my printed objects and possibly using better quality filament.
What I like
- Easy to print
- Relatively inexpensive
- Sturdy design
- WiFi capable
- Includes USB port
- Creates nice 3D prints
- Very responsive tech support (they responded the same day I emailed them)
What I’d change
- Make the build platform self-leveling
- Improve the responsiveness of the touchscreen
- Use a quieter cooling fan
- Include care instructions for the printer
- Include the Aries profile for the Cura software (and instructions for adding that profile to Cura)
Final thoughts
I really enjoyed using the Voxelab Aries 3D Printer. It comes preassembled, it’s really sturdy, it’s WiFi compatible to easily transfer your print files to the printer (using VoxelMaker slicer software), and it seems to do a good job of printing 3D objects. A beginner can print their first 3D object within 30 minutes of setting up the printer.
I was able to print many things successfully without issues (I printed a lot more things than I talked about in this review). When I did have problems with prints (only a few), I think that it had to do with fine-tuning the printer settings in the slicer software to create better prints. The quality of the filament may also have had an impact on how well my 3DBenchy prints turned out. I used two different kinds of PLA filament to print two Benchys and one had noticeable problems while the other did not.
This is a nice printer for those who are looking to try their hand at 3D printing (or likely for those who’ve been 3D printing for years). I can’t wait to print more cool trinkets!
Price: $289.00 (Voxelab), $329.00 (Amazon)
Where to buy: Voxelab and Amazon
Source: The sample of this product was provided by Voxelab.
![[MINI SIZE. ULTRA PORTABLE CHARGER]: Roughly the size of an AirPods Pro case, this smallest power bank packs 10,000mAh of long lasting power into a tiny, nano footprint. Easily slide this ultra slim, credit card size charger into your skinny jeans, a...](https://m.media-amazon.com/images/I/41rATpm6dyL._SL160_.jpg)
Now retrieving an image set.
INIU Portable Charger, Ultra Mini 10000mAh 45W Fast Charging with Detachable Cable, Flight-Safe Travel USB C Power Bank External Phone Battery Pack for Xiaomi iPhone 17 16 Samsung S26 Google iPad etc
(as of July 13, 2026 18:57 GMT -05:00 - More infoProduct prices and availability are accurate as of the date/time indicated and are subject to change. Any price and availability information displayed on [relevant Amazon Site(s), as applicable] at the time of purchase will apply to the purchase of this product.)
Now retrieving an image set.
Gadgeteer Comment Policy - Please read before commenting
HI KATHLEEN, MY NAME IS CHAD,
I JUST RECEIVE MY NEW VOXELAB ARIES , ALL WORKING GOOD BUT THE EXTRUDER AT THE BACK MAKE A BIG NOISE EVERY TIME MOVING THE FILAMENT, IT IS LIKE TOU TAP ON AN EMPTY CAN,
DO YOU HAVE THIS SOUND TO,
Chad – I haven’t had that problem. The best thing to do is contact Voxelab about your issue:
https://www.voxelab3dp.com/contactUs
Good luck!
Hello Kathleen,
My names Luca and I’m ten years old.I was just wondering if you would recommend buying this 3d printer and how much it would cost to print.
Thank you! ☺️
Luca – The Voxelab Aries is the only 3D printer that I have reviewed, so I don’t know how it compares to others. Mine seems to work fine, but you may want to Google “best 3D printers for beginners” and look at several sites to see which ones come up on everyone’s list.
As for how much it costs to print, that will vary on how much you print and the accessories you want to buy. 3D printer filament tends to be around $25 per spool and if you want several colors, it really adds up. I printed my objects using mostly PLA filament which is really easy to use. I got great results with it (I tended to use SUNLU filament).
If you want to print with other types of filament like ABS or PETG, you will want to purchase an enclosure since this printer is not enclosed. An enclosure ($30-90) helps to prevent harmful fumes from filling the room where the printer is located and helps to increase the temperature around the printer so that you get better 3D printed results. (You don’t need and enclosure if you print with PLA filament).
If you did purchase an enclosure, you may also want an exhaust fan (~$11-20), duct (3″ duct is about $10 – 15) to guide the fumes to an open window or an air filter (~$20-50) to collect any harmful fumes. All of these things will add up. (There are a couple of enclosures that have an exhause fan, hose, and filter for about $100 on Amazon).
One thing you will want to consider when looking at the Voxelab Aries is that the filament holder is located on the back of the printer. If you get an enclosure for it, you will need to look for one that allows you access to the back of the printer.
Another thing to consider is whether you want to create your own designs or use someone elses. There are many websites out there that provide 3D printer files that you can print (some are free but some cost), but if you want to design your own, you will need the design software and slicer software. There are some free version of both (like TinkerCAD (design software) and Cura (slicer software)) that are good for beginners and hobbyists.
Here is a link to 3D design software and 3D slicer software that you might want to use:
https://www.3dsourced.com/rankings/best-free-3d-software/
https://www.3dsourced.com/3d-software/best-3d-slicer-printer-software/
I hope all this info helps you get started! And thank you for leaving a comment – it’s really cool to hear from our young Gadgeteer readers!! Good luck!! 😀