REVIEW – I am loving this recent wave of higher speed 3D FDM printers, especially since I’ve been trying out some larger format items lately (like cosplay helmets) that can easily take 3 days or more on the previous printers I’ve reviewed. I’d also heard of Klipper while researching 3D FDM printers but hadn’t had the time to set it up on any yet, so having it baked into the new Elegoo Neptune 4 line of 3D printers provides the perfect opportunity to try it out. For the uninitiated (like me a few months ago), Klipper is an open-source firmware that uses a computer to precisely control the microcontrollers and enables speeds unheard of by previous generations of 3D FDM printers while still maintaining the quality of the 3D prints.
What is it?
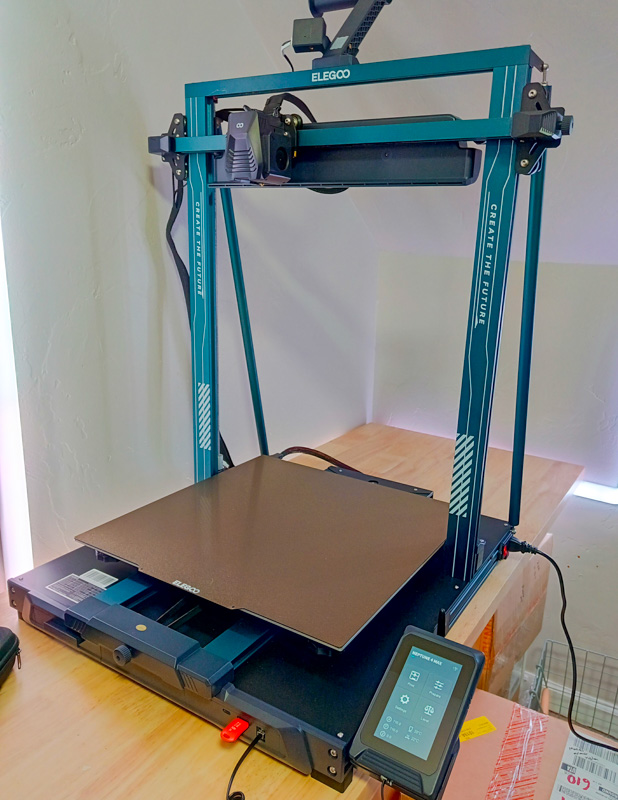
The Elegoo Neptune 4 Max FDM 3D printer is a 3D printer with a very large build volume (printable space) and capable of high speed printing (up to 500 mm/s – most previous printers I’ve used are in the 40-80 mm/s range). It can print with a variety of common materials like PLA, TPU, PETG and even ABS (though you’ll need to build or buy your own enclosure to help the bed get hot enough for ABS to stick). It has a dual gear direct drive extruder – important for higher speed printing as it can retract and extrude the plastic filament with more finesse and speed than a Bowden-style tube extruder. It also has a magnetic removable build plate, auto-levelling (121 point), and internet connectivity (LAN and WiFi) for remote monitoring and control.
What’s in the box?
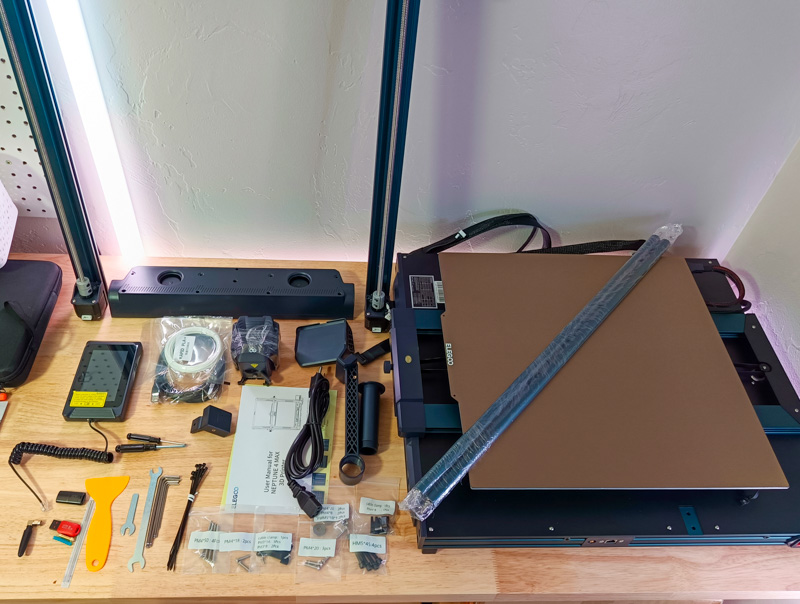
- Elegoo Neptune 4 Max FDM 3D printer
- Installation tools (wrenches, screwdrivers, hex wrenches)
- USB Flash Drive with software and demo models
- WiFi antennae
- Control screen
- Screen mount
- Filament mount
- AC cord
- Many screws and bolts for installation
- Zip ties
- Sample filament
- USB cable
Hardware specs
Click to view
- Build Volume: 420 x 420 x 480mm
- Firmware: Klipper
- Print speed: up to 500 mm/s
- Acceleration speed: up to 8000 mm/s
- Extruder type: Dual-gear direct extruder
- Hotbed: 320W, up to 85 degrees C (without enclosure)
- Platform: PEI Magnetic
- Nozzle: 300 degrees C high-temp nozzle
- Throat pipe: all-titanium alloy
- Cooling fans: 2 x 4015 ball bearing model cooling fans, 3010 ball-bearing blower fan, 2×6025 ball-bearing blower fans
- LED lights: Observation and top light bar
Design and features
The Elegoo Neptune 4 Max FDM 3D printer is similar to most of the FDM 3D printers I’ve reviewed in layout, with the bed moving in the Y direction, print head moving in the X direction, and twin screw drives lifting the print gantry in the Z direction. Most of the belts feature easy twist-knob tension adjustments.
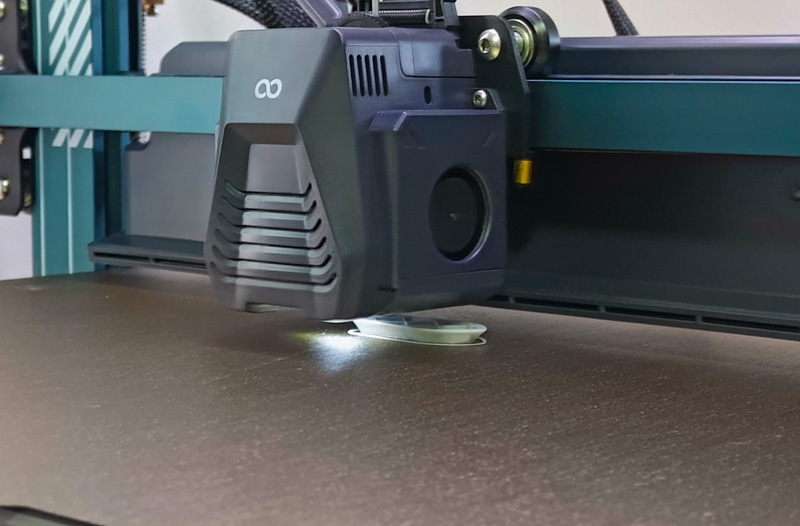
The print head features several blowers, a direct drive extruder, and you can see the wide blower running across the X-axis behind the print head in the above photo – this helps to cool the model rapidly which helps with high-speed printing. This rear wide fan can be manually switched off if you’re printing at slower speeds (and/or with a filament you don’t want extra cooling on).
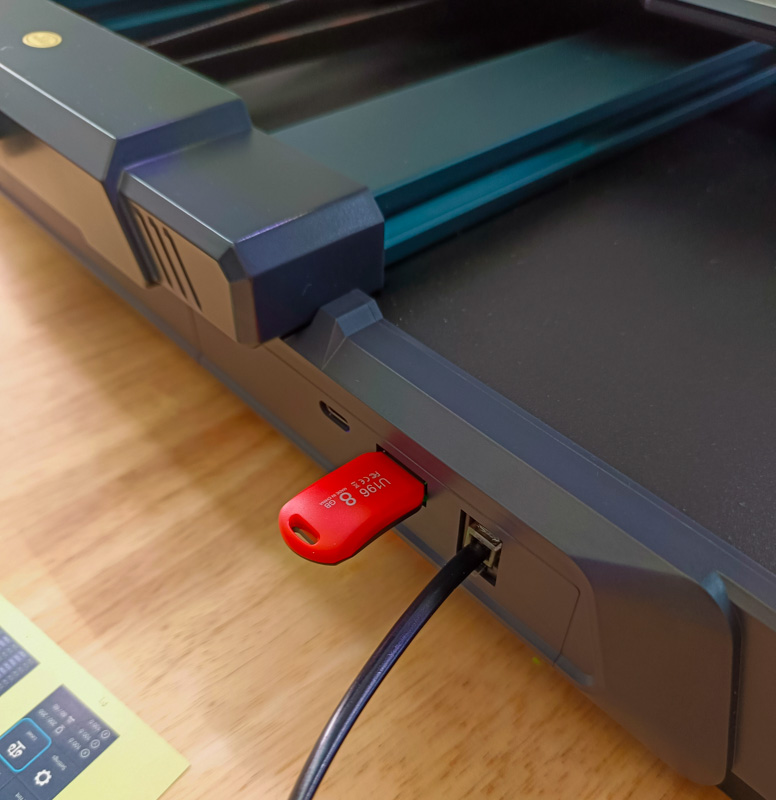
On the front are a pair of USB ports (one USB-A and one USB-C), which allows for one method of printing – via files loaded onto a USB stick. The control screen is also plugged in here to the right of the USB ports.
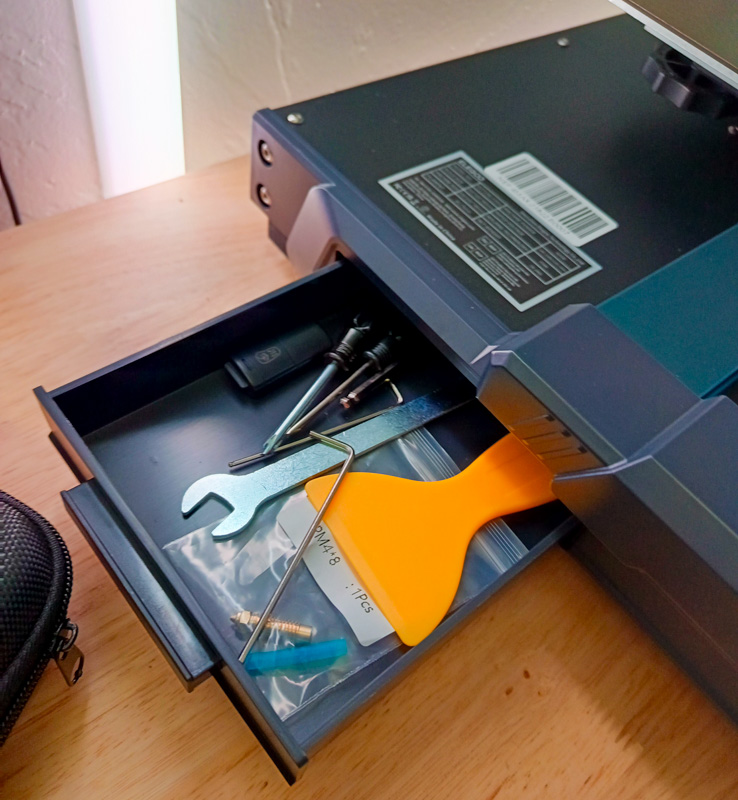
On the left side of the printer is a handy slide-out drawer for tools and spare parts.
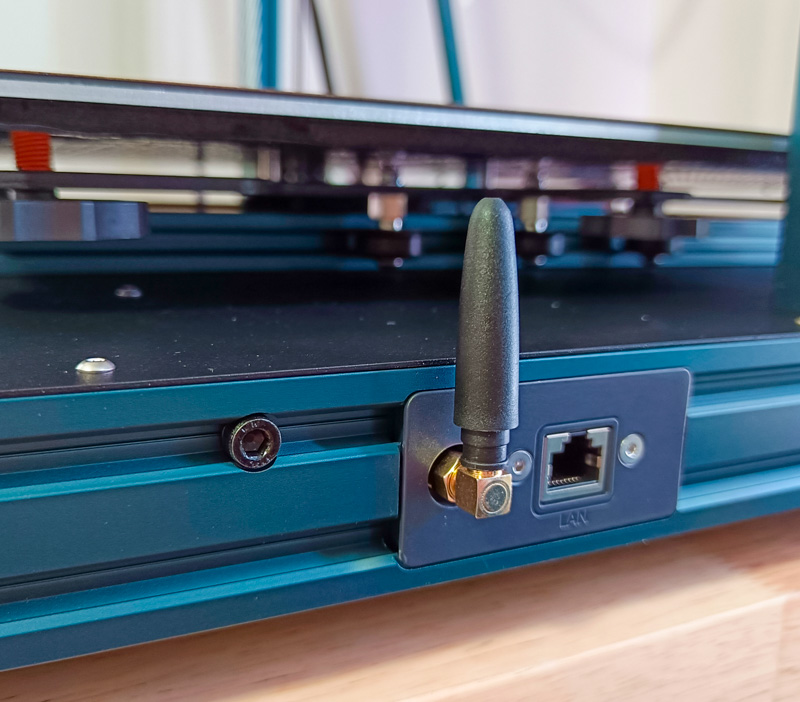
On the right side of the printer is the attachment point for the WiFi antennae and the LAN port.
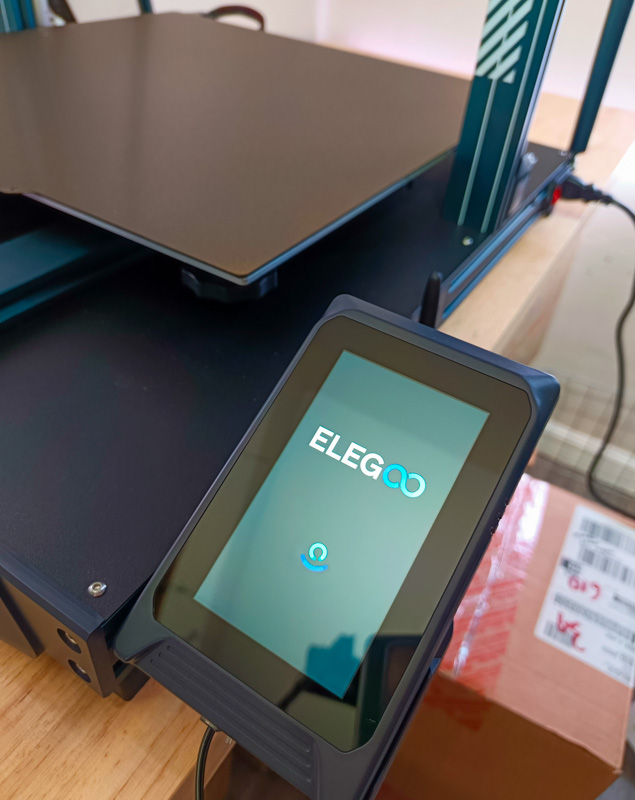
The control panel can be mounted using the provided mount onto the right side of the printer. It’s on a cable though, so you’ll see how I ended up mounting it differently later in the review which was very handy. This is magnetically attached to the control panel mount, so you can pick it up to change settings and interact with it, then place it back in the holder when done, if desired.

Looking at the back of the top of the printer you can see the large wide blower fan, and the filament sensor at the top of the printer.
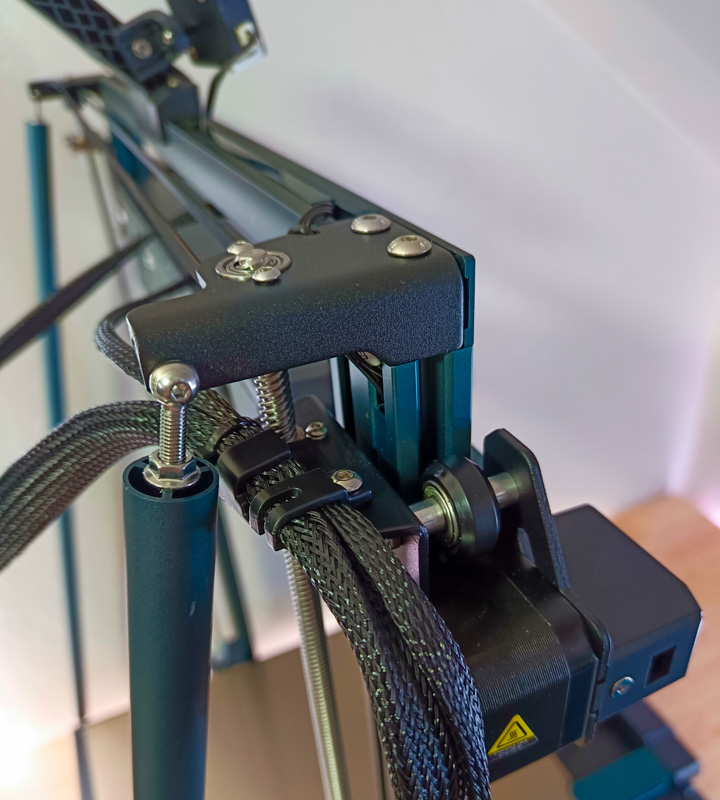
Large bars are attached to the top of the printer to further stabilize everything, and you can see how the cables leading to the print head are routed as well.
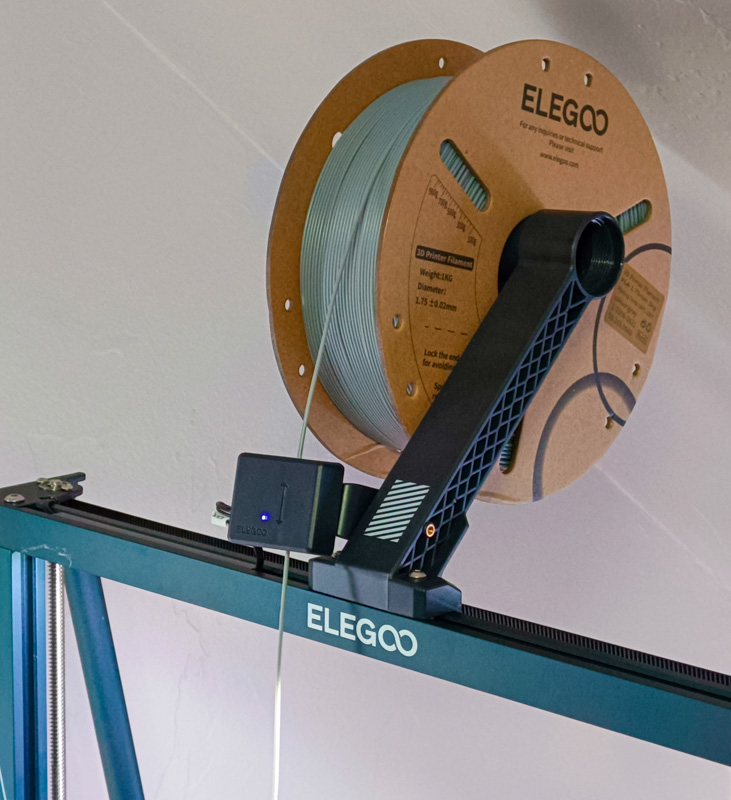
The front of the top of the printer is shown above, with filament loaded onto the filament holder and through the filament sensor. I do wish they’d done a filament sensor right on top of the print head, since I’ve had multiple times in the past where old filament snapped right at the top of the print head (and therefore remained in the filament sensor higher on the printer), resulting in a failed model since the filament ran out. Hopefully Elegoo can move to the print head in future models.

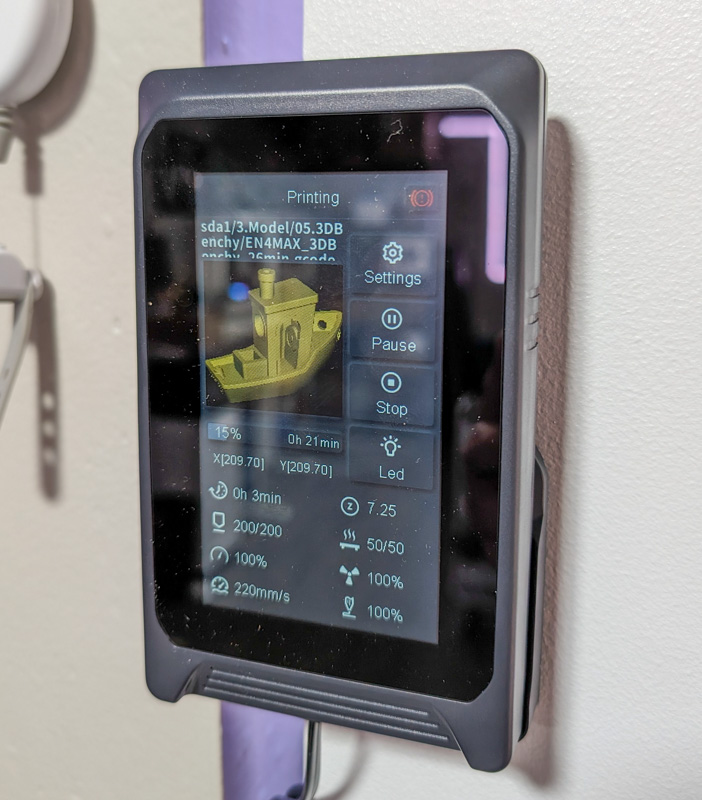
The control panel is touch sensitive, bright, and easy to use. When printing it provides quick adjustment controls that are useful, and shows status like temperature, progress, and speed.
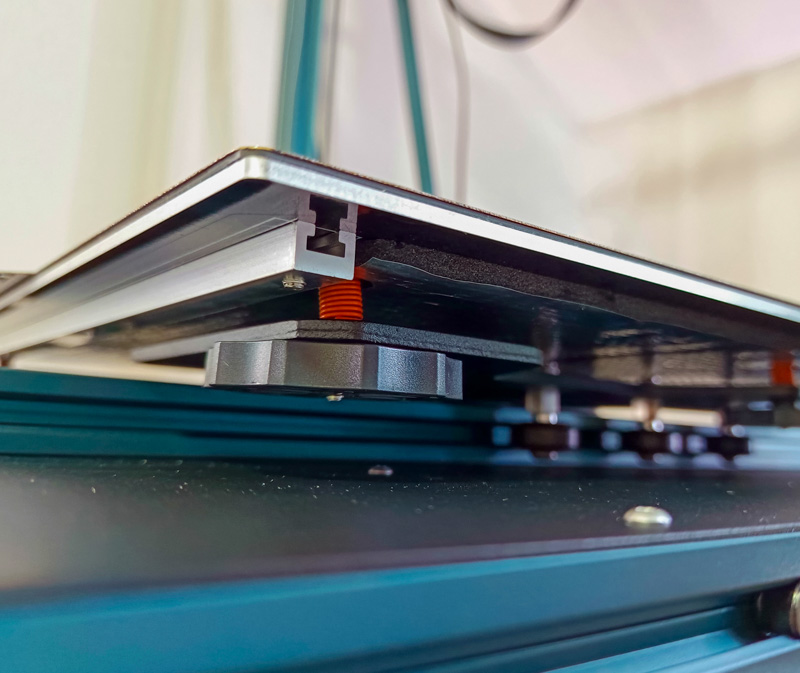
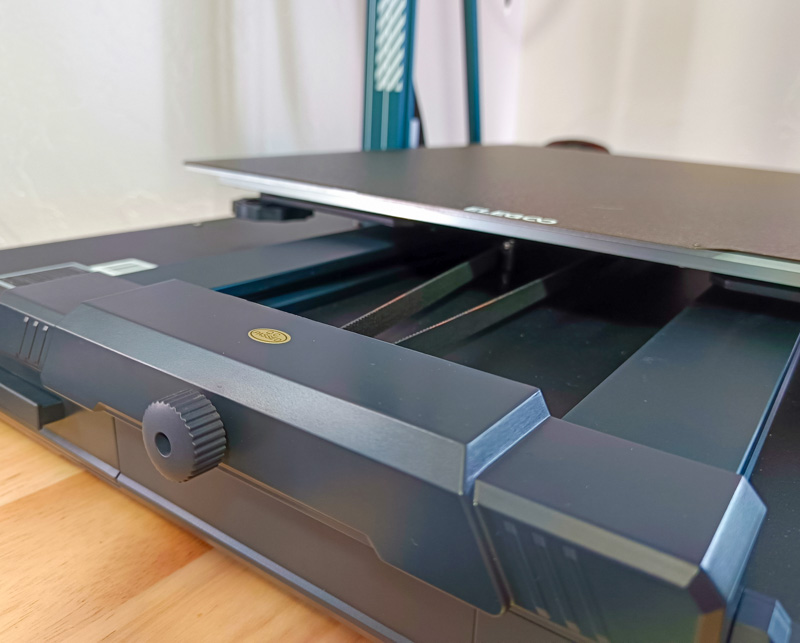
On the bottom of the printer are 6 manual adjustment wheels. During the leveling process, you’ll quickly get these dialed in and then do the auto-levelling, following the instructions was easy and the wheels seem to stay in place and not lose adjustment after weeks of printing, as expected.

Built-in LED lighting includes a light strip along the top that provides a nice illumination onto the printbed below. There’s also a single LED light on the printhead that illuminates what’s going on right at the nozzle, which is also handy.
Setup
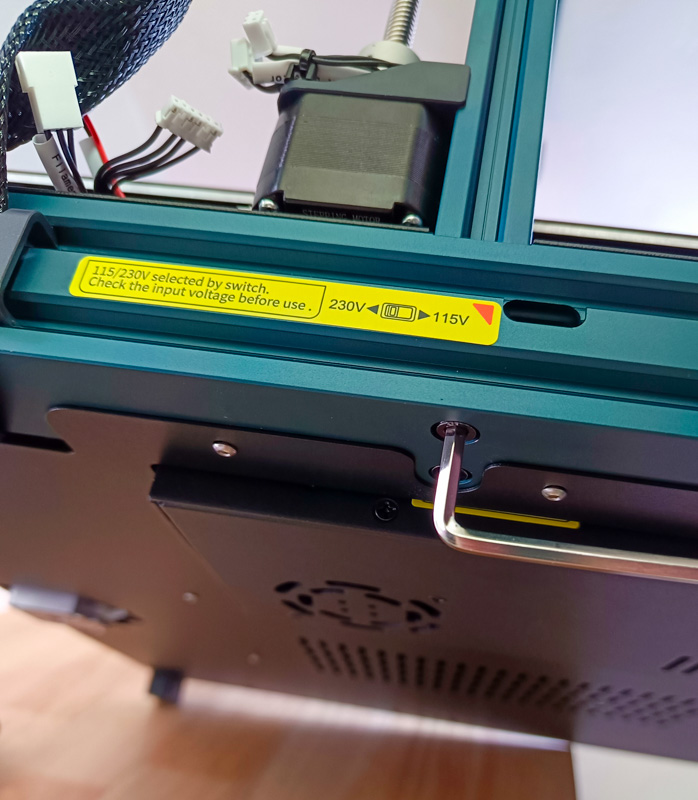
Setup is similar to most of the other FDM 3D printers I’ve reviewed: attach the print gantry to the base, and then plug a lot of things in. A pair of screws go into each side from the bottom, and this is MUCH easier with two people give the large size of the Elegoo Neptune 4 Max FDM 3D printer. Note the yellow sticker above, the printer may ship with 230V selected, which you’ll need to change if you’re using a standard American 120V wall outlet.
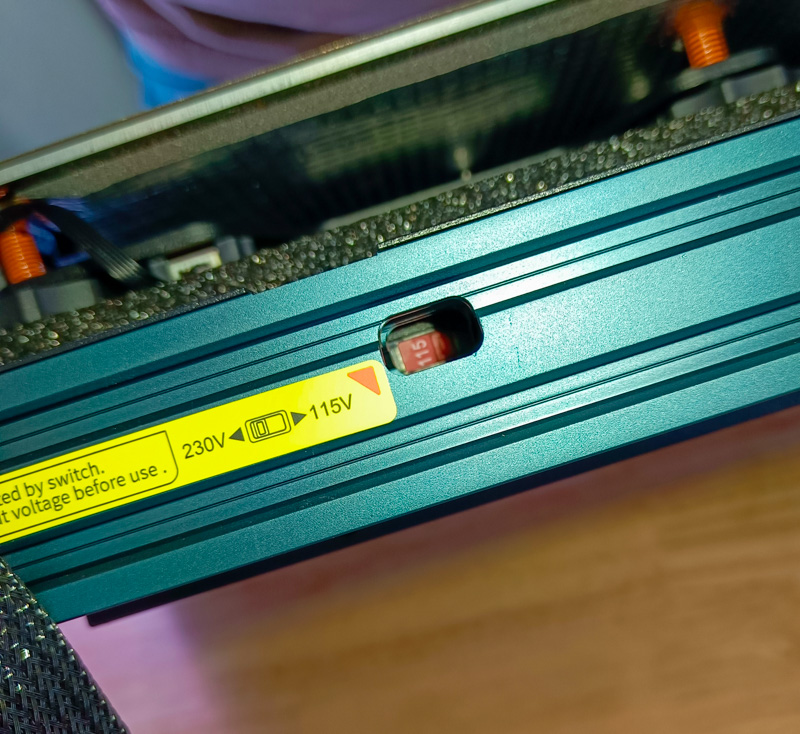
The switch is at least an inch recessed into the hold above, I used one of the smaller hex wrenches provided with the install tools to flip it to 115V.
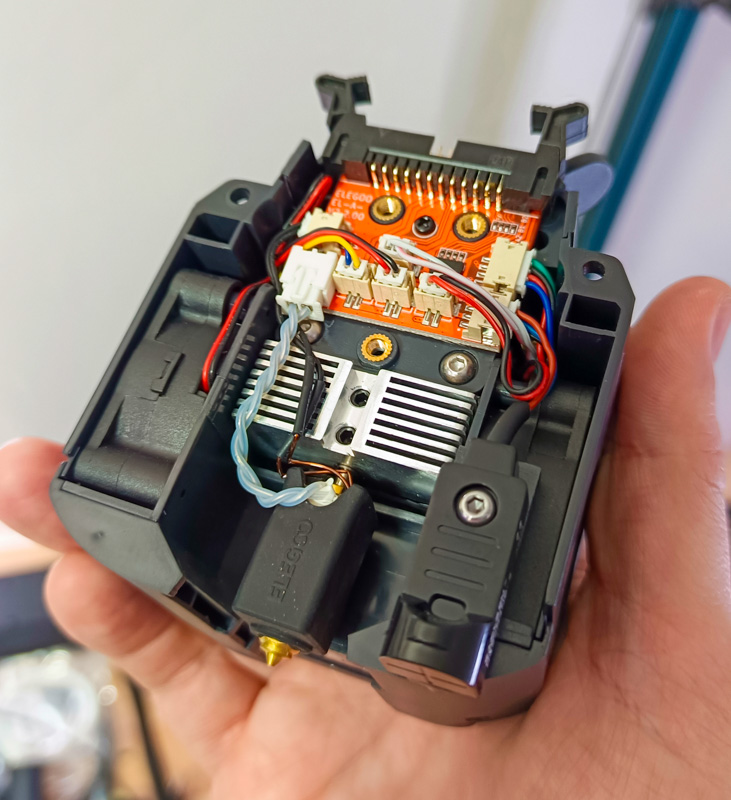
Unlike the other FDM 3D printers I’ve previously reviewed, the Elegoo Neptune 4 Max FDM 3D printer ships with the printhead unattached. Getting it installed is easy, a trio of screws hold it in place nicely, but I liked that you can see the nozzle and other bits and bobs that would normally be hidden so took the opportunity to take a picture (above).
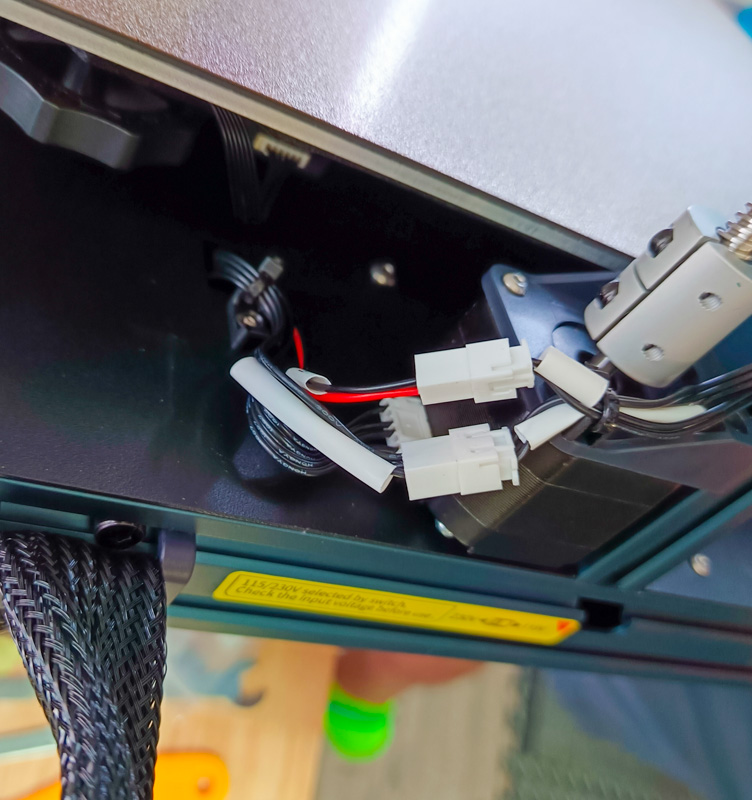
Finally, you need to check that all the various plugs and cables are connected. The manual outlines each one, but I just gave the printer a thorough once-over and found them all.
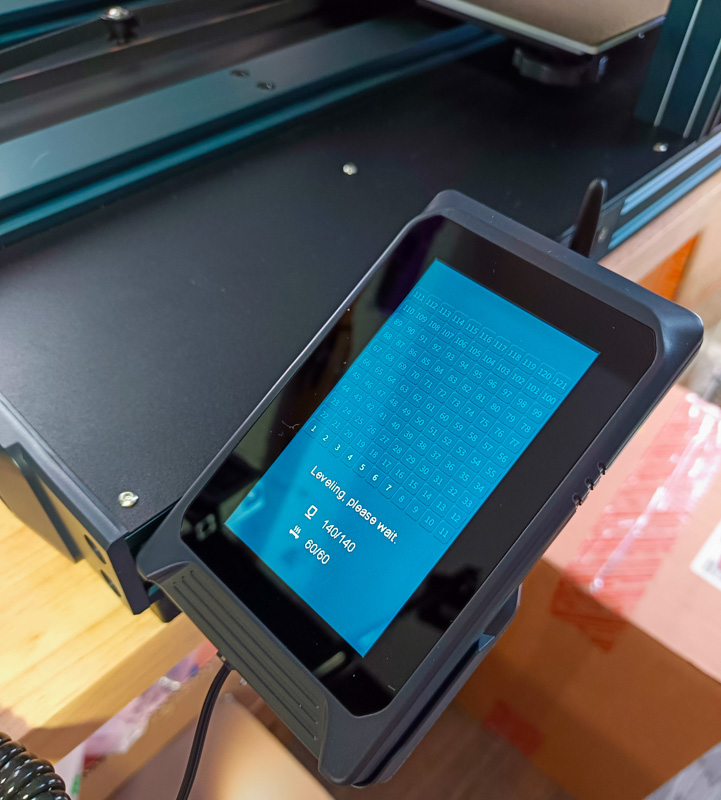
Next up is auto-leveling, which has a series of easy to understand screens that guide you to first manually level 6 points on the bed (3 on each side), then initiate the auto-levelling which takes height readings at 121 points. Once finished, you save those settings and adjust the Z-height adjustment so that a standard piece of paper just has a bit of resistance when slid between the nozzle and the bed. You can tweak this later if the plastic is being smooshed too hard onto the bed or isn’t sticking very well or at all (too low and high respectively).
To test things out, I printed out a planter model that was already on the memory card, and the printer worked like a charm on the first try.
I then moved it into its new home inside my office closet (which cuts down on noise and heat in my office), and mounted the control panel on the outside of the closet so I can easily check print status at a glance.
Performance
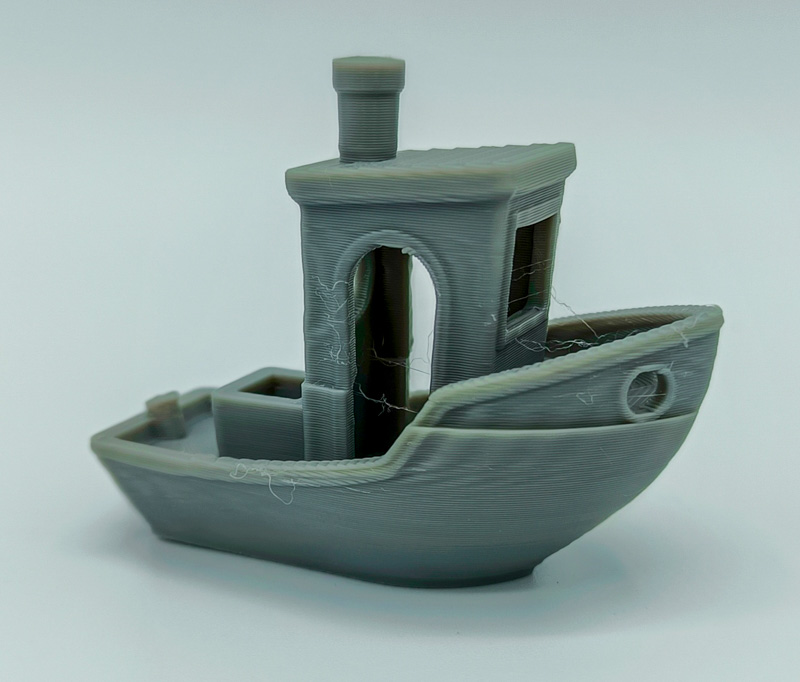
My first couple of weeks with the Elegoo Neptune 4 Max FDM 3D printer were hit and miss in terms of print success. I had a very noticeable layer shift in the Benchy (above) that I printed out, which also happened in a larger print later. I suspect it may have played a part in some failed prints as well, but Elegoo reached out with an updated firmware halfway through the review (which I simply downloaded, placed on the USB stick, and updated via the control panel on the printer). After that firmware update, no more layer shift issues.
The bottom layer of each print is fantastic, with even plastic distribution and no gaps at all. I didn’t have any prints fail due to adhesion to the bed either.

With greater speed on a large machine comes a higher likelihood of various print flaws like “ghosting”, “shadowing”, or waves, where the movement of the print bed and/or printhead causes the whole printer to move a bit and thus wiggle right after a sharp movement. Sometimes this manifests as a light line after a corner, or as you can see above sometimes it manifests in different and strange ways. I fixed this by moving the printer off the regular table I was testing on and placing it on a solid surface attached to a wall (so that the whole table wasn’t swaying a bit and contributing to printing artifacts). If you don’t have this option, you might have to lower your print speed or play with settings to mitigate issues like this.
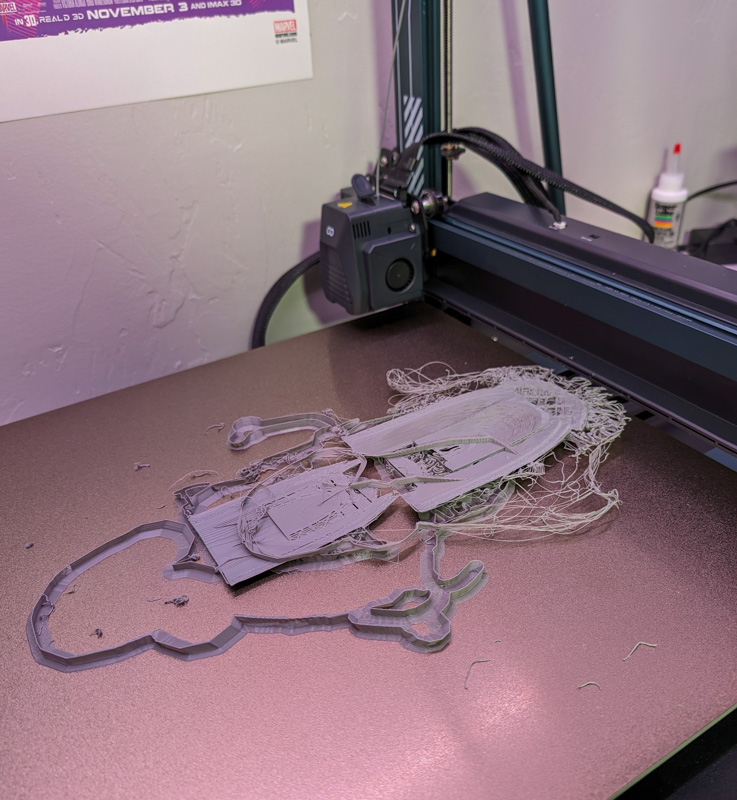
I also learned with several prints that intricate structures combined with high speed printing increases likelihood of failures. If you’re going to go full speed on large prints, you’ll want to make sure they’re not highly complex shapes (and if they are, you’ll probably want to slow down). Also, make sure your filament is dry and high quality, I had issues likely attributed to both.
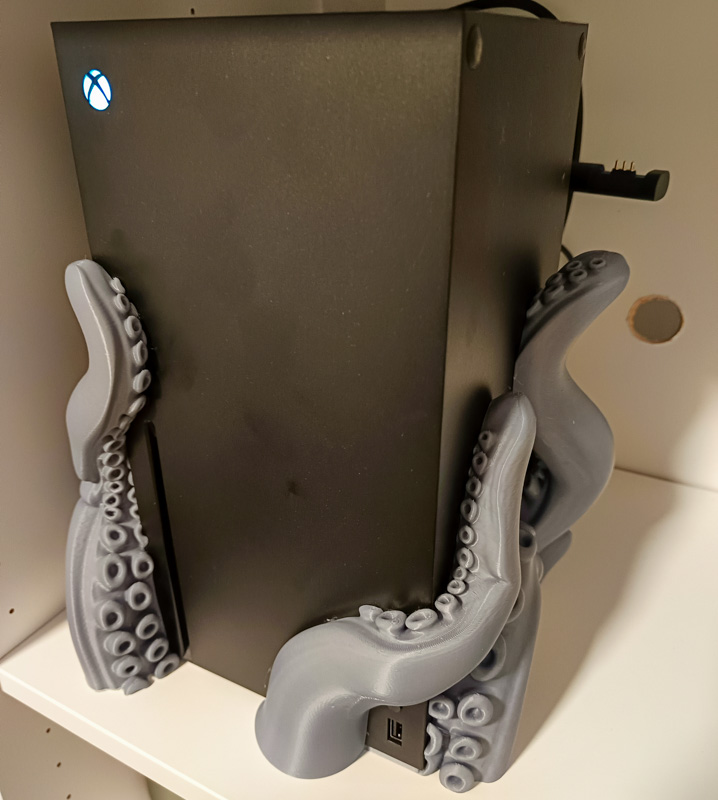
Once I dialed things in, I was very happy with the resulting print quality. The tentacles Xbox stand shown above (link to STL file) was printed at 200 mm/s and came out fantastic. With some light sanding and a coat of spray paint you can’t tell that it’s 3D printed at all. Even raw, the layer lines are very faint and the details sharp.
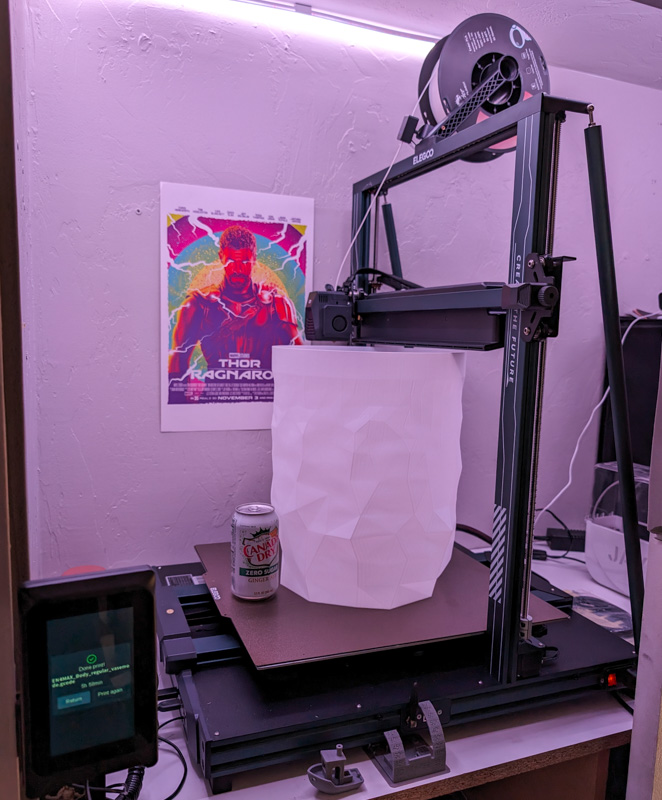
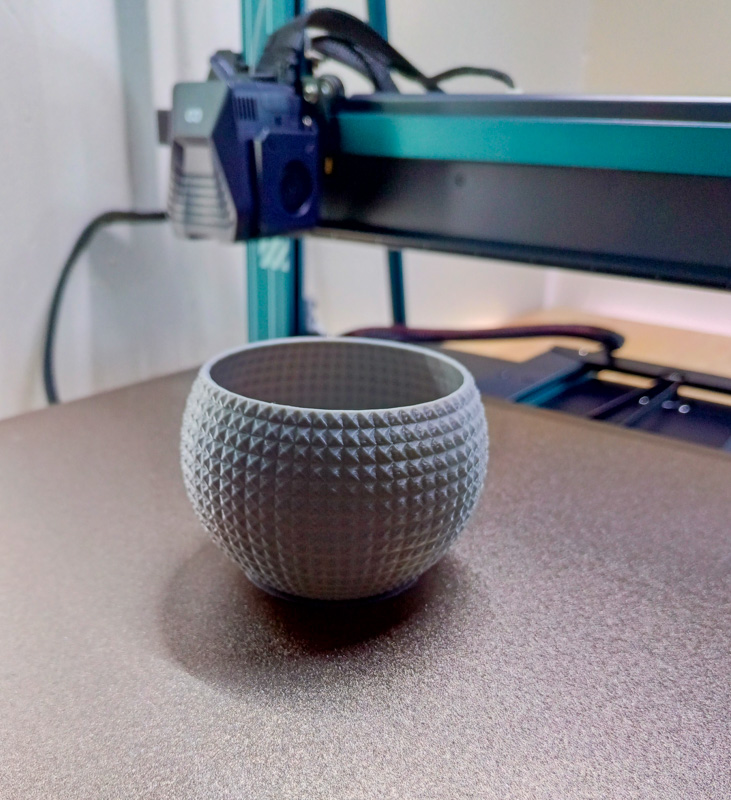
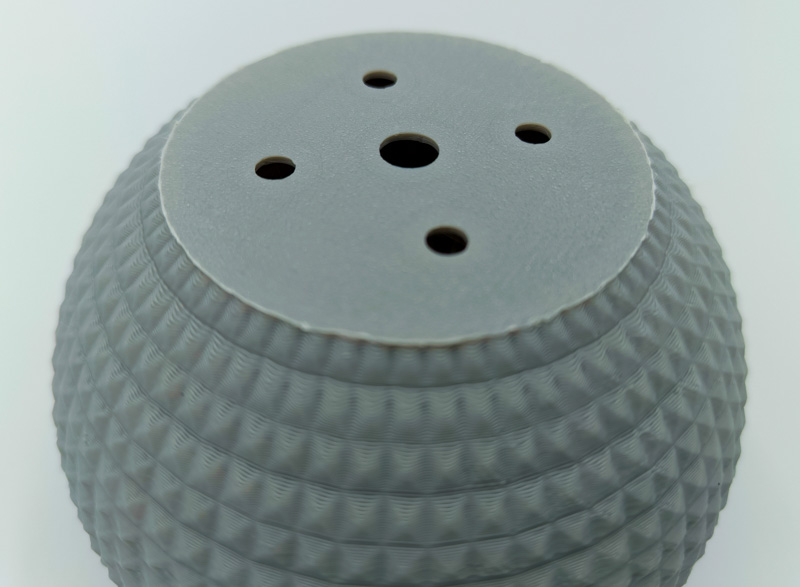
I also printed out a very large trash can (link to STL file) to test the large volume capability of the Elegoo Neptune 4 Max FDM 3D printer, and the whole thing was done in less than 8 hours (estimated 30 hours on my previous large format printer)!
Finally, some thoughts on Klipper – the firmware installed by default on the Neptune 4 series. Controlling the printer is no different than previous models, but Klipper allows for both the higher speed print capability, as well as internet connectivity and a whole world of plugins you can explore. The internet connection has become invaluable for me – I can slice and send models straight to the printer rather than relying on a USB connection or USB stick. I can log in and monitor prints and ETA from my smartphone or a browser, and there are some features and plugins I plan on playing with in the future (like the ability to add a webcam to monitor the print and use AI to send alerts if it appears your print is failing – by comparing the GCODE print file to what’s actually happening on the print bed). I feel like I’m just scratching the surface with Klipper, and I’m excited to learn more.
This guide was very helpful to me to get the Elegoo Neptune 4 Max FDM 3D printer configured in the latest version of CURA (rather than the older version provided by Elegoo on the included USB Stick): reddit link
What I like
- Large print volume
- High quality print results
- Fast printing
- Klipper preinstaller with WiFi/LAN connection options
What I’d change
- If you’re not going to utilize the massive print volume, you can save space and money by going with a smaller version in the same Neptune 4 lineup – this version is huge and takes up a LOT of space.
- Move the filament sensor from the top of the machine to the printhead itself
Final thoughts
I have used large format 3D FDM printers, and I’ve used high-speed FDM 3D printers, but having the two combined is exactly what I need for a do-it-all printer for my purposes. Large items like helmets can be printed in a day or less, instead of the half-week that previous large printers took, and with smaller items I can add multiple copies of them in the slicer and print out a whole set at once instead of one at a time. The Elegoo Neptune 4 Max FDM 3D printer has earned its place as my main 3D printer, and even got me to install permanent shelving just so it would have a solid surface to work on (and thus fewer speed ripples/ghosting/waves).
Price: $550 ($470 sale at time of review)
Where to buy: Elegoo and Amazon
Source: The sample of this product was provided by Elegoo.

Neptune 3 4 Broken Material Detection Component Filament Detector Kit for ELEGOO Neptune 3 4 Plus/Max/Plus 3D Printer
(as of July 8, 2026 18:57 GMT -05:00 - More infoProduct prices and availability are accurate as of the date/time indicated and are subject to change. Any price and availability information displayed on [relevant Amazon Site(s), as applicable] at the time of purchase will apply to the purchase of this product.)
Gadgeteer Comment Policy - Please read before commenting
Good write up.
Slight thing though. Moving the filament sensor to the printhead would not be ideal as you then would have a very shortened time limit to get new filament in line b4 you ran out. You can however disable the sensor if its not something you feel you need.
Wich speed was the trash can printed at?
I’m not 100% sure, but my guess is that I did this at 150 mm/s, and definitely printed it in “vase mode” (sometimes called spiralize, depending on the slicer). This does a single layer for the wall without any breaks like a long spiral. It’s not the strongest print, but it works for tissues and other light trash where we’re using it!
how did you get your prints glossy , mine come out matt , not like my older printer.
My best guess is the temperature you’re printing at? Assuming it’s the same filament you used on your previous printer? I’ve switched to OrcaSlicer and loving it, did some calibrations with that which might have changed the surface texture.
Could also be speed – slinging plastic at 300 mm/s instead of 50 might result in a different result?
I switched to orca as well , slowed the outer wall speed to 50 and it made no difference . I did notice your benchy is matt , but the tentacles are glossy. Thats why i asked.
I think that was a completely different filament on the tentacles, eSun PLA+ I think? Probably just a filament difference