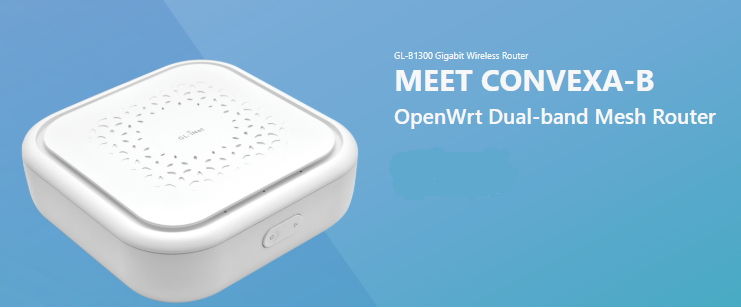
REVIEW – WiFi is everywhere these days. Wherever you are you’re being bombarded with WiFi signals. However ironically one of the big issues most people have is coverage in their own homes. It appears because of the size and construction of houses, there are often areas where the WiFi from a single WiFi router won’t reach. Deadspots! How do you solve this issue if you don’t have cable infrastucture? You add additional WiFi repeater points. This however often created management issues having multiple units to manage (often of different brands) and support separately. The “latest” solution to WiFi issues is Mesh Networking a WiFi solution to improve your coverage and simplify management. Having played with a lot of the Gl.iNet travel products, the guys reached out to me to ask if I wanted to review their B1300 – Convexa home-based Mesh Router system. Does it make things easier? Read on:
What is it?
As mentioned in the introduction previously to increase the coverage of your WiFi where you didn’t have cabling (wired performance is ALWAYS better so use where possible), you’d use a set of repeaters. I’m not going to go into all the technical background of repeaters and/or mesh systems however suffice to say if you used repeaters you’d have multiple separate boxes to manage, different brands often didn’t play well together and you couldn’t actually often see all the information you required (like what clients are attached) in a single place. Mesh networking has the concept of a “master” node and then “slave” nodes. In the mesh, all the nodes talk to each other, appear as a single WiFi network and “seamlessly” hand over to devices as they move closer to each node, two things that repeaters didn’t do well.
You can just use the B1300 as a single WiFi router, but it’s when you have 2 or more nodes that the mesh advantages start to kick in. Being based on OpenWRT, unlike many of the other vendors products, you aren’t locked into a vendors firmware and you can do everything you could with a normal OpenWRT router, add packages for load balancing, adblocking, torrents, VPN server and clients and anything else you can download from the OpenWRT repositories, even write your own firmware if you really wanted.
What’s in the box?
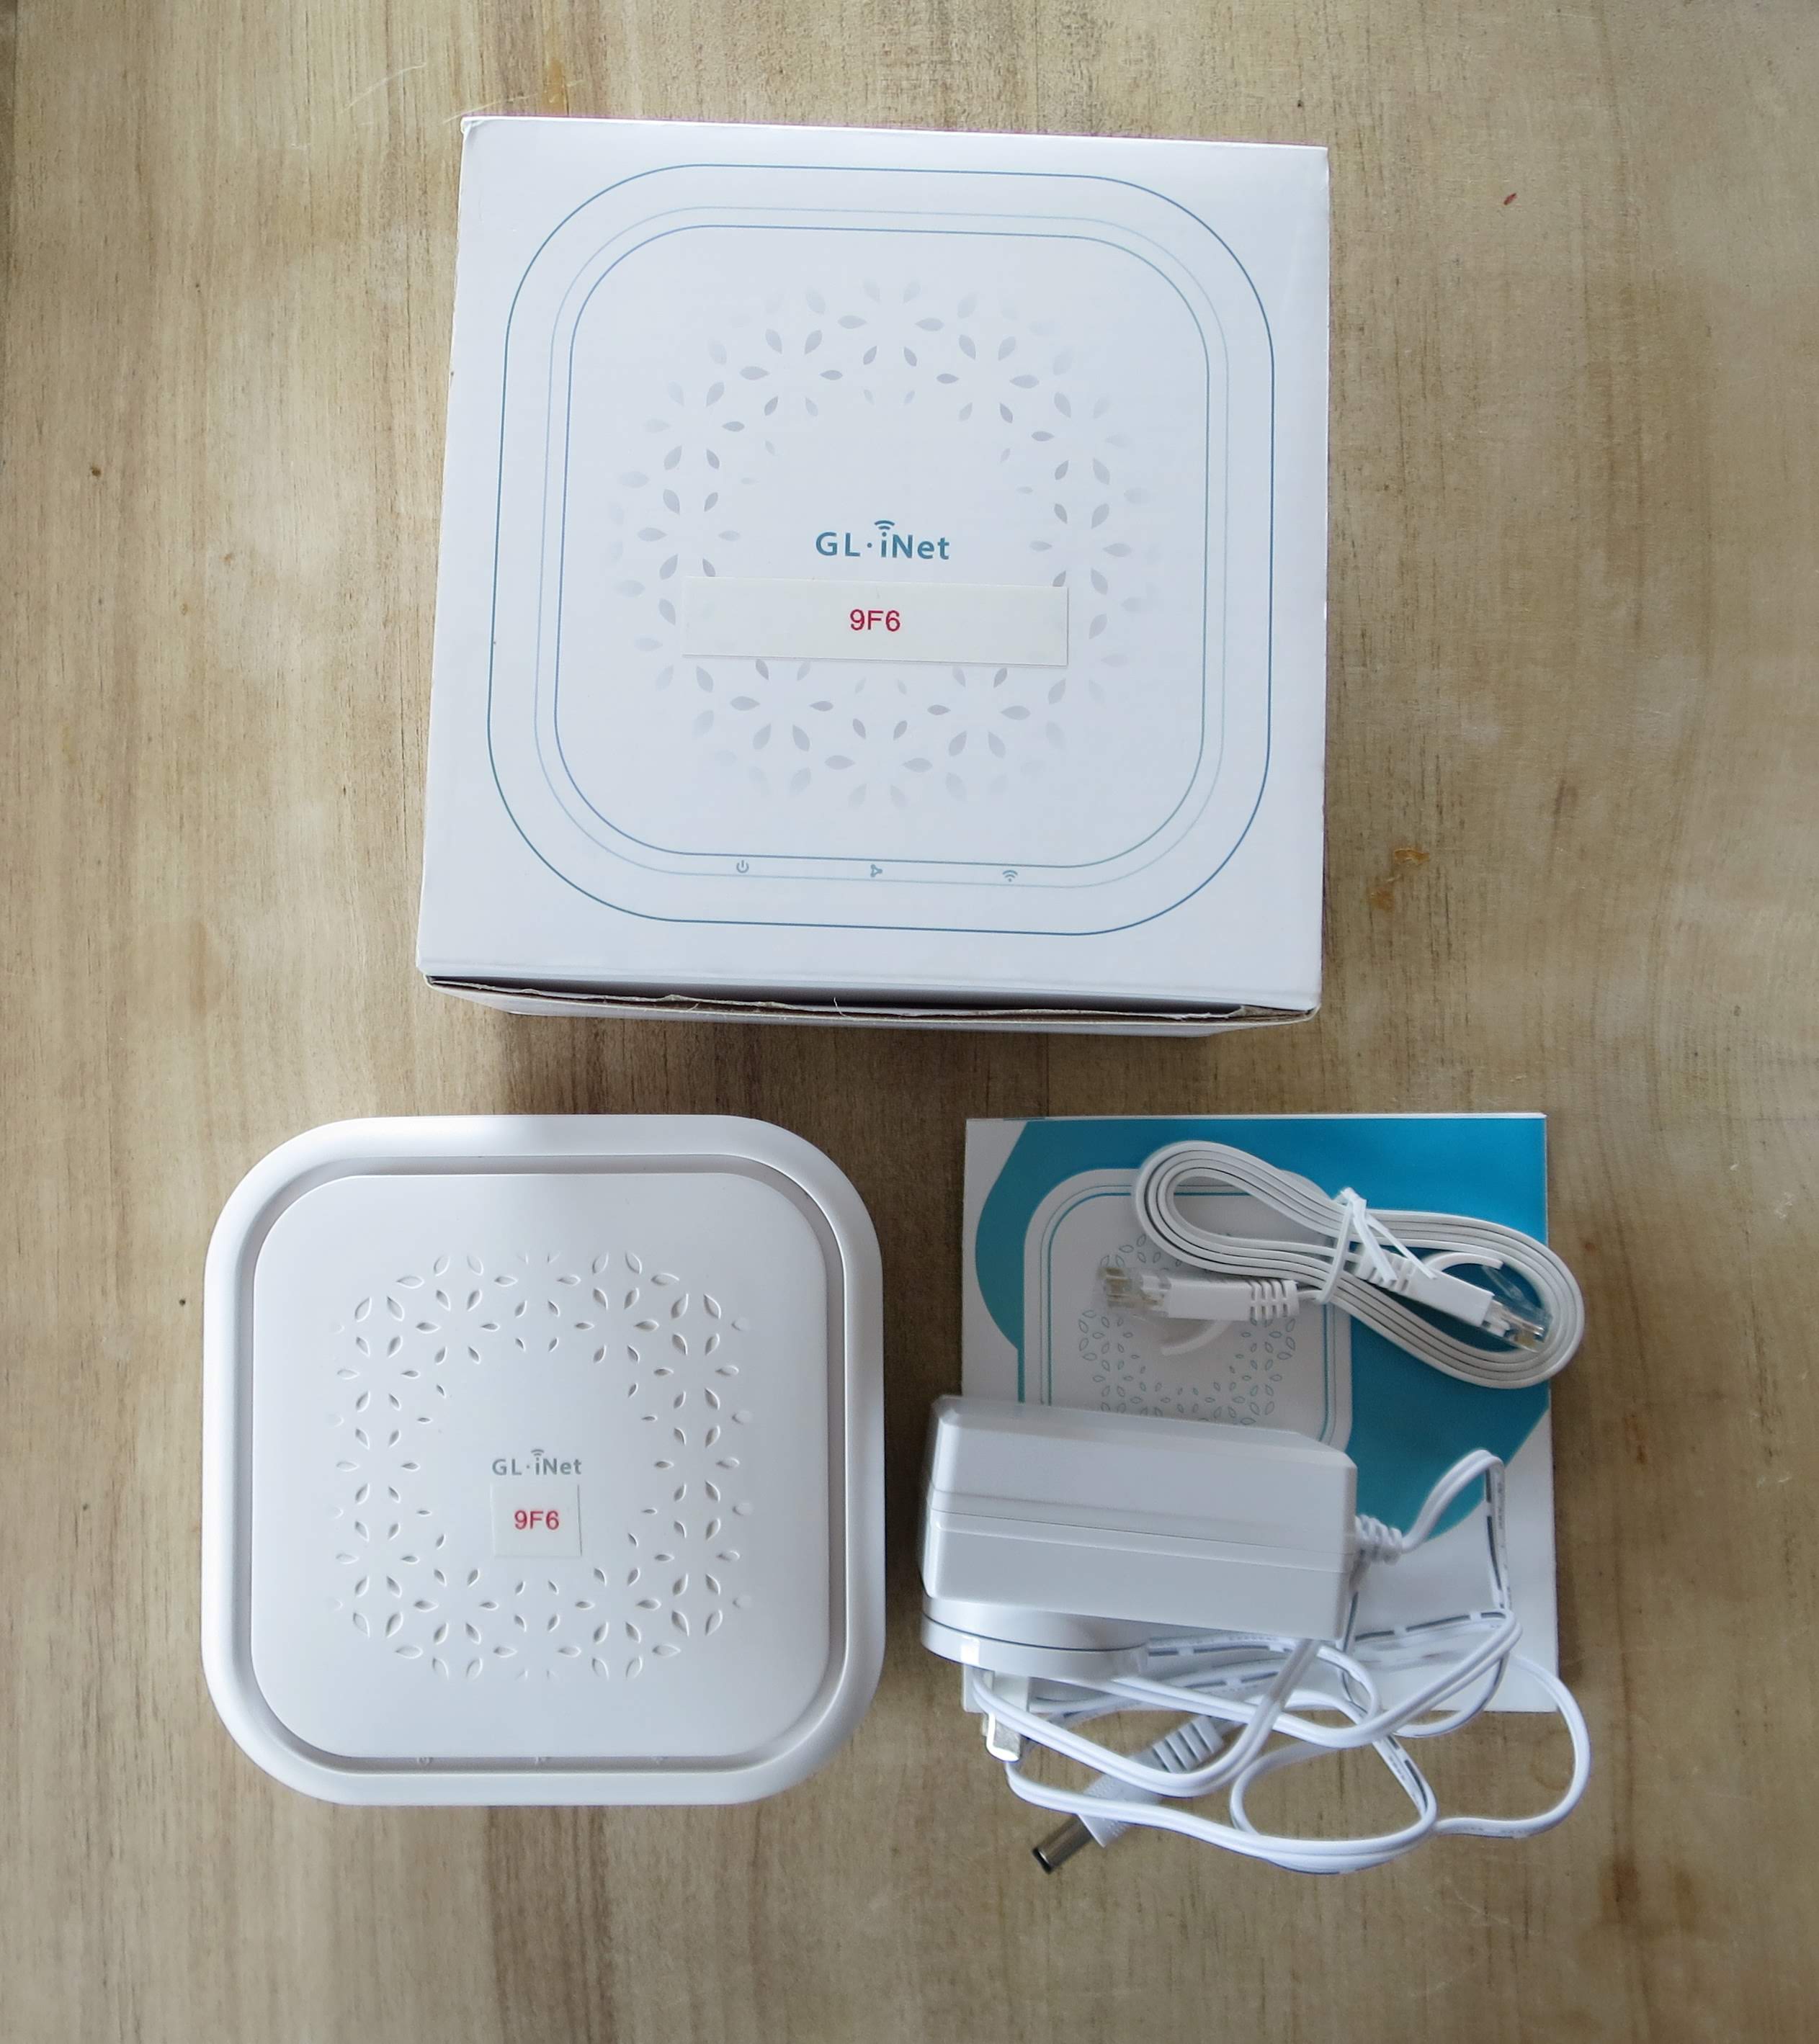
Inside the box, you get everything you need to get started. The B1300 unit, a 12V/1.5A AC adapter with country-specific plug ( you can actually order with a Power Over Ethernet (POE) module if your switch supports it and eliminate the need for the PSU), a network cable and a quick start guide.
Hardware specs
| Interface | 1 x WAN Ethernet port 2 x LAN Ethernet port 3 x LEDs 1 x USB 3.0 port |
| CPU | IPQ4028 Quad-core ARM, @717MHz SoC |
| Memory / Storage | DDR3L 256MB / FLASH 32MB |
| Antennas | Internal |
| Protocol | 802.11a/b/g/n/ac |
| Wi-Fi Speed | 2.4GHz(400Mbps), 5GHz(867Mbps) |
| TX power | 2.4GHz: 20dBm (11b) Max, 5GHz: 20dBm (11a) Max |
| Ethernet Port | 3 x 10/100/1000M |
| LEDs | Wireless status indication / Mesh LED / Power supply |
| Power Input | 12V/1.5A |
| PoE Support | Optional (works with 48V PoE injector only) |
| Power Consumption | <7W |
| Working Temperature | -20~40°C (-4~104°F) |
| Storage Temperature | -20~70°C (-4~158°F) |
| Dimension / Weight | 117 x 117 x 35mm / 212g |
Design and features
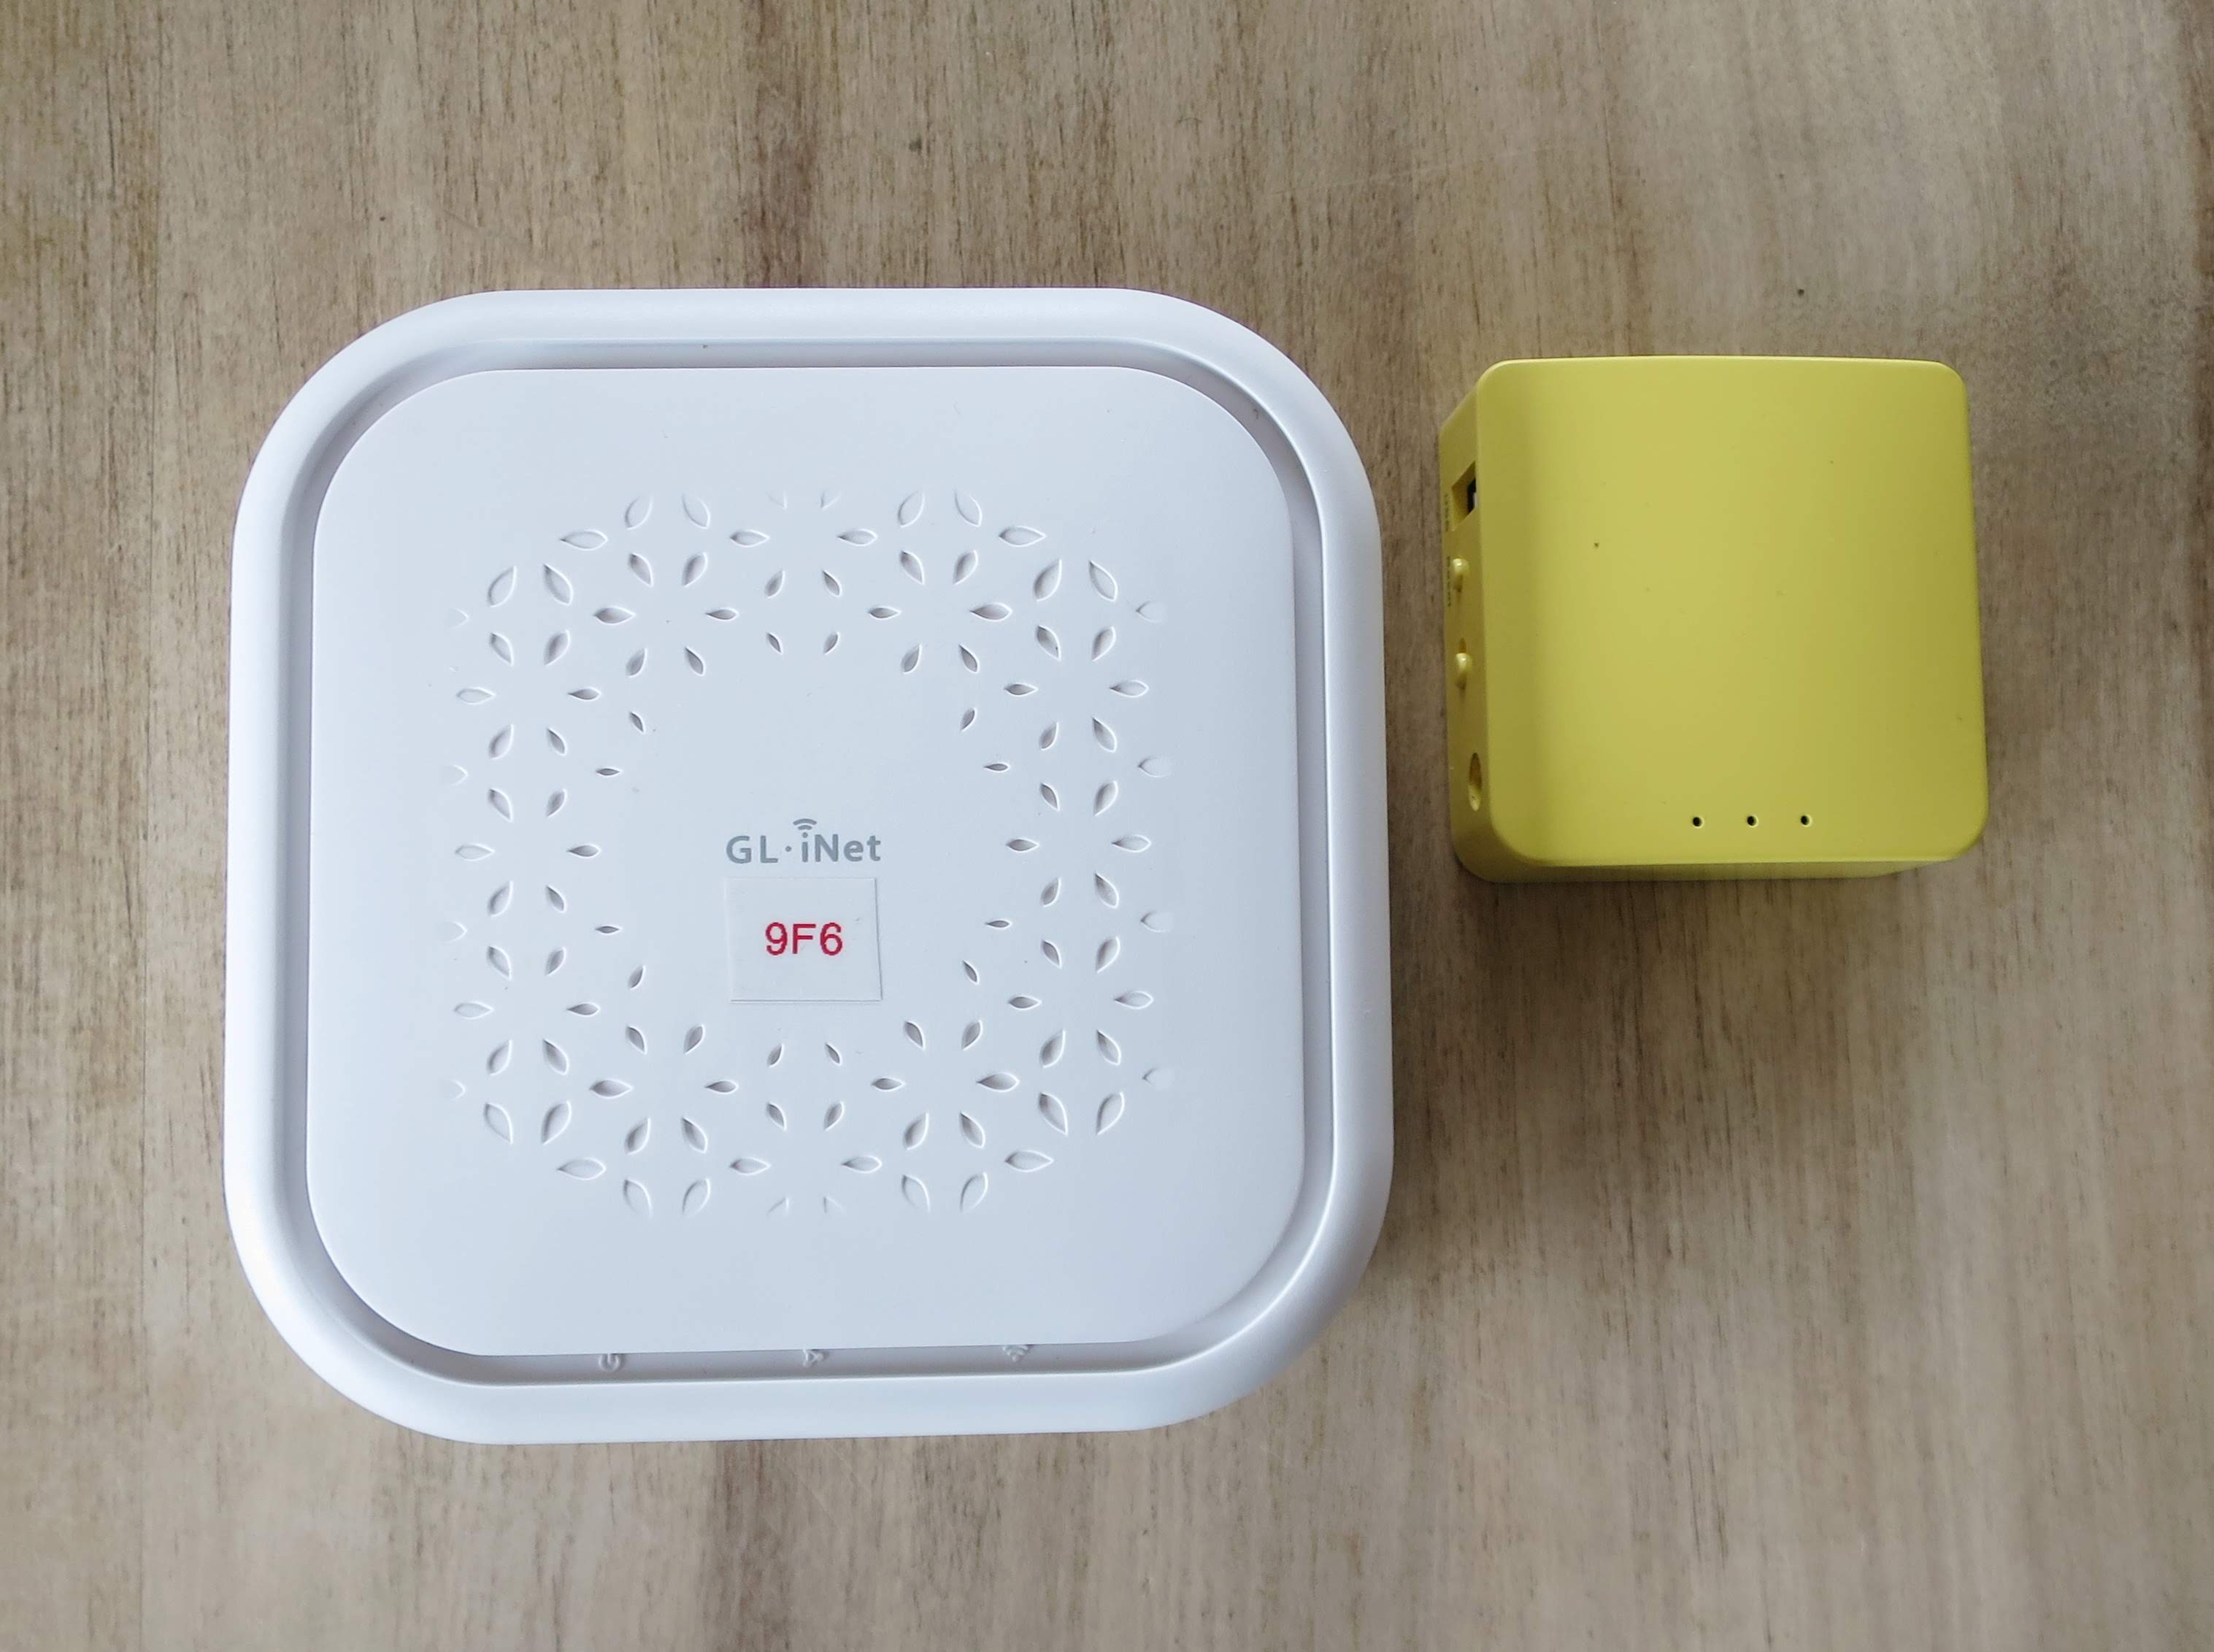
Just for interest, here it is against my Mango travel router. This isn’t quite traveling friendly like the Mango but you get a much better-specced box and mesh capability 🙂 The “standouts” here are the better processor, 3 Gigabit ports and dual-band (2.4/5) WiFi. Even though it’s built on OpenWRT unlike other vendors offerings it’s still based on the industry-standard Qualcomm Wi-Fi SON (Self-Organizing Network) mesh system.
The unit is well made, made from good quality plastic (not that shiny thin stuff) and doesn’t look too obtrusive. On the top front, you can see 3 LEDs that indicate, power, mesh status, and WiFi operation. Again like their other products they’re very discreet and aren’t going to light up your room and distract you with their flashing.
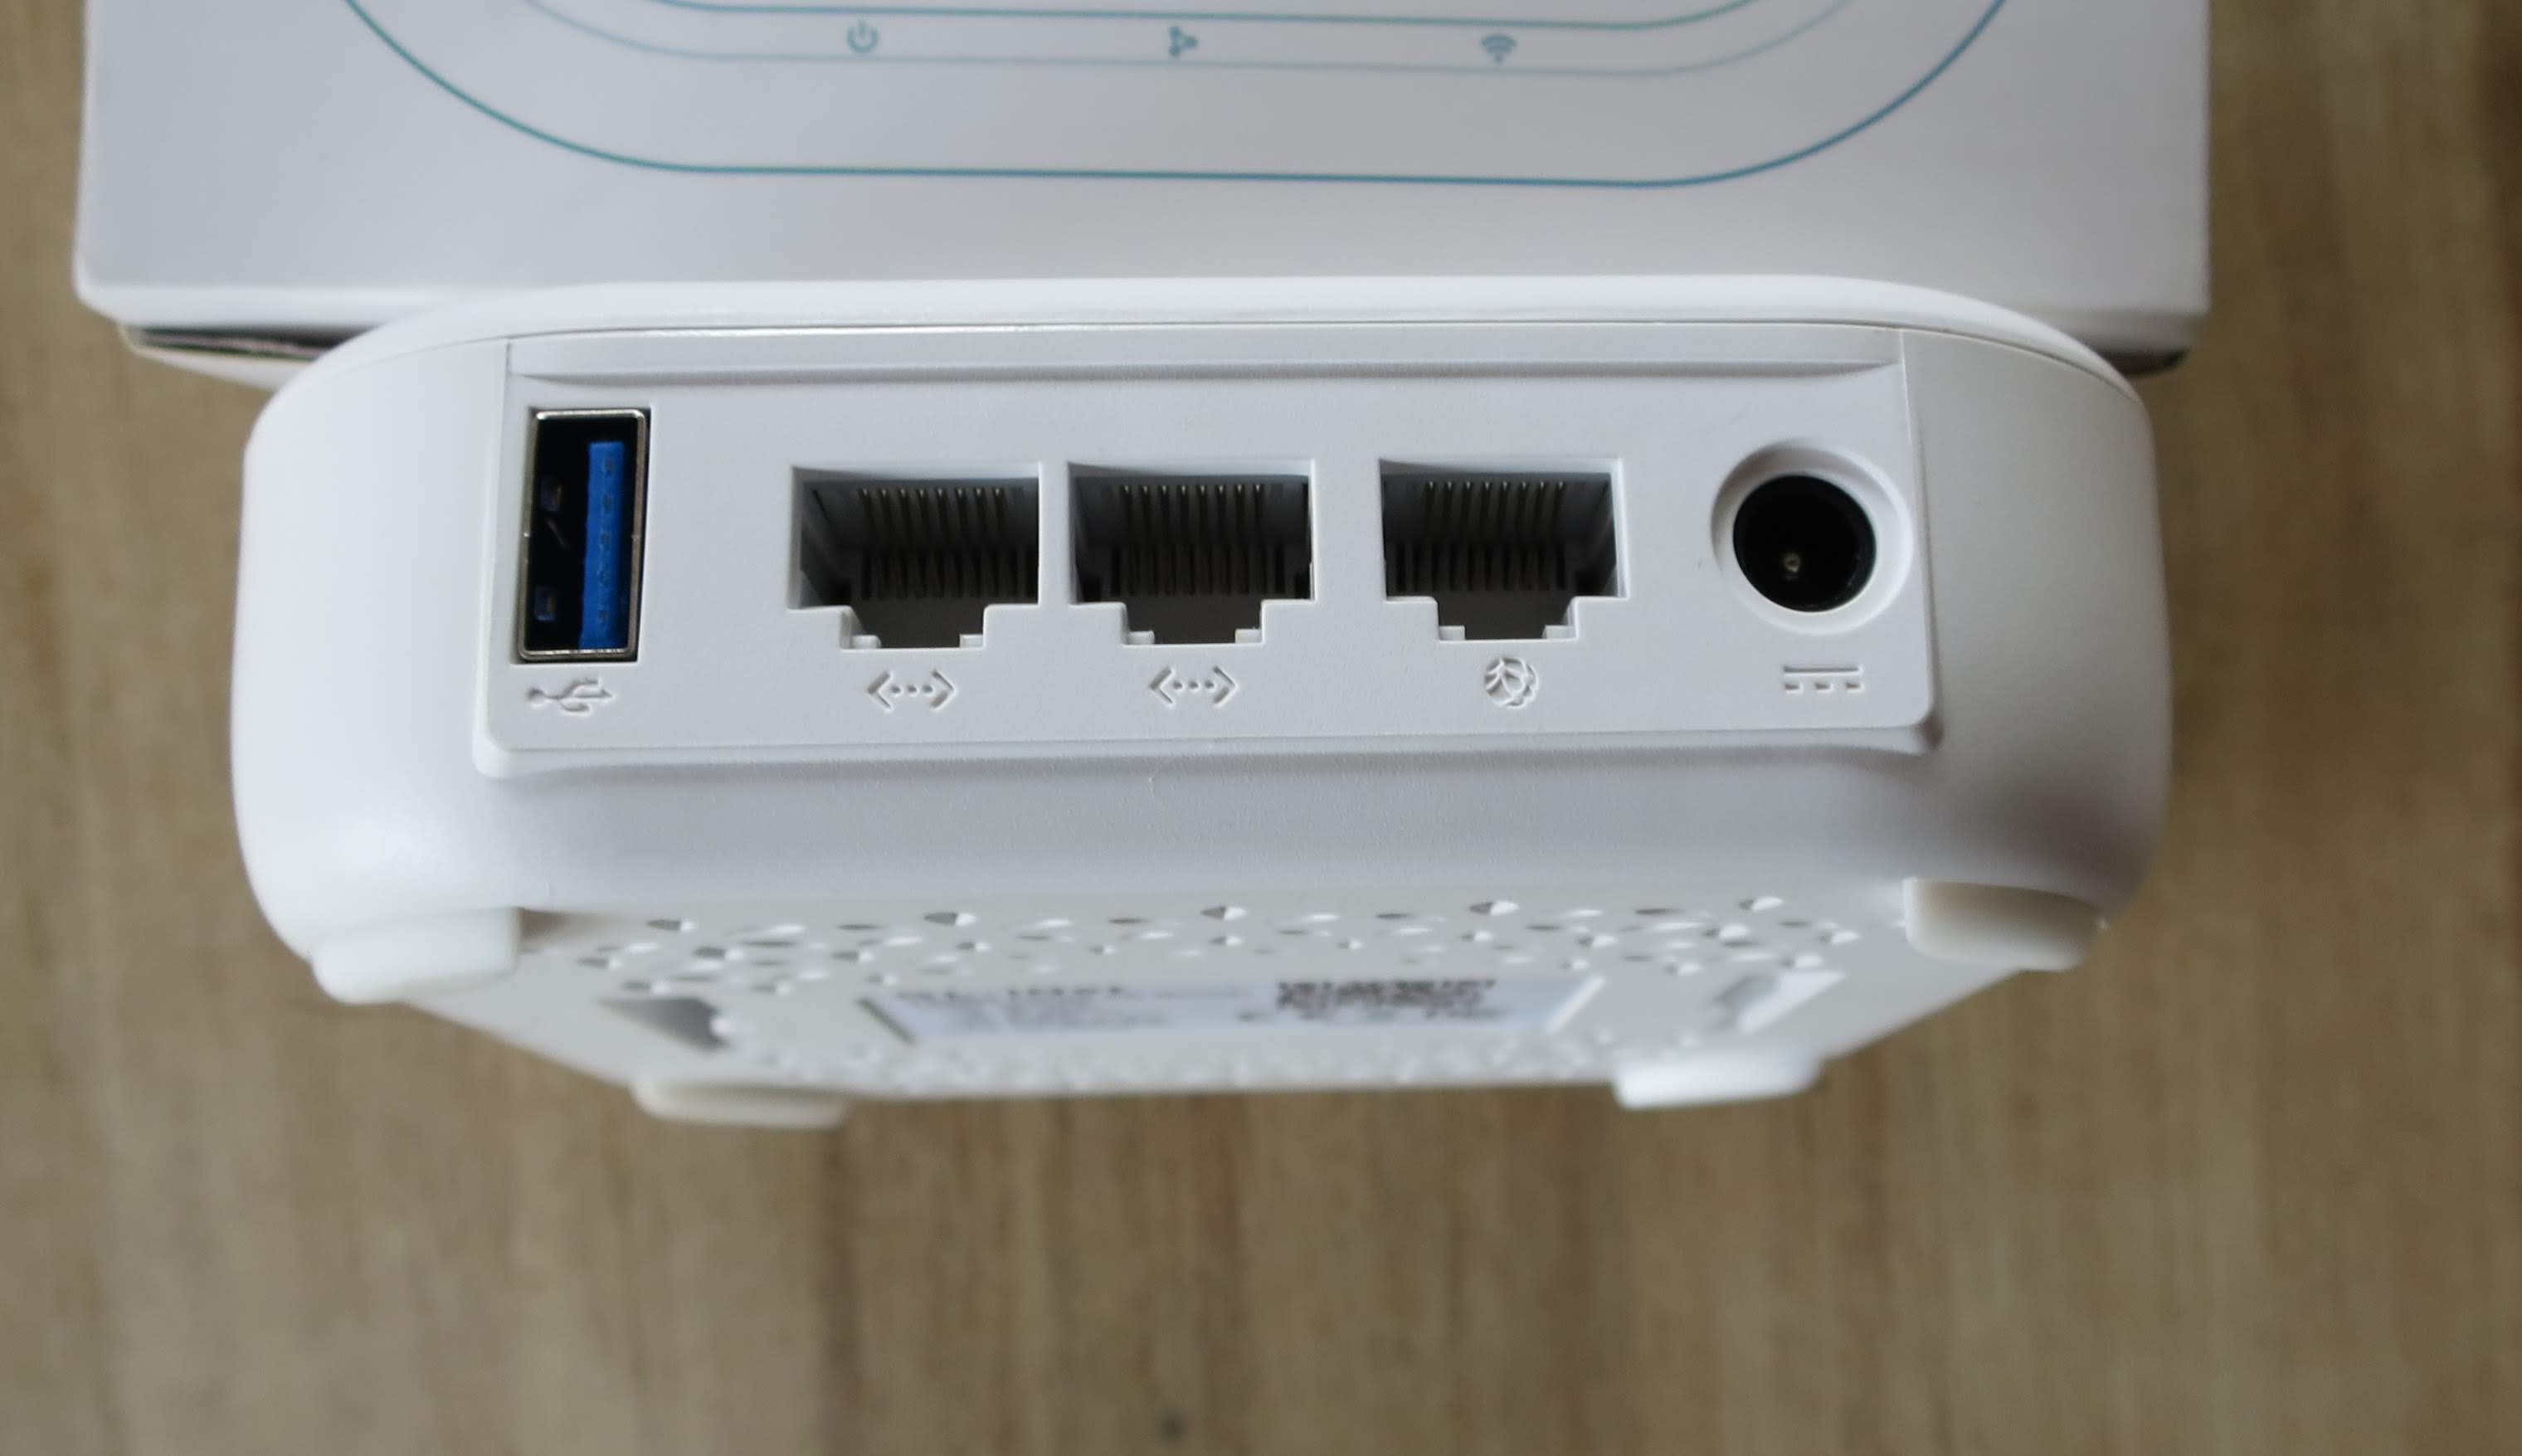
On the back, a USB 3.0 port that can be used for a flash drive or to connect a 4G dongle, 1 Gigabit WAN port, 2 Gigabit LAN ports and the power connector.
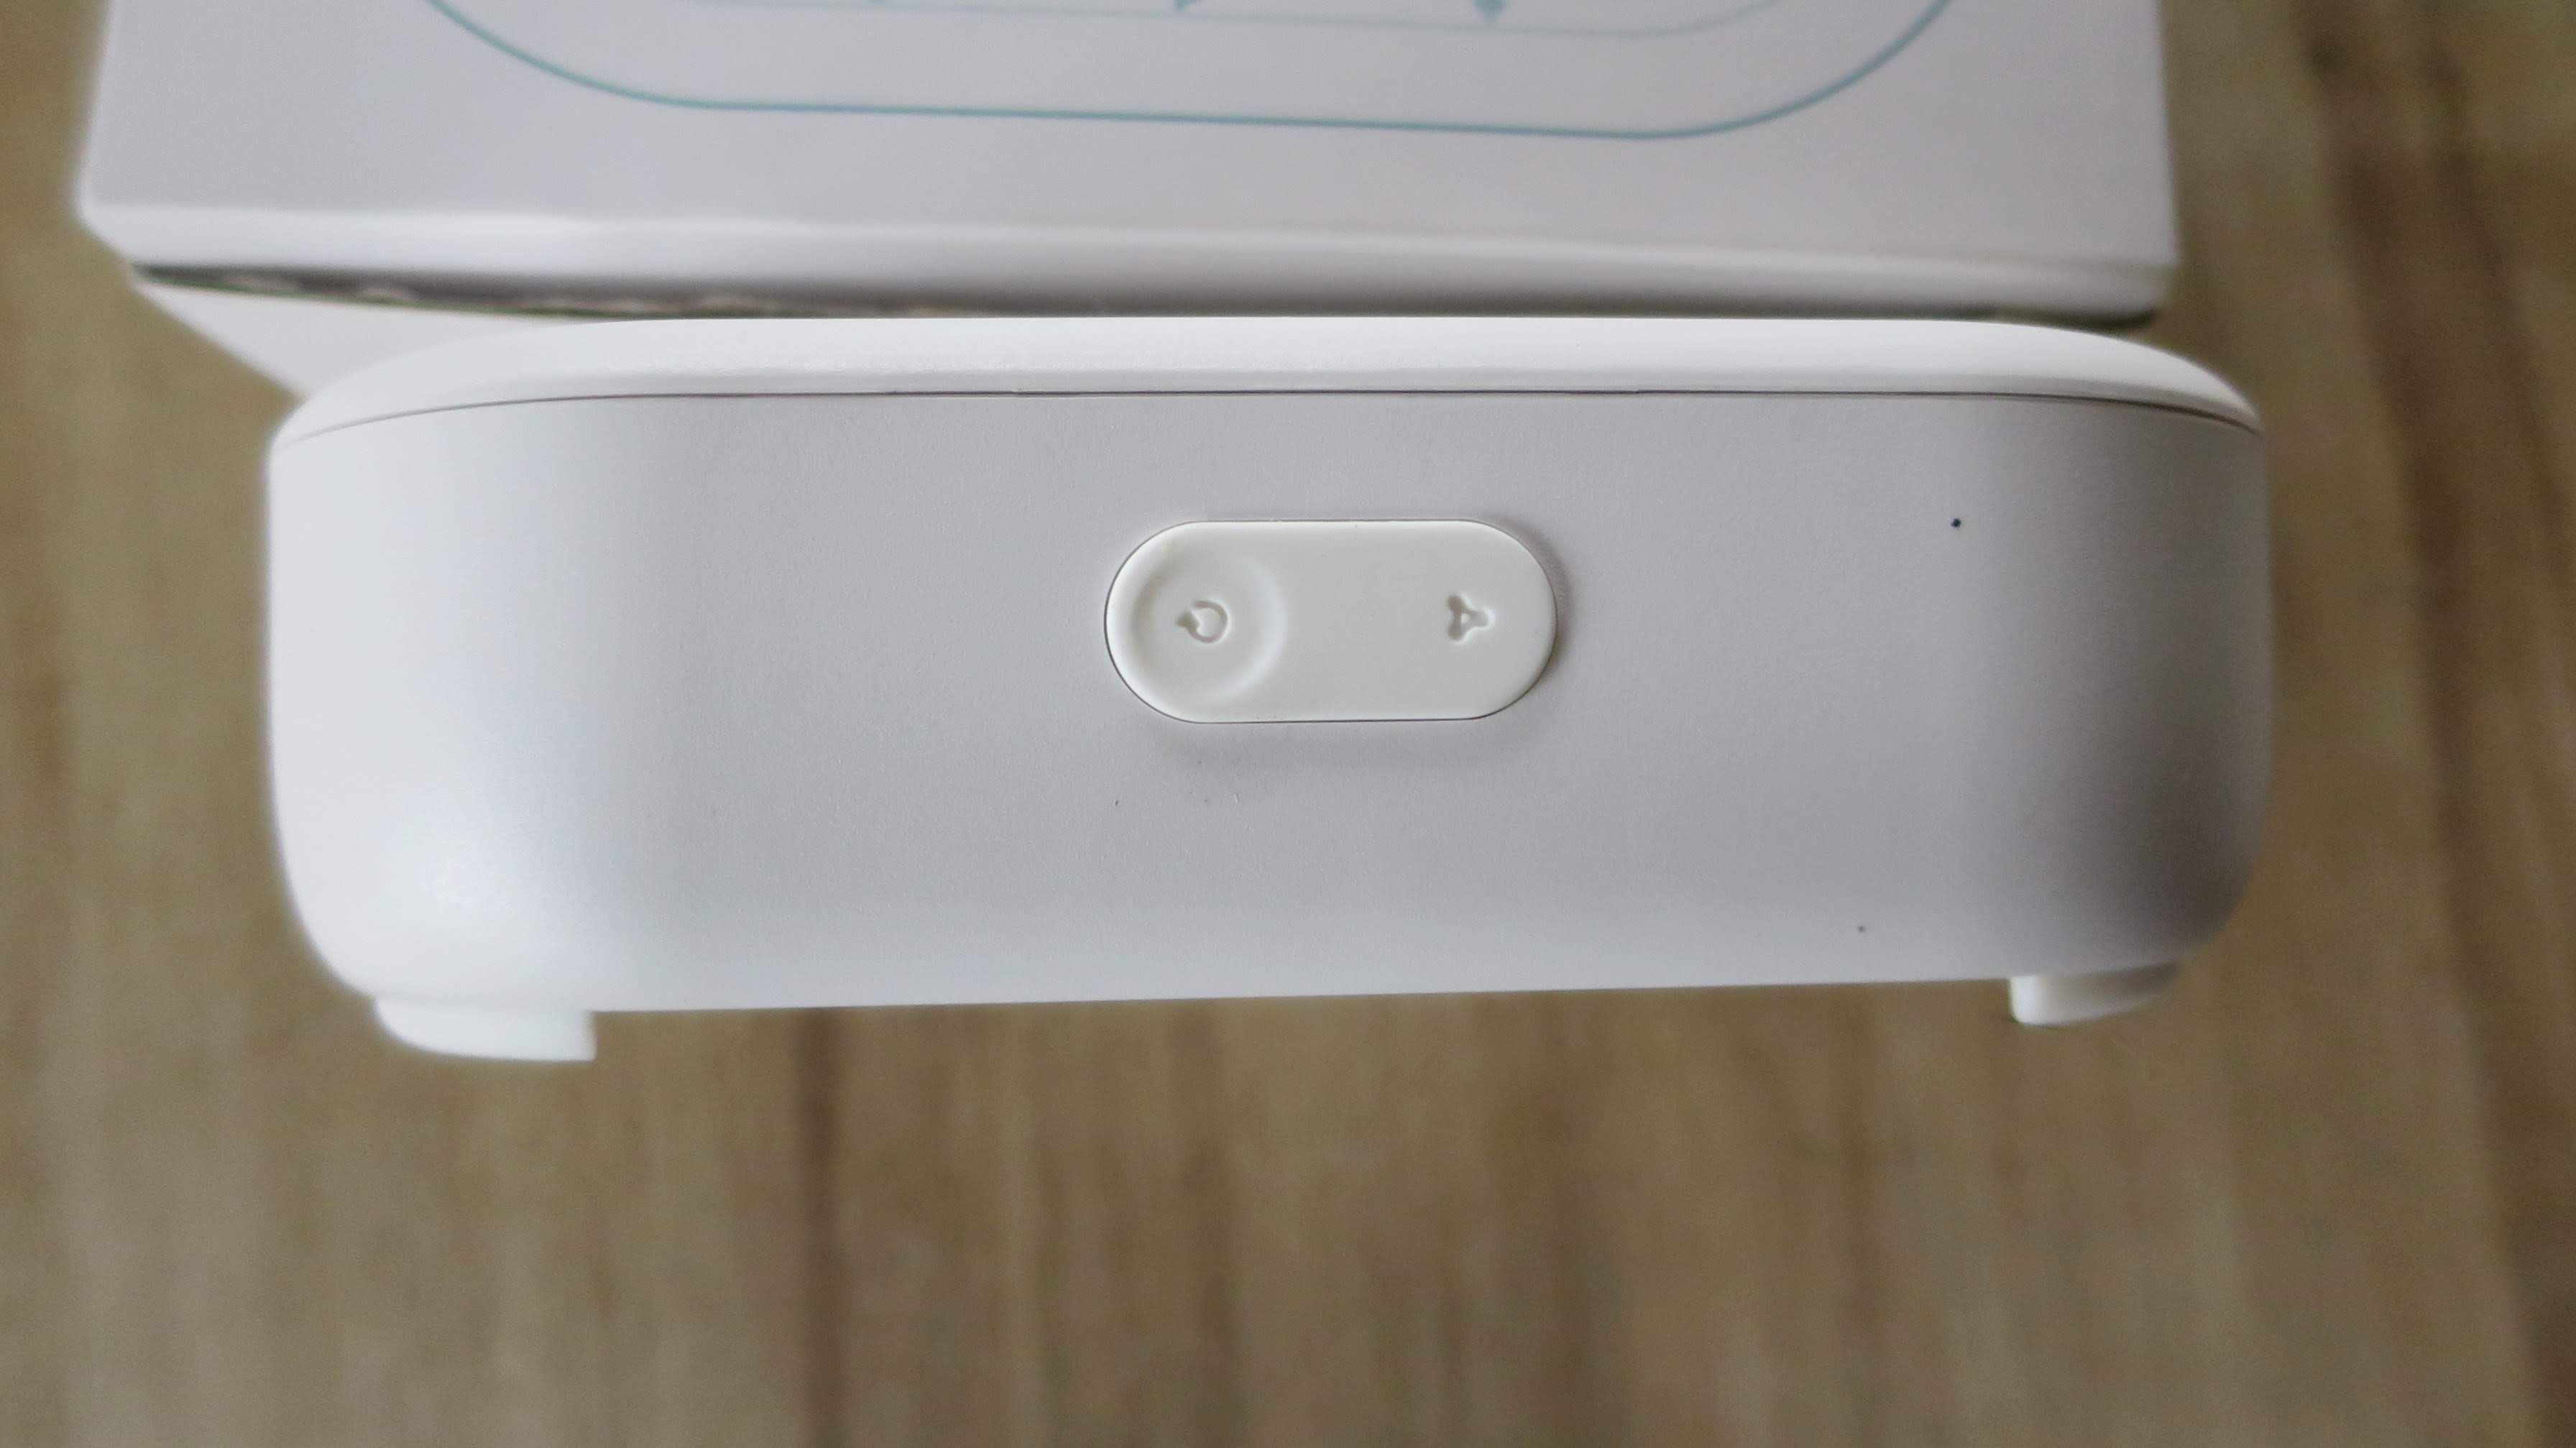
The front only has a single rocker button; a reset (short press to restart the router, long press to reset to defaults) and a mesh button.
Setup
Setup is quite easy. Plug your modem/router into the WAN port of your master node and set it up. Gl.iNet has included its own simple interface on top of OpenWRT which makes this pretty simple. I won’t cover again as I’ve already covered this (to some extent) in my Mango or Slate reviews already.
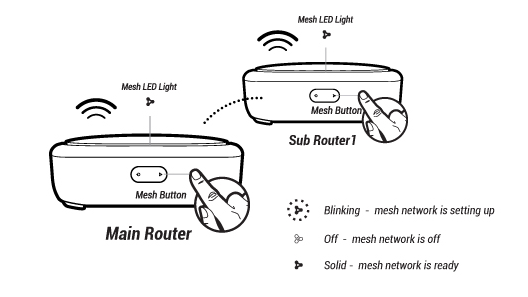
Hold down the mesh button on the front of master node until it starts to flash quickly and then hold the mesh button on the front of the first slave node until it starts to flash quickly and then wait 🙂 Eventually both the mesh lights on the two nodes will go solid and, voila, you have a two node mesh. If you have additional nodes you press the mesh button on the master node again and repeat with each slave node.
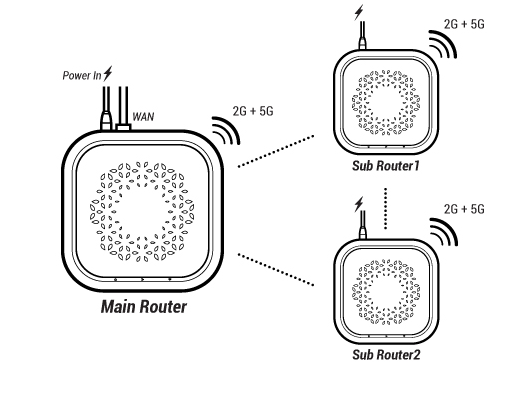
In the end, you’ll have a mesh system as per the above picture. As mentioned above each node talks to the other.
Management and interface:
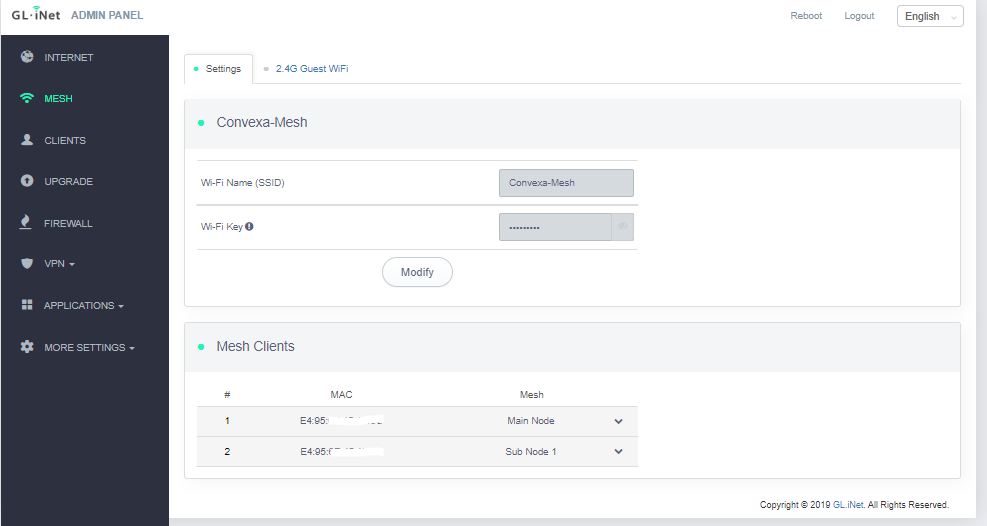
All your management is now done on the master node. On the management console (on the master node), you can now see the 2 nodes I currently have set up. Note that there’s now a single SSID for the WiFi and no differentiation between 2.4Ghz and 5.0 GHz WiFi bands. The mesh allows your clients to pick the best node and band to maximize WiFi performance.
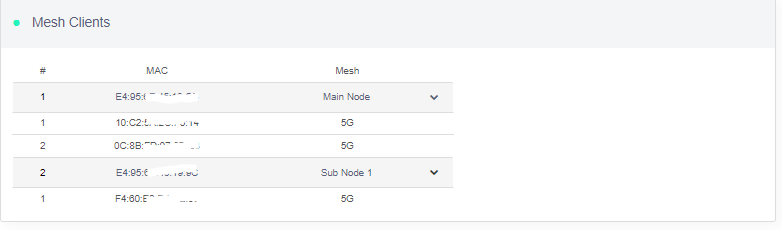
If you drill down further you can see what devices are connected to what node and on what band. If you are using repeaters, you cannot get this information in a single screen (if you can get it at all).
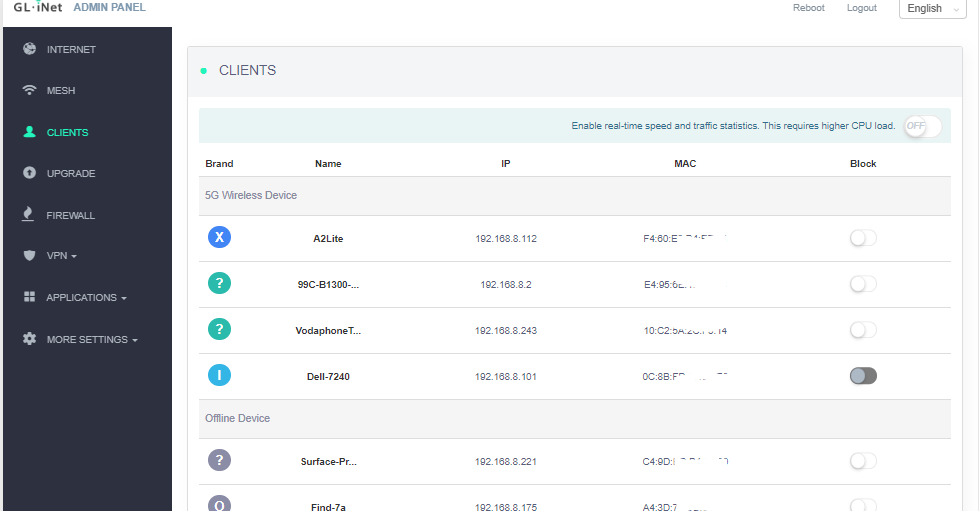
The list of clients shows every device connected to the mesh and you can block or monitor them from here.
Performance
I can now walk around the house and seamlessly move from node to node without dropping my WiFi connection. This was always an issue with repeaters, and often you’d actually have to manually change your WiFi settings to connect to the nearest repeater. Management can be done on a single node and can even be managed remotely over their cloud based platform Goodcloud if required. Dead spots are now a thing of the past (assuming you place your nodes correctly). As I move from node to node, I can see my speed and signal dropping as I move away from my connected note, then both start to increase again as I move into range of the next node.
Currently I have one node setup with a USB drive as a media storage platform and one of the lesser nodes is being used to download torrents using Transmission. I’ve even had a USB 4G dongle attached to my main node as well as a wired connection and let the router load balance between the two connections where the wired connection wasn’t up to scratch.
What I like
- Easy to setup
- OpenWRT based
- Flexible single node management
- Increased WiFi coverage
- Automatic firmware updates (to all nodes)
- I can see all my clients on my network and which node they’re attached to which you can’t easily do with repeaters
- No more multiple SSIDs and having to choose between them (often manually).
- I have a single network on multiple bands with a SSID and I don’t have to pick 2.4Ghz or 5.0Ghz the client picks the “best” frequency (not always the case, will depend on your client).
- When standing next to each node I get the same maximum speed as the master node attached to the router.
- As I move around I can see the WiFi signal drop as I move away from a node and then increase as I approach and attach to another node. Handover appears to be pretty seamless
What I’d change
- There’s not much to change here. Once you’ve set it up it’s pretty much set and forget.
Final thoughts
If you have the capability to used wired Access Points, this will always be the best option. It’s worth noting that most mesh systems should still work fine with wire connected nodes which would be the ultimate solution. That being said, in a prebuilt house it’s often either too hard or too expensive to retrofit cable runs into the existing residence to improve your signal and a Mesh WiFi connection maybe the best and most economical way of doing this.
Because the B1300 is based on OpenWRT it’s a much more flexible solution than other offerings as you can add functionality (to each node if required) as required and the ability to add more nodes means you can’t really outgrow the system. Overall mesh networking certainly goes a long way to giving you a relatively simple setup process, and a good unified platform to manage your WiFi and its devices while increasing your WiFi coverage.
Price: $ 89.00 USD
Where to buy: Gl.iNet Amazon
Source: The sample of this product was provided by Gl.iNet

2-Pack LED Video Light Kit, NiceVeedi Studio Light, 2800-6500K Dimmable Photography Lighting Kit with Tripod Stand&Phone Holder, 73" Stream Light for Video Recording, Game Streaming, YouTube
(as of June 22, 2026 21:24 GMT -05:00 - More infoProduct prices and availability are accurate as of the date/time indicated and are subject to change. Any price and availability information displayed on [relevant Amazon Site(s), as applicable] at the time of purchase will apply to the purchase of this product.)
Gadgeteer Comment Policy - Please read before commenting
Would you know if the USB3.0 port has enough power for many “port powered” USB HDD’s? If the port meets the standard, then I’d think this would be the case, but I’d love to know if you gave this a try?
Sorry have only ever connected USB thumb drives and SSD external drives, never mechanical spin 🙁
I see in the Gl.iNet forums that people say they are using them so theoretically possible.
Will depend a lot upon the drive itself so might be a suck it and see situation with your particular drive.
Sorry can’t help further (I don’t even have a 2.5/3.5″ spinning drive I don’t think).
No performance tests, just “it seems to work when I walk around my apartment”.
This reads more like an advertisement than a critical look at the product.
Routing performance? VPN performance? Wifi performance? USB / file sharing performance? Was any testing of this product done at all?