REVIEW – One of the most frustrating things about the Nintendo Switch is the need to carry a dock around if you want to both charge the switch and use an external display. The Bionik Lynx for the Nintendo Switch is a compact solution to this problem.
What is it?
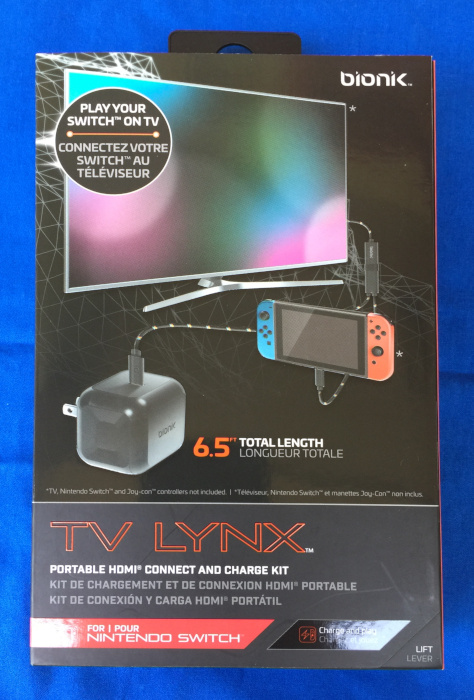
The Bionik Lynx for the Nintendo Switch (hereafter referred to as simply Lynx), is a compact solution for providing power to a Nintendo Switch and simultaneously allowing the Switch to be connected to an external display using an HDMI port.
What’s in the box?
The Lynx is packaged in a nice full-color box with a front flap which allows you to see the kit in all its glory before you purchase or open the package.
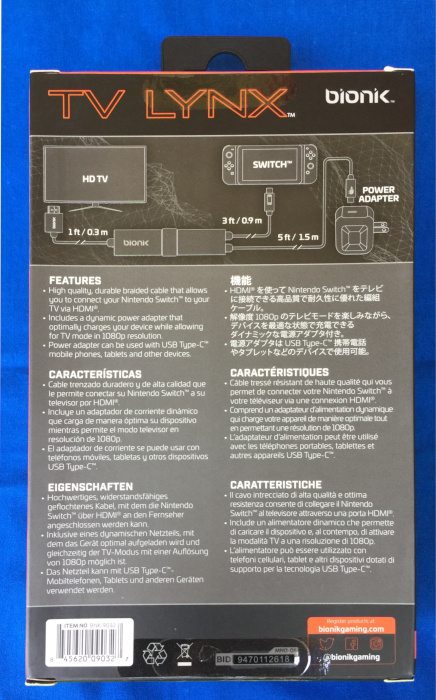
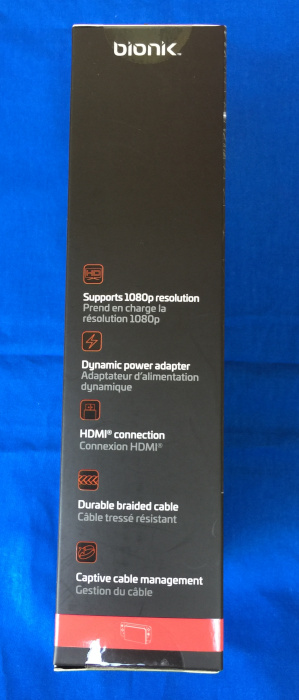
The package describes the basic features of the Lynx in 6 languages with English and French being the featured languages.
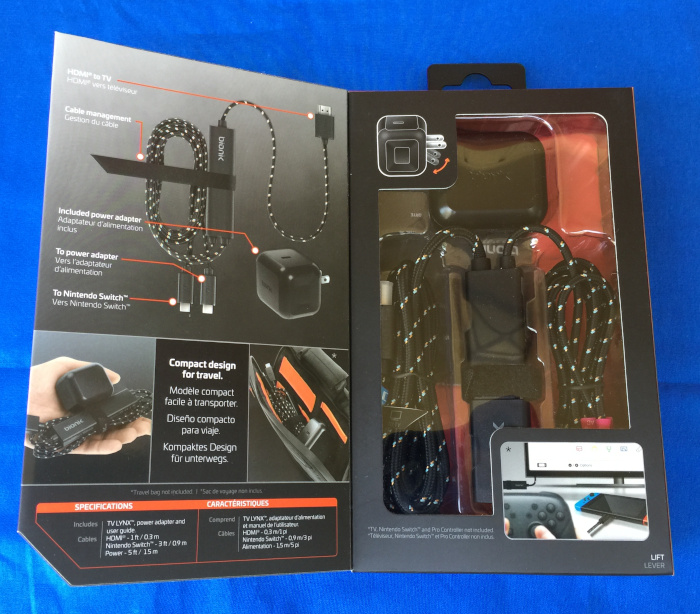
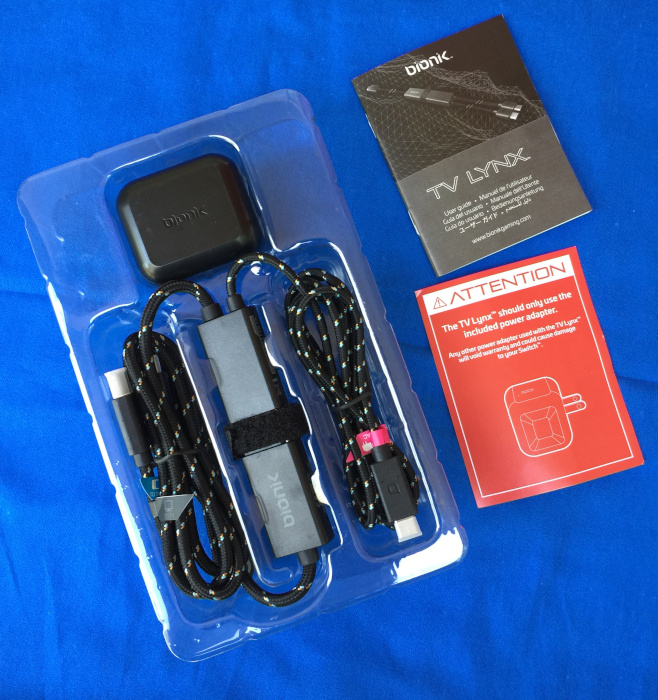
Inside the package are
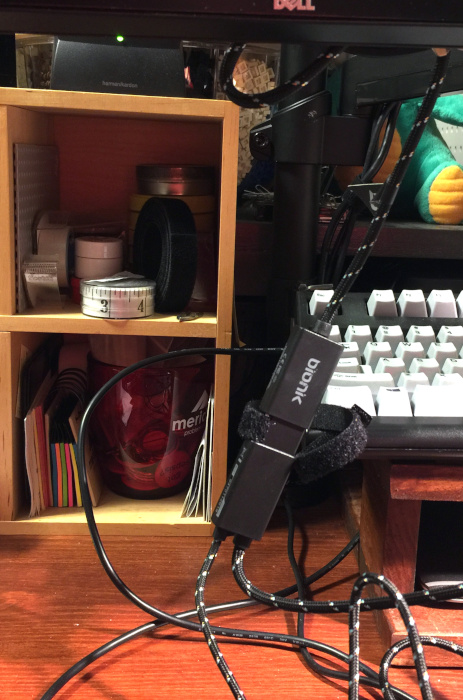
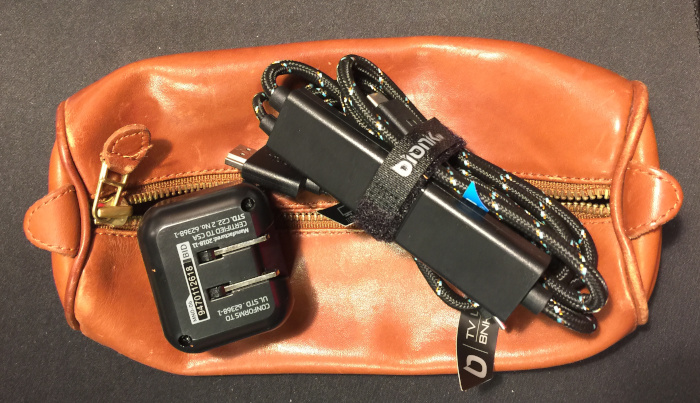
- Lynx unit with an attached branded hook-and-loop wire wrap
- Power brick with USB-C port
- Quick-start instruction manual (multi-language)
- Flyer with adamant warning to only use the enclosed power adapter with the unit
Hardware specs
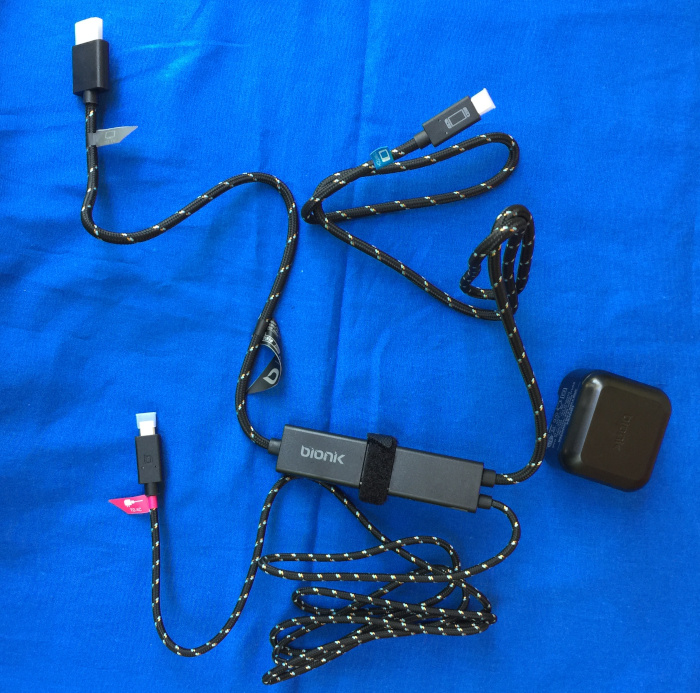
The Lynx unit itself is 9.9 cm long, 2.4 cm wide, and 1.2 cm thick. The Lynx has three attached cables that run to the power adapter (150 cm with a USB-C plug), a Switch (90 cm with a USB-C plug), and an HDMI display (30 cm with a full-sized HDMI plug). When bundled up the Lynx unit and cables is approximately 13 cm long and 5 cm in diameter and weighs 110.5 grams. The power brick measures 5.2 cm by 4.3 cm by 4.5 cm and weighs in at 70 grams.
Design and features
The Lynx is an elegant and functional device which only performs one set of functions, and it performs them very well.
Setup
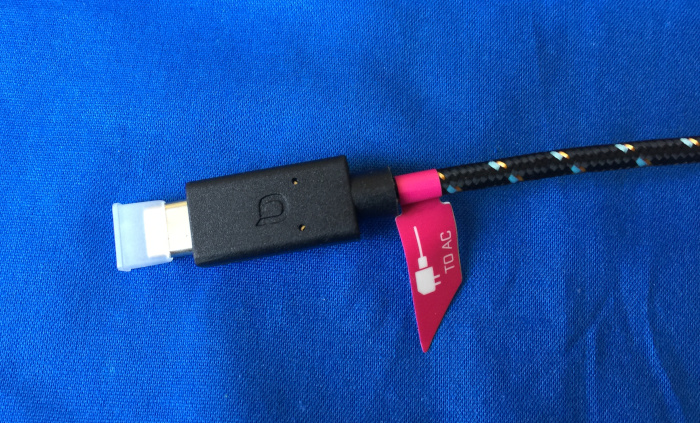
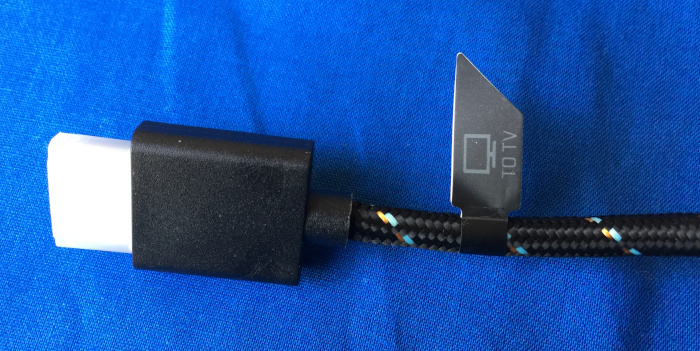
Setting up the Lynx involved simply removing the protective shipping caps from the various connectors, plugging the correct connectors into the correct places following the labeled flags / legends printed on the plugs, plugging the power adapter into an outlet, and turning on the attached display and Switch. I would have liked to see the plugs either embossed with the function or have the plug moldings color coded as I worry about the wire labels coming loose and the printed legends being worn away. I will be addressing this issue on my unit with two different colors of paint to fill in the embossed Bionik logo on the plugs and matching colored wire ties on the cables.

Performance
I initially tested my Lynx by hooking it up to the HDMI port on my monitor and hoping that the scaling algorithms in my monitor would render a decent picture. The Lynx outputs a 1080p signal over the HDMI port, but my monitor’s native resolution is WQHD/QHD/2K (2560 x 1440). When I booted everything up, the output looked as good as any other 1080p signal displayed on my monitor. A minor gripe is that the Lynx was hanging down from the bottom of my monitor rather than resting on my desk (yes, I do have my monitor set a bit higher than many others). This is due to the short video cable on the Lynx.
I panicked a bit when I couldn’t get the controls to respond. My younger son helpfully told me that I needed to undock the controllers from the Switch, because they won’t work with an external display when they are still attached. You can see how often I play video games on a Switch. I was able to load and run Super Smash Brothers Ultimate and play with no more trouble than the last time I tried. My younger son “helpfully” offered suggestions on my game play, but I was mostly able to ignore him. The only performance issue that we noted was that the HDMI signal coming out the Lynx runs audio at full volume and there is no way to adjust the volume. I have an inexpensive set of speakers that do not have an onboard volume control attached to my monitor, so game play was very loud.
We next moved to my younger son’s room and performed a second test. Since we were hooking the Lynx up to a regular TV, we could adjust the volume, but we had to rig a mounting solution because his television is mounted five feet up from the floor and the location of the nearest power outlet was just outside the maximum length of the cables. A piece of 3M Command Adhesive solved that problem. He played for over an hour, and would have played longer, but his older brother came in and demanded that his Switch be returned.
My older son has used the Lynx on several outings to friends’ houses for the Switch equivalent of LAN parties, and the Lynx has been a big hit. Again the short HDMI cable proved to be problematic, but the addition of a spare male-to-female HDMI extension cable that his friend’s father happened to have come to the rescue. I will be adding an extension cable to our kit as well.
With the addition of an HDMI extension cable, the parts count reaches three, which is where things start to get lost. I think Bionik has made an error in not including a small bag for carrying the Lynx and power adapter. Yes, they could be put into the case with the switch, but the thin cases are already tight on space and the larger carrying cases that are designed to also carry the dock have room for the dock and spare cables and power adapters, so the Lynx is a bit redundant and rattles around in that big space if you choose to use the larger case anyway.
My solution was to pull an old Levenger leather pencil/pen/cable case out of mothballs and put everything in there. Without the HDMI extension cable, it is a bit large for the Lynx and power adapter, but I imagine that the extension cable will take up much of the left over space.
What I like
- Neat and simple tool
- Easy to setup and use
- It just works
What needs to be improved
- HDMI cable could be lengthened to 50-75 cm
- Plugs could be better labeled to ensure that the wrong USB-C plug doesn’t end up in the wrong port
- Needs a carry bag
Final thoughts
The Bionik TV Lynx for the Nintendo Switch is an excellent addition to any Nintendo Switch kit. It solves the problem of powering and simultaneous external display while playing on a Nintendo Switch without having to bring along a dock and its power supply. With a few tweaks, the TV Lynx would be perfect, but don’t let the cable and storage bag issues scare you away. The TV Lynx has become a permanent part of our Nintendo Switch kit.
Price: $59.99
Where to buy: Bionik’s e-commerce site or Amazon
Source: The sample of this product was provided by Bionik.
![[MINI SIZE. ULTRA PORTABLE CHARGER]: Roughly the size of an AirPods Pro case, this smallest power bank packs 10,000mAh of long lasting power into a tiny, nano footprint. Easily slide this ultra slim, credit card size charger into your skinny jeans, a...](https://m.media-amazon.com/images/I/41rATpm6dyL._SL160_.jpg)
Now retrieving an image set.
INIU Portable Charger, Ultra Mini 10000mAh 45W Fast Charging with Detachable Cable, Flight-Safe Travel USB C Power Bank External Phone Battery Pack for Xiaomi iPhone 17 16 Samsung S26 Google iPad etc
(as of July 13, 2026 18:57 GMT -05:00 - More infoProduct prices and availability are accurate as of the date/time indicated and are subject to change. Any price and availability information displayed on [relevant Amazon Site(s), as applicable] at the time of purchase will apply to the purchase of this product.)
Now retrieving an image set.
Gadgeteer Comment Policy - Please read before commenting
Timely article – we are going away this weekend and want to take the Switch along. I was wondering if a solution like this existed, and The Gadgeteer has an article on the front page!
Thanks!
I bought the product and after two uses it stopped functioning. I had registered the product on the website and everything for warranty purposes just like any other gaming product in case you get a defective one. I had contacted support and told the what happened and gave them the information needed only to be told the warranty is only vaild if you have the receipt, like what??? So i asked “ so registering the product on the website doesnt do anything?” And proceeded to tell them that instead of encouraging people to register their product just tell them to keep their receipt instead of wasting their time. The product isnt cheap and it broke after two uses, TWO. They did nothing about it, the company is shady as hell if you buy from them know that the registration is a complete WASTE and with out you receipt theyre just going keep you money and throw you to the wind. WONDERFUL WAY TO TREAT YOUR CUSTOMERS.
Nessa,
I agree that this appears to be a case of poor customer service. I cannot speak to their CS departments and policies. I have not had the need to contact them, as I have had no problems with my unit.