REVIEW – I used to have an offset barrel smoker, and I just couldn’t get the hang of it. Managing the fuel was a pain, and temperature control was difficult. The Cuisinart 30″ Electric Smoker offers an experience for those who are new to the meat smoking game, or those (like me) who just want an easy plug-and-play solution. How did it do in my tests? Let’s cook!
What is it?
It’s a vertical smoker that uses an electric heating element. It also works nicely as an outdoor oven.
Hardware specs
- 22″ wide by 19″ deep by 37.5″ tall
- 51.5 pounds
- 584 square inches of cooking space
- 1500 watt heating element with a heat range from 100 to 400 degrees
What’s in the box?
The package contains the smoker, 3 cooking racks, a water pan, a drip pan, a wood chip box, and the power unit. Some assembly is required.
Design and features
The Cuisinart 30″ Electric Smoker utilizes a simple, no-fuss design that can not both smoke meats & vegetables and do double-duty as an outdoor oven. After several cooking sessions during my test, I can attest to the convenience and ease-of-use. Let’s explore the details.
Setup
Before we start, know that the Cuisinart 30″ Electric Smoker is a big beastie. Cuisinart claims to use some lightweight materials in the construction, but it still weighs about 50 pounds. You may want to recruit a friend to help with assembly if you’re not accustomed to maneuvering big items by yourself.
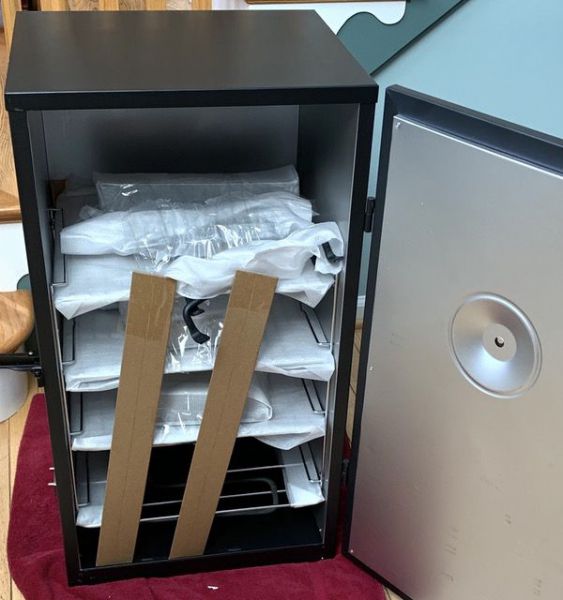
Cracking the box reveals all of the components needed for assembly. I had read some reviews that indicated problems with damage during shipping, but my box came in perfect shape, with everything well-packed:
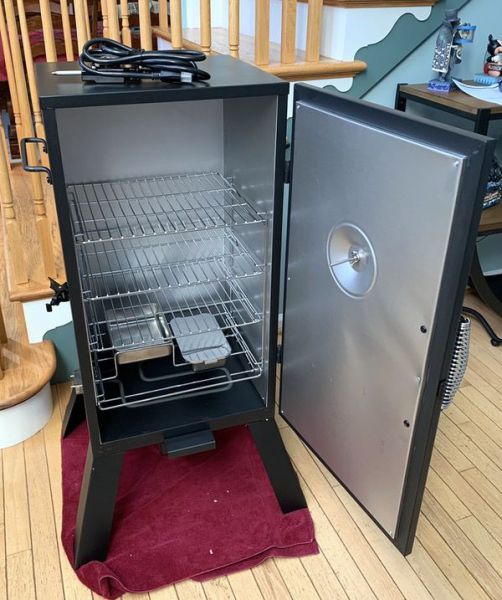
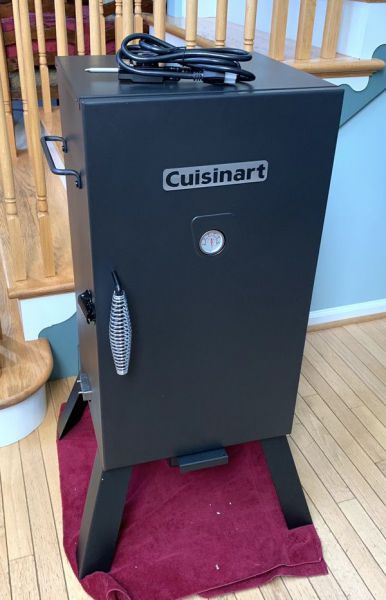
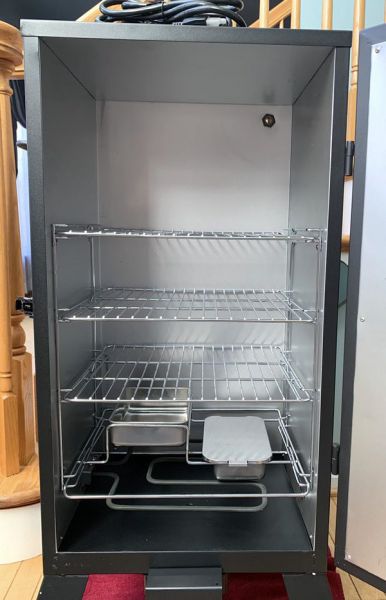
There are a handful of parts that you need to install that take just a few minutes with a screwdriver. The door and heating element are already set up. You’ll attach the legs, the side handles, and the thermometer. Once that’s done, she’s all ready to go. Here are some shots of the finished assembly. Note that this will be the first and last time you’ll see this unit in shiny, pristine condition:
Before we start, it’s important to note that Cuisinart recommends that you season the unit before first cooking. You’ll want to give the interior (except the burner coil) a wipe down with oil, or a coating of cooking spray. You’ll then close the unit and crank the heat up to 275 degrees, and let it run for about three hours. That seasons the interior and burns off any oils or dust that could have accumulated in the manufacturing/shipping process.
Key features & design details
The Cuisinart 30″ Electric Smoker feels like a solid build for the price point. The walls of the unit are insulated and about 3/4″ thick, and all the hardware looks pretty durable. It’s nice and stable when set up, which is critical for safety.
The heating element is an electric element at the base of the box. Immediately above that burner is the rack for the wood chips and water pan, followed by three cooking racks spaced 5″ apart. You’ve got 10″ of space above the top rack for large hunks of protein (like a turkey), but you can certainly adjust or remove the middle rack if you were going big (like a couple of pork shoulders). Options for hooks at the top could be nice for hanging ribs, but I wouldn’t expect that in a basic unit like this.
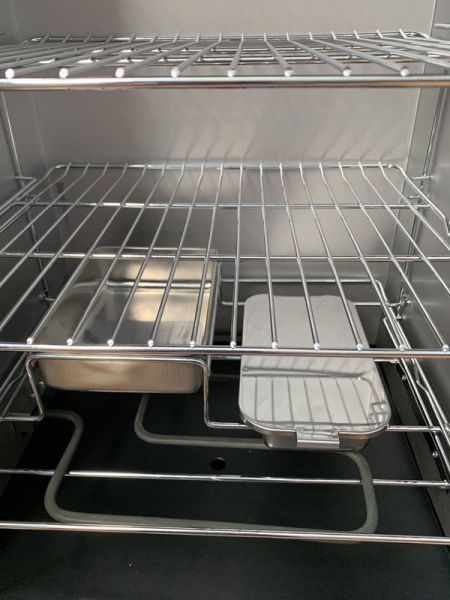
Here’s a closeup of the lower pan rig. The pan on the left is for water, which is essential for long slow cooking. The pan on the right is for your wood chips, and sits *just* above the burner to get those chips roasting. It’s also got a lid, which can be used to control the flow of smoke. Both the pans are stainless steel, and look like they will Stan up to long-term use.
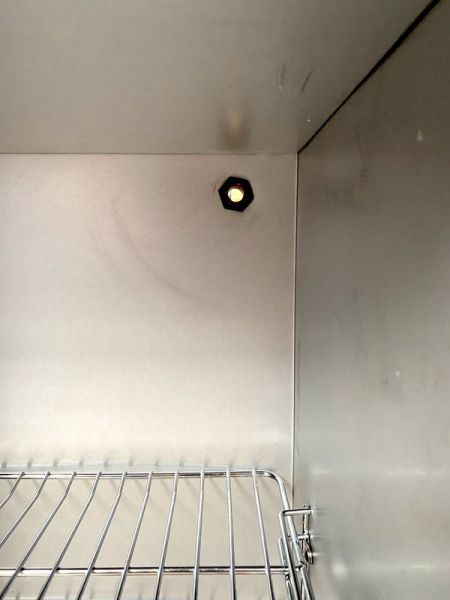
Speaking of smoke… see that tiny little port up in the corner? That’s your smoke exhaust. The unit is well-sealed, so this little port allows you to concentrate the smoke in the firebox. We’ll talk more about that in a minute.
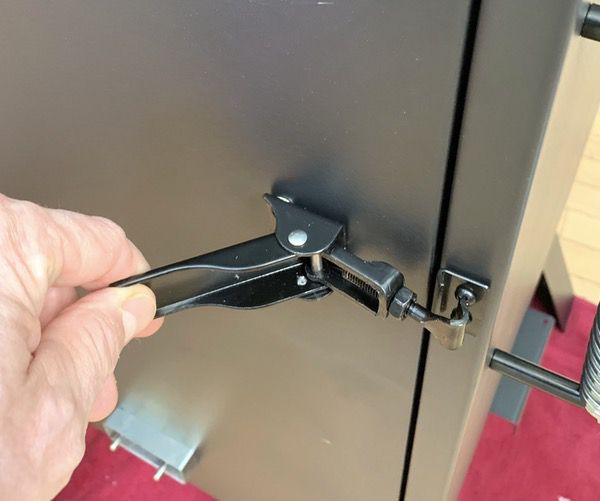
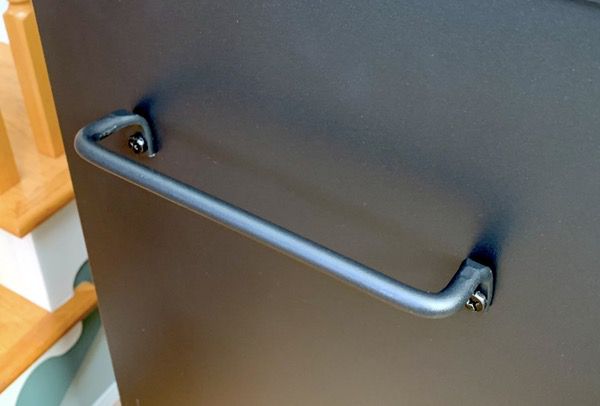
Exterior hardware is all good. It’s got a nice burly grab handle for opening the unit, and the lock uses a clever reverse-pivot system that unlocks and opens (or closes) in one motion. This is very handy for keeping your fingers from getting singed when the unit heats up:

Side handles allow you to lift & move the unit about. They’re just fine given the weight of the smoker. It is 50 pounds, so keep that in mind if you have back issues. Wheels might be more convenient, but I’ll trade them for the stability the solid legs offer.
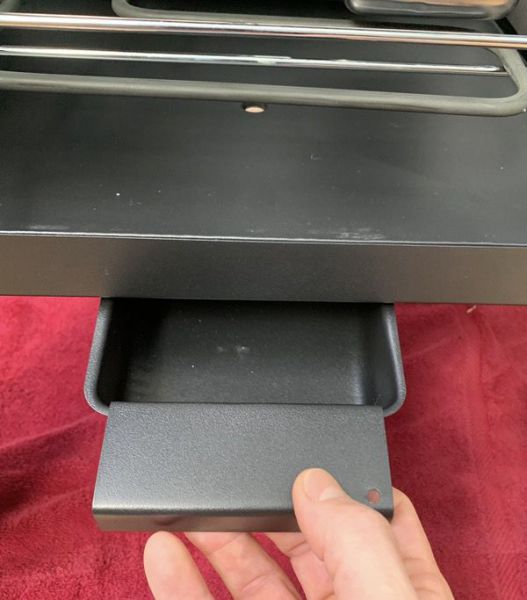
There’s a drip tray that slides under the unit in premade slots. It’s also a solid piece of metal, which I think will last a long time.
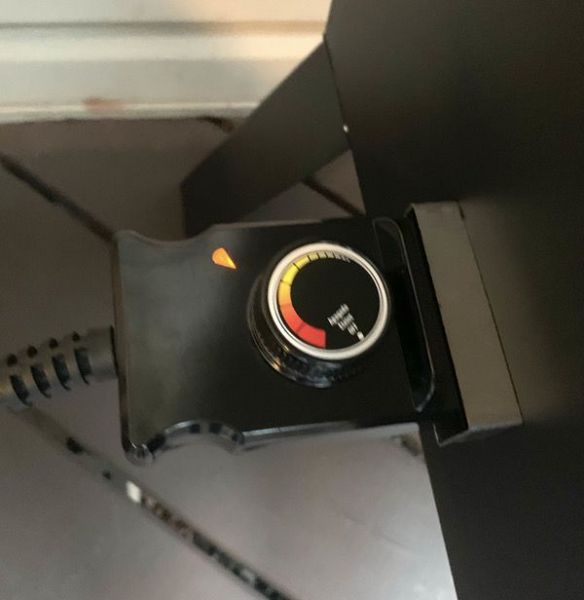
And last but not least, the power element and control. This plugs into the unit, allowing you to store it (and the chord) elsewhere. I like that quite a bit. You’ll set the coil to heat with a dial. That light-up arrow to the left is the measuring point. The light will be on when the burner is in operation.
How do you control the temperature, you ask? Well…
Performance
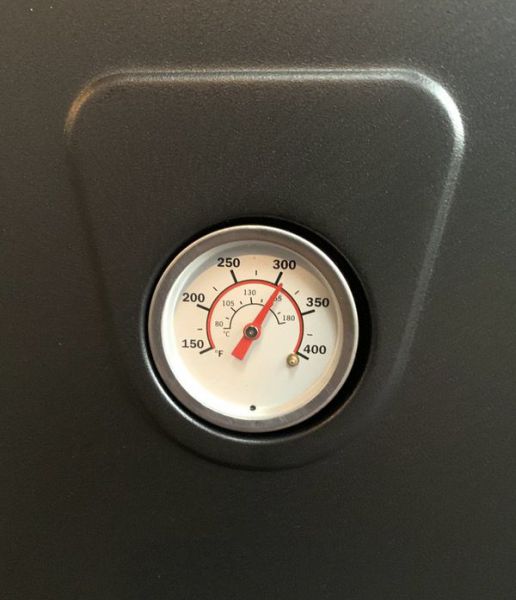
Let’s start by talking about temperature control. You’ll start by adjusting the burner to get the hot box to the desired temperature. Close the unit, fire up the burners, and let it run for 10 minutes or so (without opening the box!) to get it to temperature. Check the built-in thermometer to see where the heat is sitting, and adjust until you get it where you want it:
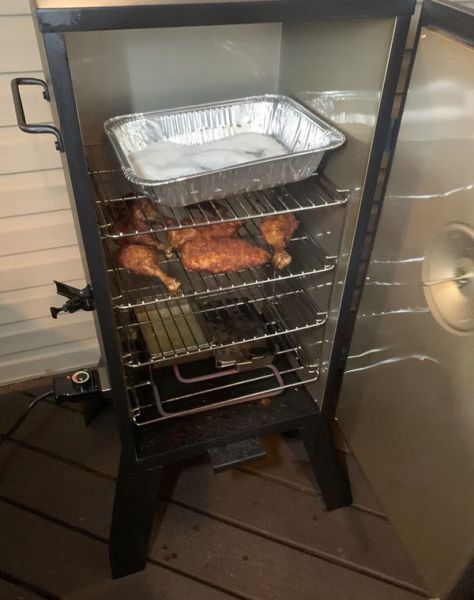
For my first cook, I was doing barbecue chicken rubbed with my own dry rub (salt, brown sugar, paprika, and spices). I set the internal temperature at 250 degrees, expecting a 2-3 hour roast time. Mesquite smoke was the wood chip choice, soaked in water for 30 minutes and drained prior to roasting. I also threw in a pan of salt to smoke while I was at it. Here’s all the product going in:
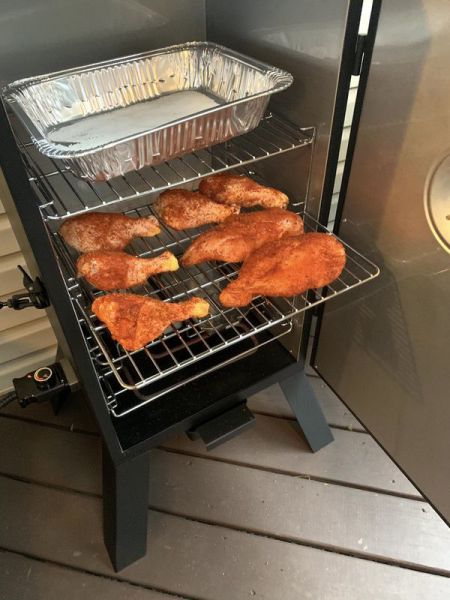
And here’s the cook at about the two hour mark:
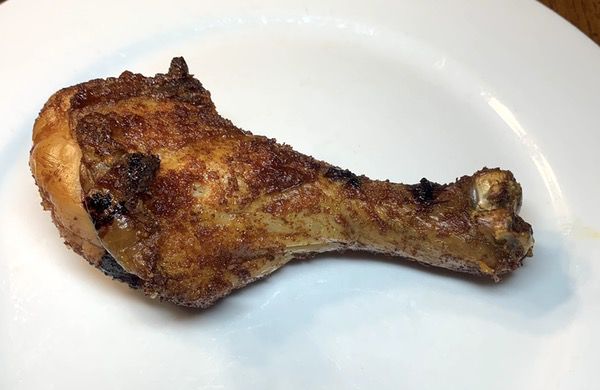
I flipped the chicken at the 75 minute mark, and added another handful of chips to the smoker box. It does take a while to get the wood chips burning at low temperatures, so that extra round of wood chips was important to getting the smoke flavor. It also seems that the hotbox might run a bit hotter than the thermometer indicates, as I was done the whole cook in just over two hours. The finished results were amazing, however. Good smoke flavor, and a nice even cook. Check out the crust on these samples:

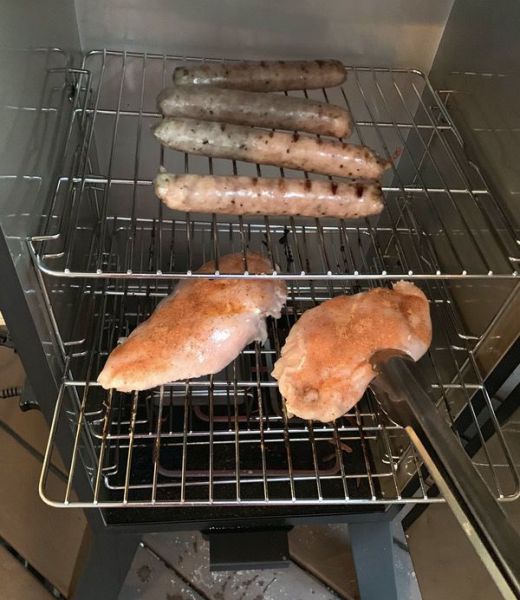
For my next cook I was going for a longer, slower cook time to smoke some fresh sausage. I set the hotbox to 225 degrees, and tested dry apple wood chips to see what the difference would be. I also added some chicken breasts done up with a dry cajun rub at the halfway point. Here’s a shot at the 90 minute point of cooking. Note that the sausage is just starting to brown up here:
At three hours of cooking all told, we’ve got nicely done sausage and chicken breasts. The smoke flavor was much less apparent in the final product, however. I suspect that the lower cooking temp has something to do with this. In future tests, I’ll probably start the unit at higher temperature for the first thirty minutes to get the smoke going, then dial it back for low & slow cooking. I’ll also test out some alternatives like smaller wood chips to see if that makes a difference.

In both cases, the smoker did a great job of maintaining a consistent temperature despite some cold, windy, and wet December days. Even if I wasn’t smoking my meats, I believe that the Cuisinart 30″ Electric Smoker is ideal for use as an outdoor oven given the consistency in heat control. I’d happily roast vegetables or just about anything else in this unit while hosting a deck party.
If there’s a downside to the design, it’s in cleanliness. There’s no mechanism in the design to collect drippings and/or fat runoff, so most of that stuff just splatters and collects wherever it falls. Check out the bottom of the unit after two cooking sessions:
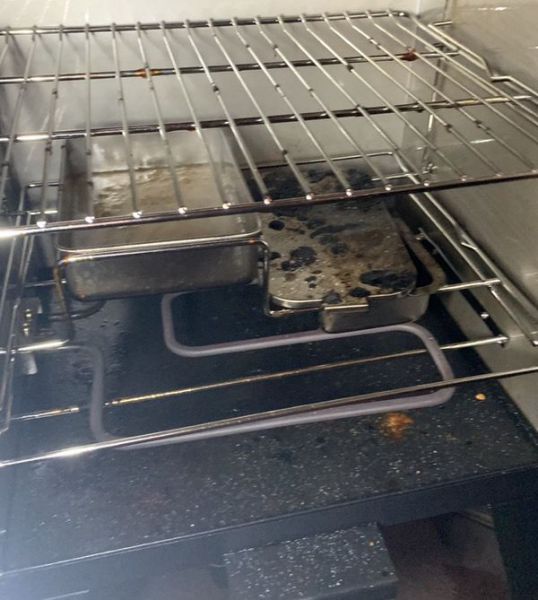
With no system for collecting runoff, the drip pan underneath really doesn’t do much good. It does catch some drippings, but only once it gets past the water tray and smoker box. I’ve noticed that grease and oils collect all around the base, and even run down the legs. I’ll probably buy a pad to put under the smoker to avoid a greasy deck, and play around with some different tin foil options to solve the drip problem. Either way, cleaning will be a challenge in the long run.
So… would I recommend the Cuisinart 30″ Electric Smoker? It depends on what you’re looking for. Compared to my old barrel smoker, it’s far easier to use and manage. I do smoke meats on my trusty Weber charcoal kettle grill as well. And there are more expensive dedicated smokers out there that include more well-rounded designs, digital temperature management, and bonus items like feeder chutes for your wood chips or pellets. But if you’re new to smoking meats and/or want something a bit simpler to use that also offers some additional versatility, the Cuisinart offers a great option at a sub $200 price point. It also adds some great convenience for those with limited space who want to do outdoor cooking, but don’t want to have a propane tank or bags of charcoal lying around (you can buy a small bag of wood chips at most hardware stores). I’ll be putting this baby to good use over the next year, and I’ll keep you updated on my discoveries.
What I like
- Easy to operate
- Consistent heat control
- Well built for a smoker at this price point
What needs to be improved
- Smoker box not as effective at lower temperatures
- A bit messy, and difficult to clean
Final thoughts
Smoking meats can be intimidating for those that are new to the process. The Cuisinart 30″ Electric Smoker offers a great & easy-to-use option for those that want to try smoking, but don’t want to invest in a more expensive piece of equipment. The additional versatility as an outdoor oven is an extra bonus. It’s also great for those that want an outdoor cooking solution but have limited space to work with or can’t have propane or charcoal grills (like apartment balconies). And at a price point under $200, I think it’s a good buy for the quality.
Update 8/24/20
As I am using the smoker pretty regularly, I’m seeing some design bugs that we should address. Several folks have pointed out that they see some leaking of juices along the legs, and I have seen this as well. I only see this on super-fatty stuff and/or large quantities of proteins, however. I suspect that there may be some seals in the base that aren’t tight. I haven’t found a workaround on this yet, but I do keep mine on a pad so that I can clean this up when it happens.
I have also seen some challenges with getting the smoker chips to fire up without assistance, especially if you’re going low & slow. Soaked chips just won’t smoulder. I have had to pre-light the chips in the box before I get started. I might play with finer chips to see if I can reconcile this one.
Either way, I’m still pleased with this electric smoker. It’s holding up really nicely to regular use. It does get a bit messy, but I’m not complaining considering the price point!
Price: $149.99
Where to buy: Available at multiple retailers. Visit the Cuisinart product page for a full list of buying options..
Source: The sample of this product was provided by Cuisinart.

ESR for MagSafe Wallet with Stand, RFID Blocking with MagSafe Ring, 5 Card Holder for Phone Case, Slim Leather Magnetic Wallet for iPhone 17/16/15/14/13/12 Series(Not for Mini), Selected Samsung,Black
11% Off
Gadgeteer Comment Policy - Please read before commenting
Hi there, thank you for the review, it was helpful. Did you ever find a better way to get smoke at lower temps?
Thank you again
Appreciate your review. One of my worries is the grease dripping down onto the heating element. Was thinking of putting a large shallow pan on the lower rack allowing enough space for the smoke and moisture to circulate. Hopefully would be easier to clean.
Do clean the interior walls after each use?
Thanks for responding.
Ed
I’ll put a pan in there sometimes to catch drippings. I’ve found that the water pan and smoker box do catch the majority of that stuff, so I don’t see a lot of flare ups.
The sidewalls will collect some stuff. I scrub them down periodically with a sponge & plain water, then crank the heat for 20-30 minutes & reseason as it’s coolling with high-heat cooking spray. But there’s only so much you can do.
Just purchased this smoker and noticed the heating element is completely exposed and was curious how you avoid grease and marinade from dripping
Hello!
Sometimes I will put a pan on the lowest level to catch drippings, but I find that the water pan and smokebox catch most drippings.
This is my first time using. My first smoke and I’m not liking how it’s going. After I loaded the 3 racks with wings, it took over an hour for the temp to even reach back up to 200 and won’t go any higher. Yes I preheated it but the temp dropped as soon as I loaded it. Any ideas? TIA
That sounds like the element isn’t working properly. You may want to contact the manufacturer!
Can I use the pellets in this smoker or it has to be the chips
I haven’t worked with pellets, but I would suspect that you could!
I’ve found that, at low temps, I have to prelight the smoking material one way or another. The chip pan just doesn’t get hot enough.
We purchased this smoker and are having a problem with drips running down the legs. It can be very messy. Can you make any suggestions to remedy this?
I have seen this as well. I’m wondering if there is a seam that could be sealed in the base. I keep mine on a pad on my deck to avoid staining the floor, but I havent seen a good solve for this yet.
Thanks for your review it was very helpful. I found there was no real smoke. I opened it a couple of times for basting. And the chip box burned very few chips. I had soaked the chips. Is there a certain amount of chips to add? Should I bring the heat up high to get the chips going? Any suggestions are appreciated
I’ve seen this at low temps as well. If I am doing low and slow, I’ve been using dry chips that I light (get ’em burning, drop the cover to kill the flames and to get the smoke started) before I start smoking to kickstart them.
THANK YOU!!! You have no idea how many websites/video links I’ve visited to find out something as simple as which is the water pan and which is the chip pan!! I’m a COMPLETE noob at this and wanted to make sure I got it right and even the product manual doesn’t show how to do it! THANK YOU SO MUCH!!!!
I’m new at this. Haven’t even plugged it in. I noticed the chip pan sits on the element at one corner of the pan. Is this going to hurt anything?