REVIEW – My husband and I have always been bicycle riders. Back in the day, we used to do the MS Bike to the Beach here in Texas where we rode 150 miles over 2 days for Multiple Sclerosis. Since then we have notbeen the true roadies we once were. We have started to ride the numerous bike paths that they have finally built here in the San Antonio, Texas area. In an effort to make himself use his bicycle more, my husband expressed a desire to be able to mount his IPhone to his bicycle’s handlebar so that he may use his bike as a method to easily get more Pokemon. Yes, he is a die-hard fan of the game. We have gone through several different mounts and not found one that is really stable and easy to use. So when I got the chance to review the Vena Magnetic Bike Mount I jumped at it. Let’s see how it worked out.
What is it?
The Vena 6Netic Smartphone Bike mount is a bike mount that uses two different methods to keep your phone safe and secure on your bicycle. It uses a six magnet phone mount and a rubber strap system to securely hold your phone in place.
What’s in the box?
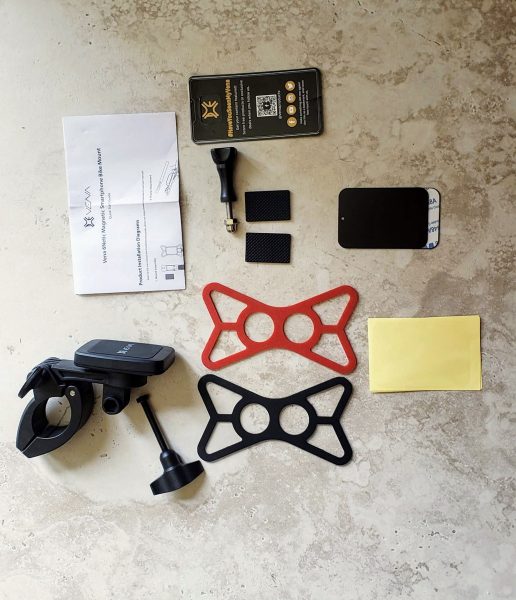
The box itself could not be any plainer. There was no outside writing on it to even describe what was in the box. However, everything inside was well packed and protected. Inside the box I found:
- The mount itself
- A long bolt with a plastic screw head and nut that is used to attach the mount to the bike
- Two different colored rubber strap systems (red and black)
- Instructions on a single sheet of paper
- A GoPro screw you can use to mount a GoPro camera to the front of the mount
- Two rubber pads used to hold the mount on the bicycle handlebars
- Two metal plates – one with 3m tape on one side and one plain
- Sticker from Vena
Design and Features
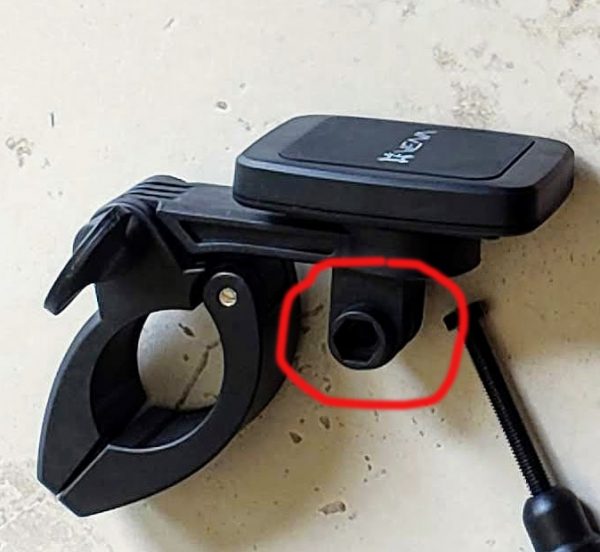
The picture below has the GoPro mount highlighted on the bicycle mount itself. I do not own a GoPro so since I could not use it, I removed it from the mount. This was easy to do with two small Phillips screws at the back of the mount. The Vena website states that you can even mount some compatible headlights using this particular mount.
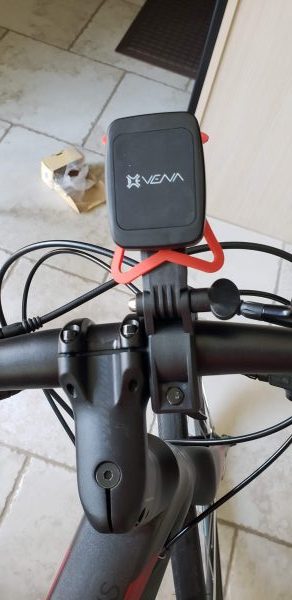
The next picture below shows you what my husband’s bike handlebars look like. He has a Specialized Sirrus which we bought last year. The handlebars are unusual in that they start off fat in the center by the stem and then go down to normal size when you get to the handlebars. This has presented us with issues when trying out other bike mounts. I would place the mount as close to the stem as possible and tighten down, but inevitably the mount would start slipping down the handlebar. A lot of this had to do with the mounts tightening down using just a basic screw that I had to tighten down with a screwdriver. Many of the mounts were awkward to mount and made tightening the mount really hard to do. The Vena mount with its large hand screw made mounting really simple.
The next picture below shows the mount completely open where it would go around the handlebar. I have just placed the two rubber grip strips inside the mount. This was very easy to do and they mounted with the 3M tape that was already attached to one side of the rubber. A lot of mounts will just give you a rubber strip you have to manually hold in place while you tighten down the mount. Having these stuck in place made mounting very easy.
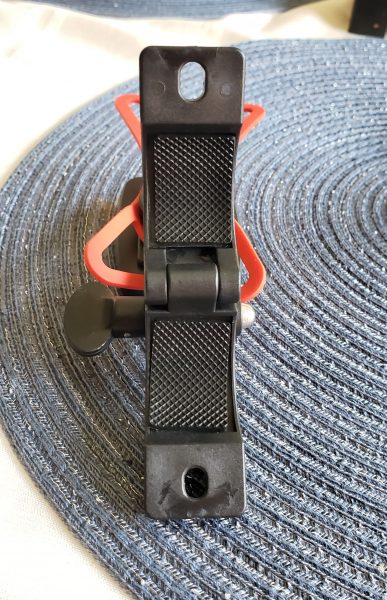
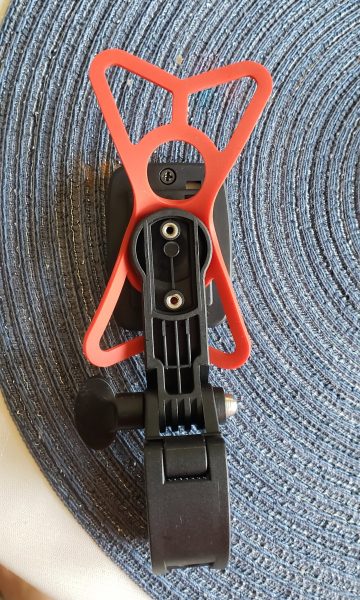
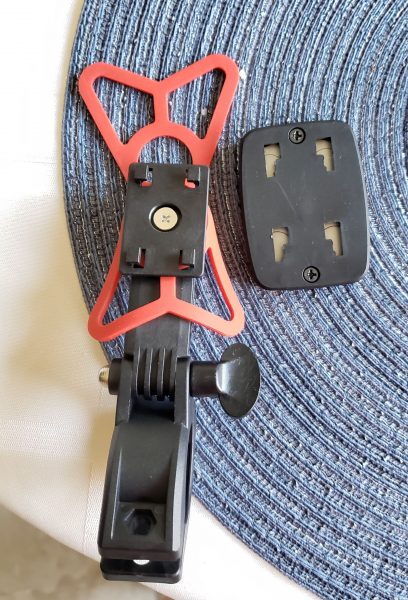
The next two pictures show how I mounted the rubber strap to the main mount. The picture on the left is showing the back side of the mount. This is the side that would be facing out towards the street in front of you. You can see the two screw holes where I removed the GoPro mount. The picture on the right is the side of the mount that would be facing the rider. I simply slid the magnet holder up and it popped off the mount. You are looking at the back side of the magnet on the right of the mount. I then slid the rubber strap over the magnet mount then clipped the magnet back in place. There were two identical circles in the rubber strap so I just picked on and left the larger part of the strap system sticking out of the top of the mount. The instructions were not very helpful in showing how to mount this rubber strap.
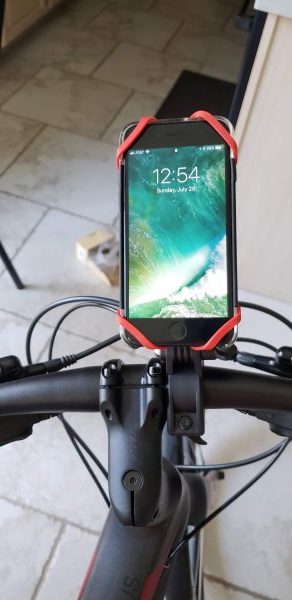
In the picture below you can now see the mount on the bicycle. The knob on the right lets you adjust the angle in which the phone is viewed.
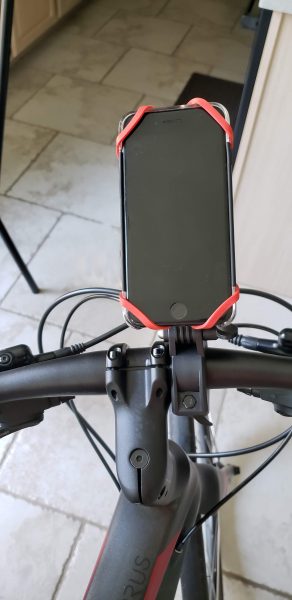
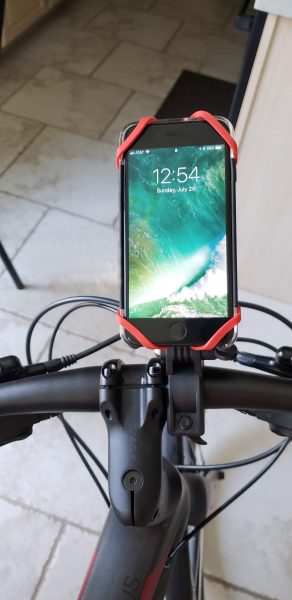
The next two pictures show you how the mount looks with my husband’s iPhone 7s installed. Something to note, I wonder if you had an iPhone X with no bezels if the rubber straps would interfere with phone usage? I took one of the metal plates and placed it inside the phone case between the phone and the case. I could not even tell it was there once mounted. I then place the phone on the mount where it was held in place by the magnet. Finally, I pulled the rubber straps out and around each corner of the phone. Let’s just say that phone is going nowhere. I literally picked the bike up and bounced it several times on the tires in an effort to dislodge the phone and it never budged. Time, of course, will tell if the mount itself will slip on the handlebars, but at least my husband will be able to hand tighten it out on the trail.
What I like
I love how easy it was to mount this smartphone holder on to the bicycle. Just being able to have a nice sturdy plastic screw head to be able to hand tighten down the mount without any tools was awesome. I also loved how they gave you the capability to easily change the angle at which you view the phone. Finally not having to manually hold a rubber strip in place while trying to tighten down the mount was also a big plus. So far the mount has held steady over a couple of rides with no issues.
What can be improved
The only concern I would have is what I mentioned before about the rubber straps going over a screen instead of just bezels like on the iPhone 7. I wonder if the touch screen would think the straps are fingers touching the screen. Maybe someone who has used a similar mount can comment on this. They also could improve their instructions so they could show exactly how the rubber strap should go on the mount.
Price: $16.99
Where to buy: Amazon
Source: The sample for this review was provided by Vena.


