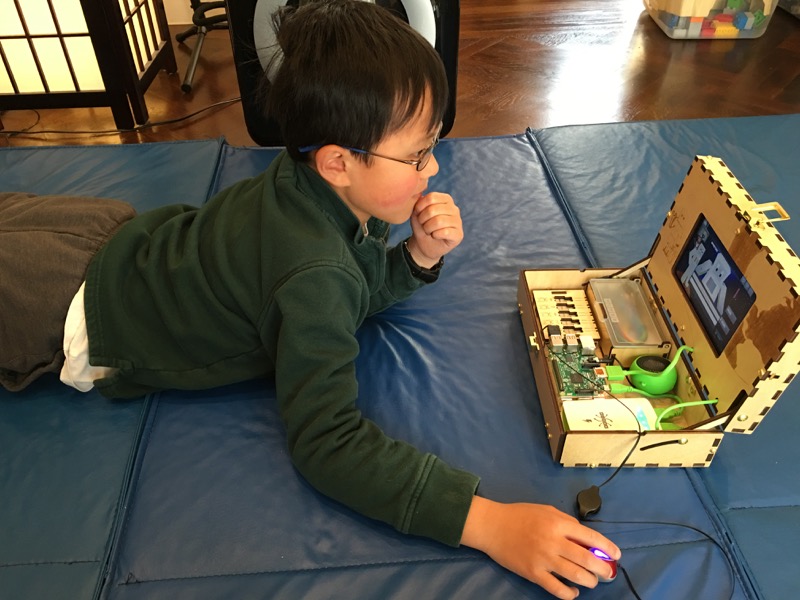
My son Joey is now 10, and like many his age, loves Minecraft. I’ve seen other attempts at creating educational products with Minecraft, but nothing quite like the Piper Computer kit. A “build it yourself” computer that plays Minecraft? I decided to take a hands-off approach and let my son build it all by himself. Let’s see what happens.
The idea of the Piper kit is to introduce kids to the world of tinkering and getting hands-on, all in a safe, controlled environment. That’s something I can get behind! Here’s what comes in the kit: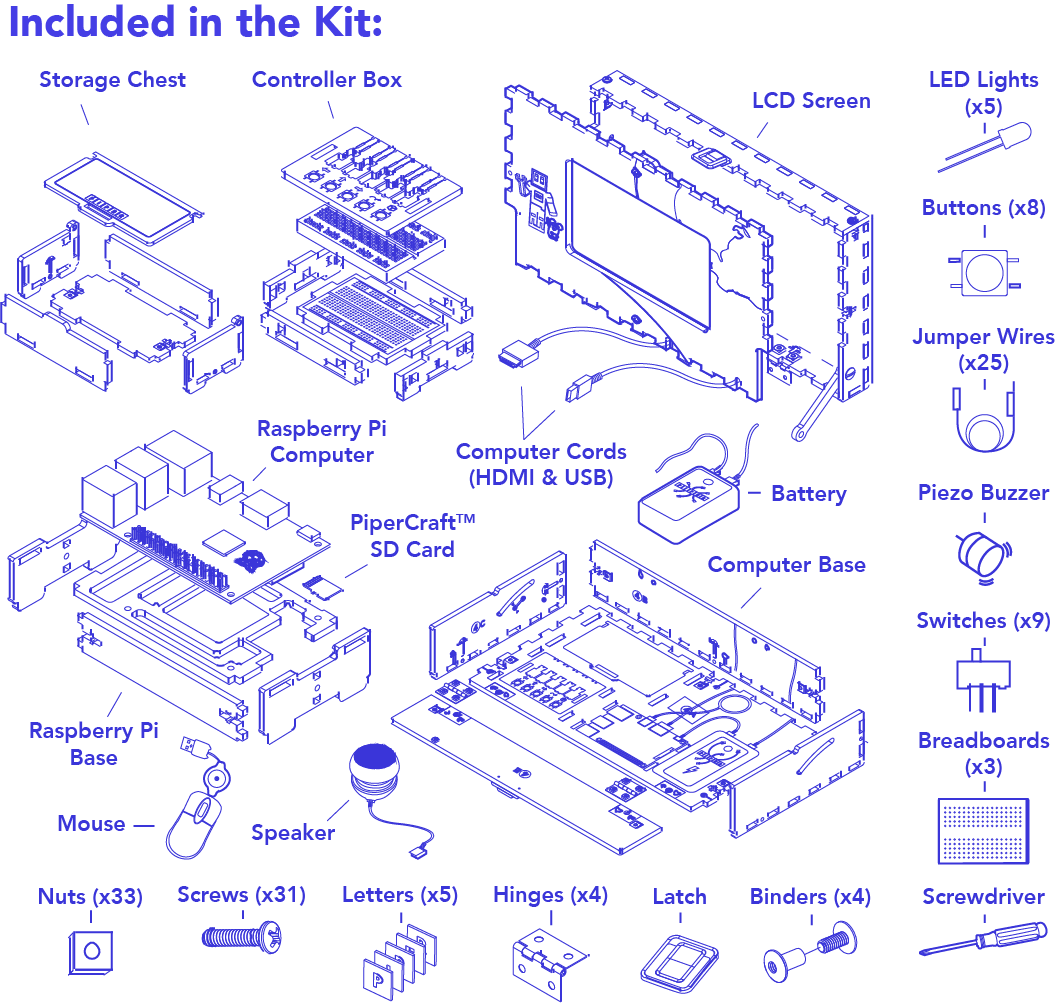
Product Specs
Wooden Box
- 3.5” x 6.5” x 11” once assembled
- 9.5mm thick pine wood
Screen
- 7″ LCD display
- 800 x 480 screen resolution
Battery
- Input: 5V/1A Output: DC5V/1A/2A
- Capacity: 5500mAh
Mini-Stereo Speaker
- 3.5mm jack
- USB charging
- High capacity battery
Raspberry Pi Computer
- 1.2GHz, 1GB RAM
- HDMI, USB, and AV jacks
- Built-in Wi-Fi
SD Card with PiperCraft™
- 8 installed game levels
- Free downloadable content
https://www.youtube.com/watch?v=G9O1aNiig_Q
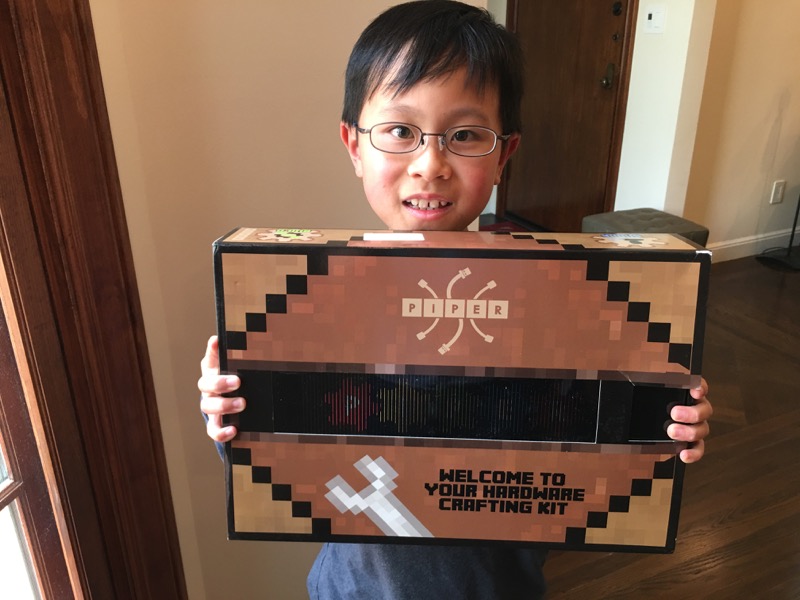
Here’s the actual box. It’s hard to photograph, but the dark stripe across the middle is actually an animated motion thingy. As you slide the box out, the clear window animates the Piper text in twirling gears. Even the box is neat!

The contents of the box are neatly laid out. All the smaller components are bagged.
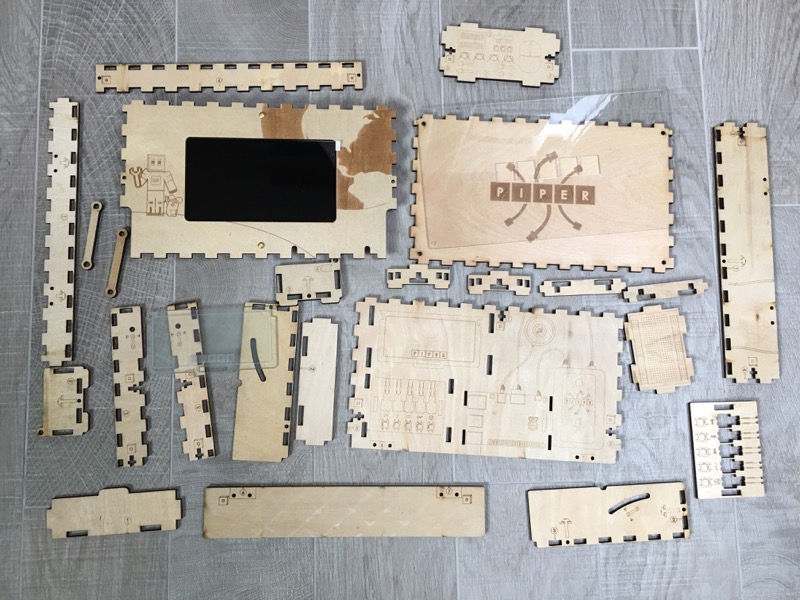
The wooden pieces resemble a 3D puzzle. Smells nice!
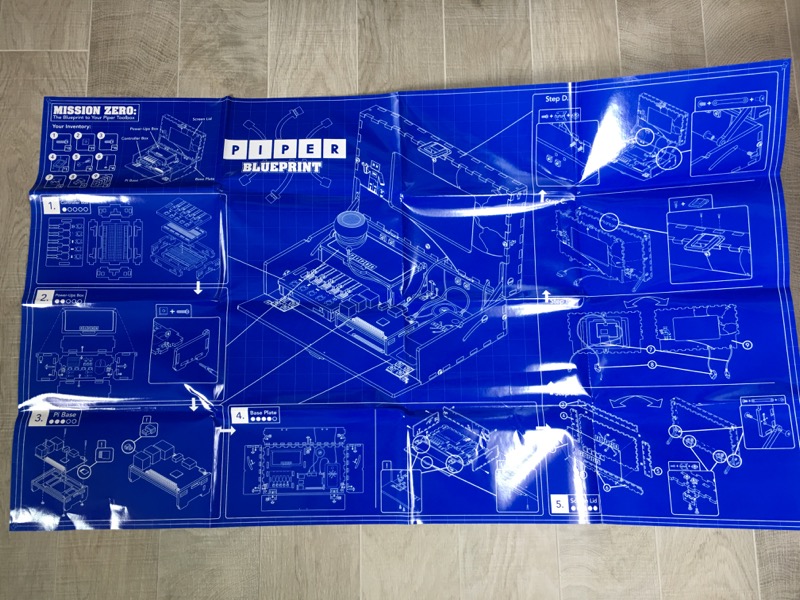
The “blueprint” is one giant fold-out poster. No page flipping required.
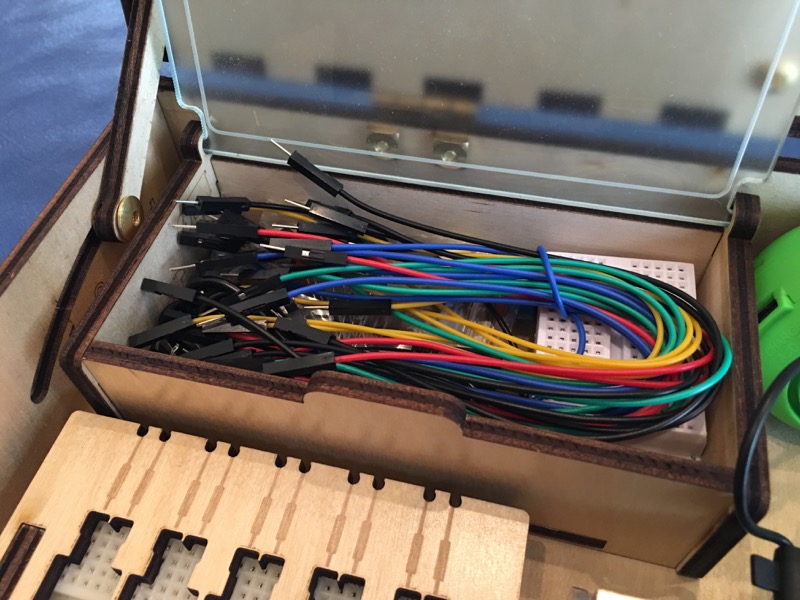
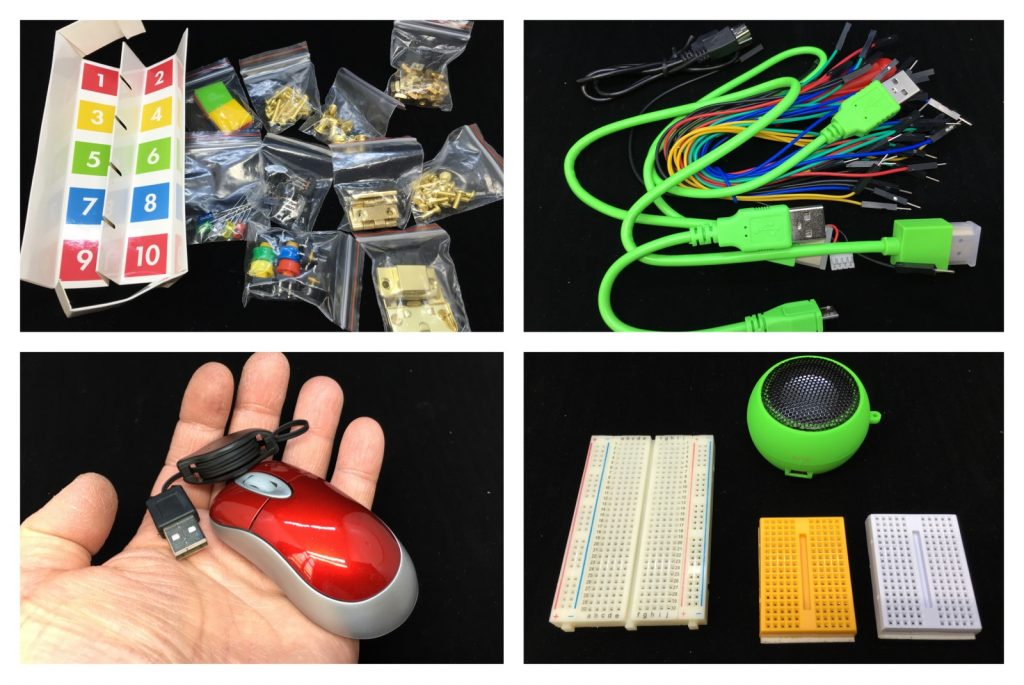 Here are some of the other components, including wires, nuts and bolts, a teeny USB mouse, three breadboards and a round speaker.
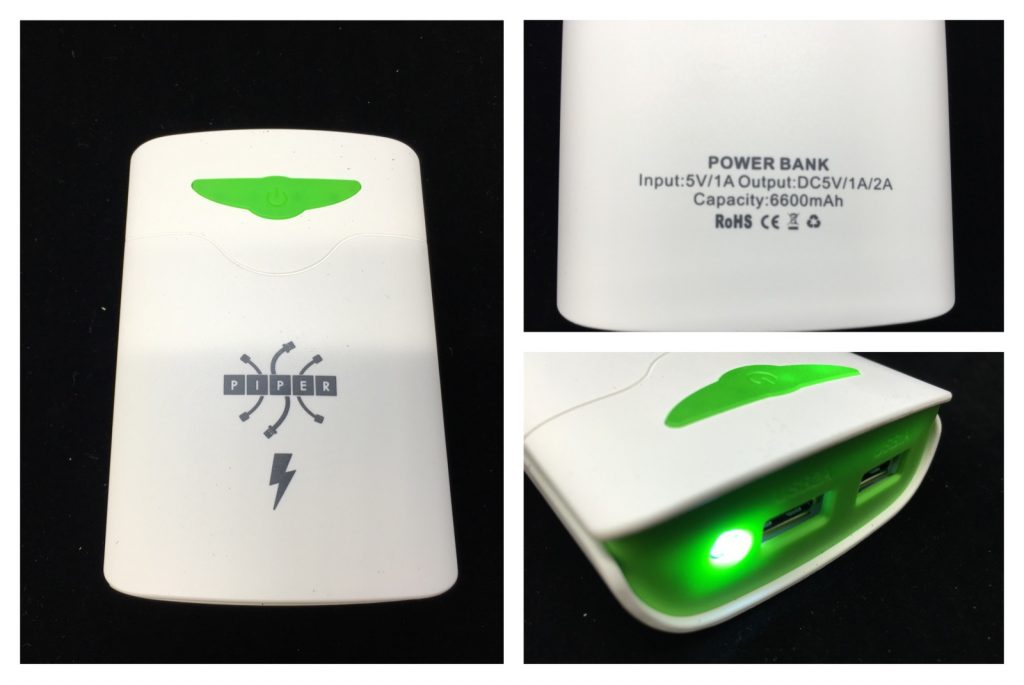 The kit is powered by a USB battery pack. This one is listed with a 6600mAh capacity, which differs from the specs on the website (5500mAh). I suspect suppliers and hardware are subject to change. It recharges like any other pack via microUSB. This pack has a built-in LED flashlight and a very hand four-LED “fuel gauge” where the power button is.

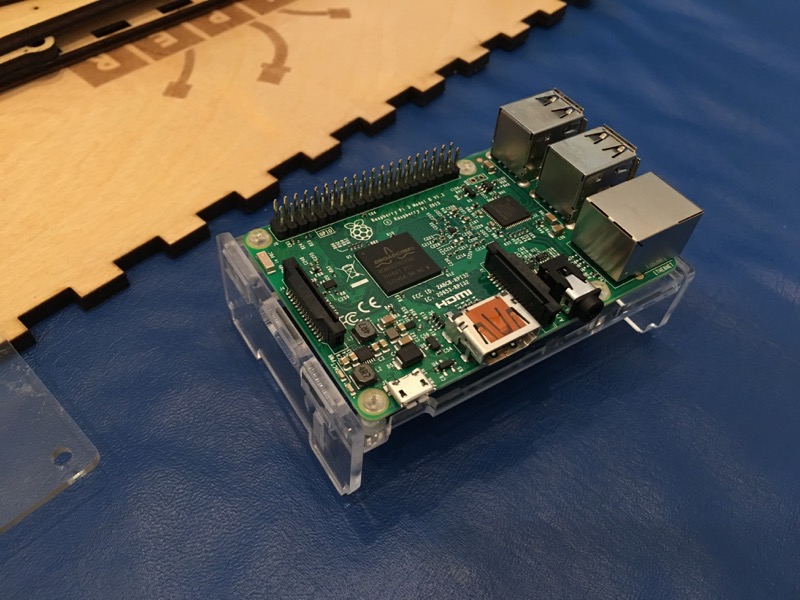
The brains of the kit is the Raspberry Pi 3, a low-cost computer that packs a punch with four USB ports, wired Ethernet jack, wifi, Bluetooth, dual-row I/O pins, HDMI video out… it’s the tinkerer’s dream. A microSD card comes preloaded with the Piper Minecraft “game”.
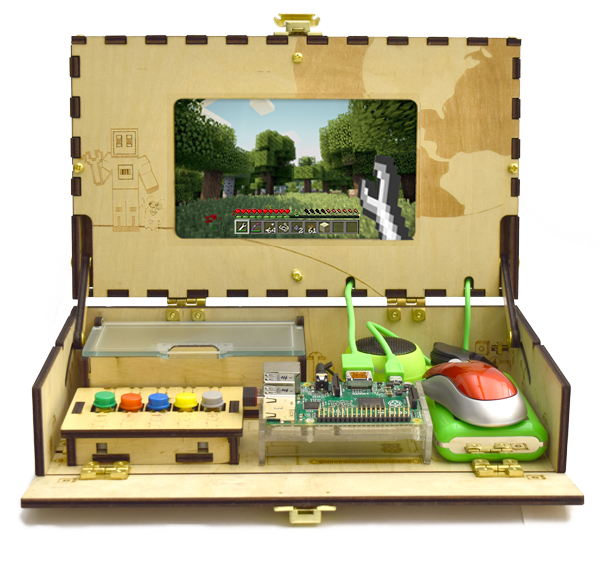
 LCD displays can be fragile. The Piper kit solves this by pre-assembling this into one piece.
 My son is experienced in building with Erector/Meccano, so manipulating screws and nuts wasn’t too big of a deal. The kit even comes with a kid-friendly screwdriver, sized for small hands. The wooden pieces snapped together without too much swearing.
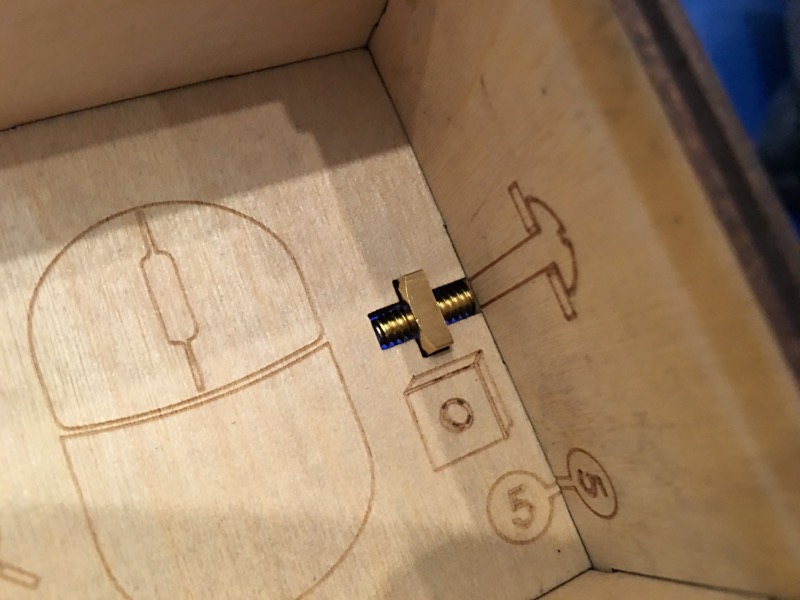
The parts that use screws are joined with this clever method, best explained with the laser-etched markings on the wood panels themselves. So very clever!
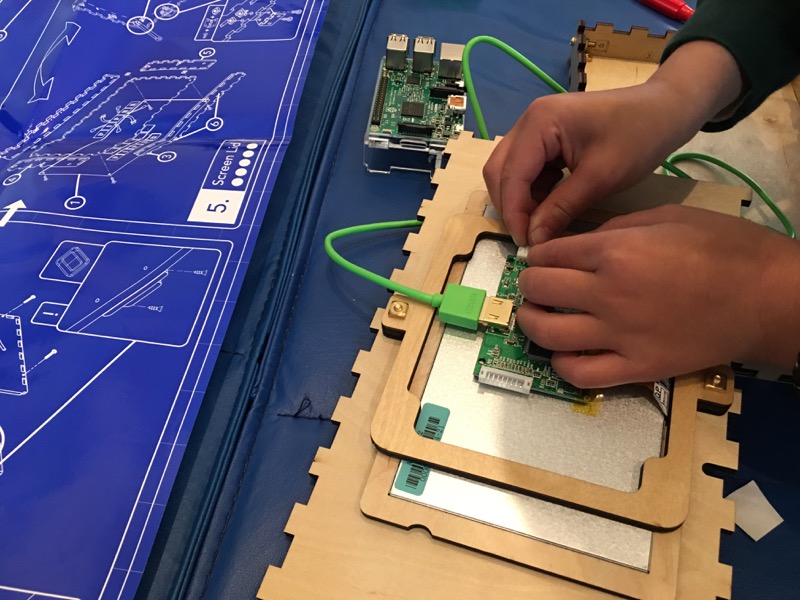
The screen only has two connections: An HDMI cable for video, and another cable for power. Both cables are the same bright green. At first I thought it would be smarter to make these cables different colors to make it easier, but then I realized that in real life, how often does that happen? This shows kids to pay attention to connector types. Here’s Joey in the final stages of case construction, and an issue came up: One type of screw was coming up short. The most common type of screw were these two identically threaded ones: one short, one long. However, the assembly instructions aren’t clear on which one to use. It would probably be wise to either include extras of both kind, or to indicate which (shorter, longer) on the printed instructions.
 Another nice touch was the laser-etched layout of the case itself. It shows the relative position of each part (computer board, battery, etc.)
One of my favorite touches was this little storage box, complete with frosted lid.
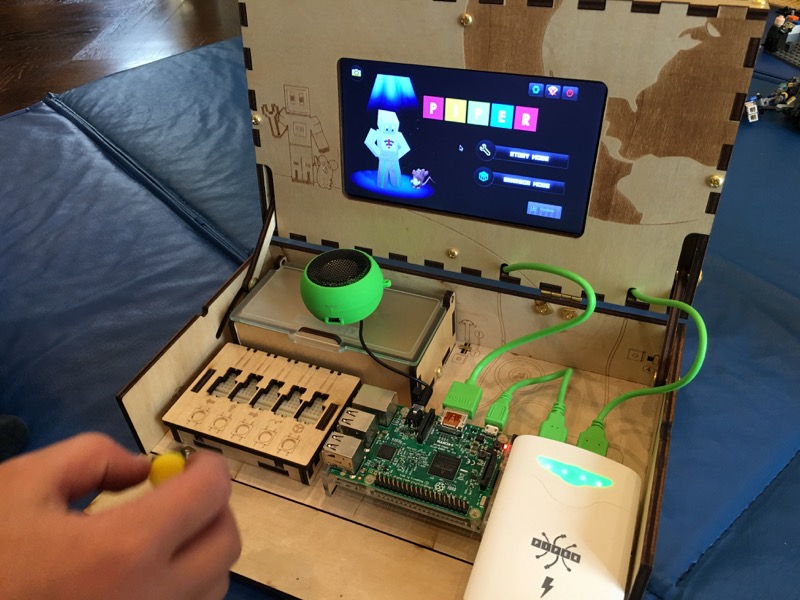
Time to boot up! The Raspberry Pi (with the included microSD card) boots up into this start screen. Since the Raspberry Pi is capable of wifi, you can update the software from this page.

The “game” is very clever. To move your character around, you need to wire up buttons and switches. The screen directs you (Minecraft-style!) how to connect wires to the breadboard and switches to the Raspberry Pi with animated graphics.

Here’s a closeup of how the wires and switches are represented.

Later in the game, you use momentary buttons, switches, LEDs and buzzers to a smaller breadboard. Didn’t grow up around breadboards like I did? No worries. Just follow the on-screen instructions.
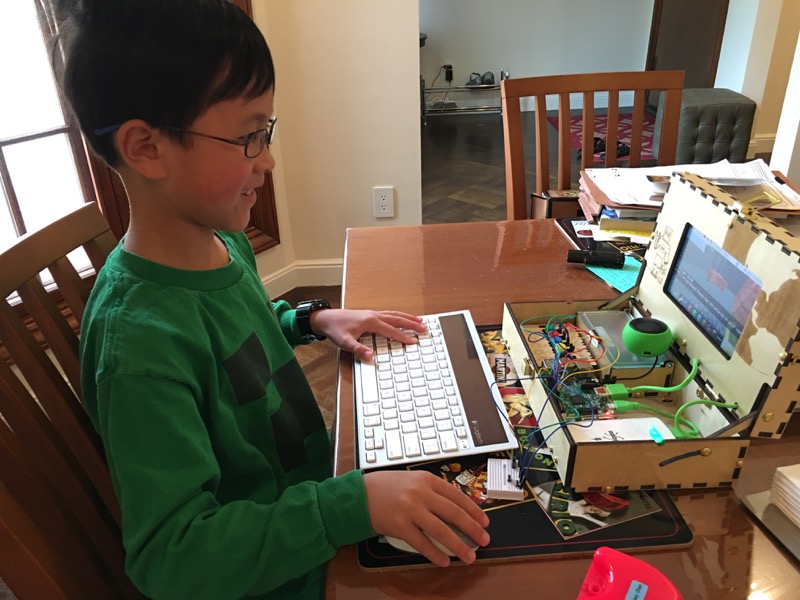
Once the “game” is complete, the Piper includes a Raspberry Pi-edition of Minecraft. However, what you may not realize is that the Piper kit is also a fully-functional Raspberry Pi computer. The preloaded Minecraft tutorial is completely optional. I have barely begun to scratch the surface of projects we can do, but I know that we’ll be ready. Here, I managed to pair a Bluetooth keyboard and connect a wireless USB mouse.
For an intermediate Minecraft player like my son, the actual Piper game was very basic. Clicking around with the hard-wired buttons he built wasn’t the most pleasant gaming experience, but that’s not the point. He got to build this computer case from a kit all by himself, with nearly no adult input (except the mismatched screws). There are other educational electronics kits, such as Snap Circuits, but the Piper kit uses real wires, components, and a breadboard- exactly the kind of bits that next-generation DIY’ers should be using. The icing on the cake is that now my son has a complete Piper/Raspberry Pi computer- complete with screen- that he can say he built by himself. It’s hard to put a price on that kind of achievement.
Source: The sample for this review was provided by Piper. Please visit their site for more info and Amazon to order.

KAMRUI Essenx E1 Mini PC Computer, AMD 3150U (Beats i3-10110U/N95), 8GB RAM 256GB SSD, Mini Desktop Computer Support Dual 4K, WiFi, Bluetooth, Ethernet for Business, Education, Home
(as of June 19, 2026 20:24 GMT -05:00 - More infoProduct prices and availability are accurate as of the date/time indicated and are subject to change. Any price and availability information displayed on [relevant Amazon Site(s), as applicable] at the time of purchase will apply to the purchase of this product.)
GMKtec G3 Pro Mini PC, Intel Core i3-10110U (Beats 4300U/N150) 16GB DDR4 (Dual Channel) 512GB PCIe M.2 SSD, Desktop Computer 4K Dual HDMI/USB3.2/WiFi 6/BT5.2/2.5GbE for Office, Business
(as of June 20, 2026 09:30 GMT -05:00 - More infoProduct prices and availability are accurate as of the date/time indicated and are subject to change. Any price and availability information displayed on [relevant Amazon Site(s), as applicable] at the time of purchase will apply to the purchase of this product.)Product Information
| Price: | $299 |
| Manufacturer: | Piper |
| Retailer: | Amazon |
| Requirements: |
|
| Pros: |
|
| Cons: |
|
Gadgeteer Comment Policy - Please read before commenting
That’s pretty cool, and I didn’t think there was any way a 10-year-old was going to put that together unassisted. They recommend it for 7-year-olds! That sounds a bit ambitious.
I was doing this stuff when I was 10 easy. Maybe even 7. I was soldering in 4th grade.
Ditto. The hardest part of the kit was not bending the tiny leads going into the breadboard, but even that’s just a matter of explaining things.
Andy, this is a fantastic review! Joey did a great job, and I’m sure you guys had a blast together building his computer and documenting it along the way. Thanks for sharing this. Man, to be a 10-year-old in 2016!
Thanks for the review! I wanted to know, was it difficult to pair the keyboard and the wireless mouse? I have some programming experience, but I’ve never worked with Raspberry Pi before.
If you use standard (NON-BLUETOOTH) Wireless Keyboard and Mice there will be no pairing process. Simply plug the receiver that came with mouse and keyboard into the USB on the Pi. If you wish to use a Bluetooth keyboard and mouse it will become a bit more complicated.
The review says it comes with a Pi Version 3. I however haven’t found where it says that on the website. The Version 3 comes with bluetooth built in. However if you receive a V2 you will need to purchase a cheap BT receiver on amazon $5-11. You can then use various guides online to pair your BT mouse/keyboard. Keep in mind you will need a normal USB or Wireless (non-bluetooth) keyboard/mouse to start this process.
However MOST wireless mice and keyboards are not Bluetooth so you should be fine.
Beat me to it. Correct. I don’t exactly recall how I paired bluetooth, but it wasn’t difficult. I think I googled the process. There’s a wealth of info on Raspberry Pi out there.
DOESN’T COME WITH A KEYBOARD! NOOOOOOOOOOOOOOOOOOOOOOOOOOOOOOOOOOOOOOOOOOOOOOOOOOOOOOOOOOOOOOOOOOOOOOOOOOOOOOOOOOOOOOOOOOOOOOOOOOOOOOOOOOOOOOOOOOOOOOOOOOOOOOOOOOOOOOOOOOOOOOOOOOOOOOOOOOOOOOOOOOOOOOOO!!!!!!!!!!!!!!!!!!!!!!!!!!!!!!!!!!!!!!!!!!!!!!!!!!!!!!!!!!!!!!!!!!!!!!!!!!!!!!!!!!!!!!!!!!!!!!!!!!!!!!!!!!!!!!!!!!!!!!!!!!!!