 I’ve tried a lot of Bluetooth keyboard cases for the iPad, and they all suffer from the same complaint. Regardless of any other features they may offer, all keyboard cases have undersized keyboards. If you’re a true touch-typist, like I am, you’ll find it very hard to type on these small keyboards because your finger placement and movements aren’t “right”. Even if you manage to adjust to the smaller size, you’ll find that a lot of the punctuation keys aren’t where you expect them to be. The absolute best Bluetooth keyboard I’ve tried with my iPad is the Apple Wireless Keyboard. Inspired by some comments on my last keyboard case review, I decided I’d try to find a case that carries both the iPad and the Apple keyboard and that could be used as a “keyboard desk” on your lap or on a tabletop.
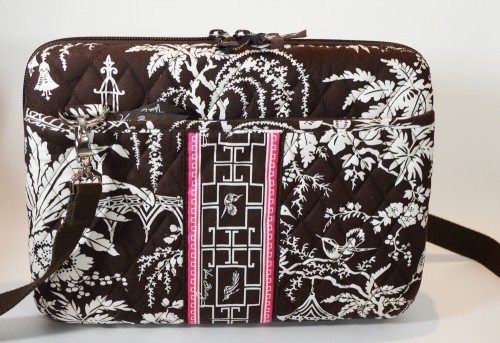
I didn’t have any luck finding such a case, so I decided I’d try to hack my own case. I started with the Vera Bradley Mini Laptop Case. I reviewed one of the Mini Laptop cases back in 2010, and you can read that review for specifics about the case. Let’s take a look to see what I did and why I chose this case as my starting point.
I realize that the Vera Bradley case isn’t going to appeal to everyone, but I was familiar with this case and could visualize how I could work with it. There may be other cases on the market that are plainer and that may even work better than this case did.
All pictures in this review can be clicked for larger images.
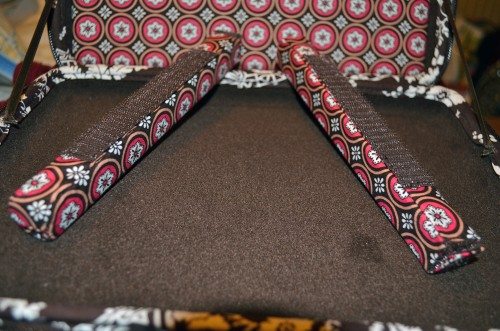 I thought of the Vera Bradley Mini Laptop because the bottom of the case is covered in a velvety fabric that acts like the loops for Velcro. The case comes with two fabric-wrapped hard foam bars with Velcro hooks sewn on one side. You use those bars to adjust the size of the storage area to keep your netbook, portable DVD player, or other small electronics from sliding around in the case. I thought I’d be able to arrange them to act as a brace for the bottom of the iPad. The top of the iPad would lean back against the top of the Mini Laptop case, and I’d have an iPad stand.
Of course, the problem with that plan is that the Mini Laptop opens up like a book and lays completely flat. I’d need to add some sort of strapping to prevent the case from opening flat.
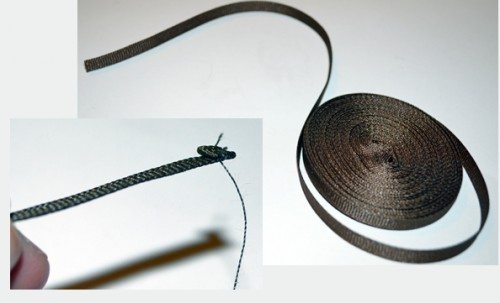 I ordered some brown grosgrain ribbon to match the color of the brown Mini Laptop. I got 0.25″ wide ribbon, but I think something wider might have worked better. I folded the end of the ribbon down a couple of times and sewed it together to prevent fraying.
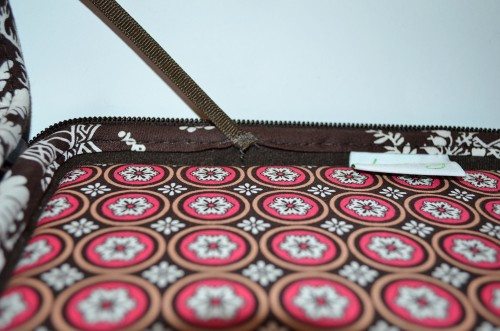 I then selected a point on the side of the case to attach the ribbon. The body of the Mini Laptop is hard and is molded into a clamshell shape. I couldn’t push the needle through the stiffening material, so I sewed the ribbon into the fabric edge on the top of one side. I just eyeballed the length I’d need to hold the top open at 90-degrees, cut the free end of the ribbon, folded it down, and sewed it to the bottom side of the case. I repeated those steps for the other side of the case.
This wasn’t as easy to do as it might sound. The fabric is attached tightly to the hard interior shell, and it was hard to get a needle through the fabric without it jabbing into the shell. It might have been easier if I had a curved upholstery needle, but I didn’t have one on hand.
Once both ribbons were in place, the case was held open at about 90-degrees.
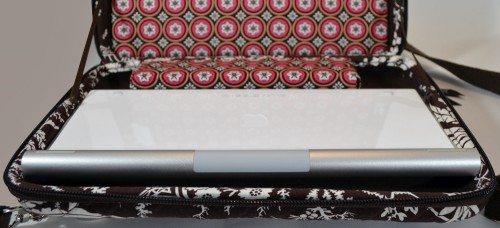 The bottom of the case is about 0.6″ deep. The curved shape prevents the keyboard case from fitting in completely to the bottom, but the width of the case is sufficient for the Bluetooth keyboard. I decided I’d put the keyboard in with the keys facing the bottom. The curved shape suspends the keyboard, so the keys don’t touch the bottom. There’s no pressure on the keys this way.
I shoved both of the Velcro bars to the hinge-side of the bottom. As luck would have it, the height of the Velcro bars is about the same as the height of the battery compartment on the back of the keyboard when it’s laying in the Vera Bradley case.
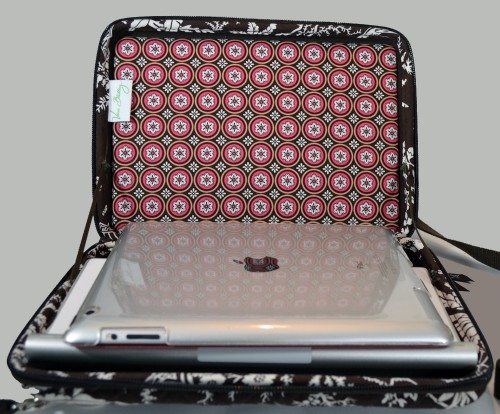 I could lay the iPad down over the keyboard, and the iPad was supported by the battery compartment and the two Velcro bars. I show the iPad with the screen down in this picture, but I think it might actually be better to have the screen up. The screen would be protected by the padded top of the Mini Laptop case.
The bag has a fabric hinge, and both the top and the bottom have depth (about 0.4-0.5″ for the top). I could easily close the Mini Laptop and zip it up with the keyboard and iPad inside. Everything was held tightly enough inside that I didn’t hear anything sliding around.
The Mini Laptop has a zippered pocket on the front (behind the open lid) that can easily hold the charger and cable for the iPad and extra batteries for the keyboard. There’s a full-length pocket on the bottom, but you should probably only put flat things in that side so the case can sit evenly.
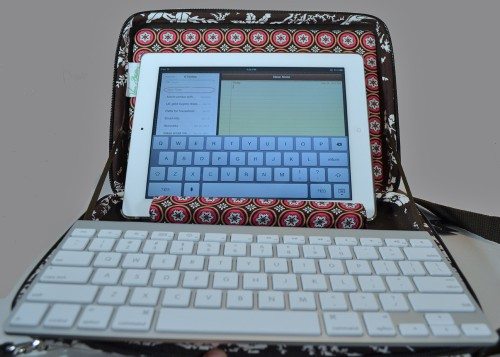 To use the keyboard case, I attached one of the Velcro bars near the hinge to serve as the base for the iPad stand. There’s a little room to move the placement of the Velcro bar, so you can adjust the angle of the iPad. It’s shown in the landscape orientation, but it also works for portrait.
What you can’t see is that I placed the other Velcro bar under the keyboard, near the battery compartment. I set the front edge of the keyboard on the lip of the Mini Laptop case, so the keyboard is supported and elevated so your wrist isn’t sitting on the zippered edge of the bag.
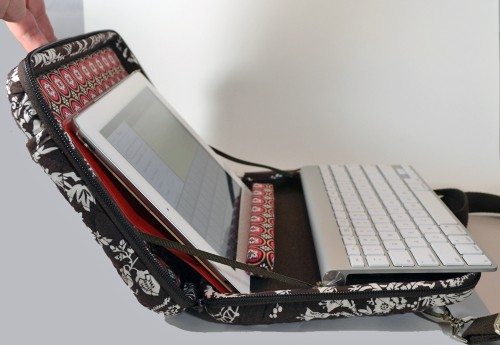 Even when empty, the case tipped back a bit when I had it open to the 90-degrees held by the ribbons. With chargers, batteries, and cables in the exterior zipper pocket, the tipping was worse. With the iPad leaning against the open top, it would simply fall back. You can see that the back had to be supported to even get this picture. I was hoping the keyboard would help stablize the position, but it’s simply not heavy enough to counterbalance the weight of the case and the iPad. Trying to use this case on a tabletop wouldn’t work, because it would tip over the minute you lifted your hands off the keyboard. Using it on your lap would be disasterous, because your iPad would almost certainly fall to the floor if you moved your hands off the keyboard.
I suppose I could try to put a weight in the open pocket to balance the open case, but who wants to carry an iPad case that’s as heavy as a laptop? I suppose you could try pulling the shoulder strap around your leg and sitting on it, but that still leaves you open to breaking your iPad if you shift in your seat and the strap slips free.
It was a good thought, but I think I’m back to the drawing board.


Gadgeteer Comment Policy - Please read before commenting
You haven’t failed, you just found 1 way that didn’t work.
Great start. I purchased a couple of extruded plastic clips (created in a Kickstarter project) that would let you prop the iPad (or even an iPhone) onto the Apple Wireless keyboard. Carrying those along in the front pocket might clear up the tipping problem.
@Mina I haven’t given up yet. I’ll have a couple more posts on the search for a “keyboard” case coming soon!
@JR Thanks! If you’re talking about the WINGStand, I bought a set of those that I’ll be reviewing soon.
If your bag can contain an Apple Bluetooth Keyboard, you can use the Origami Workstation from InCase that I reviewed back in 2011. I still am using the one shown in the review, although I have had to re-epoxy the fasteners down a few times. It adds almost no size or weight, and if you just can’t forgo the Vera Bradley look, I’m sure you could cover it with a fabric that would befit your case. 😀
http://the-gadgeteer.com/2011/08/13/incase-origami-workstation-review/
Smythe, I did get one of the Origami cases, and I think it works really well. I don’t actually need to use a keyboard with my iPad very often. This was mostly just an exercise to see if I could make it work. 🙂