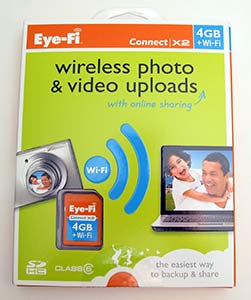
 Julie last did a review of the Eye-Fi photo-transfer SD cards in May 2010 . There’s been a few changes since then so having just obtained a Connect X2 SD card with wireless photo and video uploads from Eye-Fi (with assistance from Julie), I thought I’d cover some of the features not covered in Julie’s older review either because they weren’t available or because it was a function she didn’t use. I’ll also try and answer some of the comments from the old review that were never answered. Read on after the jump.
Since Julie’s review, there’s been 8 firmware upgrades, so hopefully there’s been some changes to functionality and bug fixes in the updates. Nice to see a company that stands behind development of its product. The nice thing is that even though Julie has had her Eye-Fi for a while, she should be able to upgrade the firmware to get the added functionality.
Eye-Fi has 3 current models at the time of writing, each with slightly different functionality, with the main differences being memory size, hotspot access, and geotagging. If you purchase a card that doesn’t support a function, you can upgrade it to add it; however, this will incur a yearly renewal fee.
The hotspot functionality was useless to me as it mostly covered the US and there wasn’t much use having it in Australia.
“Want to upload away from home? HotSpot Access enables you to upload from open networks and over thousands Hotspots including Starbucks, Barnes & Noble, McDonalds, hotels, restaurants and airports. Cards with this feature have 1 year of HotSpot Access included, renewable yearly thereafter. If not included, the card can be upgraded.”
My solution to get around this IF I need to is to create a WiFi hotspot with my Android phone, though data charges and the size of photo files these days is something to keep in mind if you’re going to do this.
After file transfers, the function that interested me the most in regards to the Eye-Fi was the geotagging feature. The question was how did they fit a full size GPS into such a small card? The answer, they didn’t. 🙂 The geotagging feature uses Skyhook’s wireless service. In Skyhook’s words:
“To pinpoint location, Skyhook uses a massive reference network comprised of the known locations of over 700 million Wi-Fi access points and cellular towers. To develop this database, Skyhook has deployed drivers to survey every single street, highway, and alley in tens of thousands of cities and towns worldwide, scanning for Wi-Fi access points and cell towers plotting their precise geographic locations. Skyhook’s extensive coverage area includes most major metro areas in North America, Europe, Asia, and Australia. “
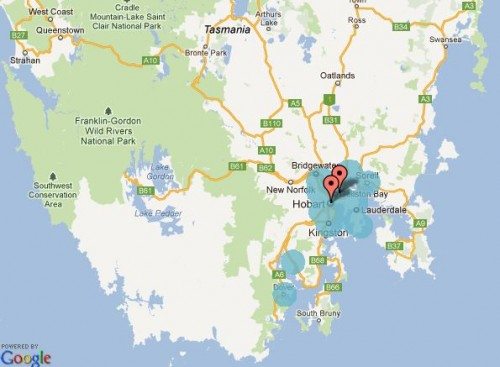 As such, the geotagging feature wasn’t that useful to me as I spent a lot of time NOT in major metro areas. You can see in the map above how limited the coverage in my state is. Now the best photo opportunities here are WAY outside the metro area 🙂 You can check out your own area on their coverage page, but something to keep in mind is that this method is never going to be anywhere near as accurate for geotagging as using a GPS.
So in the end, all I bought was the basic 4GB model. I received my Eye-Fi card at work, and in a frantic new-toy frenzy went to set it up. First “glitch”, the Eye-Fi does not support an EAP WiFi network. Something to keep in mind if you intend to use it in a corporate environment. 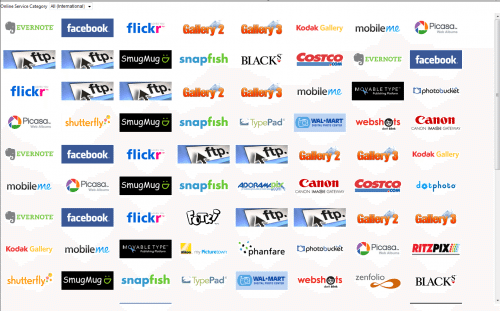 Eye-Fi now covers 25 online services that you can automatically upload your pictures to. I’m not sure why so many are repeated when you click the selection page, but here’s the screen you get. You can upload to an online service alone, to a local machine alone, or to both. The nice thing is you can also reduce the resolution of your photos to put into your online service. I’ve been downloading my pictures to my local machine in full resolution and then in a reduced resolution to Photobucket for sharing on web sites.
 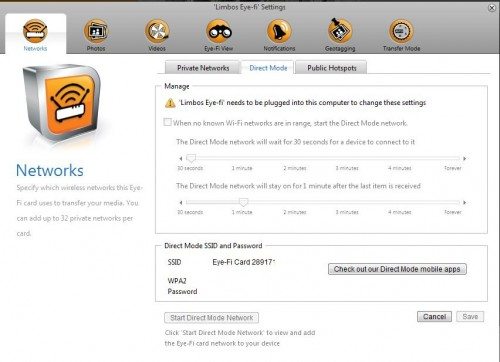 Julie discussed the iPhone app in her review but this only covered getting photos from her iPhone’s camera to her Eye-Fi account, and this archival function still exists. The Eye-Fi now supports direct mode, which allows you to download your photos directly to your Android or iOS device, something that people were asking for in the previous review. You can see above that the Eye-Fi sets up its own little SSID and WPA2 secured network. This is really useful if you’re not near the internet and want to keep a backup on your device, or if you’re in the situation where you need to review your photos straight away on a larger screen than your camera’s. While not transferred simultaneously, you can also set it up to download to your notebook/desktop as well if you wish.
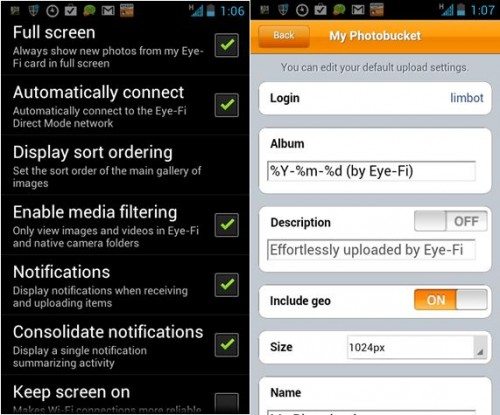 While I can’t speak for Apple devices, I have 3 Android devices setup for direct download. Above in the interface pictures (click on for an enlargement), I can change which device I’m backing up to using the Android app on each device, so I have some flexibility. The app also allows me to choose if I want pictures to be downloaded to my notebook as well. Note however that an internet connection is required to make some changes, and some functions are only changeable via the desktop Eye-Fi Centre. A nice feature is that you can make sure it only uploads on WiFi. Sending huge amounts of photos via 3G may be hazardous to your wallet 🙂
For those who are interested in the speed of transfer, above is a video of the Eye-Fi in action in a working environment. No shenanigans like reducing the size of the photo on the camera or anything 🙂 The camera is a Panasonic TZ5 and shoots at 10MP. In the foreground is my default download directory on my notebook, in the background is the Eyeview window which interfaces to the Eye-Fi online archive where the pictures are stored for 7 days as a backup. Each picture is around 3.5MB in size. Connected via an 802.11n network. You can see it’s much easier and faster than using cables and SD readers and has the advantage that in the background it’s also being sent to Photobucket.
So far I’m really happy with the Eye-Fi. The ability to take shots and have them loaded directly onto my notebook or Android device for backup, editing, and referencing is great, and the fact that I can automatically get them into Photobucket for use on forums is fantastic. I must admit though that when I’m out and about I can take up to 200-300 shots in a short space of time, and I haven’t yet done that with the Eye-Fi card. So far, my testing has only been in the 20-30 image range . It will be interesting to see how it handles that many photos being pumped directly to my Android tablet.
One thing that would be nice would be to integrate the GPS on Android/iOS device to geotag images rather than the more inaccurate and less-coverage wireless method. Now, if only I didn’t have 3 active cameras! It looks like I might have to purchase 2 more Eye-Fi cards, although the same Eye-Fi card can be used in multiple cameras without reconfiguring 🙂
INIU Mini Portable Charger, Small 45W PD Power Bank, 10000mAh USB C in&Out Fast Charging Pocket Size Battery Pack, Travel Essentials Powerbank for iPhone 17 16 15 14 Pro Air, Xiaomi, Samsung S24 etc
(as of February 8, 2026 00:45 GMT -06:00 - More infoProduct prices and availability are accurate as of the date/time indicated and are subject to change. Any price and availability information displayed on [relevant Amazon Site(s), as applicable] at the time of purchase will apply to the purchase of this product.)DEWALT Heavy Duty 3-in-1 Mini Stylus Pocket Pen, Tablet Pens for iPad, EDC Touch Screen Pens, Ballpoint w/Touchscreen Tip, Keypad Tip, Compatible iPhone Stylus Pen, Extra Ink Cartridge, Gifts for Dad
(as of February 7, 2026 17:18 GMT -06:00 - More infoProduct prices and availability are accurate as of the date/time indicated and are subject to change. Any price and availability information displayed on [relevant Amazon Site(s), as applicable] at the time of purchase will apply to the purchase of this product.)Product Information
| Price: | MSRP is $49.99, but it can be found for $39.75 at Amazon |
| Manufacturer: | Eye-fi |
| Retailer: | Amazon |
| Requirements: |
|
| Pros: |
|
| Cons: |
|


