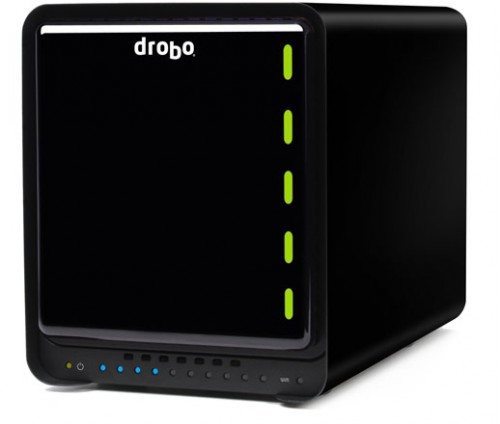
 The team at Drobo asked The Gadgeteer to review their Drobo S, generation two, a five bay USB and/or Firewire storage enclosure. For those unfamiliar with Drobo, the company came on the storage scene in the middle of 2007 with a focus on making storage simple. I like to think of Drobo as the black-colored Apple of the USB and Firewire storage market. The reason that I think of Drobo this way is that the Drobo team has a similar mindset and focus as Apple with their desire to take an old idea and give it a new and useful spin, all in a glossy black coating. Drobo may not be the the first to deliver innovative features, or the least expensive product in the market, but they have a loyal following. In this review we will see if the Drobo S, at $799 from the Drobo Store, can deliver the ease of use and performance that has converted many consumers to avid followers of the shiny little black storage box.
Over the years Drobo has done a good deal of listening to their customers as well as to the market and has added new products to the mix including Network Attached Storage (NAS) systems designed for the small and medium business marketplace. Personally, I can remember when Drobo came to market in 2007. At the time, many storage vendors were moving to deliver NAS offerings, and Drobo lagged in the market by a few years with only USB and Firewire connectivty. When Drobo delivered their first NAS product to market it was a kludge at best, requiring an external networking box to connect the Drobo to the network. This kludgie time period within the Drobo corporate history is securely in the rear-view mirror of the company as they are now delivering a full family of storage solutions for the home and business market including a NAS offering in a single package.
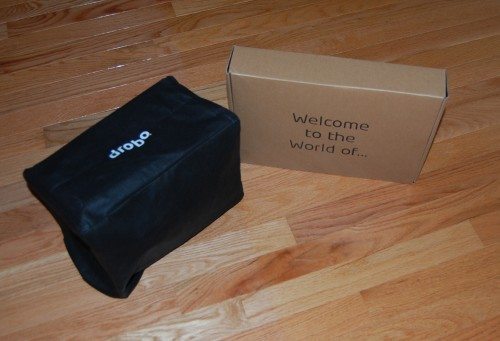 Drobo delivered their Drobo S, second edition, and I opened the package to find a well packed product that is reminiscent of my opening my first Mac, albeit in black versus the Apple Mac white. I had to stop myself from thinking outloud if Drobo is the yin to the Apple corporate yang. All joking aside, the second generation of the Drobo S differs from the first edition in that it adds a USB 3.0 port where the first generation only offered USB 2.0 along with Firewire. The Drobo box includes a simple-to-open secondary box, labeled “Welcome to the World of…” as well as the Drobo S unit wrapped in a black felt-like material labeled with the Drobo logo. Upon opening the secondary box, I was greeted by the Drobo company logo. I was now officially “Welcome(d) to the World of Drobo.”
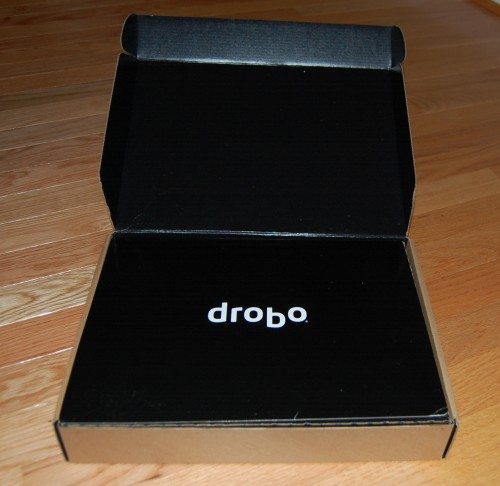 I must admit that the packaging was the first of its kind that I had seen in an external or NAS storage device, and it made me think about the thought that went into the packaging and how the Drobo team really cares about its products. In my opinion, caring about packaging is something all of the technology and gadget vendors in the world could do with a little bit more of. Understandably, having this kind of packaging adds to the cost of the overall unit and may be one of the reasons that many vendors stay away from delivering it along with their products, but I think that charging a little extra for great packaging that delivers the value of the company brand is worthwhile in the long run as it ensures that the company is burned in the mind of the consumer. I am getting off of my soap box now and getting back to the review.
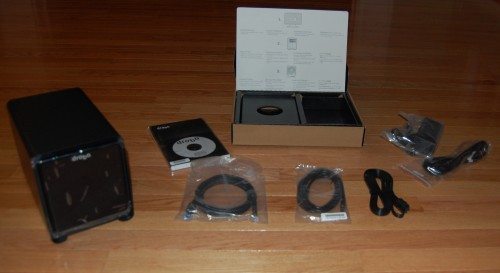 The secondary box contained; USB 3.0/2.0, eSATA, and Fireware cables, power adapter and US three prong power plug, a CD with software, and 1/2 inch thick instruction manual. For those that know me, I am not much a RTFM kind of guy in my regular life, but when doing product reviews I spend a good deal of time reviewing the instructions and following each direction as a good consumer should, but I was a bit shocked to find a 1/2 inch thick instruction manual in the box as this should be as easy as setting up any other storage device: install software, connect up power and connectivity, add drives, and away you go. The team at Drobo elected to include an instruction manual with four languages to ensure worldwide applicability. The English section of the instruction manual comprised 40 pages of the manual and the first few pages were a glorified advertisement for the Drobo, which you would have already been happy to have purchased and then see more advertising. I remember a movie that I saw in the past, I think it was Dave, in which a fake president asked his cabinet to cut their budget and one of the line items was for an advertising campaign to ensure the consumers that purchased American cars were happy with their car purchase. From this reviewer’s perspective, it just does not make sense to advertise to your customers that have already purchased your products when it was obvious that they had already convinced themselves to have purchased the products to begin with. What I really liked about the packaging, was the top part of the secondary box that when opened showed you three simple steps to getting the product setup:
1) Install the Dashboard from the Drobo provided CD
2) Insert drives in Drobo, starting with at least two drives
3) Connect power and computer cables and follow Drobo Dashboard directions.
Could it really be that simple? The answer is yes, it really was that simple.
 The Drobo unit itself is very pretty in a gloss and flat black finish. In fact, the gloss black front cover is so glossy I had a hard time taking pictures of it with my DSLR, so I resorted to using a Drobo-provided product shot. Be warned, if you like your products clean and shiny, the Drobo will not make you happy as it is a fingerprint magnet of the highest order. The Drobo S is 5.9″ wide, 7.3″ high, 10.3″ deep and weighs in at 8lbs without any hard drives or the power supply.
The front of the Drobo has a number of lights on it, including;
- Five bay status lights on the right hand side arranged vertically to mirror the drive bays they show the status of
- Power light on the left hand lower corner
- Capacity lights in blue from lower left to right that light up to show you available capacity as a percentage in 10% increments, or a total of ten lights
- Access light that shows when the unit is being accessed for read-write operations
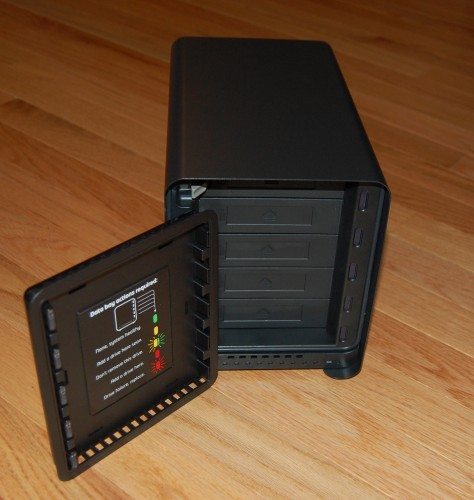 The front door of the Drobo unit is magnetic, a first in the storage devices that I have reviewed, and makes for easy removal and re-installation, albeit prone to being installed upside down. In my case I installed the door upside down several times. The air flow and venting are symmetrical so there are no concerns with installing the door upside down. On the back of the door is a legend that clearly shows the meaning of the various drive action status lights and the actions that are required, including:
- Green: None, system healthy
- Yellow: Add a drive here soon
- Yellow/Green: Don’t remove this drive
- Red: Add a drive here
- Red Flashing: Drive failure, replace
One thing that I did notice about the front of the unit and the sides is that there seems to be a very small amount of air flow vents cut into the surfaces. Most units of this design have larger air vents to allow the air to flow from front to back as it is pulled by a cooling fan. We will have to see how the Drobo S fairs in terms of cooling in our testing.
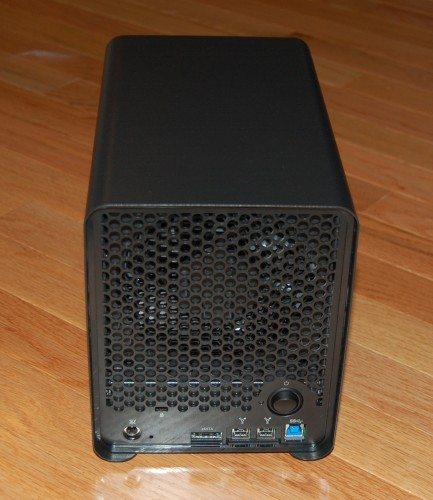 On the back of the Drobo S one can find the following:
- 12V power connector
- eSATA connection
- Two Firewire 400/800 ports for primary connection and daisy chaining a secondary Firewire device
- USB 3.0/2.0 port
- Power toggle switch
- Kensignton Cable Lock Connector to keep the Drobo S in place when would-be thieves come calling
Much of the surface area of the rear of the Drobo S is occupied by venting for the cooling fan. The team at Drobo elected to fit five drives into the standard size drive enclosure where other vendors would normally fit four. One of the main design considerations for this trade off was where to place the AC transformer, inside or outside of the unit. The team at Drobo elected to go with external placement to keep the form factor of the Drobo S smaller, while adopting a laptop style AC adapter to the packaging.
One of the main features that I was looking forward to testing out is the BeyondRAID data layout and disk management utility that is built into the Drobo S unit. Where other vendors stick with standard RAID configurations, from RAID 0, 1, 5 and 10, Drobo elected to utilize a proprietary RAID setup. BeyondRAID enables a consumer to use drives of different sizes and capabilities where most vendors with their standard RAID layouts require the same drive capacities and capabilities. Also, recently the team at Drobo updated BeyondRAID to include an implementation of RAID 6, or parallel RAID, enabling the Drobo S to survive two disk failures out of five in the unit. While the mathematics behind figuring out the case where two drives fail at the same time escapes me, the team at Drobo wants to ensure that your important data is available in the case of the unthinkable happening.
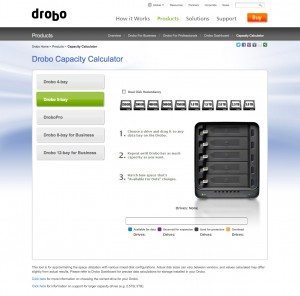 To ease the transition to BeyondRAID the team at Drobo has delivered a web-based Capacity Calculator. The Capacity Calculator is a intuitive drag and drop application in which you select your drive capacity and add it to your Drobo unit of choice and the bottom line capacity is calculated and displayed.
At this point, it was time to add my SATA Hard Disk Drives to the unit. The Drobo adds another innovative feature to the external storage market, carrier-less drives. The Drobo does not require any mounting rails or enclosures for Hard Disk Drives, making insertion and removal a breeze. No more fighting with the enclosure to fit the drive in or screwing in minuscule Phillips headed screws only to lose one and have to get on your hands and knees to find it. A very nice touch for the Drobo S.
The drives that I used for my testing included the following:
- 2 x Seagate Barracuda 1TB 7200 RPM SATA
- 1 x Seagate Barracuda 500GB 7200 RPM SATA
To start the testing I installed two drives; a 1TB and a 500GB. I then launched the Drobo Dashboard on my MacBook Pro and was told that it was ready to connect. I then turned on the power to the Drobo S and was asked if I wanted to check for an update to the Drobo S, which I did. There were no updates available. Next, the Drobo Dashboard asked me to format the hard drives installed in the system as they had not been seen by the Drobo S before. There were two choices available, HFS+, and FAT32. I should take a moment at this point to explain that all file systems are not created equally, nor are they all accessible from every operating platform. For example, Windows, Linux, and Mac systems can all see FAT32, but only a Mac can see HFS+. That is one of the main differences between the various file systems. There are many others, including performance, availability in the case of a device failure, maximize volume and single file size, data layouts, and application support to name a few, but this product review is not a review of files systems. If you are interested in finding out more about file systems you can check out the Wikipedia’s File System Comparison chart. The Drobo Dashboard tells you about the difference between HFS+ and FAT32 in terms of operating platform connectivity. For this product review I selected HFS+ to ensure a high level of performance and reliability.
Next, I was asked how large I would like my volumes to be. I selected the largest volume size of 16TB, not that I am going to ever grow to that size, but I may go there in the future, and the Drobo Dashboard tells me as much, by asking me to plan for the “foreseeable future.” Finally, I was asked to give the volume a name. I selected Drobo-Vol1 so when it shows up on my Mac I know what I am looking at. The formatting started and a message was displayed on the Drobo Dashboard that the Drobo formatting will take five minutes and require a reboot of the Drobo, along with a message to “Please be patient and allow Drobo to finish the format process.” The formatting process took under five minutes, exactly 4:32 to be exact at which point I was shown the available capacity of my Drobo S at 432.99GB of free space. You may be saying “wait a minute, I thought that you said that you put a 1TB and a 500GB drive in the Drobo S, should it be more free space?” Ah, but don’t forget that this is a BeyondRAID configuration and the Drobo S is capable of losing either drive and continuing on, in effect one drive is backing the other up, similar to a RAID 1 configuration, or a simple mirror.
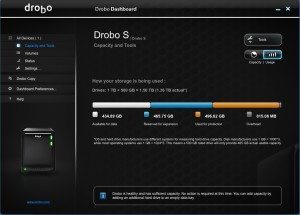 As you can see above in the Drobo Dashboard, the usable capacity is broken down based on the BeyondRAID layout of the two drives, with the following:
- 434.89GB usable capacity for data
- 465.75GB reserved for expansion
- 496.62GB used for protection, in case of a drive failure
- 815.08MB overhead
After formatting I was told that an update of the Drobo S is available, to firmware v2.1.2 and if I wanted to update, I selected “Yes.”
At this point, the Drobo asked me to stop any data transfers and wait until the Drobo came back up, reminding me not to unplug or disconnect the Drobo while the update operation was in progress. Once the update completed, the Drobo Dashboard asked me to reboot the Drobo, which I did. When the Drobo rebooted the lights on the device flashed and settled down to show the two drive bays occupied with a bright green. Once that completed, the Drobo Dashboard told me that an update to the Drobo S had an updated version, v2.0.3a and would I love to install the update. I said “Yes” and off I went to upgrade the Drobo Dashboard, which took approximately three minutes to download. The time required to download the software will vary depending on the speed of your Internet connection. Once download, it took another two minutes to install and I was back in the Drobo Dashboard, ready to manage my Drobo S.
While the Drobo S was running on my desk it was barely noticeable in terms of noise, and the unit stayed cool during my testing, nullifying my initial concerns about venting and airflow.
What is Thin Provisioning all about?
Once the Drobo S setup was complete, I opened Finder on my MacBook Pro to find the Drobo S was not available for content. I select the drive and selected “Get Info” to see the capacity as seen from my Mac’s perspective and was told I had 17.59TB of capacity, as can be seen below.
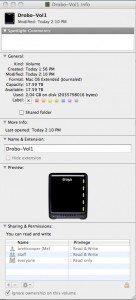 At this point, you are probably saying to yourself , “wait a minute, there was only 400+GB available from the Drobo S a moment ago, how did the Mac see over 17TB’s of capacity?” The answer is in a technology called Thin Provisioning. Thin Provisioning technology enables a device to virtualize the storage and make it appear to the operating platform, users, and applications that there is more storage available then there truly is. In reality there is still only 450GB of storage available, but it looks to me as there is a much larger pool of storage available. This works well for users that think they need a lot of storage, but tend not to use it, which will increase the costs for the organization without any really benefit. While not a perfect solution, Thin Provisioning, is very useful for users that do not need as much space as they think that they do. Thin Provisioning is in contrast to what the industry has come to call Fat Provisioning in which the full amount storage is actually allocated at the time of provisioning regardless of usage. In the case of the Drobo S, the thin provisioning provides a bit of a buffer to expand the volume to almost double the size in the BeyondRAID configuration that I was working with. This was all done automatically for me, which saved me a bunch of time during the setup process. Most vendors do not offer Thin Provisioning at all, let alone in a package at this price point. If you would like to read more about Thin Provisioning check out the Wikipedia page on Thin Provisioning.
Is expanding storage capacity really that simple?
One of the major claims from the team at Drobo is how easy it is to expand the capacity of their Drobo units, and I set about testing this claim by adding a 1TB 7200 RPM drive to the unit, and it did not miss a beat. It took under five minutes to add the new drive and grow the volume. When completed, the Drobo S turned the drive bay light green to mark that it was added. I must say that it was a very smooth and seamless process that impressed me. With other vendor’s storage products, one usually has to plan for drive expansion and allow time for the new drive to be added and the system rebalanced to deliver maximum performance and usable capacity.
After adding the 1TB, drive the Drobo S updated the volume layout within the BeyondRAID configuration and provided a new set of capacity metrics, which can be seen below.
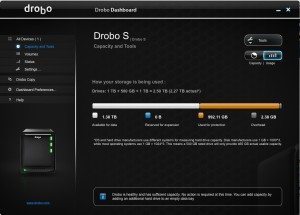 By adding a 1TB drive the following usage was available:
- 1.30TB available for data
- 0GB reserved for expansion
- 992.11GB used for protection, in case of a drive failure
- 2.3GB of overhead
Another view of the Drobo Dashboard showing the capacity of the newly expanded BeyondRAID configuration can be seen below:
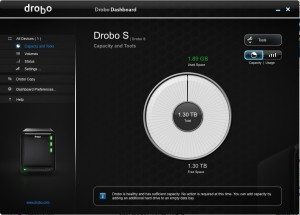 I must admit, that I like the Drobo Dashboard; it is intuitive and very pleasing to my eyes. Other storage vendors in the market should take note of the simplicity and workflow of the Drobo Dashboard and look to incorporate its simple and glacial approach to storage management. With that said, at the price point of $799 it should be this simple and one is paying for this level of simplicity. I remember from almost a decade ago that several analysts said that the initial cost of storage was some 15% of the overall cost, while the other 85% was born out of the management expense of the personnel and other costs. From an enterprise perspective these costs may be hard to justify a higher initial out of pocket, but I realize that over time the amount of time that I personally devote to managing my storage is costly and having this kind of management interface and capabilities ensures that I will not be spending hours and hours working that I have done in the past when the management capabilities were not as intuitive or well laid out.
Also, the Drobo S has a strong of blue lights on the lower part of the unit that show the usable capacity in 10% consumption based increments.
Performance
I created a number of file sets to test the Drobo S with, including a small file set composed of thousands of smaller 1MB files, and a large file set with 100 1GB+ files. I utilize my MacBook Pro and connected the Drobo S via USB 2.0 for the first test.
The performance of the Drobo S with three drives was 27.5MB/s write and 34.2MB/s read. While not super impressive for the small file test given that there are three 7200 RPM SATA disks in the Drobo S, I am not surprised as the USB connection could not sustain a high level of writes.
During the large file test, the Drobo S faired a bit better with 34.5MB/s write and 40.3MB/s read.
Both tests show that the Drobo S can handle most of the workloads that it will run into on a daily basis, including streaming SD and some lower-resolution encoded HD video. I did not test it personally, but I believe that HD content encoded in true HD will present a challenge for the Drobo S as one needs consistent 40MB/s performance to stream a high quality HD piece of content. Personally, I would expect the performance to be a bit higher, but I am not familiar the specifics of the internal processor and memory of the Drobo S.
Reliability
I wanted to test the reliability of the Drobo S, so I set a test in place that would see how the Drobo S does under load when a drive was pulled out. First step is to create a test load, which I did using my large file set. The system was humming along at a hair over 30MB/s when I pulled the lowest drive, a 1TB 7200 RPM drive. Immediately, the lights on the Drobo S changed from a green to a flashing green and yellow signifying that I should not remove any drives and that the unit was in a recovery mode.
Also, on the Drobo Dashboard, which I have come to find installed itself as a startup application-a mixed blessing we all know well – that a red warning message appeared telling me that my “Drobo cannot currently protect your data against hard drive failures.”
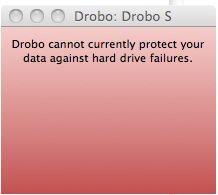 The Drobo S continued to copy the files, albeit a bit slower. Performance dropped to 14.8MB/s during the reconstruct. I opened the Drobo Dashboard to dig a bit deeper into the status and I found that the management software displayed very useful information, including a time estimate to complete the reconstruct of six minutes. True to the estimate, the Drobo S completed the reconstruct in just a hair over 5:30.
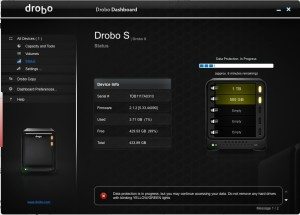 During the reconstruction, the file copy completed and the unit returned to normal operational mode, as you can see in the screen shot of the Drobo Dashboard below.
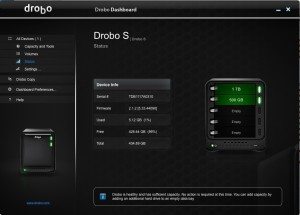 Finally, to test that the Drobo S could fully recover, I reinserted the failed drive, which was never actually a bad drive, under the same load, and the Drobo S instantly recognized the drive as one it had seen before and added it to the BeyondRAID configuration. During the reinsertion of the drive, performance was as seen before with this file set of 37.2MB/s.
One other note on the management capabilities of the Drobo S. The Drobo Dashboard includes a proactive email capability that supports sending email alerts to a user or administrator of choice in the case of a failure or other useful information. This is a very nice feature for those in a corporate setting in which the user may not manage his or her own systems, especially with a USB device that does not sit on the network, nor is centrally managed.
Backup?
The Drobo S can serve as a backup target, or Time Machine target for Macs. For Time Machine, I would strongly suggest creating a separate volume within the Drobo to keep your files and backups separate. Finally, the Drobo S has a Drobo Copy function available from within the Drobo Dashboard that can automatically backup source folders to the Drobo S at a scheduled time and day. This is a nice feature for those that want to automate the backup of Windows, Linux, or Mac file sets without having to load a third party backup software package or run Time Machine. I did not test the Drobo Copy capability during my testing so I do not have any information or review to share on this capability.
Conclusion
So, the big question, will the Drobo S live on, or will it go to the gadget graveyard? The answer isn’t a simple cut-and-dry one as it is in most of my reviews. A few years ago I purchased a NetGear ReadyNAS and have been using it as a consolidated storage pool for all of my systems in my home where I backup and store all of my content. I also have a few USB storage devices that I use for travel and scratch space for my video projects that are starting to fill up and I need to spend the time to clean them out, so from that perspective the Drobo S will find a home on my desk, but in the long term I see it going to the gadget graveyard as the performance and price tag are not what they need to be for me to use the Drobo S on a daily basis.
Overall, the Drobo S is a very well executed USB and Firewire storage product. The major selling points for me are the simplicity and usability found in the Drobo Dashboard coupled with the efficiency found in Thin Provisioning and reliability of the Drobo S. The mediocre performance and exorbitantly high price detract from what otherwise is a very well rounded storage unit. I would like to see how the Drobo network storage solutions perform as I see users, including myself, migrating away from USB and Firewire disk enclosures to network attached storage products that can be placed within a centralized location, like my wiring coat closet, or even in a small and medium business wiring closet with the telephone equipment and centralized server. Even home users are moving to centralizing their storage and consolidating down the number of storage resources, if not for any other reason, but to share the content. There are some markets, such as digital video editing that will always require a direct connection of some kind to the workstation for scratch or temporary disk space where the Drobo S and other like it will find homes, but I see their time drawing to a close as well as networks and NAS devices increasingly will compete and win this market.
Gerber Gear 22-47162N Fast Draw Folding Assisted Opening Pocket Knife, Fine Edge, Black
15% OffGerber Gear Suspension 12-in-1 EDC Multi-Plier Multitool with Pocket Knife, Needle Nose Pliers, Wire Cutters and More, Gifts for Men, Camping and Survival, Grey
9% OffProduct Information
| Price: | $799 |
| Manufacturer: | Drobo |
| Retailer: | Drobo Store |
| Requirements: |
|
| Pros: |
|
| Cons: |
|


Gadgeteer Comment Policy - Please read before commenting
Why would someone choose this over say a Thecus 4100 Pro or similar. There you get a network NAS which is bound to be faster (or USB if you choose) and the ability to easily utilize a variety of disk formats, types of RAID 0-10 and standard connectivity with all major OS. I could understand if the Drobo were cheaper but at $800 it costs more than a 4100 Pro and 4 1TB drives (although drives are almost 2x the price they were a year ago).
Not saying the Drobo is bad…just don’t understand what the benefit is.
I’m also unsure of why anyone would want to thin provision. What happens when someone tried to do a 2TB backup to a Drobo that is reporting 17TB but has 450GB available?
@Brett, I’m not trying to challenge you…I just figure I’m missing something here…
Ken,
Thank you for your comments. I agree with your assessment as the Drbo S is relatively high priced given its lack of drives and NAS capability for the broader market, but the Drobo team is focusing on the large media market where a large USB, FireWire, and eSATA storage enclosure is needed for temporary space during the creation and editing stages. In this case several users can attach and access the device and thin provisioning makes the storage seem larger then it really is, in essence virtualized. For the Small and Medium Business and Home markets where there is a singular user real, or effective freevspace can be more important then thin provisioned space, but I could also see thin provisioning in the home or SMB space. Most enterprise storage systems include thin provisioinng as a standard or licensed feature to keep space usage and costs down. For my money I would go with a NAS device with several 1TB drives, but that is based on my usage with a few users in the house and high demands on streaming media playback, not direct connected storage, but each product has an intended market and the Drobo S is not intended for my usage, but I knowseveral businesses that have a Drobo behind a Windows or Linus file sever on their networks.
@Brett, thanks…I now understand how people could use thin provisioning…not sure it would be something I’d choose, but I’ll bet there are some applications or environments where is makes sense to do so.
The speed that the Drobo incorporates a new drive is impressive and that’s certainly a benefit. Adding a drive on our Thecus 4100 Pro can take a day and recently I started a RAID 5 array on one with 4x2TB and the process took almost 48 hours.
One little note. I believe when you compare the mirroring of the Drobo RAID you want to compare it to RAID 1 not RAID 0. RAID 0 is basically striping and doesn’t do any mirroring. It’s generally used by people looking for a performance boost.
Ken,
I will update the RAID info. RAID updates can take a long time depending on what is happening in the background. It sounds like your unit is rebalancing and relaying out the data with the addition of the new disk to maximize performance and availabilty as well as recalculating parity-some complex and performance intensive tasks that I don’t believ the Drobo is doing, regardless the performance is there and they have a good solution that is simple.
Enjoy!
“true HD will present a challenge for the Drobo S as one needs consistent 40MB/s”
Not true a 5GB file will need 5MB/S to stream.
I have a Drobo S and I find it to be not that reliable, the Dashboard and the actual drive seems to have problems communicating with each other. Tech support and I have been trouble shooting since I received the unit due to Backup problems with different software programs.
My warranty will expire within the next few weeks and my problems really haven’t been solved. I have more than 30+ emails back and forth with tech support, I truly became exhausted with all of the different solutions I was given and none of them has really solved my problems.
I can’t believe that this product warrants all of the different types of Drobo’s and they are rather expensive to not have better tech support. In one email the tech support guy stated that he believed he should shift my problem to a higher level. Well it’s almost a year and the problem still exist, I’m hoping for the best!