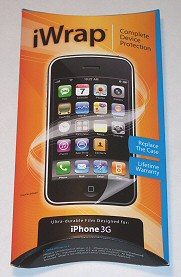
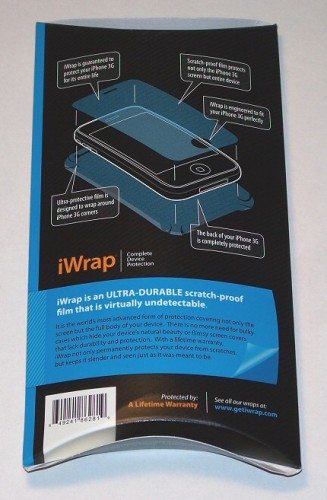
 I’ve always been a proponent of protection for my personal gadgets. Ever since walking out of the AT&T store with my iPhone 3GS in hand, I’ve had it encased in some sort of…well, case. However, I’d been researching a few of the many “skin” protective type products on the market when I was given the opportunity to try out the iWrap for iPhone 3GS. iWrap touts their product as “an ultra-durable scratch-proof film that covers your entire device and is virtually undetectable” and offers a lifetime warranty. Let’s investigate the iWrap for iPhone 3GS.
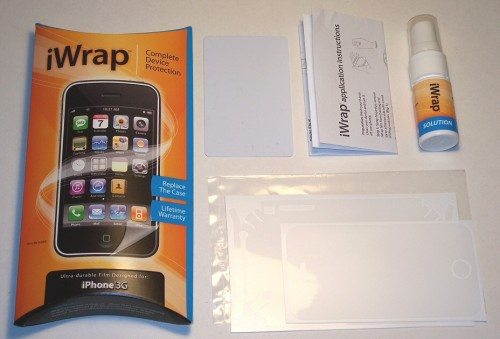
Inside the Box
- Plastic bag containing iWrap front and back films and a backing board
- Squeegee (basically a blank credit card)
- Spray bottle with solution
- Instruction sheet
Installation
Truth be told, I’ve not had the best of luck with even simple screen protectors. I’m a perfectionist about lining them up and about bubbles, lint or other imperfections getting stuck under them. So I was quite skeptical of a full-wrap “skin” style protective product. I checked out an installation video on the iWrap site, which I found to be only somewhat informative. On YouTube I found a video that was a bit more informative, but I still wasn’t confident that the iWrap was going to work as advertised. The only thing left was to dig in and try it.
I started with the screen film. As with the installation of many of these types of products, you’re instructed to wash your hands first, then wet your fingers with the provided solution, both actions being done to prevent oils from interfering with the adhesion of the film to the device. Next step was to peel the film from the backing and wet down adhesive side with the solution. So far, easy enough. I was a bit concerned about the solution seeming into my iPhone, but it didn’t appear to be a problem. I did my best to line the film up, using first the home button cutout and then the edges. I had to pull it back off once to reposition it, but it seemed to go on without much trouble. However, there were air bubbles galore. I followed the instructions and sprayed it down from the outside, then used the squeegee to work out the bubbles as best I could. Even after about ten minutes of this, there were still a lot of bubbles. It was about what I’d expected, but I was already disappointed. I let it sit all night and when I checked it the next morning, I was quite pleasantly surprised to discover that virtually all of the larger bubbles had vanished. I went about my day, using the squeegee to work on the bubbles periodically. By that evening, the bubbles were almost completely gone.
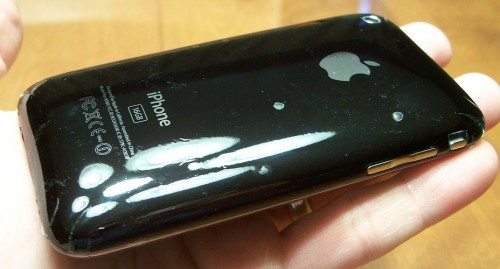
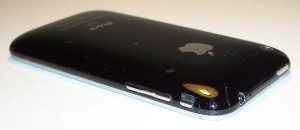
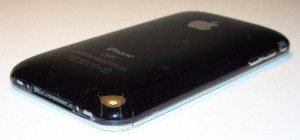
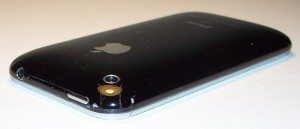
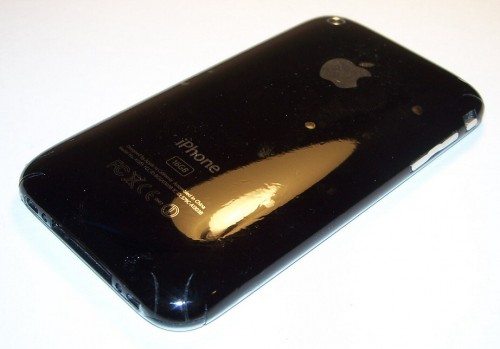
Next, on to the back film. Same drill here, but the difficulty level shot up quite a bit. Lining up the back film was quite a bit more difficult, I think because of lack of features to use in locating. I tried to use the camera bezel, but it didn’t seem to help much. I got the main part placed , but then realized the sides and corners were in the wrong spot, and I had to peel it off, re-spray and re-place it. Had to do this a few times, but finally got it where I thought that at least the main part was supposed to be.
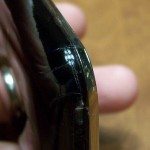
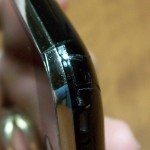
The corners were another story. I worked on those things for about half an hour and didn’t feel like I’d made much progress. I decided to let it go until the next morning, like I’d done with the screen film. Not quite the same result. Lotta bubbles, and two of the corners still looked pretty rough, because they either had gaps or didn’t want to fully adhere.
In addition, the bottom wrap-0ver edge (near the Home button) was sticking up a bit past the face, and my finger kept getting caught on it. It bugged me, so I peeled it up, sprayed and re-positioned it.
Using the squeegee on it several times throughout the day forced most of the smaller bubbles out, but the larger ones remained. Still, it looked quite good overall.
Usage
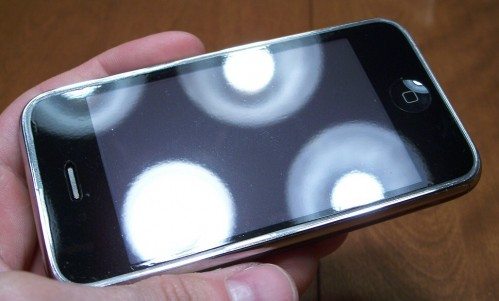
After several days, the screen film looked fantastic. Not a bubble anywhere. No loss of touchscreen sensitivity at all. The surface is basically smooth, but with a very slight “orange peel” appearance, but nowhere near like an anti-glare screen protector. It covered the entire screen and about 1 mm of the chrome bezel. The cutouts for the speaker and home button were perfectly sized and placed. So after about three days, I was very pleased with the results of the screen film.
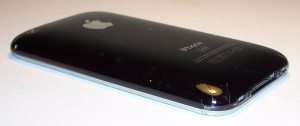
Similar situation with the back film. All of the bubbles under the back film had disappeared after working on them a bit each day for about a week. And after putting it into and taking it out of my pocket, those corners that I couldn’t seem to get to stay down became pocket lint magnets at the exposed adhesive. However, the corners are quite well covered, due largely to the precisely cut strips that roll over and conform to the rounded corners.
Both the screen and back film seem to mask fingerprints and smudges a bit more than a standard screen protector or the iPhone itself. They just seem to be less noticeable and to wipe off more easily. The film also provides a surface that only slightly “grippier” than the iPhone itself. I also wondered if I could still use a case in addition to the iWrap, so I tried placing the iWrapped iPhone in both my Incase Slider and my Otterbox Defender, but it was a no-go for both. I suspect that this is due to the back film, which does increase the overall dimensions of the iPhone slightly.
Removal
It took me a while to evaluate the removal of the films, mainly because I like the iWrap so much that I didn’t feel like taking it off! However, I did remove the back film, for two reasons: because those corner edges that I couldn’t get to stick down are attracting more and more lint (and it was really bugging me) and also so that I could place the iPhone in a case (see above), since I have several cases I want to try out. Removal of the back film was quite simple, and I would liken it to peeling off a static cling-type decal from a window. It only left behind a very minimal mount of adhesive residue, which I was able to clean off with ease. I did, however, leave the screen film on, because it seems to provide better scratch protection that any other screen protector I’ve used.
Conclusion
I was very skeptical of the iWrap at first. Installation was relatively easy with the screen film, quite a bit more challenging with the back film (especially the corners). However, after about three days I was very impressed with the appearance of the screen film, and it only took a few more days for the back film to reach a similar state. The durability of the iWrap seems much greater than a standard screen protector. IMO, appearance of the iPhone 3GS is an example of industrial design aesthetic in a a visually-appealing device, and it’s great to have a product that allows you to give your iPhone a layer of protection and still be able to show it off and keep its slim profile. It obviously offers virtually no impact or drop protection which could be gained in varying degrees by using different case designs, but against scuffs, scratches and spills, it seems to perform quite well. Overall, I was impressed with the iWrap for iPhone 3GS.
I’ve always been a proponent of protection for my personal gadgets. Ever since walking out of the AT&T store with my iPhone 3GS in hand, I’ve had it encased in some sort of…well, case. However, I’d been researching a few of the many “skin” protective type products on the market when the opportunity came up to try out the iWrap for iPhone. iWrap touts their product as “an ultra-durable scratch-proof film that covers your entire device and is virtually undetectable.” Let’s dig in.
Inside the Box
Contents of the box were fairly simple:
· Plastic bag containing iWrap front and back films and a backing board
· Squeegee
· Spray
· Instruction sheet
Installation
Truth be told, I’ve not had the best of luck with even simple screen protectors, and I’m also a perfectionist about bubbles, lint or other imperfections getting stuck under them. So I was quite skeptical of a full-wrap “skin” style protective product. I checked out an installation video on the iWrap site, which I found to be only somewhat informative. On YouTube I found a video that was a bit more informative, but I still wasn’t confident that the iWrap was going to work as advertised. The only thing left was to dig in and try it.
I started with the front film, the one that goes over the screen. As with the installation of many of these types of products, you’re instructed to wash your hands first, then wet your fingers with the provided spray, both actions done to prevent oils from interfering with the adhesion of the film to the device. Next step was to peel the film from the backing and wet down adhesive side with the spray. So far, easy enough. Placing the film on the screen is where things started to get a bit troublesome. I did my best to line the film up, using first the home button cutout and then the edges.
Screen film
Retained full touchscreen cababilities
Very slight “orange peel” effect
Covers entire screen plus about 1mm of bezel
Cutouts perfectly sized for home button and speaker
Back film
Bubbles!
Edges seem quite well covered, but hard to get in place
Updates 03/13/15
I kept the iWrap on my iPhone 3GS for a few months, mainly to feel like I had given it a fair amount to time for review purposes. However, the corners where it wrapped around the iPhone just kept attracting more and more lint and it was really annoying. And I also wanted to go back to a more protective case.
Source: The sample for this review was provided by iWrap. Please visit their site for more info.
Klearlook Silicone Double-Sided Suction Cup Phone Case Detachable Mount, Sticky Phone Grip with Higher Suction Power for iPhone, Hands-Free Phone Accessories Holder for Selfies and Videos, Light Pink
(as of February 11, 2026 23:08 GMT -06:00 - More infoProduct prices and availability are accurate as of the date/time indicated and are subject to change. Any price and availability information displayed on [relevant Amazon Site(s), as applicable] at the time of purchase will apply to the purchase of this product.)for Magsafe Portable Charger,5000mAh Slim Wireless Magnetic Power Bank with USB C Charging,Travel Essential for Magsafe Battery Pack Compatible with iPhone 17/16/15/14/13/12 Series,Graphite Gray
(as of February 11, 2026 23:22 GMT -06:00 - More infoProduct prices and availability are accurate as of the date/time indicated and are subject to change. Any price and availability information displayed on [relevant Amazon Site(s), as applicable] at the time of purchase will apply to the purchase of this product.)Product Information
| Price: | Full Body Wrap: $19.95Screen Only: $12.95Back Only: $14.95 |
| Manufacturer: | iWrap |
| Pros: |
|
| Cons: |
|


Gadgeteer Comment Policy - Please read before commenting
device is look horrible with this “skin”
@Dmitry – I had a difficult time photographing it to accurately represent its appearance, but I can tell you that, as I wrote above, all of the bubbles under the film had disappeared after working on them a bit each day for about a week. I was quite impressed with the appearance after that point.
I used the invisi-shield (similar product) for about a week then took it off. It makes your phone look like you wrapped it in cling film. Makes it look cheap and ugly. Yuk. Prefer a nice leather case. Much more classy.
Meh… Zagg is still better
@Myc – Of course a lot of this is based on personal preferences, however I never felt like the iWrap appeared like it was “wrapped in cling film” but was impressed with the end result once all the bubbles had disappeared. I do agree that there are many cases that look quite nice, but for those who prefer the “naked” look of their iPhone yet want some level of protection, this may be a good way to go.
@Snowjoggs – I’ve not tried out the Zagg invisibileSHIELD product, but one difference appears to be that the invisibileSHIELD has multiple pieces for the back coverage, while the iWrap has only one. I would love to do a comparison of the products at some point.
Hey Andy, I appreciate the review.
I work for iWrap–and I think you’re right that this is a great product for those who prefer the look of the iPhone sans case.
To those commenting about the invisibleShield, you can see the products’ principle differences here:
http://www.getiwrap.com/comparison