I thought it might be interesting to write up some tips about Android 7.0 (Nougat) features that I find fun to use. I realize that not all our readers have Android 7.0, but for those of you who do, you will find some of the new features very handy. One of those features that I really enjoy using is being able to customize my notifications in the notification shade and Nougat offers a faster and easier way to manage them.
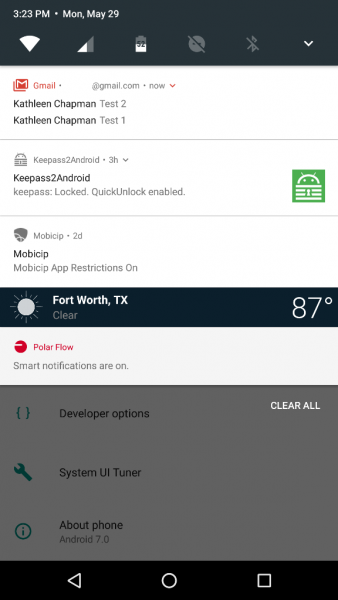
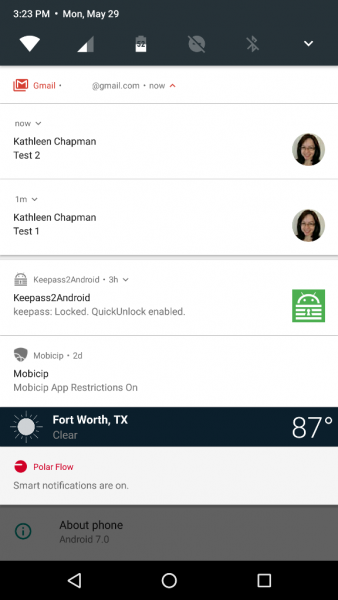
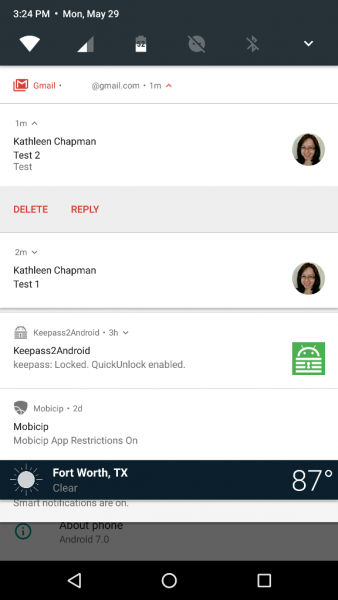
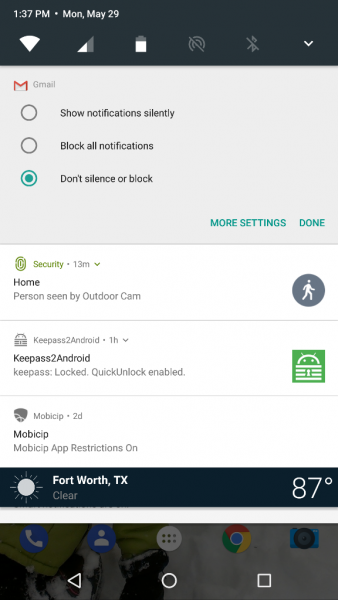
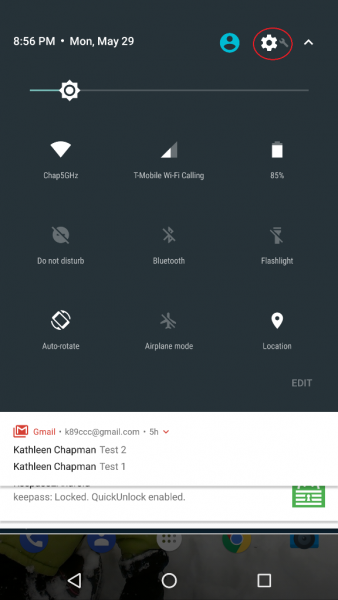
Android 7.0 now allows apps like Gmail to bundle their notifications in the notification shade (although not all apps do this). When you receive several emails, Gmail will group them together in the notification shade like that shown in the left screenshot above. If you pull down on the Gmail notification, it will separate each email as shown in the center screenshot above. And, if you continue to pull down on each email, you will be given the options to Delete or Reply.
Now, to easily manage your notifications, you’ll need to pull down on the notification shade and long press on the notification you wish to customize. This reveals three options to choose from: “Block all notifications”, “Show notifications silently”, or “Don’t silence or block”. Pretty sweet, right?
But wait, that’s not all. What if you would like to prioritize your notifications in the notification shade by order of importance? Nougat allows you to do so via the Power Notification Controls available in the System UI Tuner.
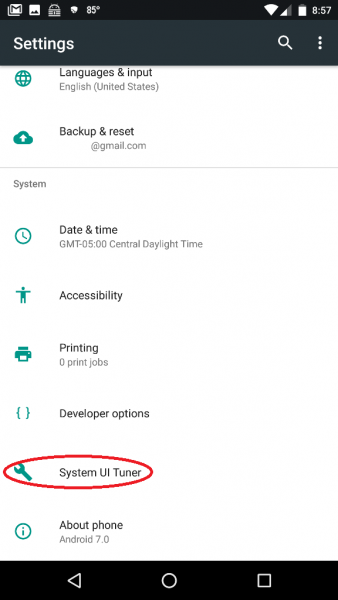
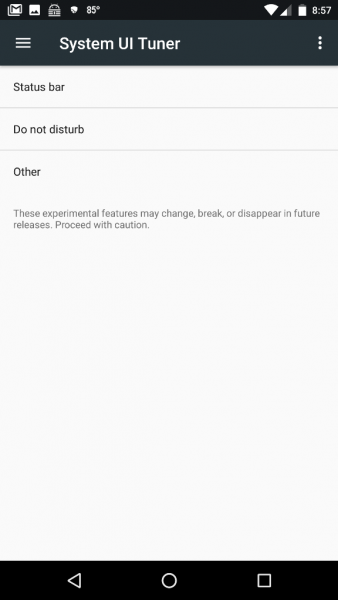
Where is the System UI Tuner? It is located in your device Settings (the gear icon located in the upper right corner after pulling down on the notification shade twice as shown in the left screenshot above) but it does not show up automatically so you will have to long press on the Settings gear icon for about five seconds then release. After you release, a message pops up saying, “Congrats! System UI Tuner has been added to Settings.” Another message warns you (after opening the Tuner) that it is “Fun for some but not for all. System UI Tuner gives you extra ways to tweak and customize the Android user interface. These experimental features may change, break, or disappear in future releases. Proceed with caution.” (Ooh, how I hope they don’t take this away!!!)
NOTE for HTC users who wish to access the System UI Tuner: Thanks to hasmujo on YouTube, there is a workaround for you to access the System UI Tuner. To do this you will have to download Nova Launcher (the free version is fine) if you don’t already have it installed.
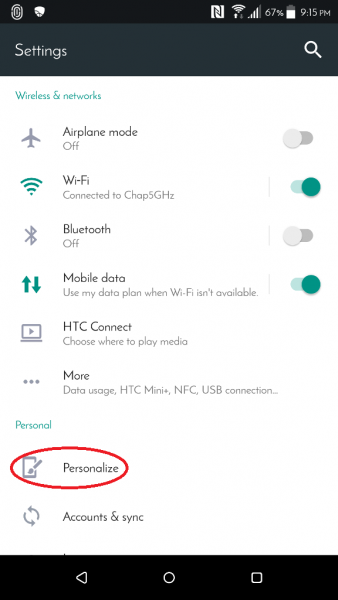
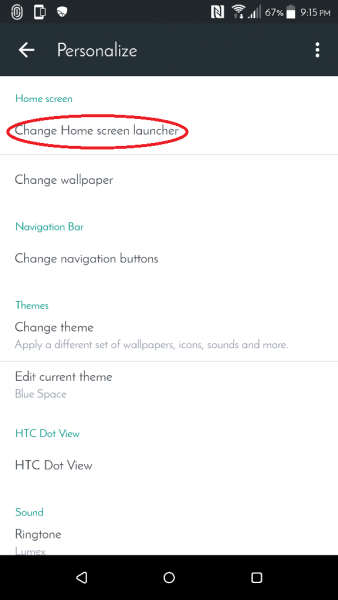
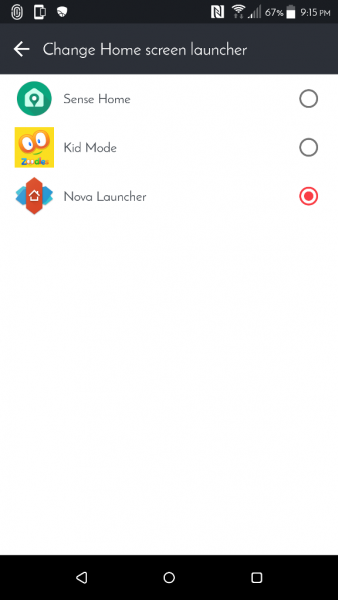
Once installed, you’ll need to set Nova Launcher as your new launcher by tapping on the following:
device Settings (gear icon) > Personalize > Change Home screen launcher > Nova Launcher (depicted in the screenshots above; you can revert to your previous launcher later once you’ve selected all the System UI Tuner settings you want).
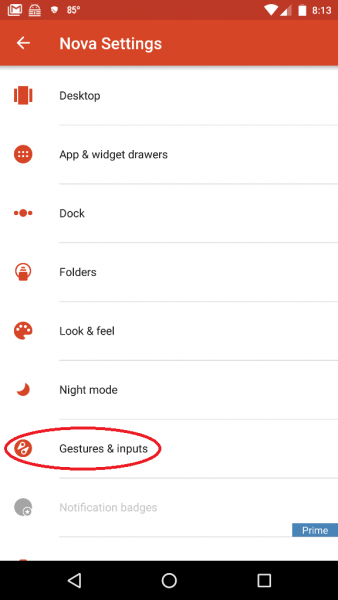
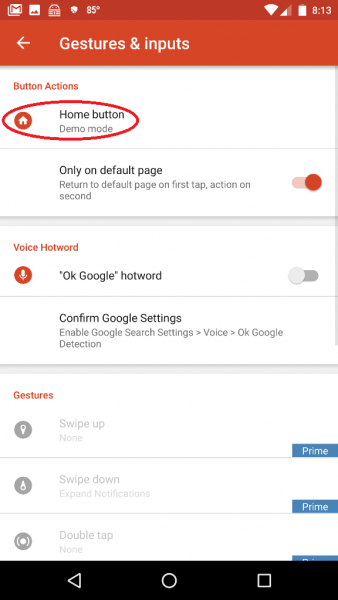
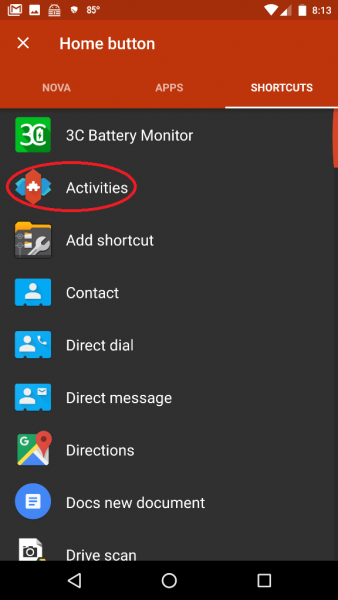
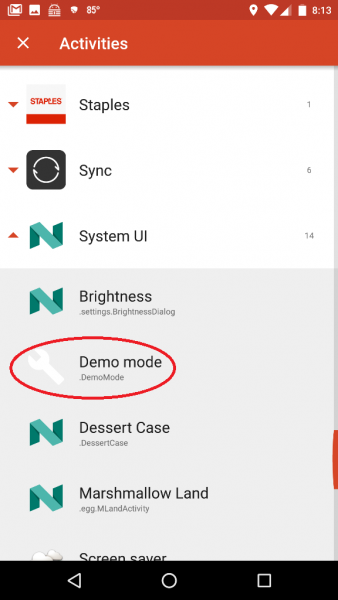
Now you’ll need to set up your phone’s soft Home key to launch the System UI Tuner. To do this you’ll need to tap on the following:
Nova Settings app (in the App Drawer) > Gestures & Inputs > Home button > Shortcuts (located at the top of the app screen next to “Nova” and “Apps”)> Activities > System UI > Demo mode (the steps are shown in the screenshots above which may be tapped on to view a larger size).
After setting up the Home button to launch the Demo mode System UI setting, you’ll then back out of all these settings then tap on the soft Home key on your phone (you might need to tap on the Home button twice if you weren’t already on your phone’s Home screen). This launches the System UI Tuner settings. Now back to Power Notification Controls…
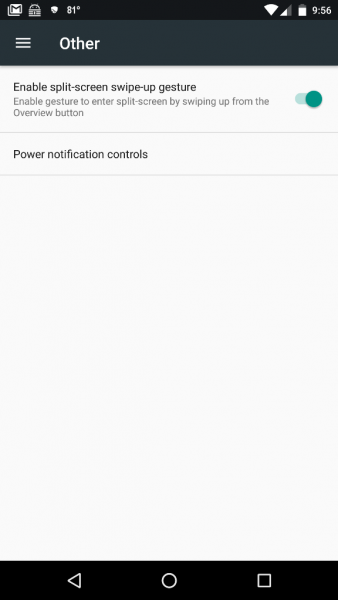
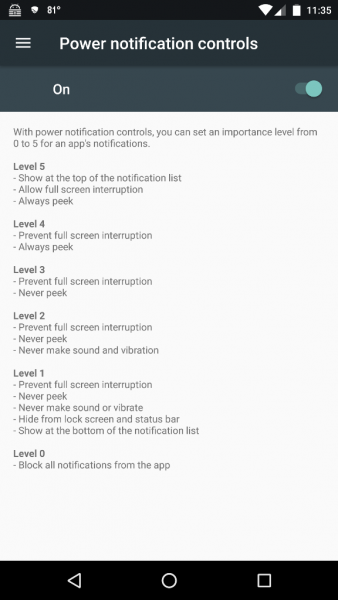
To navigate to and turn on the Power Notification Controls, you’ll need to go to the System UI Tuner settings by tapping on your device Settings icon (gear icon) > System UI Tuner (located near the bottom of the list) > Other > Power Notification Controls and slide the button to the On position (shown in the right screenshot above).
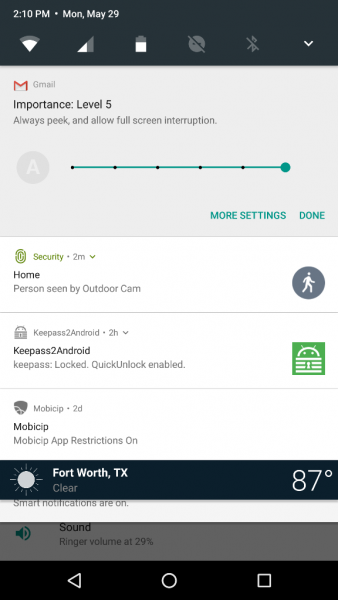
Now when you long press on a notification in the notification shade, you will see information like that shown in the left screenshot above. Each of the dots on the horizontal slider bar represents a notification importance level (shown in the right screenshot above):
- Level 5
- Show at the top of the notification list
- Allow full-screen interruption
- Always peek
- Level 4
- Prevent full-screen interruption
- Always peek
- Level 3
- Prevent full-screen interruption
- Never peek
- Level 2
- Prevent full-screen interruption
- Never peek
- never make sound and vibration
- Level 1
- Prevent full-screen interruption
- Never peek
- Never make sound or vibrate
- Hide from lock screen and status bar
- show at the bottom of the notification list
- Level 0
- Block all notifications from the app
Notice the grayed out “A” located on the left of the slider bar? When this is NOT grayed out, it means that the app automatically determines the level of importance for you. This is the default setting of installed apps, and you must tap on the “A” to be able to customize the level of notification importance. Voilà! There you have it – custom notifications!
Isn’t Android awesome? And it just keeps gettin’ better with time…



Gadgeteer Comment Policy - Please read before commenting
Great collection of tips. Thanks, Kathleen!
Thank you! 🙂
Things like this are why this site is at least a once or twice DAILY stop for me. 🙂
P51D007 – Wow, that’s high praise! That was very nice of you to say so – it made my day!! 😀
Does the System UI Tuner work on a Samsung Galaxy S8+? I hold down the device settings for more than 5 seconds and I don’t receive a System UI Tuner enabled message or anything else for that matter. Thanks for the article.
Doug B – Try the steps lined out for HTC users. That should work for all phones if you can’t successfully long press on your device Settings gear icon. Let me know if you are successful.
I use Nova Launcher Prime…Huawei Mate 8. Holding the gear icon didn’t work, but the using the Nova Launcher workaround did! Thanks!
Rusty – That’s awesome! I (and hasmujo) are glad to help out!