The Bellini Kitchen Master is kind of like a really gorgeous guy you always imagined would be the perfect boyfriend till he became your boyfriend, and you realized he wasn’t so perfect, though you still felt you needed to believe it because of all the wonderful packaging. Besides, everybody says he’s wonderful, so it really must be so. You’re obviously missing something.
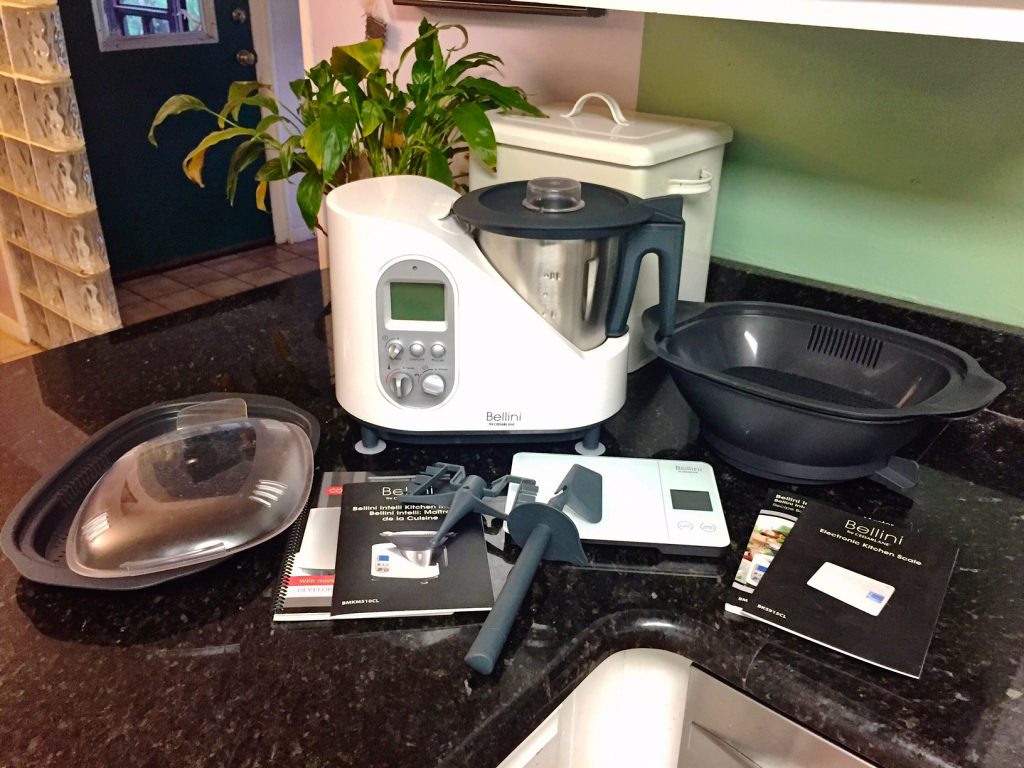
My Bellini arrived in early January, right as we were receiving guests. The box was the size and weight of a giant panda (“How do you know what a panda weighs?” asks my husband, Bill “Mr. Headphones” Henderson), though not quite the same shape. It contained so many parts and books that I mentally shut down and kept the box intact on the dining room table until after our company left late in the month. I geeked out because the letter accompanying it was written in French, which Mr. H asked me to read aloud even though he didn’t understand a word. In another nod to the Bellini’s French Canadian pedigree, the measurements and temperature are metric. (The kitchen scale that’s included measures in imperial and metric.)

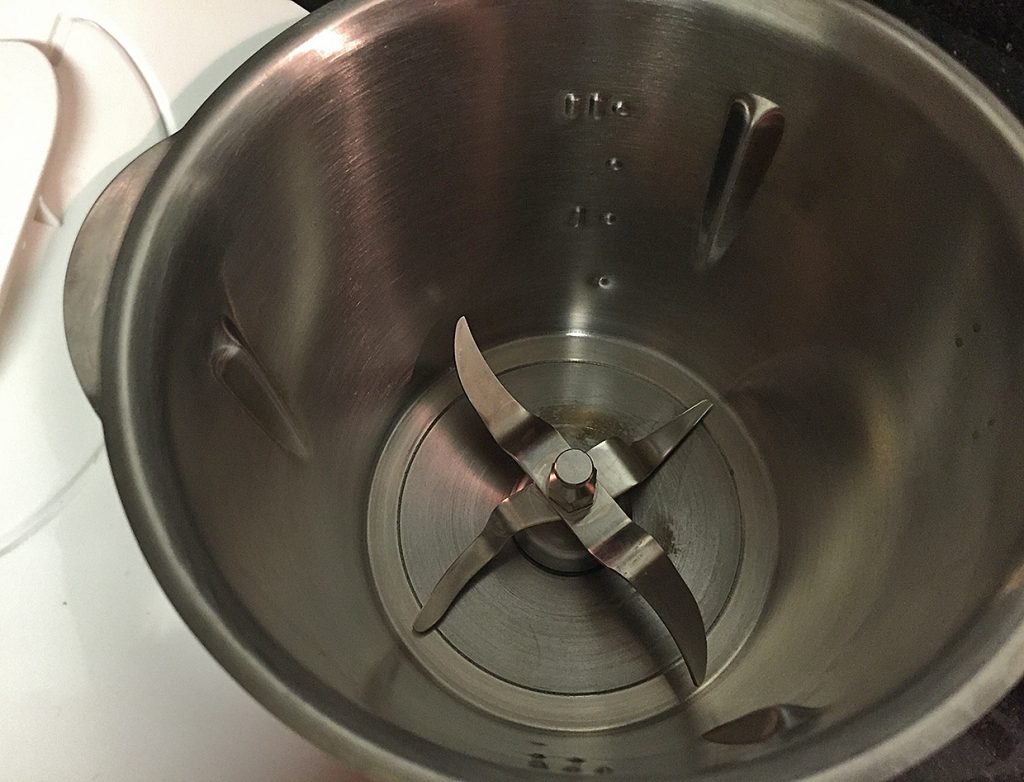
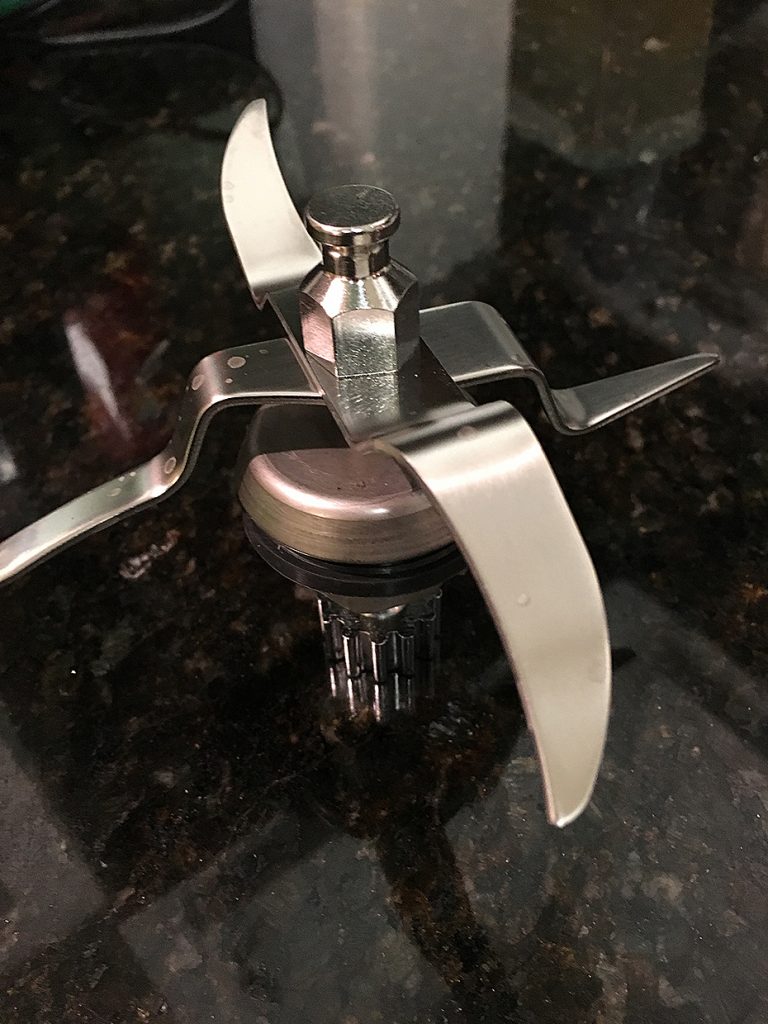
Just seeing the chopping blade caused me to see flashbacks of my life, which I was certain would end with a lethal finger cut. My fears were justified. You must hold the blade in place while locking it using a lever at the bottom of the bowl. The lever can be a sticky widget, and if you’re not careful, you can flood your counter when you pour liquid into the Bellini bowl. (I speak from experience.) Also, the lever isn’t adequately identified in any of the books that came with the Bellini, but Mr. H was able to find it. One last note about the blades: In the manual they look different, but my blades – with the exception of the stirring blade – are virtually identical. The lever and blade issues came heavily into play when I made rice pudding. Stay tuned for that story.
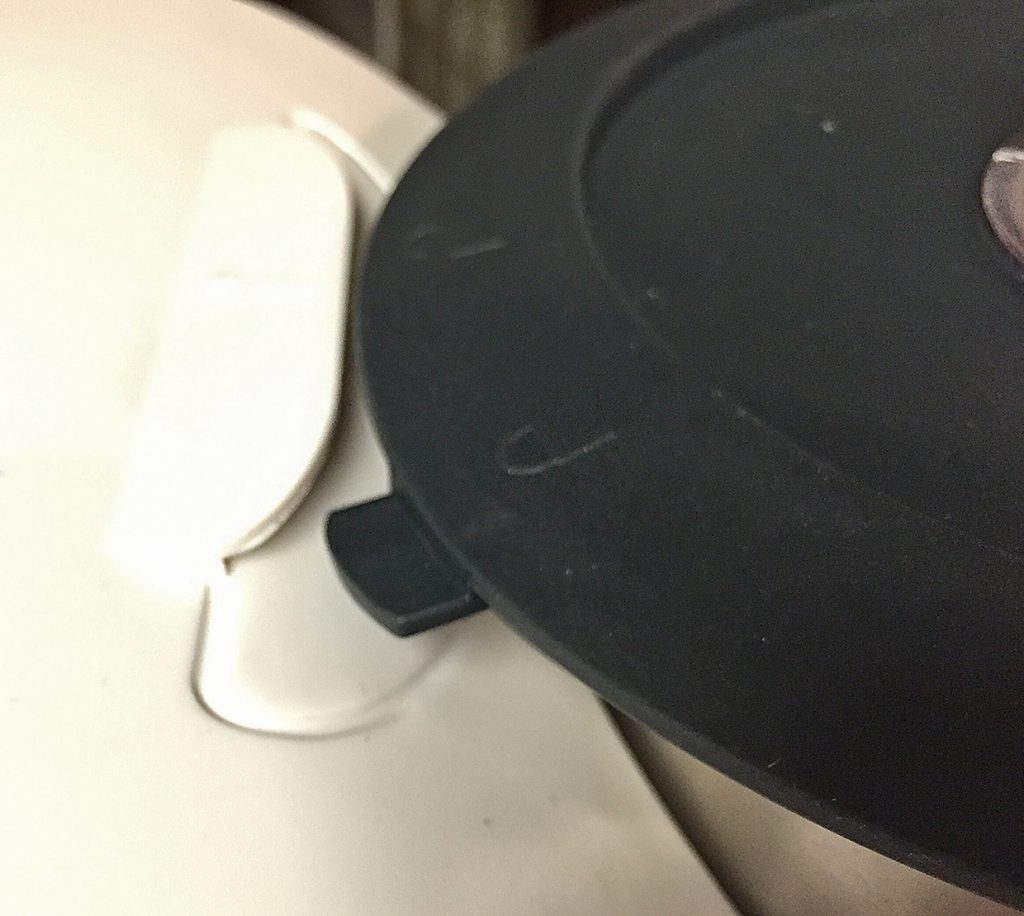
The first thing I noticed about the unit is the steep learning curve. Aside from the many parts and instructions, it’s just not easy to use. The bowl is temperamental and practically needs to be slammed onto the base for the unit to operate without issuing a warning light. (Read about my guacamole experience for more on the warning light.) Also, the lid has to be centered on the bowl and fitted under an edge so a locking mechanism can slide into place. This also requires linebacker force, something a diminutive woman like me lacks. When I complained to Mr. H about how hard it is to slide the lid into place, he took hold of it and went into some interesting new yoga poses while saying, “It’s easy to get into place. See?” I definitely did see. I wish you had been there to see it too.
For my first recipe, I tried butterscotch pudding, which starts with a basic caramel sauce made with butter and brown sugar. The sauce cooks on Speed 2 for 12 minutes until you pour the cream, cornstarch slurry, milk and vanilla through the lid. I didn’t have dark brown sugar, which the recipe called for, so I fudged (see what I did there?) and used light. Fifteen minutes later, it came out very slightly thickened, and it took a few hours to set enough to eat without a straw. But the result was a delicious, though more akin to caramel than butterscotch. Our son and his friend enjoyed it, and so did I – twice. Mr. H doesn’t care for butterscotch pudding. (“I like butterscotch, and I like pudding, but I don’t like the two together. Some things shouldn’t be mixed,” he says.) I’m mentally filing the whole caramel thing for dip or ice cream topping. Mr. H likes caramel sauce.
The book (or one of them) recommends sticking to the recipes provided until you’re used to the unit. This can be a little tough when you’re married to Mr. H, the world’s self-proclaimed pickiest eater. Lobster bisque, made with roaches of the sea? Out. Hummus, made of mushed-up beans, which must remain intact in his world, and garlic, which he says gives him bad breath? Definitely out. And the list goes on. So I decided to get creative early on. I do cook, after all.
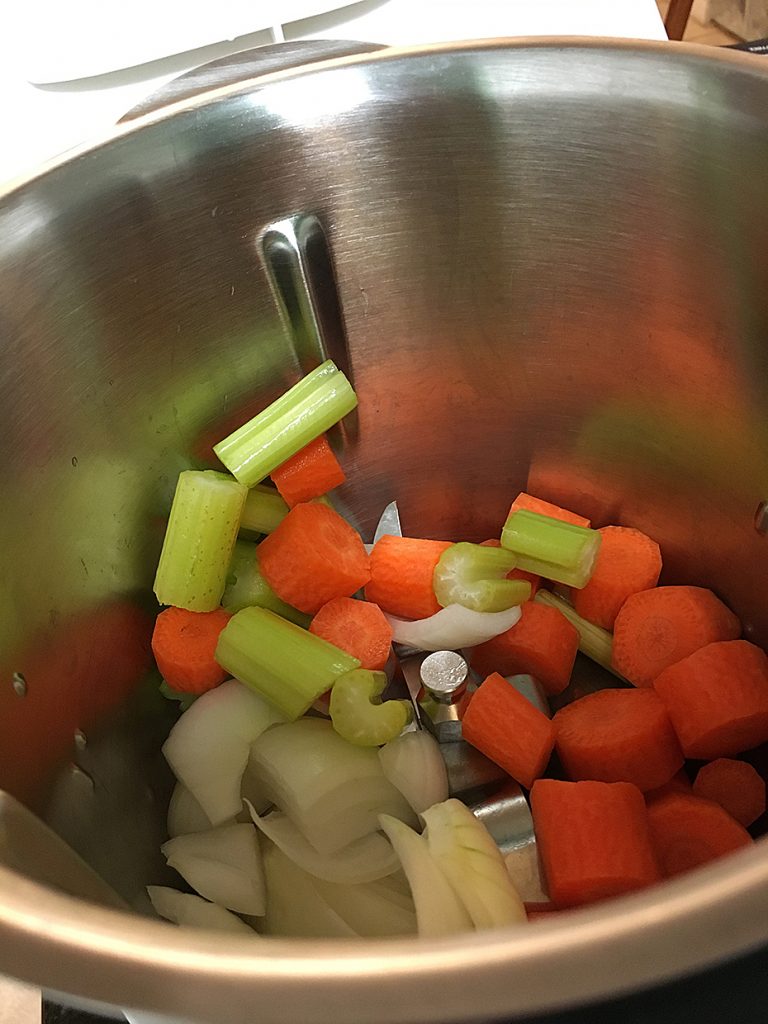
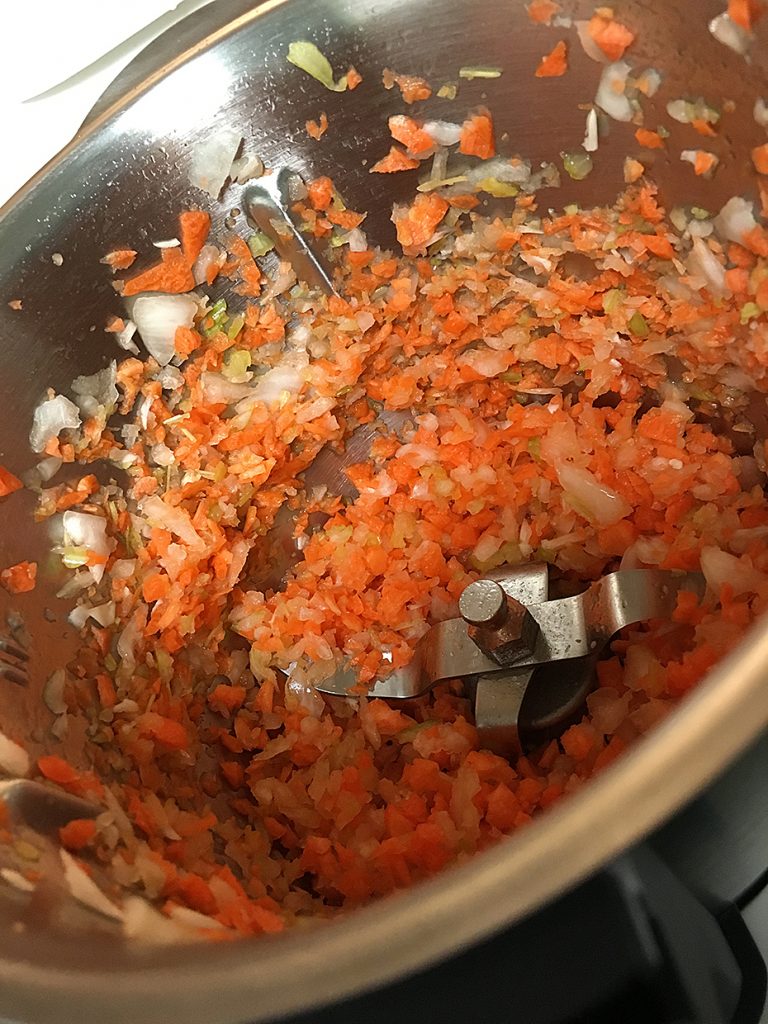
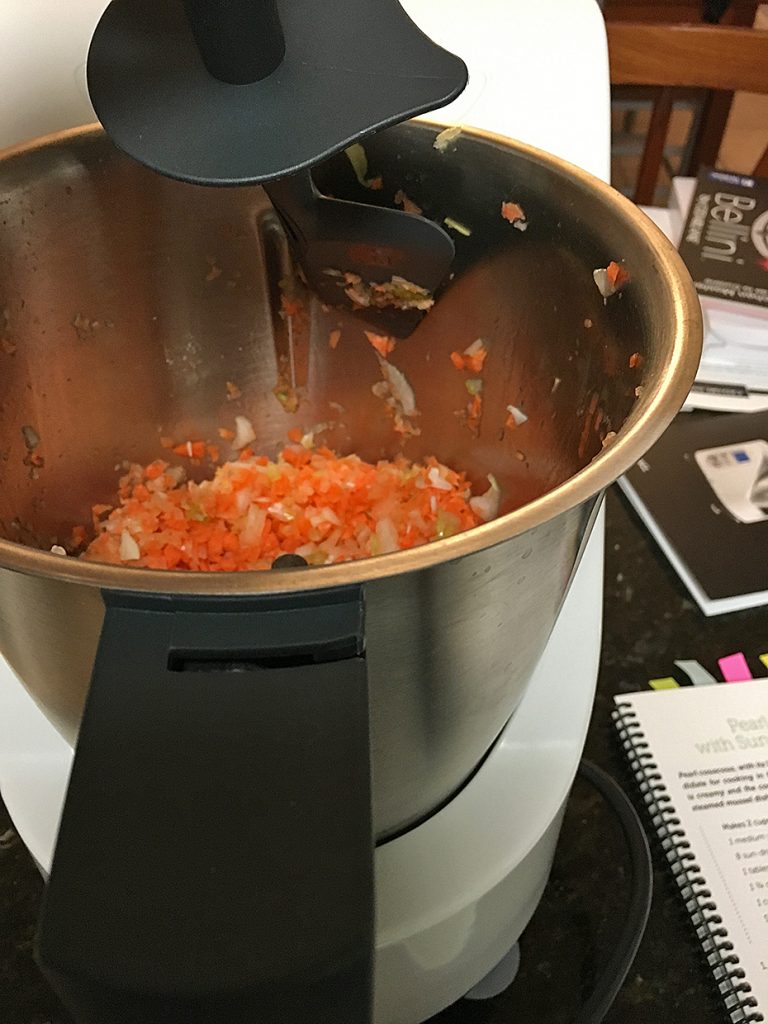
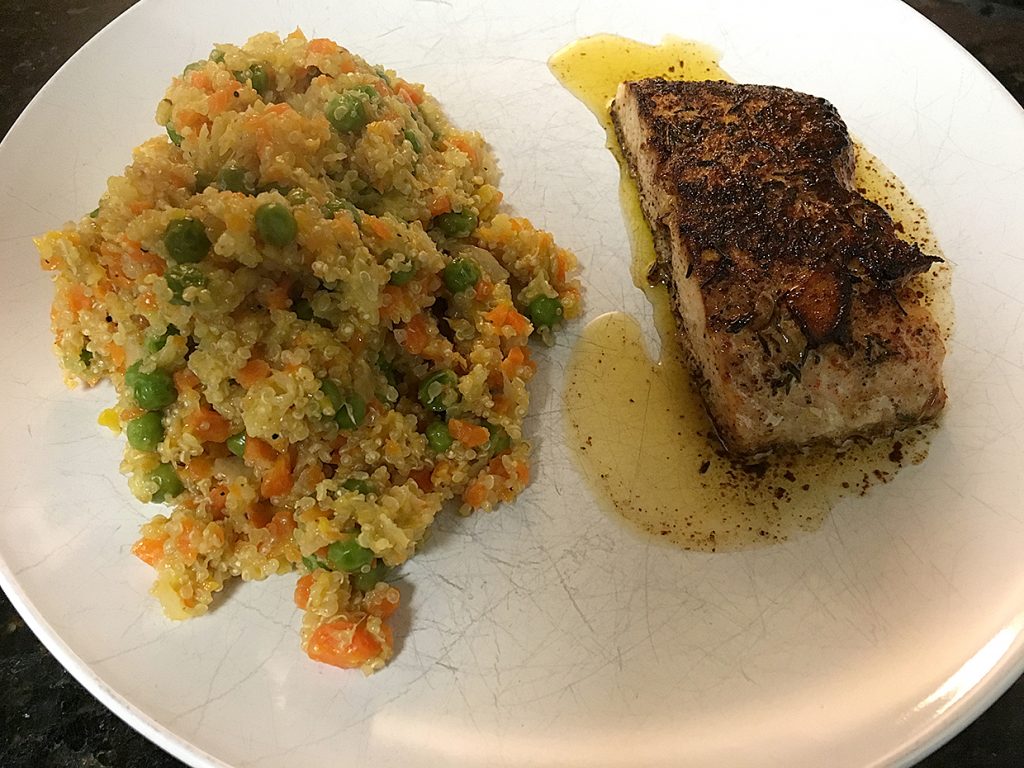
For my second recipe, I would experiment by making quinoa pilaf, for which I based cooking times and instructions upon a couscous recipe in the cookbook. I was sick with a cold and needed dinner but didn’t feel like making it, and I found myself eyeing the Bellini. Could I pull this off? I wondered. I started by coarsely chopping onion, carrots and celery, and chopping them on Speed 3 for 10 seconds. Then I poured in a tablespoon of olive oil and some garlic, put on the stirring blade (which is plastic and non-lethal to fingers) and cooked on Speed 1 for six minutes. Then I removed the measuring cup in the lid to pour the quinoa into the bowl, replaced the cup and cooked it another minute. Then I braved it: I removed the lid and used the company-issued spatula to scrape down the sides before adding in the remaining ingredients: hot water, a bay leaf, lemon zest and juice, and seasonings. I set the temperature at 100 degrees C (212 degrees F), set the timer at 15 minutes and let it go. With five minutes to go, I poured some frozen peas through the lid and replaced the cup. The result was delicious with perfect texture. I decided the Bellini has some serious knife skills. I served the quinoa pilaf alongside some blackened salmon with lemon butter. I was happy. Mr. H was happy. This particular recipe was a success.

The next time around, I decided to prepare things that our son and I would enjoy and just make special provisions for Mr. H. Our son and I are big Tex-Mex fans, so we decided to make nachos one Friday night. This give us a good opportunity to make a batch each of guacamole and con queso in the Bellini. Using the recipe book that came with the machine, I had all the guac ingredients in the Bellini, only to discover the bowl warning light would not go off. The light indicates either the lid isn’t fitting properly on the bowl, or the bowl isn’t fitting properly on the base. My son determined the lid was fine and the bowl was seated squarely on the base, but we were still getting a warning. Then he discovered the problem: The sensor wasn’t making proper contact with the base. He dismantled and reassembled the base, but my guac couldn’t wait. I simply dumped all my ingredients in my Ninja blender, gently pulsing till everything was blended. But I still wanted to try the con queso. Fortunately, my handy son got the machine working just in time.

The queso recipe starts with your basic roux (one part fat to one part flour to one part milk), but it calls for a disproportionate amount of cheese. The flavor was good, but the consistency was very gummy – no shock, considering the artery-clogging amount of cheese – especially with reheating. I thinned it out considerably and made a Tex-Mex mac and cheese, which was quite good. Yes, it tasted as good as it looks.

More complications came with cleanup time. The bowl stuck to the base, which required more intervention. This time Mr. H came to the rescue, and I have to admit the machine was a worthy adversary even for him. I would have been completely unable to use or clean the machine had I not had two handy men on standby. If you buy this machine, I recommend weight training.

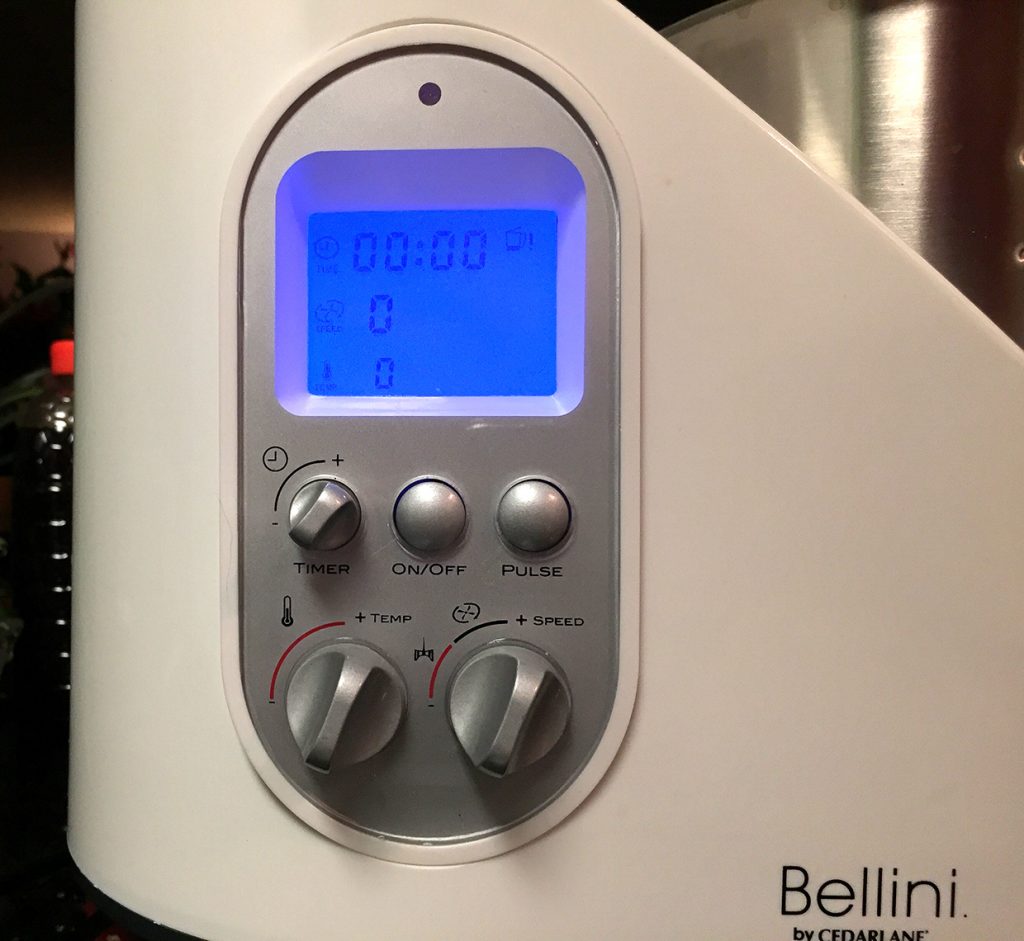
It was time to try some steamed vegetables. I put snow peas and bias-sliced carrots in the steamer basket. The recipe booklet calls for 4 cups of cold water and then cooking the veggies on Speed 3. When the timer went off, however, the veggies were cold and uncooked. I ended up steaming them by an alternative method and decided I must have done something wrong. I reviewed the book again and decided to try the same veggies another night, this time using hot water, which is supposed to reduce cooking time. Yet again, however, the veggies were completely uncooked when the timer went off after 15 minutes. Again, time compelled me to find an alternative method of steaming. After reading another review, I found there actually is a steam setting that looks like an error code. Nowhere in the instructions did I find this handy info.
The next day I decided to try to make rice pudding, one of my son’s comfort foods, using the recipe in the booklet. Before pouring my ingredients in the bowl, I needed to swap out the blade, which locks in place from the bottom. Now, before I move on to what happened next, allow me to digress. The chopping and stirring blades, as shown in the manual, look different. The stirring blade has blunt ends, whereas the chopping blade is sharp all around. But in reality the difference between them is hardly discernible, and using the wrong blade can greatly affect your results, giving you a puree instead of a chop, for example. But let’s move on to what happened next.
I was on the phone with my Aunt Cora while I was pouring my ingredients in the bowl and fitting the bowl to the base. The next thing I knew, my counter and floor were covered in milk. I work with words for a living, and I know sayings and idioms have historical roots.“Don’t cry over spilled milk” probably came about because spilled milk can give you good cause to cry – as you watch it ooze onto your mail, pour out of every opening of your $600 machine, down the front of your dishwasher and down onto your tile, much to the delight of your predatory dog. My Aunt Cora was probably crying, but her tears were from laughter; I was too busy trying to find enough towels to clean up the mess even to get a photo.
Once I transferred the ingredients to a beaker and began to survey the unit, I found the seal around the blade was properly in place. The lock, however, wouldn’t engage on the blade, which caused whatever went into the bowl to pour out the bottom like one of those old drink-and-wet dolls – a great concept for potty training but lousy for cooking. It would engage on the other blade, however.
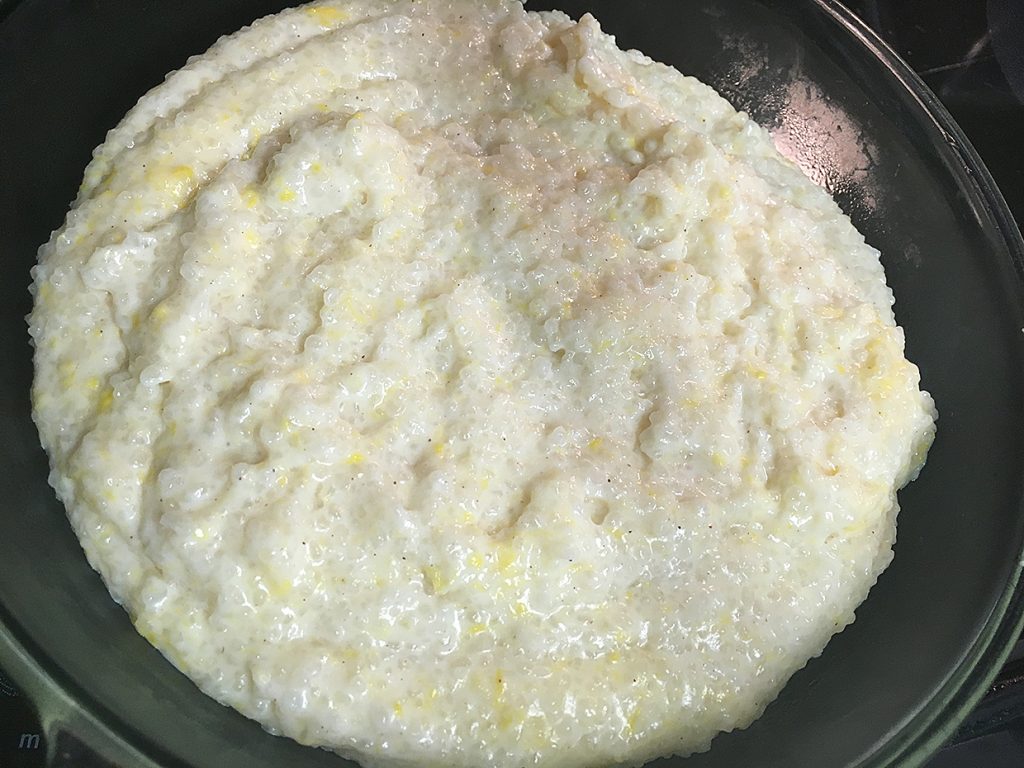
Once the mess was cleaned up, the blade switched out and the unit tested for sealing, I went back to work on the rice pudding. The recipe calls for cooking the milk, rice, sugar, salt, vanilla and cinnamon for 50 minutes before beginning to add four egg yolks in an additional five minutes of cooking time at a slightly lower heat. The eggs, unfortunately, scrambled, demonstrating the speed needed to be higher and the temperature lower. Like the con queso, the pudding had a gloppy texture, which wasn’t helped by the fact that the stirring blade decimated the rice kernels. Aside from the flecks of egg and gumminess, it could have benefitted from a little more sugar. I decided it’s worth the extra effort to make rice pudding the old-fashioned way.

My final foray was a two-parter: homemade butter that I would then use in a sauce for steamed mussels, seeing how I needed to test the steaming basket. The butter recipe calls for 2 cups of cold heavy cream and some sea salt. (Skip the salt if you want to make unsalted butter for cooking and not salted butter for garnishing.) The recipe also recommends chilling the bowl for 10 minutes, time permitting. For me, it didn’t.

Making the butter is a multistep process that gave me great respect for my late Grandma Bays, a farm wife who used to milk her own cows and churn her own butter. First I mixed the cream at Speed 3 for seven minutes. When I checked it at seven minutes, it was a salty but perfect whipped cream, perhaps because I didn’t chill the bowl. So I gave it an extra five minutes and found butter when the timer went off.


Then I drained off the buttermilk, which would go into chocolate-chocolate cupcakes the next day, using the small steam basket over a steel bowl. Per the recipe, I returned the butter to the bowl with a half-cup of ice water, mixed it for 20 seconds at Speed 3, and again drained off the liquid. I repeated this process until the liquid (a no-longer-useful form of buttermilk) was mostly clear. Then I pressed the butter between layers of paper towels until the moisture was absorbed. The result was a delicious, soft butter.

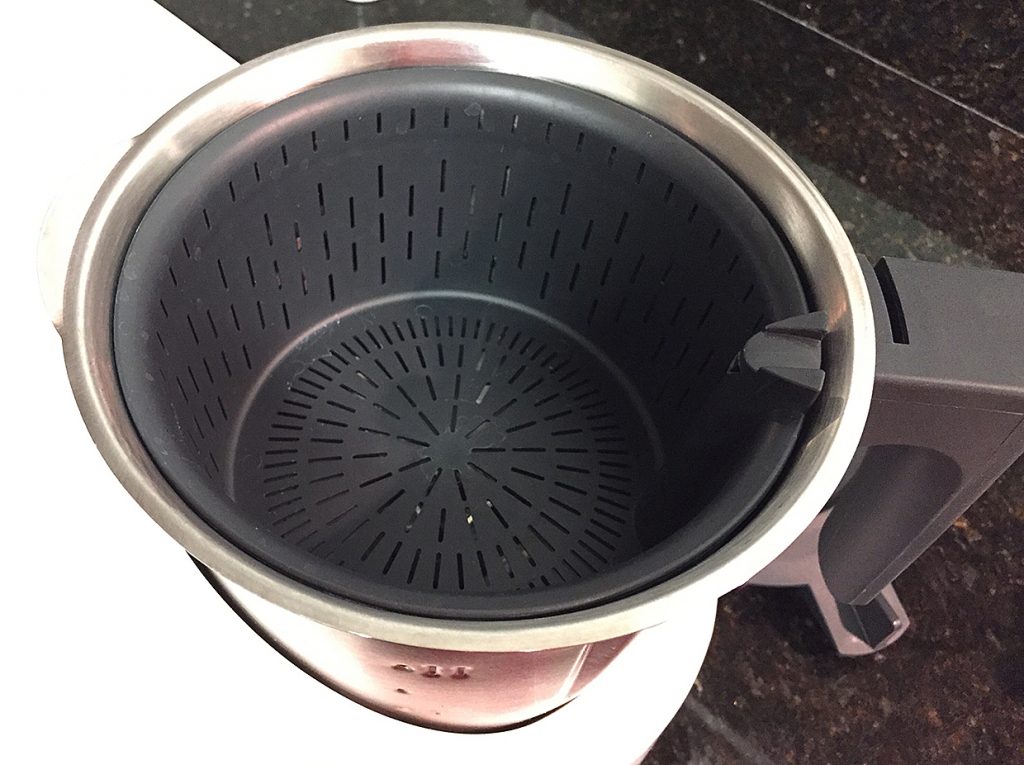
It was time to make mussels. If you’ve never made mussels, you might consider hiring out the cleaning process. I suggest a pressure washer, something my Alaska friends use to descale fresh fish. Cleaning mussels is slow-going, somewhat gross and very stinky, and I found myself feeling guilty for ripping off the little guys’ beards. As I cleaned them, I placed them into the large steamer attachment. Meanwhile, I substituted my fresh butter for the olive oil in the recipe, and I sautéed my garlic for two minutes on Speed 2. (Note: The recipe calls for chopping the garlic in the bowl, but my garlic was pre-chopped.) Once the garlic was sautéed, I added white wine, water, rosemary and parsley to the bowl, attached the steam basket, and cooked the mussels at Speed 5 for 15 minutes, slightly longer than the 12 minutes recommended. Because I now knew about the steam setting on the temperature dial, I was rewarded with a nice head of steam rising off the unit a couple of minutes into the process.
When our son and I sat down to eat our mussels (Mr. H ate pizza), we quickly came to several realizations:
- The Bellini doesn’t steam evenly. Some of the mussels didn’t cook at all, and many were slimy.
- We used to like mussels.
- I am the proud owner of a $600 butter maker.
My Bellini experience has been a journey that has taught me I’m an old-fashioned cook. Give me my Kitchen Aid stand mixer, my peripheral handheld mixer, my Ninja blender and my food processor, and together we have this cooking thing covered. As for the Bellini, I hope to pass it on to our daughter, a working mom who is married to an engineer. Perhaps it will find itself in more capable hands.
Source: The sample for this review was provided by Bellini by Cedarlane. Please visit for more information and Amazon to price check and order.
Product Information
| Price: | $599.99 US |
| Manufacturer: | Bellini by Cedarlane |
| Retailer: | Amazon |
| Pros: |
|
| Cons: |
|
Gadgeteer Comment Policy - Please read before commenting
Very nice review … I enjoyed reading it, although I have no plan to buy this appliance.
It is French. What did you expect – logic?
what does that mean???
I found the Bellini very easy to use. A pot that stirs. How many instructions could you possibly need for that? And yes, the code ST means steam, and it is in the instruction manual.
I used it without looking at the instructions and found it simple and straightforward to use. I have also followed some of their recipes with success every time.
If you cannot cook and do not want to think about the process, with or without a counter top appliance, no appliance will help. You have to want to make good food and use the tools (electronic or not) to the best of your ability. Good things will usually follow.
Agree. I know this is years after the fact but I just got
my hands on one of these machines and to say this
review is unfair is an understatement. I want to respond in case anyone out there is researching this machine as (unfortunately) this is one of the few hands on reviews out there.
User error contributed to many of the reviewer’s issues (not using proper “steam function”–it IS noted in the instructions contrary to reviewer’s statements; not ensuring blade was locked resulting in spillage of bowl contents; complaining that the locking mechanism for the blades is not readily identified–it is highly intuitive and easy to understand by just looking at the bowl). To add, use of hyperbolic statements for effect is not useful at all. Yes, significant force is required to lock the lid, but I’m not “linebacker” (5’2, 100 lbs) and I manage just fine. The bowl does not need to be “slammed” onto the base. Many people would have been turned off of this “$600 butter maker” after this ridiculous review.
Bonjour
Je cherche le joint de caoutchouc pour le couvercle du Master chef . Est ce que vous vendez ces pièces
Merci
Denis Laliberté
Desolée, Denis. Je suis une journaliste, pas une vendeuse.