ARTICLE – Most retro gaming projects treat nostalgia as a software problem. Load an emulator, map some buttons, slap the interface onto whatever display sits nearby, and call it a tribute. The original experience gets compressed into convenience, and something tactile disappears in the process. The warm glow of that pea-green screen, the deliberate physicality of those buttons, the way the whole device felt like a self-contained world: none of that survives translation to a modern monitor.
LCLDIY, a Chinese hardware maker with a reputation for building things nobody asked for but everyone secretly wants, understood this tension immediately. The LEGO Game Boy sets flooding the market look fantastic on a shelf, but they sit there doing absolutely nothing. Static objects wearing the skin of something that was never meant to be still.
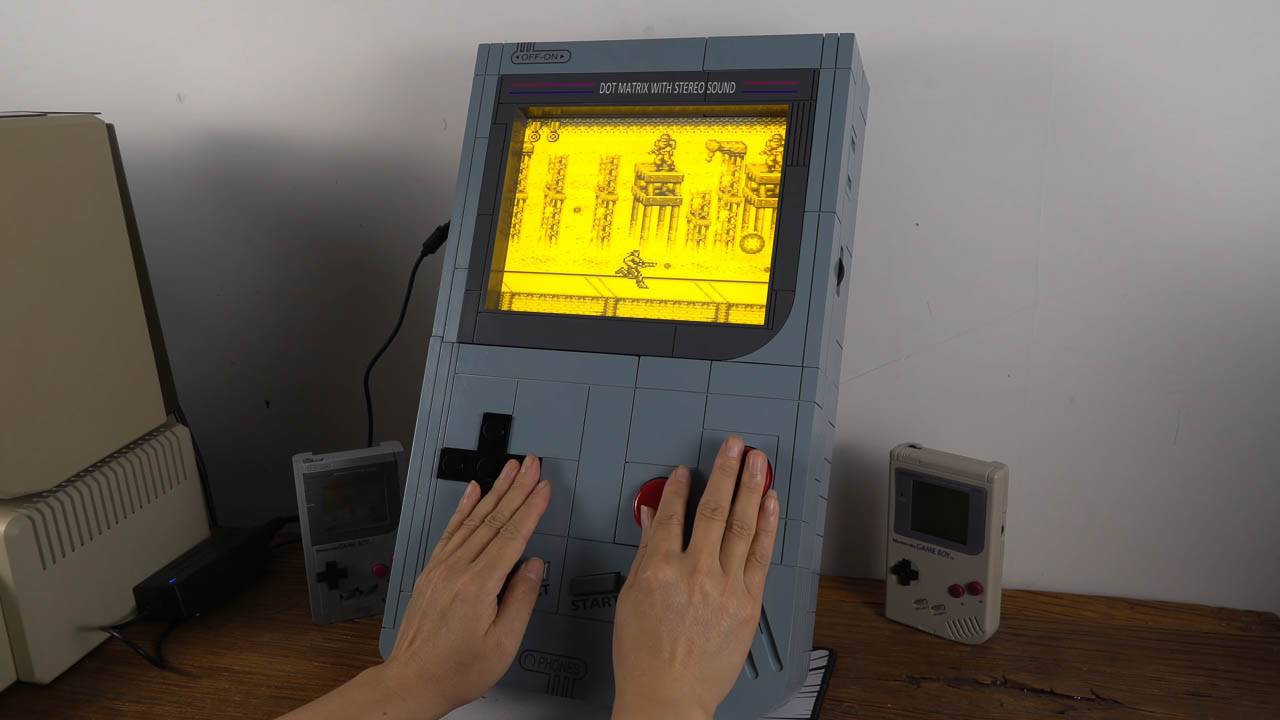
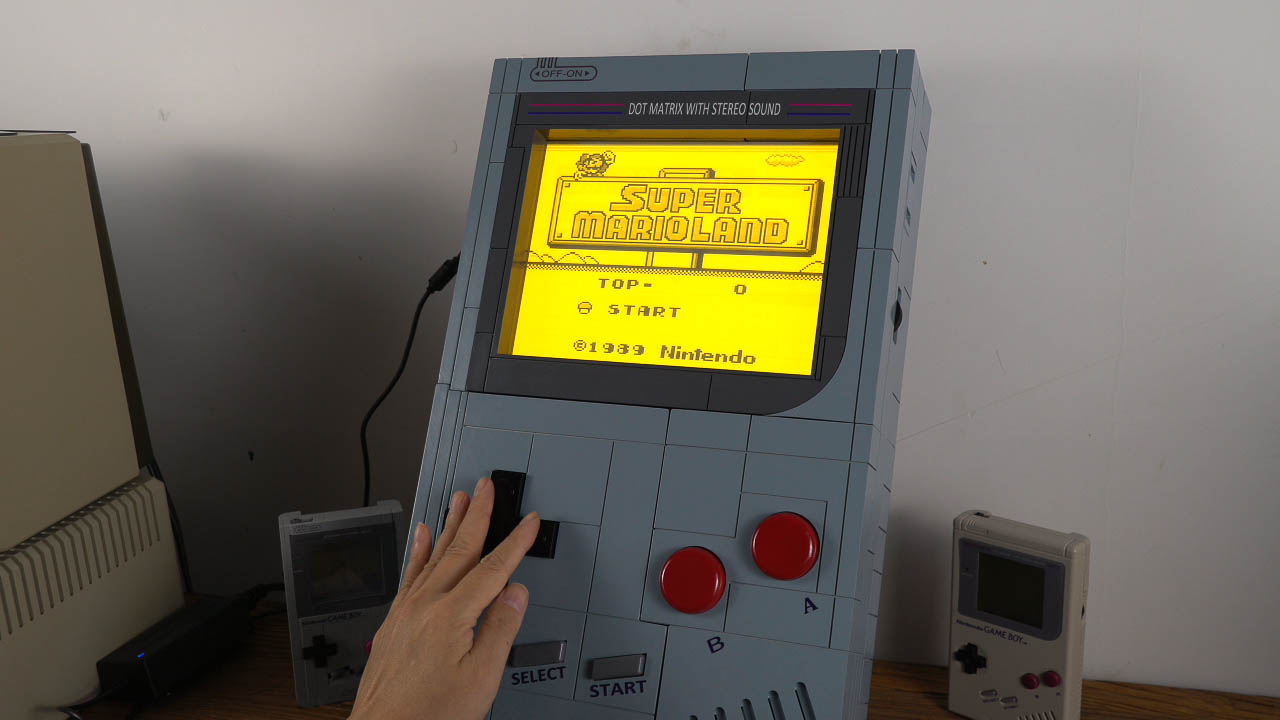
So LCLDIY built a giant, playable LEGO-style Game Boy instead, one that runs real Game Boy games, uses a vintage electroluminescent screen, and needed a custom graphics card just to talk to that obsolete display.
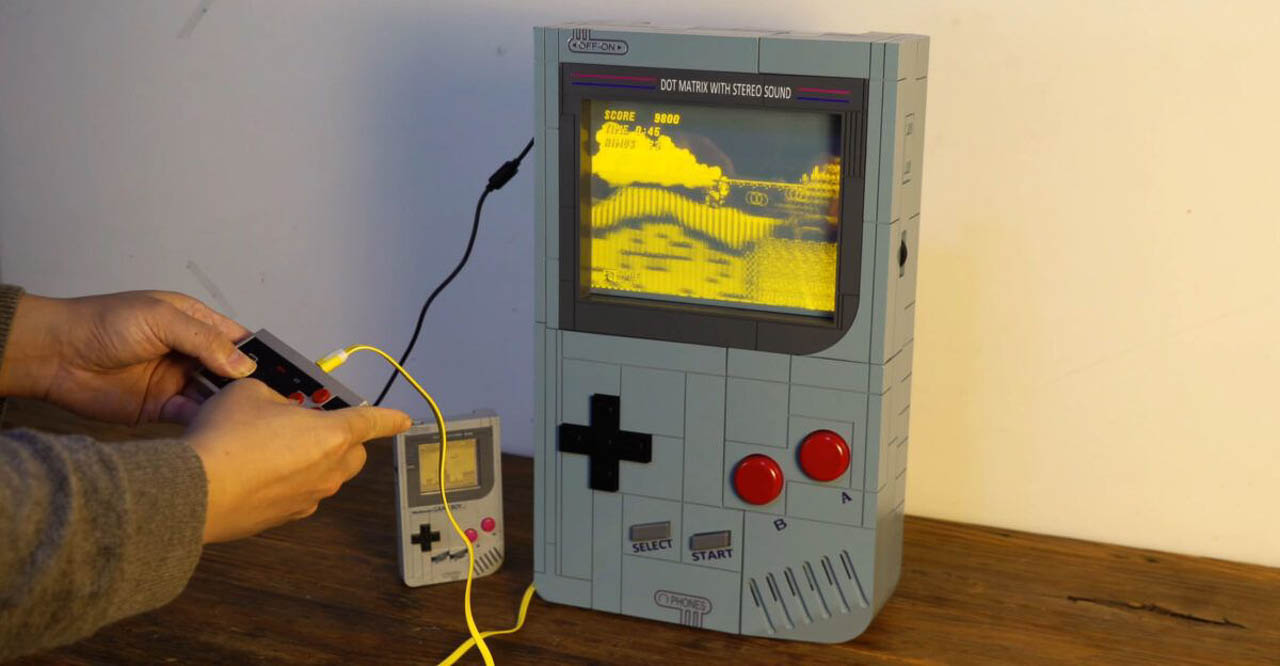
What emerged blurs the line between console and installation piece. It runs actual Game Boy emulation, accepts external controllers, and features arcade-style buttons scaled to match the oversized shell. None of that makes it special.
⬇︎ Jump to summary
Project Type: Open Source DIY Build
Cost: Free (design files, PCB schematics, BIOS)
Where to get files: Hackaday
Why this exists
Vintage electroluminescent displays produce light through phosphor excitation, generating a warm amber glow that shares more DNA with candlelight than with modern backlighting. LCLDIY chose this technology because it was correct, not because it was convenient. The original Game Boy screen had a specific visual quality that modern panels cannot replicate: that greenish tint, the motion blur, the way pixels seemed to breathe rather than snap into place. Electroluminescent panels capture that atmospheric softness in a different color temperature but with the same essential character.
Convenience would have meant an LCD with a shader filter. Correctness meant hardware archaeology.
Here is where the project becomes genuinely interesting, and where most retro builds would have compromised or stopped entirely. Electroluminescent displays do not behave like anything a modern computer expects to talk to. Standard VGA, HDMI, DisplayPort: none of these protocols speak the right language. The timing signals are wrong. The synchronization is wrong. The data delivery is wrong. You cannot simply plug an old display into a new motherboard and hope for the best.
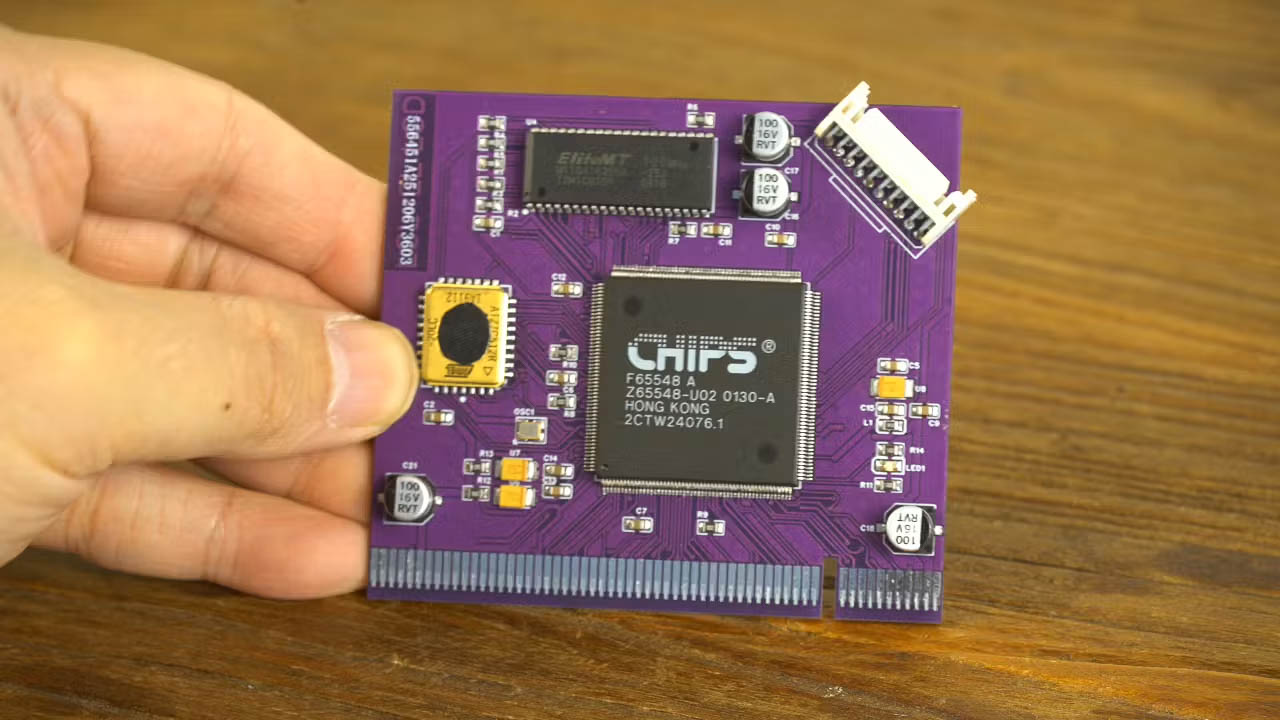
LCLDIY didn’t settle for a filtered LCD pretending to be something older. The builder designed a custom graphics card from scratch instead.
Centered around the 65540 Flat Panel VGA Controller chip, this custom GPU generates the exact timing, clock, and data signals the electroluminescent panel requires. The graphics card BIOS has been released publicly, which means this is not just a showpiece collecting dust on a shelf. It is a blueprint for anyone willing to learn how displays actually work at the signal level, where clock domains and synchronization pulses matter more than resolution numbers.
Amber glow, phosphor memory
Where a modern LCD would render Game Boy graphics with clinical precision, the electroluminescent panel adds texture and atmosphere. Pixels do not sit in perfect isolation. The glow bleeds slightly, softens edges, and creates the impression of hardware that is alive rather than merely functional.
If you ever played a Game Boy in a dark room, watching that screen cast its faint light across your hands, you understand what LCLDIY was chasing. CRT monitors had their own glow. LCDs have their backlight uniformity. Electroluminescent panels occupy a strange middle ground: self-emissive but soft, bright but not aggressive, warm but not orange.
This isn’t nostalgia through rose-colored glasses. It’s nostalgia through phosphor excitation, and that difference separates decoration from authenticity. LCLDIY built around the display because the display was the experience, not a window into it.
Custom silicon for an obsolete screen
Building a graphics card is not trivial. It requires understanding clock domains, signal timing, data serialization, and the specific electrical characteristics of the target display.
The 65540 Flat Panel VGA Controller chip sits at the heart of LCLDIYs solution because it’s old enough to understand how flat panels from the electroluminescent era expected to receive data. This is not modern silicon optimized for gaming frame rates or video decoding. It is purpose-matched hardware speaking the same generational language as the display it serves.
The entire internal computing stack follows this philosophy. A vintage Intel 845 motherboard runs the emulation software, chosen specifically because it interfaces cleanly with the custom graphics card without requiring driver gymnastics or compatibility layers.
LCLDIY documented the entire process and released the BIOS publicly. The Hackaday write-up includes enough detail for another builder to replicate the graphics solution or adapt it for different vintage displays. That kind of openness is rare in projects that could easily remain proprietary showpieces, and it transforms the build from a one-off art piece into an educational resource. The barrier to replication is knowledge, not access.
Shell, controls, and physical presence
Standard LEGO bricks lack the structural integrity and surface finish needed for a display piece at this scale. LCLDIY turned to light-curing resin printing, which produces smoother surfaces than FDM printers and handles large-format objects with better dimensional stability.
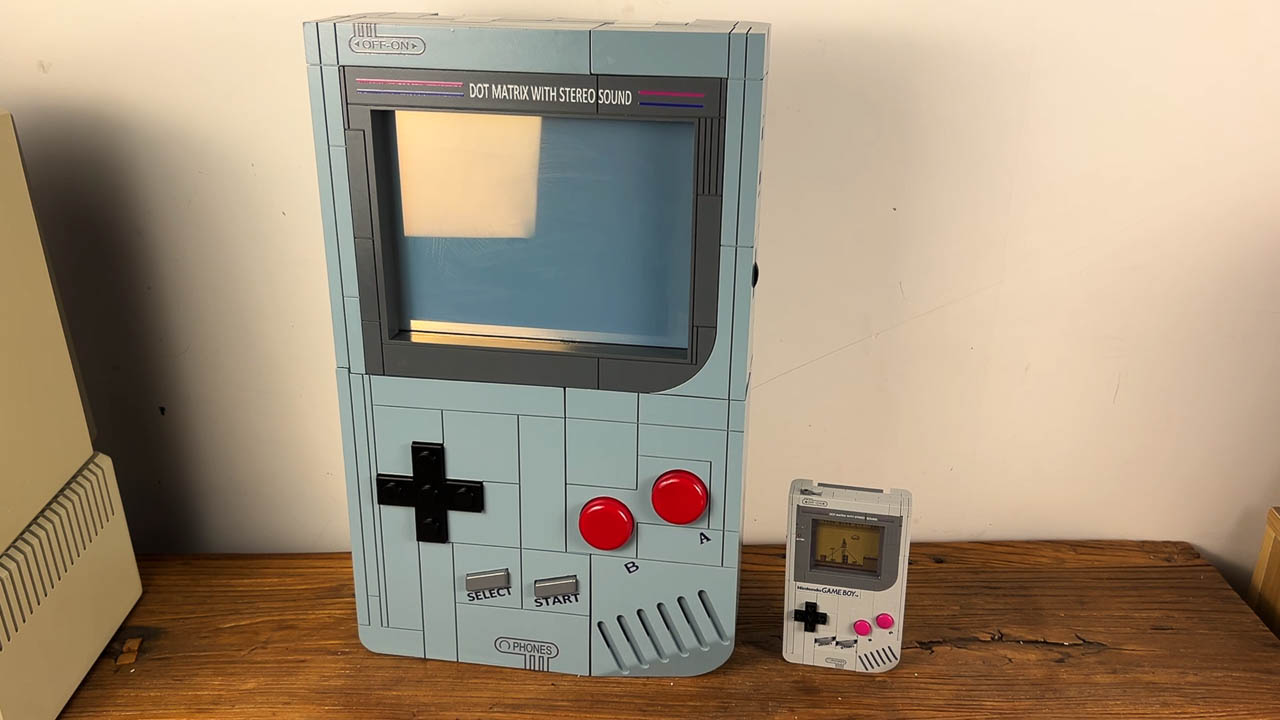
The result is a shell that looks like oversized LEGO but feels like a finished product, painted to match the classic Game Boy gray with transfer stickers for authentic labeling. Arcade-style buttons replace the original d-pad and action buttons, scaled to match the proportions of the enlarged shell. The tactile feedback differs from the original membrane switches, but the visual language remains intact. You could set this next to an actual Game Boy and the design vocabulary would read as family resemblance rather than distant homage.
External gamepad support reinforces the hybrid identity LCLDIY was pursuing. This is simultaneously a console you can play and an installation piece you can display. Neither function compromises the other.
Who this is (and is not) for
You’ll appreciate this project most if:
- You care about how old displays work, not just how they look in an emulator
- You like the idea of building or modding hardware, not just downloading ROMs
- You see retro tech as something to understand and extend, not just collect
Skip this if your interest in retro gaming begins and ends with software emulation. RetroArch on a Raspberry Pi with a nice filter achieves similar visual results for a fraction of the effort. The magic of this project lives in the hardware archaeology and signal-level understanding of how displays actually work.
It’s also not a weekend build. The custom graphics card alone requires PCB design, component sourcing, and enough electrical engineering knowledge to debug timing issues.
What this signals
Retro gaming has split into two camps over the past decade. One optimizes for convenience: emulators, FPGA recreations, modern displays with scanline filters. The other chases authenticity at any cost, hunting for original hardware, restoring CRT monitors, and accepting limitations as features rather than bugs.
LCLDIYs project sits in a third space, one where authenticity means understanding the original technology deeply enough to recreate its essence at a different scale. The custom graphics card is the projects real thesis statement. It argues that the screen is not a peripheral to the Game Boy experience but the experience itself.
Project Type: Open Source DIY Build
Downloads: Graphics card PCB, BIOS, BOM, 3D printable shell (STL)
Compatible Displays: LJ64H052, EL640.480-AF1, EL640.480-AG1, EL640.480-AM
Where to get files: Hackaday
Scaling up the shell and buttons was decoration. Scaling up the displays soul required engineering from first principles.
We have covered plenty of retro gaming builds that prioritize convenience or novelty. This one prioritizes understanding, and the documentation makes that understanding transferable. For anyone curious about vintage display technology, signal timing, or what it actually takes to make old hardware talk to new hardware, LCLDIYs giant LEGO Game Boy is less a finished product than an invitation to learn.
![[MINI SIZE. ULTRA PORTABLE CHARGER]: Roughly the size of an AirPods Pro case, this smallest power bank packs 10,000mAh of long lasting power into a tiny, nano footprint. Easily slide this ultra slim, credit card size charger into your skinny jeans, a...](https://m.media-amazon.com/images/I/41rATpm6dyL._SL160_.jpg)
INIU Portable Charger, Ultra Mini 10000mAh 45W Fast Charging with Detachable Cable, Flight-Safe Travel USB C Power Bank External Phone Battery Pack for Xiaomi iPhone 17 16 Samsung S26 Google iPad etc
(as of June 27, 2026 19:11 GMT -05:00 - More infoProduct prices and availability are accurate as of the date/time indicated and are subject to change. Any price and availability information displayed on [relevant Amazon Site(s), as applicable] at the time of purchase will apply to the purchase of this product.)