REVIEW – I’ve been toying with the idea of putting a dash camera in my car for a while now. Honestly, I wasn’t looking forward to running cables, or taking up a 12-volt socket, or splicing into the fuse box. I saw a few online articles on how easy the FITCAMX dash cams are to install and how well they look. I received a FITCAMX Dash Cam for my 2023 Ford Maverick to review. Read along to see how it went for me.
⬇︎ Jump to summary (pros/cons)
Price: $169.99 (Front 4K (2160) 64GB version
Where to buy: FITCAMX, Amazon, Walmart
What is it?
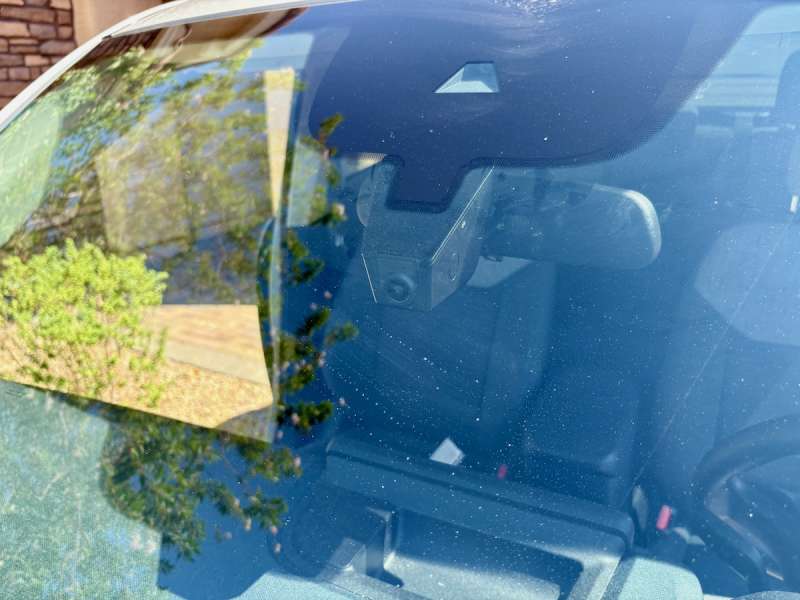
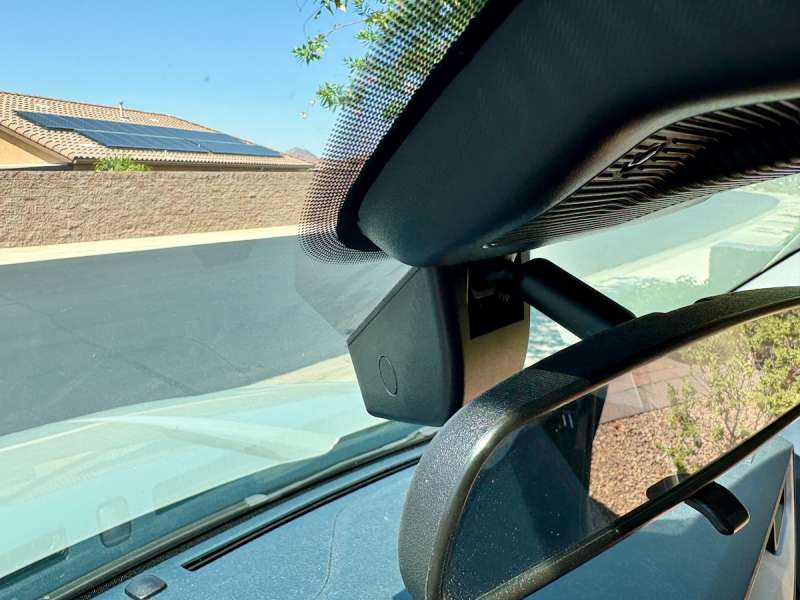
The FITCAMX Dash Cam is an aftermarket dash cam capable of recording 4K videos that installs using the same mounting point as the rear view mirror, giving that OEM look.
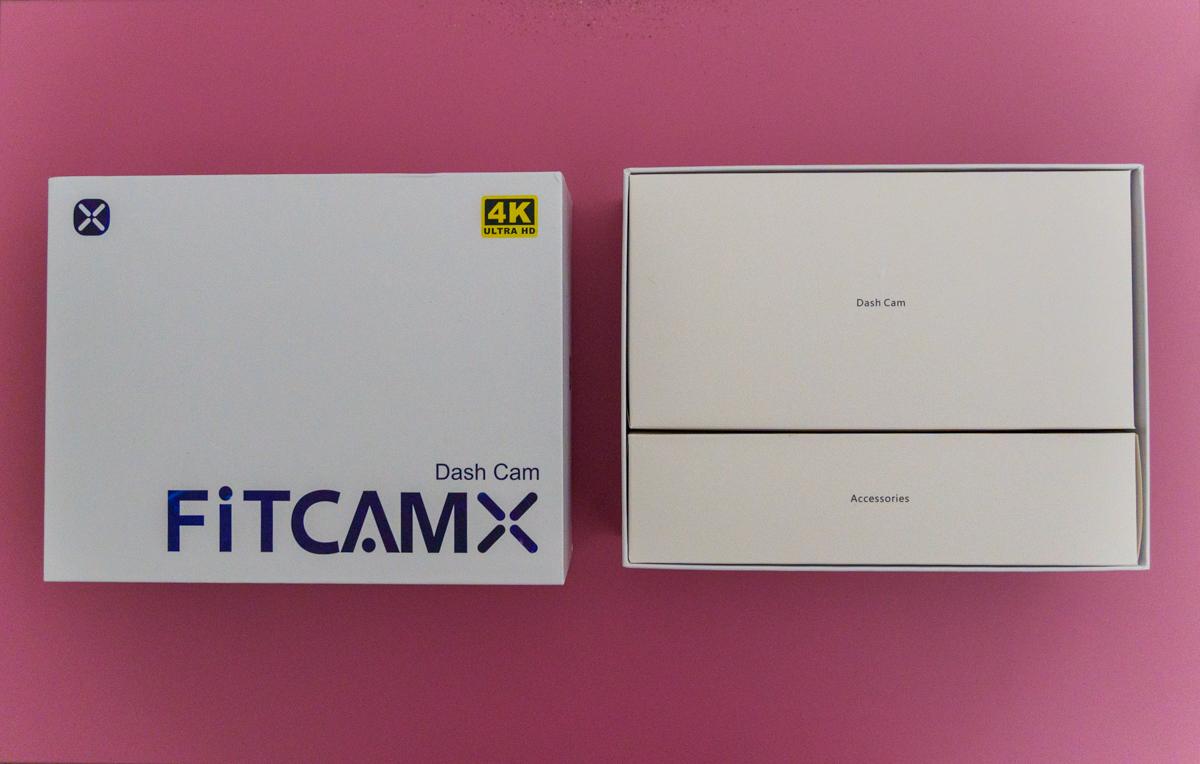
What’s included?
- From Cam
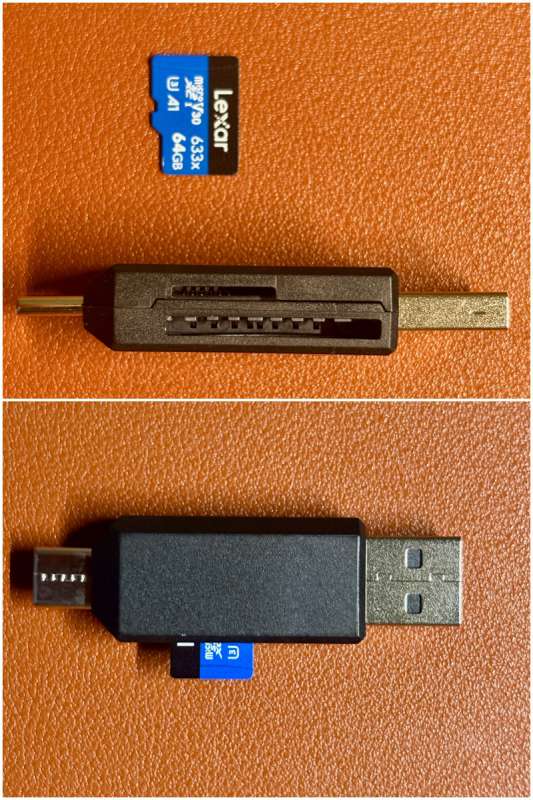
- 64 GB MicroSD card
- Y Cable
- Pry Removal Tool
- Memory Card Reader
- User Manual
Tech specs – 4K Single Front Cam ONLY
CPU: Novatek 96670
RAM: 2 GB
Front Resolution: 2160P (4K)
Video Pixel: 8MP
Wide Angle: 170º
Max Aperture: f/1.6
WiFi: 2.4Ghz
Mobile App: iOS and Android
Front Cam Installation: No Wiring
Parking Mode: No (If required, please contact FITCAMX to purchase a fuse box kit)
Loop Recording: Yes
Nightvision: Yes
Warranty: 1 year
Max Memory Card Size: 256 GB
** The rear camera cannot be added separately **
Design and features
I bought my son a front dash can from a different vendor for his birthday a couple of months ago. He is leasing his car, and I got him a generic, universal dash cam that he could take with him to the next car. The drawback was that it involves running a cable along the edge of the healdiner, down the A pillar, and under the dash to be plugged into the 12-volt socket for power. From the outside, it’s obvious that there is a dash cam stuck to his windshield. While researching options for him, I was also looking into a simpler OEM option for me.
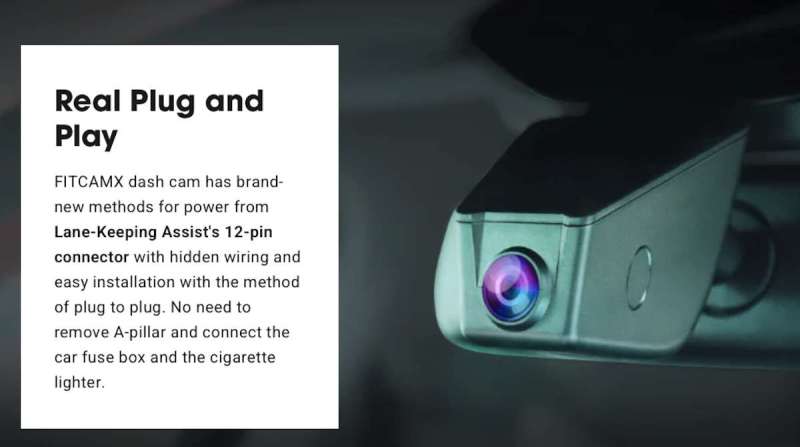
The FITCAMX Dash Cam looked to be the option I was looking for. But some of the reviews indicated that if my truck didn’t have rain-sensing wipers (which it doesn’t), then I would need to run cables to my fuse box. When I received the FITCAMX Dash Cam, I was expecting a bundle of wires to accommodate all the connection options. To my surprise, there was only a Y-connector cable. Could it be this easy? Yes, actually – follow along with the install with me in the Assembly, Installation, Setup section below. Basically, took about 10 minutes, and I was ready to go! Here is the installation video from FITCAMX:
Since I asked for and received only the Front 4K camera option, the Parking option was not included. If desired, let FITCAMX know when ordering, and they will include the fuse box kit.
The FITCAMX Dash Cam does use a G-sensor to automatically detect sudden collisions when driving. It will immediately save the files and prevent overwriting. Normally, the auto-overwrite feature will overwrite the oldest files when the microSD card is full.
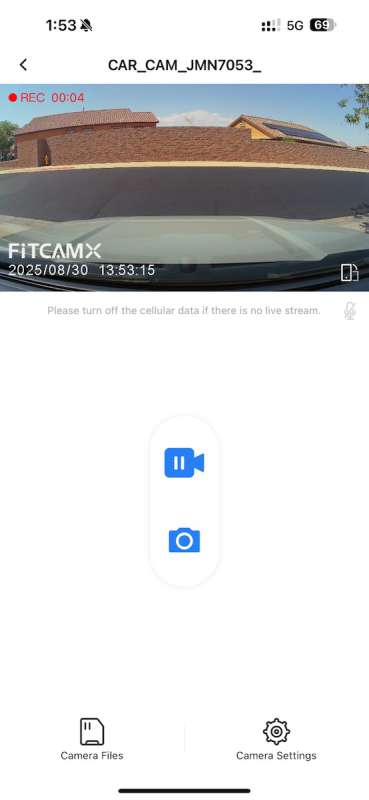
Unlike other dash cams, the FITCAMX Dash Cam does not have an external screen to monitor what the camera is recording. To view the recordings, you’ll need to connect to the dash cam with the FITCAMX app using WiFi and download the footage. Or you can pop out the microSD card and use the included adapter and plug the USB connector into a computer to download.
Back to the WiFi connection…this is your only option to connect to the FITCAMX Dash Cam. This is a quick process and works well.
Assembly, Installation, Setup
My anxiety about installing the FITCAMX Dash Cam turned out to be all for nothing! I did read some reviews that stated the install was tough and could take a couple of hours. But even while taking pictures, I was done in about 10 minutes!
To be fair, I only installed the 4K Front Cam option. And this latest version uses a Y-connector that connects to the Lane-Keeping Assist 12-pin connector to provide power. I did not need to fish a cable under the weatherstripping or under the A-pillar, or take up a 12-volt socket. With this connector, every time the truck is powered on, the FITCAMX Dash Cam powers on and starts recording.
The included printed directions were not helpful and pointed me online for more information. And the QR code to scan for installation brought up the install video for a Ford F-150, not the Ford Maverick that I am using. But due to the simplicity of the install, I was able to figure it out.
- Unscrew the bolt from the rear view mirror
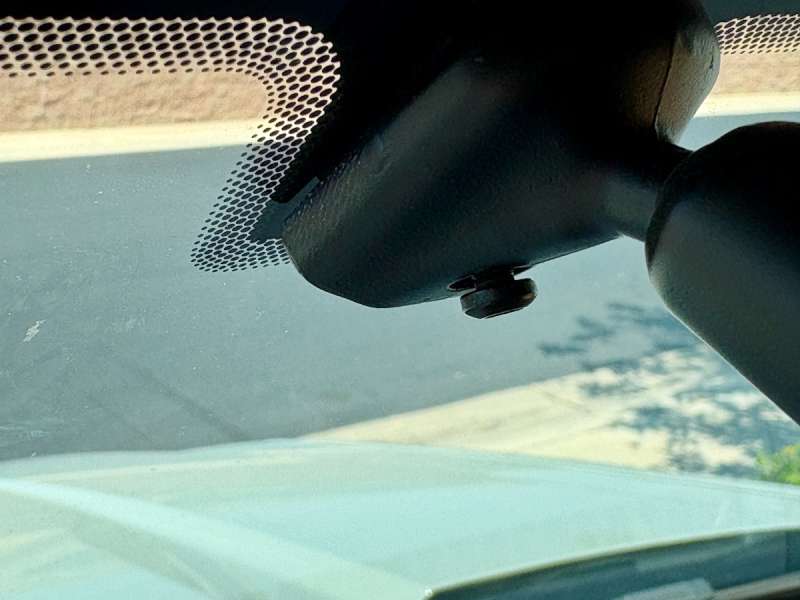
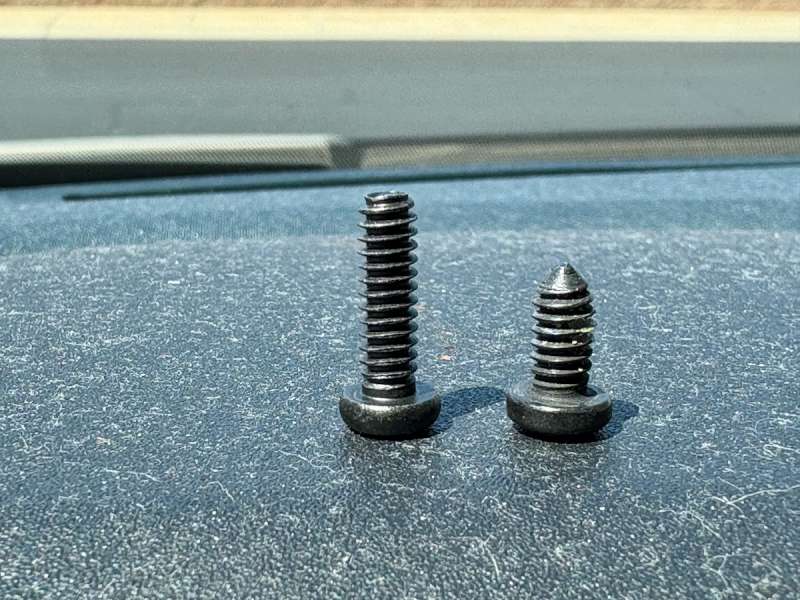
- Install the bracket by sliding it over the rear view mount – it will fit snugly in place. Use the included longer bolt to attach the bracket to the rear view mirror.
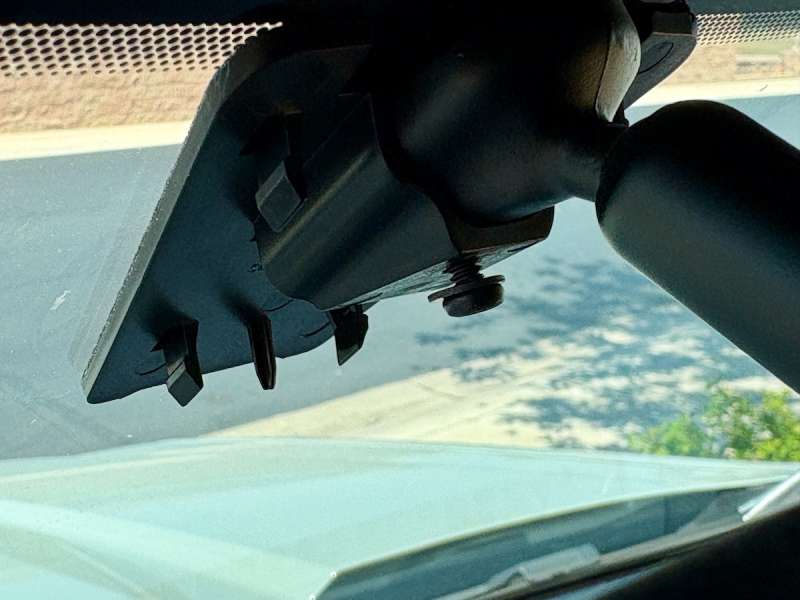
- Using the included plastic pry tool, pry off the rear view mirror cover.
- Unplug the Lane-Keeping Assist 12-pin connector from the exposed assembly.
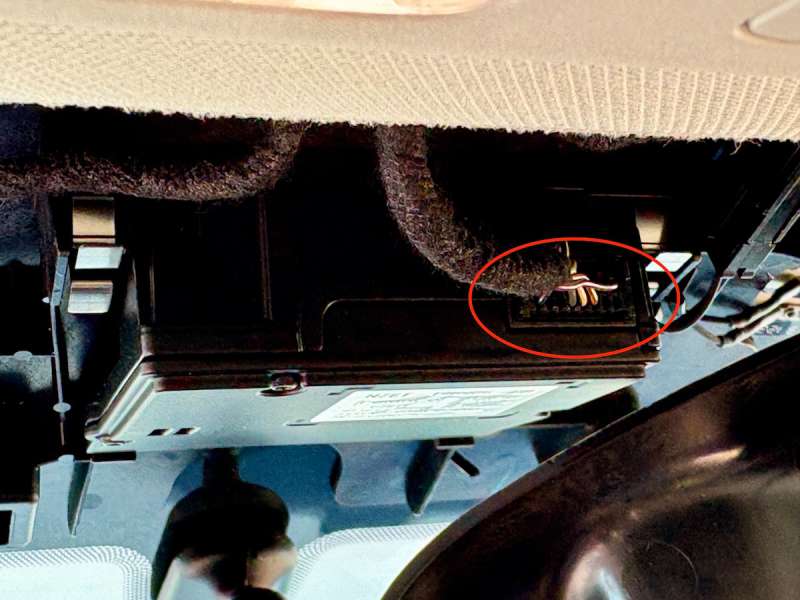
- Insert the Y-connector by plugging one end into the newly vacant 12-pin slot and the other end into the FIITCAMX Dash Cam.
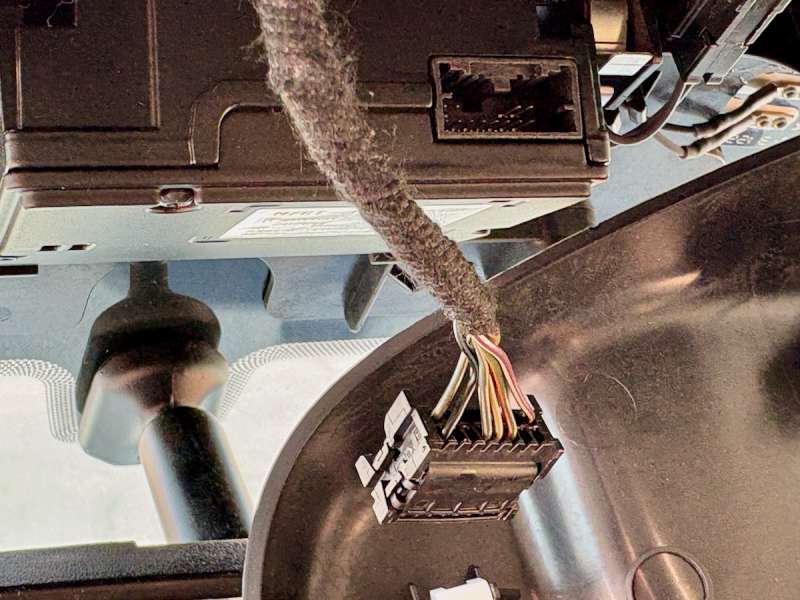
- Plug the Lane-Keeping Assist 12-pin connector into the Y-connector.
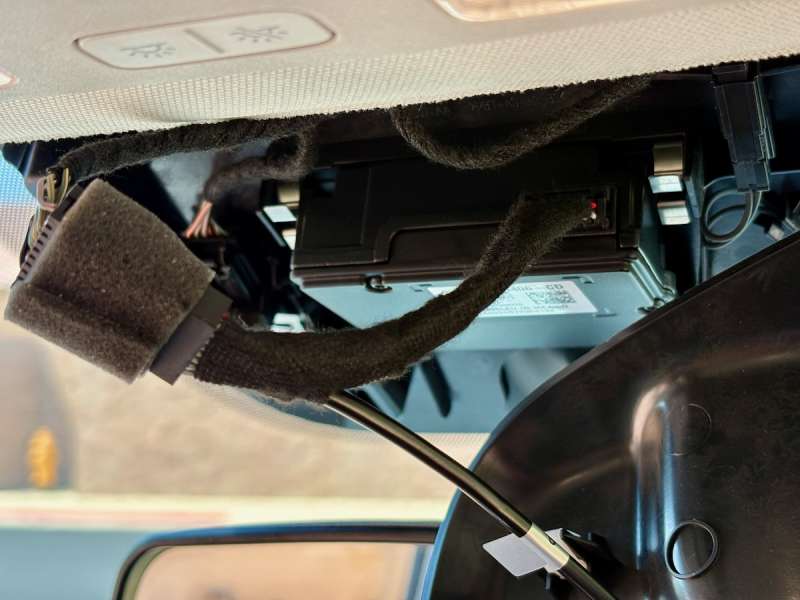
- Tuck the cables and snap the cover back on.

- Snap the FITCAMX Dash Cam on the mounting bracket – it should firmly snap in place.
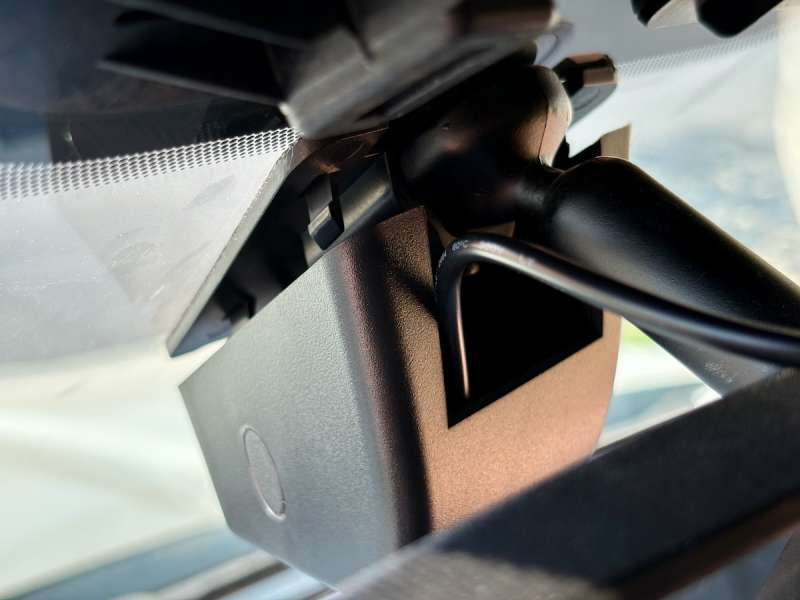
- NOTES: If installing the CPL filter, it will be easier to install on the FITCAMX Dash Cam before installation. In the unit I received, the 64GB microSD card was already installed. DON’T FORGET TO REMOVE THE BLUE PROTECTIVE COVER FROM THE LENS!
Performance
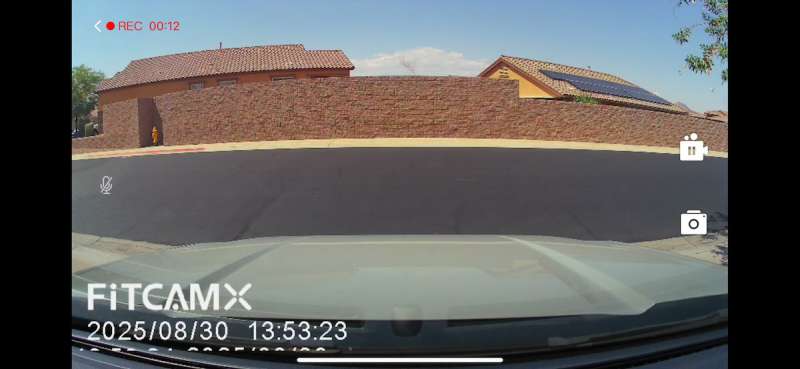
As much as I was shocked and impressed with the installation of the FITCAMX Dash Cam, I wasn’t nearly as happy with the video quality. On my 27″ 1440P QHD monitor, the footage seemed grainy, even in bright daylight.
And at night, it was worse.
I guess if there was an accident, the quality would be enough to tell a story, but anything more would be a compromise. On my iPhone 16 Plus, it looked better…but smaller.
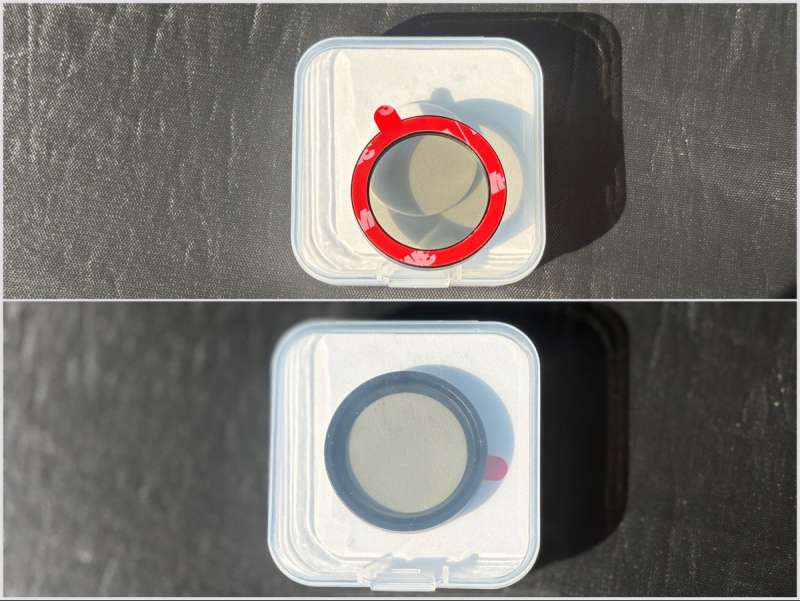
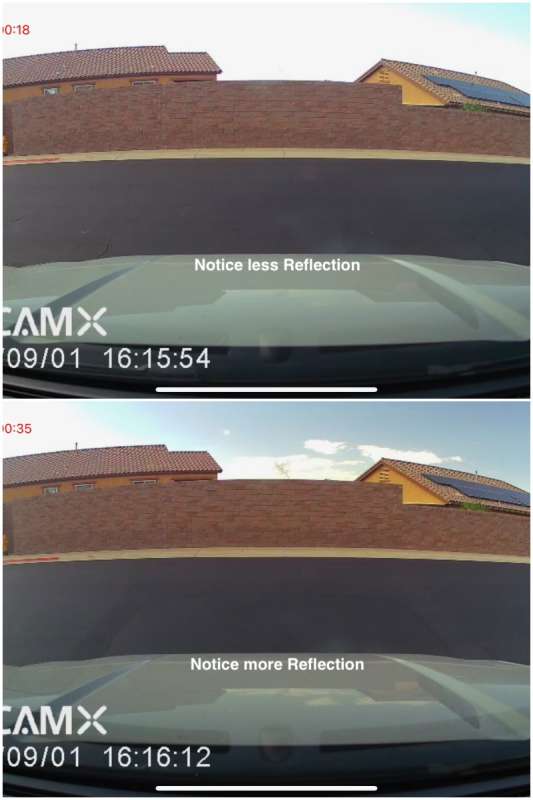
Included in my review unit was the CPL filter, or circular polarizing filter. Traditionally, a CPL filter reduces reflections, brings out deeper colors, and cuts down on haziness. As a photographer, a CPL filter does indeed do these functions and really can’t be replicated in post-processing. The thing is, to take full advantage of the effects of a CPL filter, the shot or footage needs to be at 90º from the sun. This CPL filter is no different. Depending on conditions, you’ll need to turn the outer ring on the filter to gain any improvements. The hiccup is….I rarely drive straight in the same direction for miles and miles, especially in the city. This means I would need to constantly rotate the CPL filter ring to get the best possible footage. Not ideal.
Final thoughts
After installing the FITCAMX Dash Cam in my Maverick, it was out of sight…and out of mind. It would start recording after starting the truck and stop recording when I shut the truck off. Without an external monitor, I was oblivious to all the activity. I did occasionally double-check to make sure that everything was working correctly, but it just did its thing in the background.
I do live in the desert, and temperatures in the peak months often exceed 100º F, and through the windshield of my truck, temperatures just skyrocket. I am curious and hopeful that the extreme temperature doesn’t cause problems or shorten the lifespan of the FITCAMX Dash Cam. I use a sunshade, but it doesn’t cover the camera.
So far it’s been working fine…just wish the video quality was better, especially being touted as 4K.
What I like about the FITCAMX Dash Cam
- Installed within 10 minutes!
- No need to run cables or splice into the fuse box
- Discreet
What needs to be improved?
- Instructions should be more than scanning a QR Code to watch a video
- Do to the WiFi connectivity, unable to connect to the FITCAMX and the internet
- MicroSD card was noticeably hot when pulling it out in the middle of the day under intense sunlight
- I was expecting better quality videos
Price: $169.99
Where to buy: FITCAMX, Amazon, Walmart
Source: The sample of this product was provided for free by FITCAMX. FITCAMX did not have a final say on the review and did not preview the review before it was published.
It looks like my colleagues have reviewed quite a bit of dash cams so far this year. Please check out their links below for their insights and observations.
Check out these other dash camera reviews!
- 70mai Dash Cam 4K T800 review – Three (cameras) for the money and double 4K to go
- Botslab G980H Pro dash cam review – Cover all the angles
- VIOFO A329S 3-Channel 4K dash cam review – You’ve seen the news; you need a dash cam.
- GKU D1000 3-Channel 4K Dash Cam review – 4K + 3-Lens = 2 cool!
- DDPAI Z60 3 channel dash cam review – Comprehensive camera connectivity
![[MINI SIZE. ULTRA PORTABLE CHARGER]: Roughly the size of an AirPods Pro case, this smallest power bank packs 10,000mAh of long lasting power into a tiny, nano footprint. Easily slide this ultra slim, credit card size charger into your skinny jeans, a...](https://m.media-amazon.com/images/I/41rATpm6dyL._SL160_.jpg)
Now retrieving an image set.
INIU Portable Charger, Ultra Mini 10000mAh 45W Fast Charging with Detachable Cable, Flight-Safe Travel USB C Power Bank External Phone Battery Pack for Xiaomi iPhone 17 16 Samsung S26 Google iPad etc
(as of July 13, 2026 18:57 GMT -05:00 - More infoProduct prices and availability are accurate as of the date/time indicated and are subject to change. Any price and availability information displayed on [relevant Amazon Site(s), as applicable] at the time of purchase will apply to the purchase of this product.)
Now retrieving an image set.
Gadgeteer Comment Policy - Please read before commenting
Looks like similar to the cameras from MANGOALTECH.
I have the Mangol version of this camera and I do live in AZ. It stopped working after a year (last recording was mid-June – I suspect the heat). It has power but would no longer record or show WIFI signal to connect to the phone. Customer service was prompt and offered to send me a replacement.
Thanks for the heads up! I’ll keep checking it.
Also the Mangoal version doesn’t have that FitcamX watermark on the video feed. There’s no logo.
Also, you need their PotPlayer app to watch the clips. PotPlayer doesn’t work on Macs. PC only, so I have to convert my Mac into a PC virtual machine, just to view the files.