REVIEW – Mowing our lawn on a set schedule has proven to be a challenge with our busy lives and we’re too cheap to pay people to mow our small lawn. I’ve been eyeing robot lawnmowers for a while now thinking they may help with our problem. However, do they cut grass as well as a push (or riding) mower? They cost much more than a push mower, so I want to know if they can do the job before purchasing it. I was recently given the opportunity to review the Mammotion Yuka 1500 Robot Lawn Sweeping Mower. I spent a month with it and found that it kept up with the mowing, but it had a lot of issues with it.
What is it?
The Mammotion Yuka 1500 Robot Lawn Sweeping Mower is an automated device that cuts grass, collects yard debris, and empties the grass clippings for you.
The mower uses an RTK device for precise positioning. “Real-time kinematic (RTK) [positioning] is a technique used to enhance the precision of position data derived from satellite-based positioning systems (global navigation satellite systems or GNSS) such as GPS, GLONASS, Galileo, NavIC and BeiDou” (www.geospatialworld.net). “A multi-band GNSS device can access GPS (American), Galileo (European), GLONASS (Russian), and Beidou (Chinese) satellite constellations simultaneously” (www.gp-radar.com).
“Yuka accesses four global navigation systems (GPS, GLONASS, BeiDou, and Galileo) and incorporates supplementary sensors, thus, providing nearly 100 times improved accuracy than conventional GPS systems” (Yuka User Manual)
What’s in the box?
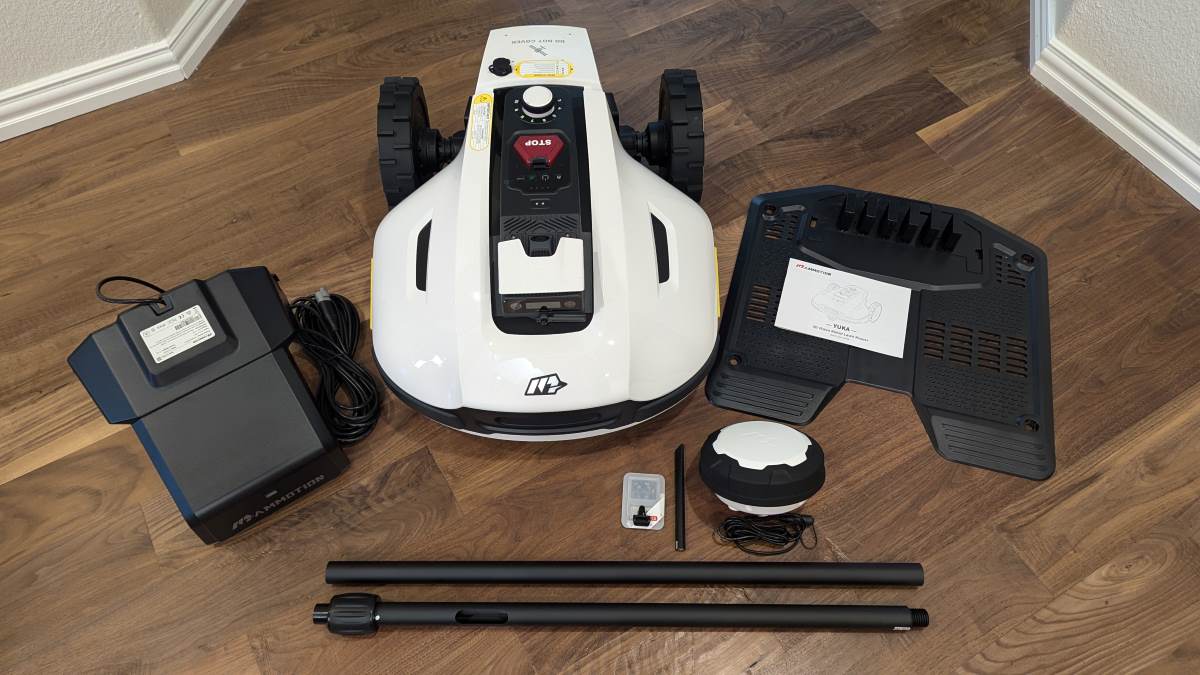
- Yuka 1500 3D Vision Robot Lawn Sweeping Mower
- Mower charging station (charging tower + base)
- Mower Quick Start Guide
- 8 Extra blades with 8 screws and washers
- RTK antenna
- RTK reference station
- RTK pole (2 pole sections)
- There were several items in smaller boxes:
- The mower power supply
- The metal trident stake for the RTK pole
- 4 plastic clamps (cord ties) to hold the power cord to the RTK pole, 4 plastic screws to anchor the mower charging base to the ground using a large plastic 8mm Allen wrench, 4 plastic cable pegs to anchor cables to the ground, an RTK reference station power supply and extension cord (10m), a screwdriver (Philips bit and 2.5mm hex bit), and a bag containing 4 screws, a small Allen wrench, and a SIM card removal tool.

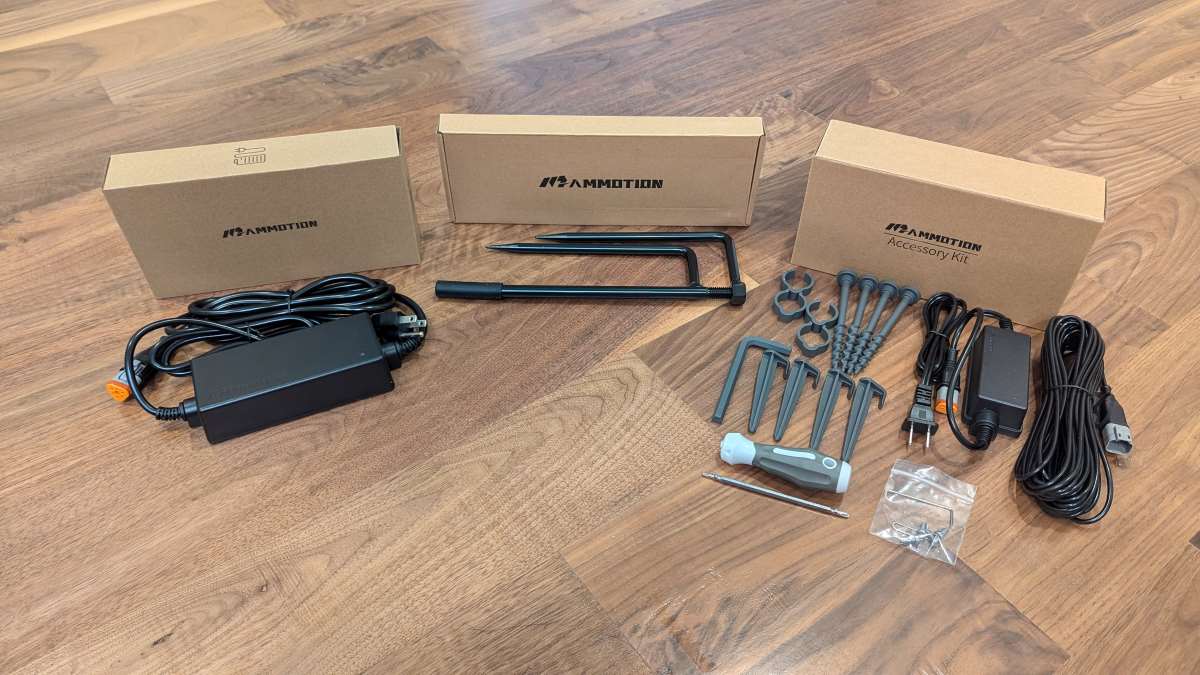
Two additional boxes were sent to me in separate shipments.
The RTK wall-mount kit (sold separately) was sent in one shipment (shown in the first photo above):
- A pole to mount the RTK unit to the side of a building
- Wall anchors
- a template for the wall mount
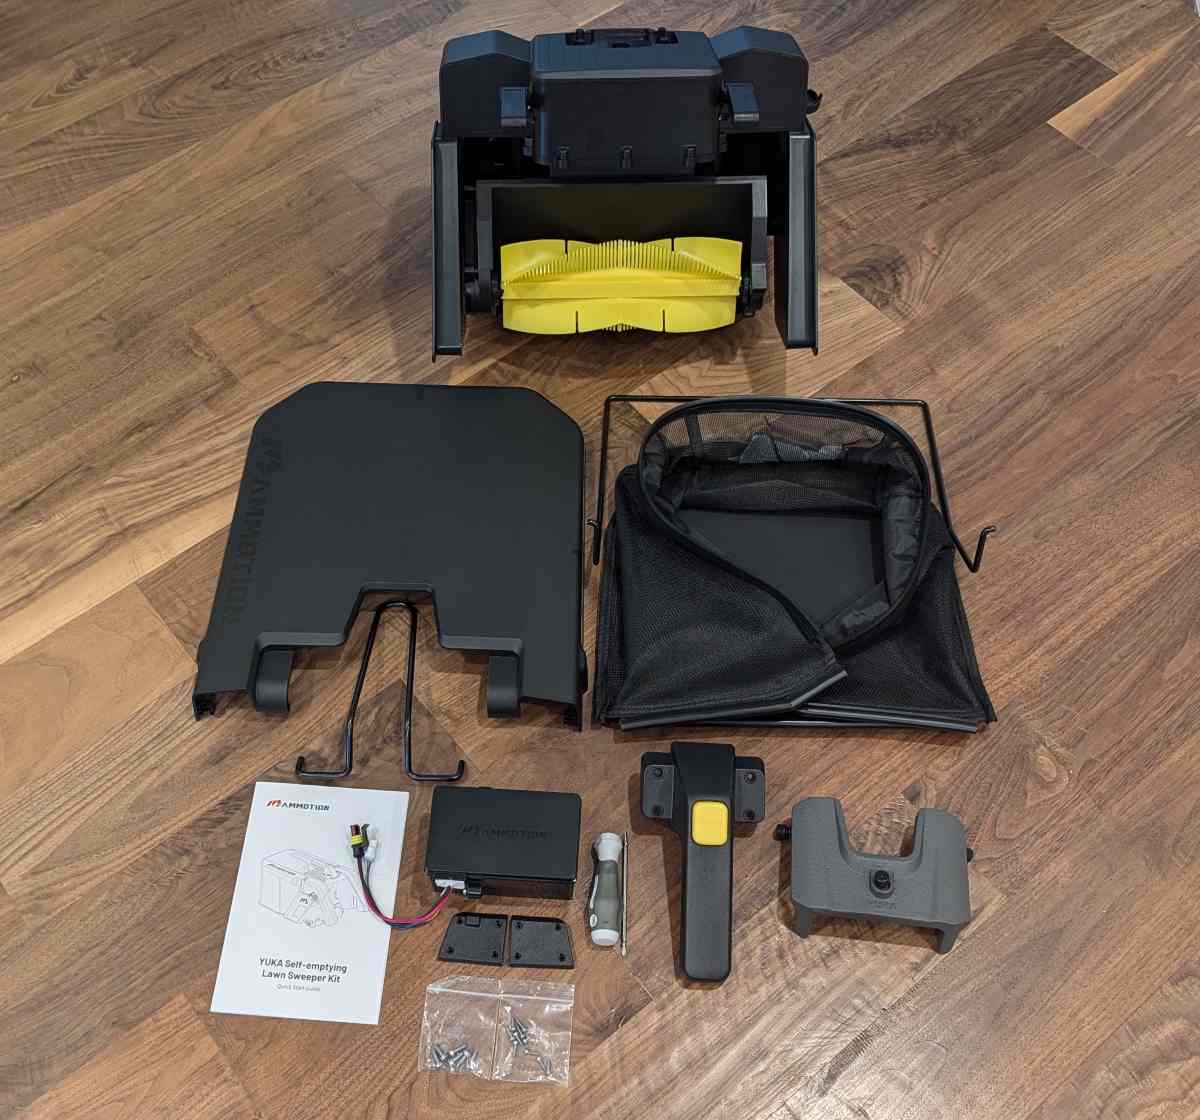
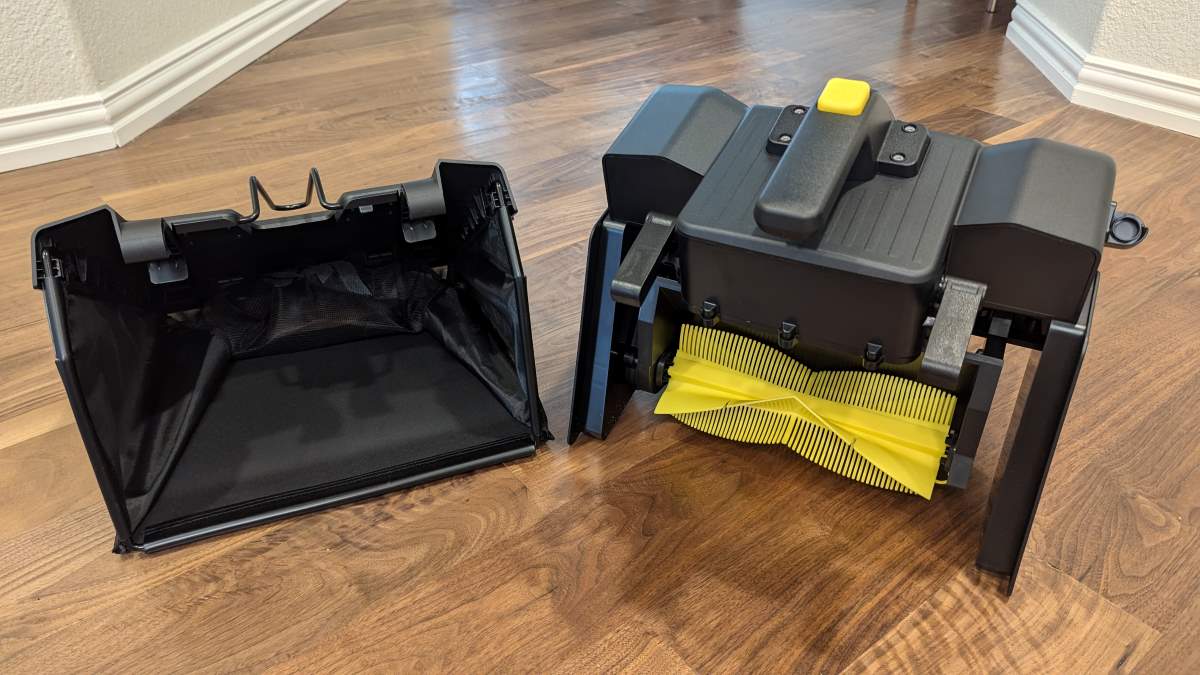
The Yuka sweeper kit (sold separately) was sent in another shipment (shown in the second photo above):
- Hopper pieces which include cover, mesh bottom, wire handle, and screws
- The sweeper module + handle
- A battery for the sweeper
- A lawn mower counterweight
- A screwdriver (Philips bit and 2.5mm hex bit)
- Screws
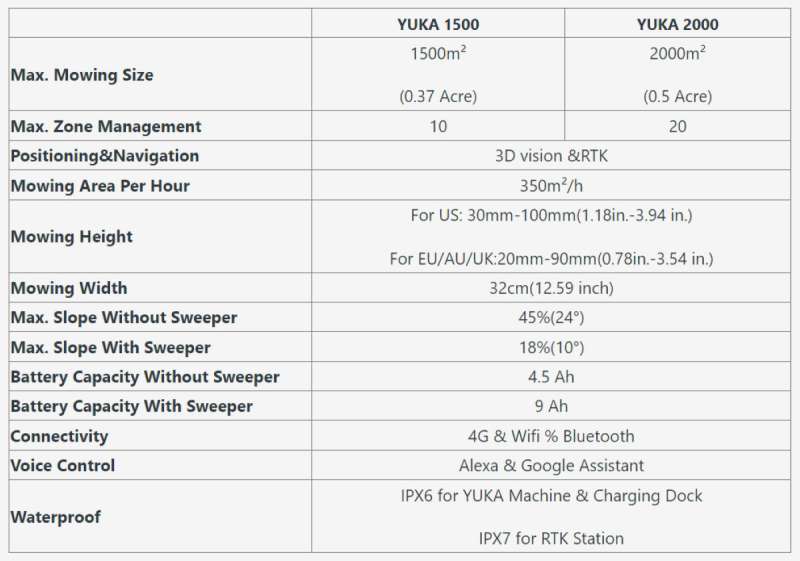
Hardware specs
Click to expand
Design and features
Setup
Hardware Setup
Assembling the charging station and installing an optional SIM card
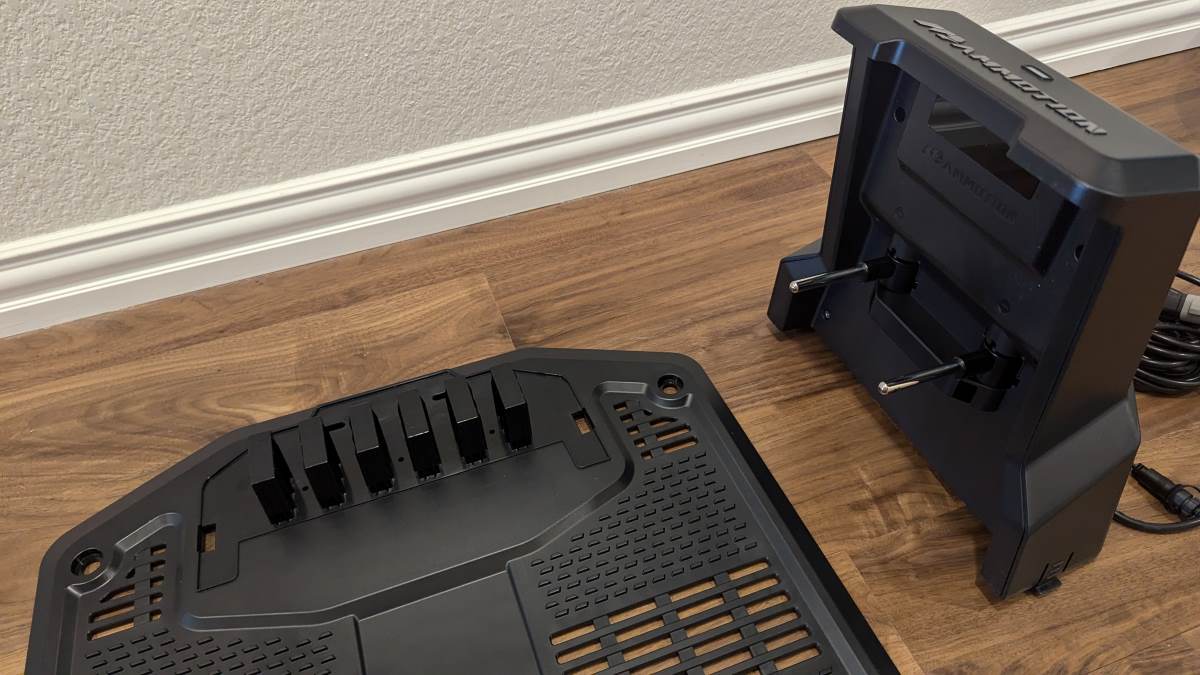
First, I assembled the Yuka 1500 charging station by inserting the charging tower into the base. It clicks in place and you then use screws to fix the tower to the base from the underside.

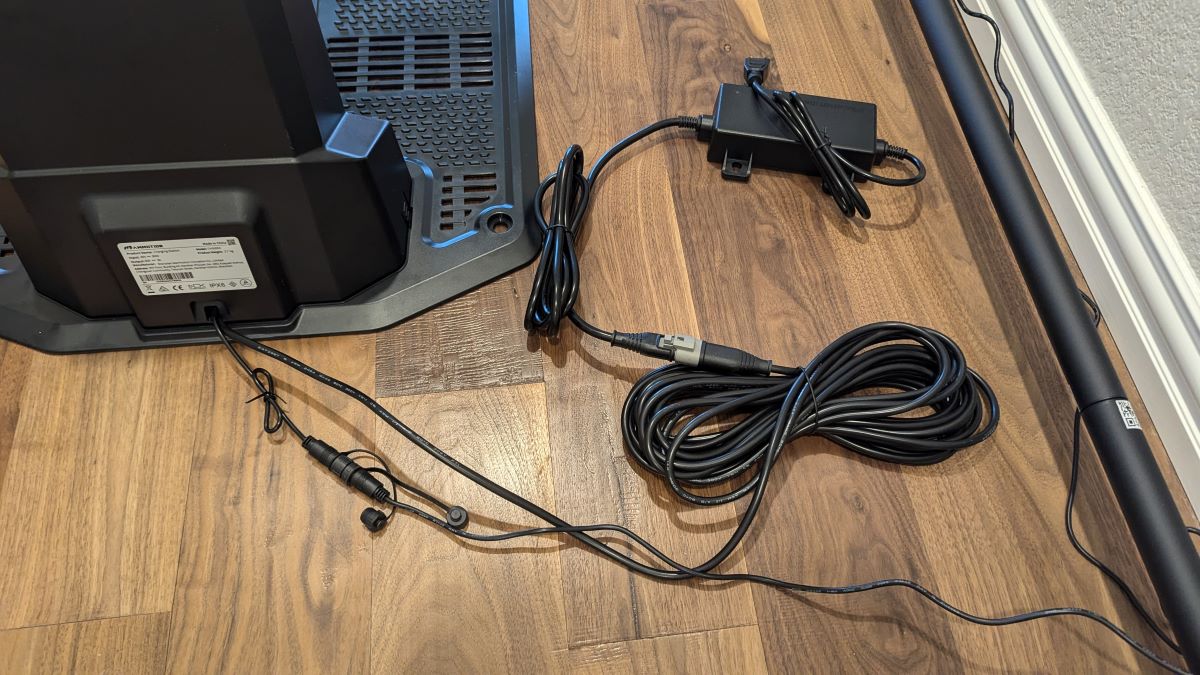
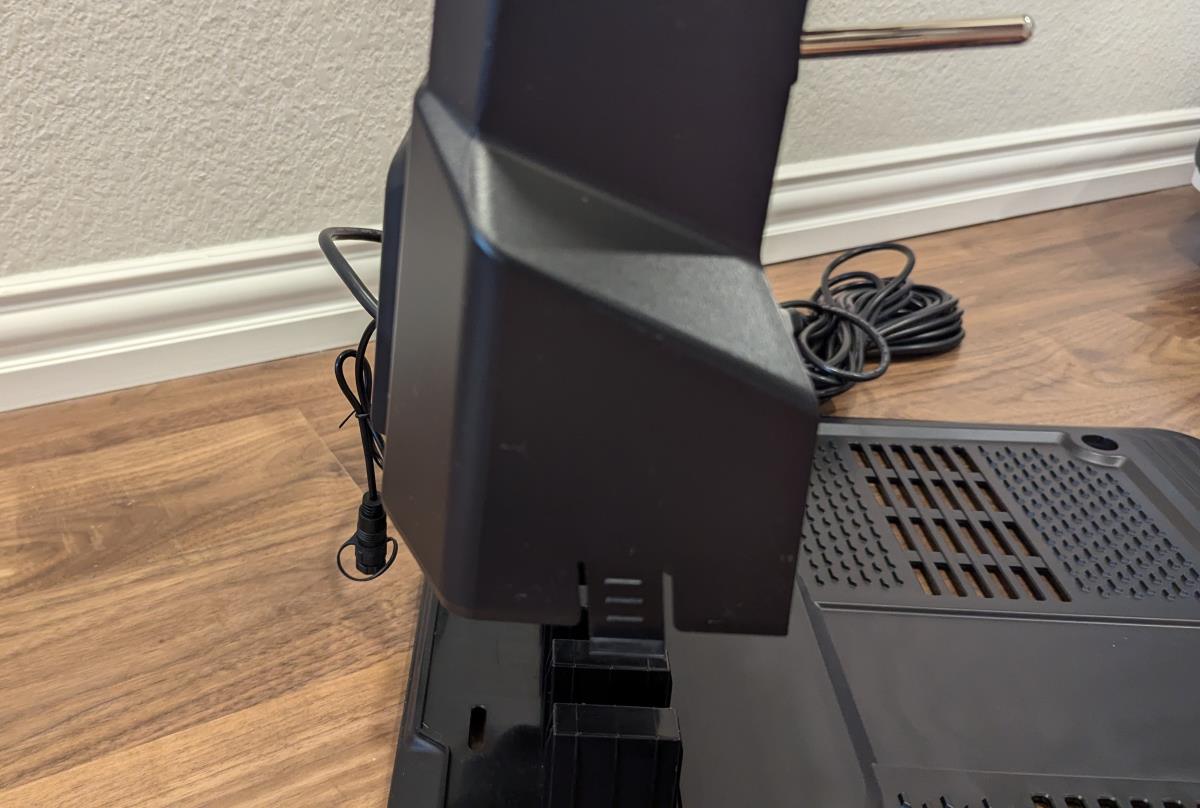
There were two cables attached to the charging tower. The thinner cable is the power cable for the RTK station (first photo above). The longer thicker cable is the power cable for the charging station (second and third photo above).
You don’t have to use the RTK power cable attached to the charging station because Mammotion provides a separate 10m power cable for the RTK device – just in case you want to place the station somewhere further away from the charging station.
Mammotion provides a video on how to assemble and set up the charging station and how to install the SIM card as shown above.

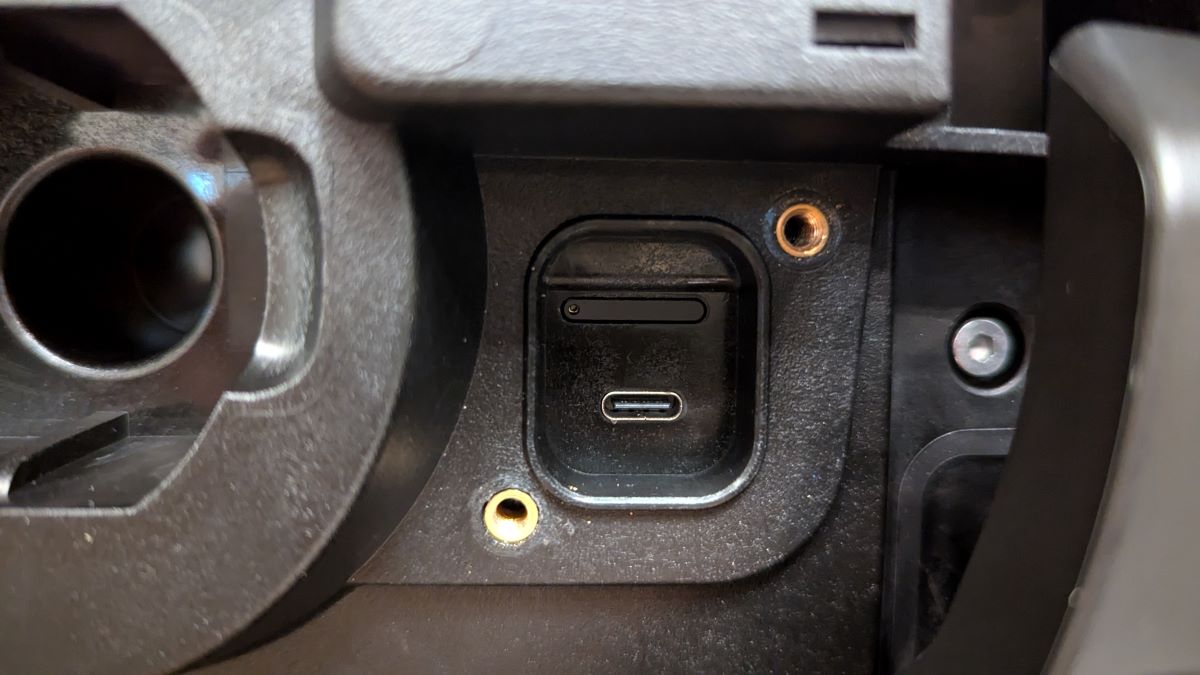
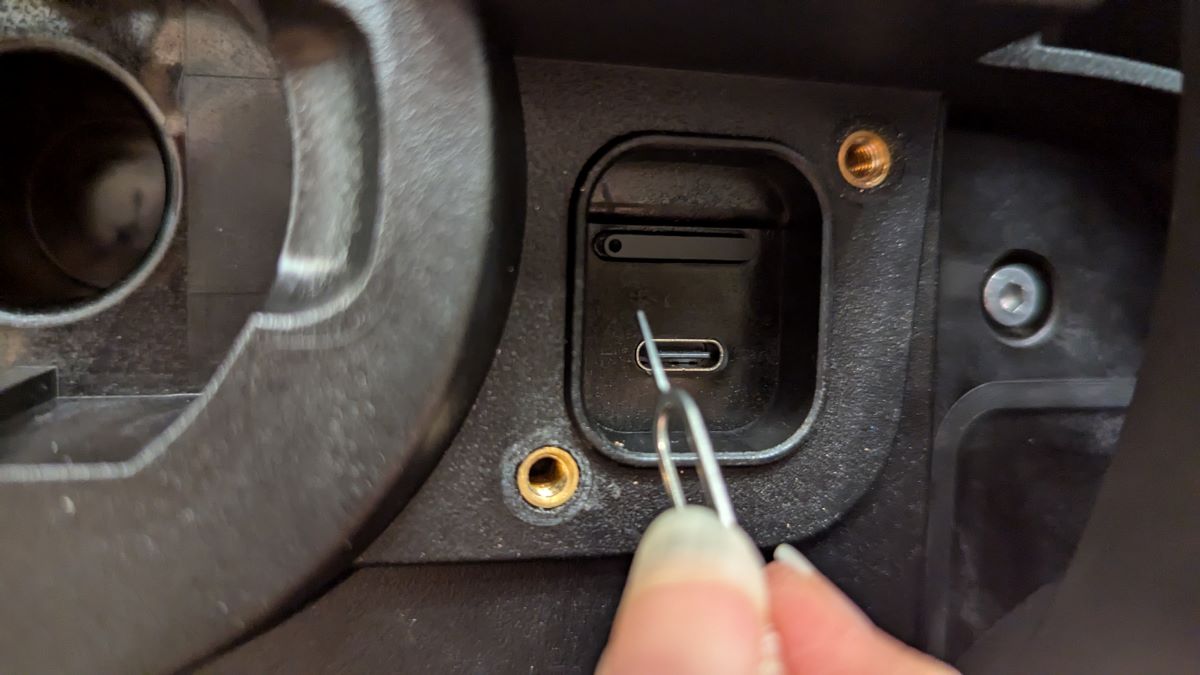
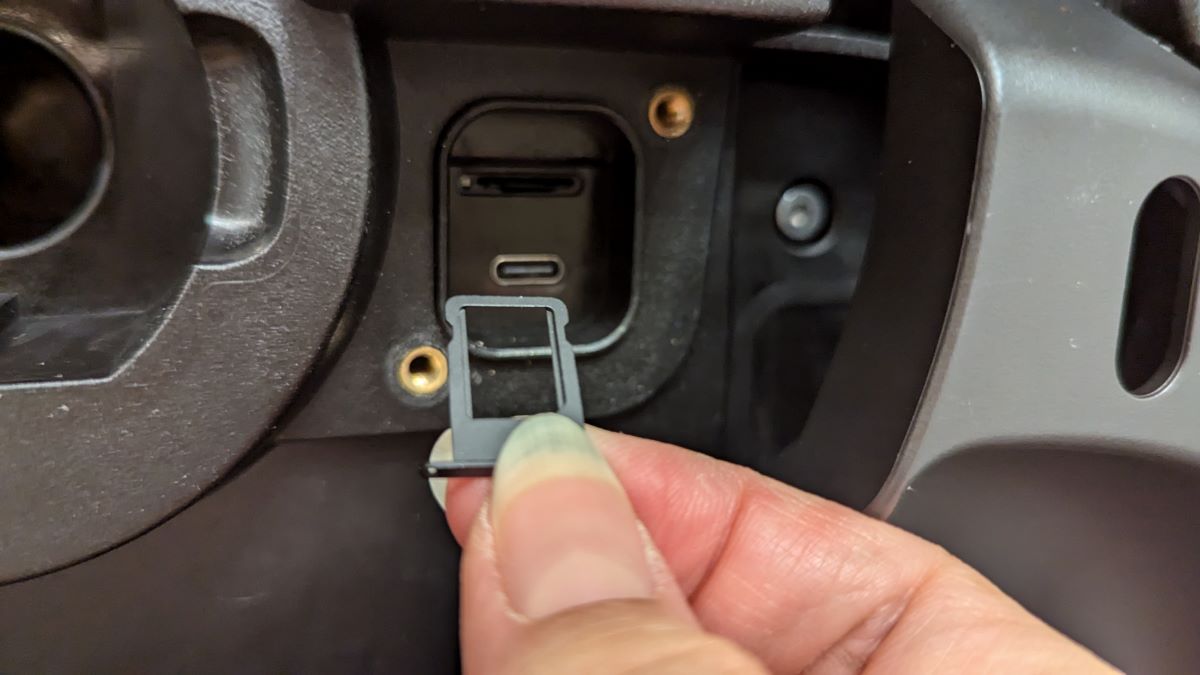
I don’t have a SIM card to use with the mower, but I wanted to see where the SIM card area was on the Yuka 1500. It is located right next to the front wheel of the mower. I needed to remove the wheel before I could access it.
Assembling the RTK reference station
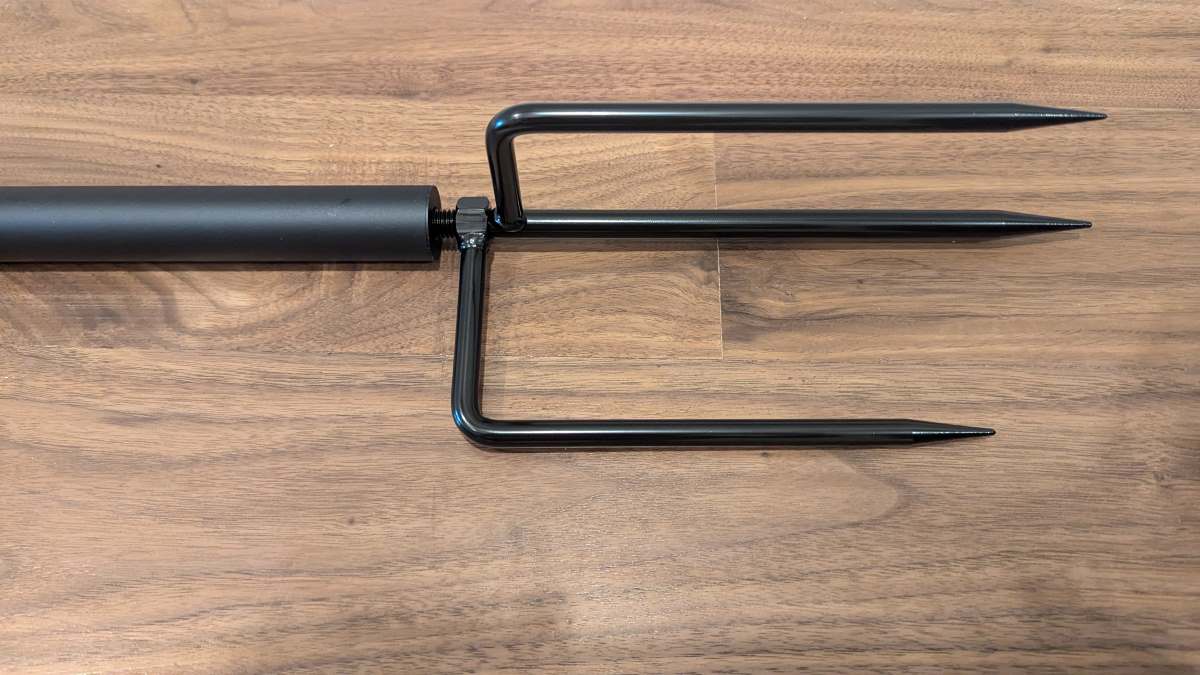
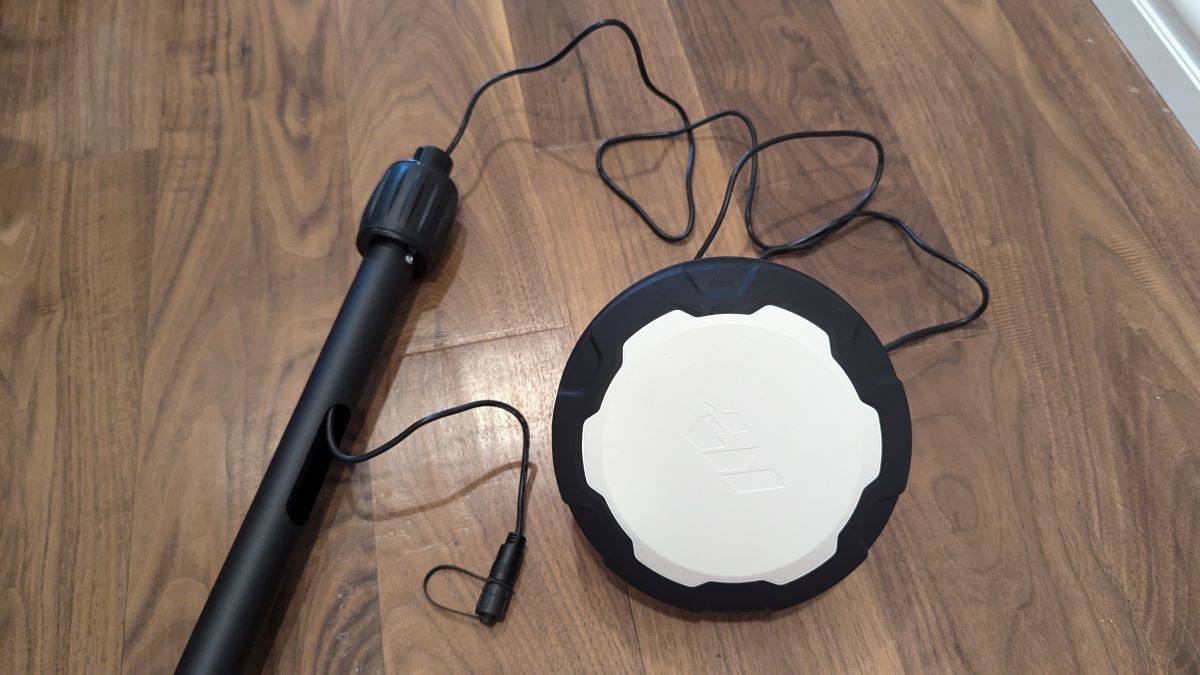
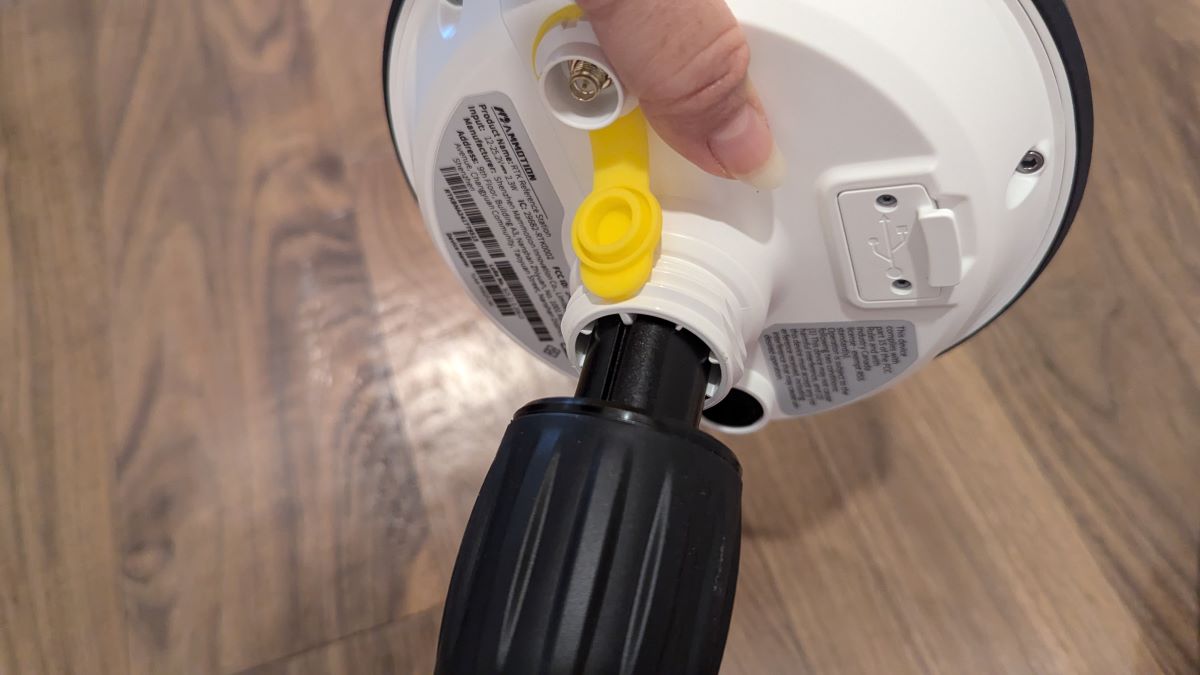
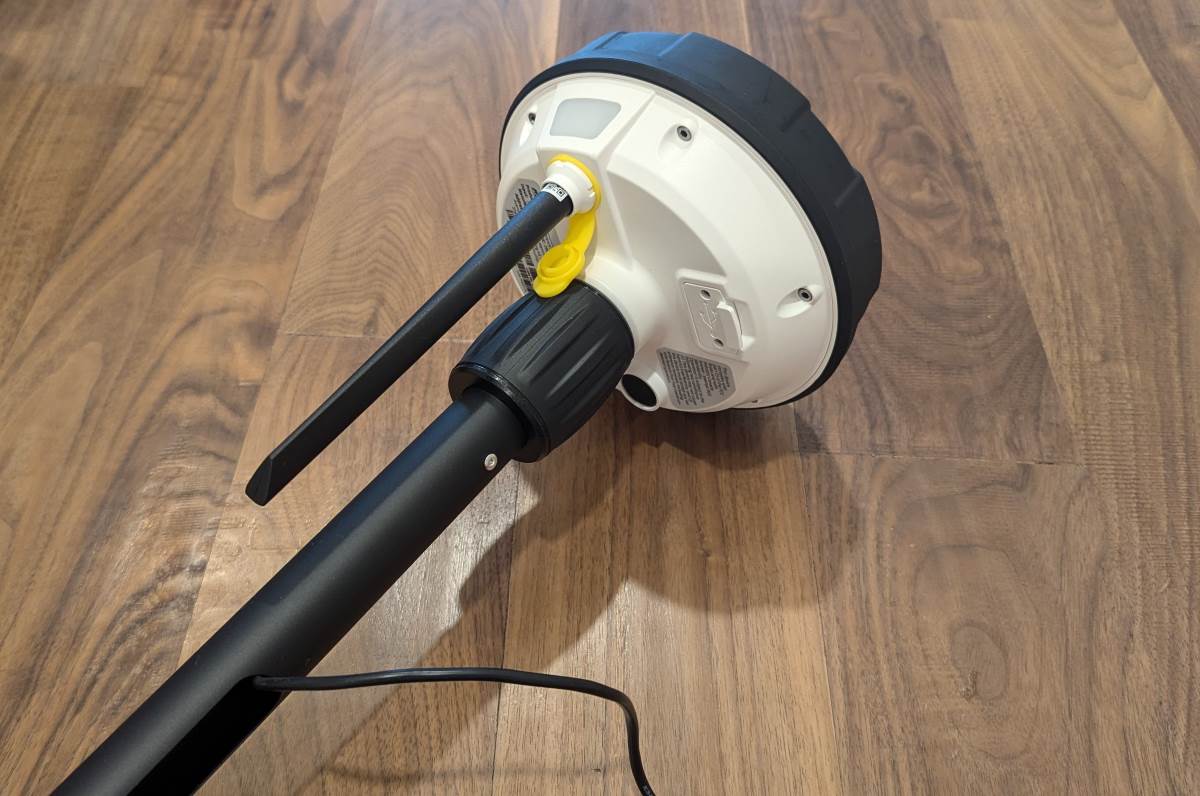
To assemble the RTK reference station, I screwed the two pole sections together as well as the trident ground stake into the bottom of the RTK pole (first photo above). I then fed the power cable attached to the RTK station through the top of the pole and out through an opening on the side of the pole (second photo above). I then slid the threaded collar up from the top of the pole to the bottom of the RTK station (also threaded) and rotated the collar clockwise to secure the RTK station to the pole (third photo above). Lastly, I screwed the RTK antenna into the underside of the RTK station (fourth photo above).
Assembling the sweeper kit
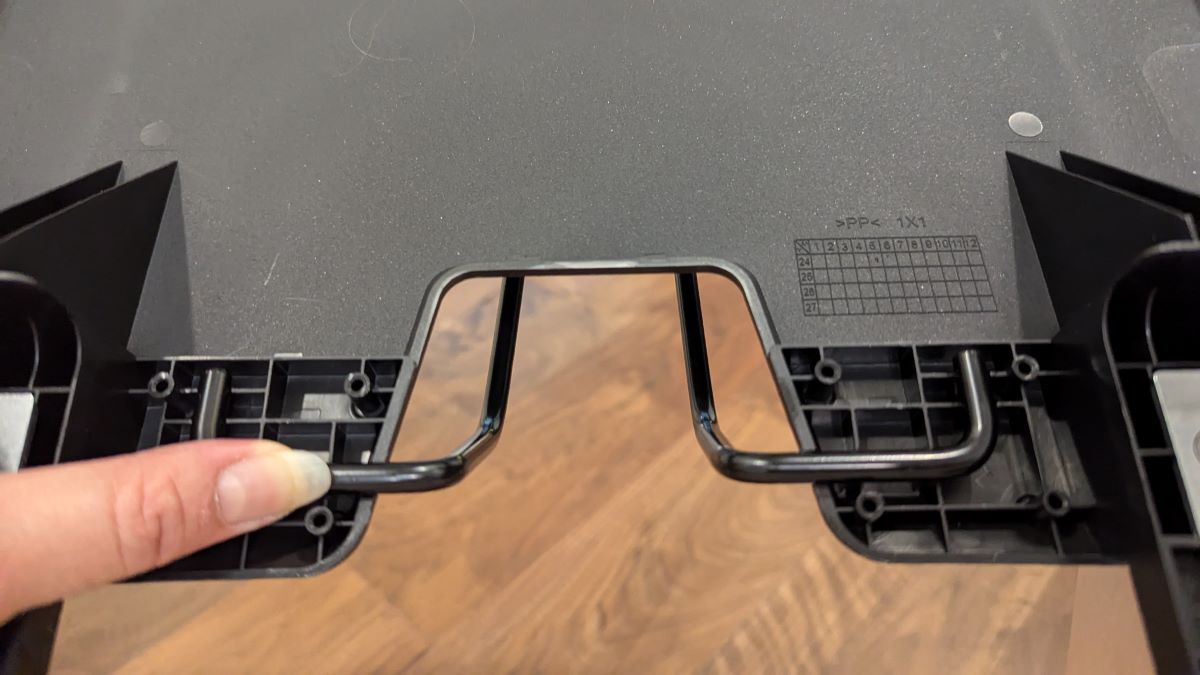
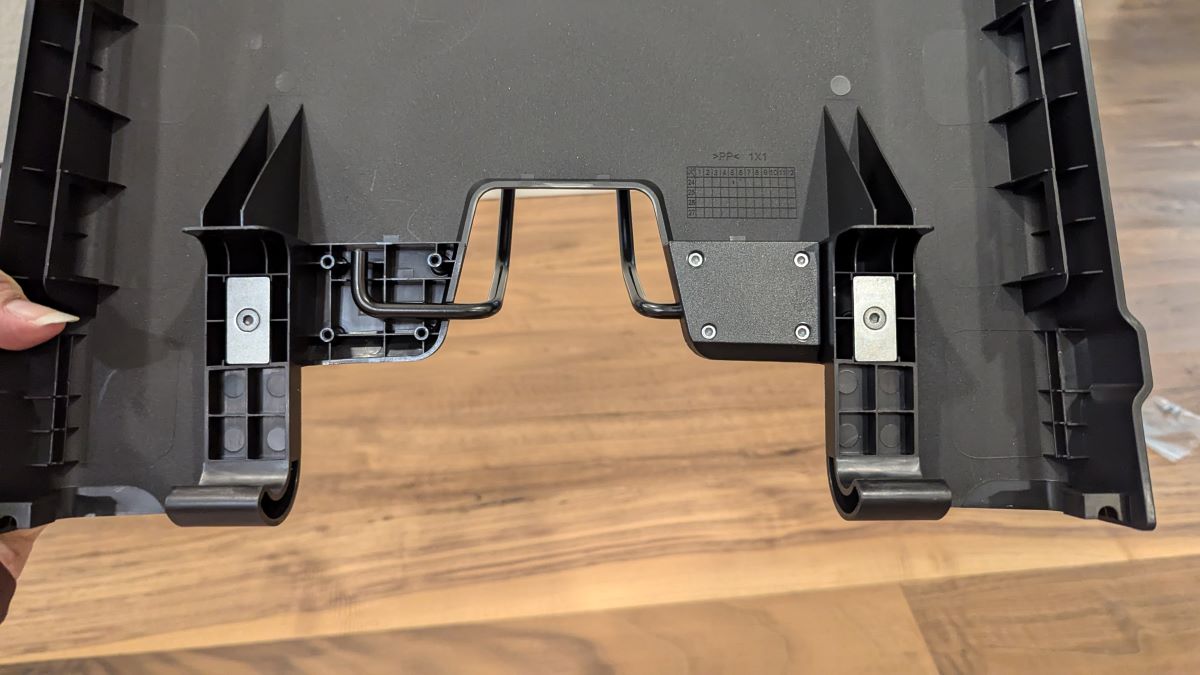

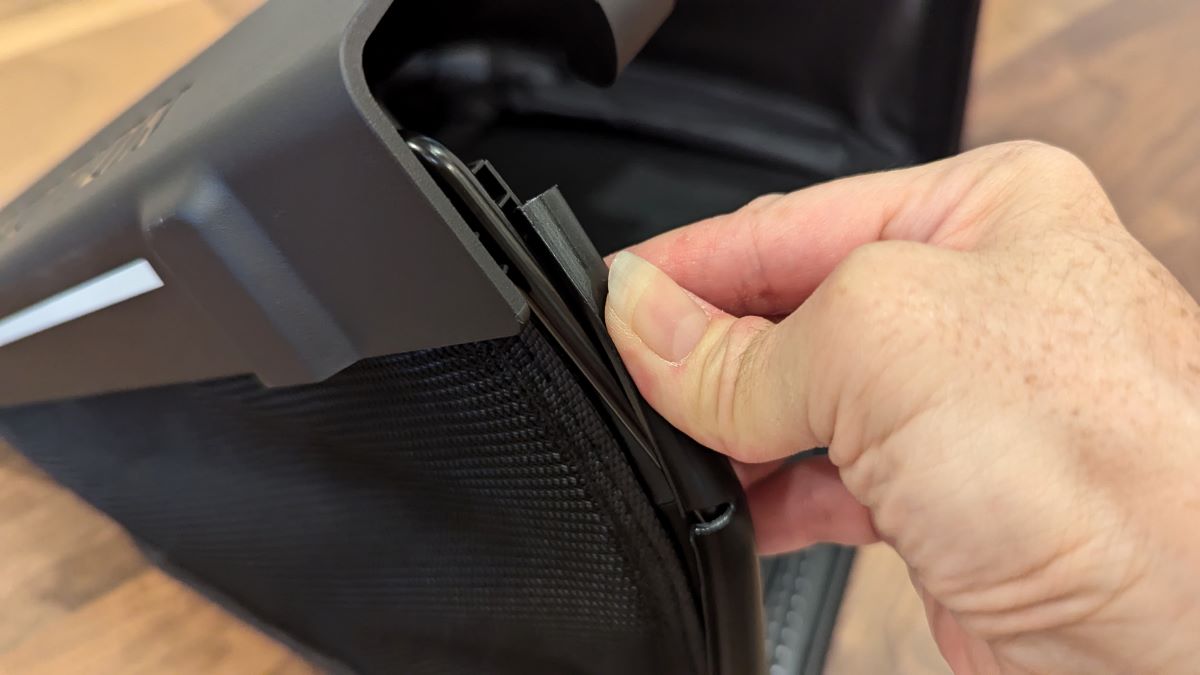
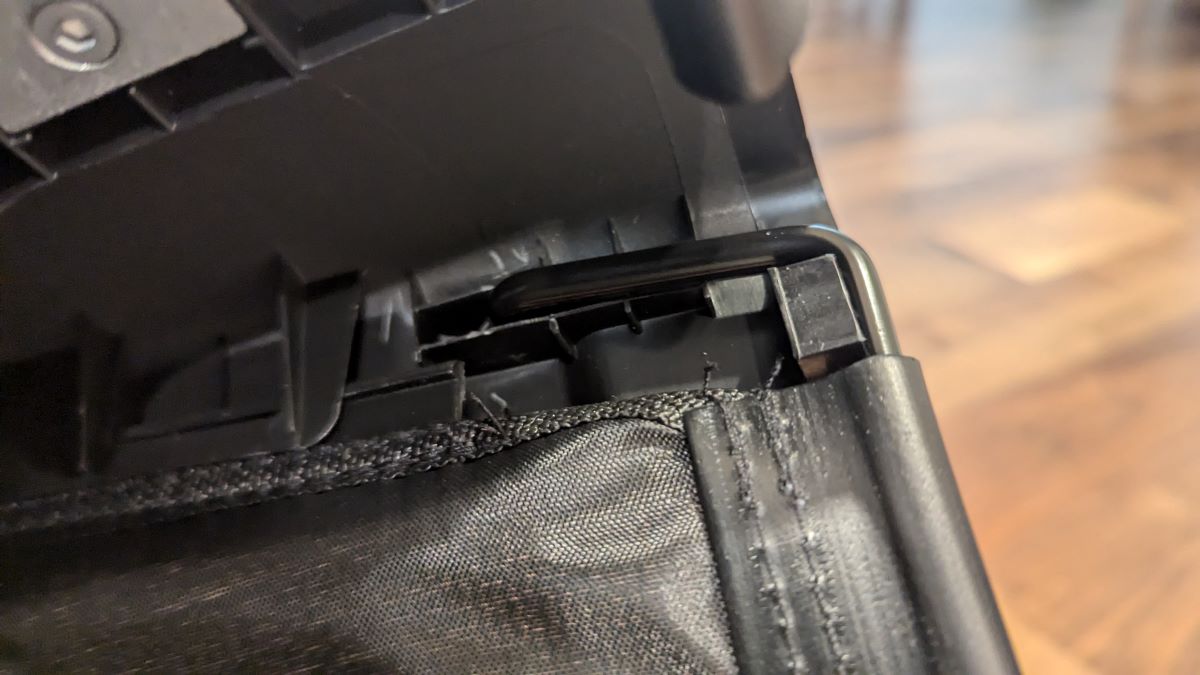
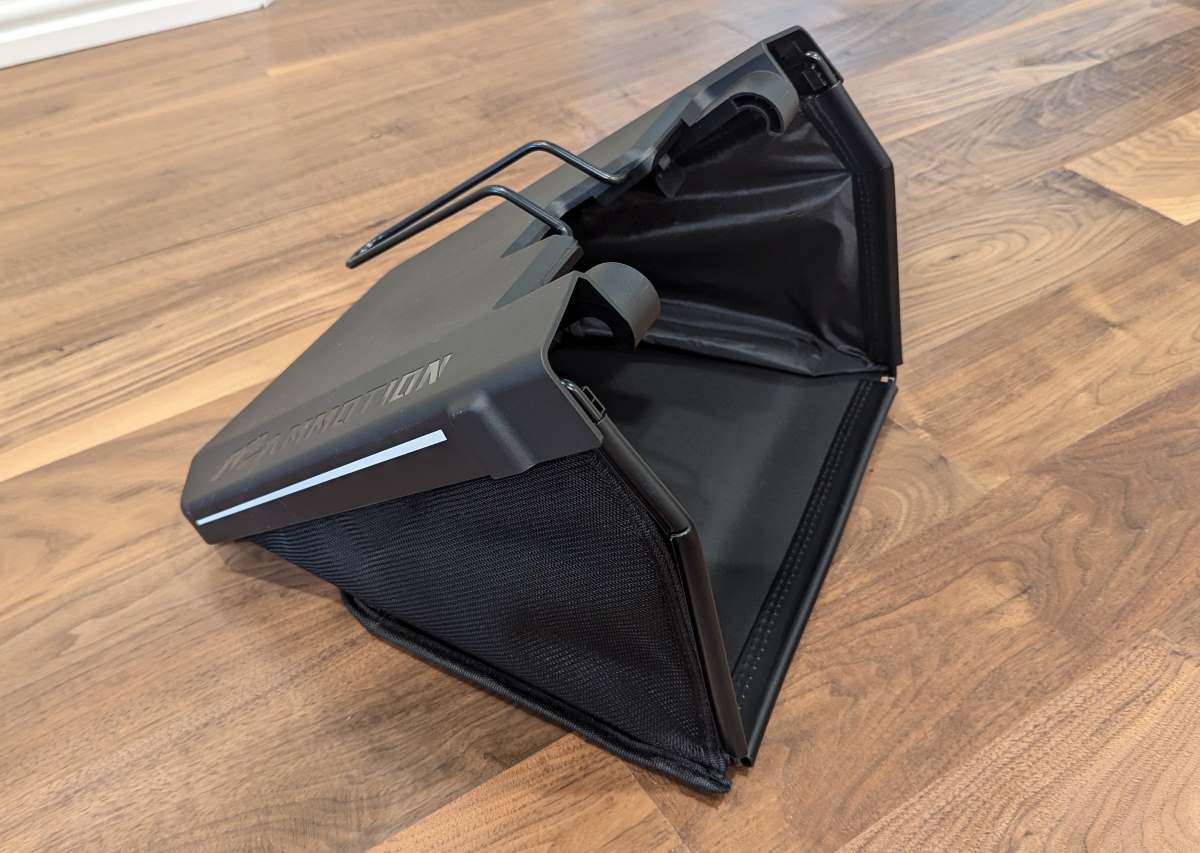
The above images show how I assembled the hopper…
…and the handle for the sweeper module and how they attach. However, I won’t explain how I assembled them because Mammotion provides great videos to do just that.
The above is the assembly video for the hopper and sweeper handle.
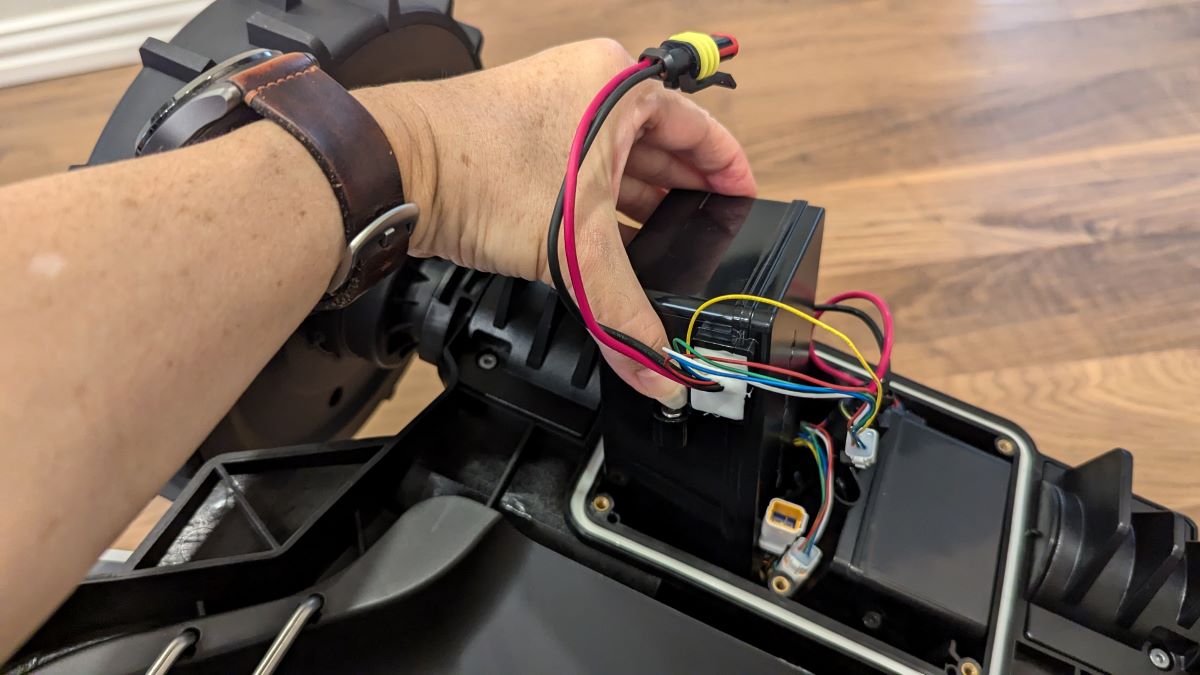
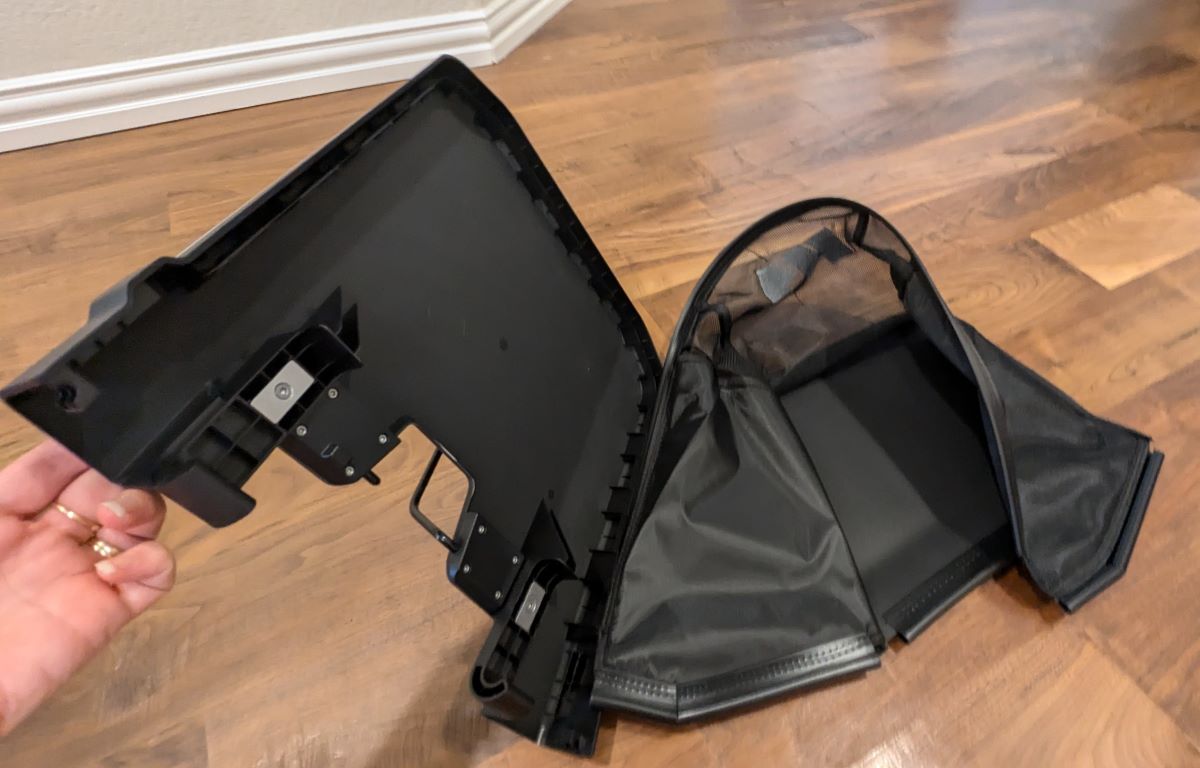
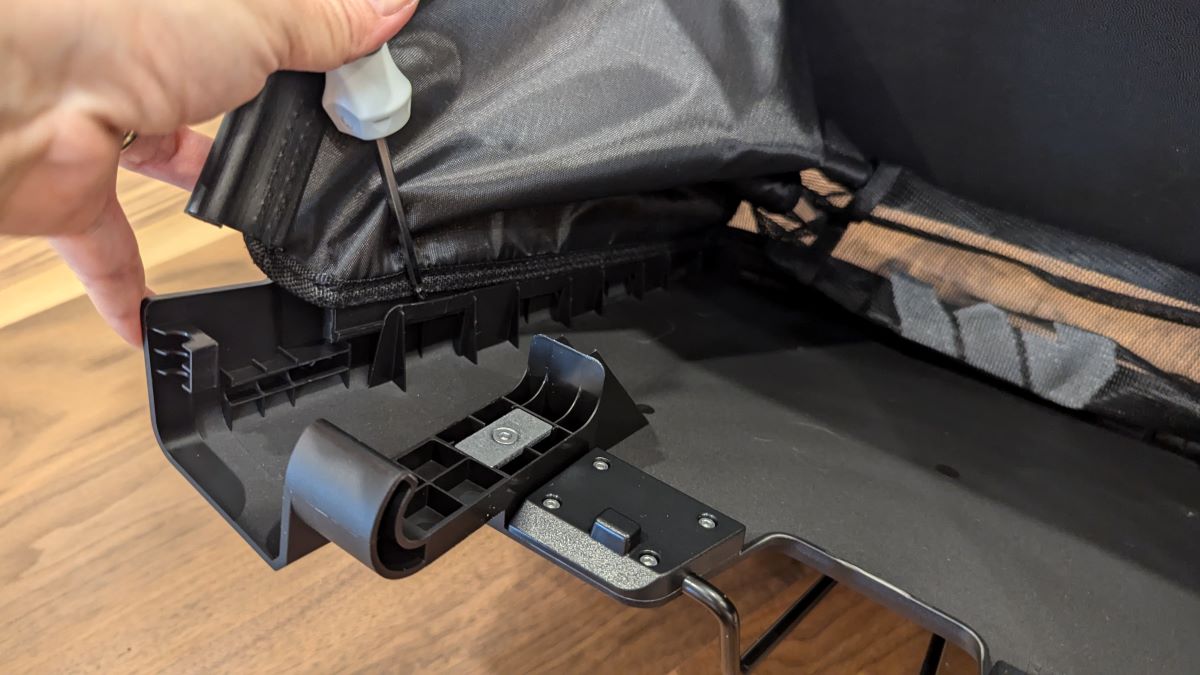
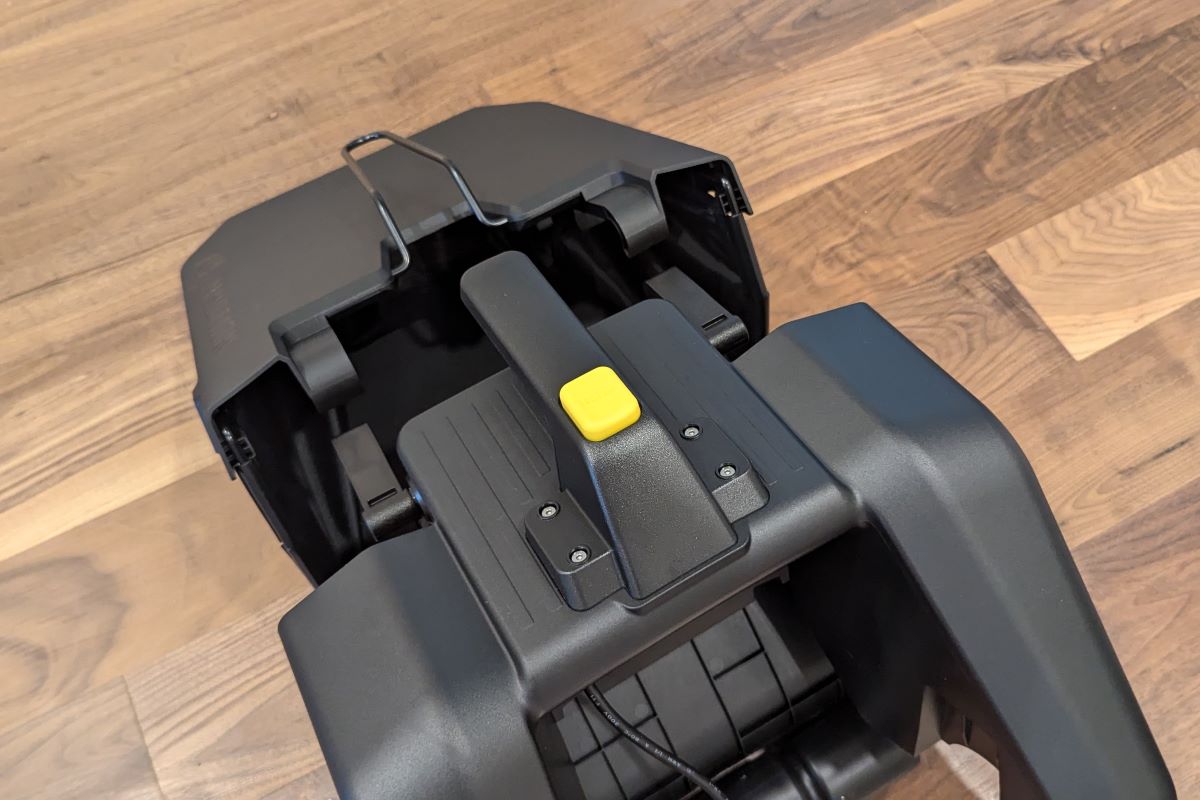
Before using the sweeper module, you need to install the sweeper battery in the mower.
Again, Mammotion provides a great video on how to install the counterbalance on the mower (which is used when you use the sweeper module on the mower) and the sweeper module battery as shown above.
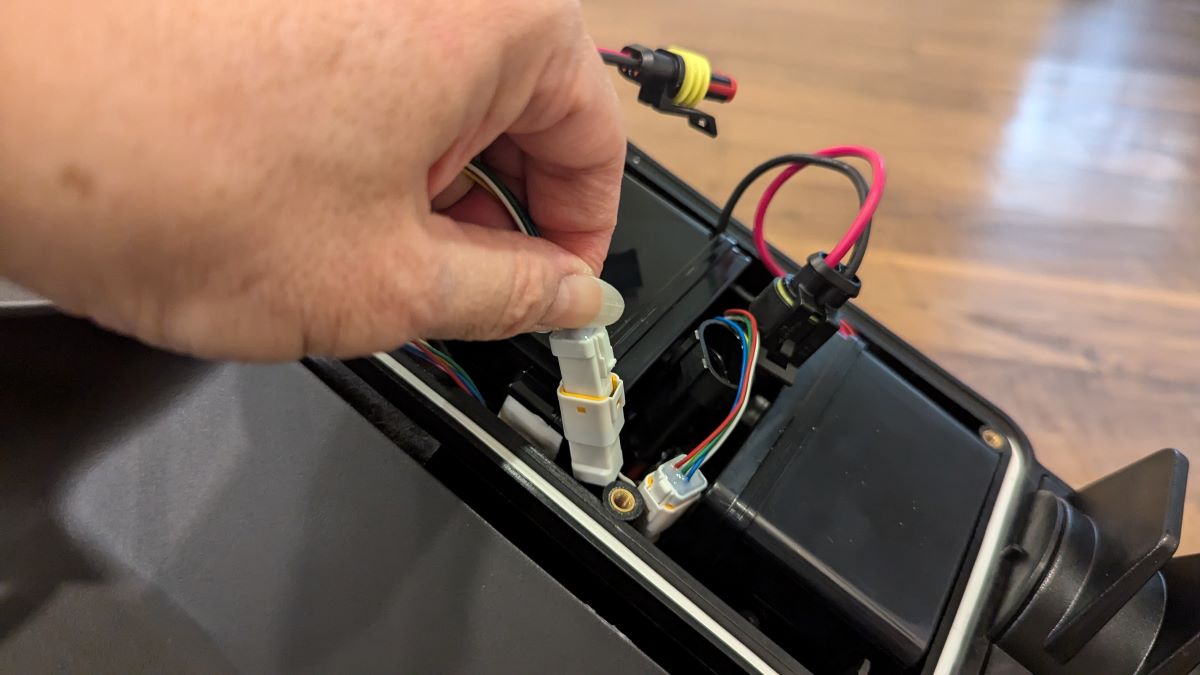
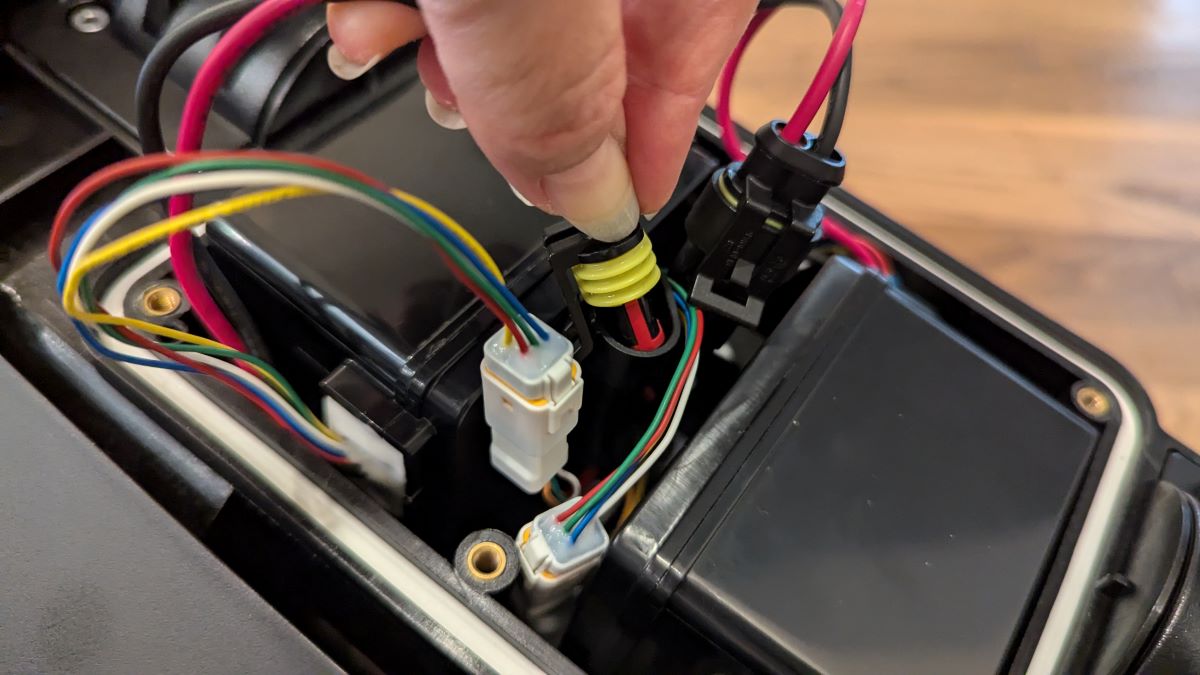
After attaching the hopper and sweeper to the mower, I attached the cable from the sweeper to the mower as shown above.
Features
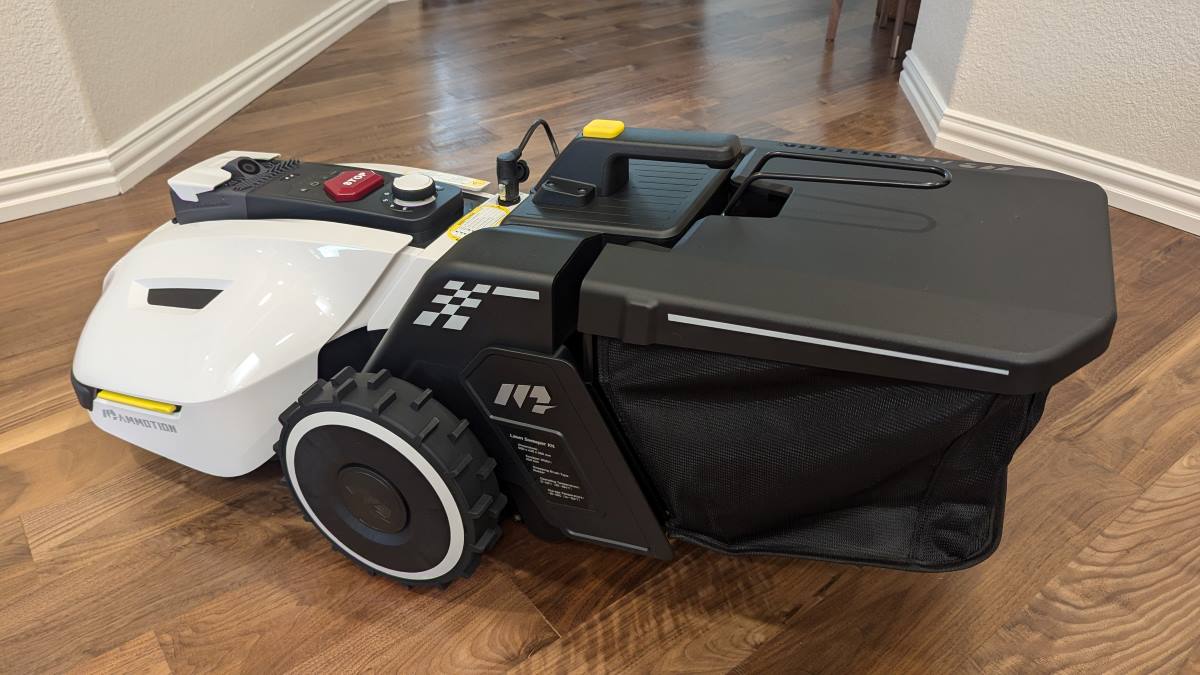
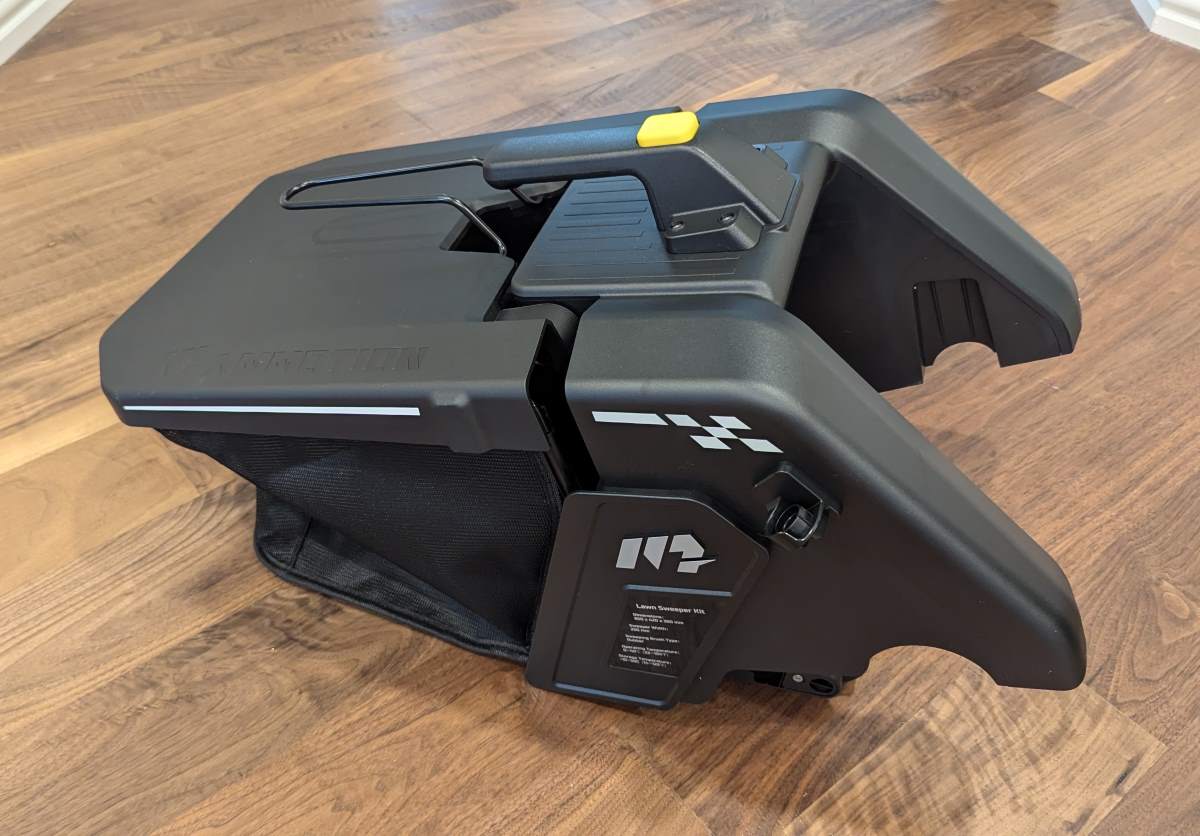
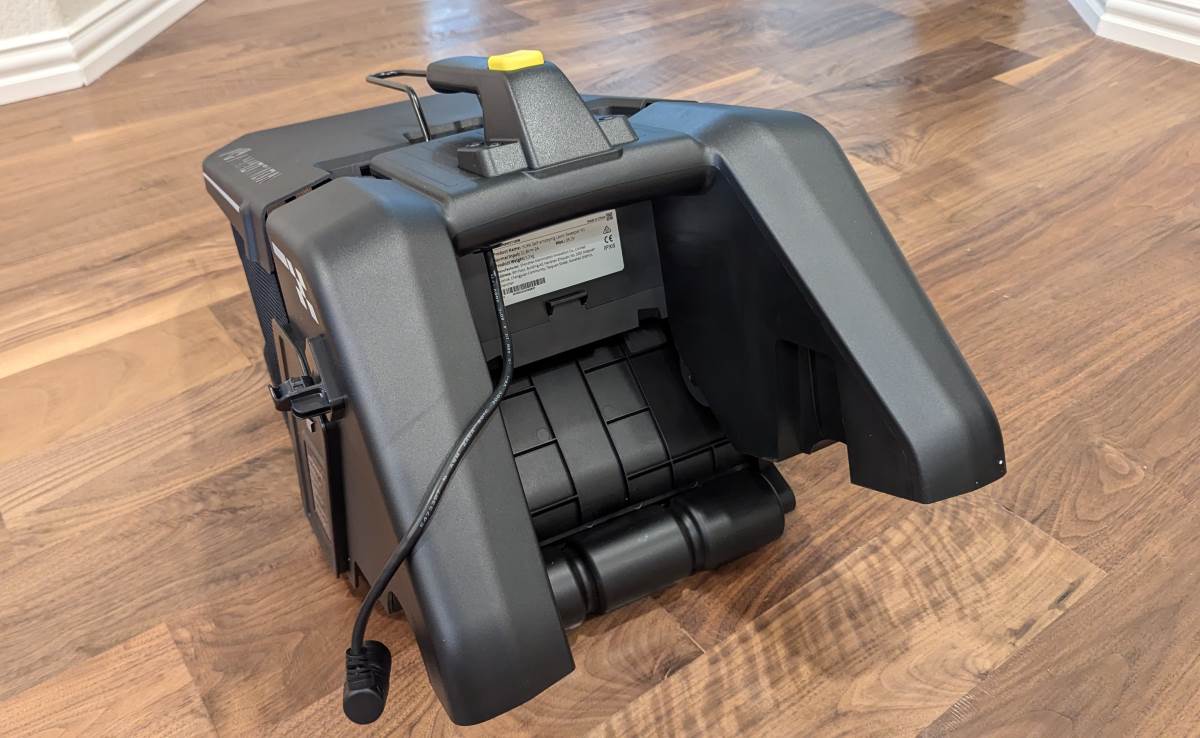
The above photos illustrate how the mower with the attached sweeper looks when assembled.
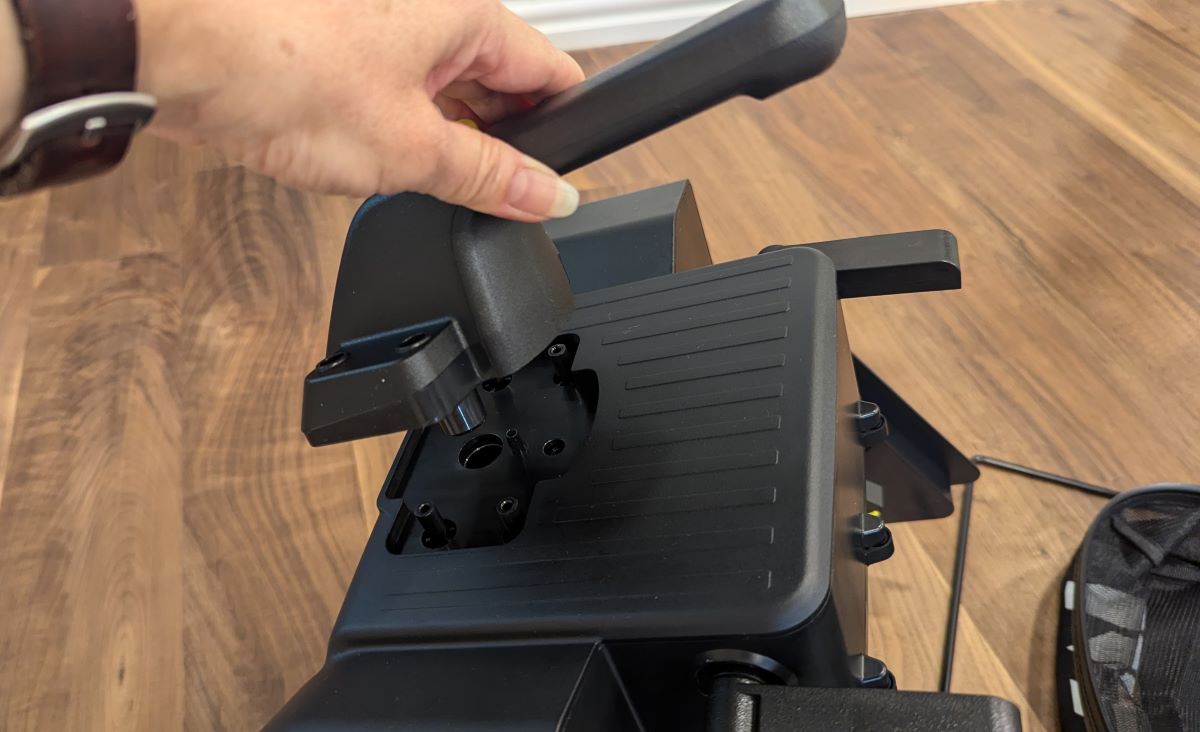
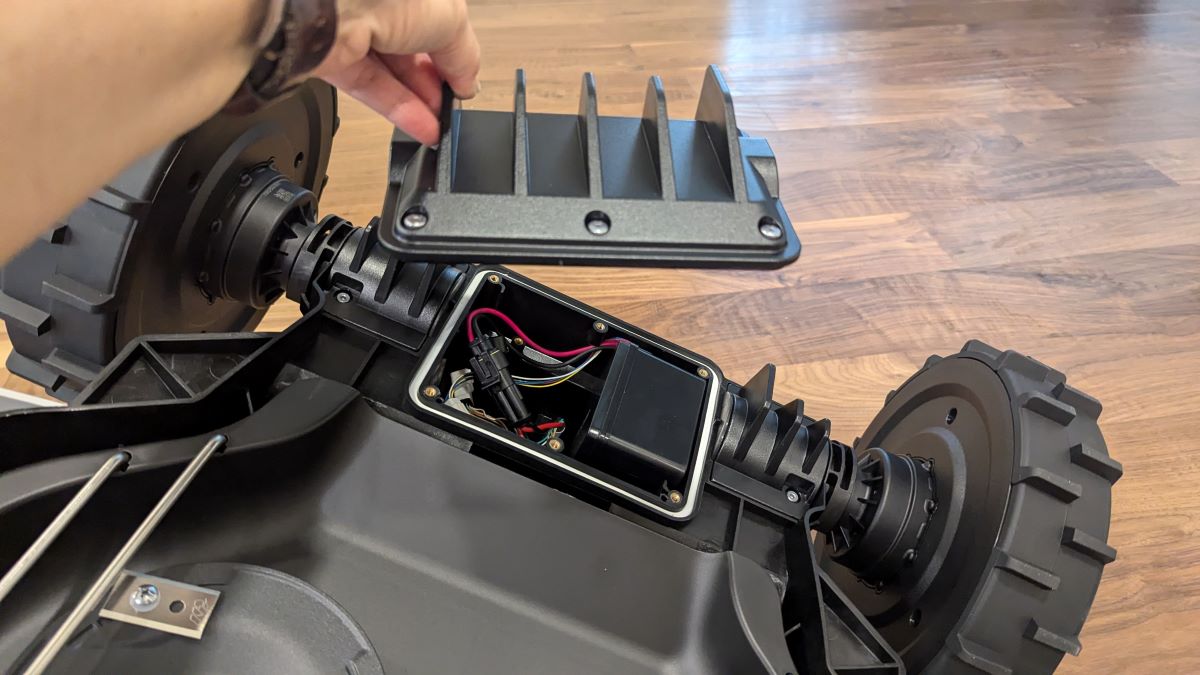
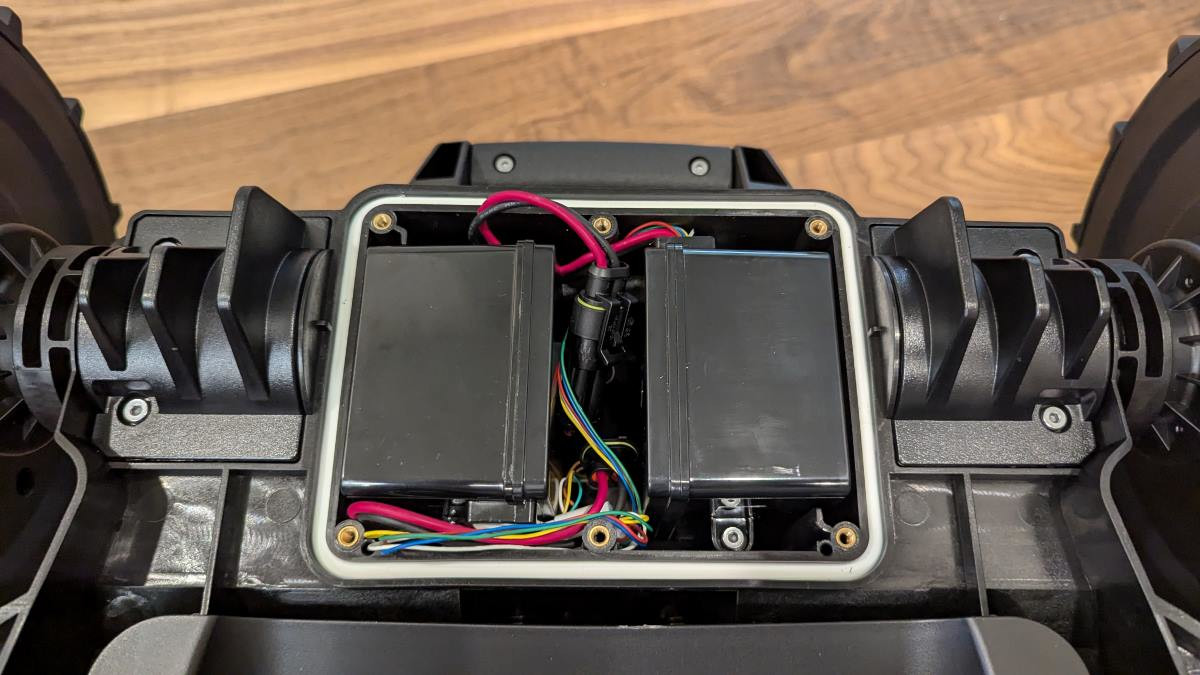
I attached the counterbalance later which involved popping off the small white plastic cover on the top of the mower and installing the counterbalance in its place using finger screws.
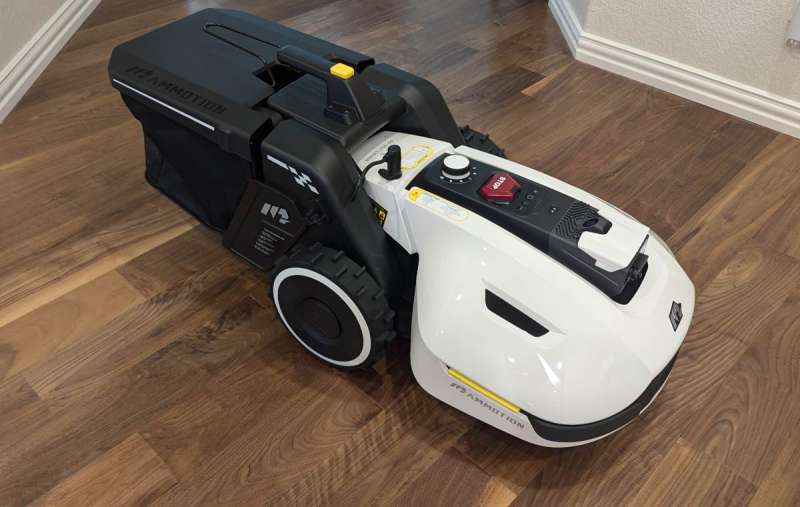
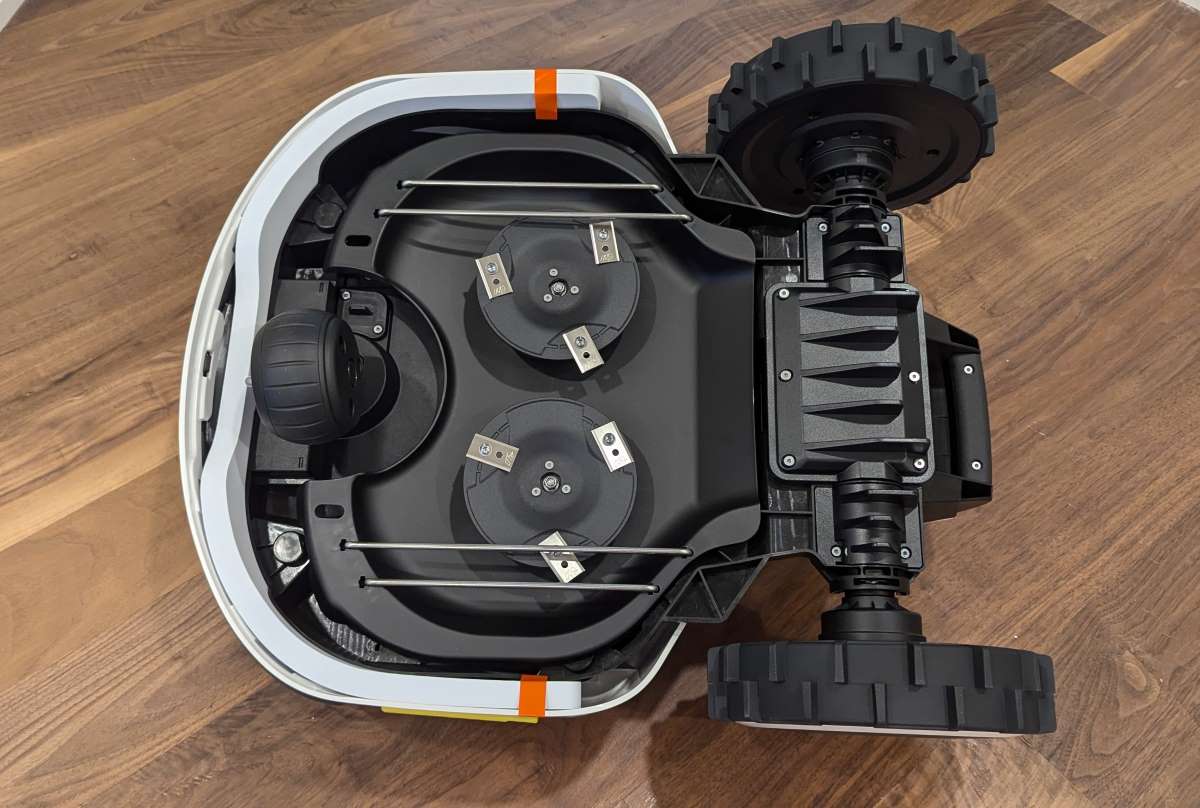
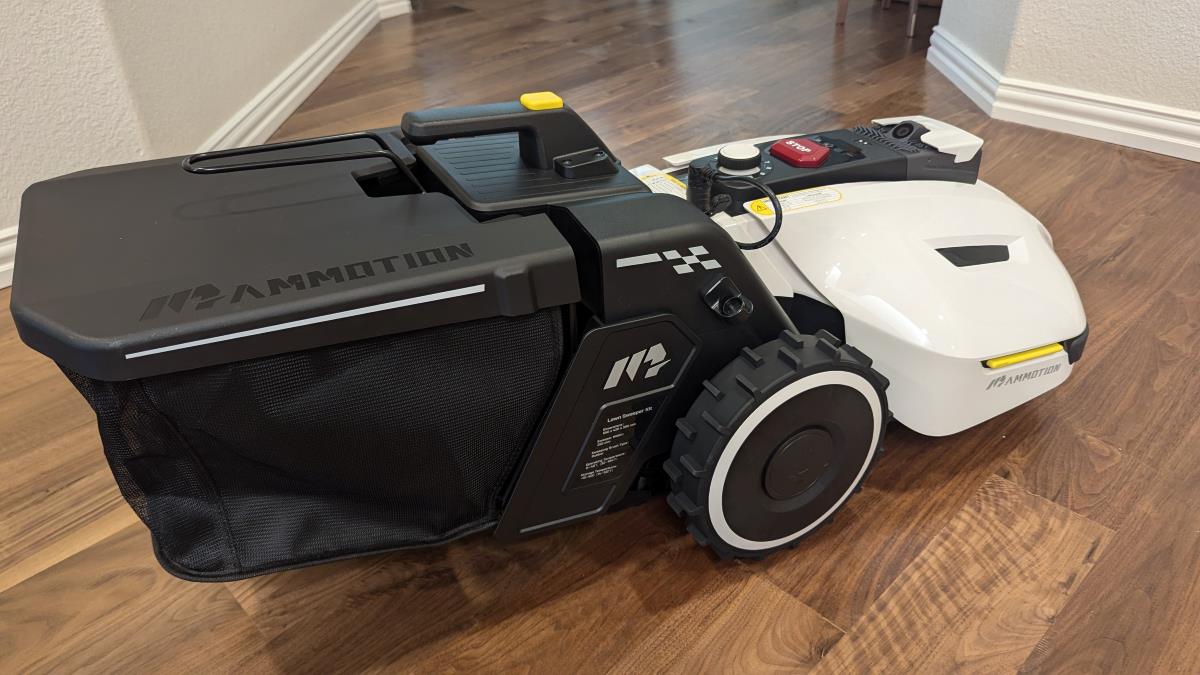
The mower and sweeper are mostly made of plastic. The white body of the mower is a single piece that moves and functions as a bumper.
The mower’s large rubber wheels make it look like it would handle terrain well.
There are two versions of the Yuka lawnmower: the Yuka 1500 and the Yuka 2000. The main difference between the two is the maximum mowing area. The Yuka 1500 max mowing area is 1500m² (0.37 acres) and the Yuka 2000 is 2000m² (0.5 acres).
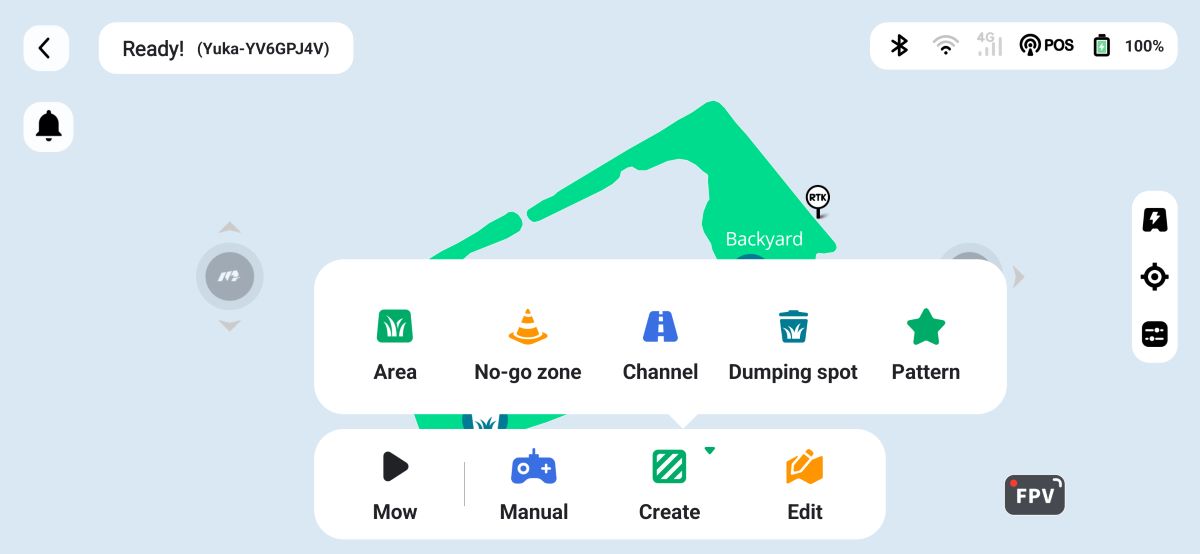
The Yuka series lawnmowers can sweep up lawn debris (as long as you purchase the optional lawn sweeping kit) and cut grass. They are also self-emptying (as long as you have the sweeping kit), equipped with 3D vision to aid in positioning when the satellite signal is obstructed, don’t require a perimeter wire, and use dynamic obstacle avoidance (like robot vacs). You can create multiple mowing areas/zones and mow each separately or all at once by creating tasks in the app (10-zone maximum for the Yuka 1500 and 20-zone max for the Yuka 2000).
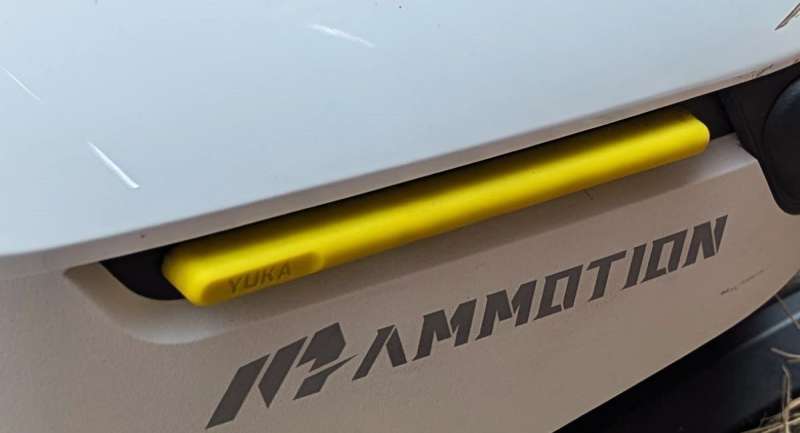
There are thin strips of yellow silicone on the sides of the bumper to provide additional protection. When the sides of the mower come into contact with something, the mower detects a shift in the bumper that will either tell it to turn away from the obstacle or stop it from running if the impact is great enough.
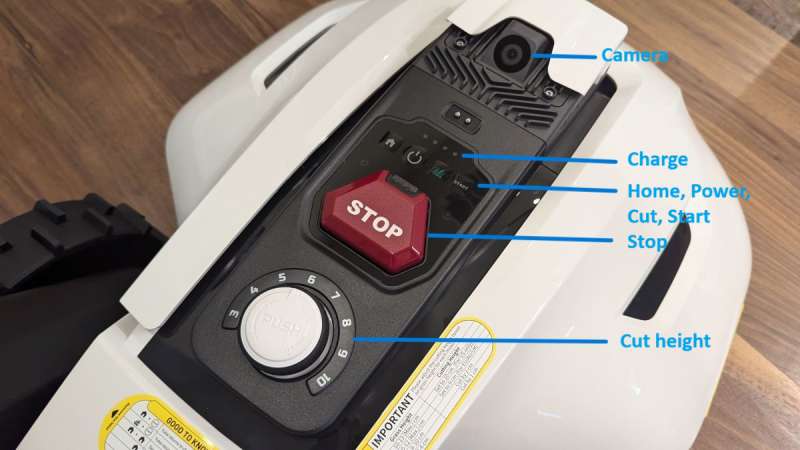
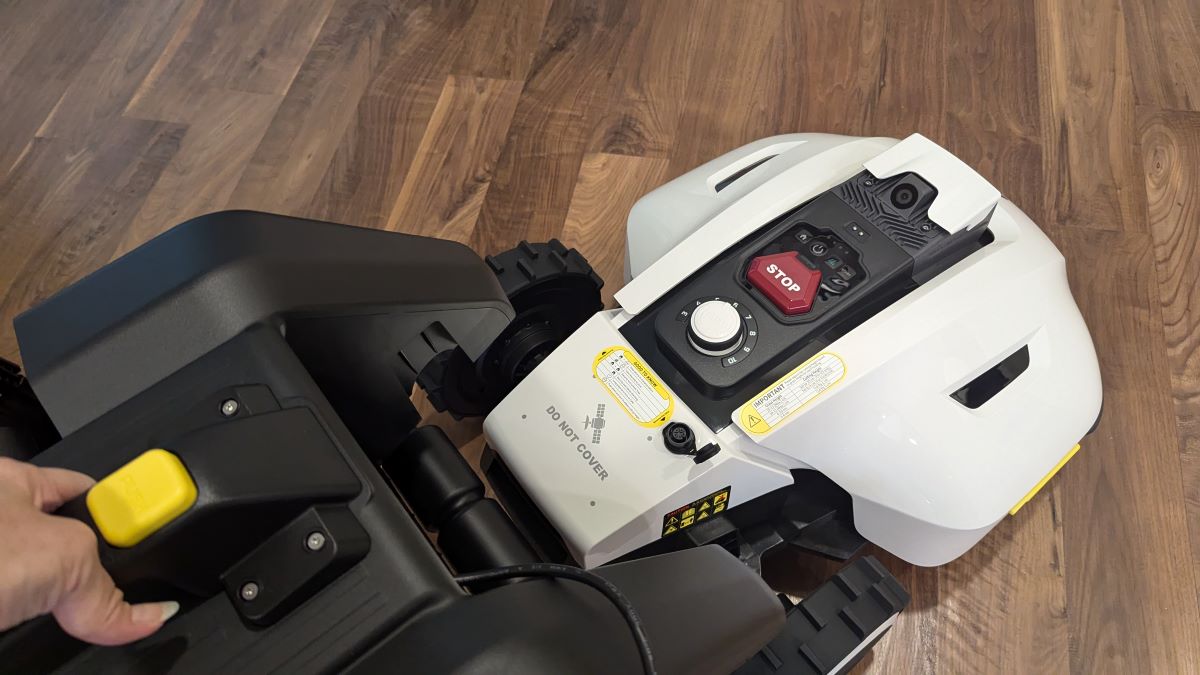
The Yuka includes a touch control panel on the top (home, power, grass, and start buttons).
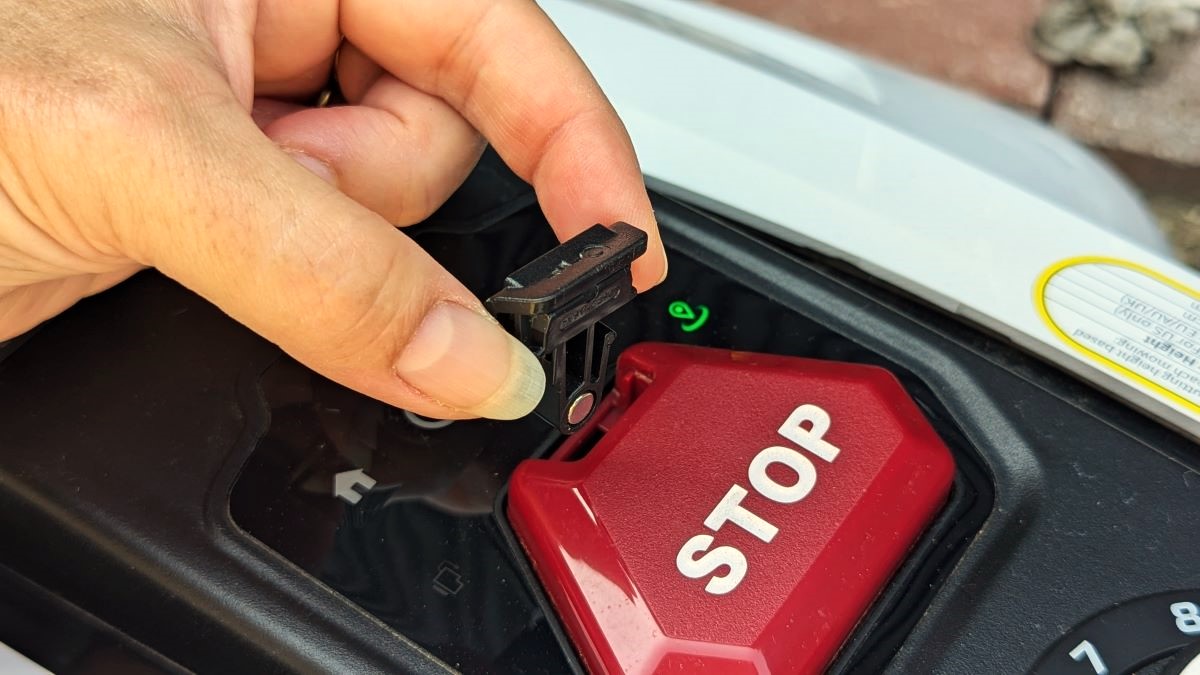
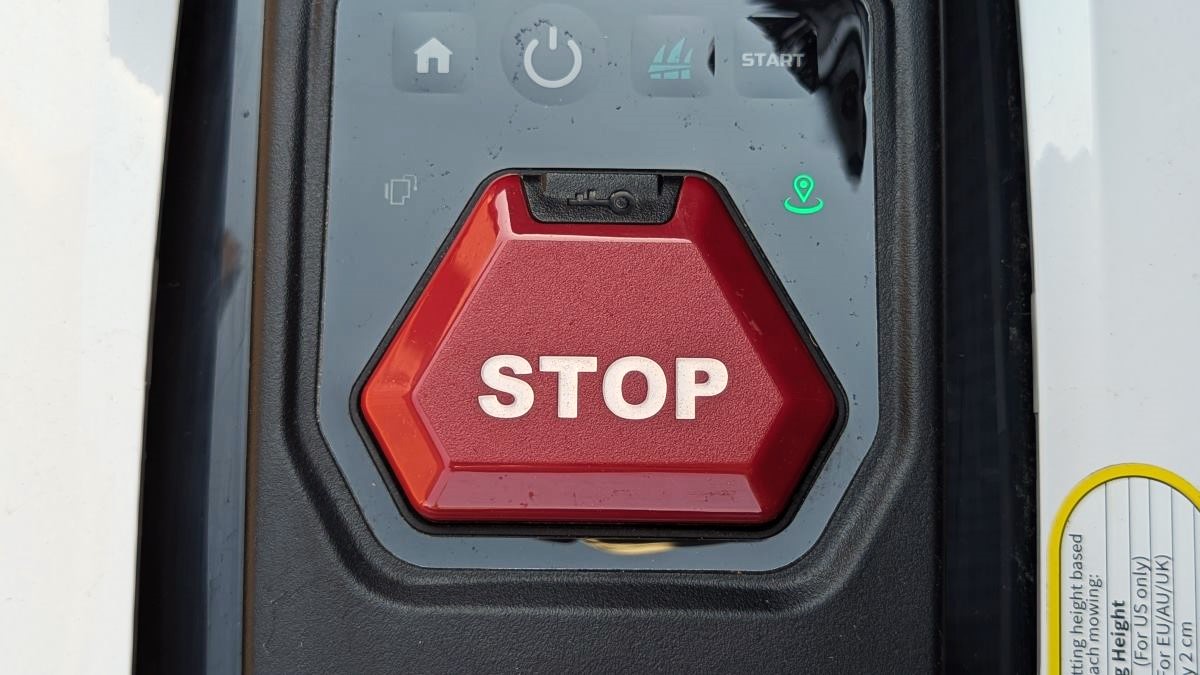
There is also a large red manual emergency Stop button, the top of which is a security key. The lawnmower will only work if that key is inserted. So when extracted, no one can use the mower. This is one of the anti-theft features that the designers included.
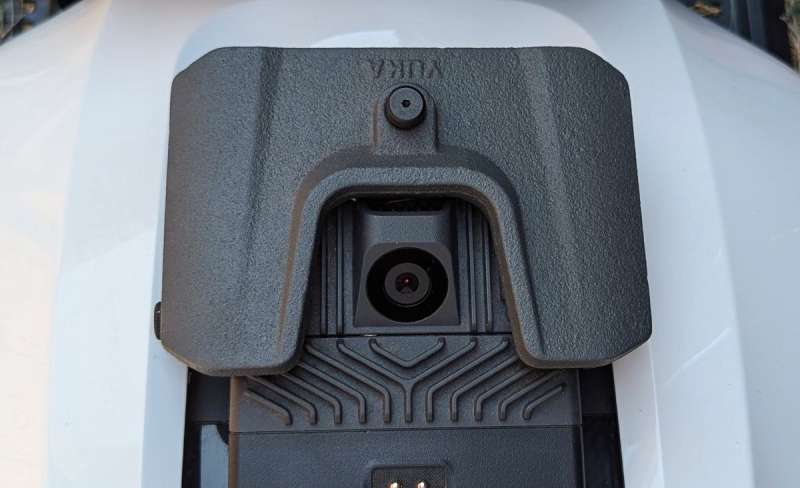
Also on the top of the mower is a manual push-and-rotate knob to adjust the grass-cutting height, a camera facing the sky, and…
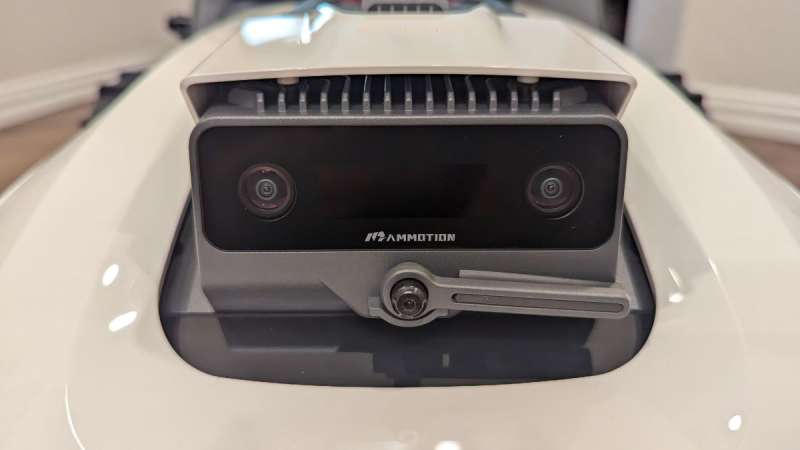
…two cameras on the front (the 3D vision module – its eyes seem to follow me), a wiper blade to clean off the front cameras,…
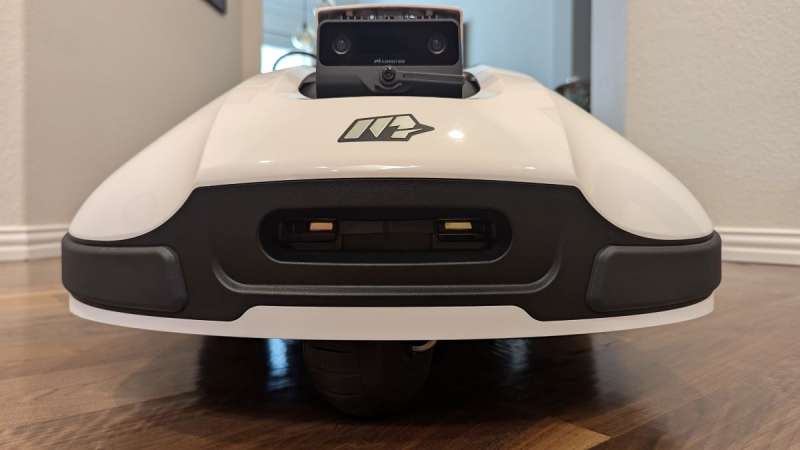
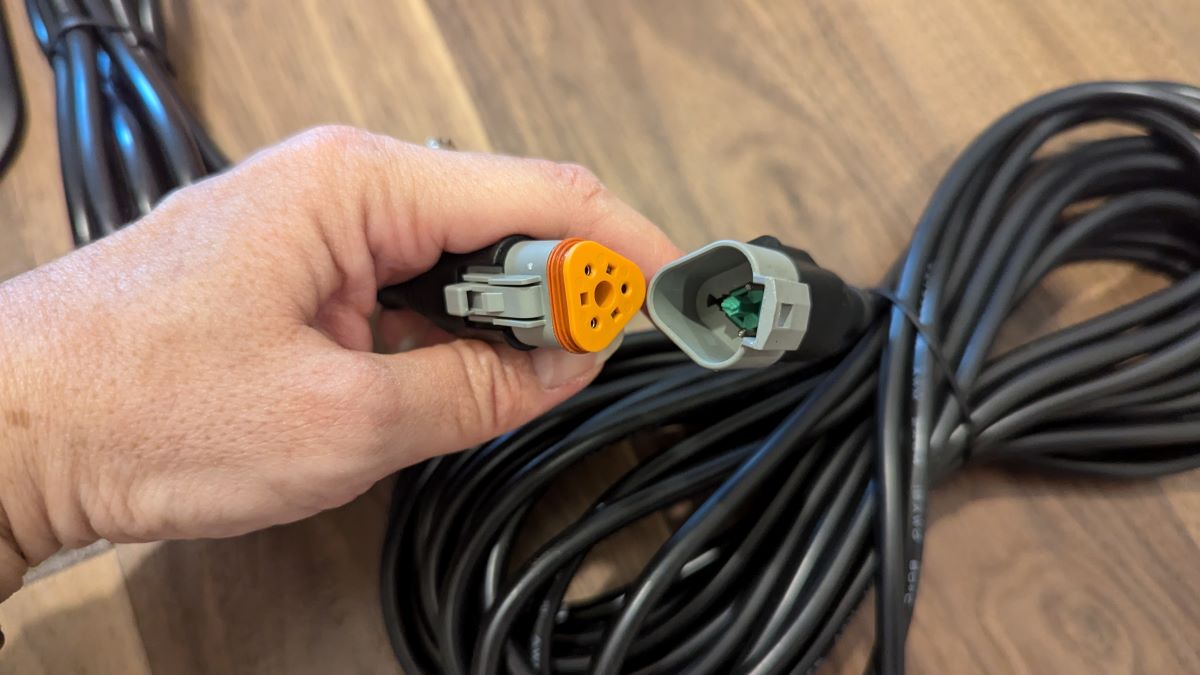
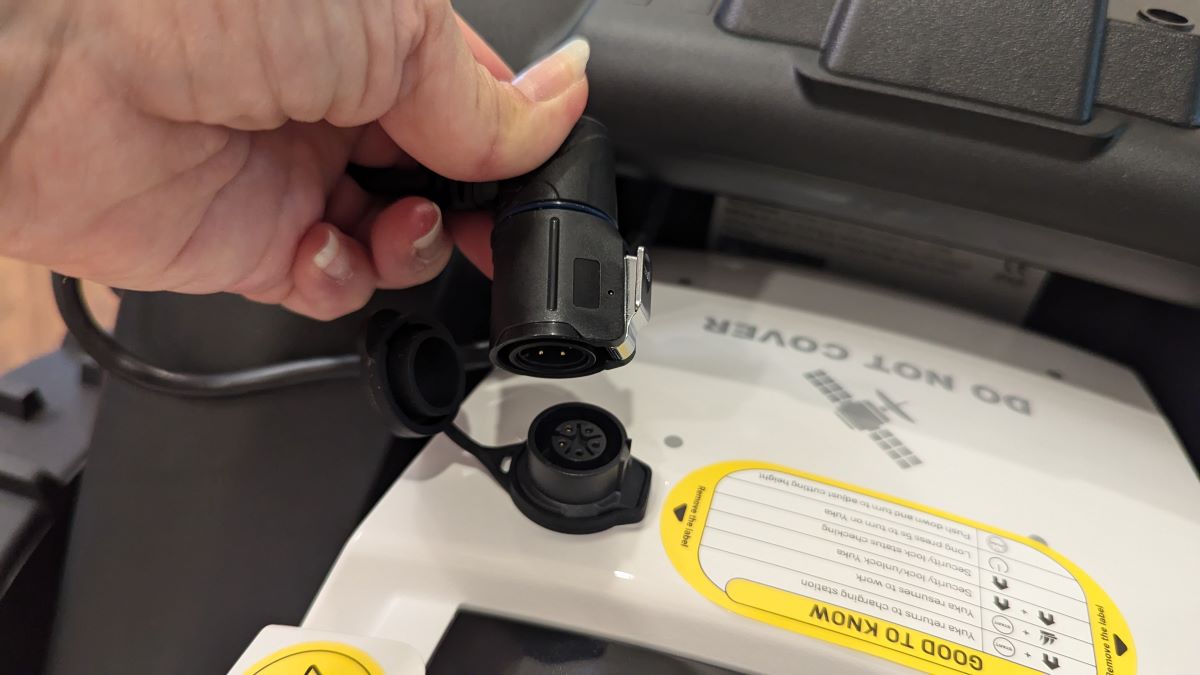
…and the charging ports on the front of the mower.
The design of the Yuka lawnmower is sleek and attractive. It looks like a race car, especially when viewed from the front.
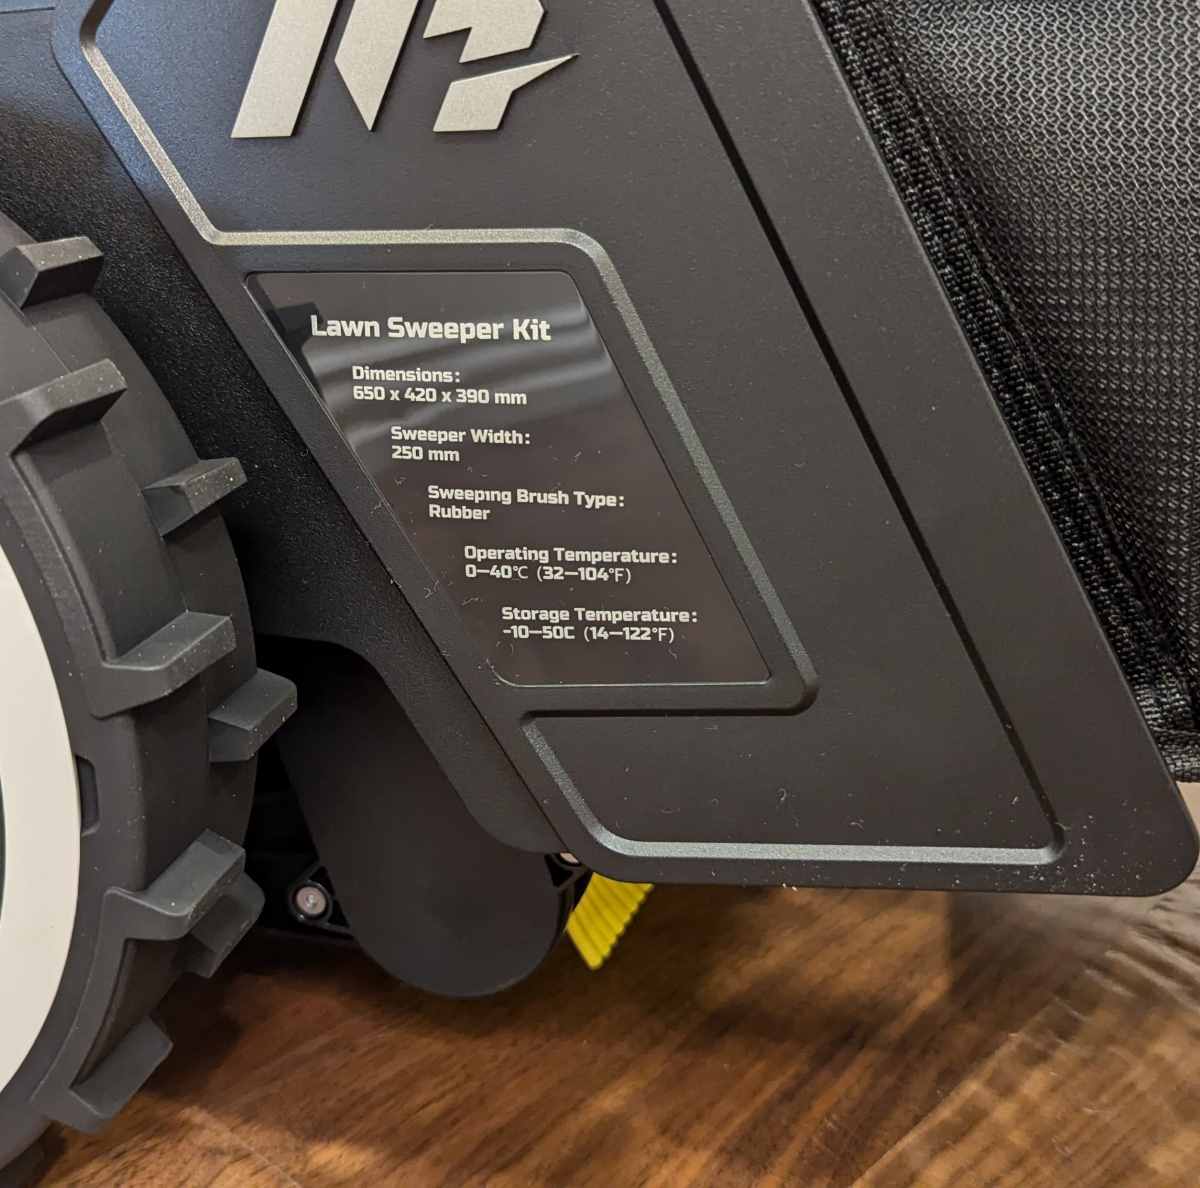
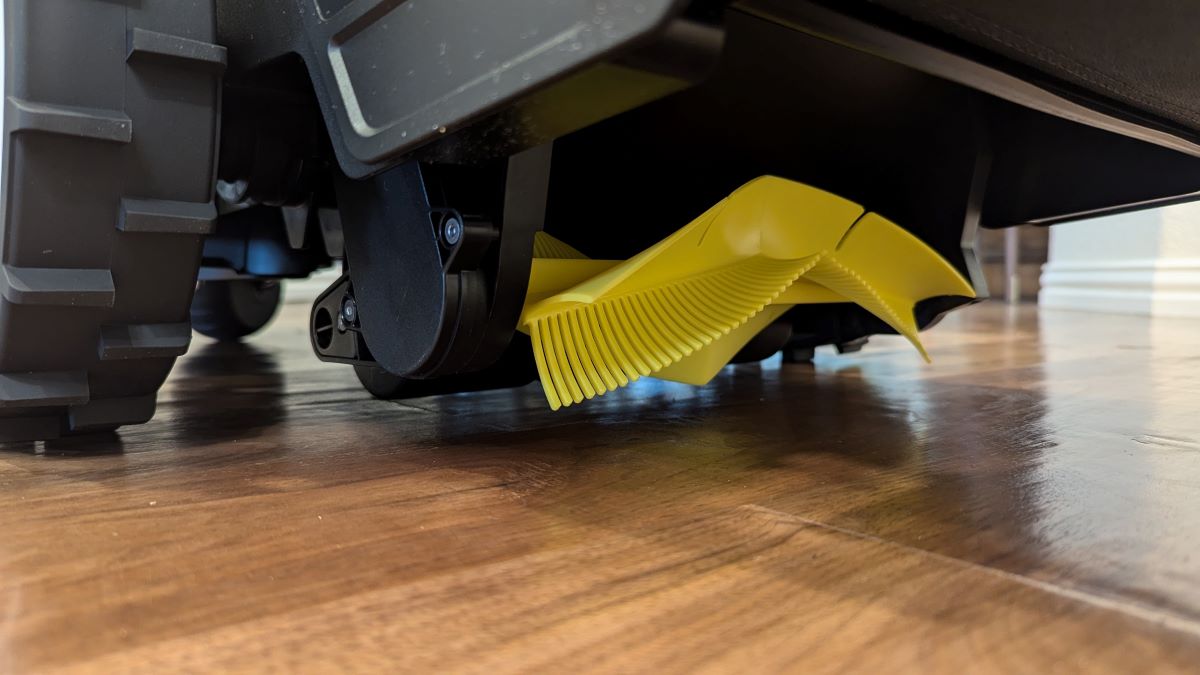
The sides of the mower display information about the dimensions of the sweeper and the operating and storage temperatures (first photo above). The sweeper contains yellow silicone blades and bristles that brush the lawn debris into the hopper (shown in the center photo above).
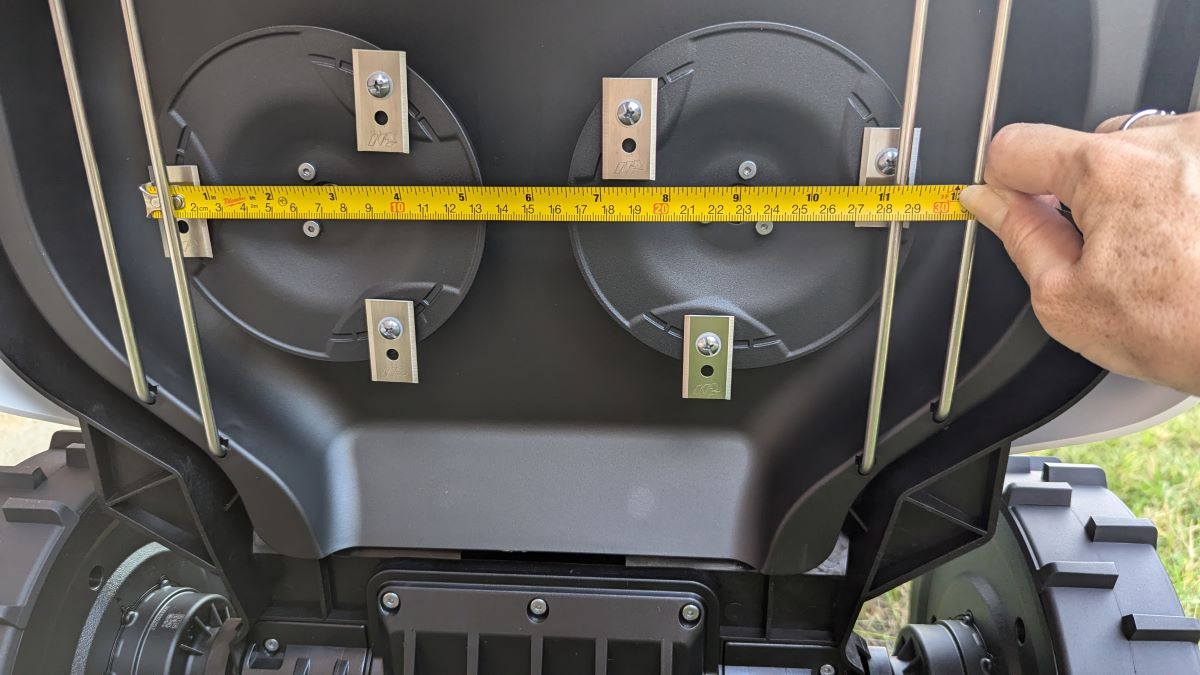
The cutting width of the lawnmower is 32cm or 12.59 in. (last photo above).
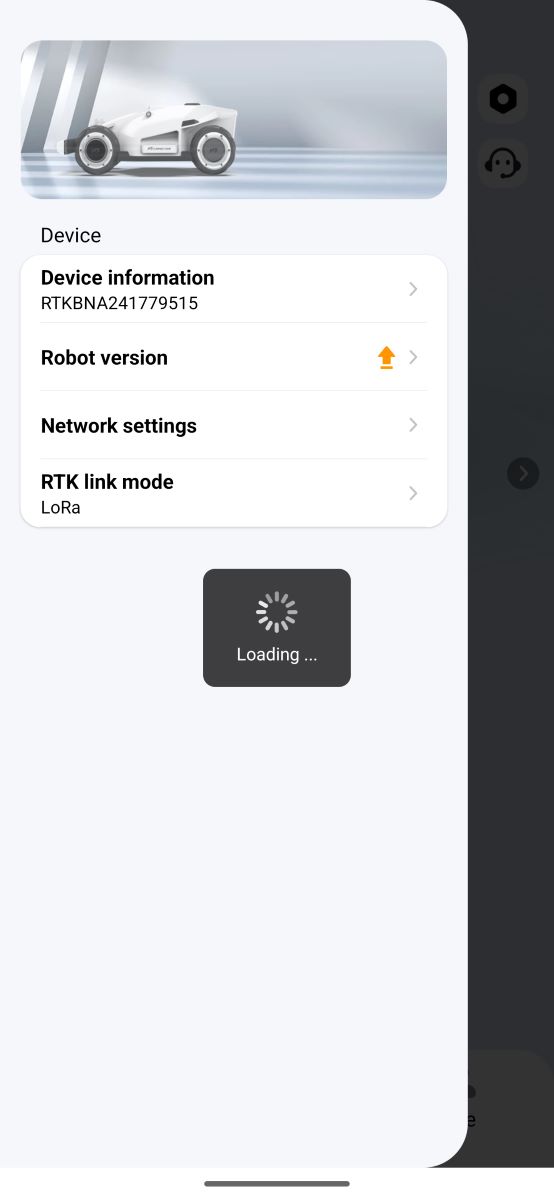
App Setup
Getting started using the app
To use the Yuka series lawnmowers, you need the Mammotion app. Using this app was not very intuitive. So first things first…
HERE’S THE YUKA USER MANUAL!!!
It’s fairly well-written and very helpful. I didn’t realize that it existed until late in my testing. I struggled to find things in the app because I didn’t have the manual, so I’m sparing you the heartache.
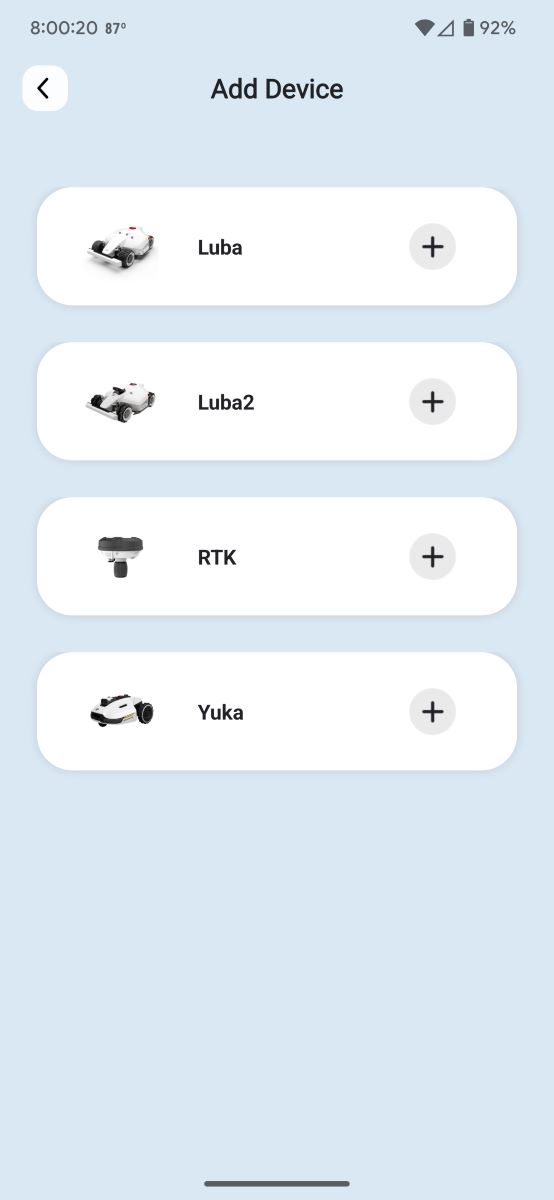
Adding the mower and RTK reference station to the app
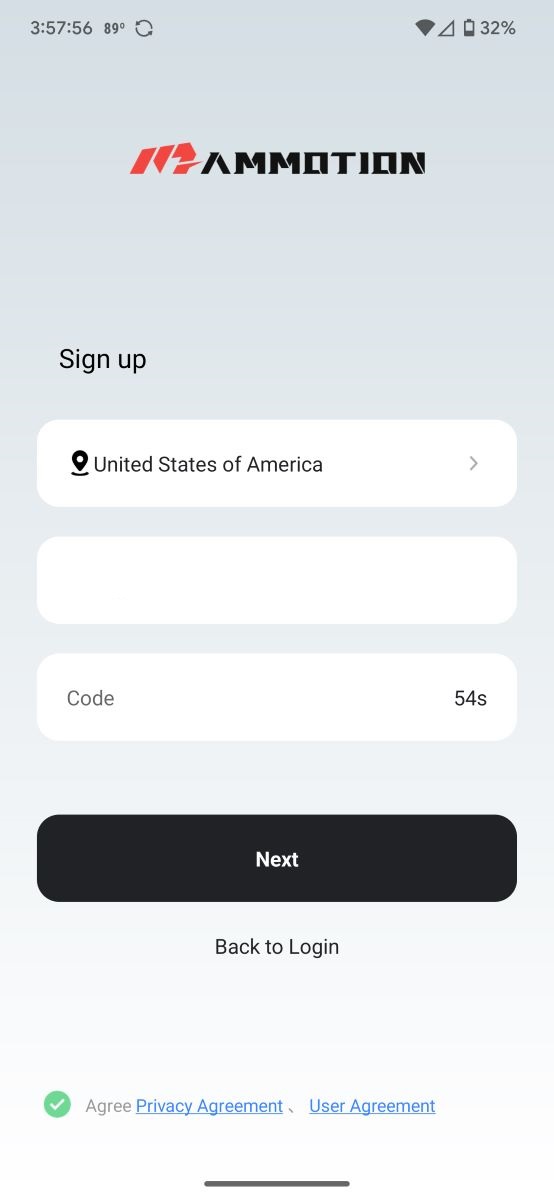
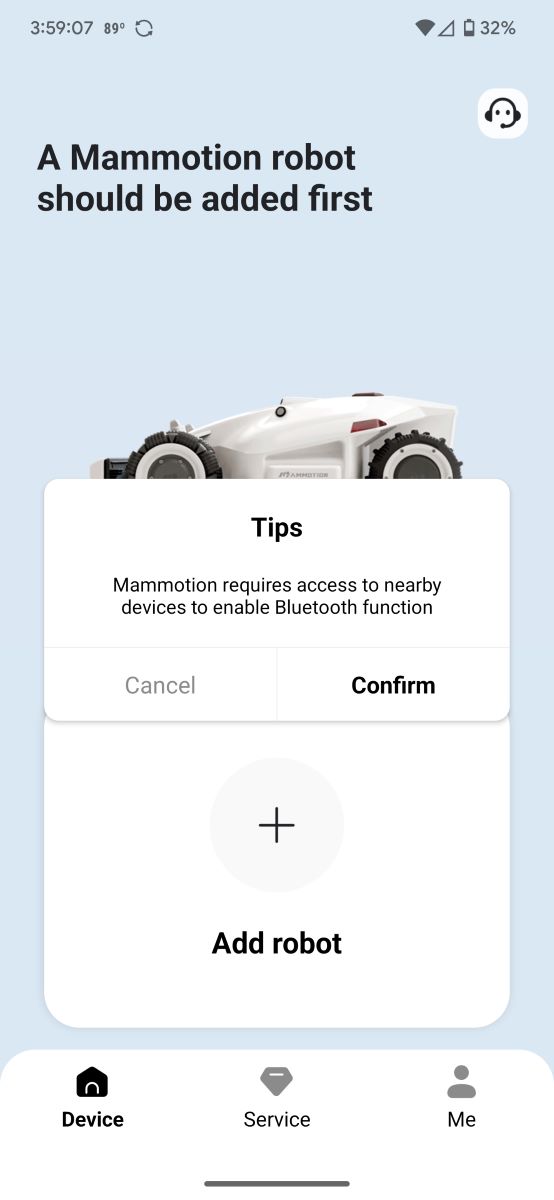
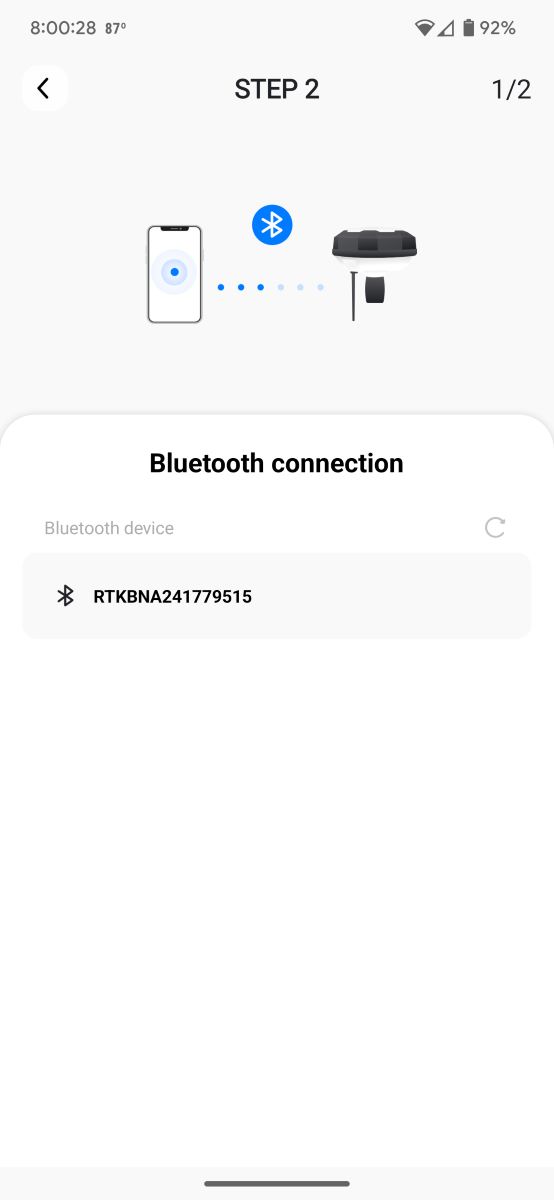
After installing and launching the Mammotion app, I signed up for an account and added the Yuka robot to the app. I kept my phone close enough to the mower to add it using Bluetooth. I then added it to my WiFi network.
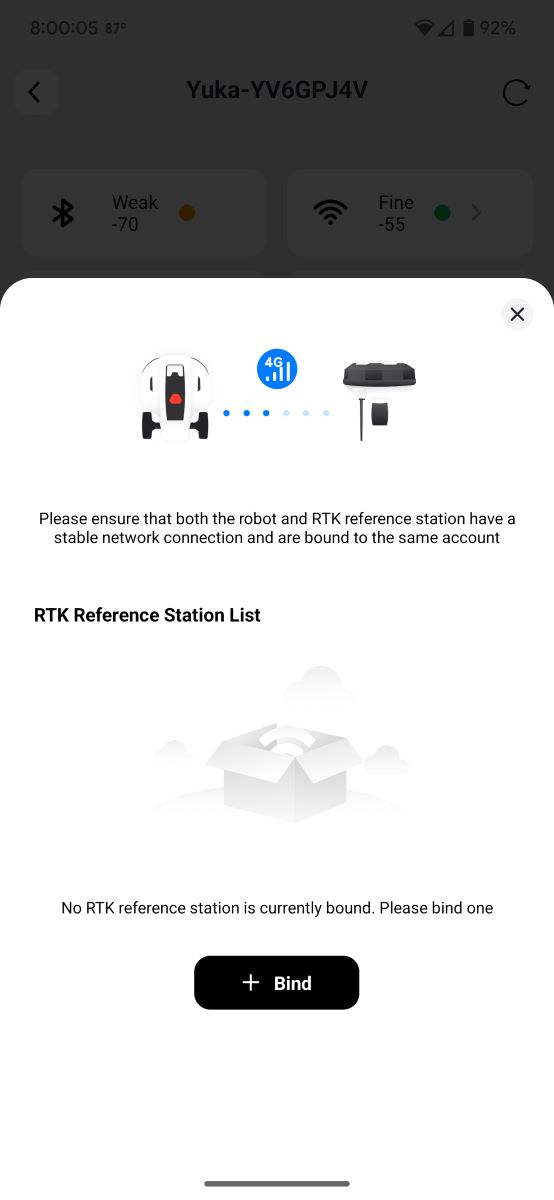
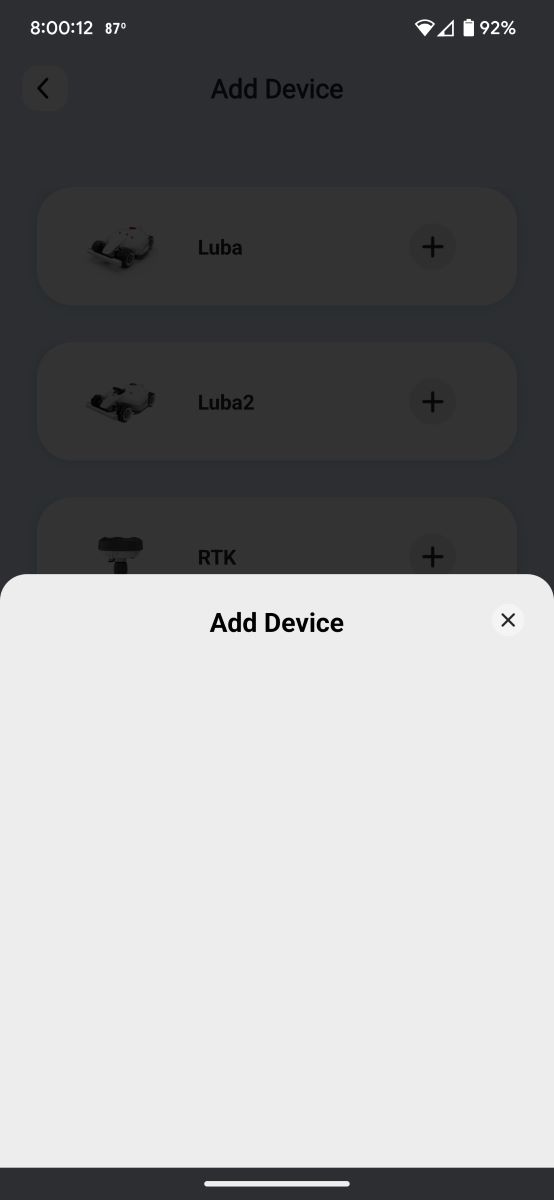
Afterward, I needed to add the RTK station to the app but was unsure how to do it (I didn’t have the User Manual at the time to know how to do this). The app tried to find an RTK reference station to bind it to the robot (first screenshot above) but couldn’t find one because I hadn’t added it yet. So I tapped the “Bind” button and a blank “Add device” screen popped up (second screenshot above). I was a little confused about what to do next so I closed the blank screen and the following screen allowed me to select an RTK station to add it (third screenshot above).
It turns out that after connecting the robot to my network, I could have swiped left on the homescreen to add the RTK station as a new device. I discover this by swiping in all directions and randomly tapping on things. The manual would have come in so handy for me…
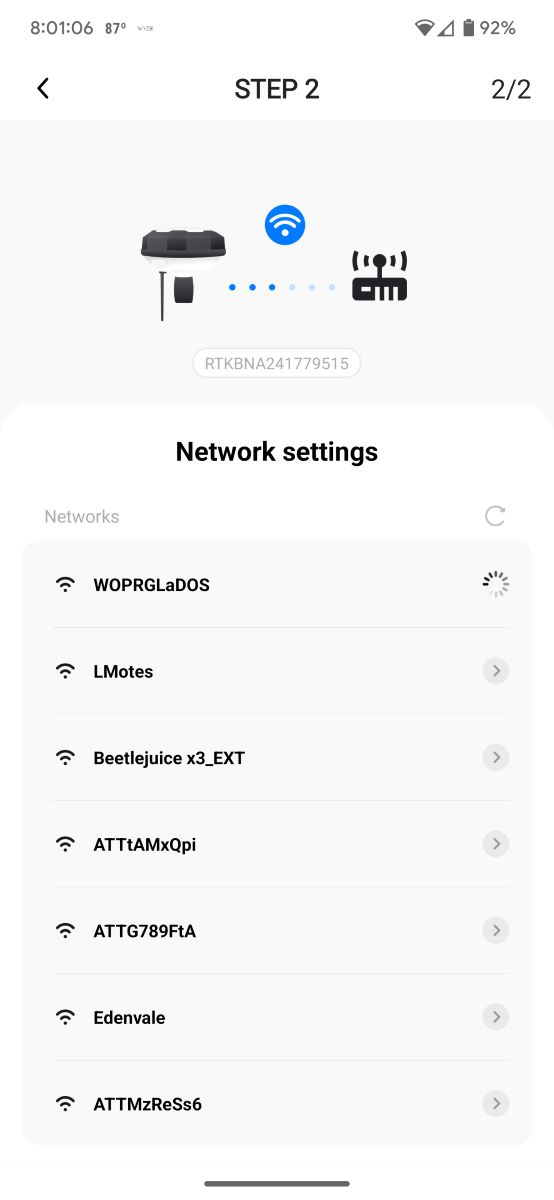
The app used Bluetooth to find the RTK device (fourth screenshot above). I then tapped on it and connected it to my WiFi network (fifth and sixth screenshots above).
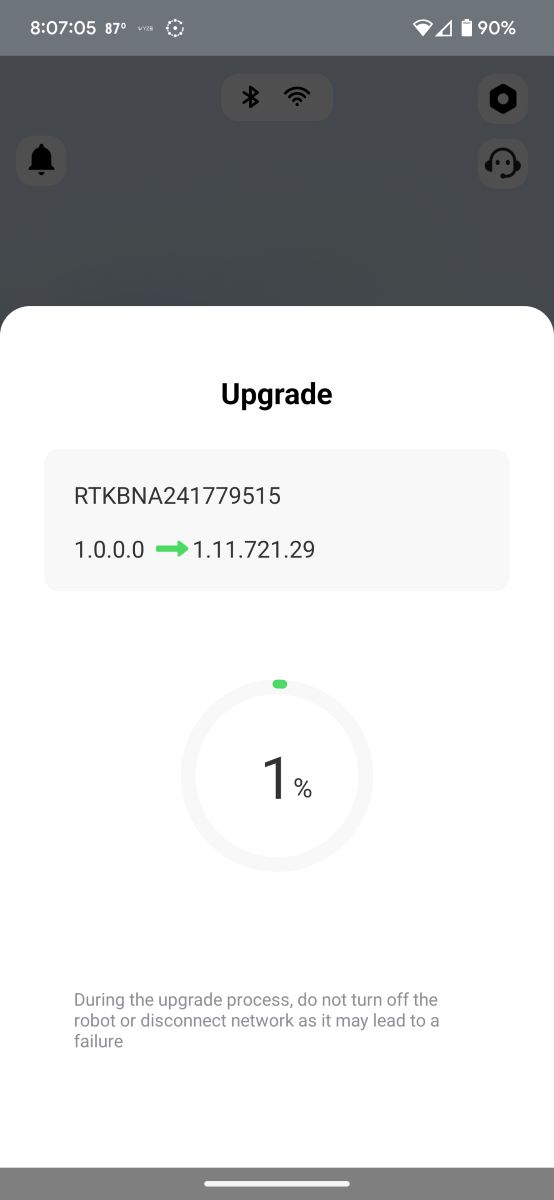
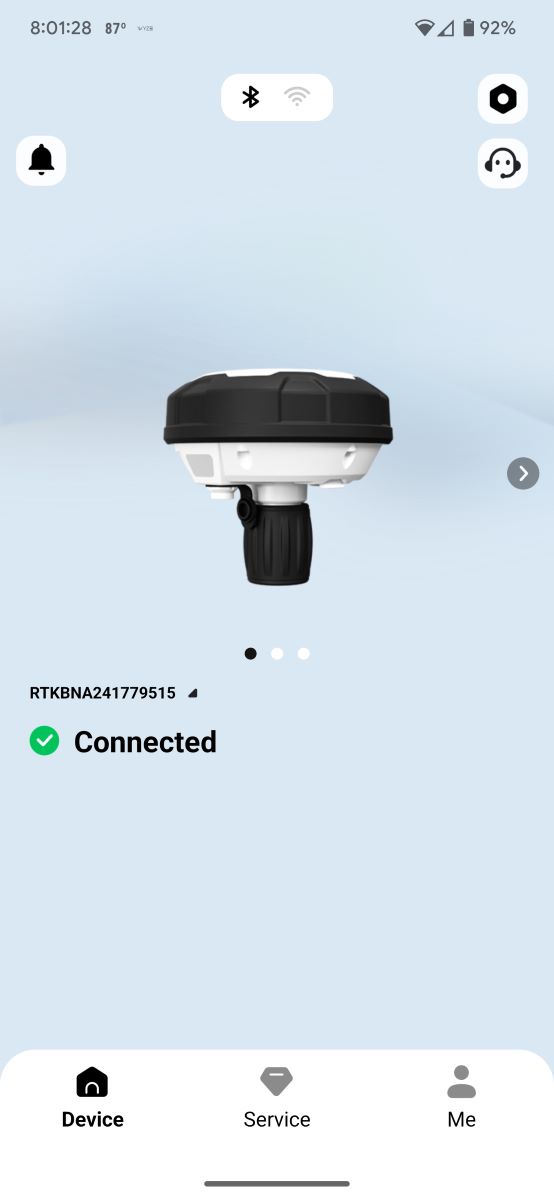
The RTK station and robot needed an update after which, the robot was ready for satellite positioning.
Placing the mower and RTK station in a clear area to receive good satellite signals
It was challenging to find the ideal spot to place the mower/charging base and the RTK station to receive good satellite signals. The manual covers this, but I didn’t have it at the time.
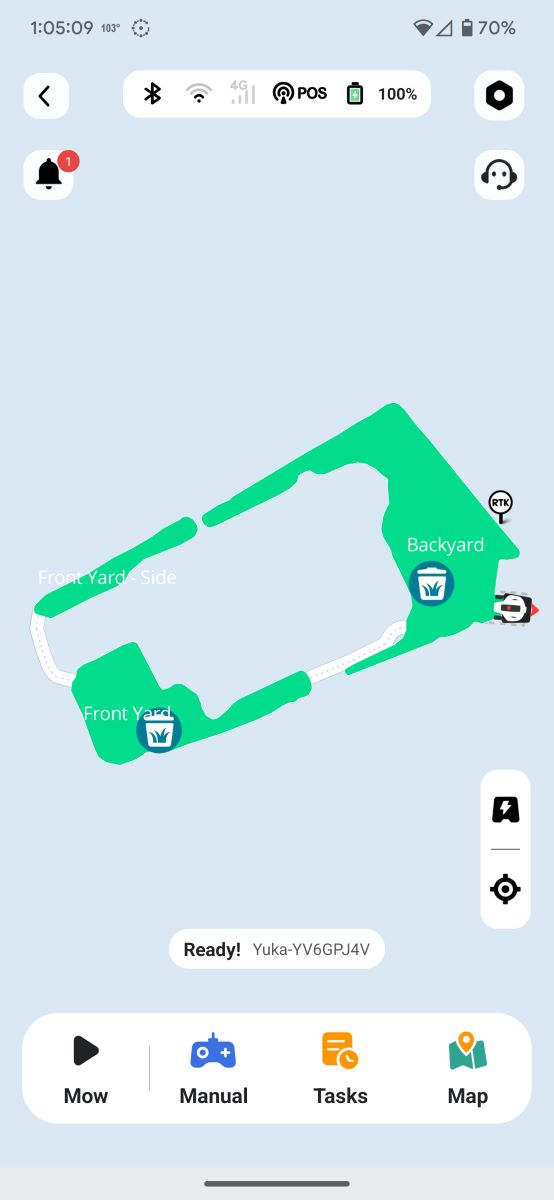
The mower and RTK station need access to a clear view of the sky (no obstructions overhead) and a power outlet. I also had to consider that wherever I installed them, the mower wouldn’t be able to mow there. I discovered much later that you can place the charging base outside the mapped lawn area, but you’ll need to create a “channel” for it. A channel is a path between mapped areas for the robot to use.
I tried a few different positions against our house near outlets and then against our shed where there were outlets, but apparently, the overhangs were obstructing their view.
Note: You need to find a good spot for the RTK station before creating any maps because if you have to move it later, you’ll need to delete your maps and start again.
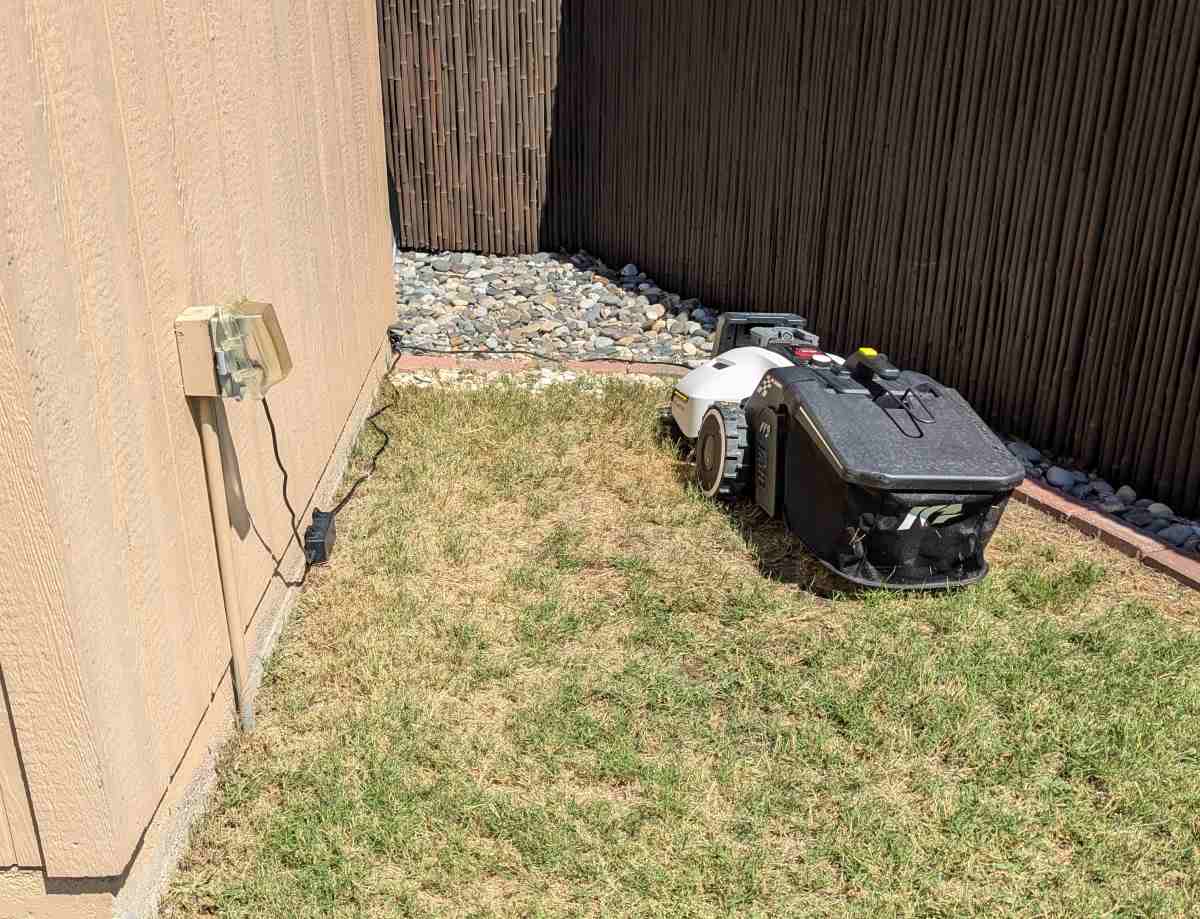

I finally placed the charging base between my fence and the side of my shed (first photo above) and the RTK station against my fence several feet away from my shed on the other side (second photo above).
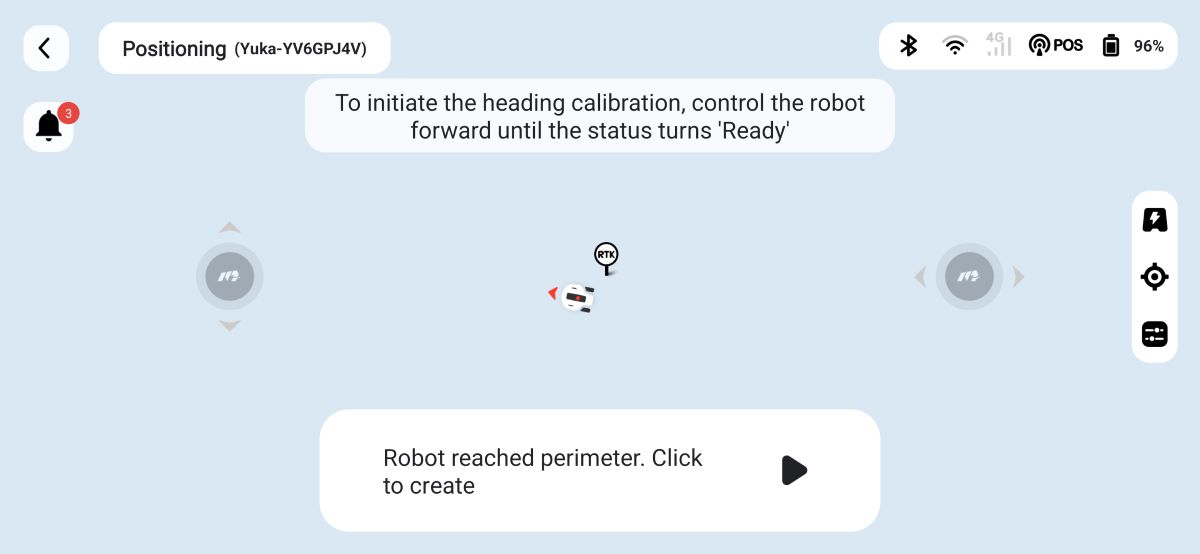
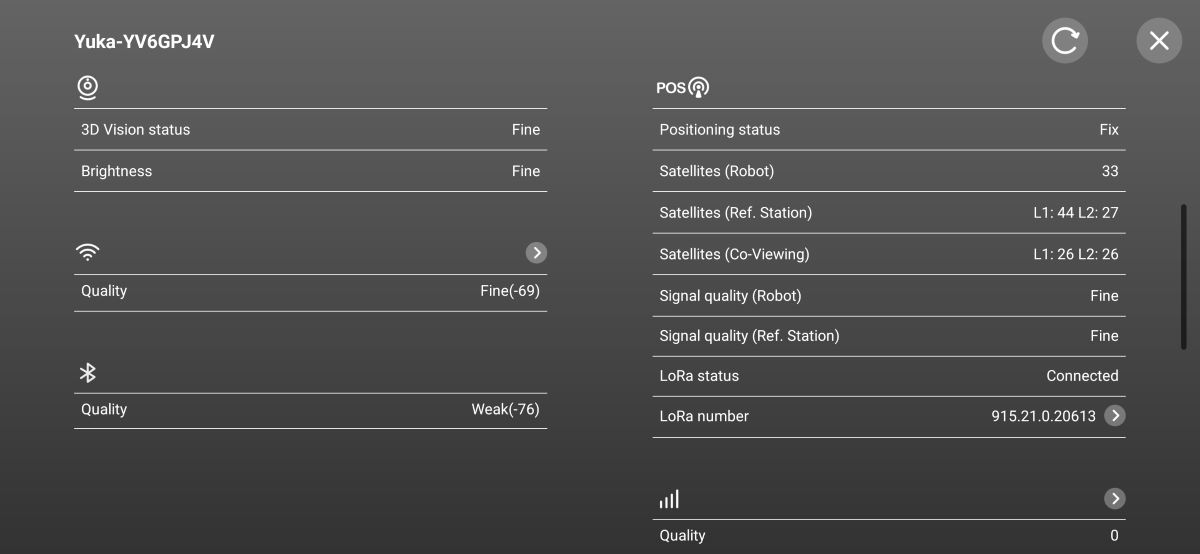
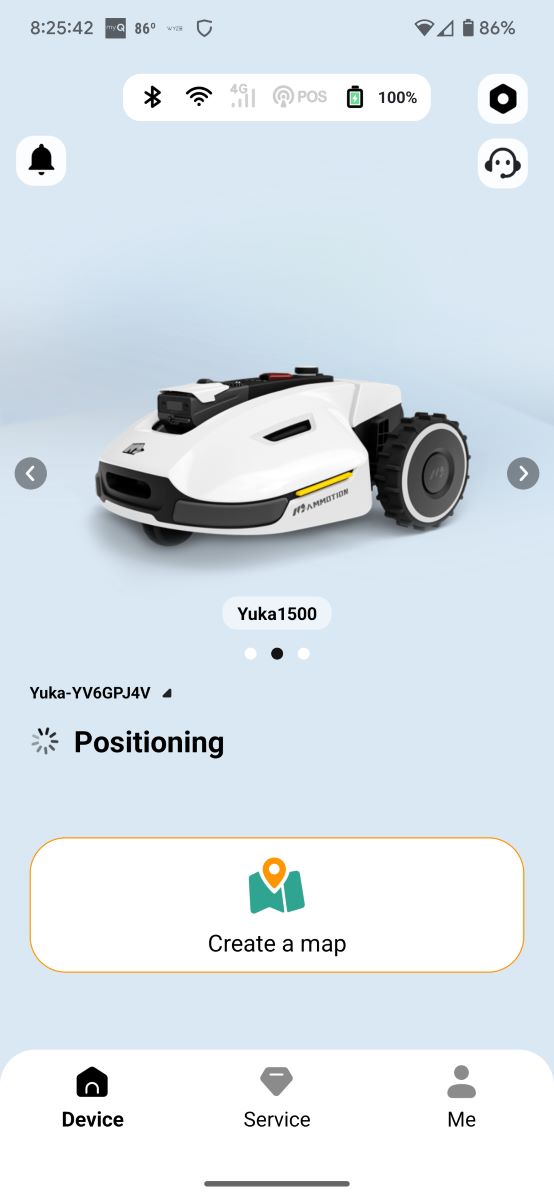
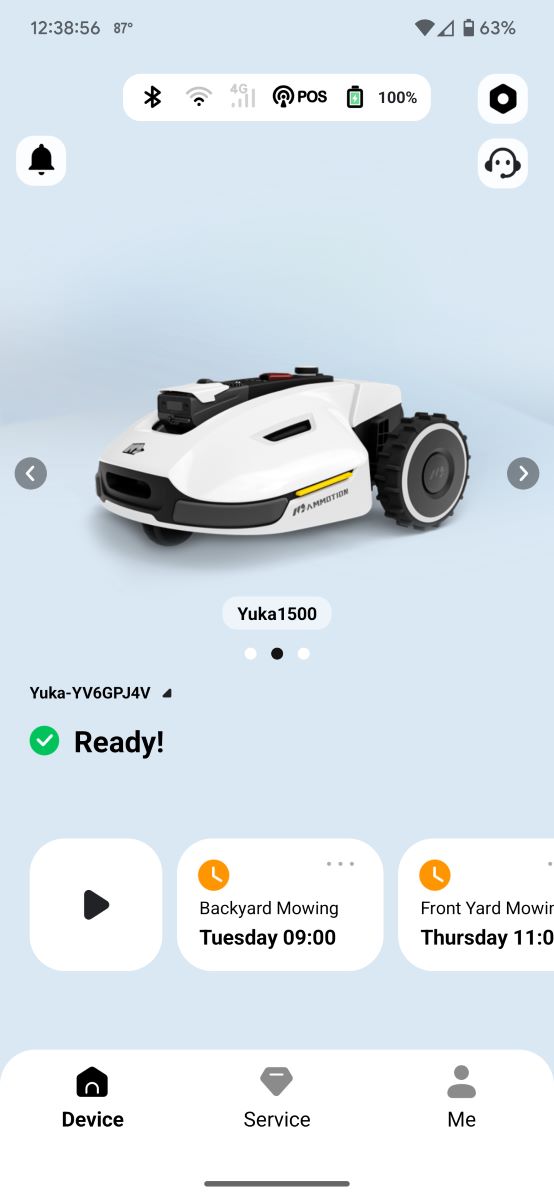
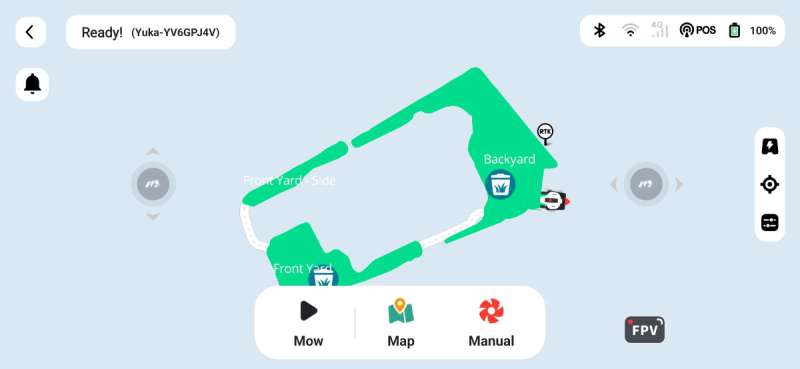
After deciding where to place the RTK station and robot, the app prompted me to manually control the mower to a spot where it could receive satellite data. The robot status says “Ready” when it receives the data. To view the satellite data on the app (second screenshot above), tap on the app status bar (the bar in the upper right corner of the first screenshot above which contains the Bluetooth icon, WiFi icon, 4G icon, POS (lol) icon, and Battery icon).
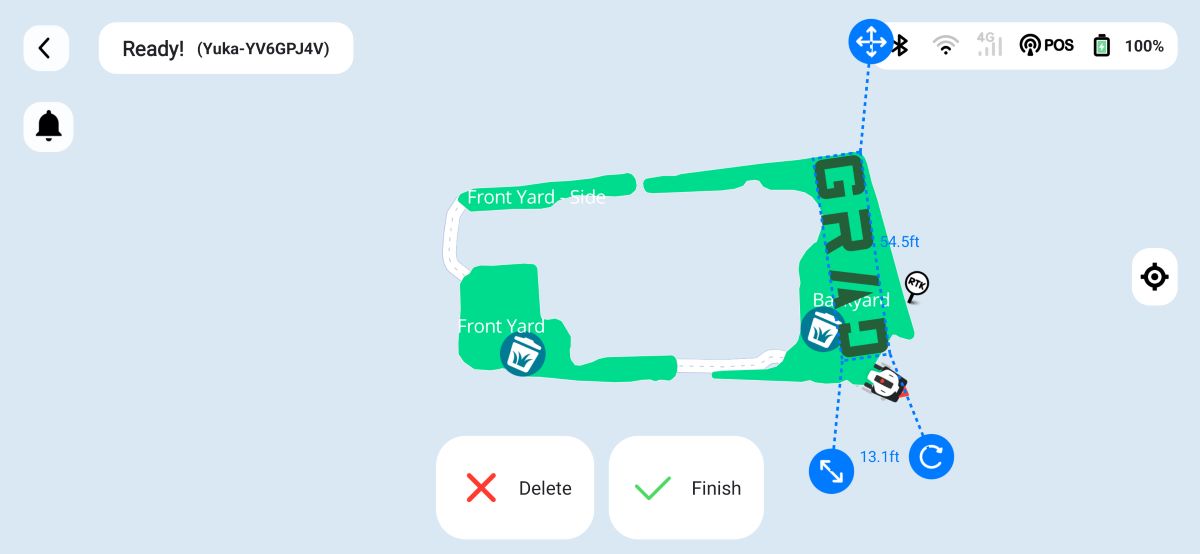
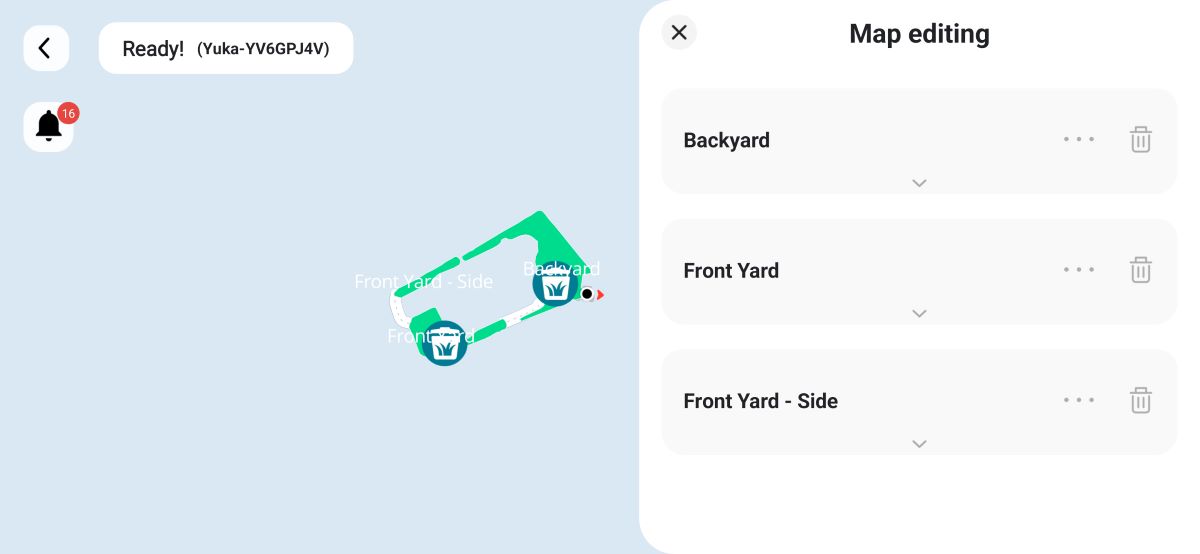
Creating a map area
When you launch the Mammotion app, the first screen that often pops up is the RTK reference station screen (it may or may not be connected). To create the first map of my yard, I needed to swipe left to the second page of the app to get to the robot screen. I then tapped the “Create a map” button below the picture of the robot.
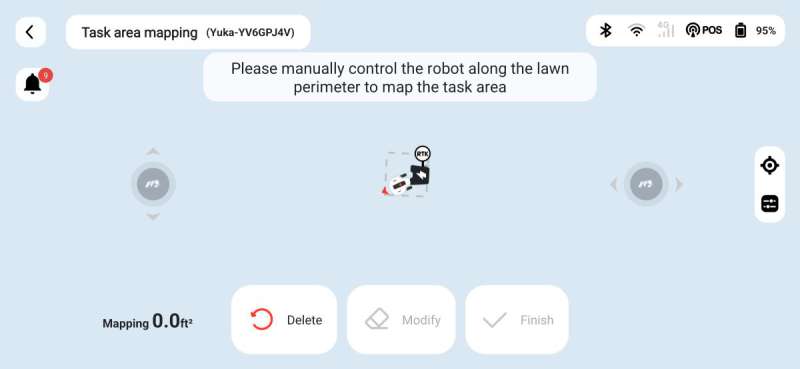
I then needed to manually drive the robot to the lawn’s perimeter to start the mapping process. It was tricky controlling the mower using the Forward/Back and Left/Right controls on my phone. The controls aren’t particularly responsive and I had to get the hang of driving the robot around my sprinklers, patio, walkways, and garden beds. It was slow going.
You can create up to 10 mowing zones (also known as map areas or task areas).
Creating a task
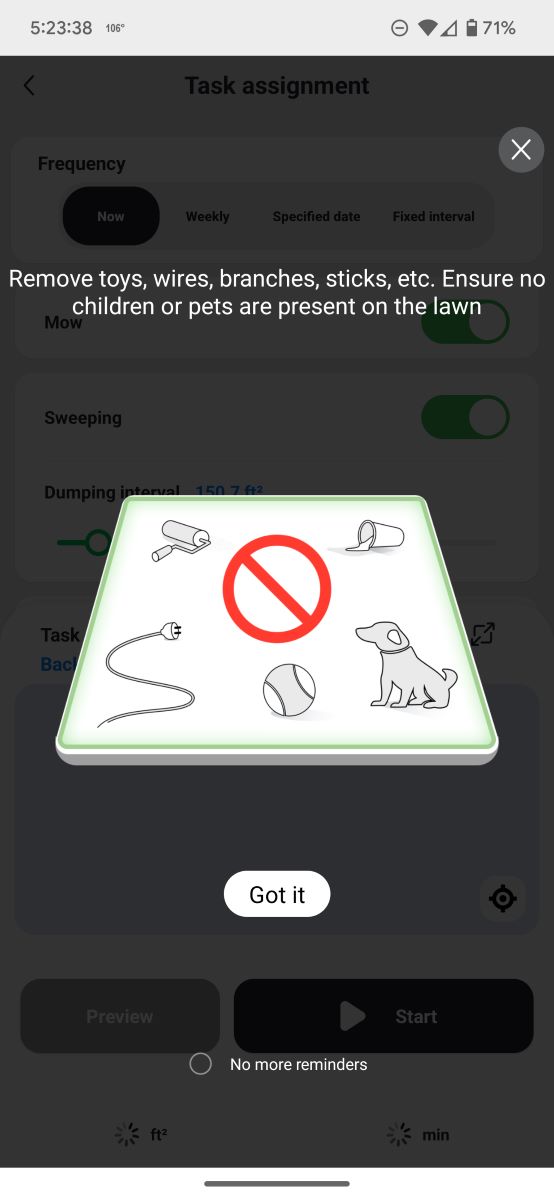
After creating my first map, I created a scheduled task by tapping the “Add” button on the robot screen. I was prompted by the app to clear the mowing area of any objects.
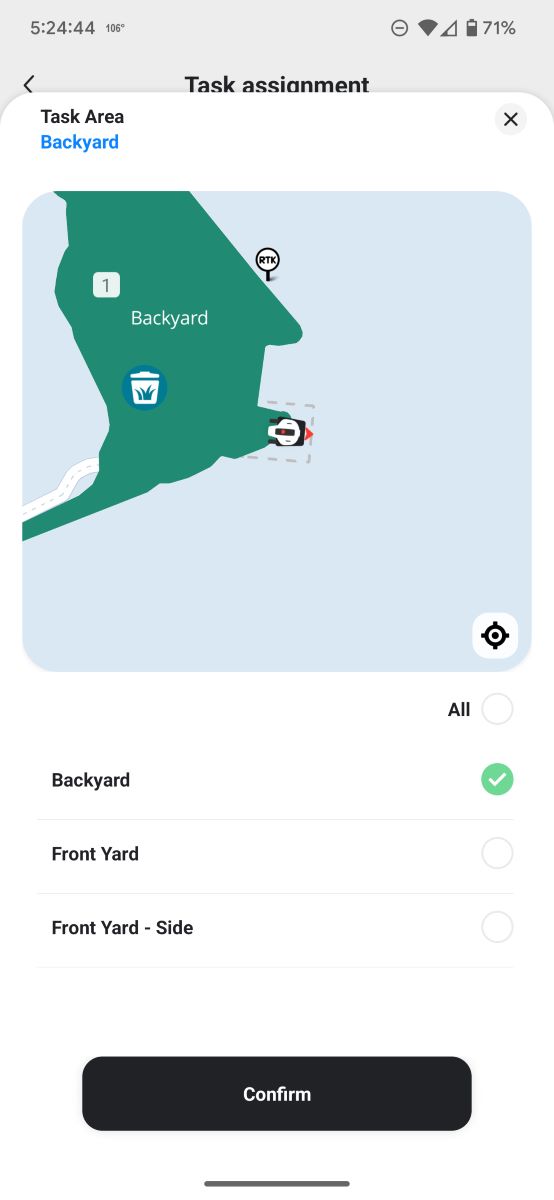
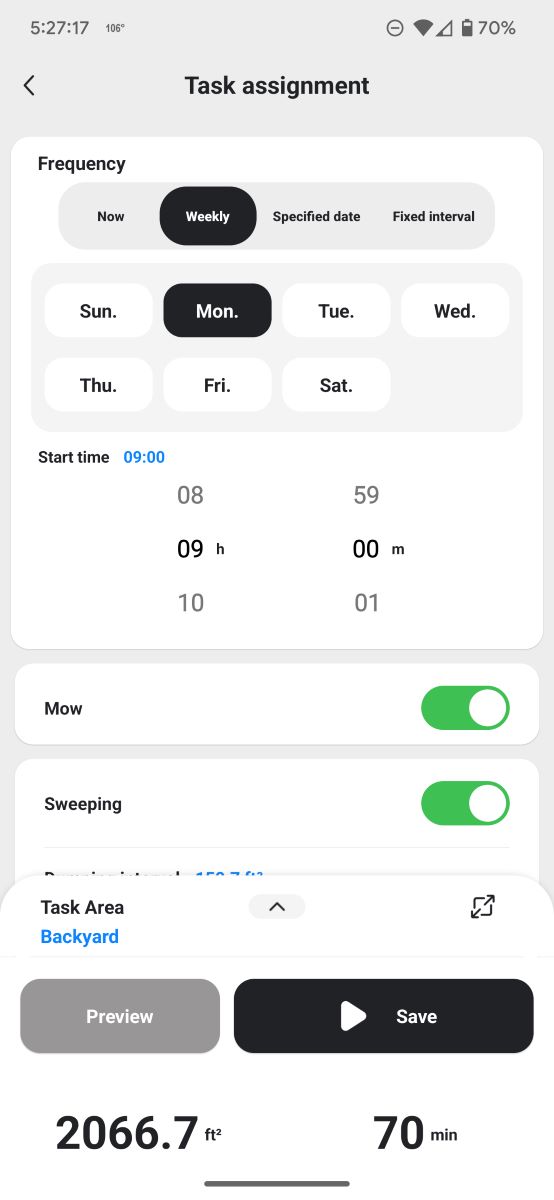
Next, I needed to select the mapped areas I wanted to use for the task (first screenshot above). I selected how often I wanted the task to run (weekly, fixed interval, etc.), the time, whether I wanted the robot to mow, sweep, or both…
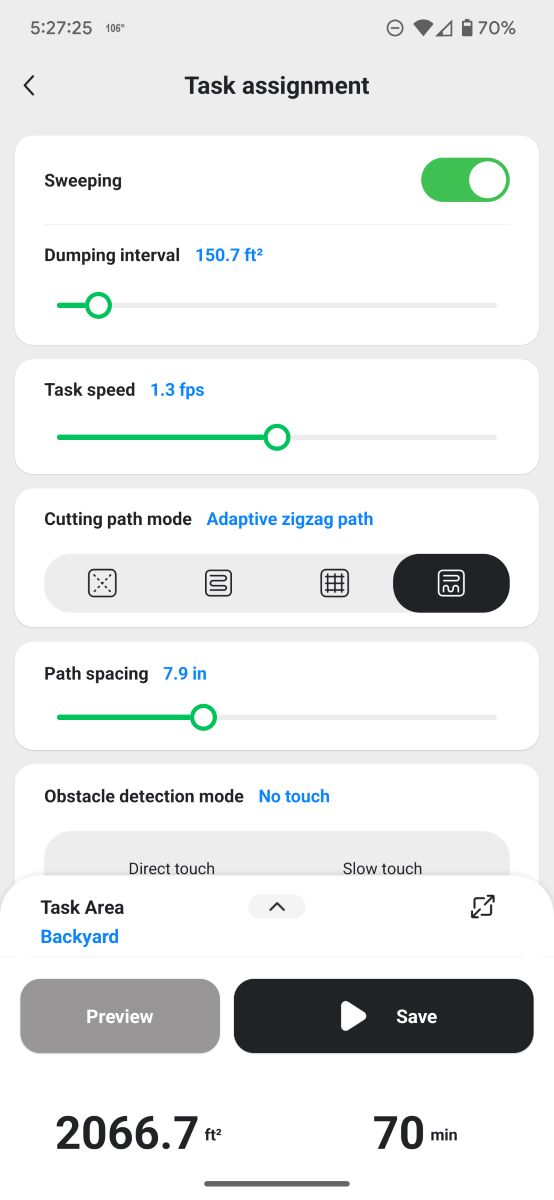

…the dumping interval, the robot speed, the cutting path mode (perimeter only, zigzag, chessboard, adaptive zigzag), path spacing, obstacle detection, how many perimeter laps and no-go zone laps I wanted the mower to mow. You create no-go zones around pools, etc. and this tells the mower to mow 0, 1, 2, or 3 laps around that zone.
Next, you have path order and start progress (what percentage of the map area you want the mower to start at).
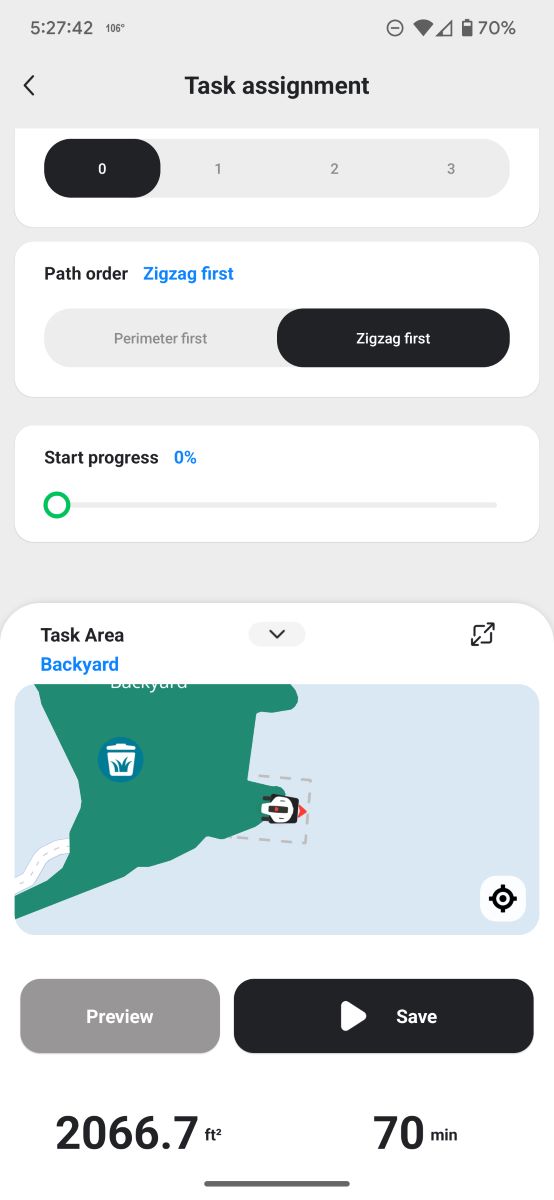
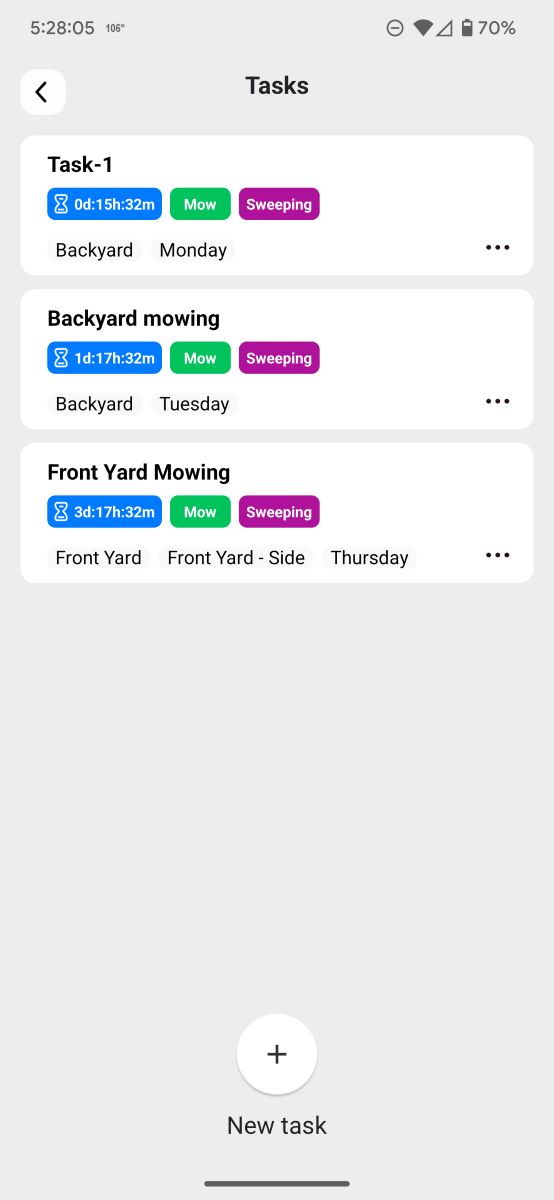
You can then preview the path of the mower or save the task (first screenshot above). When you finish saving, you’re brought to a screen listing your tasks (second screenshot above).
Because I have the self-emptying sweeper attachment for the Yuka lawnmower, I toggled on “Sweeping” in the task settings. The app then prompted me to create a dumping spot.
Okay, so how do I create a dumping spot? I finally figured it out.
You need to get to the screen shown in the second screenshot above – which, by the way, should be the app home screen in my opinion.
How do you get there, you ask? Well, you tap the Yuka robot picture shown in the first screenshot above, of course.
I tapped on the Yuka mower on the robot screen (first screenshot) > Map (second screenshot) > Create (third screenshot) > Dumping Spot (third screenshot). I couldn’t just tap on the screen to add the spot to the mowing area, I had to drive the robot manually to a task area and find a spot for the mower to dump the grass clippings.
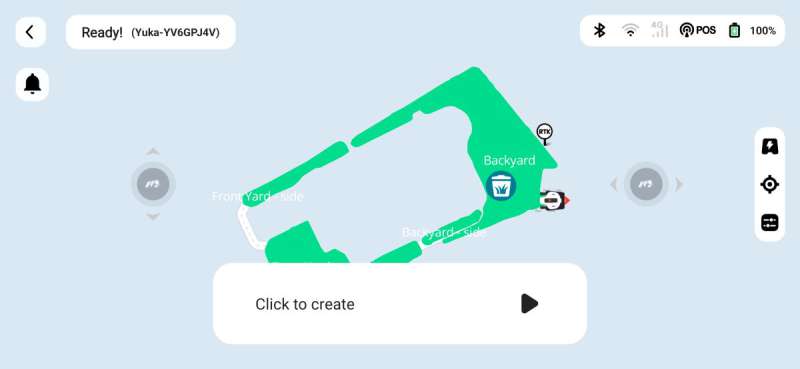
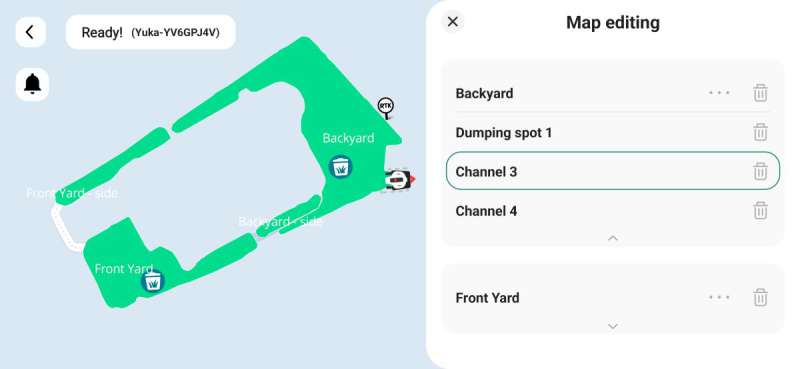
Once there, I tapped “Click to create” to create the spot. I found out later from the User Manual that the dumping spot can be inside or outside the task area, but if it’s outside the task area, you’ll have to create a channel to connect the task area to the dump spot.
After creating the dumping spot, I then created “Channels” to connect the separate lawn areas. To do this, I tapped the Yuka mower on the robot screen > Map > Create > Channel. Again, I had to drive the robot manually to a task area and tap the right arrow button to create the channel.
Performance
The Good
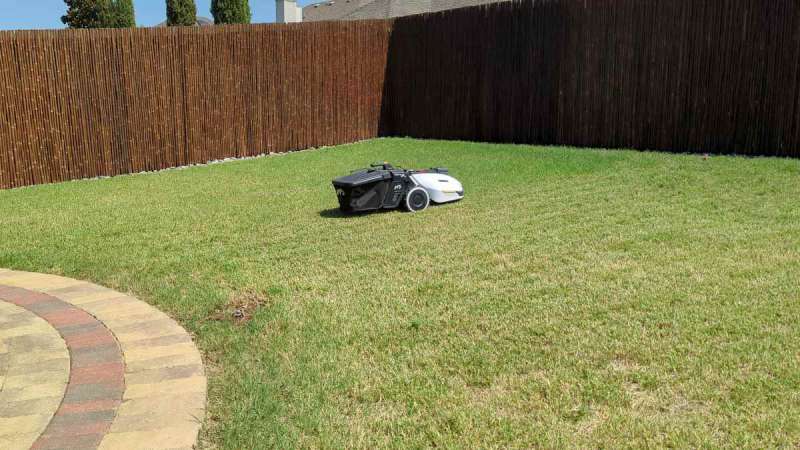
Once it was set up, the Yuka 1500 Robot Lawn Sweeping Mower completed each of my tasks regularly in an organized pattern on one charge of the battery – until it didn’t (more on that later). In fact, it completed all my yard areas/zones on one charge (sadly, my lawn is tiny – not all things are bigger in Texas, apparently) and it never clogged up with grass clippings.
It’s nice that the mower maintains its positioning even when it’s beneath a tree. It can also detect and mow around obstacles like our trees. Additionally, with the self-emptying sweeper attachment, the mower regularly empties the lawn clippings in the designated dumping spot to complete its tasks without your intervention.
You have to manually adjust the height of the cutting disks using the knob on top of the mower, but doing so is very easy – just push in and rotate to the desired setting.
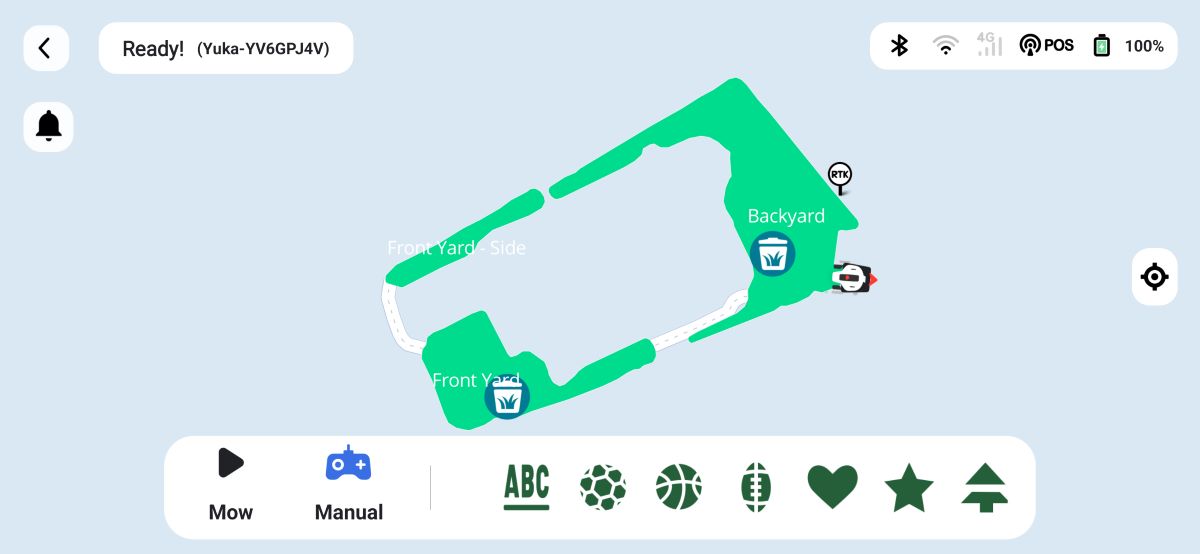
And, if you want the mower to create some shapes or letters and numbers in your lawn, you can choose from a handful of designs currently available in the app.
Additionally, the mower can sweep up leaves, debris, acorns, and branches (up to 1.37 inches) according to the Mammotion website. I’m excited to see if it will work on my leaves and acorns. I’ll have to report back about that in the fall.
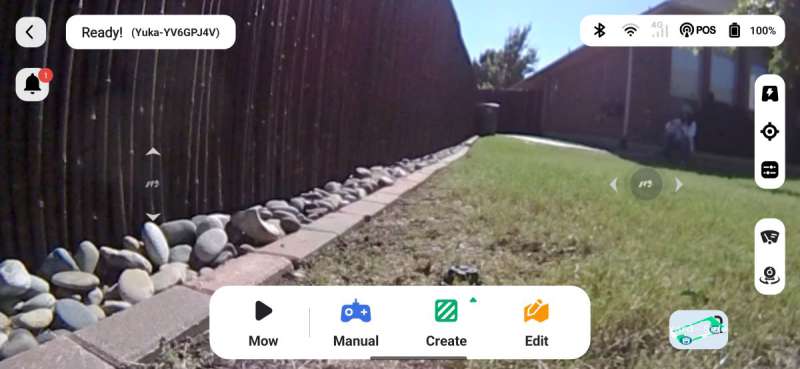
You can even see the robot’s point-of-view from the app using the 3D vision module.
Here’s a video of what you would see when tapping the “FPV” button on the Mammotion app (tap on the robot picture on the robot screen > Map > “FPV”) as the Yuka lawnmower runs a task. I didn’t alter the speed of the video – it’s unfortunately choppy and pixelated and during the last few seconds, the video froze.
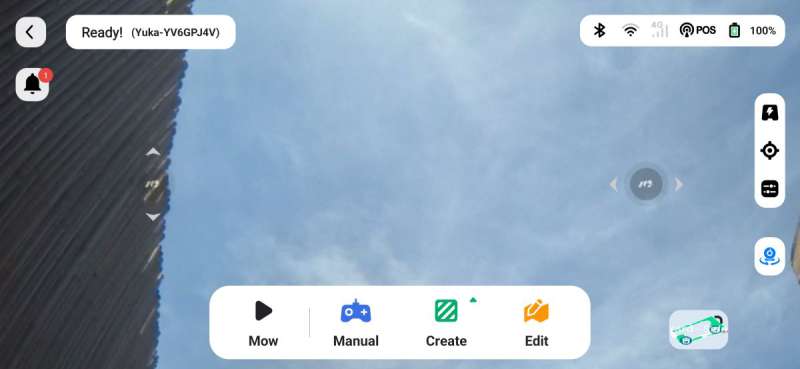
The above is from the camera on top of the mower.
The Bad
Leaves of Grass
All that sounds nice, right? Yeah, however, I had many issues with the Yuka 1500. Early on I noticed that the sweeper sometimes left clumps of grass clippings around the yard, but decreasing the distance the mower traveled before emptying the hopper seemed to fix the problem.
Also while the robot was mowing, I noticed that it missed cutting some grass here and there. It wasn’t obvious from a distance but was more noticeable while standing in the yard. It doesn’t seem to cut as precisely as a push mower.
Where is everything?
I also had issues with the Mammotion app. As I mentioned before, using the app is not intuitive. When I first started using it, I quickly discovered that things weren’t where I thought they should be. I didn’t realize there was a User Manual available and thus I couldn’t find basic things like where to create additional maps after having created the initial map.
Because manually driving the robot with the app was difficult, I wanted to edit my “channels” because they were crooked. But where do I edit channels? I couldn’t find the setting to edit those, so I thought I’d try to create another one in the same area. But when I did that, the app told me I needed to delete one to create another. Okayyyy – so where do I delete the channel?
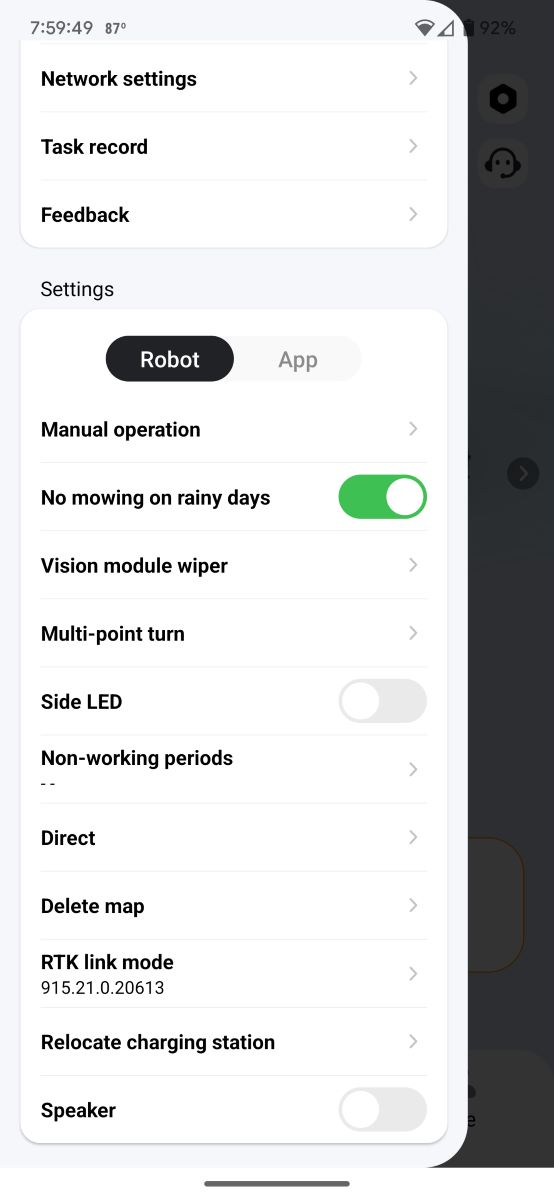
I tried looking in the robot settings by tapping on the cog in the upper right corner of the robot screen. There I saw “Delete map” (second screenshot above).
I thought I’d give that a try. You can see where this is going…
I figured it would give me a list of the mapped areas, dumping zones, and channels where I could select the ones I wanted to delete. At the very least, I thought it was worth a try since most apps ask you if you’re sure you want to delete before actually doing it. Nope. It deleted everything! AHH! NOO!! I had to re-create ALL my maps, dumping zones, and channels.

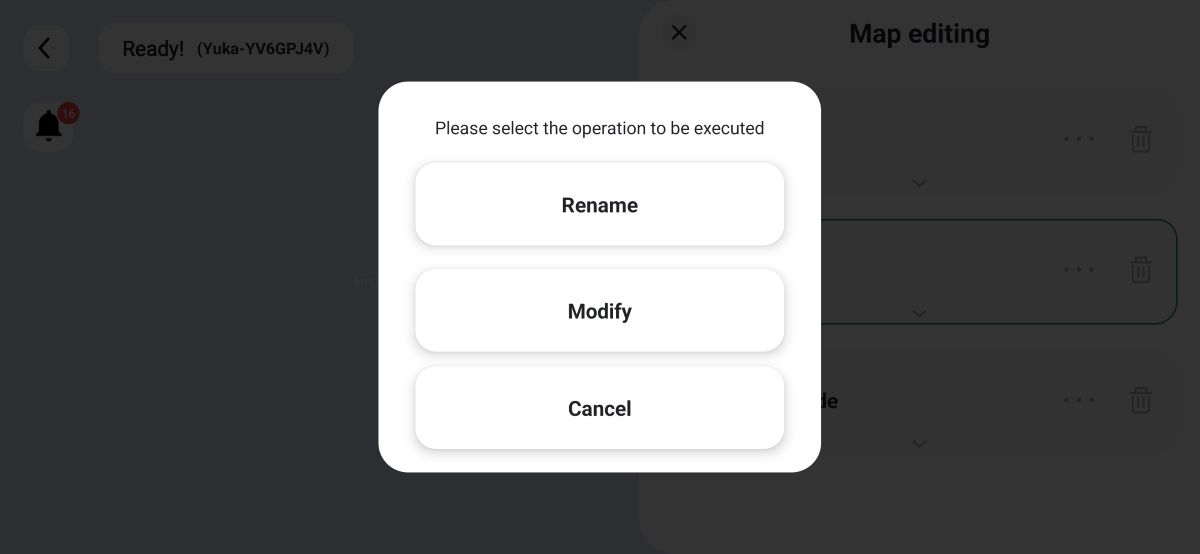
I finally found out where to edit my dumping areas and channels. I needed to tap on the Yuka robot picture on the robot screen > Map > Edit (first screenshot above). From there you can tap the three dots next to the map area (second screenshot above) and tap “Modify” (third screenshot above)…
…or tap the drop-down arrow under each map area to edit the channels and dumping spots.
Look out, comin’ through!
There are two remote controls on the app to steer the robot – Forward/Backward and Left/Right. The controls are not very responsive and can be extremely frustrating. Manually controlling the mower takes some getting used to even if you are a gamer.
I also had issues with the manual mowing. The app lets you manually control the robot to mow your yard. Sometimes the robot’s responses lagged significantly from what I was doing with the app controls. So, when I wanted the robot to move forward just a little bit and it didn’t respond right away, I tried again. Then suddenly the robot would race ahead and crash into a wall all while I was panicking and feverishly trying to turn the robot away from it, but the lag was too great.
Additionally, if the mower didn’t respond to my controls within a couple of seconds, the mower stopped mowing. Thus I kept having to start the mower repeatedly to complete my mowing. The app is supposed to allow you five seconds before shutting off. Yeah, no.
Additionally, when I bumped into something while manually mowing, sometimes the mower wouldn’t let me mow again until I shifted the bumper back to a particular position. It didn’t look off-kilter, so it took a while to figure out what was happening. In the 100-degree Texas heat. Yeah. Fun.
The Ugly
Diggin’ its heels in
There were other issues outside the app. While watching the mower complete a task, I noticed that when it turned near an object like a fence or the shed, the back of the mower collided with the fence or shed.
But instead of stopping and trying to move in a different direction, the rear wheels continued to turn. The wheels ended up gouging ruts in the yard. A similar thing happened when the mower traveled over uneven ground. The mower got stuck but the wheels continued to spin.
“All done! How’d I do?”
A couple of times I observed the robot approach the dumping spot and if the previous piles of grass were too high, the mower sometimes scurried back to the charger to charge before the task was completed (there was plenty of battery left to finish the task).
One time, the mower started its scheduled backyard mowing task. I set it to do the zigzag mowing first then to mow the perimeter twice. It completed the zigzag area, ran off to its base to charge, and then proceeded to inform me that it had completed its task. So, I tried to create a new task to mow just the perimeter. The mower backed out of the charging station, drove a couple of feet away, went right back to the charging station, and notified me it had completed its task. Ugh!
I tried modifying the backyard mowing task to start it at 79% (as if it had already completed mowing the yard up to 79% and needed to finish mowing the last 21%).
It left its charging station, drove to the perimeter of the yard, mowed a few feet, stopped, and then went merrily back to the charging station saying that it had completed its task. Really???
Ever since then, the mower has completely stopped mowing the perimeter of my lawn. I tried to alter the task settings to get the mower to mow the perimeter first and then do the zigzag laps, but it ignored the perimeter altogether and started right in on the zigzag laps. Oh my gosh, I spent a ton of time over the last month working on this mower review and dealing with all its issues in 1,000,000-degree Texas heat. I’m so done. D. O. N. E. Done!! At least for now. Until they release firmware updates and app updates.
What I like
- It mows regularly
- It can mow my front and back yard on one charge of the battery (my yard is small – about 0.25 acres) without getting clogged
- It automatically empties the grass clippings in a designated dumping spot
- It can detect and go around obstacles
- It uses an RTK reference station for precise positioning so I don’t have to use boundary hardware
- Cutting height adjustment is easy, though you need to do it manually using the push knob on top of the mower
- I had no issues with the mower getting clogged
- It can sweep up leaves, acorns, and small branches (up to 1.37 inches), which I will test in the fall
What I’d change
- It misses cutting some grass (it doesn’t seem as precise as a push mower)
- If the back of the mower hits a wall or fence while turning or backing up, the rear wheels continue to spin and grind up the area under the wheels, so mowing narrow areas between a house and fence is a challenge
- It doesn’t mow the grass in the dumping spot or charging area (if they are within the task area)
- The Mammotion app is not intuitive, it needs a lot of reorganizing to make it more user-friendly
- Manual control of the mower lags
- Manual mowing stops almost immediately if it doesn’t detect the remote controls from the app which sometimes lags significantly
- It’s extremely expensive – the robot and self-emptying sweeper are sold separately
Final thoughts
The Mammotion Yuka 1500 Robot Lawn Sweeping Mower is a sleek-looking device. Once it’s set up, it keeps up with our lawn care regularly which is difficult for us to do when busy. It mows our entire front and backyards on one charge without any clogs, detects and mows around objects, automatically dumps grass clippings in designated areas, and maintains its position throughout.
However, it’s not quite as precise as a push mower (it misses cutting some grass), the back wheels continue turning and gouging up the yard if the back of the mower hits a wall, the areas around the charging station and dump spots don’t get mowed if they are within the task area, it’s difficult to manually drive the mower around using the app (which is necessary to manually mow or create the virtual boundaries of the mowing areas), the app is disorganized and not user friendly, and the mower is really expensive. If you purchase the mower and the sweeper kit, it would take about 1.25 years to break even if you spend $30 per week for lawn service. And that’s paying someone every week throughout the whole year.
While it has incredible potential, the technology is relatively new, so it makes sense that there are growing pains. Here’s my suggestion – let the technology mature before you buy. You’ll reap the benefits of lower prices and fewer headaches.
Update 9/25/24
Mammotion recently released some firmware updates for the Yuka mower and RTK station. I updated them using the app and tested the mower to see if any of the issues I experienced were resolved. It’s now much easier to manually maneuver the mower using the app and the mower now mows the perimeter of my yard. However, I noticed some issues with the perimeter mowing. The mower veers away about three feet from the perimeter in front of my garden bed (in the front yard) and doesn’t come back to it for several feet. I’m not sure why. There’s no object in its path.
Additionally, when mowing the perimeter of the backyard near the fence, it mows 1-2 feet away from the perimeter in some areas. Even the animation in the app shows that the mower is clearly off the perimeter. So, even with the firmware update, the Yuka mows some of the perimeter but misses other areas of it. Thus, the Yuka mower still very much a work in progress.
Price: $1399.00 (Yuka 1500 mower only), $2048.00 (with the self-emptying sweeper kit)
Where to buy: Mammotion or Amazon
Source: The sample of this product was provided by Mammotion. Mammotion did not have a final say on the review and did not preview the review before it was published.

Now retrieving an image set.
Google Review Tap Cards (3-Pack) by TapFive - Tap for Instant Reviews - All Phones Compatible - Reusable Smart Tap NFC & QR - Boost Business Reviews - Powered by TapFive (3 Card Pack)
(as of July 13, 2026 18:55 GMT -05:00 - More infoProduct prices and availability are accurate as of the date/time indicated and are subject to change. Any price and availability information displayed on [relevant Amazon Site(s), as applicable] at the time of purchase will apply to the purchase of this product.)
Now retrieving an image set.