REVIEW – Here in Indiana, we love to be outdoors. Love it. However, having all four full-on seasons ’round these parts means we can and often do have our fair share of chill-in-the-air or even downright, deep-space frigid temperatures. For those times, the situation can be made tolerable and even pleasant when a bit of extra heat is available to help push back the chill while chillaxin’ on you your patio or deck. The Terra Hiker Patio Heater is designed to do just that. Let’s check it out. Gadget on!
What is it?
The Terra Hiker Patio Heater, as its name implies, is a propane-powered outdoor heater.
What’s in the box?
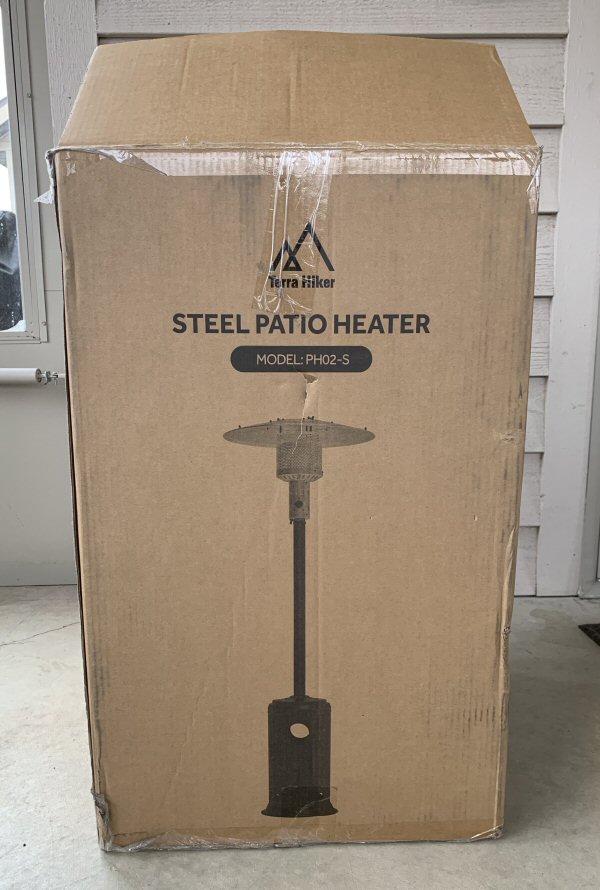
The Terra Hiker Patio Heater arrived in a sizeable cardboard box that was a bit heavy—a little over 40 lb. Because a good portion of my personal fitness training involved picking up heavy things, moving them to a new location, then putting them back down again, I was able to pick up the heater’s box and move it myself, but it would probably have been easier with two people involved.
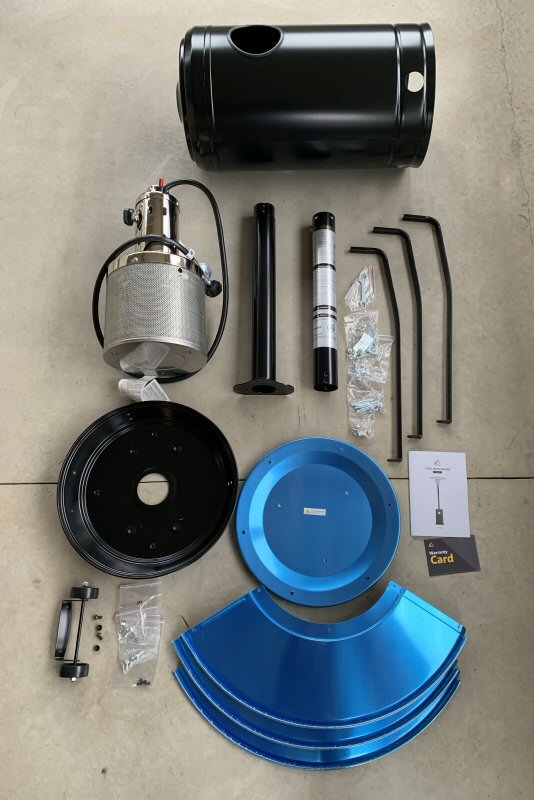
The Terra Hiker Patio Heater requires assembly and includes the components shown above.
Hardware specs
- Model number = PH02-A
- Fuel source = Standard 20lb propane tank (not included)
- Heat output = 47,000 BTUs
- Heating area = Up to 269 square feet
- Burn time = 12-30 hours on a fully-filled 20-pound propane tank
- Safety = Auto shutoff 35-degree tilt valve; optional anchoring arms & pins
- Controls = Piezoelectric ignition starts up in 1 second; variable heat control knob
- Materials = Stainless steel
- Total height = 89 in
- Tank housing = 15 in (D) × 25 in (H)
- Reflector = 30 in (D)
- Warranty = 24 months
- Location of Manufacture = China
Setup and assembly
As noted above, the Terra Hiker Patio Heater requires assembly. The photo above of the components may appear a bit daunting, but I’m a mechanical engineer and I don’t really *need* instructions to assemble a product like this, but for purposes of a thorough review, I did use them. 🙂 I jest, but I do realize that the photo above could make the assembly process appear quite daunting, but the Terra Hiker Patio Heater instructions are in fact well-detailed and I found them to be quite effective in illustrating the steps involved in the assembly.
I’ll also note that instructions advise that two people are required to assemble the heater. But again, being a mechanical engineer, I basically ignored that bit of instruction. 😉 However, although I was indeed able to assemble the heater by my lonesome, I do admit that for one of the assembly steps (attaching the top portion to the main tube while simultaneously feeding the hose down through the tube), it probably would have been easier to have a wingman for the assist.
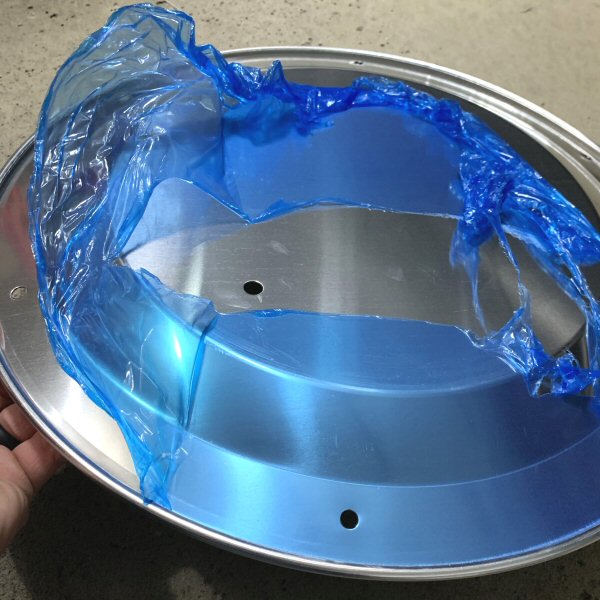
I’d estimate that it took me about 30 minutes to assemble the Terra Hiker Patio Heater, but it would have taken me about 15 minutes had I not needed to remove a thin blue film from each of the four reflector components, an example of which is shown in the image above. I’m not going to candy-coat it: while removing this film was obviously not impossible, as the pictures further down clearly illustrate, it was a seriously time-consuming and frustrating pain (and with fingernails trimmed overly short, would have been well nigh impossible).

The only other aspect of assembly that I’d mention is the optional anchoring arms and pins that can be assembled to the base of the heater. These are intended to be used in situations in which the heater is not placed on a hard or completely flat surface, such as in the grass in your yard as opposed to on patio concrete or other hard, flat surface. If used, the anchoring arms are bolted equidistant from each other to the base of the heater, then the pins, which are essentially miniature tent stakes, are driven through slots in the arms and into the ground. I didn’t include this feature as part of my evaluation of the Terra Hiker Patio Heater, because I plan to use the heater on either my outside patio or my inside screen porch, both of which have hard surfaces, plus, the ground in Indiana in February is like concrete and it would be next to impossible to drive the pins into it.
Design and features
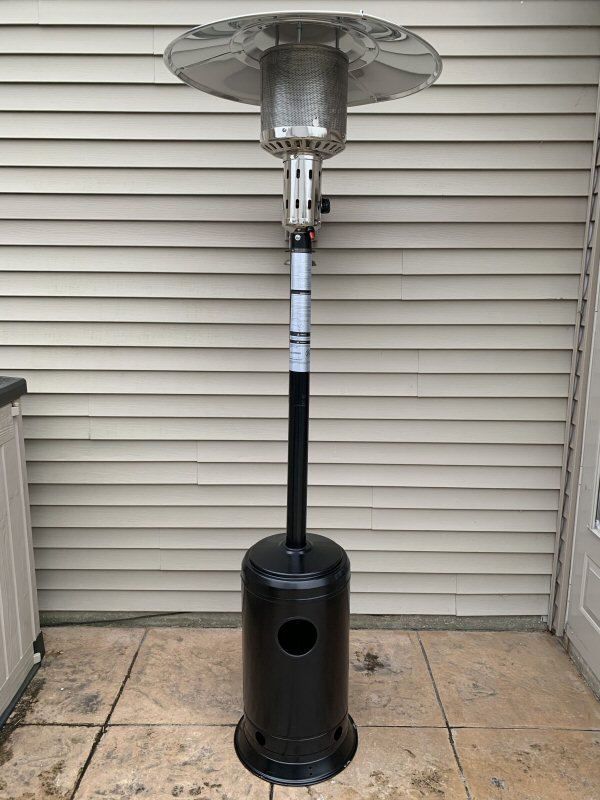
Once assembled, the Terra Hike Patio Heater is a nice-looking product. It is considered a “mushroom” style propane heater, for what should be obvious reasons. With its silver upper portion and a black lower portion, its colors are neutral enough to fit with many decor styles or colors. It is made from stainless steel materials, which should help to make it durable and prevent rust over time.

The very top of the Terra Hiker Patio Heater has a 32-inch chrome silver dish, which acts to reflect the heat downward, rather than allowing it to escape upward.
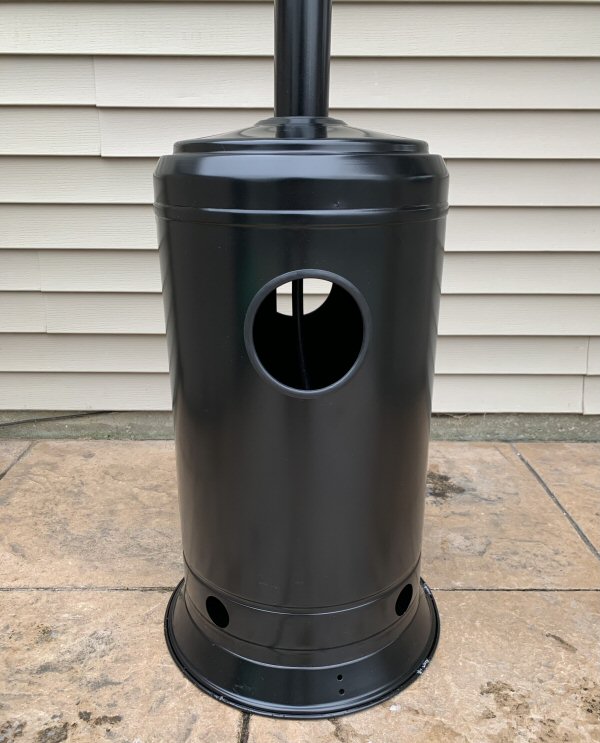
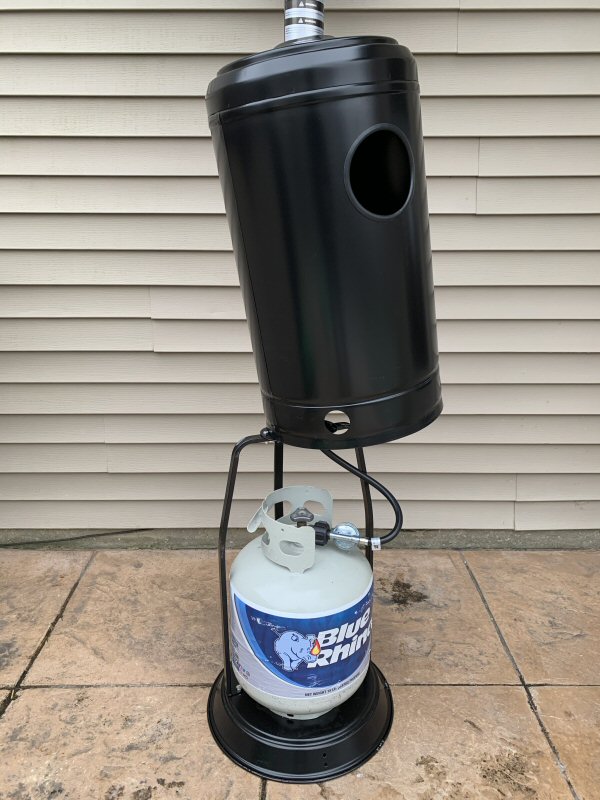
The bottom portion of the Terra Hiker Patio Heater, the tank housing, is a black cylinder with two large holes.
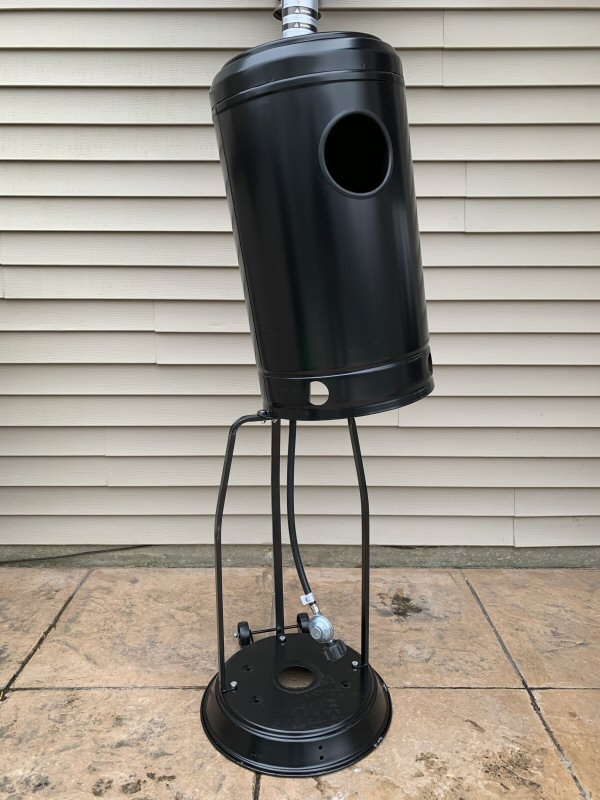
Lifting the tank housing provides access to the spot where a propane tank is placed, which is surrounded by three support legs. Note that the Terra Hiker Patio Heater does not include a propane tank, you must provide one yourself, but these can typically be bought at nearly any gas station or grocery store.
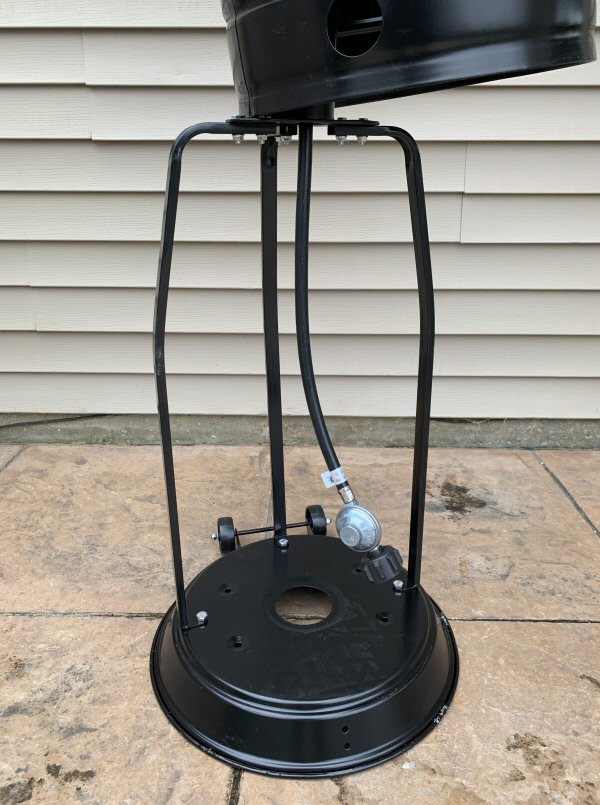
A hose with a regulator hangs down from the bottom of the Terra Hiker Patio Heater’s vertical black tube. The regulator attaches to the propane cylinder as you’ll see further below. The tank housing can be rested atop any of the three bolts that secure the support legs to the lower post support, giving it a hands-free feature while swapping out the propane tank.
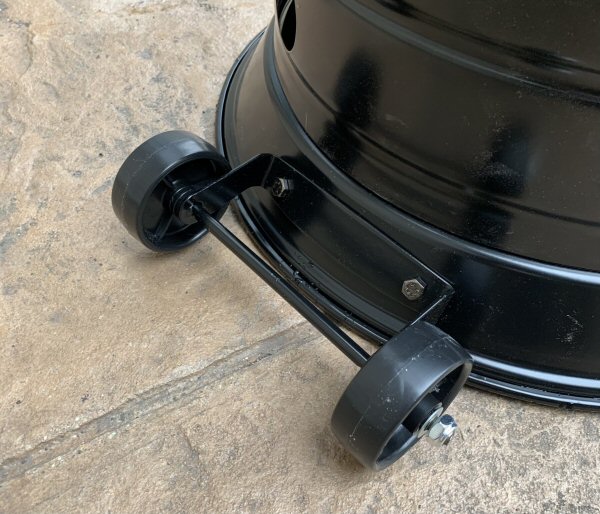
The base of the Terra Hiker Patio Heater has a pair of wheels that facilitate easier movement of the heater. Simply tip the heater back on the wheels, then roll it to a new destination, then tip the heater back down again until it is level. Easy enough, but if you need to transport it across rough terrain, the heater is easy for two people to pick up and carry.
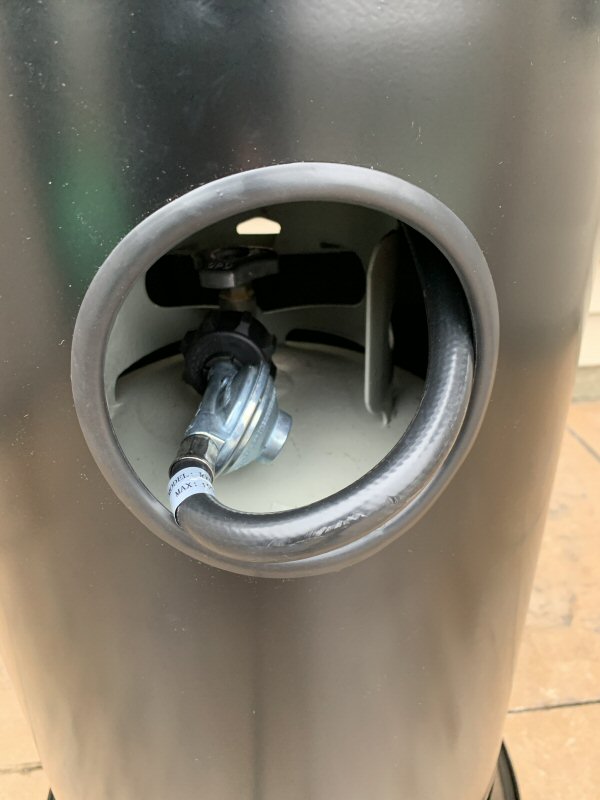
The propane tank fits within the three legs of the bottom portion of the heater.
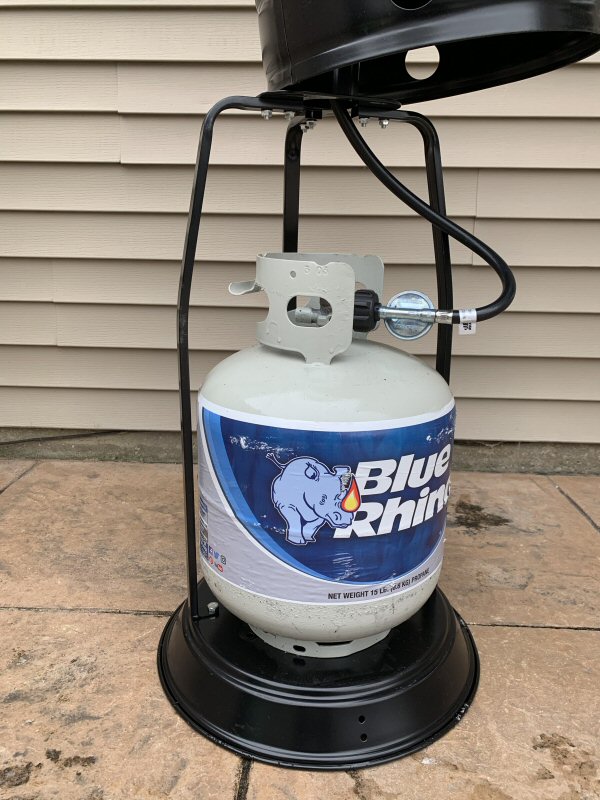
The tank is a bit of a tight fit and must be somewhat carefully oriented such that its valve and the hose regulator can be properly oriented to connect together.
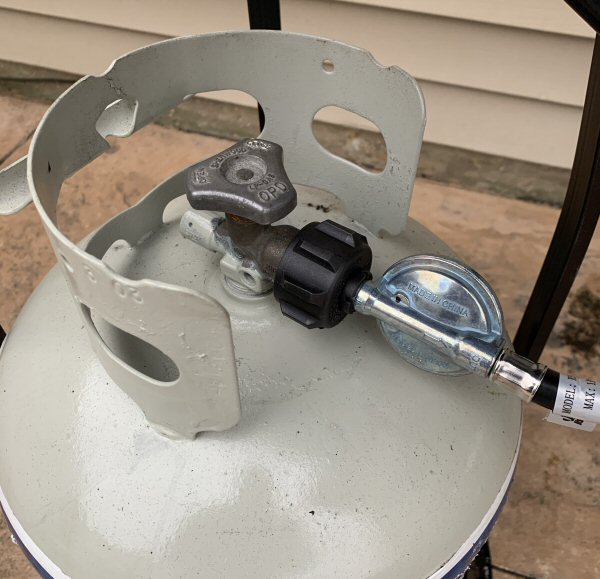
Once the regulator has been securely threaded onto the tank, the tank’s valve can be opened and the Terra Hiker Patio Heater is ready to use.
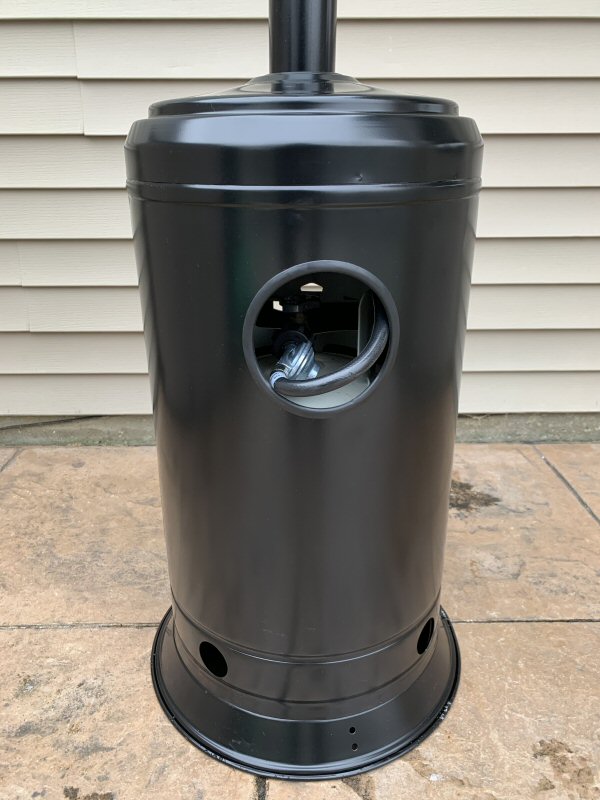
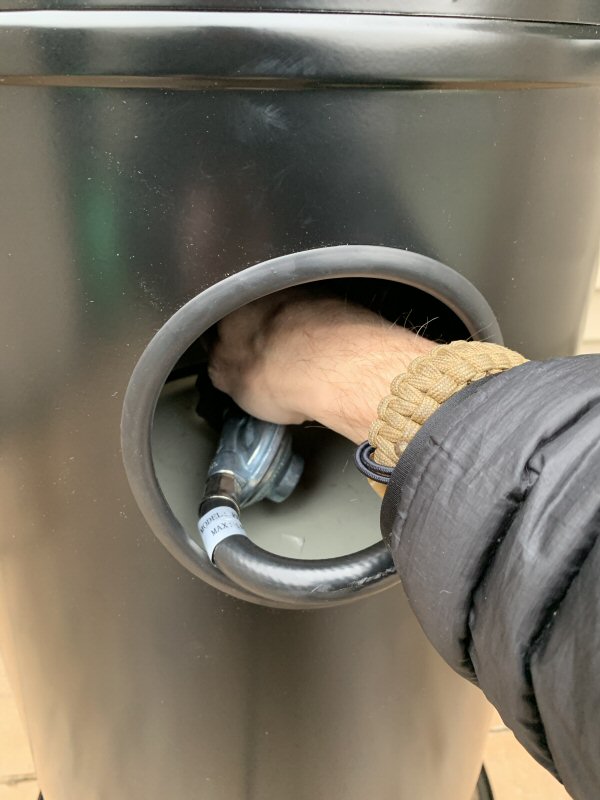
To get the hose to fit inside the tank housing once the hose had been attached to the tank, I had to bend the hose.
The hose is bendable but fairly stiff, so bending it back on itself to fit took some work, and as you can see above, a bit of the hose protruded from the circular hole in the tank housing.
The propane tank’s valve knob can be accessed via the holes in the tank housing. Starting the flow of propane from the tank into the heater by turning the tank’s valve knob is the first step to starting the heater.
Operation and performance
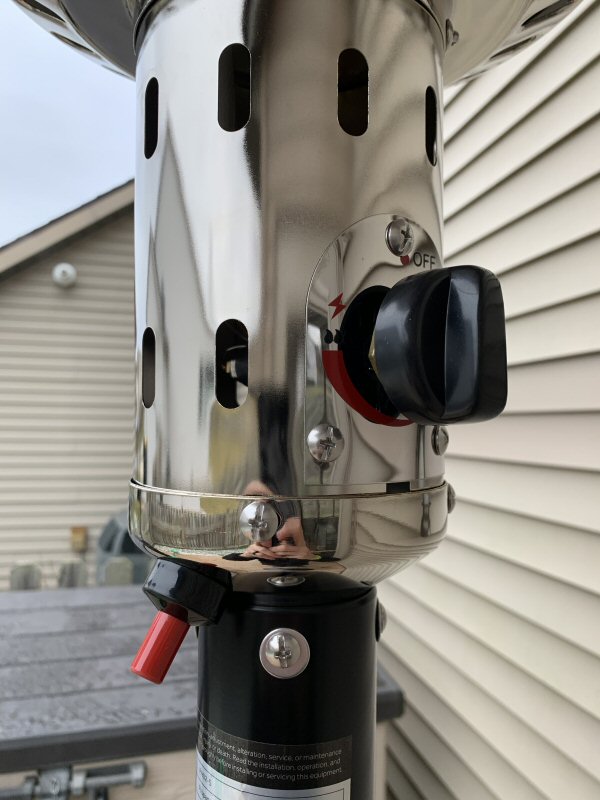
I performed my initial trial of igniting the heater outside on our small patio. All of my evaluations were performed in temperatures that were hovering around 30 degrees F in February in northeast Indiana, on a day with a slight intermittent breeze. My first trial was to ignite the heater. Per the heater’s user manual, I began by pressing down and turning the heater’s black variable control knob, shown on the right in the above image, to the maximum position, rotating it clockwise until it stopped. Next, I pressed the control knob down for about 10 seconds to allow the propane gas to flow up from the tank. Then, while continuing to press down on the control knob, I pushed the red igniter button, shown on the lower left in the above image, a couple of times. The igniter is a piezoelectric style, similar to those on propane-fueled grills, and after pressing it a few times, the flame ignited with a whoosh sound. The manual advises to continue to hold down the control knob for 10-20 seconds to ensure ignition, but that wasn’t necessary for me, as once the flame was lit, it stayed lit.
Once lit, I kept the control knob at the maximum position owing to the sub-freezing temperature and to give the heater a better opportunity to provide more heat.
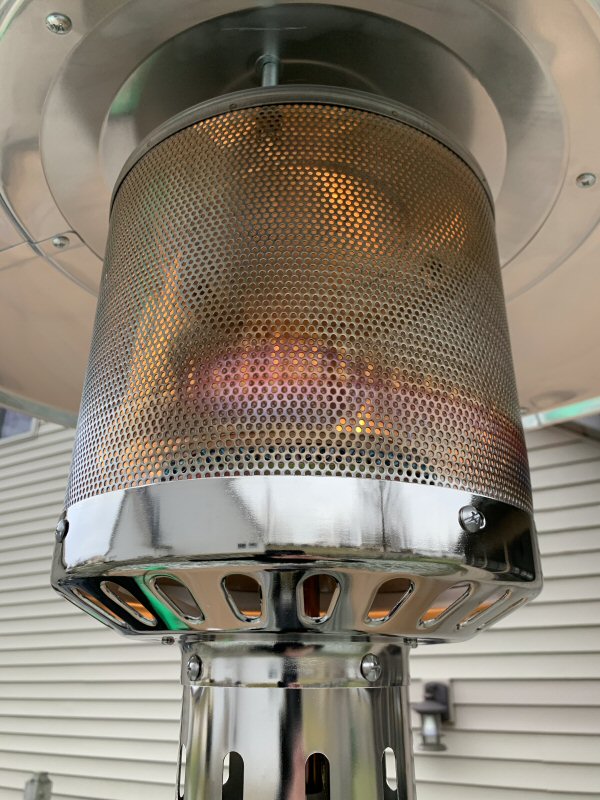
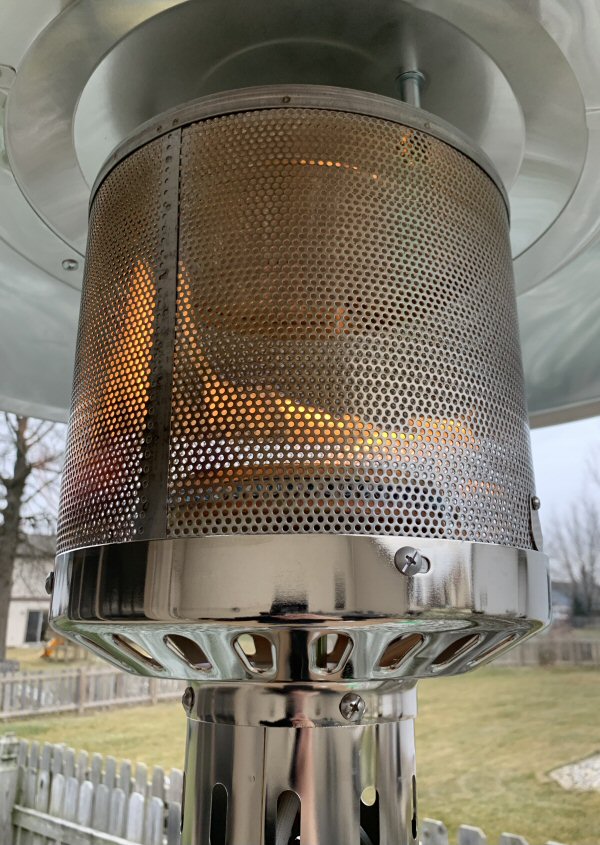
As mentioned, there was a slight sporadic breeze that day, which caused the flame to flicker and blow in a particular direction quite a bit, the results of which can be seen in the above photo. The flame screen heated up in the spots where the flame contacted it and glowed in the spots that made direct contact with the flame (which looked pretty cool, I must admit). Placing my hand near the flame screen, I could feel heat emanating from it, but faintly, so I thought it best to give the heater some time to do its thing and spread heat down further. So I waited. I waited about 15 minutes, but alas, between the 30 degrees F ambient temperature and a sporadic light breeze, the heater just didn’t provide much heat down to me. I could only feel it on the top of my head. Maybe I didn’t wait long enough, but I was getting colder by the minute and the heat wasn’t reaching me, so I ended this first experiment. The last thing I did before turning off the heater was to carefully tip it over to test its 35-degree tilt valve auto-shutoff safety feature, and it worked perfectly, stopping the flow of gas once the heater was tilted about 35 degrees from vertical.
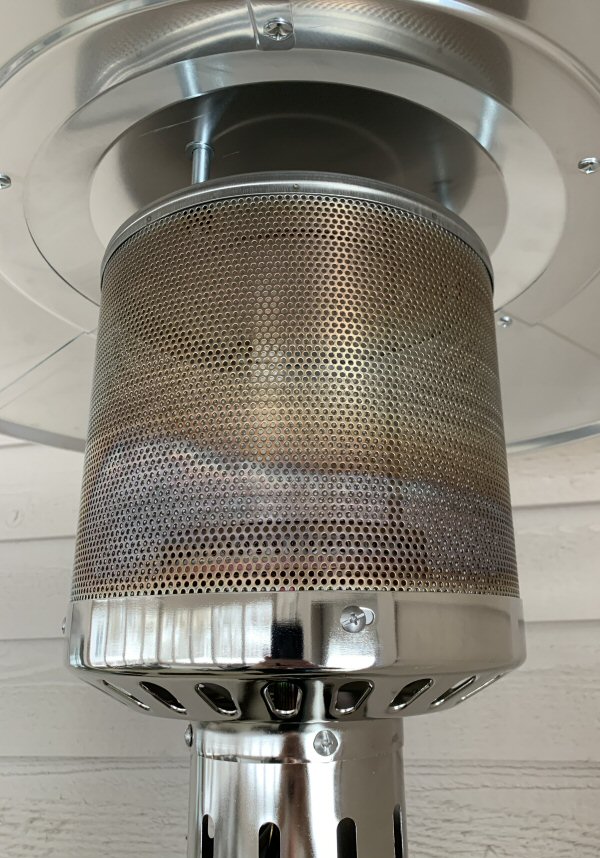
After turning off the heater and allowing it to cool a bit, I notice what appeared to be carbon buildup on the flame screen. Although not an issue at the time, I could see that this might build up over a season of usage, and may need to be cleaned off. The user manual describes how to to do this. I tipped the heater back on its wheels and moved the heater from our outdoor patio and into the screen porch attached to the back of our home Owing to its almost dumbbell-like weight distribution (very bottom-heavy but also somewhat top-heavy) I had to do a bit of awkward manhandling to get it through the door, and although this would have probably been easier with two people, I was able to accomplish it. As its name implies, our screen porch, which is attached to the back of our home, has large screened windows on three of its walls. This means that while it is essentially open to outsides temperatures, it does provide a bit of protection from wind. It is also where we would be most likely to use the heater in late spring or early fall.

The heater’s instruction manual advises that the heater should only be used in locations in which it has at least 3 feet of clearance above the top of the heater and 3 feet of clearance all around the heater. Since I am quite fond of our screen porch and spend many hours there during the warmer months, and I had no desire to accidentally burn it to ashes by placing the heater in an ill-advised location, I only placed it in this corner location to take a few photos.

I hadn’t noticed this until I moved the heater into the corner of my screen porch, but the heater, at least the upper portion of it, has a bit of lean to it. I was disappointed to see this. While this could certainly be attributable to my effectiveness in assembling the heater’s components, I’m fairly adept at this sort of thing (unnecessary modesty alert: I’m actually quite adept at assembling products like this). I thought that I might be able to correct this, so I went back to the components that seemed the most obvious ones to correct the lean, which I reckoned to be the three support legs in the bottom portion of the heater, which could have the highest degrees of potential variability in their positioning. I carefully loosed the bolts, adjusted them a bit, and re-tightened them, but to no effect—the lean was still present. I have to state that this lean, although not to a degree that appears to make the heater unstable on its own, does make me a bit cautious about it being more unstable if it were bumped. From both an aesthetic and safety perspective, this was a concern, but as note above, between the heater’s 35-degree tilt valve auto-shutoff safety feature and the fact that the heater is very bottom-heavy due to the propane tank, perhaps the safety aspect of this tilt is less of a concern.
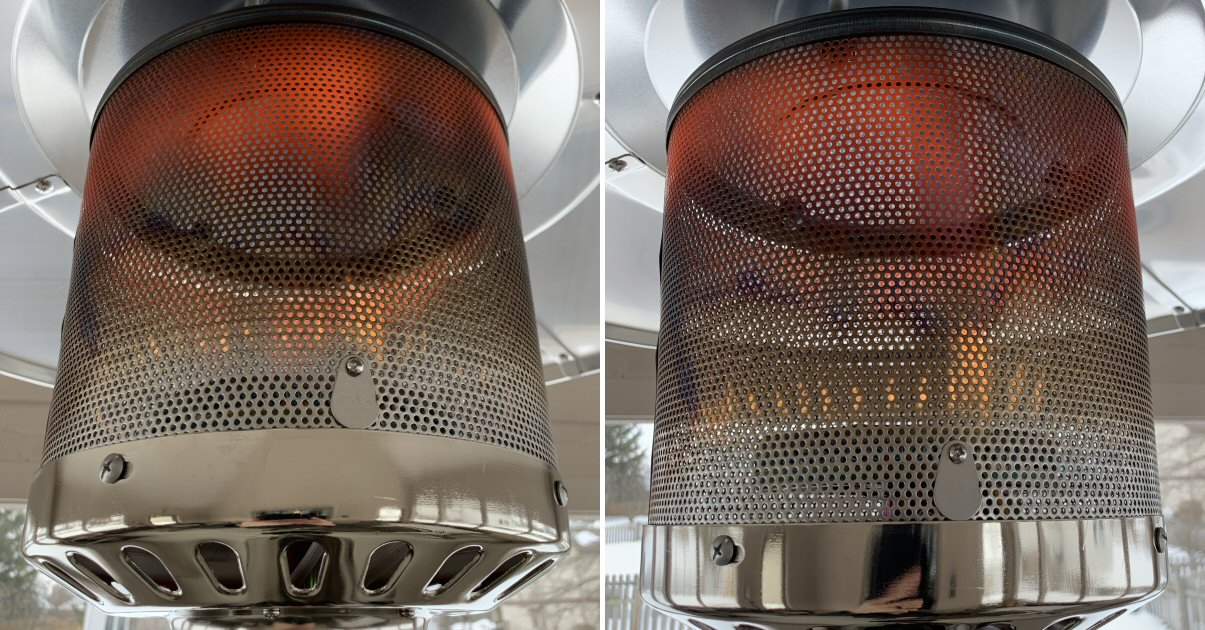
For my final trial, I moved the heater to a position inside our screen porch that was at least three feet away from any walls or the ceiling, per the user manual’s warnings. I then re-ignited the heater and waited. I could feel heat near the top of my head initially, just as with my previous fully outdoor trial. However, my thought in moving the heater inside our screen porch was that the bit of shelter it provides from fully outdoor conditions would give the heater a better opportunity to provide more heat. So again, I waited for about 15 minutes, a which time I moved near the heater and found that the heat it was providing had moved down to the point where I could fully feel it on my head and the tops of my shoulders, so I let it go a bit longer. After several more minutes, the situation hadn’t changed much. I sat down in a chair under the heater and couldn’t feel any heat. Terra Hiker claims that this patio heater is capable of producing a heat output of 47,000 BTUs and heating an area up to 269 square feet, so I was a bit perplexed by what seemed to be limited heat production. I suspected that I hadn’t given the heater sufficient time to spread warmth, or if the cold temperatures were affecting the pressure of the propane tank, or if I’d simply been performing all my evaluations in conditions that were just too cold for the heater to make a dent—perhaps if I’d tried it in late spring or early fall conditions that were a bit warmer, the heater might have performed well. Perhaps once spring arrives here in northeast Indiana, I’ll re-evaluate the Terra Hiker Patio Heater and update this review.
What I like
- Easy to operate
- Easy to swap out the propane tank
- Durable design and materials
- Looks good and can blend in with many styles of surrounding decor
What I’d change
- Didn’t provide sufficient heat to be useful in low temperatures (around 30 deg F)
- Upper portion leans, making it look like it might tip over
Final thoughts
The Terra Hiker Patio Heater was fairly easy to assemble, it was easy to install the propane tank, and very easy to operate. Aesthetically, its black and silver styling allows it to fit into virtually any surrounding decor, and its 35-degree tilt valve auto-shutoff safety feature worked perfectly. However, once fully assembled it did have a bit of a tilt that made it appear less than aesthetically pleasing, and it did not seem able to produce sufficient heat to be useful, although in fairness this may have been due to giving it insufficient heating time, or to the 30 degree F and slightly breeze ambient conditions in which I was evaluating it. For me, the jury is still out on Terra Hiker Patio Heater’s effectiveness, but do plan to test it again once the temperature rises this spring.
Price: $179.99
Where to buy: Amazon.com
Source: The sample of this product was provided by Terra Hiker.

Amazon Basics 46,000 BTU Portable Outdoor Propane Patio Heater with Wheels, Commercial & Residential with Water Tank, Adjustable Heat Output, 9-Foot Radius, Slate Gray, 32.1"L x 32.1"W x 91.3"H
(as of June 15, 2026 18:48 GMT -05:00 - More infoProduct prices and availability are accurate as of the date/time indicated and are subject to change. Any price and availability information displayed on [relevant Amazon Site(s), as applicable] at the time of purchase will apply to the purchase of this product.)
Now retrieving an image set.
Gadgeteer Comment Policy - Please read before commenting
Good review: detailed and the abundance of photos helps a lot. I have owned two similar heaters over the years. Both failed after 18 to 24 months. I could not get either to start properly. The construction of my previous heaters did not lend itself to disassembly / replacement of deficient parts. My only option was to buy a new heater. In the instructions / documentation, is there a mention of replacement parts. Also, does the heater have a warranty? Again, very good review.
Thanks for stopping by The Gadgeteer and for the kind words, Mike. To answer your questions:
– The manual explains Cleaning and Maintenance but does not mention replacement parts.
– The back of the manual states a “warranty of 45-day unconditional money-back guarantee and a 24-month warranty from date of purchase.”
Love the review!! I purchased the same model heater, but one of the hardware bags was shipped empty (and sealed). When I contacted their post sales support email, they said it’s discontinued and can’t provide replacement parts. They did give me a link to a hardware replacement pack on Amazon, but none of those parts are the ones I need. The missing hardware pieces are the 4 truss screws n washers for attaching the head. Any possible chance you know the measurements of those truss screws? I’m getting nowhere with their support and am just going to run to my local hardware store to try n find them, if can identify the proper screw size. Any help is greatly appreciated!!