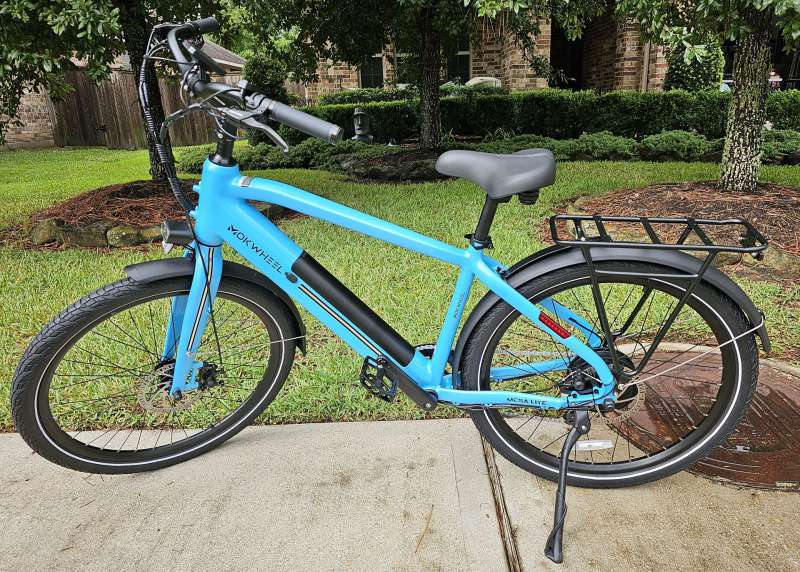
REVIEW: Everyone, their brother and second cousin is selling eBikes these days. In order to stand out, there has to be a feature that calls to the buyer, compelling a purchase. The Mokwheel Mesa Lite electric bike wants to position itself as an affordable commuter and utility ebike. Let’s see if it lives up to the promise…
What is it?
The Mokwheel Mesa Lite is a commuter-class eBike that can also double as a utility bike thanks to the included rear luggage rack. The Mesa Lite mostly relies on pedal-assisted riding, meaning you share the work with the electric motor.
Specifications
- Between 60 and 80 mile range on a single charge
- Top speed of 28 MPH while in pedal assist mode
- 79 pounds curb weight
- 48 volt 750 watt electric motor housed in the rear axle
- Total weight capacity of 400 lbs.
- Accomodates riders between 5’6″ and 6’8″
- Shimano rear derailleur and gear assembly
Building the eBike
The Mokwheel Mesa Lite electric bike arrives in a large flat pack box in approximately 4 pieces – the main bike frame (with the rear wheel, fender and luggage rack attached), the handlebars pre-wired with the control devices, the front fender, and a box with the various bits needed to assemble (Allen wrenches, nuts and bolts, and axle end covers).
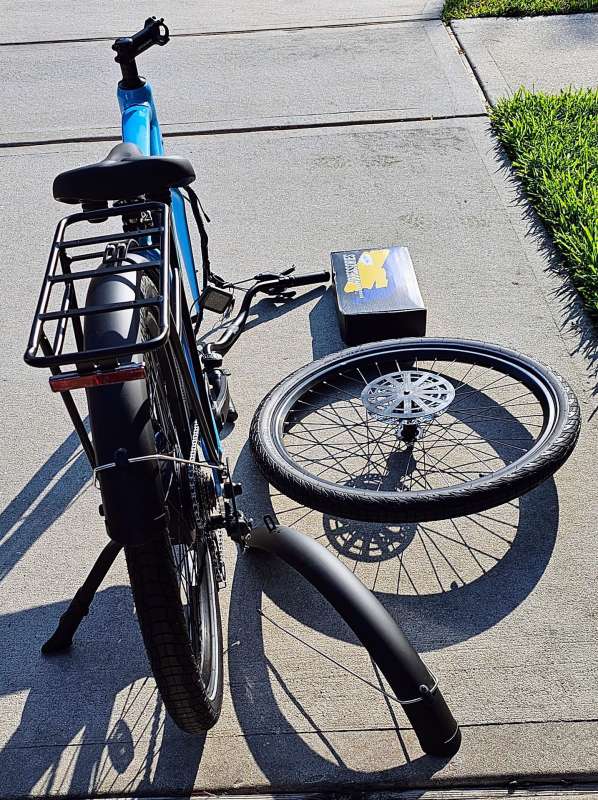
Here’s another view of what’s in the box:
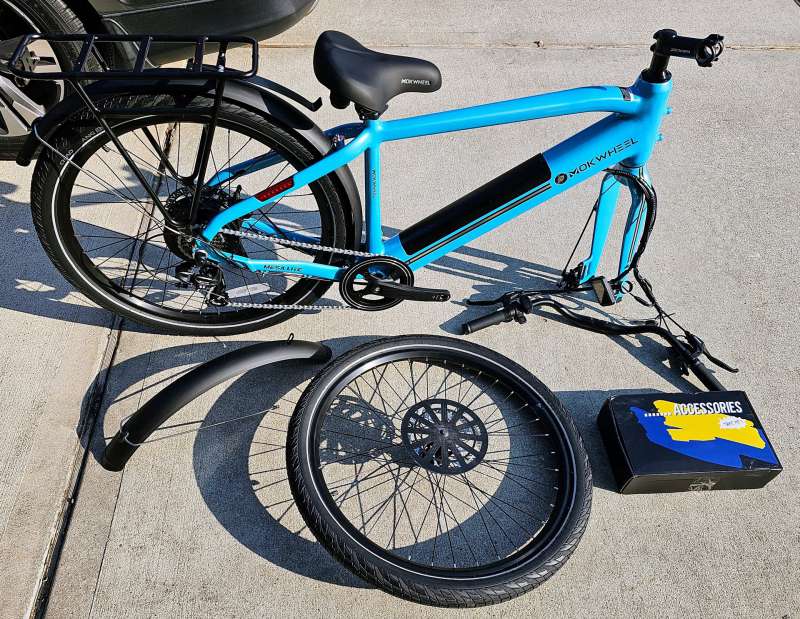
Here’s where I encountered the first problem. The aforementioned box contains an instruction manual for assembling and riding the bike. Sounds good, right? Unfortunately, the manual is pretty generic across Mokwheel’s entire bike line, with a notice printed in the manual to head to the web site for detailed instructions for any specific model. And believe me, this is a necessity since you need to position things like the front fork and brake disc properly to avoid an accident.
I went to the web site and could not locate ANY instructions for the Mesa Lite. The closest I could get was the Mesa Step-Through model, and there are enough differences between the two that the video (and no printed manual) was pretty much worthless. I emailed the support team for any help, but I am hoping that my message fell through the cracks because I never received a response. Needless to say, there was a fair amount of reverse engineering and comparing with pictures on the web site in order to get this assembled.
You’d think that with only 4 major parts this would be simple. And you, much like me, would be wrong about that. The major issue I had was in putting the handlebar assembly onto the front fork assembly. There are a number of screws which tighten the handlebars, others which are supposed to help set the height of the handle bars, and still others which lock the handlebar to the fork.
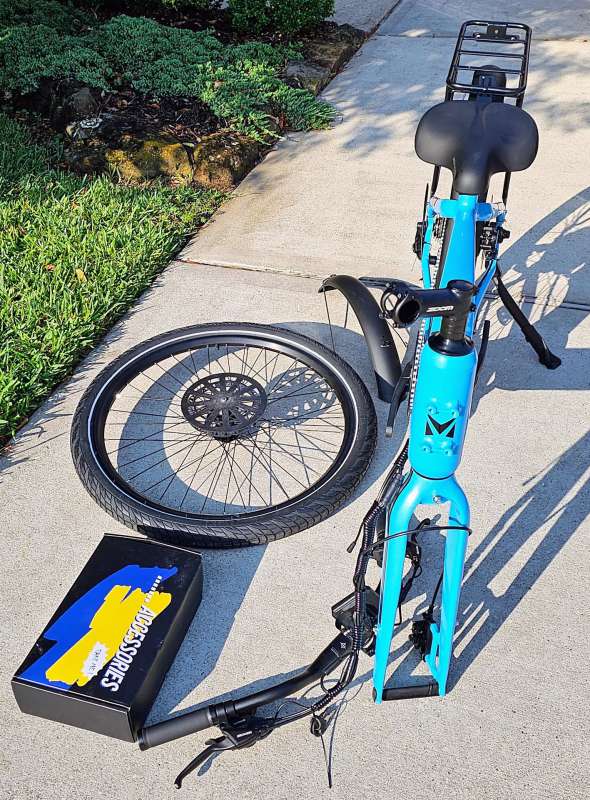
The front part of the fork is where the handlebar clamps onto the assembly. There is an alignment guide on the handlebars which tells you where to lock the handlebars in place. That is the easy part. More difficult, keeping the alignment centered while trying to tighten the handlebars in place.
Even with the bike put together, I am not terribly confident in the way in which the handlebar assembly sits in the frame through to the front fork. There is too much play in the assembly for my liking, which makes riding a little more exciting (but not in a good way).
Because we were in a massive heat wave in Texas, I could only work limited hours assembling the bike and then only in the early morning before the sun tried to fry us to a crisp. Total assembly time (not including heat breaks) was about 5 hours – and most of that was not actually spent tightening screws but trying to make sure I put it together the right way.
The finished assembly:
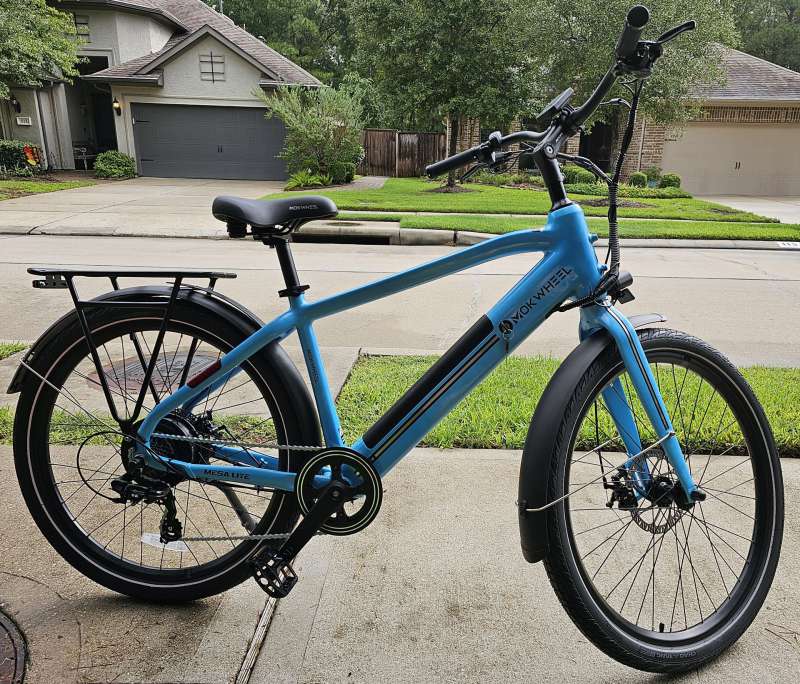
Where the black handlebar assembly connects and runs through the frame is where the looseness is contained. I could never get the assembly tight enough to give me a level of comfort while riding. It is not “sloppy-loose” but there is enough play in the connection to make me wonder where I went wrong on assembly, and more to the point, to make me feel like the entire fork assembly would just come off.
Time to ride
With the Mokwheel Mesa Lite electric bike assembled, it was time to take the Mesa Lite on its maiden voyage. Actually, it was time to figure out how to ride the bike. Like almost every eBike out there, the Mesa has a key which unlocks the battery. Unlike every other eBike out there, the Mesa key does not turn in the opposite direction to enable riding mode. With the complete lack of instructions, I really thought I had done something wrong (even though the key assembly was already built into the frame when I pulled it out of the box).
Turns out that inserting the key is enough (he said after spending an hour scouring the web for any help I could find). With the key in the lock, pressing and holding the power on switch enables riding mode. But once turned on, riding mode is actually just a “you peddle” mode and nothing more. To enable electric motor assist, pressing the up (or down) arrow button enables “peddle-assist” which basically means that as you peddle, the motor kicks in and helps as part of the power train. The higher the “peddle-assist” (or PA) number, the more the motor works and the less effort expended to ride.
This is the control panel for the Mokwheel Mesa Lite electric bike:
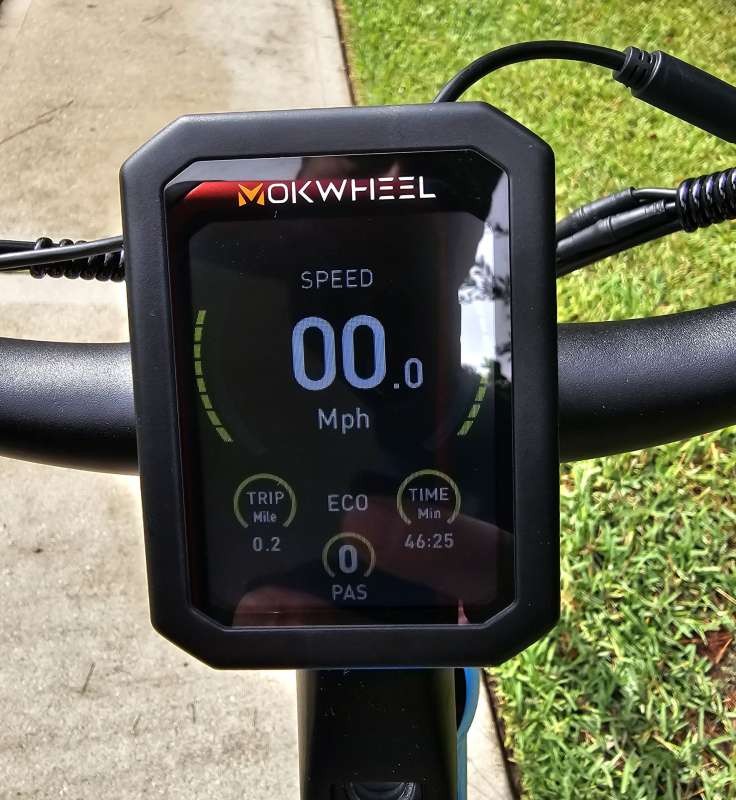
From here you can see the speed, the miles on the current trip, the time since the control panel was turned on, and the pedal assist mode (1 – 10, with 1 being mostly you).
The Mesa Lite does have a full motor mode (where your peddling is not necessary). I found this mode digging through info on Mokwheel’s site for a completely different model. Press and hold the down arrow key to enable this mode, and then use the thumb throttle switch below the control box as you would a normal eBike throttle. The rub here, though, is that the thumb throttle makes it very awkward to use the brake handle. I don’t have thick and meaty hands, and I found that I would have to let up entirely on the throttle and then grasp the brake in order to use it.
Here are the control switches along with the thumb throttle:
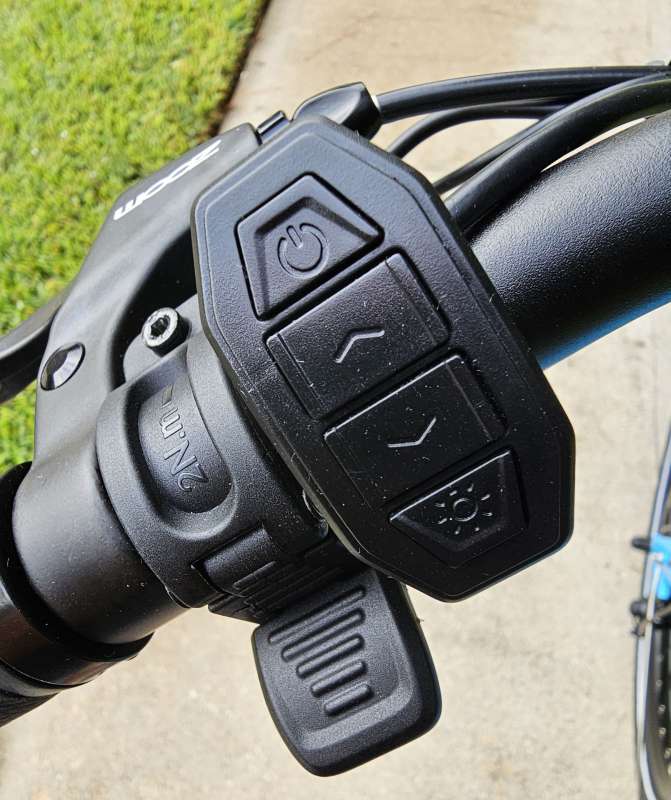
At the top of the switch assembly is the on/off switch (also used to switch between KPH and MPH), up and down arrows to change the pedal assist mode, and the headlight on/off switch. Below this assembly is the thumb throttle.
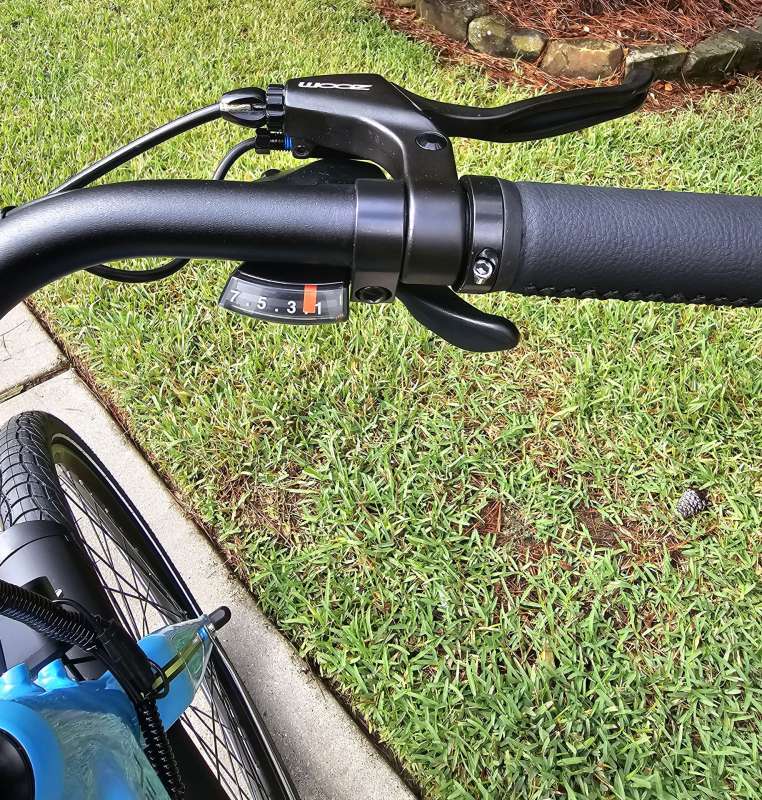
On the opposite side of the handlebar assembly is the rear wheel gear selector:
There are some things I find troubling about the Mesa (aside from the lack of usable instructions). First, it seems like the range for this bike is far behind a lot of other competitors. At 60-80 miles, it is a shadow compared to others which get north of 100 miles. It feels like this bike will spend more time on the charger than others.
The components that make up the Mokwheel Mesa Lite electric bike are brand name – Samsung battery, Shimano gearing, etc. But it feels like the proverbial definition of a platypus – a beaver designed by a committee. It all looks great together, but the actual execution is somehow lacking. Maybe it is the way in which it was assembled, but I am not sure I would want to take this on a 40 mile ride. My circle of confidence with the Mesa is about 2 miles. Maybe 5, tops.
What I like
- The bike feels substantial if a little heavy
What I’d change
- Specific, detailed instructions whether printed or on the web
- Better range that is more in line with the competition
- Change thumb throttle to a grip-style throttle
Final thoughts
I really wanted to love Mokwheel’s Mesa Lite despite what you read above. If I had confidence that the eBike was assembled properly it would have helped mightly to get there. Even though the bike looks just like the pictures of the assembled bike on their site, there is enough play in the steering column that makes the Mesa feel unsafe to ride. Combine that with the limited range and odd choice of a thumb throttle for full motor mode doesn’t make the eBike a compelling purchase.
I am going to play some more with the bike to see if I can get it into a state where I feel better about the safety aspect. If I can do that, I will update this review. But as things stand today, I am not sure it is a good buy for anyone but the most experienced cyclist or someone who loves to tinker mechanically.
Price: $999.00
Where to buy: Mokwheel
Source: The sample for this review was supplied by Mokwheel.


![[Ultra-Secure] With our uniquely designed bike phone holder handlebar, whether navigating bumpy roads or high-speed roads, your phone remains securely fastened to the handlebar. Its all-round shape firmly secures each corner of your phone, providing ...](https://m.media-amazon.com/images/I/41f8iCmkMsL._SL160_.jpg)
Gadgeteer Comment Policy - Please read before commenting
5 hours to assemble?
Also the Specs are wrong.
36V Motor / Battery / Cadence sensor and 58lbs
Please correct