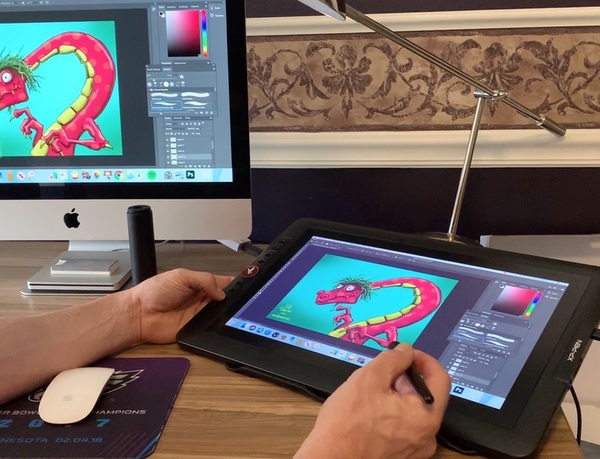
REVIEW – Artists & creators, get over here! I’m reviewing the XP Pen Artist Drawing Pad, a tablet for your digital painting & drawing needs. I love to draw, and it’s time to make some art. To the review!
What is it?
It’s a tablet & pen combination that, when connected to your computer, enables you paint & draw in your favorite graphics program.
What’s in the box?
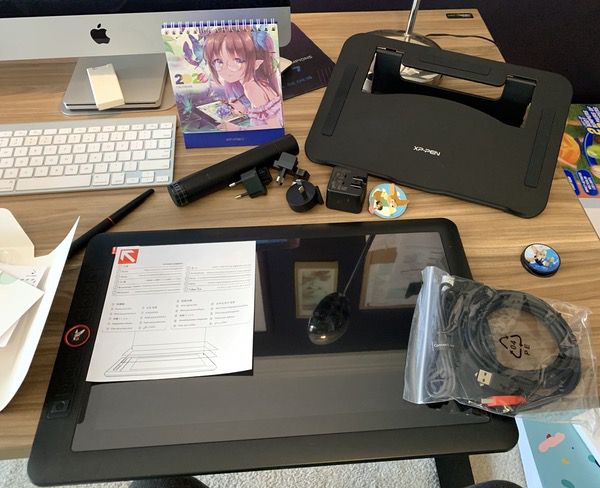
I’m reviewing the Artist Display 15.6″ Pro Holiday Edition, which includes a bunch of extra goodies in addition to the tablet gear. This package includes:
- The tablet
- A tablet stand
- The stylus, including 8 replacement nibs
- A stylus case and stand
- A drawing glove
- 4 different international power adaptors
- A cleaning cloth
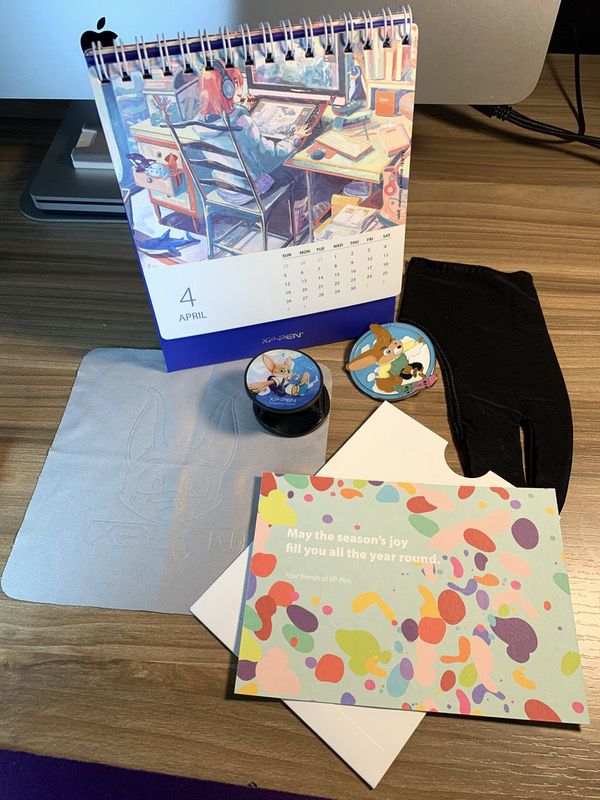
- A themed calendar, greeting card, enameled pin, and pop-up style phone stand
Hardware specs
- Tablet size: 443 mm by 280 mm by 12.6 mm
- Active drawing area: 344 mm by 193 mm
- 8 programmable shortcut buttons and a roller wheel on the tablet
- Battery-free stylus
- 8192 levels of pen pressure, with a 60 degree tilt angle
- 1920 by 1080 pixel display resolution (5080 LPI)
- 88% NTSC (120% sRGB) color accuracy, with 178 degree visual angle
- Compatible with Windows 10/8/7 and Mac OS 10.10 or later
- 3-in-1 combination HDMI and USB connection and power adaptor cable
Design and features
The XP-Pen Artist Drawing Pad is not designed as a standalone device. It’s a drawing tablet that connects to your computer. You’ll then use your preferred graphics package to do the work. I’m using Photoshop for this review.
XP-Pen also has numerous models and sizes to choose from. The specific model I am testing is the 15.6″ Pro Edition, which means it has a 15.6″ corner-to-corner drawing area. It’s also the Holiday Edition package, which includes some whimsical additions (a desk calendar, a greeting card, an enamel pin and a pop-style phone stand) that feature anime-style artwork. It’s all cute and fun if you’re into that sort of thing. You also get a cleaning cloth and a drawing glove.
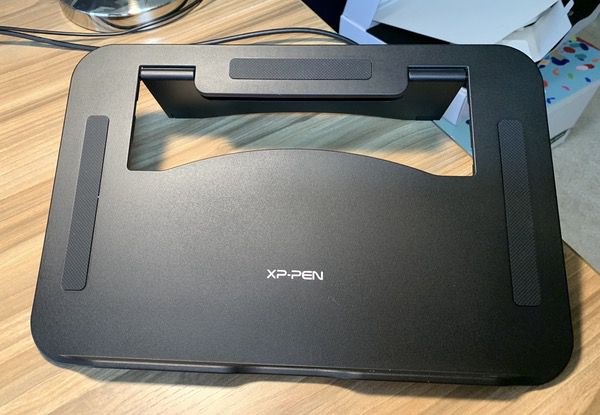
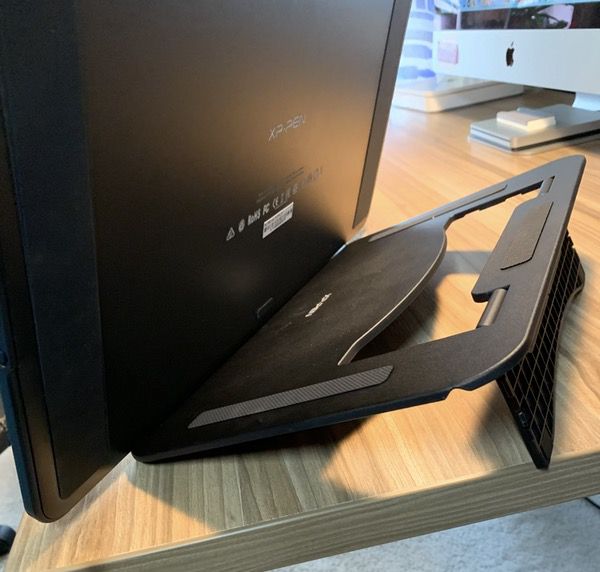
Cute accessories aside, the core package is well tricked-out for your drawing needs. You’ll get a tablet stand for your desk, with pop-out legs and rubber strips to keep the tablet from sliding around. The stand is set at a fixed angle, which I felt was fine for my drawing style.
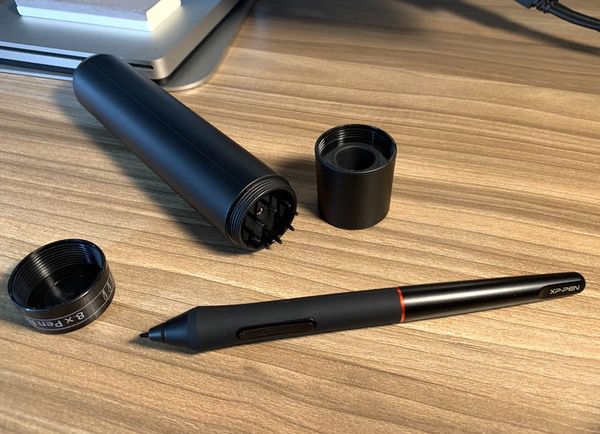
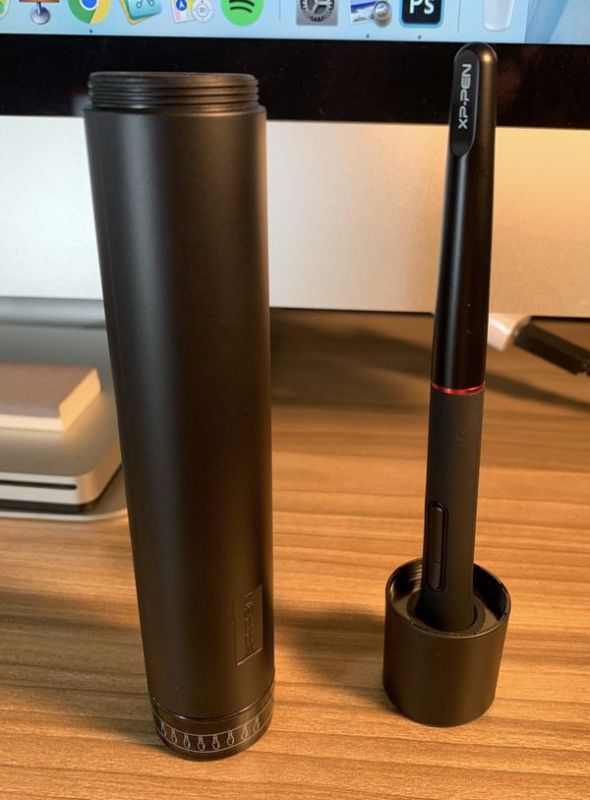
The pen itself is lightweight, and tapers gently from the base to the business end. The stylus itself requires no battery or charging. It’s got a soft grip material where the handling happens and a rocker-style two button control. A beefy pen case with an internal sleeve keeps your pen protected when you’re on the move. The cap unscrews, and serves as a pen stand at your desk. You’ll also find the base unscrews and includes 8 replacement nibs.
We will walk through the setup first, then get into the performance details.
Setup
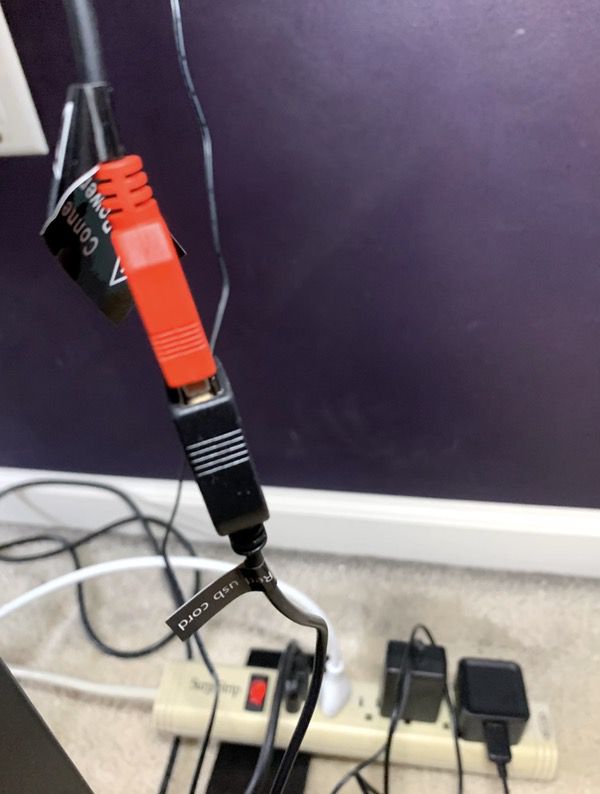
Setup begins with the three-in-one cable included in the package. The single-plug end connects to the tablet through a port on the side.
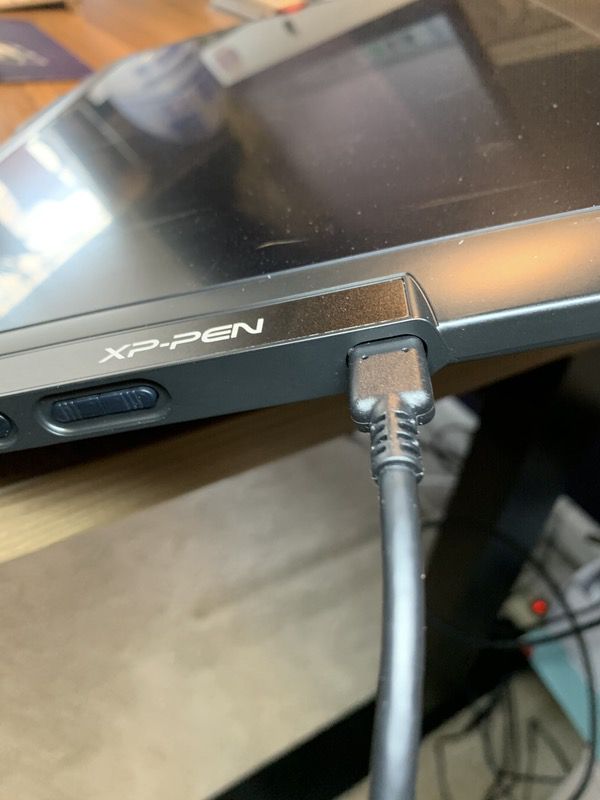
The cable has an HDMI plug, a black USB plug for connecting to your computer, and a black USB plug for power. I have an older iMac, so I needed to get a Thunderbolt-to-HDMI adaptor to make things happen. The HDMI plug goes into the adaptor, and the adaptor plugs into my iMac. The black USB cable is connected to an open USB port.
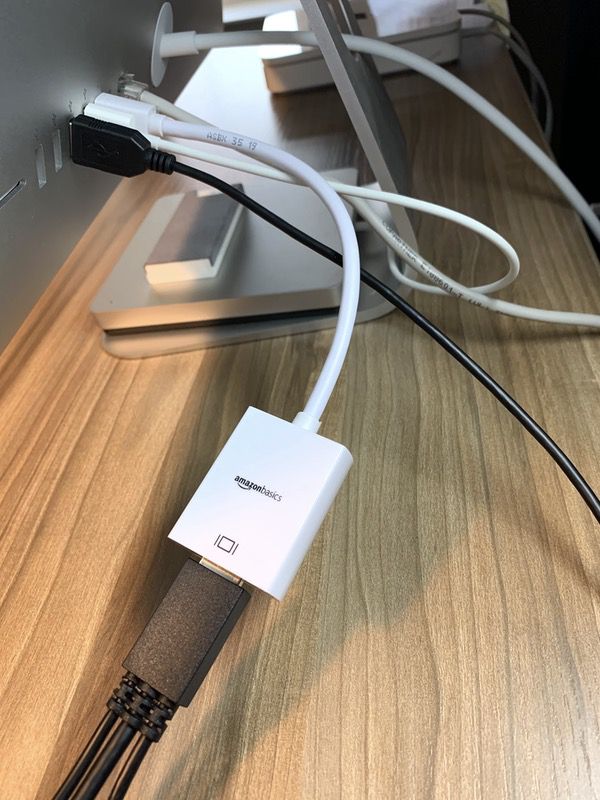
The red cable can be connected to the computer, or plugged into a USB extender cable that’s also included in the kit as I did here. That extender then plugs into the USB-compatible power brick (also provided). You can see the power brick at the bottom right of the photo plugged into my power strip.
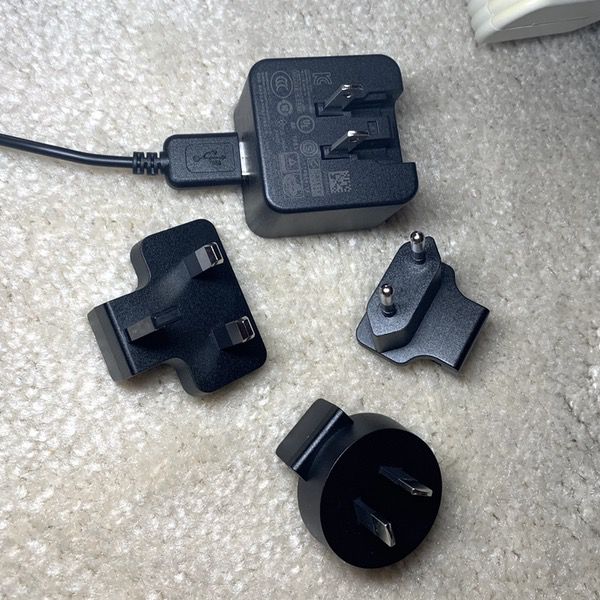
If you’re a user outside of the U.S. or are doing some international travel, you’ll find three additional international adaptors in the box that plug into the power brick. With all the options, you can pretty much connect to any compatible device. Note that newer Apple products may require an additional hub for the HDMI and USB adaptors. You’ll want to check your setup to be sure you have all the connection points you need.
The tablet stand is a straightforward affair. Pop out the legs, and lay your tablet to rest. It’s also got rubber feet on the base in addition to those skid pads under the tablet, so it doesn’t slide around. There’s also a protective packing film on the tablet that you will remove before you get to drawing.
Power it all up and you’ll need to download some software from the XP-Pen site to meet your computer’s requirements. The instructions vary based on your setup and operating system, but XP Pen’s web site provides a user-friendly support section to find the software that’s right for your computer. For my old iMac I needed a device driver and a tablet configuration app. It should be noted that you will have to allow permissions for both the driver and the app to control your computer’s settings if you’re using a Mac like mine.
The installation will set you up with multiple monitors, and optimize display for the tablet. Power users may want to set things up differently, but I chose to mirror the tablet and main monitor settings for my testing.
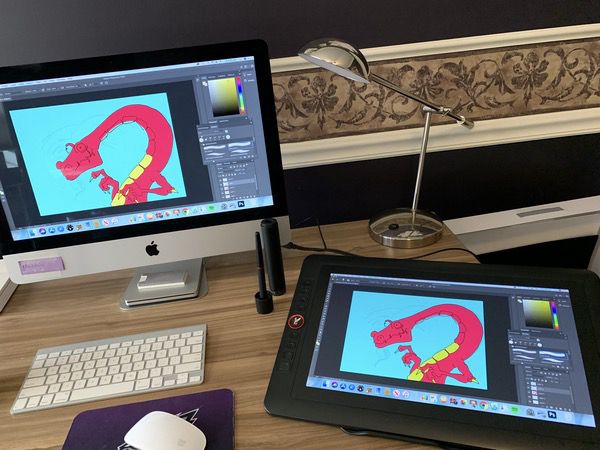
It’s also important to note that you’ll be bringing your own software for drawing. I’m using Photoshop here, but the XP Pen site includes a list of compatible packages that you should check out.
I can’t report any issues with the installation and setup that were troublesome. The XP Pen documentation is pretty good. I did some fiddling with the settings, but the whole process took less than 30 minutes start to finish.
Performance
I’ll confess that this was a bit of a new learning experience for me. I do all of my illustration work on my iPad Pro with Procreate these days. But that can be a little tough to manage if you’re doing professional work, or need to leverage the more expansive creative packages like Photoshop. I’m happy to report that, despite my lack of practice with this toolset, the XP Pen Artists Drawing Pad makes for an intuitive and easy to manage drawing tool.
The drawing surface on the pad is excellent. It’s got a scratch resistant, anti-glare, high-transparency surface that effective suppresses ambient light glare and provides a smooth drawing surface. I never got the feeling that I was experiencing any drag or choppy movement of the pen across the surface. Pen action is smooth, and that fine pen tip allows for accurate detail work. Sometimes I find a hint of lag if I draw too quickly, but I suspect that is the fault of my outdated iMac more than the tablet itself.
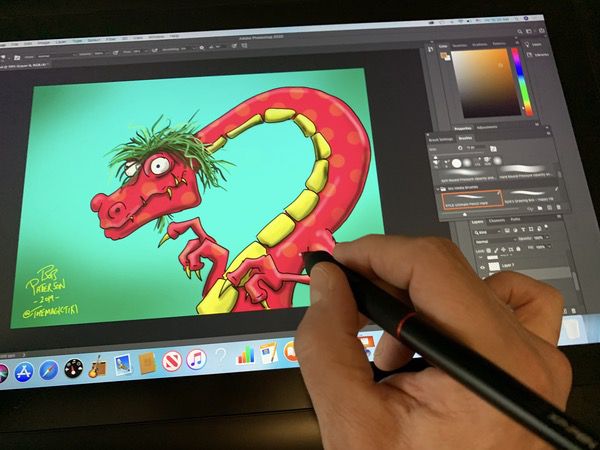
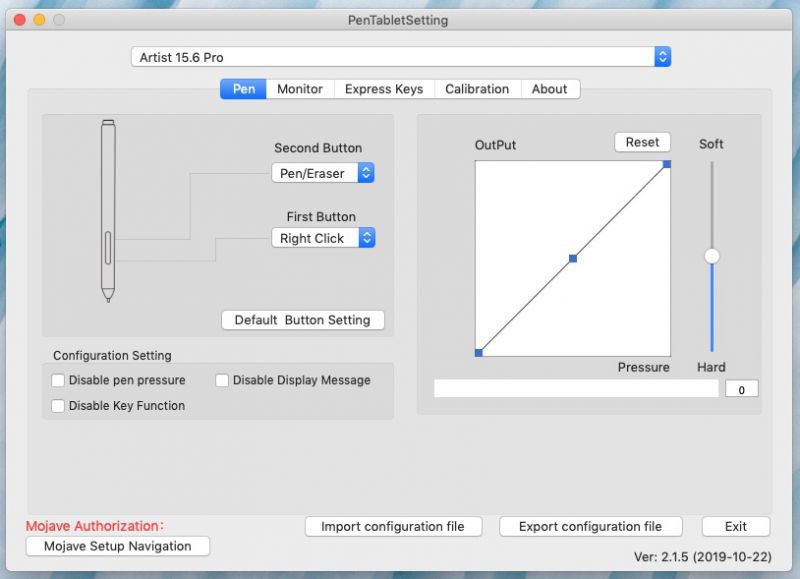
The pen itself has a very natural feel. It expresses a 60 degree sensitivity angle for shading, and over 8000 levels of pressure sensitivity. That means you can deploy a full suite of painting, sketching, and shading effects with practice. The configuration app also enables you to manage the levels of sensitivity, and to change the default functions of the two buttons on the pen’s barrel.
The tablet has 8 buttons on the left side along with a scroll wheel. These individual functions can also be customized, but I left them on their default settings for this test (brush size +/-, zoom in/out, undo, hand (drag) tool, swap to brush tool, swap to erase tool).
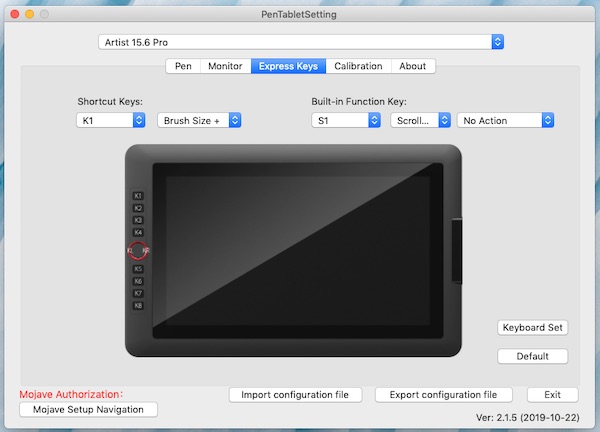
The real power of the tablet starts to become apparent when you leverage these side controls to quickly enact commonly used drawing functions. Here’s a sample video I created to show you how that works. Note that my left hand is resting comfortably under the tablet, and I’m hitting the shortcuts with my thumb as I switch between tasks. With a little practice, this setup has enabled me to quickly navigate larger canvasses, swap out the brush and eraser as needed, and adjust brush sizes on the fly.
The configuration options can also be saved, so you can set different defaults for the buttons & scroll wheel depending on what you’re doing at the time. I suspect this will come in handy if I am doing more “painterly” style work where I might want to do more quick-switching for blend & smudge tools as opposed to line art illustration.
Note how bright the color is on the tablet! You have some adjustments you can make to the brightness on the side, but the color levels are excellent overall. Professionals can probably speak a bit more to the technical specifics, but I’m finding the renderings in my brief tests to be accurate and true. And the bright work surface is a pleasure to work against.
Here’s the finished sample work. I purposely used my typical drawing method on the iPad Pro for this piece, which begins with a rough sketch followed by line art, block color fills, enhancements, and shading/highlights (all on different layers). I threw in some painterly effects with the hair. I was very pleased with the results, and was able to replicate the style & effects pretty seamlessly with a little practice.

I’ll admit that it is not *quite* as smooth and intuitive as my Apple Pencil & iPad Pro combination, but I can say with some confidence that it’s really close… close enough that I think I could get there with some more practice. I’ll absolutely use this rig for commissioned pieces & production/commercial work where I need Photoshop’s advanced image controls. I’m still also practicing with those shortcuts and extra button functions, but I think that will get better & make my work more efficient with time.
What I like
- Professional quality rig
- Great color on the tablet
- Flexible connection options
- Relatively easy to set up and install
- Nice responsiveness in the pen
What needs to be improved
- Would like to see an adjustable height/angle on the tablet stand
- Experienced some lag at points while drawing, but this might be my antiquated computer
Final thoughts
After a long layoff from using this type of rig, I’m really pleased with the XP Pen Artists Drawing Pad. It’s a high-quality package that’s tuned for professional work. The feel of the pen and the surface is natural, and I’m not seeing any issues with overall performance. I’m going to enjoy putting this one through its paces as I get more comfortable with the configurations.
Price: Multiple versions are available, but the model as tested retails for $429 and is currently on sale for $329.
Where to buy: Go to the product page on XP Pen’s web site.
Source: The sample of this product was provided by XP Pen.


