
REVIEW – I have a large air fryer/toaster oven that sits on the countertop that I have used for several years now. I use it mainly as a secondary oven and to air fry things like fries and chicken. I hate using it as an air fryer because it is such a pain to clean. I have grease around all four sides of the oven, plus the rack and the lining rack. When I saw the Kismile Air Fryer’s design, I thought it would be an easy-to-clean tool that could make things like fries and tots. Read on to see how well the Kismile cooks and how easy it is to clean.
⬇︎ Jump to summary (pros/cons)
Price: $169.99 currently there is an additional 10% off coupon
Where to buy: Kismile
What is it?
The Kismile Air Fryer model 12501KAF0 is a 4.5-quart and 1.8-quart glass-bowl air fryer. It has a removable heating element top that includes the controller. It is placed on top of either glass bowl. It can air-fry, grill, bake, or deep-roast. You can easily keep track of how your items are cooking by looking inside the glass bowl.
What’s included?

- The main housing with the control board and heating element.
- An adapter that lets you put the housing on the larger bowl.
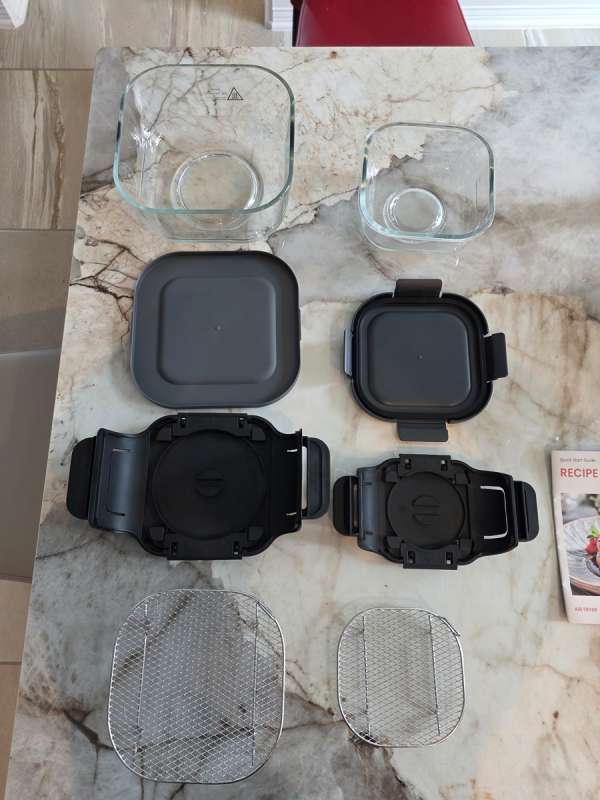
- 4.5 qt bowl lid
- 1.8 qt bowl lid
- 4.5 qt bowl
- 1.8 qt bowl
- A grill rack for each-sized bowl
- user manual
- recipe book
- cautionary page
Tech specs
- AC 120V/60hz
- 1550 watts
- The large bowl will hold up to 4.5 quarts and the small bowl will hold up to 1.8 quarts
- It has modes for air fry, bake, roast, and grill
Design and features
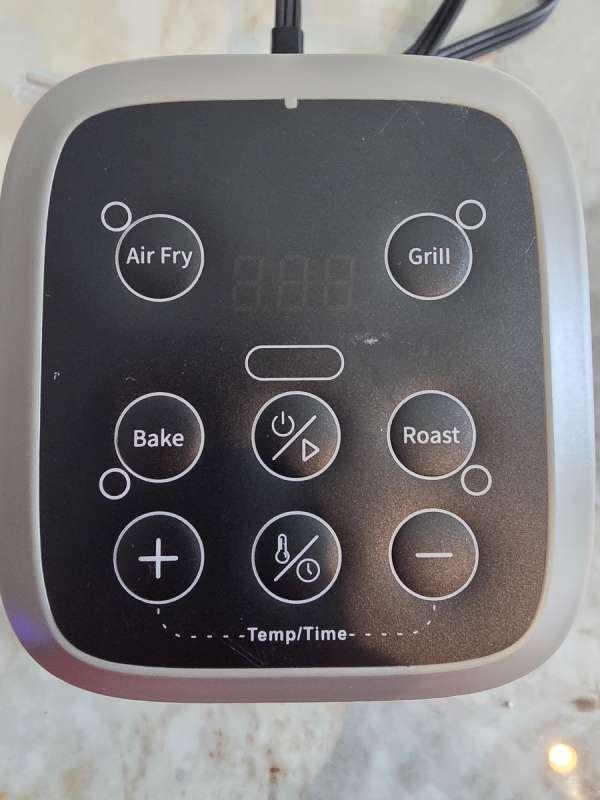
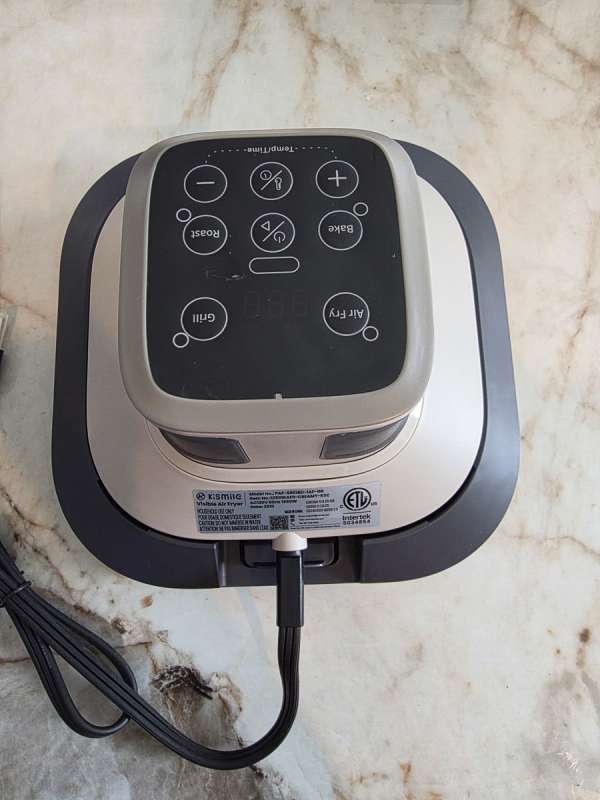
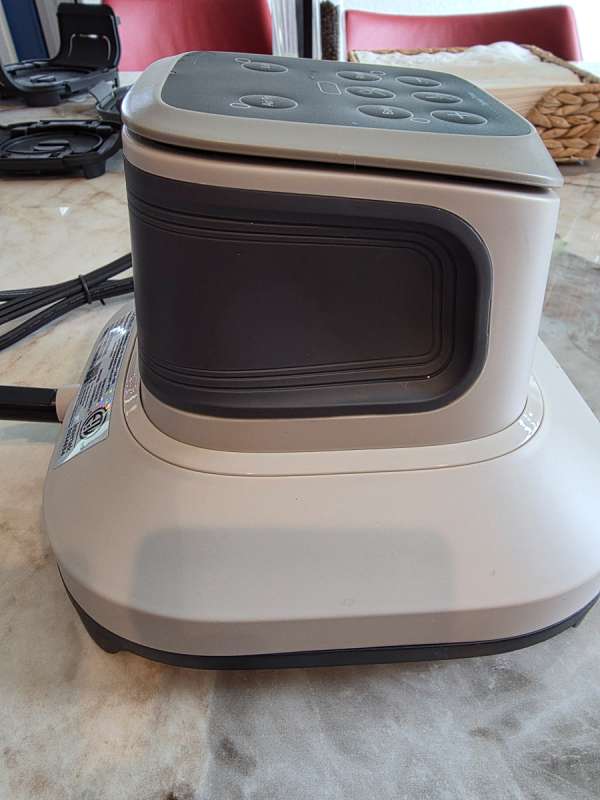
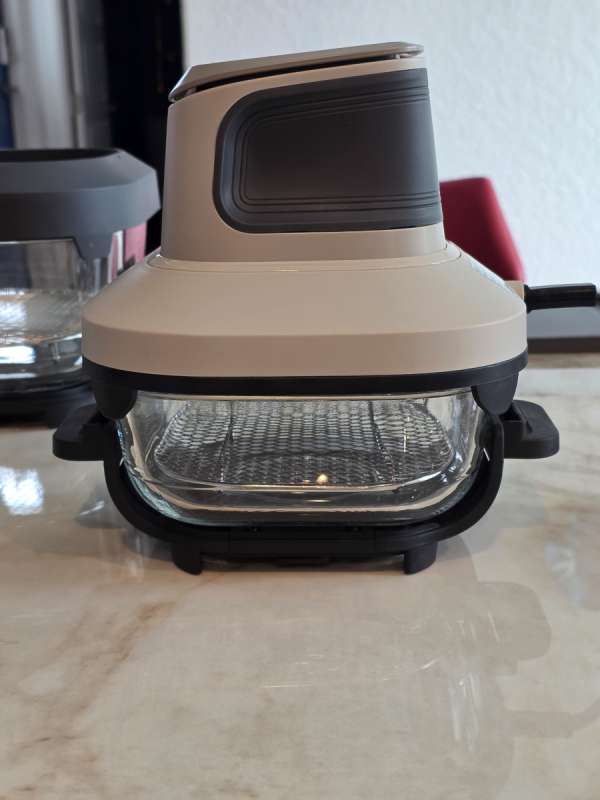
The main control housing has buttons on top to set the cooking method and also contains the heating element. There is also a housing adapter that allows the main housing to be inserted to use the larger cooking bowl.

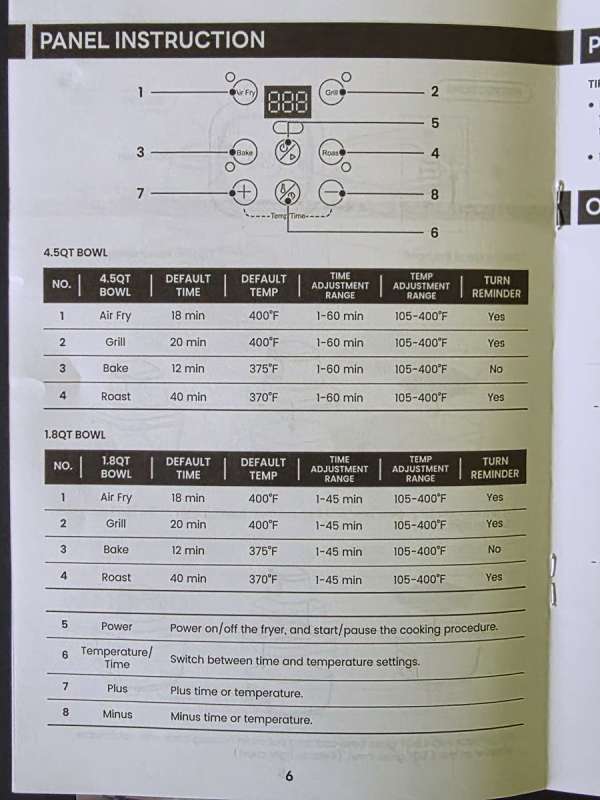
The buttons on top of the housing let you set your cooking method. Pressing the power button in the middle of the controller will turn the unit on. The Air Fry mode is selected by default and will have the red LED flashing in the small circle to the top left of the Air Fry button. You then select the cooking mode you want by pressing the button. Each cooking mode has a default time and temperature shown in the picture below. You can then adjust the time and temperature by pressing the time/temp button below the power button and then pressing the plus or minus buttons to change the value. The housing knows when it is on top of the large or small bowl because it knows when it is inserted into the adapter. It will automatically adjust the default cooking times based on the bowl used. The maximum cooking time in any mode is 1 hour. I had to restart the cook myself when cooking a 5-lb chicken because an hour wasn’t long enough.
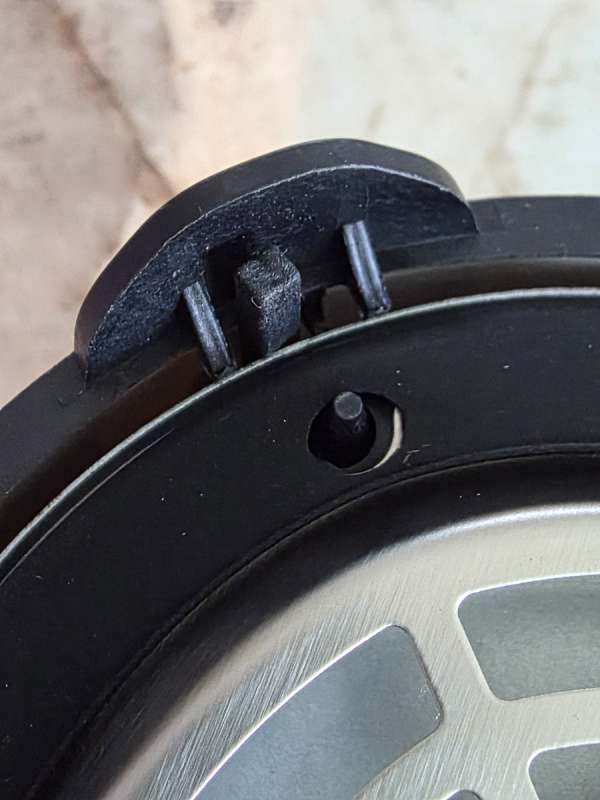
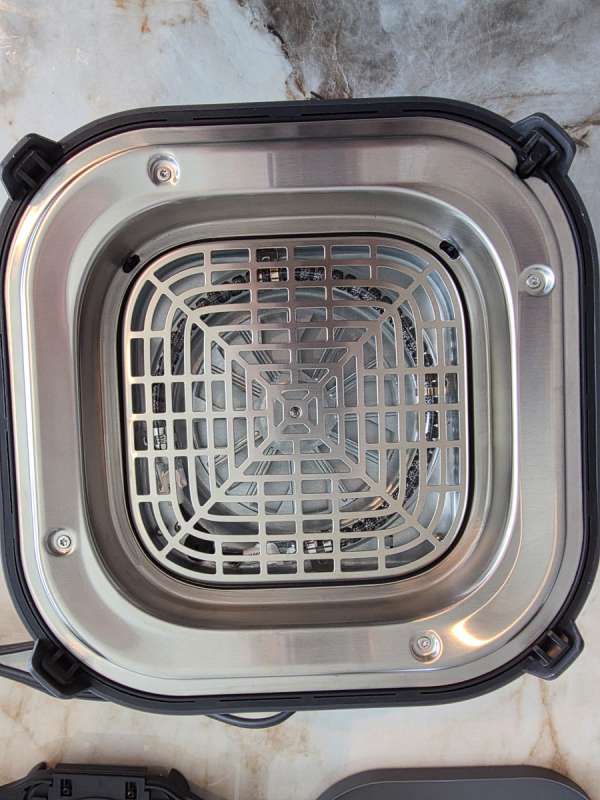
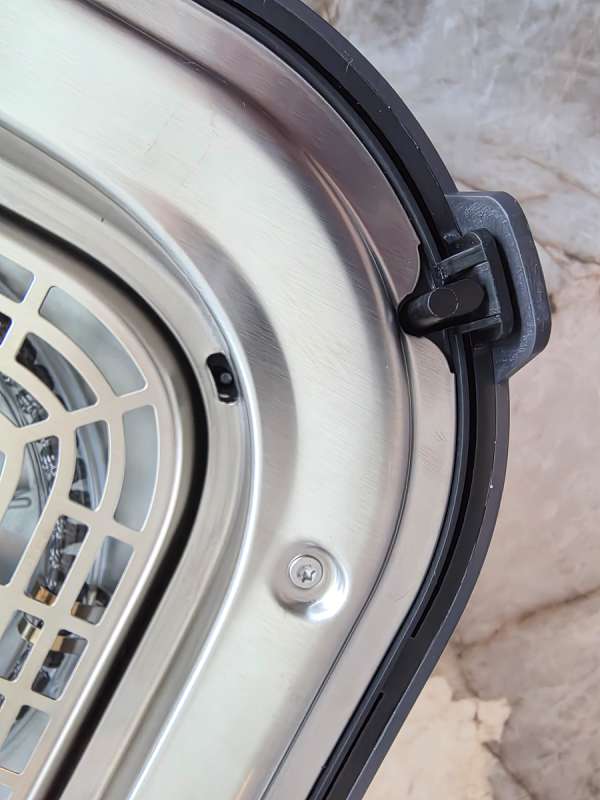
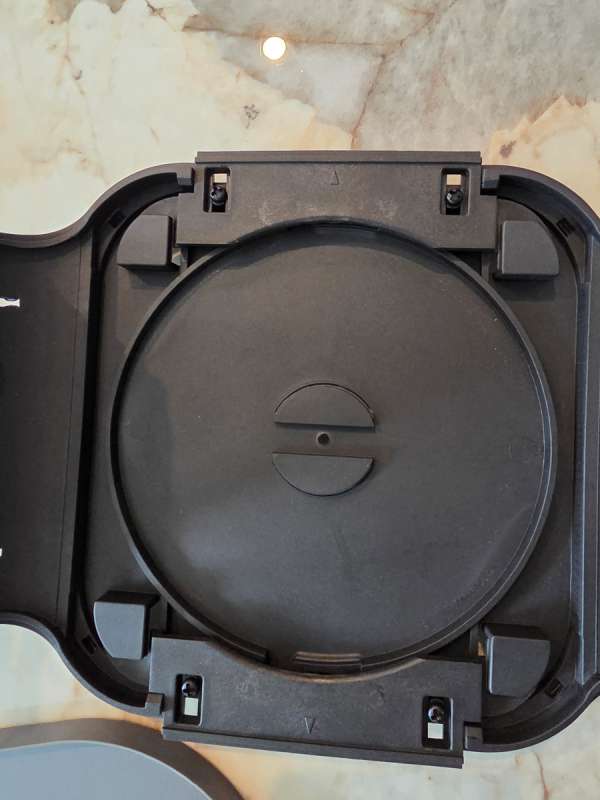
The pictures below show the underside of the housing, where you can see the heating element and the fan. One of the corners has a special tab that sticks out. When that tab is depressed by the edge of the bowl, the housing knows it is inserted into the smaller of the two bowls.

The adapter for the larger bowl is plastic on top and has a release lever on one side. At the bottom, it is metal.

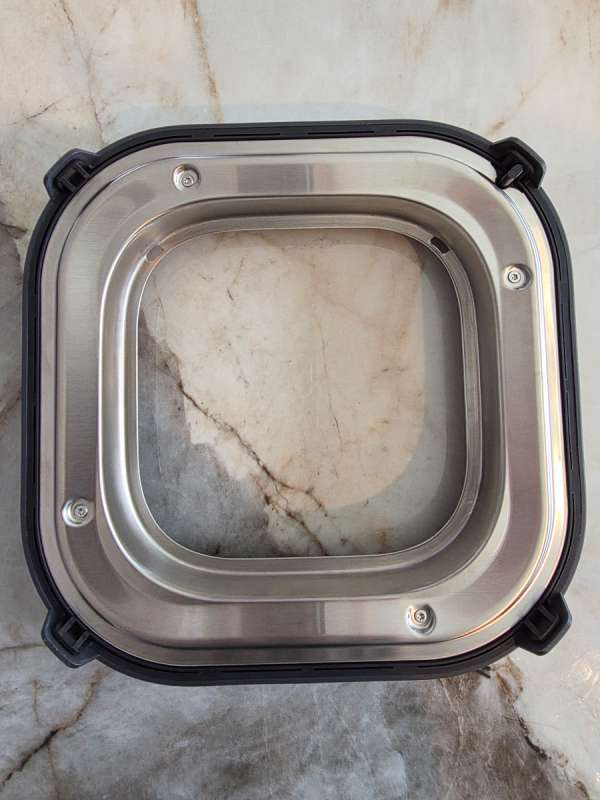
The housing snaps into place on top of the adapter. To take it back out, you simply press the lever and tilt the housing back out.
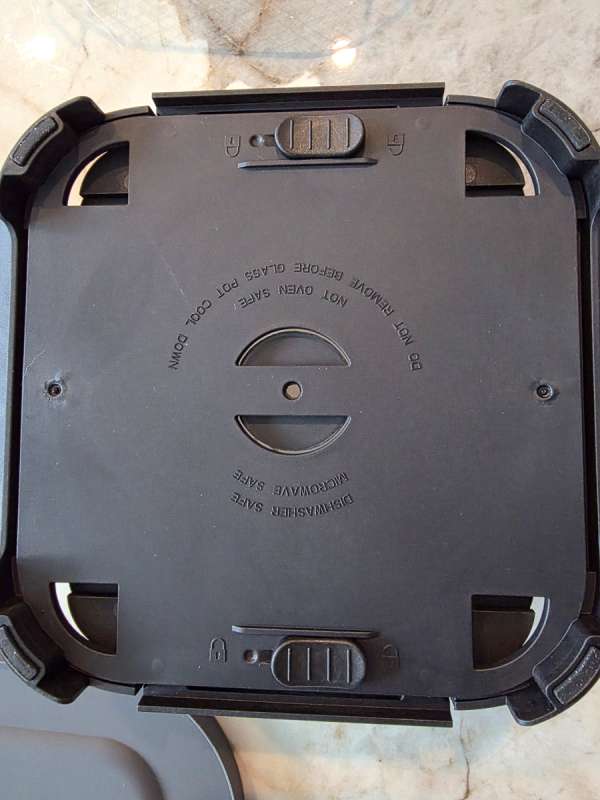
 Here is the bottom of the adapter with the housing inserted. There is also a close-up of the tab that is sticking out in the corner so the housing can know that it is inserted into the larger bowl.
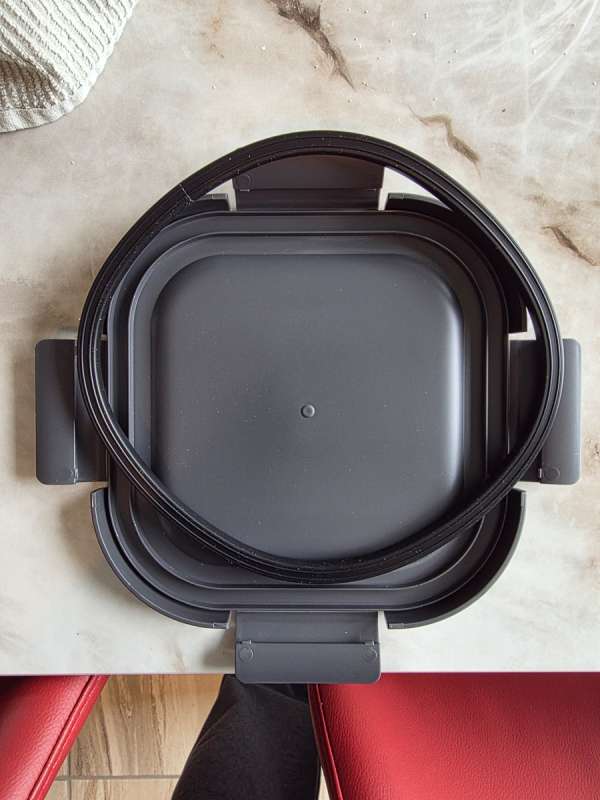
When cooking, to give the bowls more stability and to provide handles for the very hot glass bowls, Kismile has provided stands/carriers. The first two pictures below show the top and bottom of the carriers. The bottom has two lock buttons that slide left or right to release the clasps that hold the bowls’ sides. You unlock both levers and slide the grab rails out. Then you place the bowl back into the carrier, push the grab rails back into place, and lock them. The bowl is now securely in the carrier.
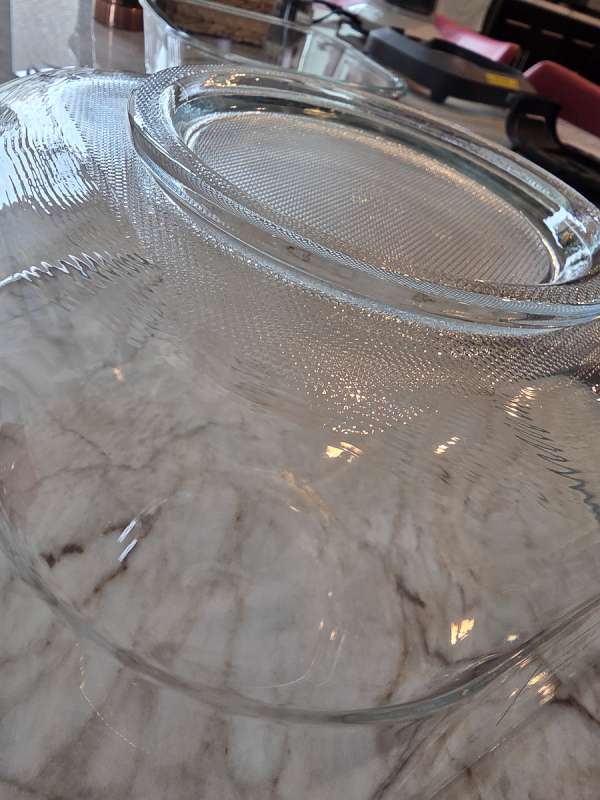
This picture shows the lip at the bottom of each bowl. That provides the area for the bowl carrier to grab.
Here is a picture of the large bowl locked into place on its carrier.
I also took a picture of the side of the main housing unit. It has a nice, narrow rubber grip that runs around all three sides. That allows you to grab the housing to lift it off the bowls easily.
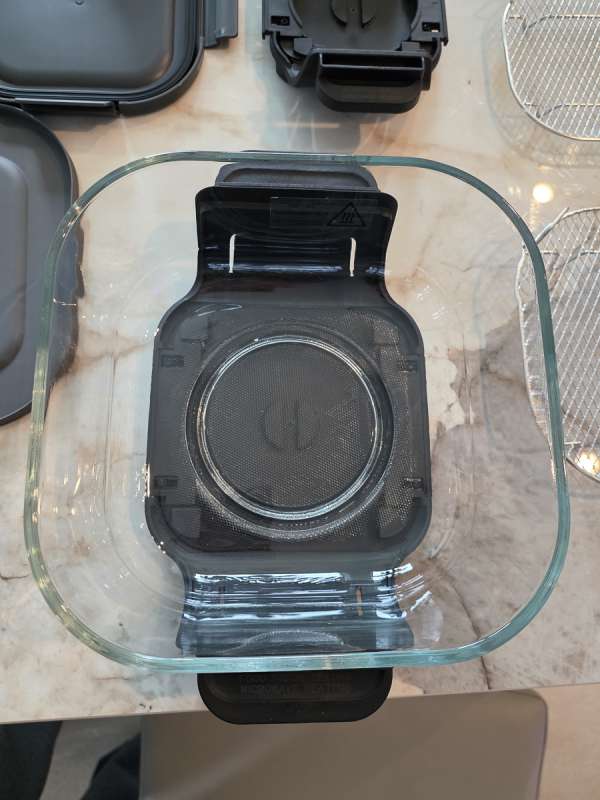
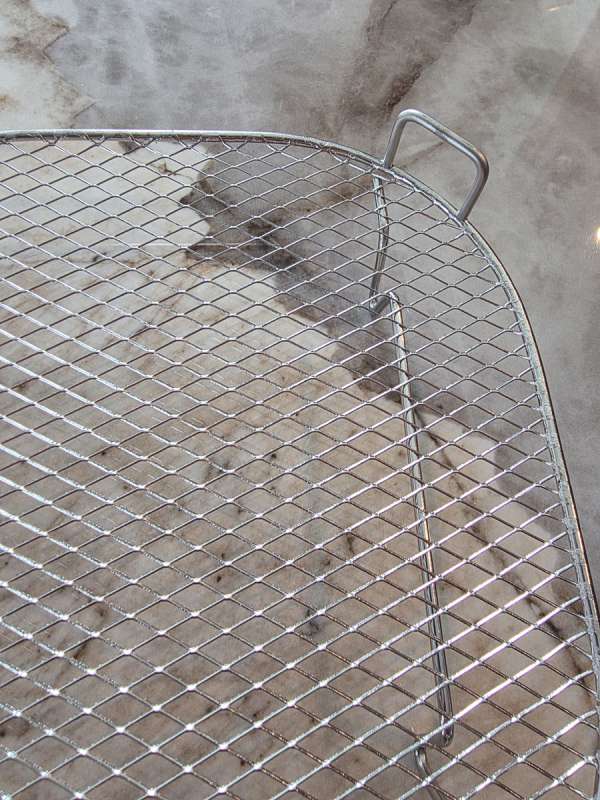
Each bowl has a grill rack. Since these racks are inserted into the bowls, they provide a nice handle for you to grab and remove them from the bowl easily.
Each bowl also comes with its own lid. The lid for the smaller bowl is very nice because it has a detachable rubber gasket and lock-down sides. The large bowl only has a standard plastic lid. I wish the large bowl had the same type of lid as the smaller bowl. Either way, the lids provide a nice option for storing leftovers.
Here is the large bowl with the lid on.
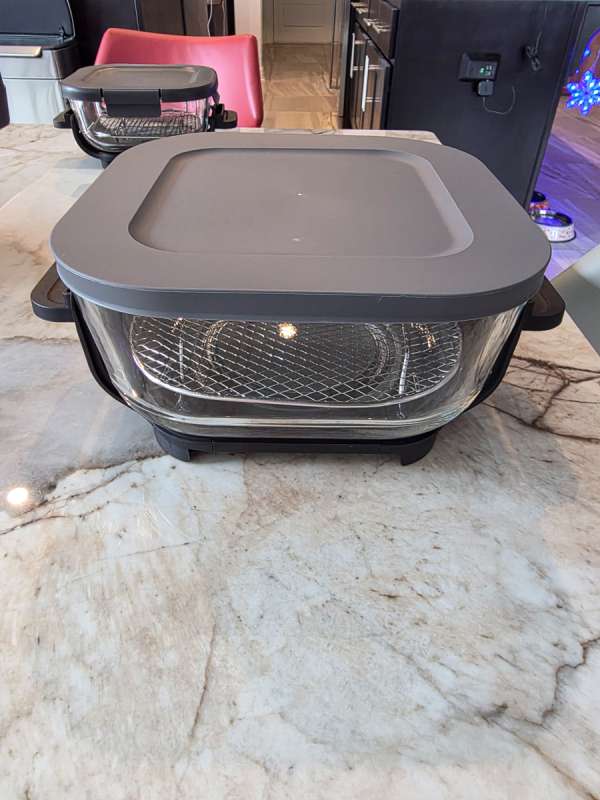
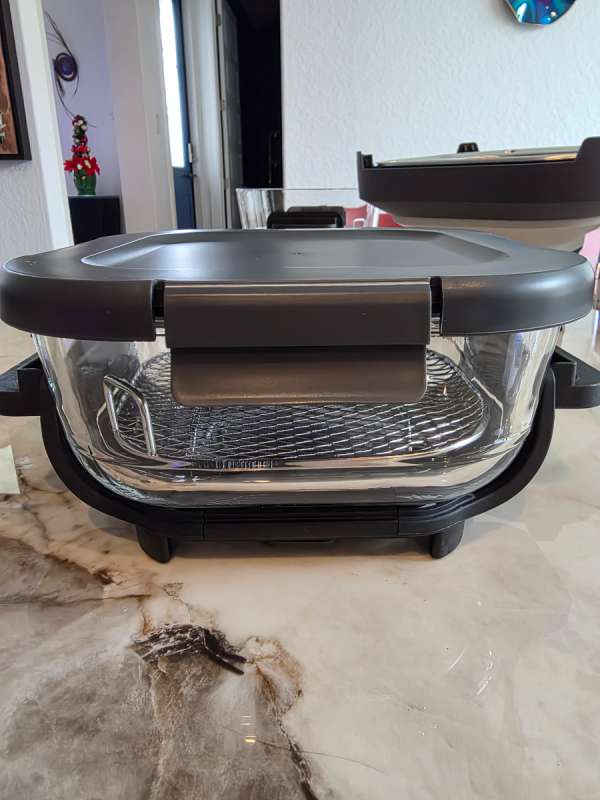
Here is a picture of the air fryer all set up with the adapter, bowl carrier, and grill tray on the large bowl.
Performance
I decided to be very ambitious on my first cook with this air fryer and decided to make a whole roasted chicken. Apparently, in San Antonio, we only have Texas-sized chickens, and the smallest one I could find was five pounds. I stuffed that sucker with lemon and rosemary. I also rubbed it with butter and put some seasoning all over it. In the picture below, you can see how well it fits into the 4.8-quart bowl. With the housing on top, there was just barely half an inch of clearance between the top of the chicken and the heating element. I was an idiot and did not read the recipe completely. I should have placed the chicken breast side down. After about 20 minutes of cooking in the deep roast method, I noticed (yay for the glass bowl!) that the top of the chicken was getting burnt. I managed to flip it over and continue cooking.
The alarm on the housing unit did go off after 30 minutes, but I kept it cooking because I knew 30 minutes wouldn’t be long enough. I want to note that the alarm beep was not very loud. As a matter of fact, if you are in another room, you would have a hard time hearing it go off. I used a meat thermometer to check the temperature of the meat after an hour of cooking. I ended up cooking the chicken for an additional 30 minutes. I was so excited when the chicken was completed because it smelled delicious! I forgot to take a picture of the completed chicken. Yes, the side facing the housing will get extra dark, which is why they recommend placing the chicken breast side down. The recipe also called for only a 3lb chicken, but I could only find a 5lb one.
That chicken was the most tender and delicious chicken I have ever cooked. Cleanup was a breeze because I could put the bowl in the dishwasher and wipe down the housing.

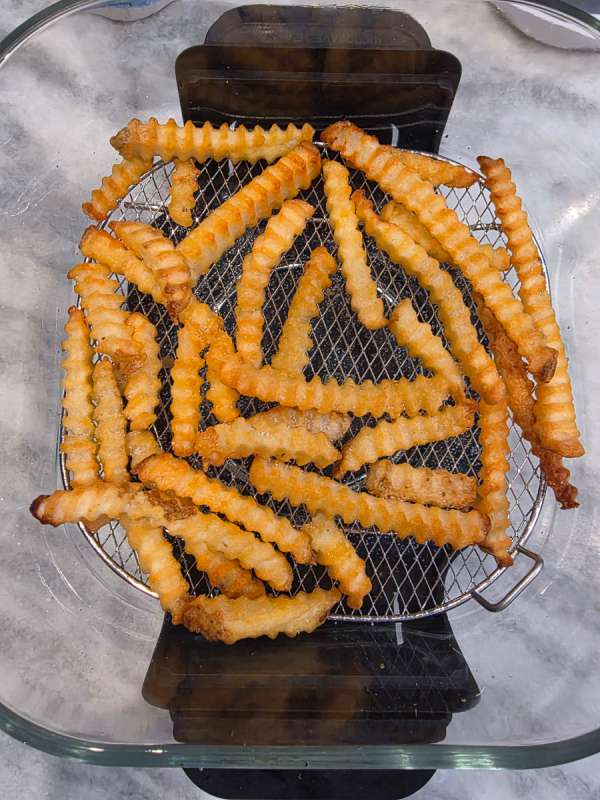
The next thing I cooked was some French fries. I placed them in a single layer in the large bowl. I put the mode on air fry and used the default time and temperature. I flipped them halfway through when the timer went off. When the timer goes off, lift the housing off, stir your food, and put the housing back on the bowl. The timer will continue where it left off. These fries were the best-tasting, perfectly crispy fries I have ever made in an air fryer. I believe that has to do with a heating element that covers the entire top of the bowl. Most oven-based air fryers have heating element bars that cover only parts of the top and bottom of the oven.
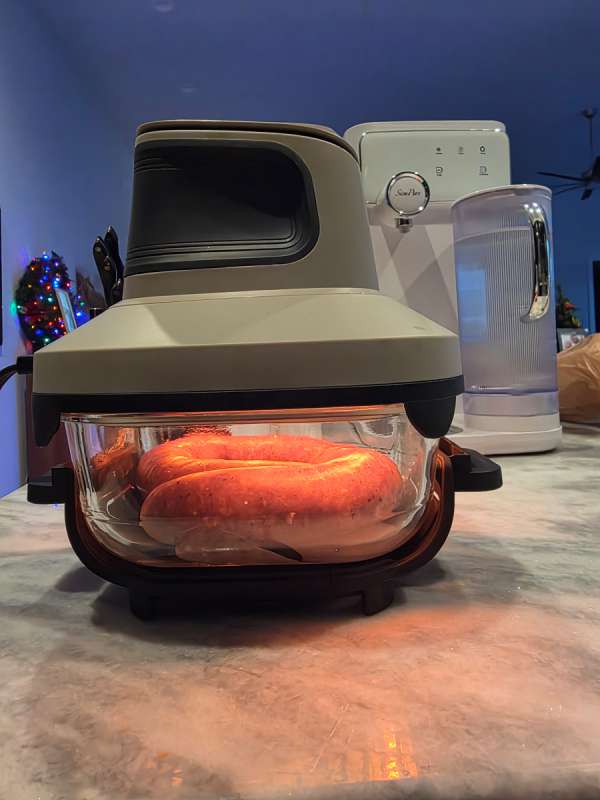
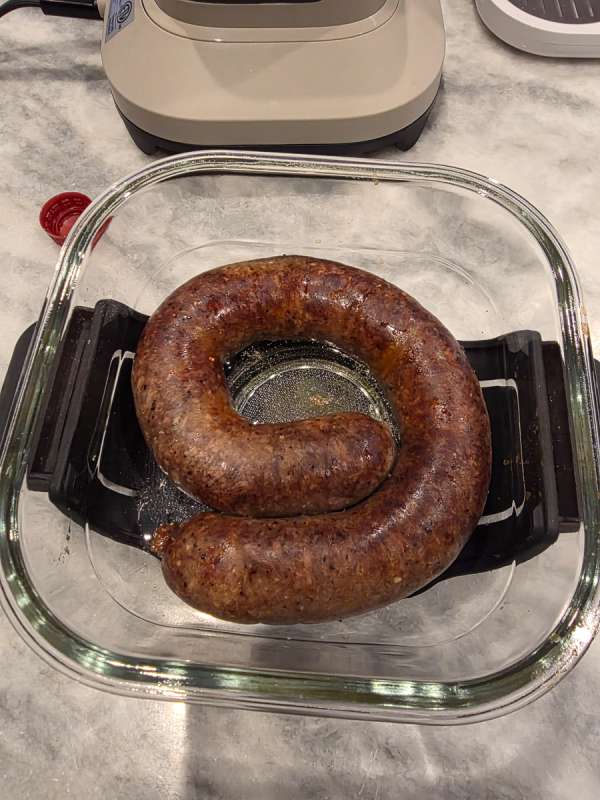
The last thing I cooked was some sausage in the smaller bowl. The sausage I cooked was a Polish sausage called Lelitka. It is a lot like the Cajun sausage boudin, but it uses hominy instead of rice. I set it to bake for the default 12 minutes. It came out perfect!

Final thoughts
The Kismile glass air fryer has become my new favorite. I love that it is so easy to clean, and the glass bowls can also work as storage containers afterwards. It provides a consistent level of heat throughout the entire bowl. My big square oven-style air fryer heats via heating element bars across the top, which can lead to inconsistent heating across a large surface area. My only complaint was that the timer alarm was a bit too quiet. One thing I did notice while writing this review is that this air fryer is not available on Amazon for some reason. I see a few look-alike air fryers that are cheaper, but I am not sure they would cook the same, since the main housing looks a bit different on them. I am sure many drawer-based air fryers cook the same way as this Kismile, but you can’t see how well your food is cooking in them.
What I like about Kismile Air Fryer
- Glass bowls are easy to clean and let you see your stuff as it cooks.
- They provide lids to allow the bowls to act as food storage containers.
- They provide stands that have grab handles.
What needs to be improved?
- The beeper on the alarm could be louder.
Price: $169.99 currently there is an additional 10% off coupon
Where to buy: Kismile
Source: The sample of this product was provided for free by Kismile. Kismile did not have a final say on the review and did not preview the review before it was published.

Apple iPhone FineWoven Wallet with MagSafe – Black
(as of April 3, 2026 18:28 GMT -05:00 - More infoProduct prices and availability are accurate as of the date/time indicated and are subject to change. Any price and availability information displayed on [relevant Amazon Site(s), as applicable] at the time of purchase will apply to the purchase of this product.)
Gadgeteer Comment Policy - Please read before commenting
looks like a ninja crispi rip off