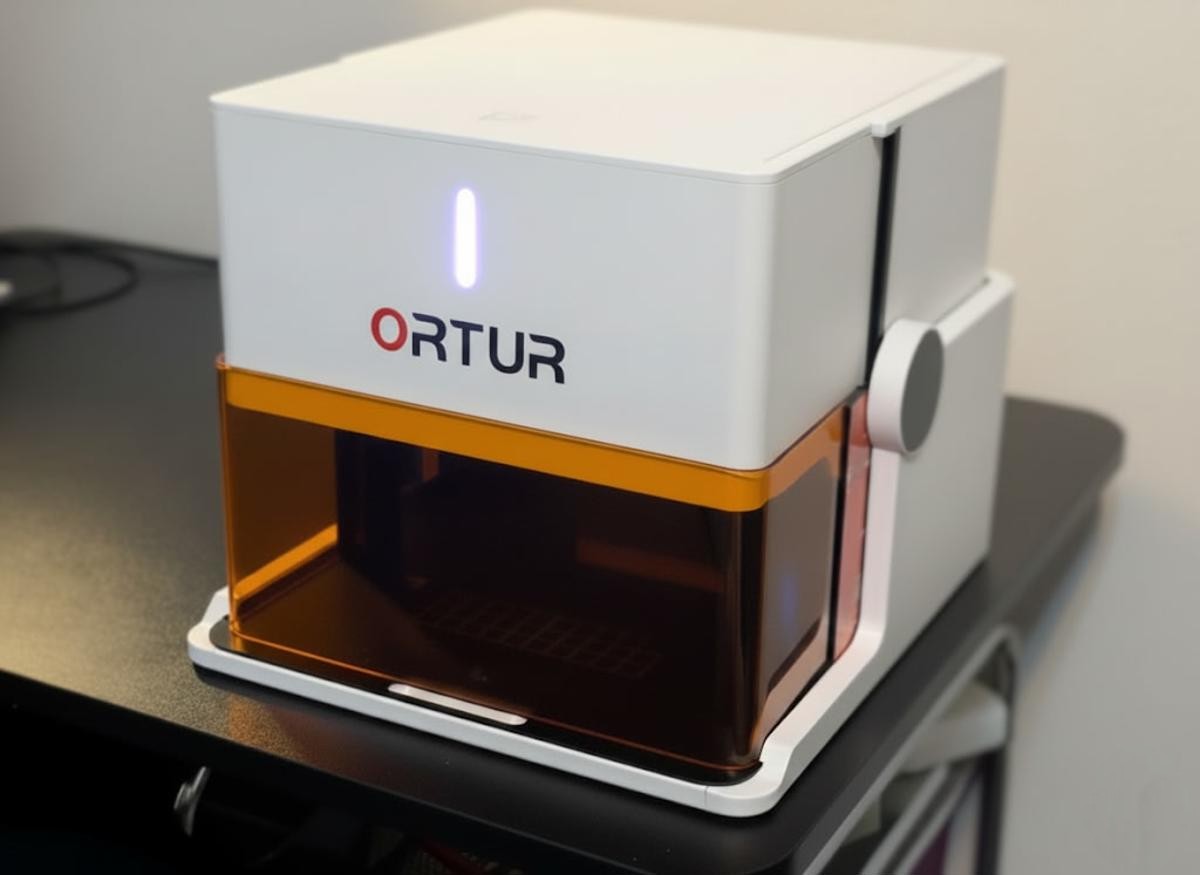
REVIEW – Laser engraving has always been intriguing to me. However, the last engraver I reviewed was not the best experience. The new ORTUR R1 has restored my hope in laser engraving. Not only is it small and portable. It is user friendly.
⬇︎ Jump to summary (pros/cons)
Price: $259.00
Where to buy: Amazon and ORTUR
What is it?
A compact, portable laser engraver with two laser options.
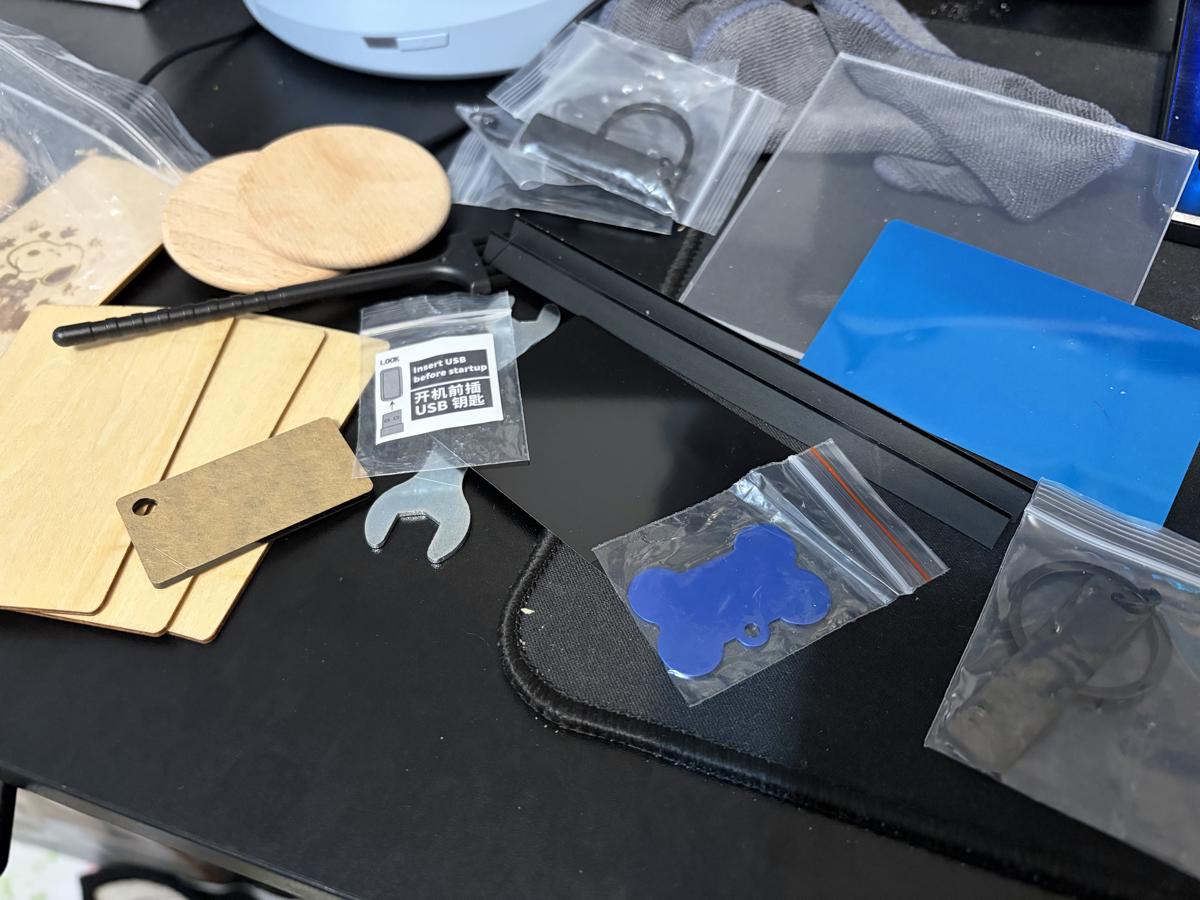
What’s included?
- Laser engraving machine
- 1.3W IR light (red laser)
- 5W Blue light (blue laser)
- Test acrylic
- Test wood chips x4
- Test aluminum sheet
- Triangular blade x2
- Brush
- Wrench
- Card reader
- USB key
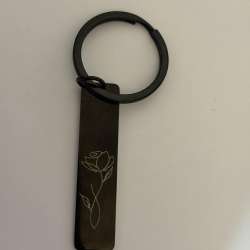
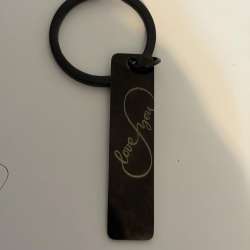
- Pet tags x2
- Multiple keychain items
- Wooden circles (multiple)
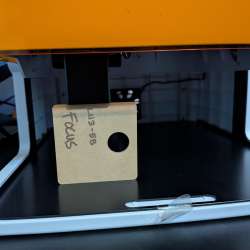
- Focus points for each laser
Tech specs
Design and features
Trying new things doesn’t always end well. When I first attempted laser engraving, it was a bit of a disaster. I really wanted to be able to find a new hobby that was easy enough that I didn’t have to dedicate half my life to figuring out how to make it work the way I wanted. I have six kids. I don’t have time and energy.

(Honestly, I believe the last laser I reviewed was a lemon. Not that the laser model itself or company are lemons, just the specific one I got. After talking with their customer service and physically changing certain things, I was able to almost do what I wanted.)
The ORTUR R1 has been a much better experience. The unit itself is small, which gave me a lot more room to test things out. I know that might sound a bit counter-intuitive because the plate engraving size is only 100 mm x 100 mm so it’s really not that big. But being able to have the unit right there when I had a spare minute was so much different than when I had to make time to figure things out on the computer, put them onto an SD card, turn on the engraver, make sure it was the right file type and size, if it wasn’t I had to go back to the computer and do it again. Now I get to sit down, try something right there, and leave. So much better. Total. Game. Changer.
This tiny R1 printer is still a baby in the engraving world. It only came out within the last month. I feel honored to have been able to review this device. I am glad that I didn’t give up and write laser engraving off as a complete waste. This machine is small, portable, and much less intimidating. For anyone wanting to try something new, this is a fun and relatively inexpensive hobby that could potentially turn into something more.
The app is friendly! I hate when I try a new product and I don’t even get past the welcome screen because the app doesn’t want to play nice. This was not like that. Thank Heavens! I was able to easily find and connect the R1 laser engraver every time. If the unit was on, my phone could find it. Inside the program was a simplistic, user-friendly grid, and I could instinctively navigate to the items and settings that I wanted to play with. When I wanted to try something new, I would go online and find a picture or quote and save it to my phone. I didn’t have to put things through photoshop or change to specific file types. It makes me want to engrave more often because of how fun and easy it is.
The ORTUR is also compatible with more complex programs like LightBurn and LaserGrbl. These programs are much more intense. I’ve been able to play around a little bit with them, but not nearly to the point where I would feel comfortable giving a tutorial or something like that. Honestly, I hope that I can get to the point where I can make a super dumbed down version of the very basics of laser engraving and put it online for other newbies like me.


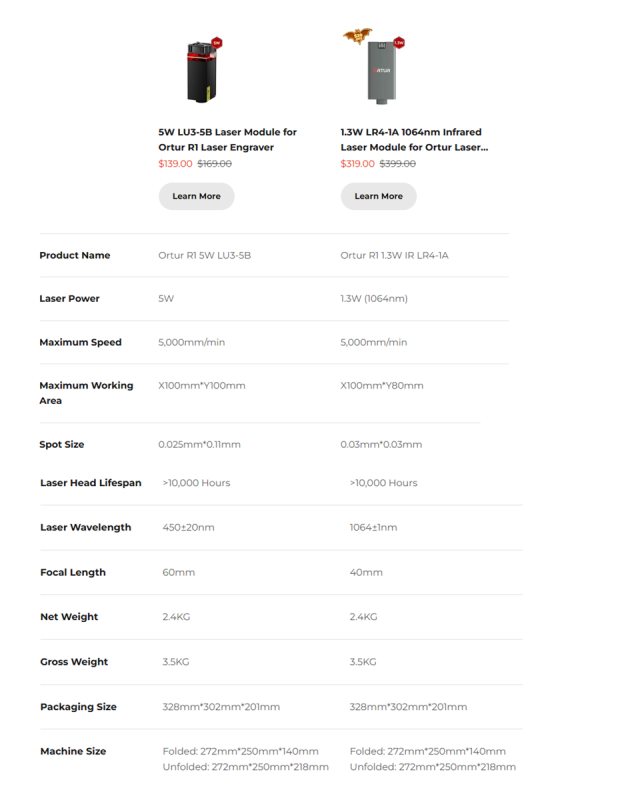
This laser engraver also comes with two different lasers. A red laser and a blue laser. I had to do some research to figure out which laser to use with which project I was working on. The red laser is more compatible with metals and shiny things. The blue laser works amazing on wood and other acrylic and cardboard type items. I know that there is a lot more to each laser, I just haven’t been able to dig deep yet. I just know that for most of the projects that I have in mind I will probably be using the blue laser. Things like Christmas ornaments on wood slices, family photos for a birthday board, snowflake cut outs to decorate with, fun projects my kids can do over the holiday breaks, and other items like that. I am excited to try some jewelry making with the red laser though. I have always been curious at how different necklaces, keychains, charm, bracelets, or other items have such cute intricate designs. Even just the casual usage that I do, I would totally recommend this laser engraver to others who are just starting out.
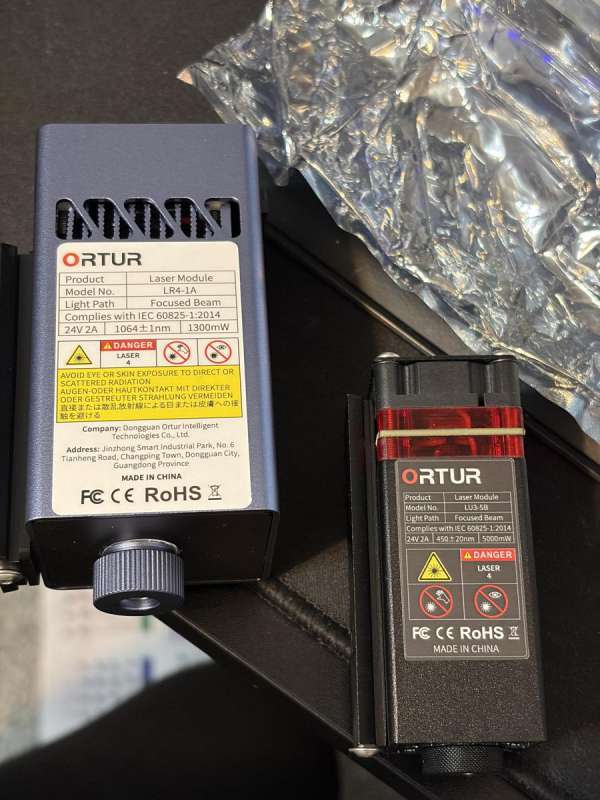
As a side note. I thought that the laser that was the color blue was the blue laser. It is not. The little black and red laser is actually the 5W blue light, while the bigger blue colored laser is actually the 1.3W IR (infrared laser) red light. I was very confused for a minute trying to figure things out. *face palm*
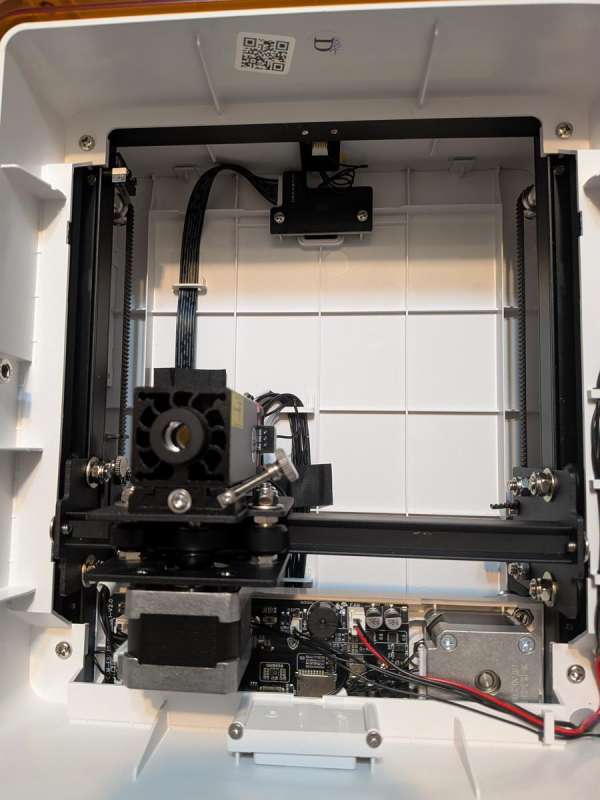
Switching the laser is not as difficult as you would think. There is a small cable on top of the laser unit itself that needs to be unplugged. Once the laser is unplugged, you loosen the screw on the side, and the unit will slide off the rails. Be careful, you really don’t want to hurt the lasers. To put on the other laser, you slide the unit on the rail, attach the little cord, and tighten the screw. The tricky part you have to remember is a small slider on the guide rails above that move the X or Y axis. If you don’t adjust it for the different lasers, it reminds you by making some loud horrendous noises signaling the correct sensors are not being hit. The machine beeps at you and then after you fix things, you are able to print again.

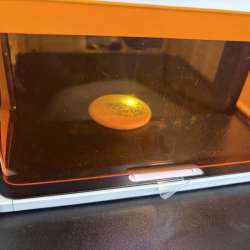
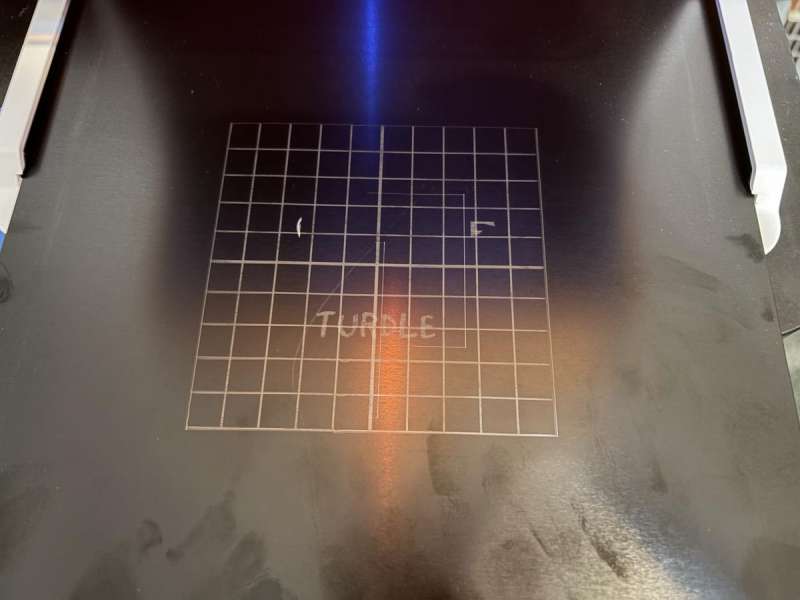
One of the things that I didn’t like about this engraver, is the small laser zone grid is not visible to the human eye. If you think you know where to place the object to engrave, you probably won’t be right. It’s a bit deceiving. Thankfully, there is a button in the app that shows you where the border of your current project will be. When you push that button, the laser will shine around the selected area, and you can position whatever materials you are hoping to engrave in place. After a couple trial and error errors, I decided it was worth it to me to engrave on the metal plate that the machine uses as a base. I just printed a small grid to match the one that the app used. Now my guest work isn’t nearly as ridiculous, and I don’t ruin as many projects.
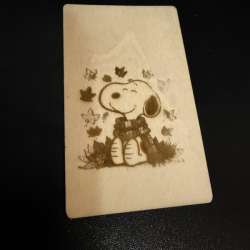
This ORTUR unit comes with plenty of fun items to practice engraving on. Keychains, wooden circles, pet tags, acrylic, Metal sheets, and more. There are two pieces in the bags of samples and other engravable material that are actually to be used as a focus. I wrote on mine with sharpies which laser each one belongs too, and have made 3D copies in case I lose the current ones. After you have the materials you want to engrave in place, make sure the laser is focused by placing a piece on top of your materials and slowly lower the laser until it is touching the focus point. Don’t worry, in the app as you are preparing to engrave, a pop-up will remind you to check the laser to make sure it is in focus. I love that the app has multiple safety pop-up precautions and reminders as you go.


Another thing I like about this laser engraver is the front piece slides up and down as a shield, or eye protectant. I still don’t recommend staring at the laser as it works through your projects, but it is a lot safer than having an open laser.
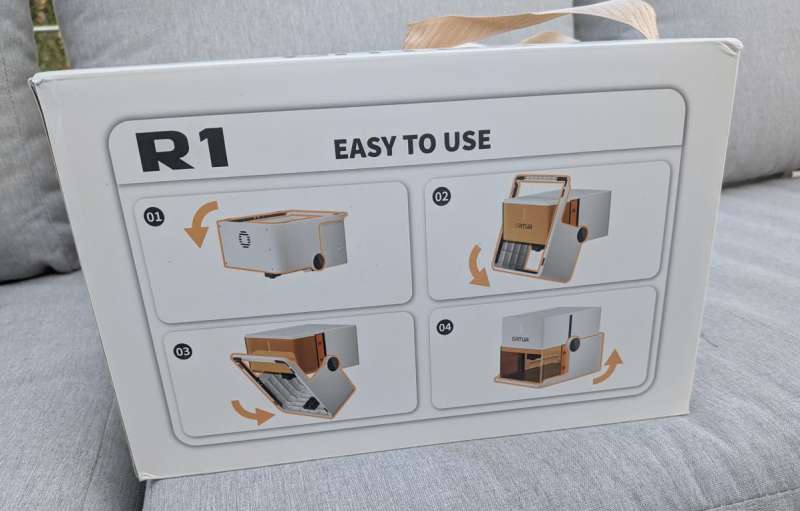
Set up for this machine was basically nonexistent. I didn’t have to connect anything, there was already a laser in place ready to use, and all I really needed to do was connect to my phone. One of the really neat things about this particular R1 laser is the compact design. There is a small button on the back that you can press to release. Pull the black metal plate out, and the laser engraver folds out, or back to be compact and portable, or ready to go. I’m sure there are much more technical terms, but my kids call it a transformer because it is so cool.
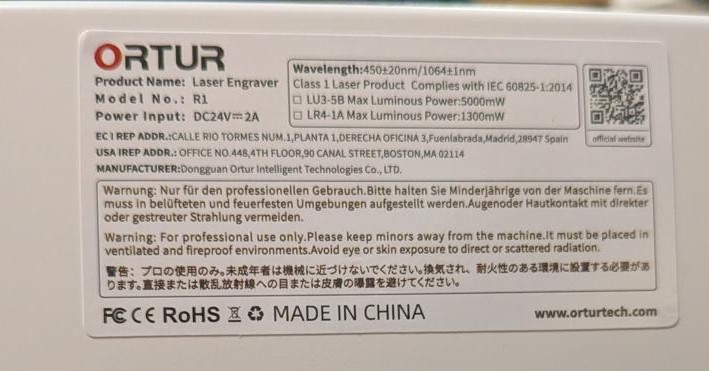
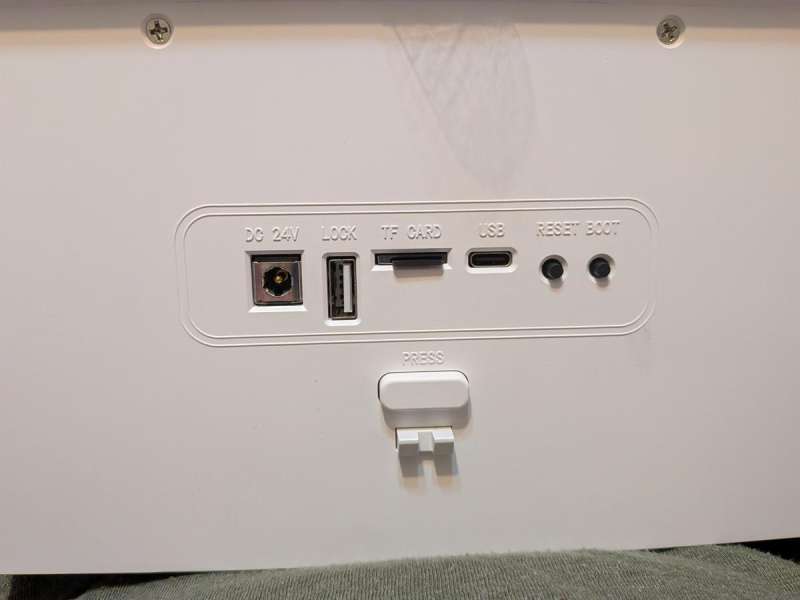
On the back of the R1 there are different ports. There is a USB-C, the power plug, the key which looks like a Bluetooth dongle, but must be in place before the unit will work. There are also pop-ups that tell you to unlock the machine when you are using the app. Like I said, it is user-friendly. 🙂
With as much fun as I have been having on this engraver, I’m going to have to start a dedicated space to keep my messes from overflowing to the rest of my house. Ha!
Final thoughts
I am glad that I didn’t give up completely on laser engraving. The ORTUR R1 has restored my confidence, and peaked my interest once again. It is a lot more fun, and less frustrating because of how simple the app has made designing and engraving. The engraver may not be huge, but the ability of one or both lasers I feel can accomplish just about any project I have in mind. There is so much more to learn and discover, and I am excitedly up to the challenge. With a little time and patience, I will master the art of the laser engraver.
What I like about ORTUR R1 Laser engraver
- Compact
- Built-in shield
- Two different lasers
- Lots of items to engrave included
- Easy to store
- App is very simple
- Convenient
- Plenty of safety precautions
- Fairly intuitive
- Pretty basic. People with less experience shouldn’t have too much trouble figuring it out
What needs to be improved?
- Aligning the laser and the material you are engraving is complicated
- The shield for eye protection could use a little finesse. Sometimes raising and lowering is tricky
- There are no tutorials for this R1 engraver.
- I wish there was something that I could attach to the outside of this unit to store the extra laser
Price: $259.00
Where to buy: Amazon and ORTUR
Source: The sample for this review was provided by ORTUR. ORTUR did not have a final say on the review and did not preview the review before it was published.
Gerber Gear 22-47162N Fast Draw Folding Assisted Opening Pocket Knife, Fine Edge, Black
(as of March 15, 2026 18:29 GMT -05:00 - More infoProduct prices and availability are accurate as of the date/time indicated and are subject to change. Any price and availability information displayed on [relevant Amazon Site(s), as applicable] at the time of purchase will apply to the purchase of this product.)
Gadgeteer Comment Policy - Please read before commenting
Price in the review is only for the 5W laser version. The version that comes with both lasers is $400.
Interesting, it seems your laser has no problem with straight lines. Mine makes waves on the X-axis. So far, I’ve only received two lines of code from support, $120 and $121, which didn’t improve anything. How stable is your laser head on the X-axis? Mine wobbles.