
REVIEW – Swytch is at it again. Their brand new GO kit makes it even easier to transform your favorite bicycle into an eBike. You get a motor-driven front wheel, their newest frame-mounted battery pack and everything else you need for way less than the cost of a new eBike. Jump in to see what’s new…
What is it?
The Swytch GO Kit converts the bicycle you already own into an eBike. The motor, battery, controller/display are all included, it fits just about every bicycle out there and it’s simple enough for just about anyone to install themselves.
What’s included?
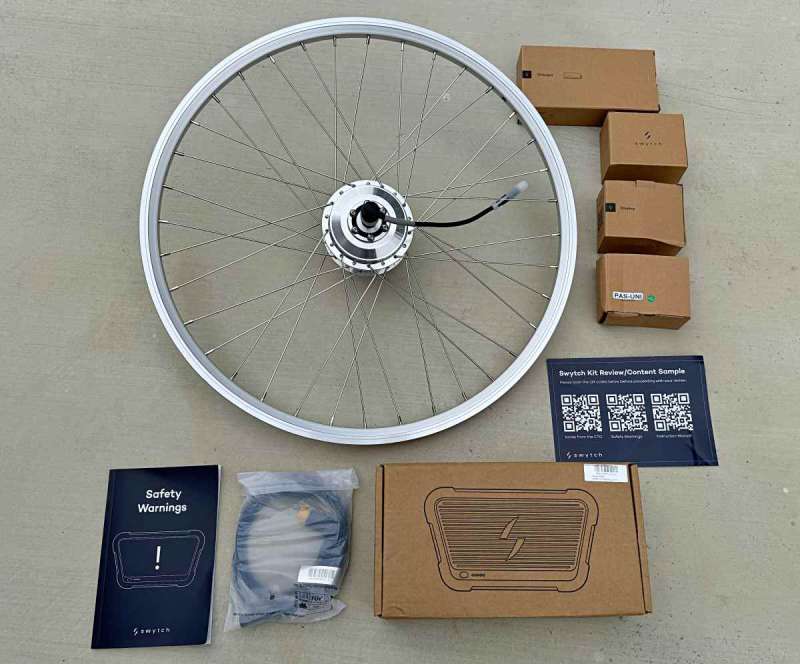
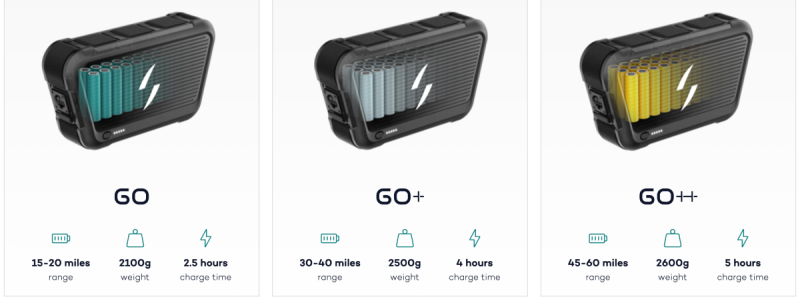
- GO Power Pack (either GO, GO+ or GO++ depending on your selection at time of purchase)
- Hub Motor Front Wheel
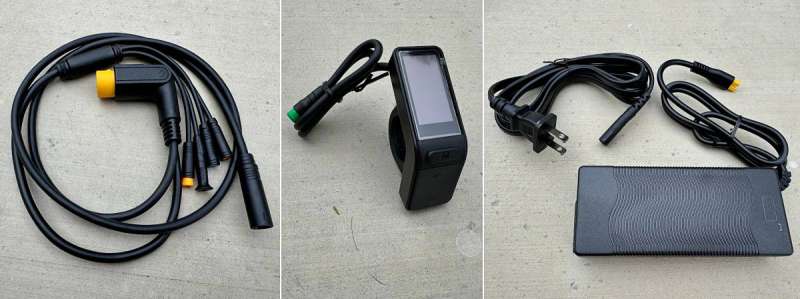
- AC Charger
- LED bar mounted controller/display
- Crank-mounted 12-magnet cadence ring and fitments
- Tube-mounted cadence sensor
- Connection cables and cable ties
Tech specs
Click to expand
Hub Motor Front Wheel – 250W geared, 40nm torque, up to 20 mph, motor-hub pre-laced into one of 16 rim sizes (from 16″ to 29″) with disc mount and rim brake surfaces.
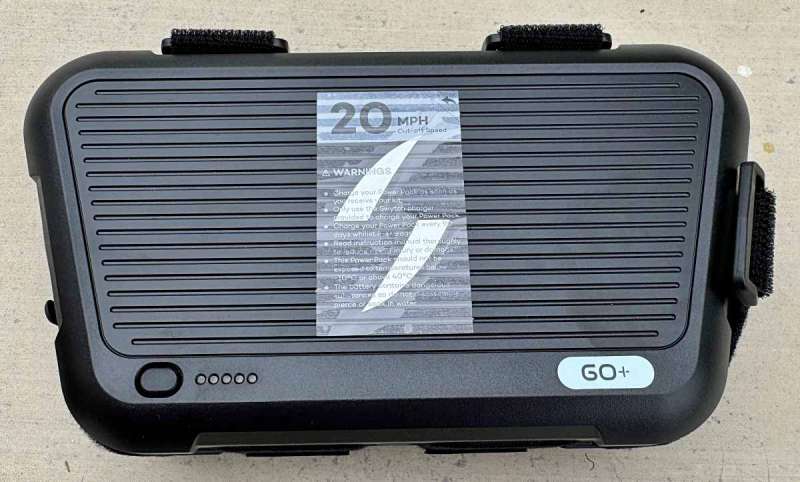
Go Power Pack – Lithium Ion Battery available in 3 power configurations. All are physically the same size.
 Display – Low-profile display with controls for on/off and assist levels
Design and features
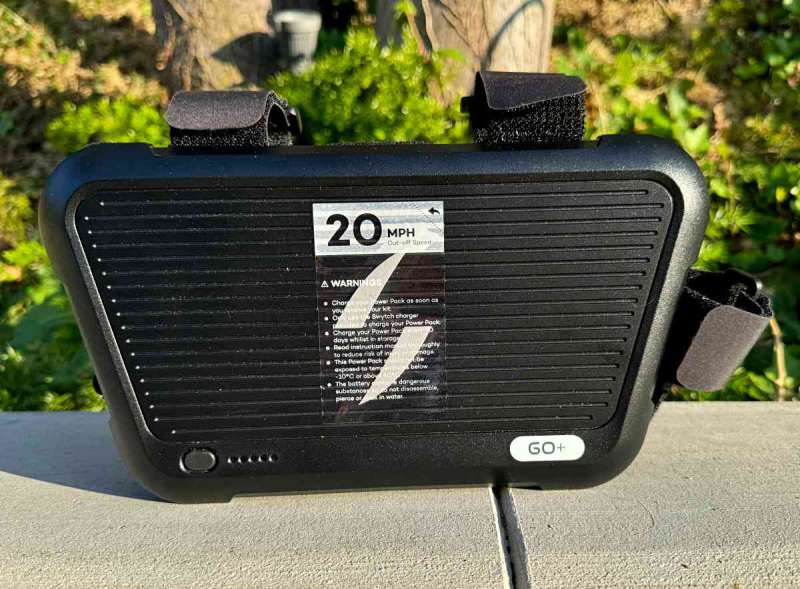
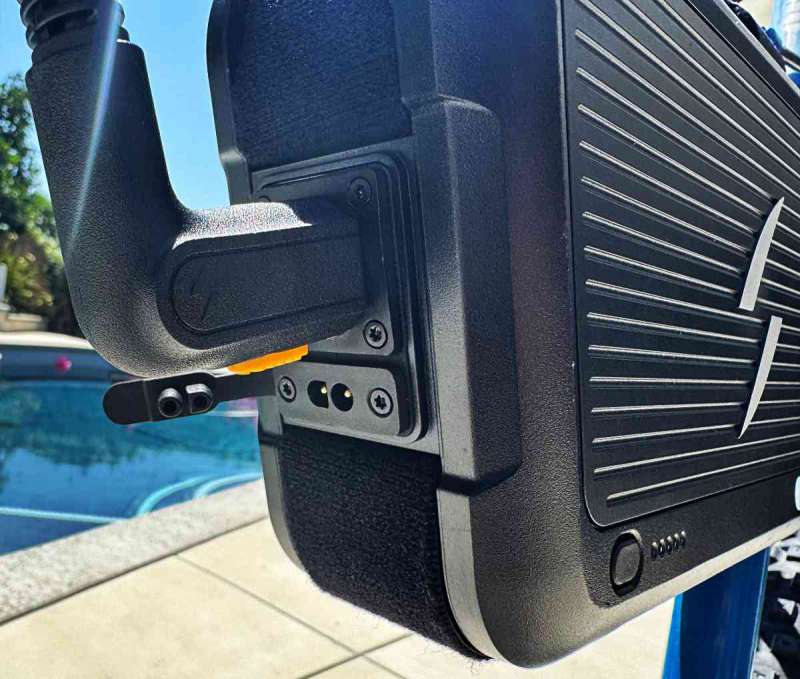
The GO Power Pack is the big update here, and Swytch has executed it really well. Three Velcro straps hold the battery in place, and more Velcro straps surround the whole battery. After installing it, you have a very stable solution that does not swing around when riding or have much effect on your bike’s handling, as there’s no weight on the handlebar.
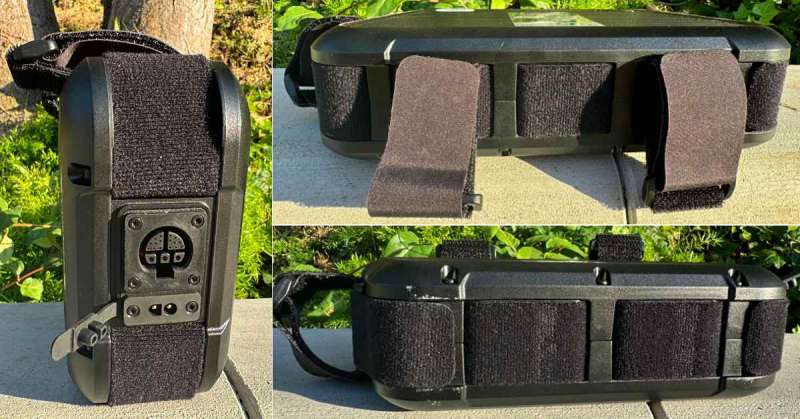
Here, you can see better angles of how all those straps interconnect, providing soft material against your frame and open connections for powering your bike and charging it when it’s time.
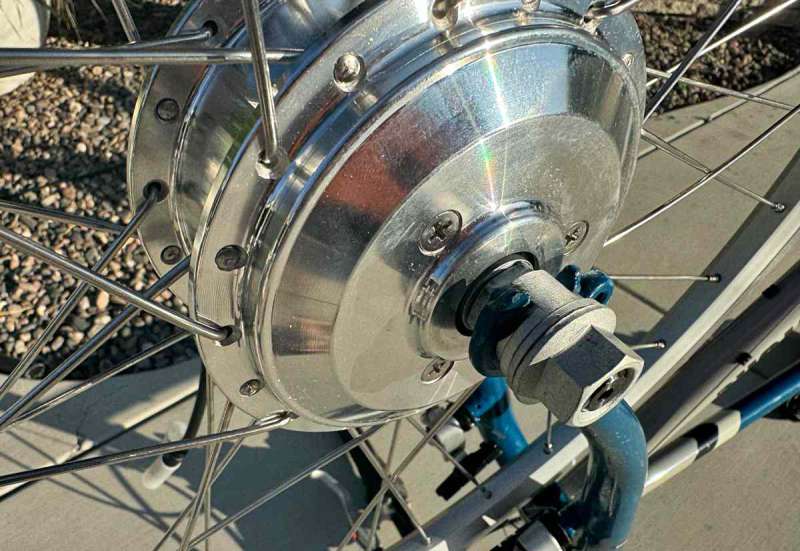
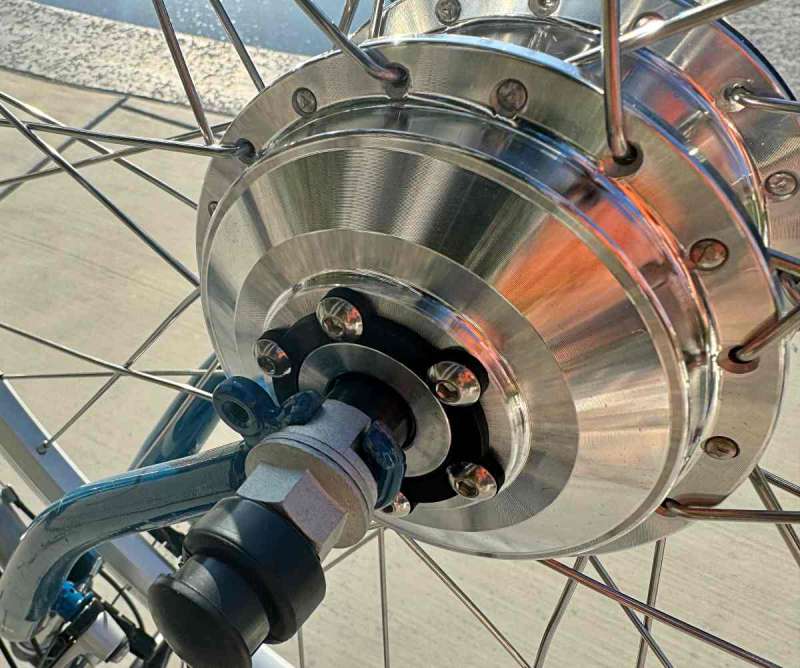
The motor is the other main component as it’s what actually makes your bike provide additional assistance when you start pedaling. It’s beautifully polished silver and only adds a minimal amount of weight for all of what you’re getting with the system.
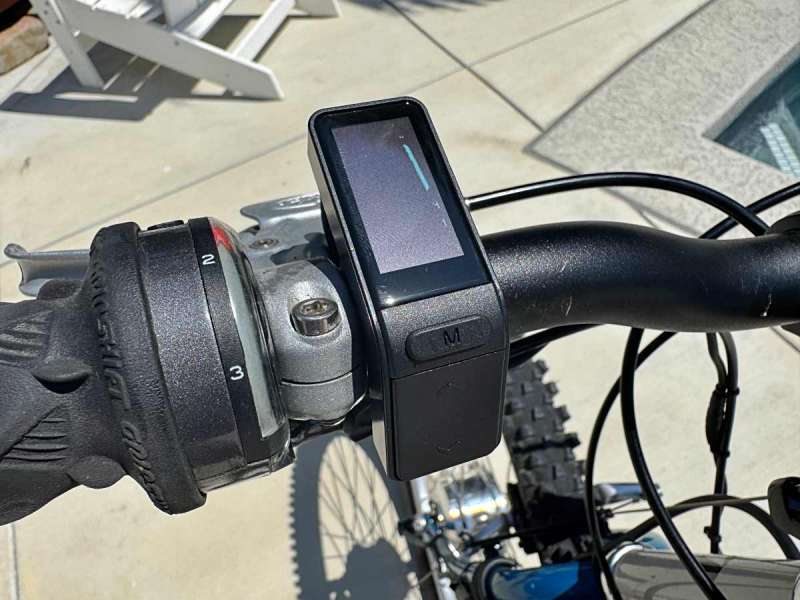
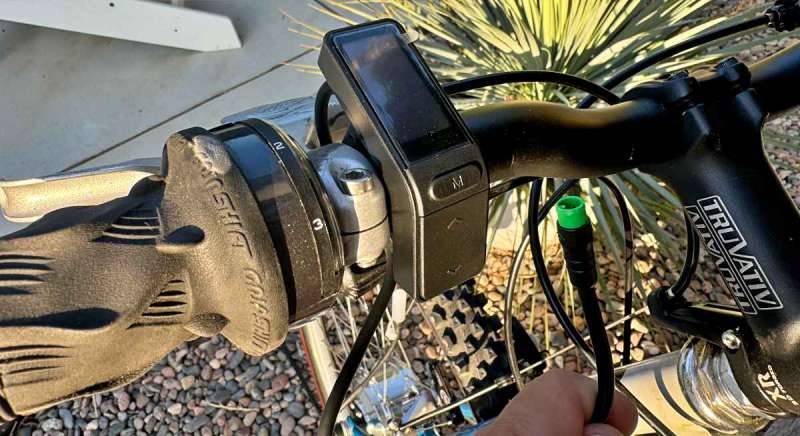
The display is one of the smallest and easiest to use. There’s a power button above the screen (not visible below), a mode switch, and up/down buttons for adjusting the amount of assistance while you ride.
Assembly, Installation, Setup
As I mentioned in the intro, this kit is even easier to install than their previous two kits which I’ve reviewed here and here. It still starts with installing your new front wheel. These are available in sizes 16″-29″ and are compatible with disc or rim brakes out of the box. You may need to buy a new 6-bolt disc rotor if the bike you’re converting has Shimano Centerlock rotors.
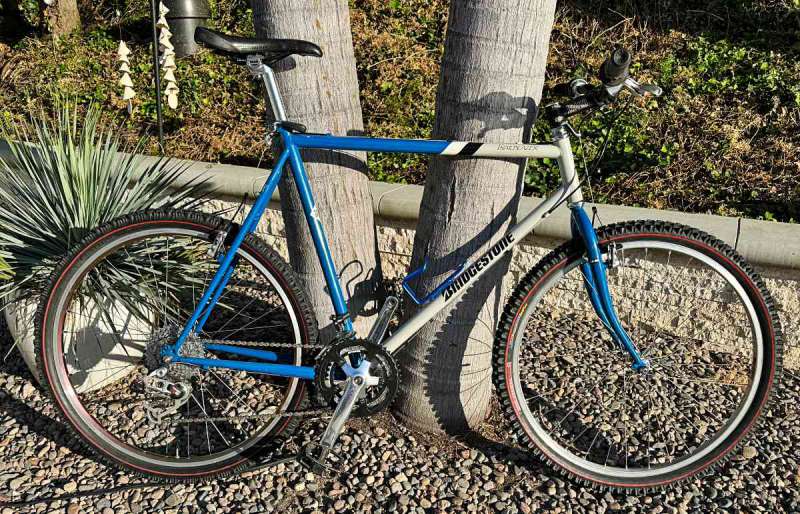
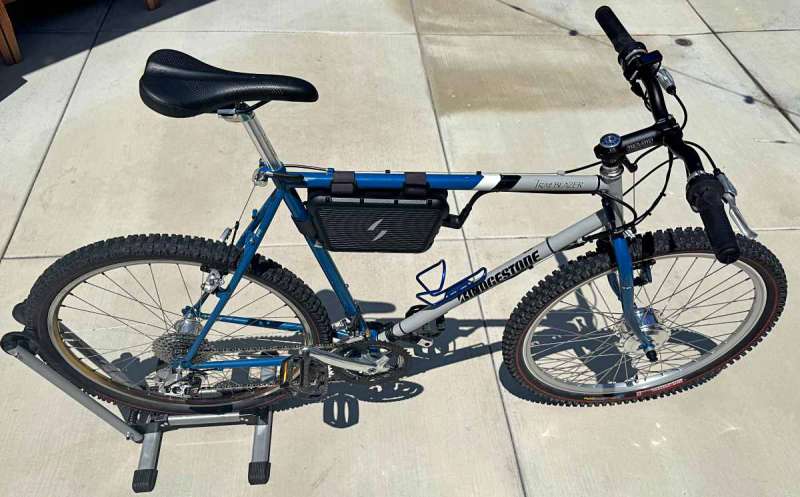
This time around, I converted an early 90s Bridgestone MB5 Trailblazer frame set that I had recently built using parts I had lying around from that era, including Grip Shifters and wheels I had built myself. Swytch was able to confirm they had a 26″ front wheel with 100mm spacing that would work with the quick-release dropouts on the fork. Here’s the bike before the conversion.
Remove your front wheel, deflate the tire and then carefully move your tire and tube over to the new Swytch wheel. Get that aired up, and install your disc rotor if you have one. If not, leave the six bolts and the spacer in place and then install the wheel into your fork with those bolts and the motor cable on the left side (non-chain side). Make sure to tighten the nuts securely and then readjust your rim brakes to hit the braking surfaces properly.
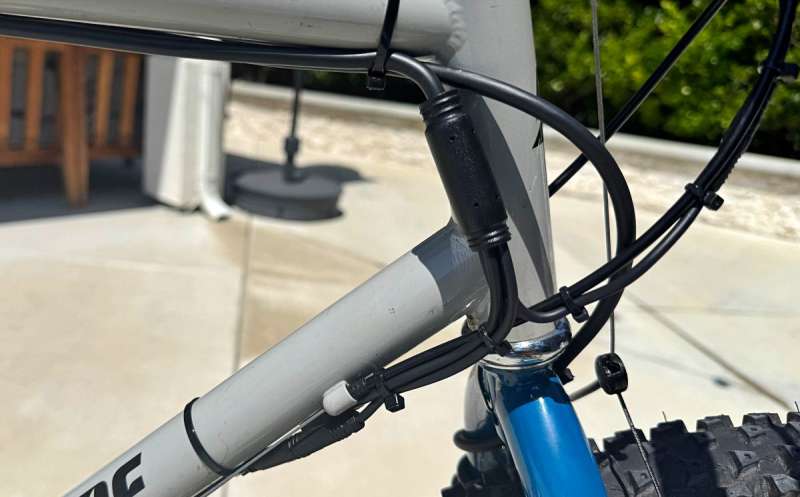
Installing the battery pack is really simple as it’s just velcro straps. Just go around the tube, through the strap loop on the battery and then close the strap on itself. As you can see below, there’s plenty of length especially on skinny 90’s tubing. If you have an exposed brake or shift cable (like in my photo below) make sure to run the straps under the cable or that brake or shifter will not be braking or shifting properly. If you get creative, you can tuck the ends in with some careful strap-by-strap adjustments. I didn’t see extra straps on the Swytch website, so I’d check on that before you go cutting.
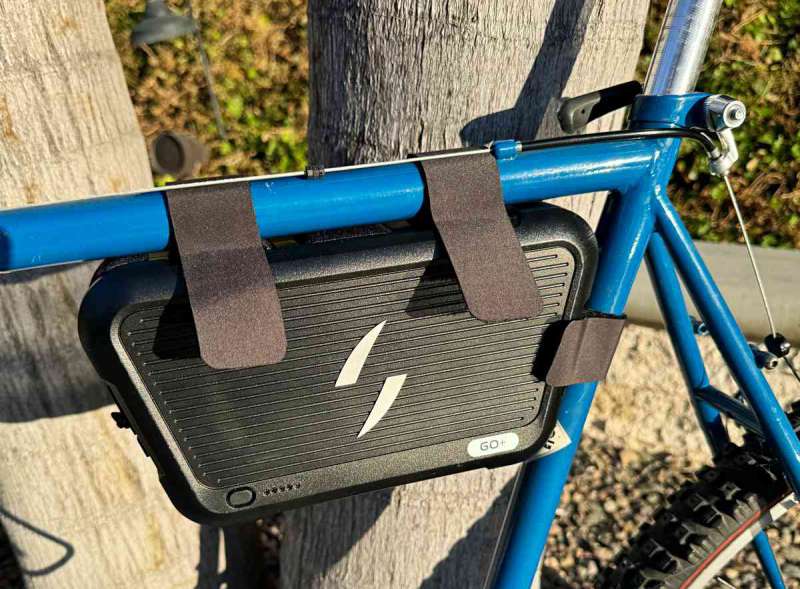
Connect the main cable to the front of the battery. The angle will aim it right at your top tube where you can route it towards your handlebars. Depending on the size of your bike frame, you can experiment with other mounting locations including upside down if you have a step-through frame. In the below image you can see the charge port and cover which are just below the main cable connector.
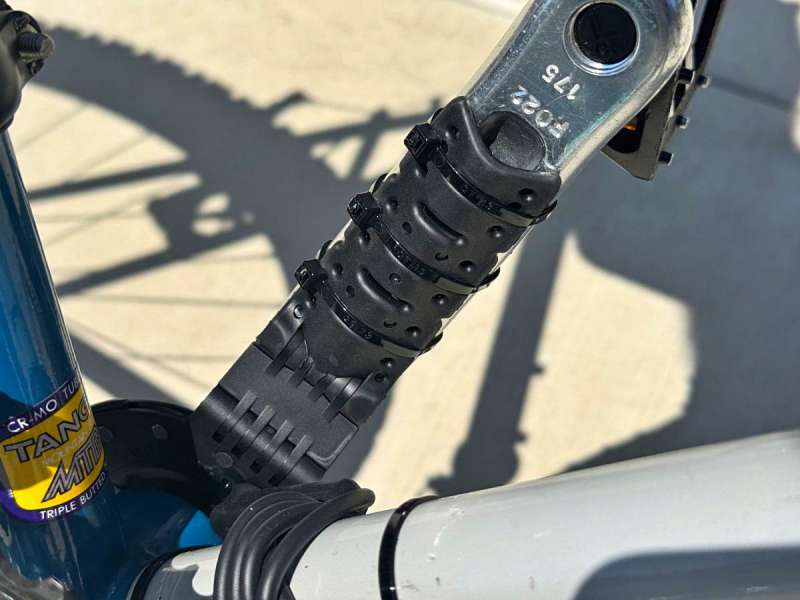
Run the cable up to your head tube and then down towards your cranks/pedals. You can use some tape, velcro or loose zipties for now as you may end up trying a few scenarios to minimize bulk and excess cable lengths.
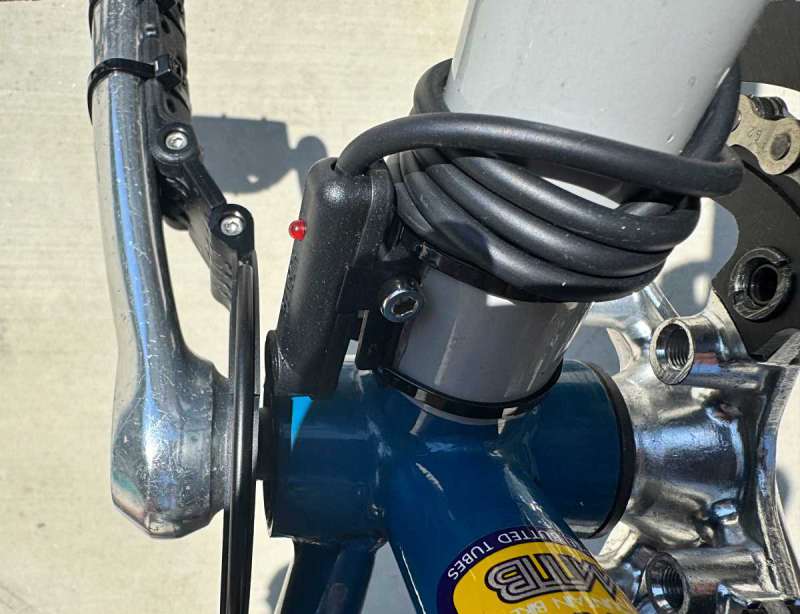
Above I have a single cable going up to the display/controller which you need to install on the handlebar. It’s the green one shown below connected directly to the display’s cable. I was able to run it parallel to the front shifter cable and keep the cable line pretty clean. The controller is typically installed on the left side, but can go on either if you’ve got room. Keep it close enough to your grip that you can reach the up/down arrows with your thumb as that’s how you’ll adjust the amount of assistance.
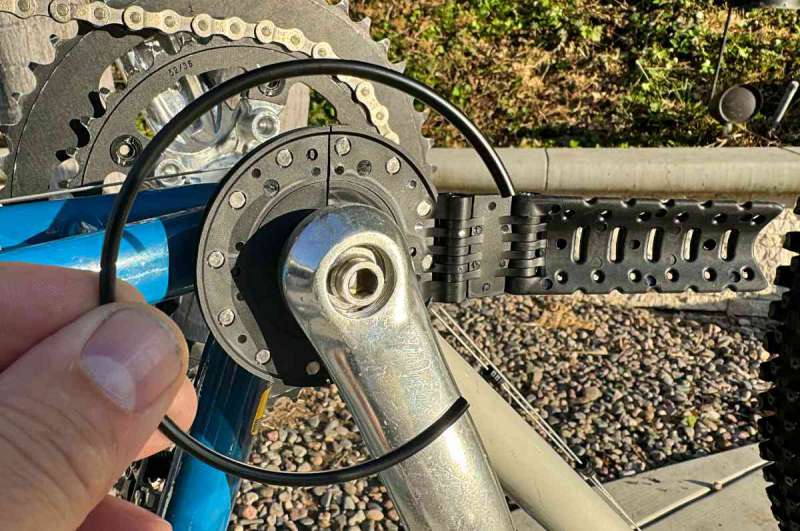
Next is installing the cadence/pedal sensor and magnet array. Here you snap the two half circles together around your crank spindle on the non-chain side. I have the crank arm plate deliberately offset by about 60º here so you can see the two hinges that allow it to contour to the inside of your crank. Go ahead and align that on the backside of your crank and then flex and install the spring ring around the outside perimeter of the magnet circle.
Press the crank arm plate against your crank and ziptie it into place. It’s important that this is tight as that magnet ring needs to spin reliably and straight for the system to work.
Getting the magnet sensor into place is the trickiest part. It can be placed on the down tube like I’ve done or on the seat tube (where the yellow logo on my bike is) if that’s a better fit for your bike or cable lengths.
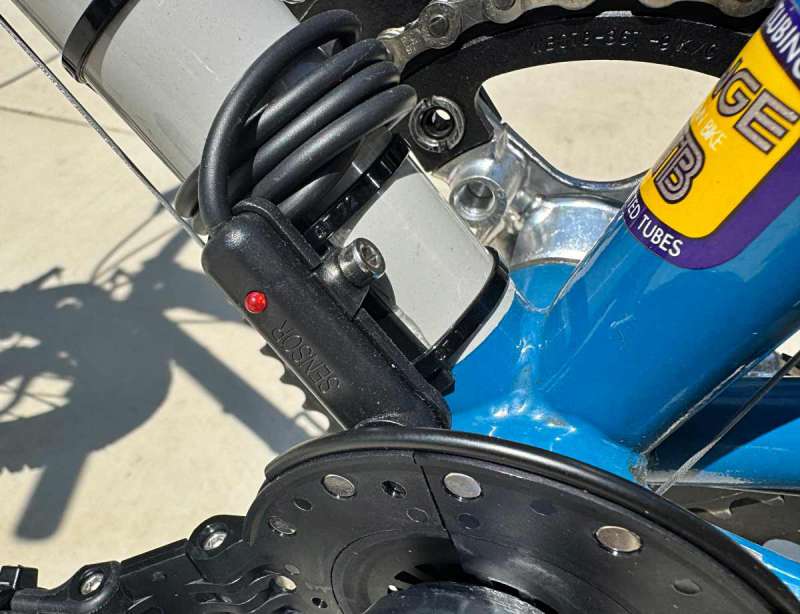
The key component of this part of the install is to get the distance from the sensor to the magnets as close as possible without contact. Too far and the system won’t know you’re moving and will not provide power. Here’s a shot showing a distance that worked well on this install. You’ll also want to make sure that the magnet disc is parallel to the sensor as you pedal. You can freewheel the crank backwards without moving to see if that distance is changing much. If it’s all good, tighten the hex bolt and all zip ties. Most likely, if you run into any power delivery problems later, it will be this sensor or magnet ring getting bumped out of alignment.
That’s it. Make sure to charge the battery fully before you head out for your first ride.
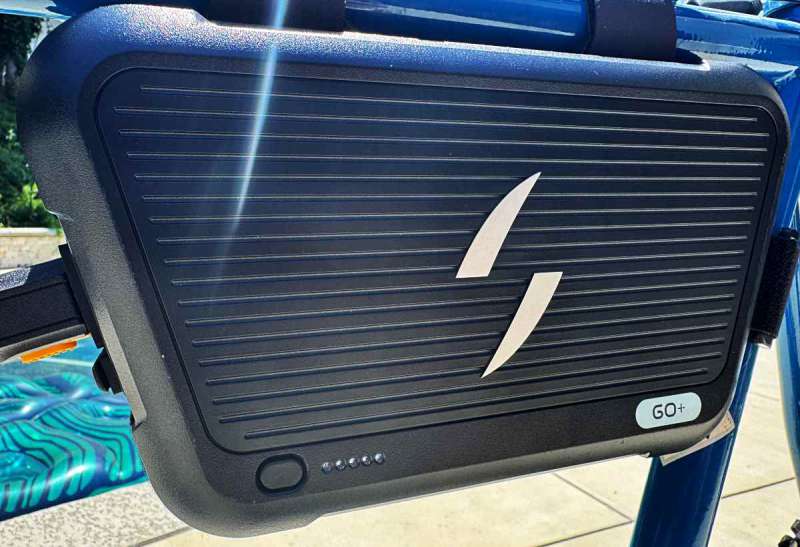
Press and hold the button on the battery to turn it on (all 5 LEDs will light if fully charged) and then the top power button on the display to power on the system. Use the up button to increase the assist level and then down to reduce it. Now go have fun.
Here’s the fully converted Bridgestone. That front hub perfectly matched the polished silver White Industries rear. Pretty happy with this setup.
Performance
This is the third Swytch system I’ve reviewed and best by far. The hub-based motor in the front wheel has remained relatively the same throughout, other than differences in wheel size, so the main variation has been the battery and its placement on the bicycle. The first two systems both used handlebar mounts for the battery. Those were convenient but put all that battery weight between your hands where you were moving it back and forth as you turned your handlebars. It wasn’t a show-stopper, but with this new GO Pack on the bike’s frame my bike steers almost identically to the way it did before the kit. The front hub is obviously heavier than the front wheel I replaced, but that weight is down low. The new battery is up high, underneath the top tube so the center of mass is higher and the bike clearly weighs more, but that weight feels much more normal than hanging on the bars.
Other than that, the system works as expected. The amount of assist is easy to control with the up/down buttons on the display and the bike responds quickly to pedal input because of all the magnets passing the sensor as opposed to a single magnet on a wheel where you might have to hit a full wheel rotation for the system to know you’re moving.
Battery life is easily double the previous versions, and it’s really easy to remove from the bike if you wanted to bring the battery inside for charging instead of lugging the whole bike around. The only complaint I have on the battery is that it sits best right where I want to grab the bike if I’m going to lug it up some stairs. Might have to 3D print a spacer to put some finger room in between it and the top tube.
Should you want a throttle or brake sensors (that kill power if you activate your brakes), Swytch has those accessories on their site and they’ll connect to those extra extensions on the main cable from the battery.
What I like about Swytch GO eBike Conversion Kit
- Best battery pack yet – Lots of range and easy to mount
- Hub based motor is the easiest way to add a motor to a bicycle
- Pretty easy install
- Doesn’t dramatically change the handling of your bicycle
What needs to be improved?
- Clean cable management is still weakest point in the system
- Battery might sit where you want to grab to lift the bike
Final thoughts
Shopping for eBikes might be fun, but it’s not easy and it’s hard to get a feel for a bike on a limited test ride. If converting a bike is an option, it takes a lot of that unknown out of play because it’s a bike you already own and have ridden. If you’re like me, you may have a few candidates in the garage that might get a new lease on life with some electrification. Swytch has it pretty figured out with the GO Kit and it’s definitely worth checking out.
Price: Starting at $419 (if you sign up for the pre-order waitlist) or at $799 if you want one right away (via eBay)
Where to buy: Swytch
Source: The sample of this product was provided for free by Swytch and did not have a final say on the review or preview it before it was published.
![[Ultra-Secure] With our uniquely designed bike phone holder handlebar, whether navigating bumpy roads or high-speed roads, your phone remains securely fastened to the handlebar. Its all-round shape firmly secures each corner of your phone, providing ...](https://m.media-amazon.com/images/I/41f8iCmkMsL._SL160_.jpg)
LISEN Bike Phone Holder, [Super Easy Install] Motorcycle Phone Mount Ebike Accessories Bicycle Handlebar Holder Mount Gift for Adults Kids Mountain Mini Bike Gear Accessories for iPhone Samsung Pixel
(as of March 19, 2026 05:46 GMT -05:00 - More infoProduct prices and availability are accurate as of the date/time indicated and are subject to change. Any price and availability information displayed on [relevant Amazon Site(s), as applicable] at the time of purchase will apply to the purchase of this product.)
Gadgeteer Comment Policy - Please read before commenting
They certainly needed a larger battery. I first got the smaller air battery, that was supposed to get up to 20 k range. It pooped out after 12 k. I then got the larger air battery, that was supposed to get at least 30 k, but it gives out after 20k.