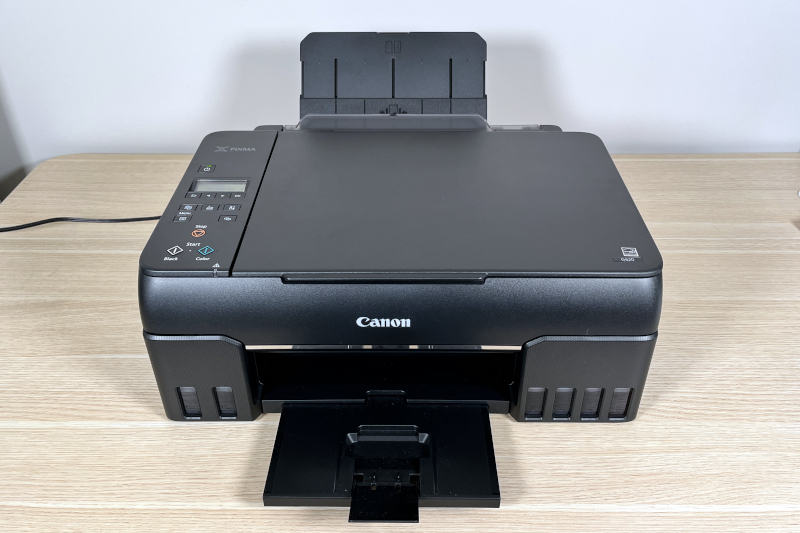
REVIEW – The Canon PIXMA G620 is an inkjet photo printer designed for consumer use. In a previous article, I reviewed the G620’s ability to print from my personal computer, a Mac mini, where I found that it can print beautiful photos once I made a few configuration changes. In another article, I reviewed its ability to print from my phone, an iPhone 13, where I once again found it can print great-looking photos, but only if I use Apple Photos to edit and Apple AirPrint to print.
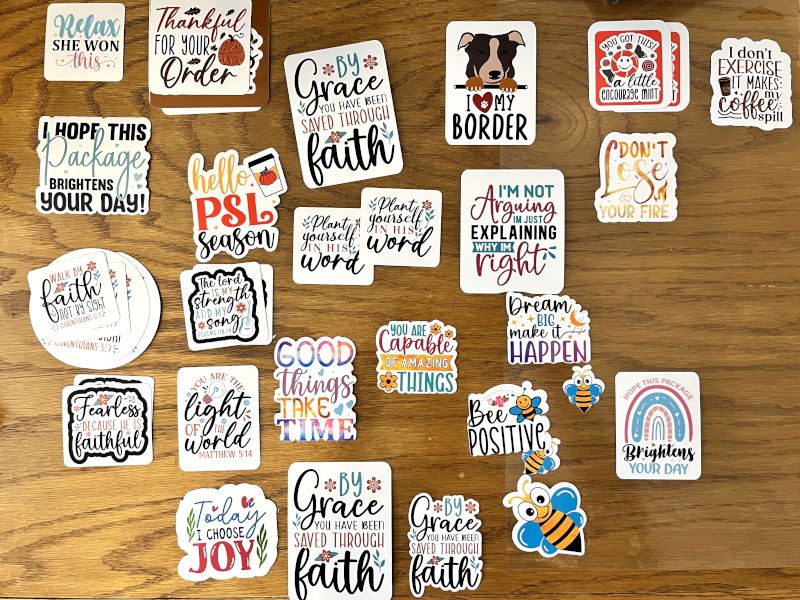
This is the third in a three-part review, and I have a confession to make: Printing photos is not the real reason that I am reviewing the G620. I am reviewing it because my wife wants to use it in conjunction with her Cricut in order to print stickers. If you’re not familiar, a Cricut is a smart cutting machine that works with an app to help creators design and personalize things like cards, apparel, and more. My wife has used a Cricut Explore Air 2 for years, and now she wants to use it to create stickers. This article will share what we’ve learned and provide Cricut users with a head start on printing their own.
The remainder of the review will cover three aspects of printing stickers: setting up the stickers using Cricut Design Space, printing the stickers using the Canon PIXMA G620, and cutting out the stickers using a Cricut. The intended audience of this review are Cricut users who already know how to use Design Space and their Cricut and want more information about creating their own stickers.
Cricut Design Space
Creating stickers starts with Design Space (DS), the software that creators use to prepare and cut their designs with a Cricut. Here are the steps for using it:
One, find a set of images formatted as PNG to use as stickers. You can purchase hundreds of images at once from websites like Design Bundles. Here’s one example of a bundle that has 545 images to get you up and going quickly. Alternatively, you can design your own.
Two, import all the image files into a new DS project and add them to the canvas.
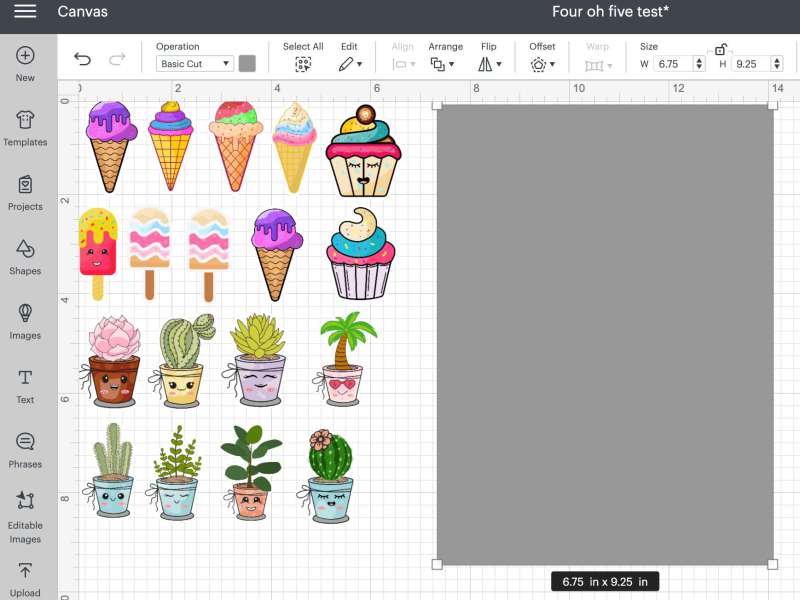
Three, create a 6.75 x 9.25 rectangle using the square shape tool; this becomes your print surface. Every image that you have imported must eventually fit into this area. Make it gray, so that it’s easier to see, and send it to the background.
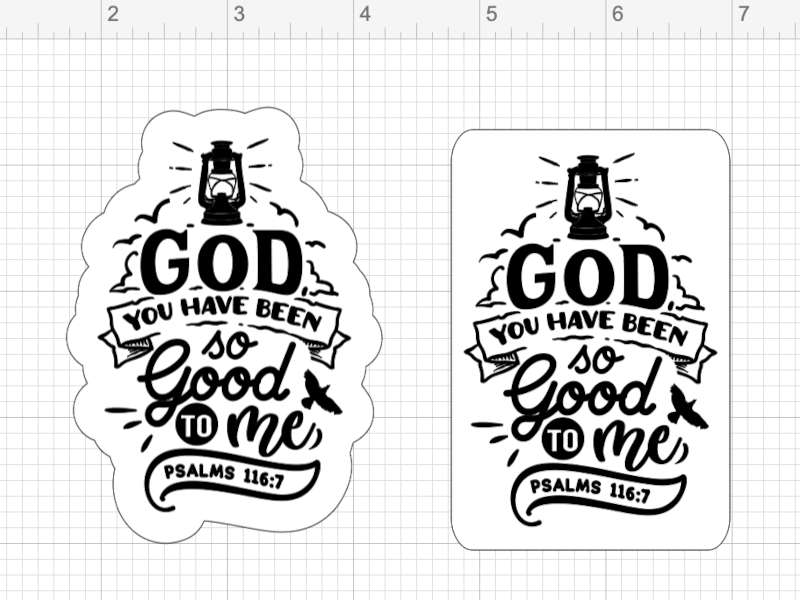
To make the sticker easier to see after it has been stuck, you may want to add a border to it, if it doesn’t have one already. There are two ways to do this. One, you can add a 0.25-inch offset. Two, you can create a shape (usually a square or a circle) that is somewhat larger than the image itself and put it behind the image. In general, using an offset looks better than using a shape; however, if the offset involves a lot of small, sharp corners, the Cricut might have problems cutting them unless you keep your blade sharp. You will have to experiment to see which way you like best. Set the color of the offset or the shape to be white. You could use any color for this purpose, but generally white is the best color for helping the image to show up on the sticker.
Four, group the images and the border together. Attach the border to the sticker and then flatten.
Five, resize all the images to the desired size.

Six, add the images to the print surface created previously.
Seven, use the space wisely and fill the entire surface with images as much as possible. In other words, don’t print one sticker at a time, unless it is so big that it fills the entire page. Don’t let the stickers overlap with each other.
Eight, once all the images have been added to the print surface, delete the print surface and select and group the images with the attach tool.
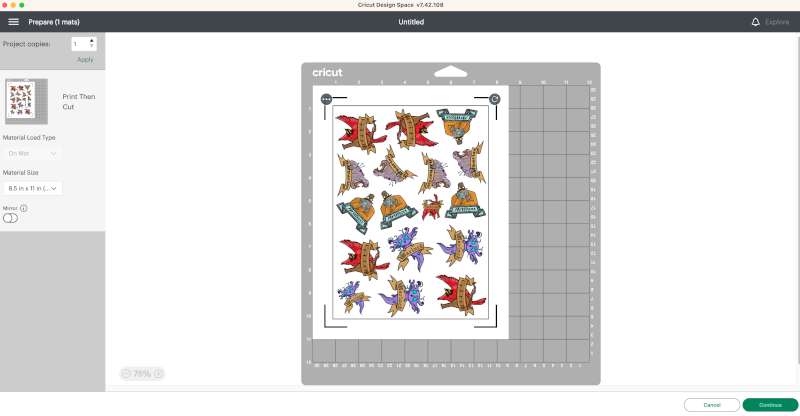
Nine, click the Make and Continue buttons, then click the Send To Printer button.
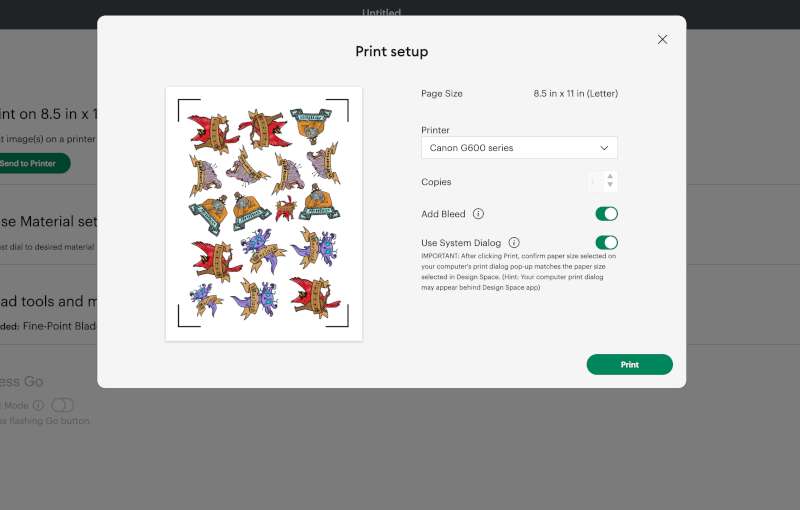
Ten, on the Print Setup screen, select the G620 printer, check the Add Bleed option, and check the Use System Dialog option. Click the Print button.
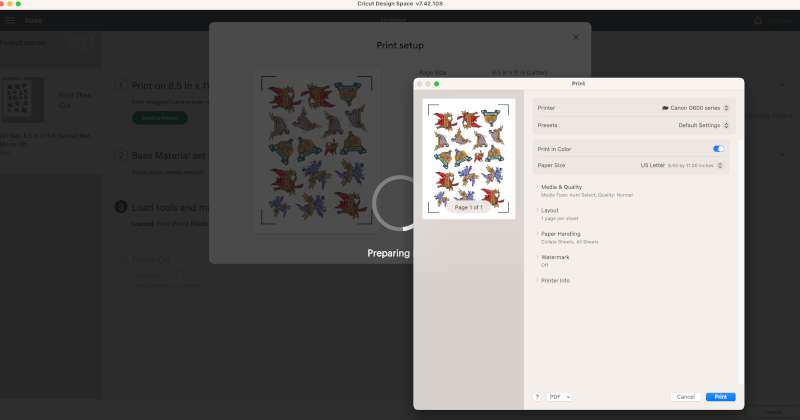
Eleven, the Print dialog allows you to select specific print options, but unfortunately, it always shows up behind Design Space. Move the DS windows out of the way so you can see the Print dialog. From here, set Media Type to Glossy (or Matte, depending upon the sticker paper) and Quality to Best.
Twelve, before you click the Print button, go to the G620, put the sticker paper in the rear feed, and use the feed settings to set the Size to Letter and the Type to Glossy (or Matte, depending upon the sticker paper). Now go back to DS and click Print on the Print dialog. You can now move the DS window back into view.
Canon PIXMA G620
A wide variety of sticker papers are available that work with the G620 and a Cricut, and we tested eight of them for you. Here is a quick overview of each:
Stickers made from matte paper are best used in places where they will never get wet, such as in a journal or a planner.
- Matte Paper by Four oh Five Basics (from Hobby Lobby)
- Pros: Cricut reads the alignment lines
- Cons: Print color is muted, Cricut did not always cut completely through the paper
To make the matte paper (more) waterproof, we laminated the top of the sticker paper after printing but before cutting.
- Matte Paper by Cricut (with Laminate)
- Pros: Waterproof (except on the edges), shinier than matte
- Cons: Laminating requires another step in the process, lamination can leave bubbles and wrinkles, very expensive compared to third-party brands, print color is muted, Cricut did not always cut completely through the paper, difficult to remove the backing
If you don’t want the stickers to be shiny, a matte finish on vinyl is an option.
- Matte Vinyl by Cricut
- Pros: Thin and waterproof paper
- Cons: Print color is muted, very expensive compared to third-party brands
Sticker paper from Cricut is often three to four times more expensive than off-brands, so we tried this paper from Joyeza and found that it worked just as well as Cricuts.
- Matte Vinyl by Joyeza
- Pros: Thin and waterproof paper
- Cons: Print color is muted
Though some might prefer matte, stickers are more often glossy in appearance. We always preferred the glossy look over a matte look. We did, however, run into a consistent problem when using glossy paper. Design Spaces adds alignment marks to the four corners of each printed page to help it cut more accurately. When we printed stickers on glossy paper, the Cricut always had problems sensing these marks; we had to use a Sharpie to darken them, which reduced accuracy a little bit.
- Glossy Vinyl by Gwybkq
- Glossy Vinyl by Lzerking
- Glossy Vinyl by Paper Plan
- We tested three different brands, and they were virtually identical. The biggest difference is that the Paperplan stickers were so thin, they tended to curl when removed from Cricut mat. In the end, we preferred the paper from Gywbkq – what a horrible name! – simply because it was cheaper.
Cricut Explore Air 2
My wife has the Cricut Explore Air 2, and these are the steps that she followed to get it to cut out the stickers:
- Line the sticker paper on the Cricut mat.
- Use a Sharpie to darken the alignment marks.
- Rotate the pressure dial to poster board cut.
- Feed the mat into the Cricut and press the Feed button on the Cricut.
- Once the Cut button is flashing, press it.
- At this point, the Cricut attempts to read the alignment marks, and if successful, it cuts out the stickers.
Most of the time my wife found that the Cricut cut through the paper, but occasionally it did not. Before removing the Circuit mat, she would always check to see if the paper was completely cut; if not, she did NOT remove the mat from the feeder. Instead, she simply pressed the Cut button again. This almost always resolved the problem. To finish, she removed the mat from the Cricut and the stickers from the mat.
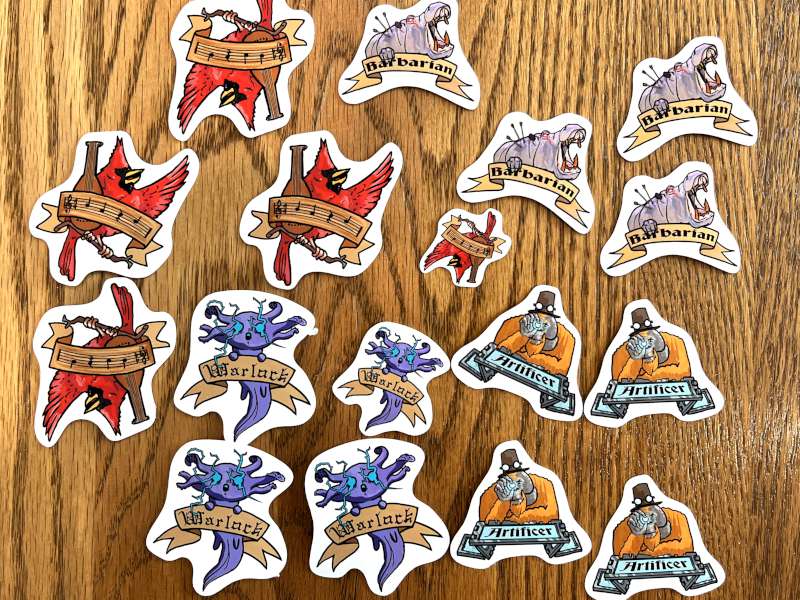
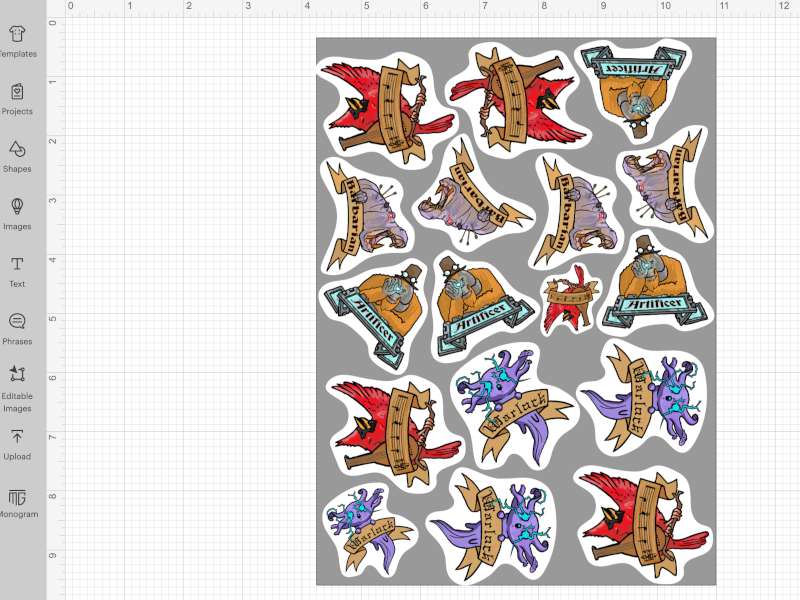
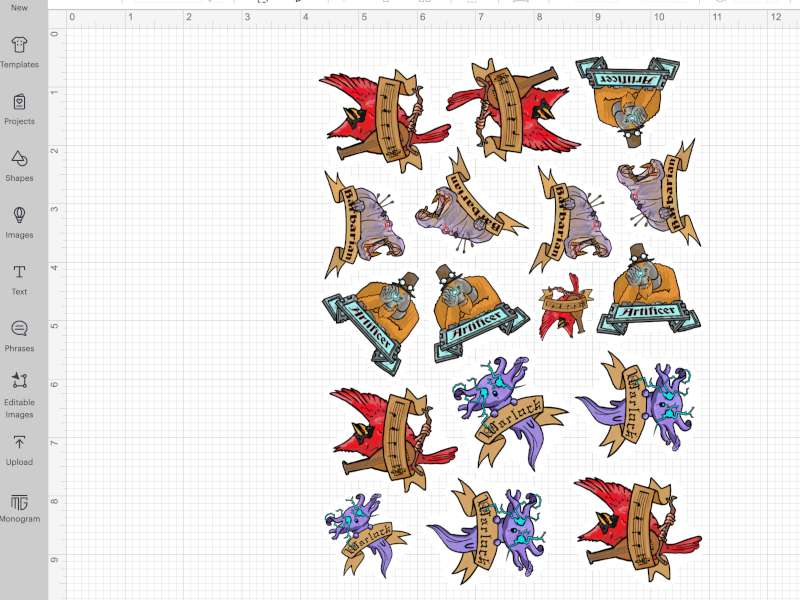
The Holy Grail of sticker printing is being able to print custom stickers from your own designs. As an example, take a look at these stickers. Our son-in-law, Ryan, who is a freelance artist, drew these images to represent character classes for a game. He added a smooth white border and then sent them over, and my wife was able to print them as stickers. Super cool!
What I like
- Stickers!
- Vinyl, glossy look
- Convenience of printing custom stickers at home
What I’d change
- Nothing. The G620 did its job just fine.
- (The Cricut needs help with alignment marks on glossy paper, but that’s not Canon’s problem.)
Final thoughts
If all you need is mass-produced stickers, it’s still cheaper to buy them (by the hundreds) from Amazon. If, however, you want your own custom stickers, whether from your own images or those you buy, this is the way to do it. After much trial and error, my wife is very happy with the results that she was able to get from the Canon PIXMA G620 and her Cricut. It’s so satisfying to be able to create our own stickers at home; while the costs are more than printing 4 x 6 photos, it’s still very reasonable. If you are a Cricut fan who is looking to print and cut your own stickers, we highly recommend that you pick up the G620.
Update 09/25/24
Recently my wife printed a photo using the G620, and there were lines across the print. As we’ve only printed 700-some pages, this printer is too lightly used to be experiencing problems. I looked at the online manual and read through the maintenance section. I followed the instructions to clean the print head and then deep clean the print head. When I printed the nozzle check pattern, however, there were still lines in the test page. I registered the printer on Canon’s website and then called their support number (1-800-OK-CANON). Over a period of a couple weeks, I spoke with three different representatives trying to diagnose the problem. I never waited for more than two minutes, and I found them to be courteous and knowledgeable as well as native English speakers. (Don’t judge me; some accents are hard to understand, especially over a poor phone connection.) In the end, they were able to solve my problem, and the printer is working fine! I am very happy with Canon’s support, and I continue to recommend this printer to you.
Price: $299
Where to buy: Amazon or Canon
Source: The sample for this review was provided by Canon.

Liene M100 4x6'' Photo Printer, Phone Printer 100 Sheets & 3 Cartridges, Full-Color Photo, Portable Instant Photo Printer for iPhone Android, Thermal Dye Sublimation, Wi-Fi Picture Printer 100 Papers
(as of June 30, 2026 16:00 GMT -05:00 - More infoProduct prices and availability are accurate as of the date/time indicated and are subject to change. Any price and availability information displayed on [relevant Amazon Site(s), as applicable] at the time of purchase will apply to the purchase of this product.)